
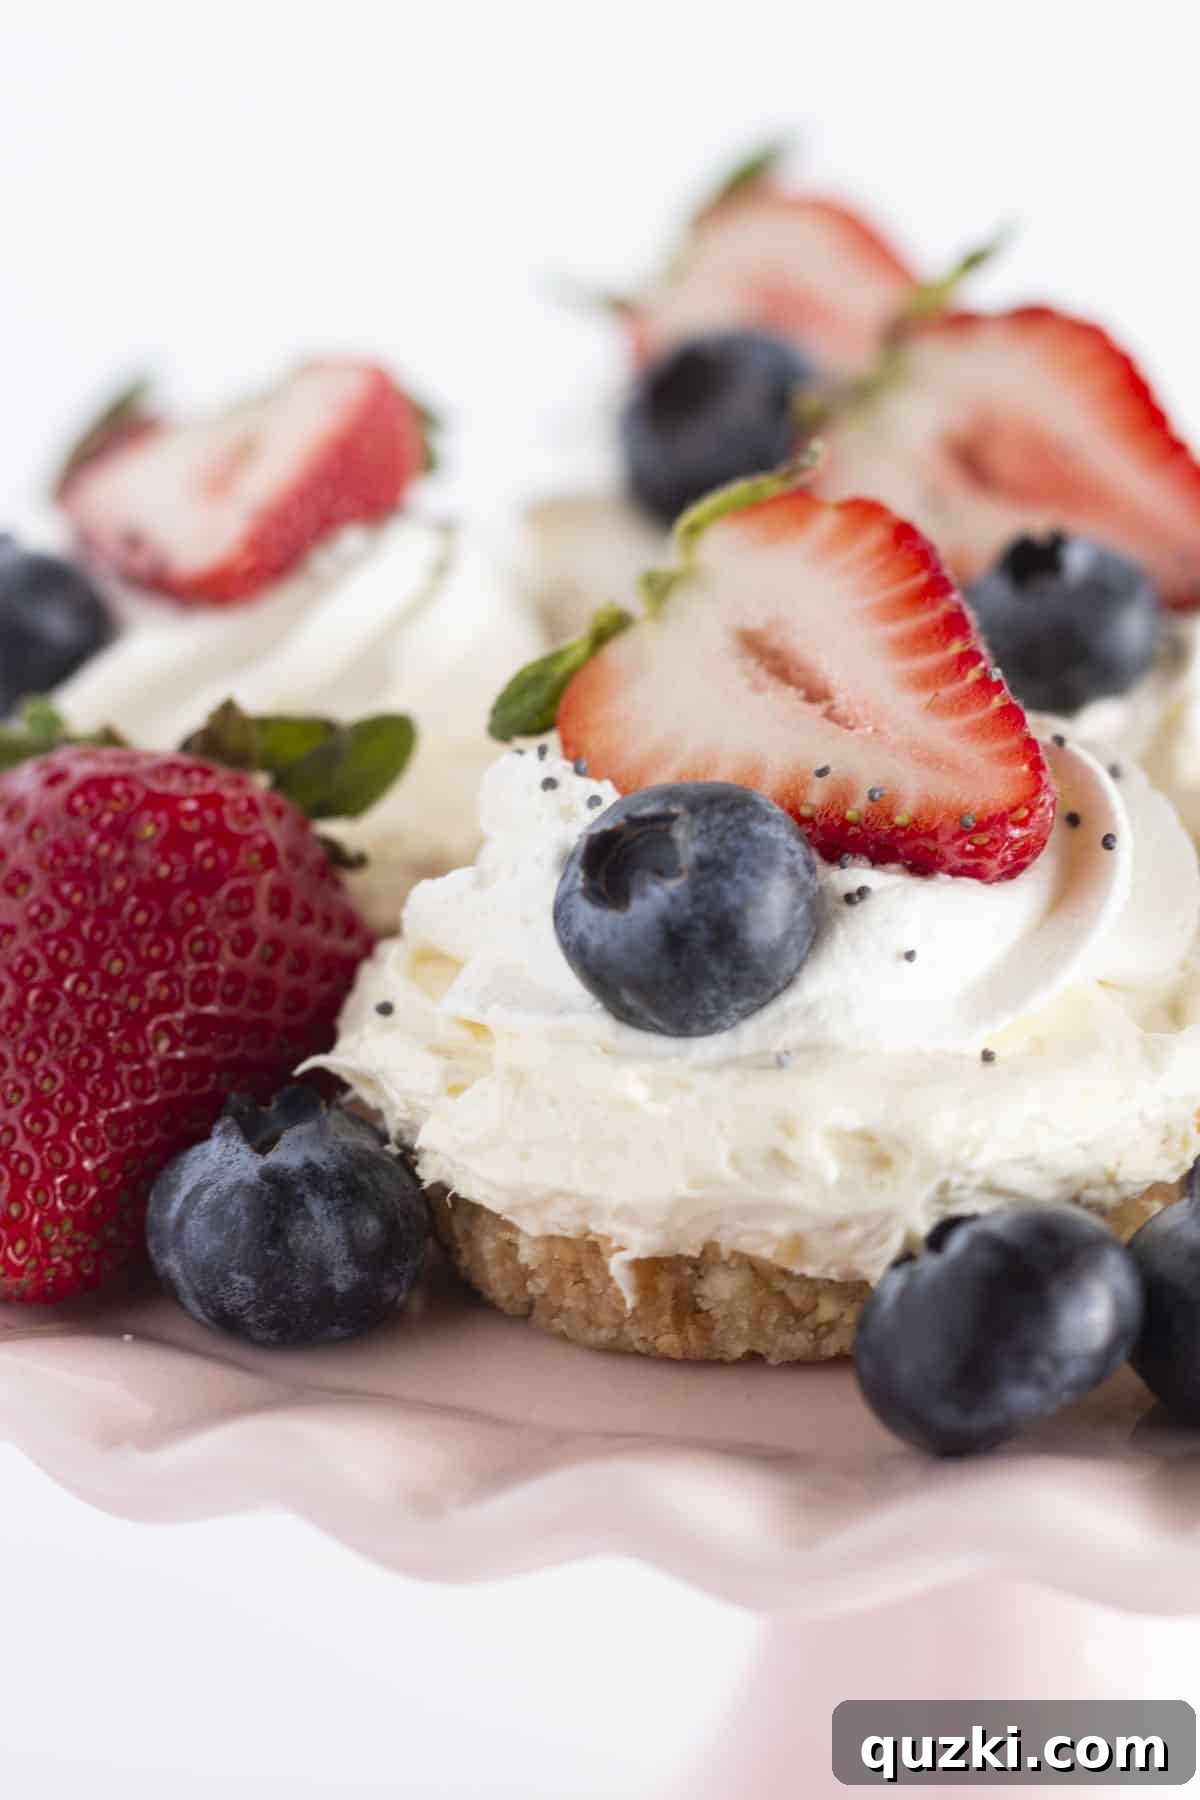
Imagine a dessert that’s not only incredibly delicious but also effortlessly simple to create, requires no baking, and is perfectly portioned for individual enjoyment. That’s exactly what you get with **Easy No-Bake Mini Cheesecakes**! These delightful treats are a game-changer for anyone who loves cheesecake but prefers a lighter, quicker, and undeniably adorable alternative to traditional baked versions. They’re a joy to make, a pleasure to serve, and a guaranteed crowd-pleaser, whether for a casual gathering, a special occasion, or simply a sweet moment to yourself.
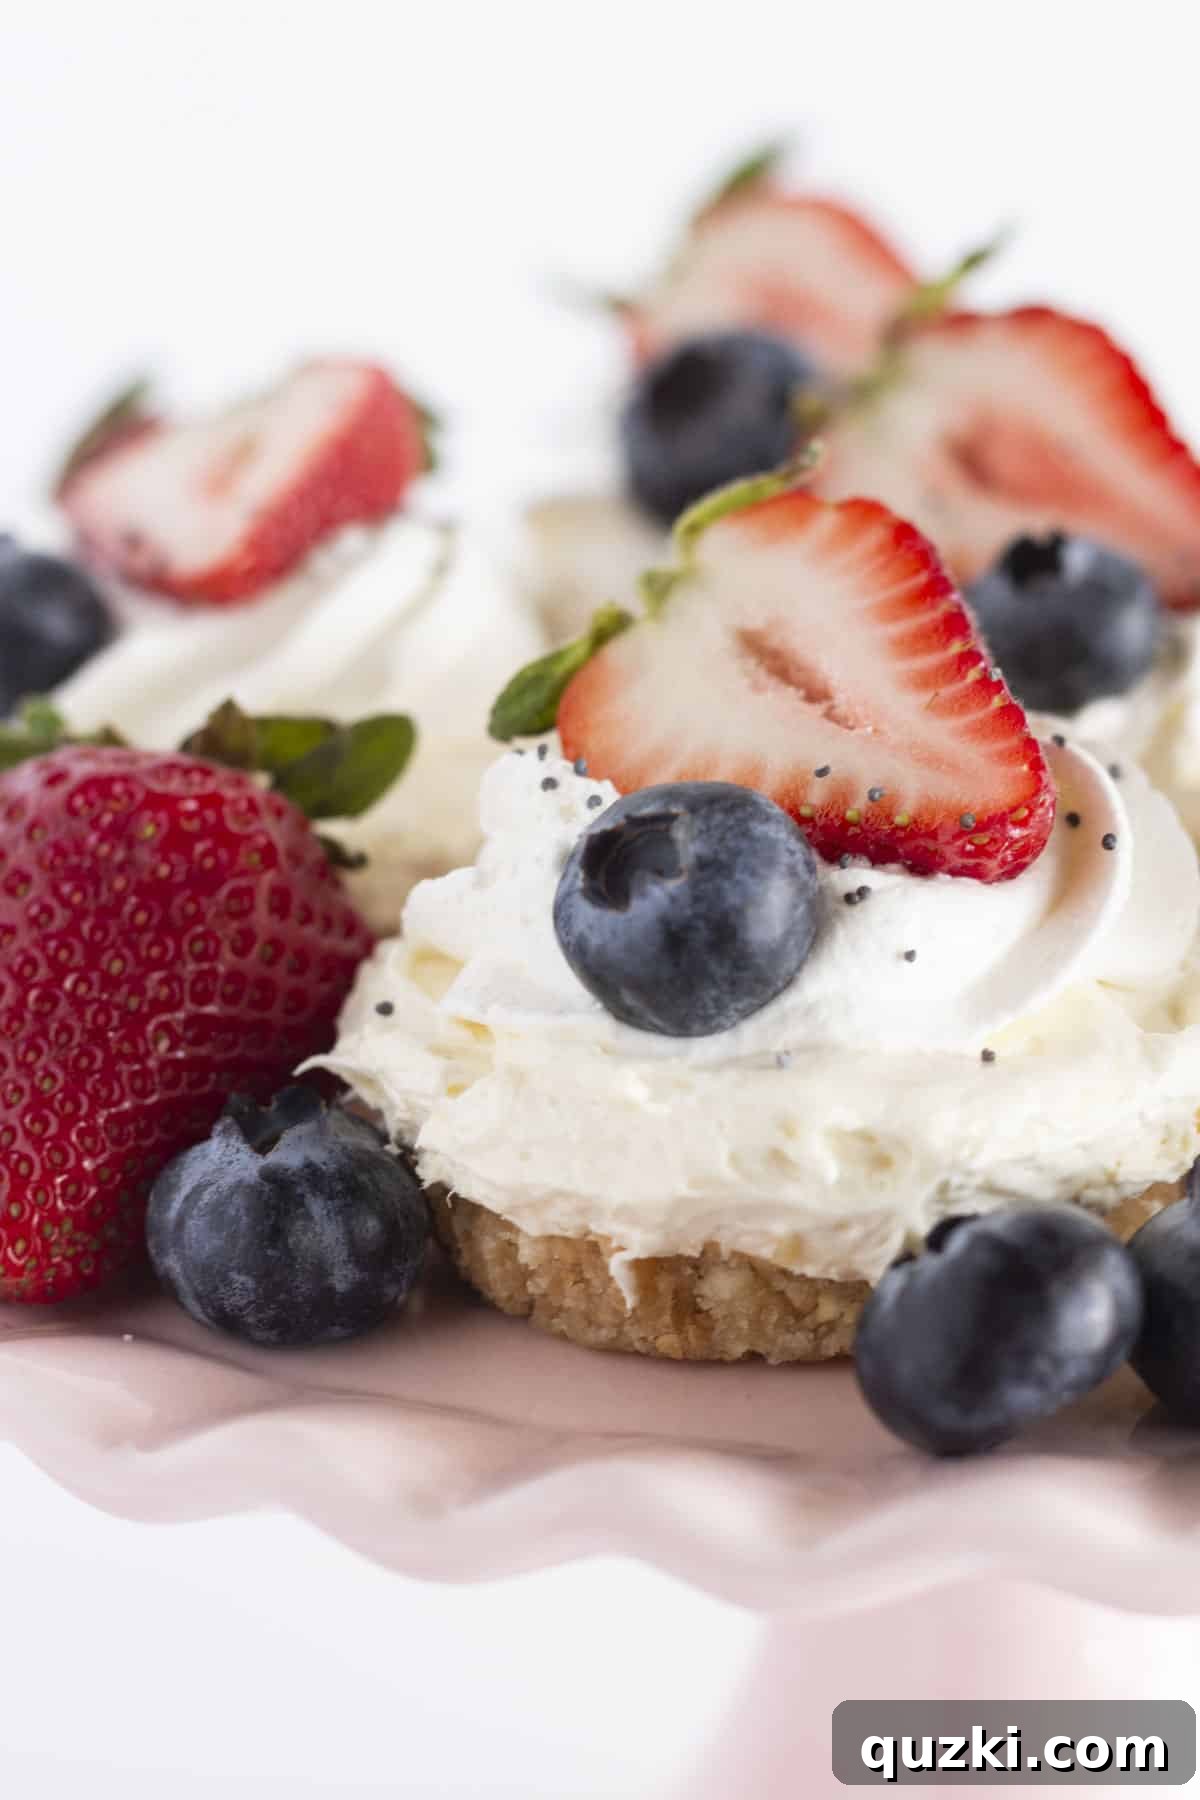
Table of Contents
- What Exactly Are No-Bake Mini Cheesecakes?
- Why You’ll Love These Easy No-Bake Mini Cheesecakes
- Essential Ingredients for Your Perfect Mini Cheesecakes
- How to Make Easy No-Bake Mini Cheesecakes: A Step-by-Step Guide
- Expert Tips for No-Fail Mini Cheesecakes
- Frequently Asked Questions About No-Bake Mini Cheesecakes
- Endless Topping Possibilities for Your Mini Cheesecakes
- Craving More No-Bake Cheesecake Inspiration?
- Easy No-Bake Mini Cheesecakes Recipe Card
What Exactly Are No-Bake Mini Cheesecakes?
As the name wonderfully suggests, mini no-bake cheesecakes are individually portioned cheesecakes that come together without ever needing an oven. Unlike their baked counterparts, which are often denser and rely on eggs for structure, no-bake cheesecakes feature a uniquely light, airy, and incredibly smooth filling. This eggless preparation results in a melt-in-your-mouth texture that often gets compared to a luxurious mousse or a rich pudding, offering a delightful contrast to the crisp, buttery crust beneath.
The beauty of no-bake cheesecakes lies in their simplicity and versatility. They are significantly quicker to prepare than traditional cheesecakes, making them an ideal dessert for busy schedules or when you want a decadent treat without the fuss. Their individual size makes them not only charmingly adorable but also incredibly convenient for serving. Say goodbye to messy slicing and uneven portions; each guest gets their own perfect little dessert.
While this recipe focuses on a classic vanilla flavor profile, the world of no-bake cheesecakes is vast and exciting! You can easily adapt the base recipe to create a myriad of flavors. For instance, imagine the tropical delight of a Banana Pudding Cheesecake, the beloved crunch of a Golden Oreo Cheesecake, or the indulgent comfort of a Chocolate Chip Cookie Cheesecake. These mini versions open up a world of possibilities for creative dessert exploration.
Why You’ll Love These Easy No-Bake Mini Cheesecakes
If you’re still on the fence about trying this recipe, here are just a few compelling reasons why these mini cheesecakes will become a staple in your dessert repertoire:
- Effortlessly Simple: Forget complicated techniques, water baths, or the fear of cracks. This recipe is designed for ease, making it perfect for novice bakers and seasoned pros alike.
- No Oven Required: Keep your kitchen cool, especially during warmer months. The “no-bake” aspect means less energy consumption and more time enjoying your day.
- Quick Preparation: With minimal active prep time, you can have these desserts chilling in the refrigerator in under 30 minutes.
- Perfect Portions: Each cheesecake is a single serving, making portion control a breeze and presentation incredibly elegant. No need for knives or plates; just grab and enjoy!
- Customization King: The base recipe is a blank canvas for your creativity. From fresh fruits to decadent sauces, the topping possibilities are truly limitless.
- Make-Ahead Marvel: These cheesecakes need to chill, making them an ideal make-ahead dessert for parties, potlucks, or busy weeknights. Prepare them the day before and simply garnish before serving.
- Crowd-Pleasing Flavor: The combination of a crunchy vanilla wafer crust and a creamy, sweet, and tangy filling is universally loved.
Essential Ingredients for Your Perfect Mini Cheesecakes
Crafting these delectable mini cheesecakes requires just a few key ingredients, each playing a crucial role in achieving the perfect texture and flavor. The beauty is in the simplicity and how these components come together to create something truly magical.
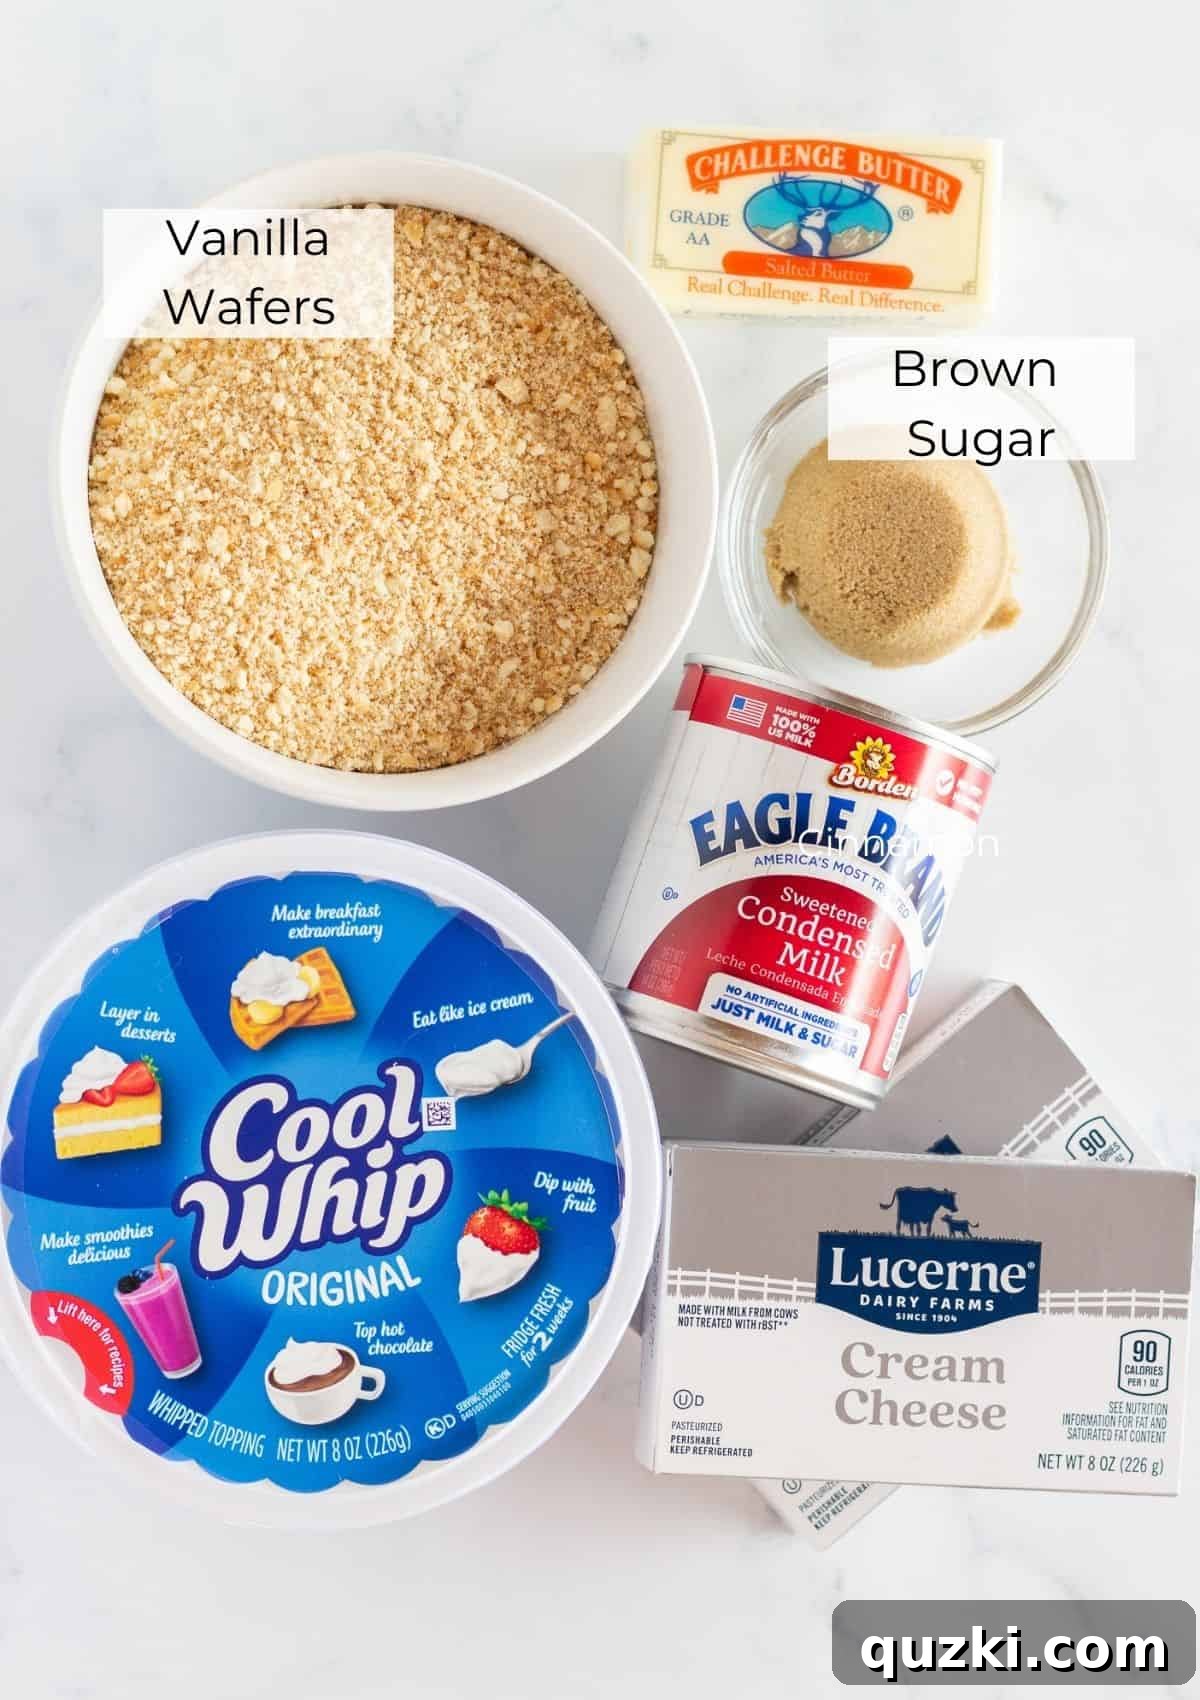
- Vanilla Wafer Crumbs: These form the delightful base of your cheesecakes. Vanilla wafers provide a distinct, sweet vanilla flavor and a wonderfully crisp texture that holds up well. To make crumbs, simply pulse whole vanilla wafers in a food processor until finely crushed. If you don’t have vanilla wafers, graham cracker crumbs or crushed Golden Oreos make excellent substitutes for a slightly different flavor profile.
- Brown Sugar: A touch of packed brown sugar adds a deep, molasses-rich sweetness to the crust, complementing the vanilla wafers beautifully and helping the crust firm up.
- Melted Butter: This is the binding agent for your crust, ensuring the crumbs stick together and create a stable, flavorful foundation for your cheesecake filling. Unsalted butter is usually preferred in baking to control the salt content.
- Cream Cheese: The star of any cheesecake! Opt for full-fat block cream cheese, and ensure it’s fully softened to room temperature before mixing. This is crucial for achieving a perfectly smooth, lump-free filling. Lower-fat cream cheese might result in a less firm and creamy texture.
- Sweetened Condensed Milk: This magical ingredient is key to the no-bake filling. It provides intense sweetness and rich creaminess, eliminating the need for granulated sugar and contributing to the filling’s smooth, luscious consistency without adding extra liquid. It acts as both a sweetener and a thickener.
- Whipped Topping (like Cool Whip): This is the secret to the incredibly light and airy texture of the no-bake filling. Whipped topping, once thawed, adds volume and a delicate lightness that makes the cheesecake feel like a cloud. While homemade whipped cream can be used, store-bought whipped topping is often more stable and convenient for no-bake recipes, helping the cheesecake hold its shape better.
Refer to the complete recipe card at the end of this post for precise measurements and quantities.
How to Make Easy No-Bake Mini Cheesecakes: A Step-by-Step Guide
Creating these charming mini cheesecakes is surprisingly straightforward. Follow these steps for a perfect batch every time!
Step 1: Prepare the Muffin Tin and Crust
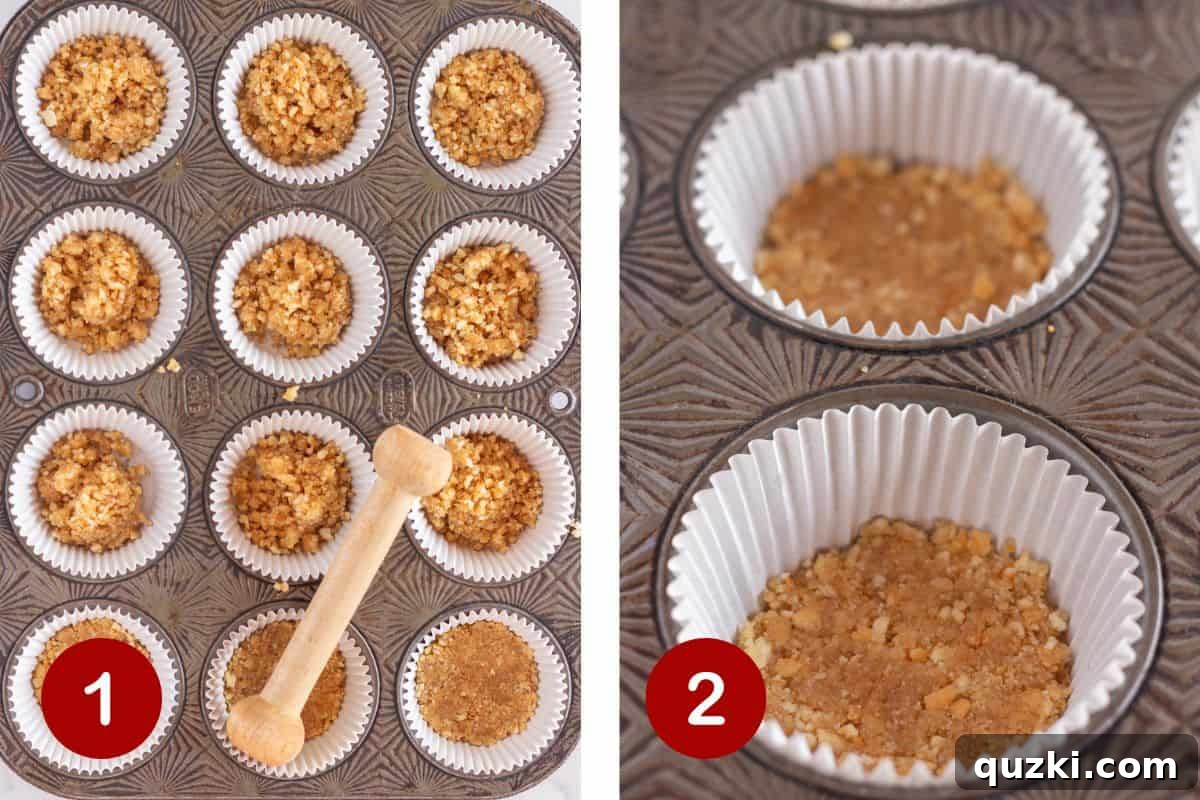
Begin by lining a standard 24-cup muffin tin with cupcake liners. This crucial step ensures your cheesecakes can be easily removed once set, preventing any sticking or mess. In a large bowl, combine the vanilla wafer cookie crumbs, packed brown sugar, and melted butter. Stir thoroughly until all the crumbs are evenly coated with the buttery mixture. This creates a moist, cohesive crust. Using a heaping tablespoon, measure the crust mixture into the bottom of each prepared muffin cup.
Step 2: Press the Crust and Chill
Once the crumbs are in the muffin cups, use your fingers, the back of a small spoon, or a tart shaper to firmly press the crust down. You want a compact and even layer at the bottom of each liner. This firm base is essential for a sturdy cheesecake. Once all crusts are pressed, refrigerate the muffin tin for at least 10-15 minutes while you prepare the filling. This chilling time helps the butter solidify, setting the crust even further.
Step 3: Prepare the Creamy Filling
In a medium mixing bowl, add the softened cream cheese. Using either a hand-held mixer or a stand mixer fitted with the paddle attachment, beat the cream cheese on medium speed until it is completely smooth and creamy, with no lumps remaining. Next, pour in the sweetened condensed milk and continue mixing until the mixture is thoroughly combined and smooth. Finally, gently fold in the thawed whipped topping using a rubber spatula. It’s important to fold it in carefully to maintain the light, airy texture of the whipped topping, rather than deflating it.
Step 4: Fill the Crusts
Now it’s time to add the dreamy filling to your chilled crusts. Use a large cookie scoop (typically holding about 3-4 tablespoons) to portion the cheesecake mixture evenly onto each mini crust. This helps ensure consistent sizing and a tidy appearance for all your cheesecakes. If you don’t have a cookie scoop, simply use a spoon to add about 3-4 tablespoons of filling to each cup.
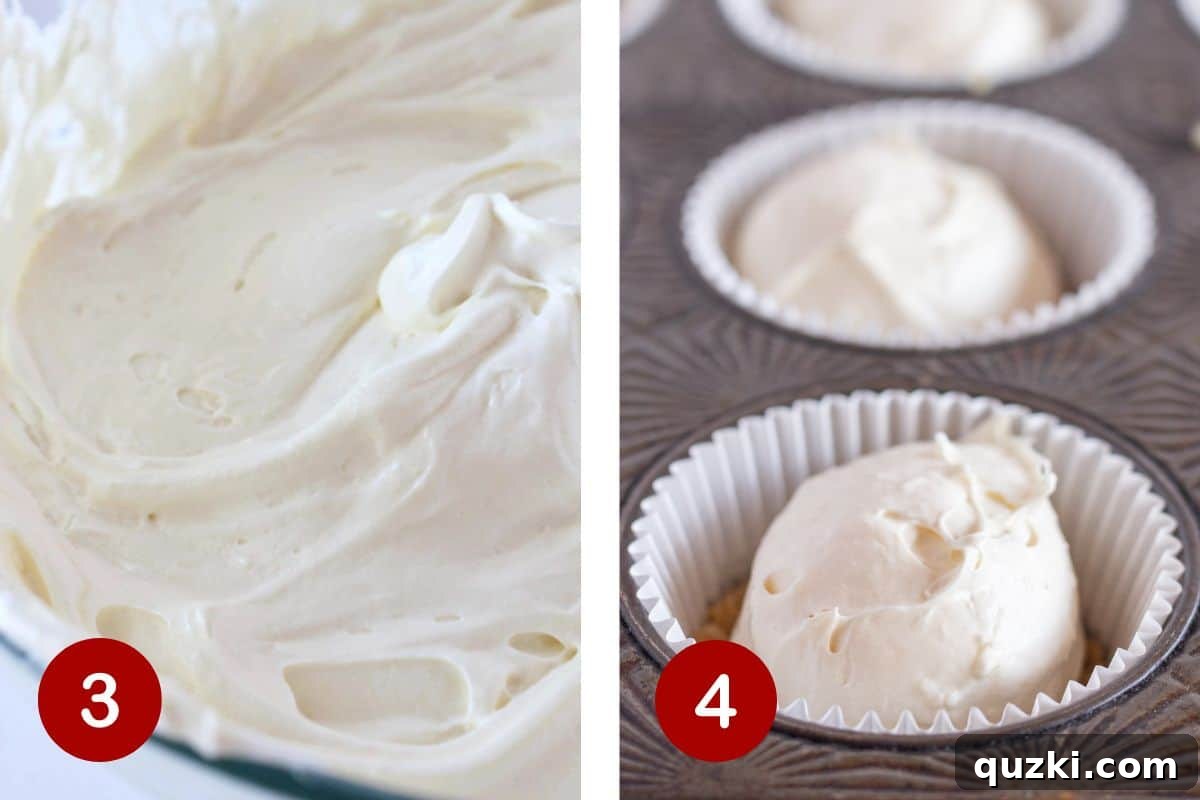
Step 5: Smooth and Chill
Once the filling has been added, use the back of a spoon to gently spread the cheesecake mixture into an even, smooth layer on top of each crust. This creates a neat and professional finish. Cover the entire muffin tin loosely with plastic wrap to prevent any odors from the refrigerator from affecting the cheesecakes. Refrigerate for a minimum of 4 hours, but ideally, for the best and firmest set, leave them overnight.
Step 6: Remove from Muffin Pan
After the cheesecakes have fully set, remove the muffin tin from the refrigerator. Carefully lift each cheesecake out of its muffin cup. Then, gently pull the cupcake liners straight down and away from the sides of each individual cheesecake. The filling, once set, should not stick to the liners, making removal surprisingly easy. Pulling straight down works best to keep the edges clean.
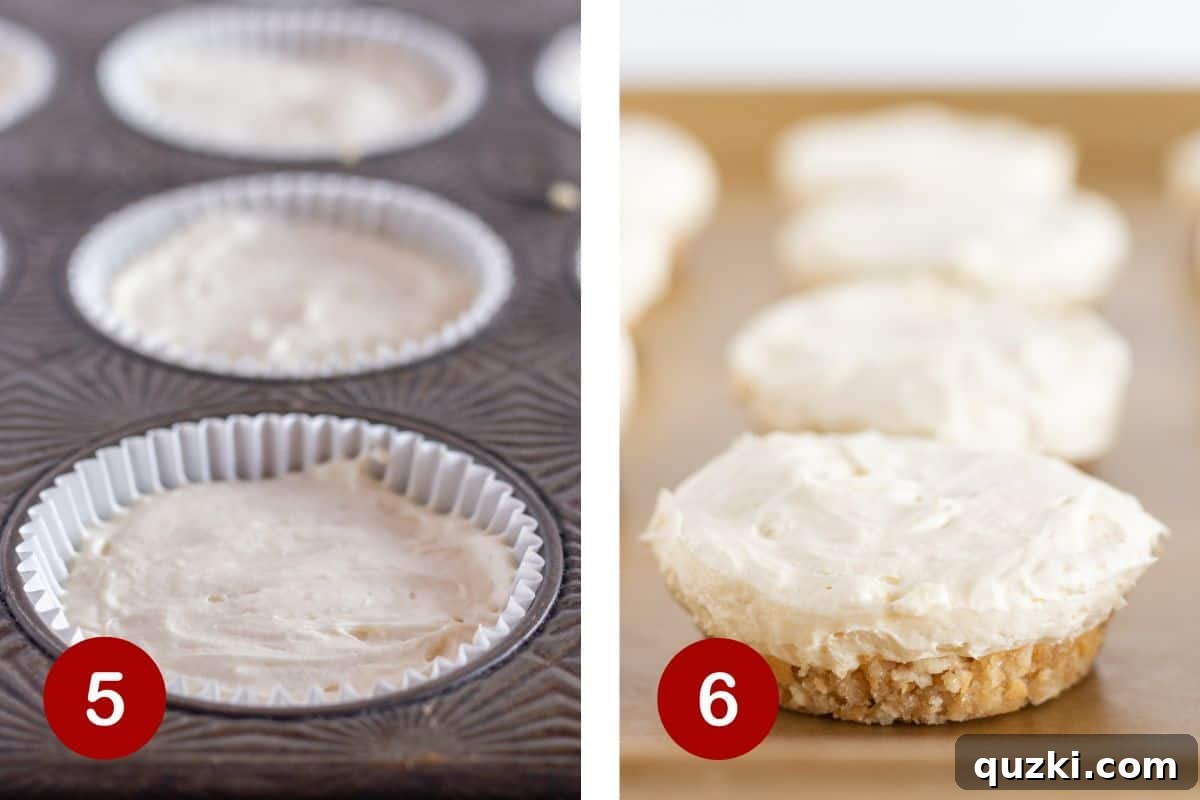
Step 7: Garnish and Serve
To serve these delightful treats, add a dollop of fresh whipped topping (or whipped cream) to the top of each cheesecake. This adds an extra layer of creamy goodness and visual appeal. Then, let your creativity shine with your favorite toppings! For a classic and refreshing touch, fresh berries like blueberries and sliced strawberries are always a hit. A sprinkle of poppy seeds can add a subtle decorative element. Serve immediately and enjoy the cheers!
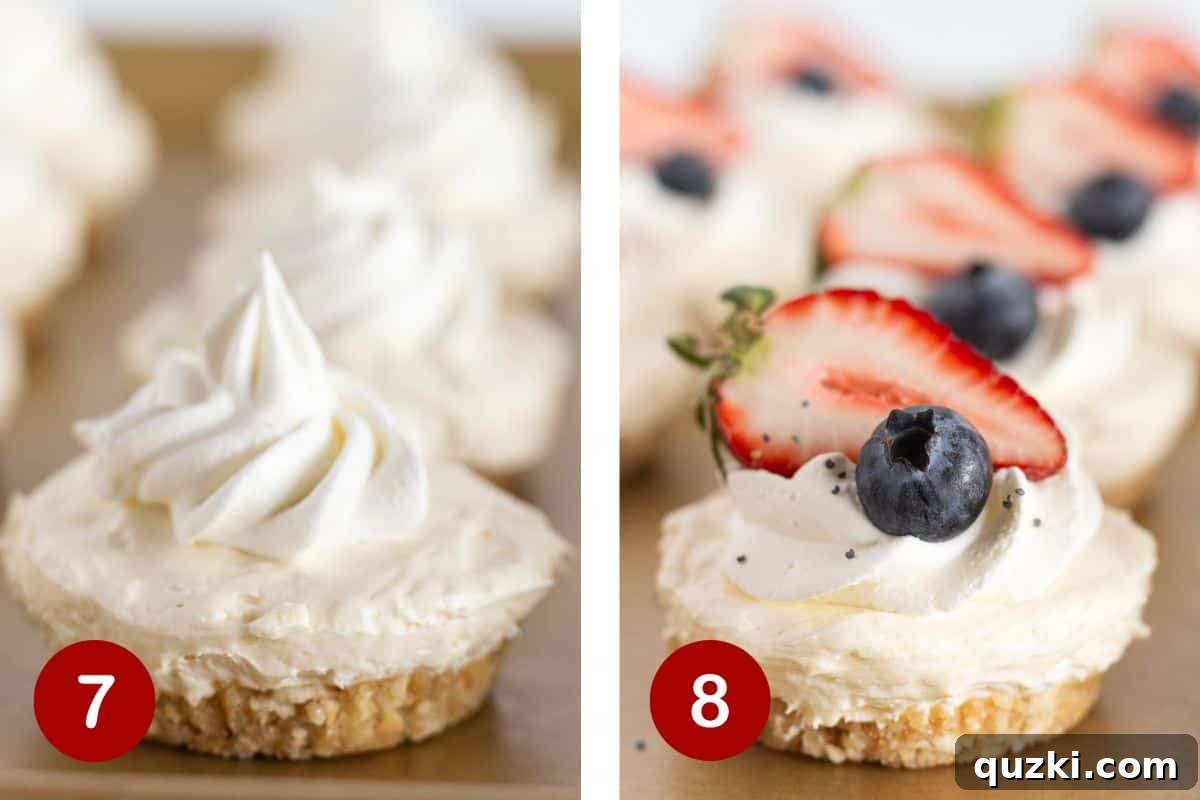
Expert Tips for No-Fail Mini Cheesecakes
While this recipe is incredibly forgiving, a few expert tips can elevate your mini cheesecakes from great to absolutely perfect!
- Always Line Your Muffin Tin: This step is non-negotiable! Lining the muffin tin with cupcake liners is the secret to effortlessly removing your delicate cheesecakes. The smooth, non-stick surface of the liner ensures the crust and filling won’t adhere to the pan, allowing for a clean lift-out every time. Don’t skip this, especially if you want perfectly intact individual servings.
- Firmly Press the Crust: A solid crust is the foundation of a good cheesecake. After distributing the vanilla wafer crumbs, use significant pressure to press them down firmly into each muffin cup. This prevents the crust from crumbling when you remove the cheesecakes and provides a satisfying crunch. Tools like a tart shaper, the bottom of a small glass, or even your thumb can help achieve a compact, even layer. You can also experiment with different crusts, like a chocolate chip cookie crust for a unique twist.
- Do Not Overmix the Filling: Once you add the whipped topping to the cream cheese and sweetened condensed milk mixture, switch to a gentle folding motion with a rubber spatula. Overmixing at this stage will deflate the air that the whipped topping provides, leading to a denser, less airy cheesecake texture. You want to maintain that light, cloud-like consistency.
- Use a Large Cookie Scoop for Even Portions: For professional-looking, consistently sized mini cheesecakes, a large cookie scoop (often labeled as a ¼ cup or 3-4 tablespoon size) is your best friend. It ensures each cheesecake receives an equal amount of filling, leading to uniform results. If you don’t have one, measuring out 3-4 tablespoons per crust will work just fine.
- Allow Ample Chilling Time: Patience is a virtue when it comes to no-bake cheesecakes! The longer they chill in the refrigerator, the better they will set up and firm. While 4 hours is the minimum, allowing them to refrigerate overnight (8-12 hours) will yield the absolute best texture, ensuring they are perfectly firm, stable, and easy to handle when you remove the liners.
Frequently Asked Questions About No-Bake Mini Cheesecakes
Won’t the filling stick to the wrappers?
It’s a common concern, but no, the filling typically will not stick to the wrappers, especially once it’s fully set in the refrigerator. The smooth, non-porous surface of the cupcake liners, combined with the firm texture of the chilled cheesecake filling, prevents adhesion. For the easiest removal, gently peel the liner straight down around the edges of the no-bake mini cheesecakes. This technique minimizes any disruption to the cheesecake’s shape.
Can I use homemade whipped cream instead of whipped topping?
Absolutely! Homemade whipped cream can certainly be used for the filling, and it will add a lovely fresh dairy flavor. If you have a fantastic homemade whipped cream recipe you love, feel free to use it. However, it’s worth noting that store-bought whipped topping (like Cool Whip) is often preferred in no-bake cheesecake recipes because it contains stabilizers that help the cheesecake set more firmly and maintain its shape for a longer period. If using homemade whipped cream, ensure it’s whipped to stiff peaks and understand the final texture might be slightly softer.
Do mini cheesecakes need to be refrigerated?
Yes, they absolutely need to be refrigerated. The main ingredients in the filling – cream cheese and whipped topping – are dairy-based and will become soft and lose their structure if left at room temperature for an extended period. To maintain their creamy texture and ensure food safety, always store these mini cheesecakes in the refrigerator until just before you plan to serve them. This also helps them maintain their firmness and makes them much easier to enjoy.
How do you harden no-bake cheesecake?
No-bake cheesecake filling hardens naturally as it chills in the refrigerator. The fats in the cream cheese and whipped topping solidify when cold, giving the cheesecake its firm, sliceable (or scoopable, in this case) consistency. The sweetened condensed milk also plays a role in binding the ingredients. The longer they sit in the fridge (up to overnight), the firmer they will become. For an even firmer, almost ice cream-like texture, you can also freeze the cheesecakes for an hour or two before serving, or store them in the freezer for longer-term storage.
How long do they last in the refrigerator?
When stored properly in an airtight container in the refrigerator, these mini no-bake cheesecakes will maintain their freshness and deliciousness for up to 4 days. If you want to prepare them further in advance or save some for later, they also freeze beautifully. You can freeze them for up to 2 months in an airtight container. Thaw them in the refrigerator for a few hours before serving.
Endless Topping Possibilities for Your Mini Cheesecakes
One of the most exciting aspects of these mini no-bake cheesecakes is the sheer variety of toppings you can use to personalize each one. While fresh fruit is always a delightful and refreshing choice, don’t limit your imagination! Think of these cheesecakes as a delicious canvas waiting for your creative flair. Let these ideas inspire you:
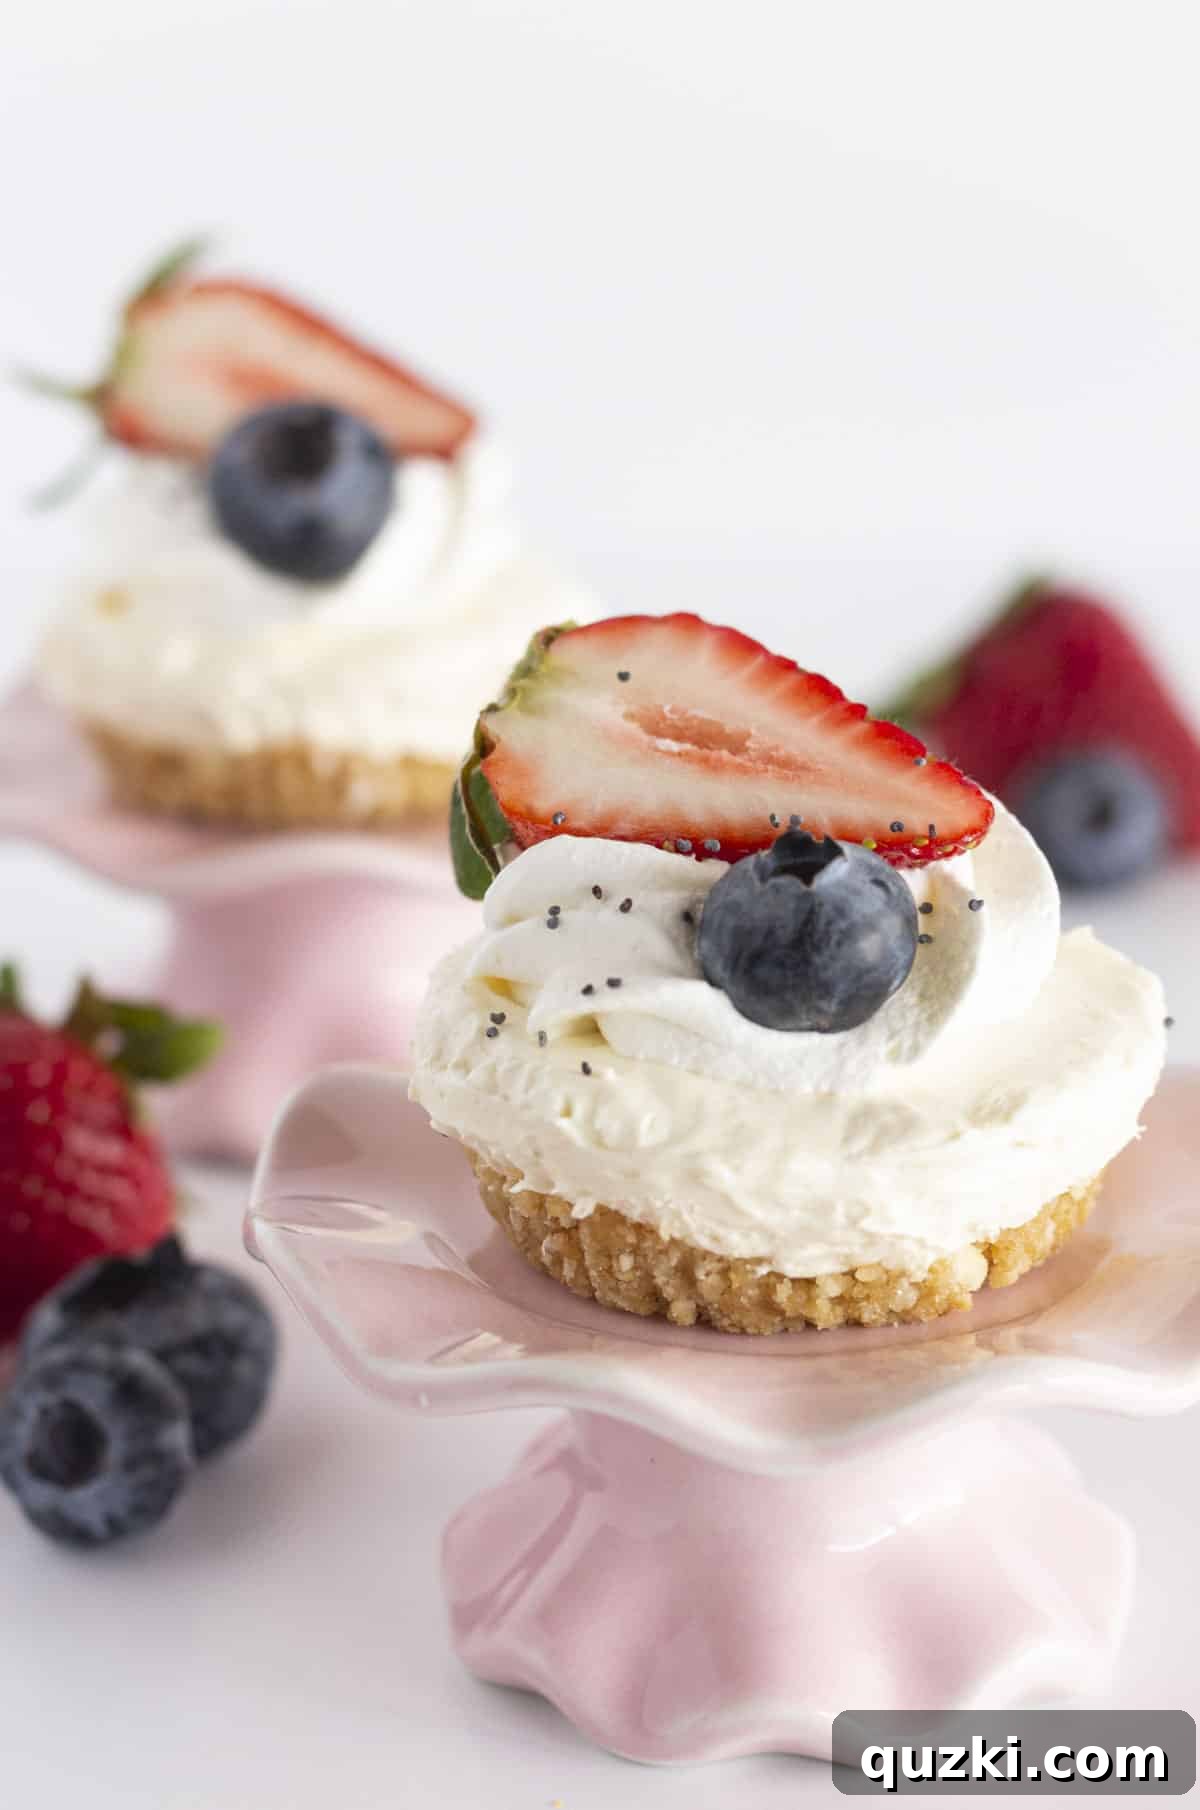
Fresh Fruit & Zest:
- Berries: Blueberries, strawberries (sliced), raspberries, blackberries – a timeless and vibrant choice.
- Citrus: A sprinkle of fresh lemon or lime zest for a bright, tangy kick, or a spoonful of homemade or store-bought lemon curd.
- Stone Fruits: Diced peaches or nectarines in season.
- Tropical: Finely diced mango or passion fruit pulp for an exotic twist.
Sauces & Syrups:
- Salted Caramel Sauce: A drizzle of rich, buttery salted caramel for an indulgent touch.
- Chocolate Sauce: Classic chocolate fudge or a lighter chocolate syrup.
- Fruit Purees/Jams: Warm up your favorite berry jam or a smooth fruit puree for a quick, elegant topping.
- Nutella: A dollop of creamy hazelnut spread for chocolate lovers.
Crunchy & Decadent:
- Chocolate Chips: Mini chocolate chips, white chocolate chips, or shaved chocolate.
- Chopped Nuts: Toasted pecans, walnuts, almonds, or pistachios for texture and earthy flavor.
- Cookie Crumbles: Extra vanilla wafer crumbs, crushed Oreos, or shortbread pieces.
- Toasted Coconut: Adds a lovely texture and tropical hint.
- Mini Marshmallows: A fun and playful addition.
Inspired Combinations:
You can even draw inspiration from other popular no-bake cheesecake recipes. Think about the comforting flavors of a Cookie Butter Cheesecake, the autumnal warmth of a Pecan Pie Cheesecake, or the nostalgic sweetness of an Easy Strawberry Crunch Cheesecake. Each offers unique topping ideas that can be adapted for your mini versions.
No matter what you choose, the key is to add your toppings just before serving to ensure they are fresh and vibrant. Have fun experimenting and discovering your favorite combinations!
Craving More No-Bake Cheesecake Inspiration?
If you’ve fallen in love with the ease and deliciousness of no-bake cheesecakes, there’s a whole world of flavors waiting for you to explore. These recipes take the same simple principles and apply them to create a variety of show-stopping desserts that are perfect for any occasion. From classic flavors to exciting new combinations, you’re sure to find a new favorite:
Discover Your Next Favorite No-Bake Dessert!
Cheesecakes
Easy Vanilla No-Bake Cheesecake
A simple, classic, and incredibly creamy vanilla cheesecake that requires no baking, perfect for any occasion.
Cheesecakes
The Best Oreo No-Bake Cheesecake
Indulge in this rich and easy Oreo cheesecake, featuring a crunchy Oreo crust and a creamy filling packed with cookie pieces.
Cheesecakes
Easy No-Bake Banana Pudding Cheesecake Recipe
Combine two classic desserts into one with this irresistible banana pudding cheesecake, a comforting and creamy delight.
Cheesecakes
The Best No-Bake Cherry Cheesecake
A vibrant and refreshing cherry cheesecake that requires no baking, perfect for a quick and impressive dessert.
Did you try this recipe?
Leave a ⭐️ review below and tag @practicallyhomemade on Pinterest! We love seeing your creations!

★★★★★ (5 from 2 votes)
Easy No-Bake Mini Cheesecakes
Easy No-Bake Mini Cheesecakes offer a delightful individual dessert experience, starting with a flavorful vanilla wafer crust and culminating in a light, creamy filling made irresistible with sweetened condensed milk. These adorable treats are perfect for any occasion, requiring no oven and minimal effort.
Rate Recipe
Print Recipe
Want to save this recipe for later? Enter your email below to have it sent straight to your inbox, along with new recipes from us every week!
(Please note: This is a placeholder for a form. For functional forms, please implement your own backend solution.)
Ingredients
Vanilla Wafer Crust
- 2 ¼ cup Vanilla Wafer cookie crumbs
- ¼ cup brown sugar, {packed}
- ½ cup butter, {melted}
Cheesecake Filling
- 16 ounces cream cheese, {softened}
- 14 ounces sweetened condensed milk
- 8 ounces whipped topping, {thawed}
Instructions
Crust Preparation
- Line 24 muffin cups with paper cupcake liners, ensuring they are fully seated in the muffin tin.
- In a medium bowl, combine the vanilla wafer cookie crumbs, packed brown sugar, and melted butter. Mix these ingredients thoroughly until all the crumbs are evenly coated and moist.
- Add a heaping tablespoon of the crumb mixture into the bottom of each prepared muffin cup. Use your fingers, a tart shaper, or the bottom of a small, flat glass to firmly press the crumbs down, creating a compact and even crust layer.
- Refrigerate the muffin tin with the prepared crusts for at least 10 minutes while you prepare the cheesecake filling. This helps the crust firm up and set.
Cheesecake Filling & Assembly
- In a separate mixing bowl, beat the softened cream cheese using an electric hand-held mixer or a stand mixer until it is smooth and free of any lumps.
- Gradually add the sweetened condensed milk to the cream cheese, continuing to mix until the ingredients are well combined and the mixture is smooth and creamy.
- Gently fold in the thawed whipped topping using a rubber spatula until it is fully incorporated and the mixture remains light and airy. Be careful not to overmix, as this can deflate the whipped topping.
- Using a large cookie scoop (about 3-4 tablespoons), scoop the cheesecake mixture evenly onto each prepared vanilla wafer crust.
- Use the back of a spoon to gently spread the filling out into an even layer on top of each crust, ensuring a smooth finish.
- Cover the muffin tin loosely with plastic wrap and refrigerate for at least 4 hours. For the best possible set and firmness, it is highly recommended to refrigerate them overnight.
Serving
- To serve, carefully remove the chilled cheesecakes from the muffin pan. Gently pull the cupcake liners straight down from the sides of each cheesecake; the filling should not stick.
- Top each mini cheesecake with an additional dollop of whipped topping (if desired) and your favorite fresh fruit or other toppings of choice. Consider fresh berries like blueberries and sliced strawberries for a classic touch.
- Store any leftover mini cheesecakes in an airtight container in the refrigerator for up to 4 days. They can also be frozen for up to 2 months.
Notes
- Don’t skip lining the muffin tin with cupcake liners. This ensures easy removal and prevents sticking.
- Avoid overmixing the filling after adding the whipped topping; gentle folding maintains its light, airy texture.
- A large cookie scoop (3-4 tablespoons) helps create uniform and perfectly portioned cheesecakes.
- For the best set, allow the cheesecakes to chill for at least 4 hours, or preferably overnight.
Topping Ideas:
- Fresh fruit (berries, sliced kiwi, diced mango), lemon curd, chocolate chips, salted caramel sauce, chopped nuts (pecans, walnuts), chocolate sauce, berry jams, or shredded coconut.
Nutrition
Serving: 1 mini cheesecake, Calories: 210kcal, Carbohydrates: 20g, Protein: 3g, Fat: 14g, Saturated Fat: 8g, Polyunsaturated Fat: 1g, Monounsaturated Fat: 3g, Trans Fat: 0.2g, Cholesterol: 35mg, Sodium: 153mg, Potassium: 99mg, Fiber: 0.1g, Sugar: 15g, Vitamin A: 416IU, Vitamin C: 0.4mg, Calcium: 69mg, Iron: 0.1mg
Nutrition information is automatically calculated, so should only be used as an approximation.
Like this recipe? Leave a comment below! We love hearing from you!
There you have it – a comprehensive guide to crafting delightful, easy no-bake mini cheesecakes that are sure to impress without the stress. This recipe proves that you don’t need a complicated baking process to create an elegant and incredibly satisfying dessert. Whether you’re a seasoned dessert maker or just starting out, these individual treats offer a perfect blend of simplicity, versatility, and undeniable deliciousness. So go ahead, whip up a batch, get creative with your toppings, and enjoy the pure joy of a perfectly portioned, creamy cheesecake. Happy no-baking!