
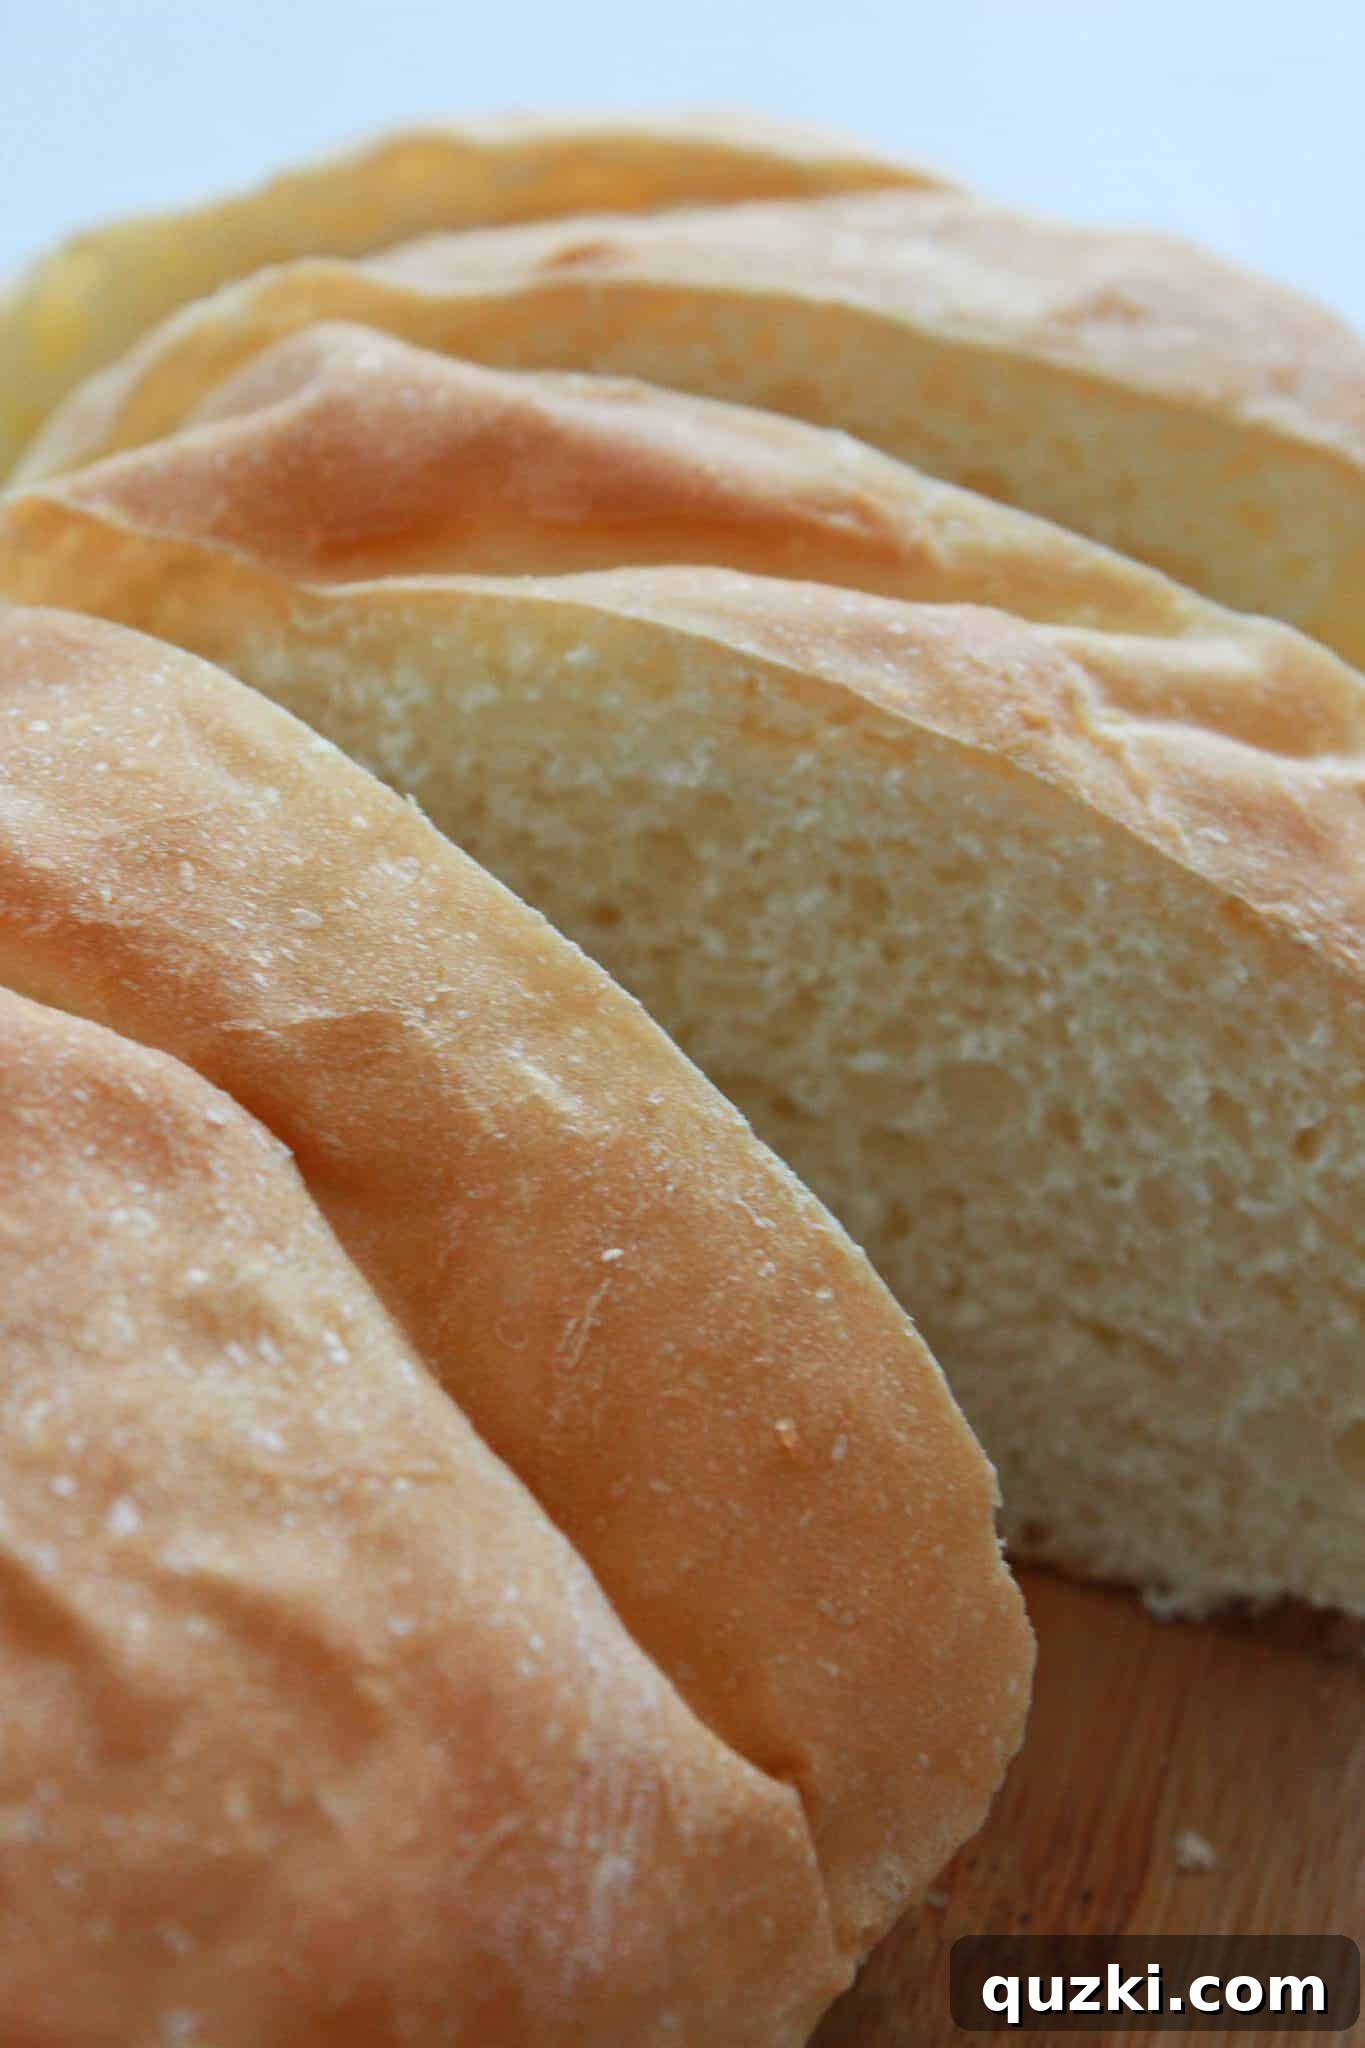
Effortless One-Rise French Bread: Your Guide to Bakery-Quality Loaves in Under an Hour
Imagine the aroma of freshly baked French bread filling your kitchen, its crust perfectly crisp, its interior wonderfully soft. For many, baking bread from scratch seems like a daunting, time-consuming task, involving multiple rises and hours of waiting. But what if you could achieve this culinary dream in just about an hour, skipping an entire lengthy proofing step? Living in a rural area, far from the nearest artisanal bakery, has inspired me to master the art of homemade bread. My latest obsession? This incredible One-Rise French Bread recipe that delivers exceptional results with remarkable speed and simplicity. It’s a game-changer for anyone who loves the taste of fresh bread but doesn’t have hours to spare.
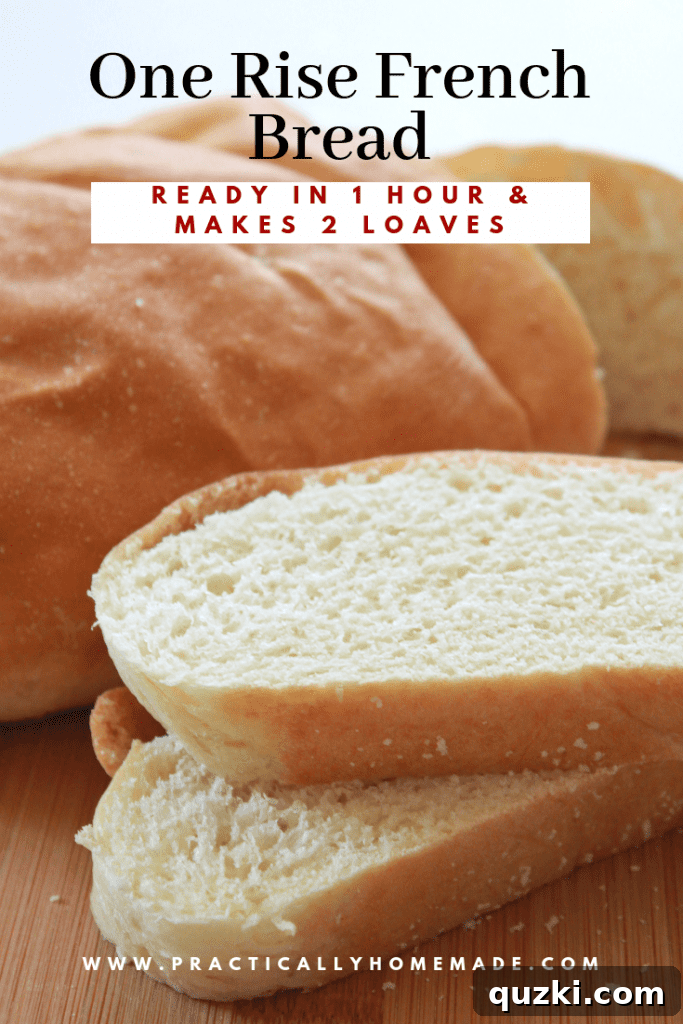
This recipe consistently yields two beautiful loaves, offering fantastic versatility. You can enjoy one immediately, warm with a smear of butter, and pop the second one into the freezer for a busy weeknight meal or to surprise a friend or family member with a thoughtful, homemade gift. The convenience of having a ready-to-bake loaf on hand is simply unmatched, transforming ordinary meals into extraordinary experiences. Say goodbye to store-bought bread and hello to the delightful world of quick, homemade French bread!
Explore More Speedy Bread Recipes:
- One-Rise Cinnamon Rolls: Indulge in warm, gooey cinnamon rolls without the long wait.
- One-Rise Crescent Rolls: Fluffy, buttery crescent rolls perfect for any dinner table.
Last week, I served this incredible French bread alongside my Easy Lasagna Skillet, and the combination was nothing short of magical – a true feast for any carb enthusiast! One common concern when venturing into one-rise bread recipes is the potential sacrifice of texture; many worry that skipping the first rise might result in a dense or less airy loaf. I’m thrilled to report that with this specific recipe, those worries are completely unfounded. The texture of this French bread is absolutely fabulous: light, tender, and incredibly soft on the inside, with a satisfyingly crisp crust. It truly rivals the quality of bread from a traditional bakery, proving that speed doesn’t have to compromise excellence.
Disclaimer: This post may contain affiliate links. I may receive a small commission from any purchases you make through these links, which helps support this site at no extra cost to you.
The Simple Magic of One-Rise French Bread: Dough Preparation
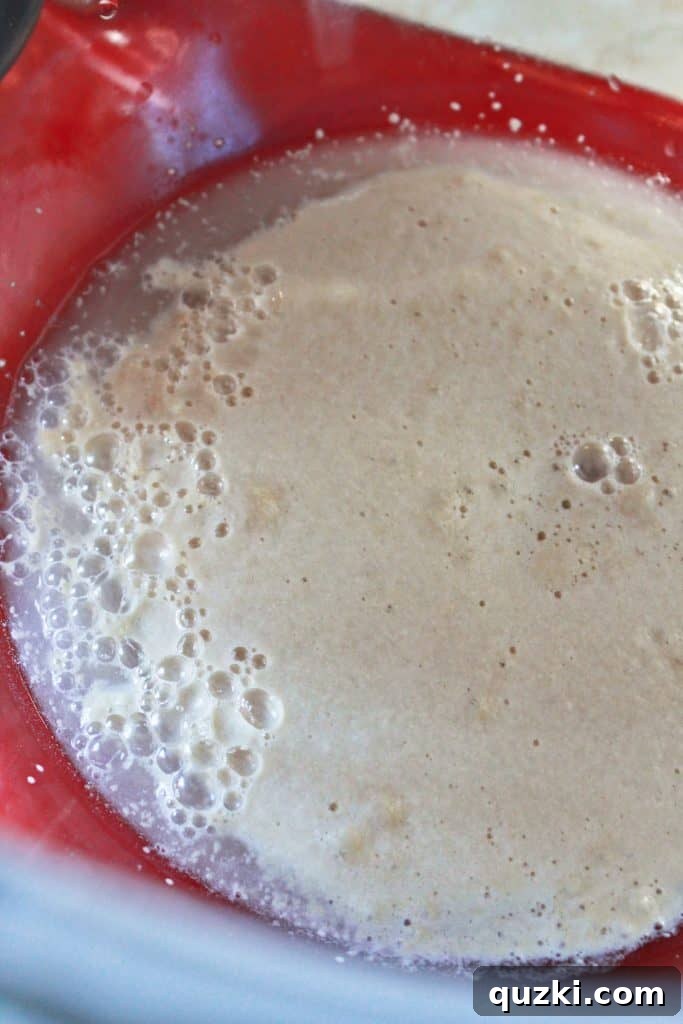
Bringing this dough together is surprisingly simple, even if you’re new to working with yeast. The process begins with blooming the yeast, a crucial first step that ensures your bread will rise beautifully. For this recipe, you’ll want to use Rapid Rise yeast. This type of yeast is specifically formulated to activate quickly, making it ideal for our expedited one-rise method. You’ll combine it with warm water and a touch of sugar, creating the perfect environment for the yeast to come alive. Within about 10 minutes, your mixture will become delightfully bubbly, signaling that the yeast is active and ready to work its magic. This visual cue is a confidence booster, letting you know you’re on the right track for a perfectly risen loaf.
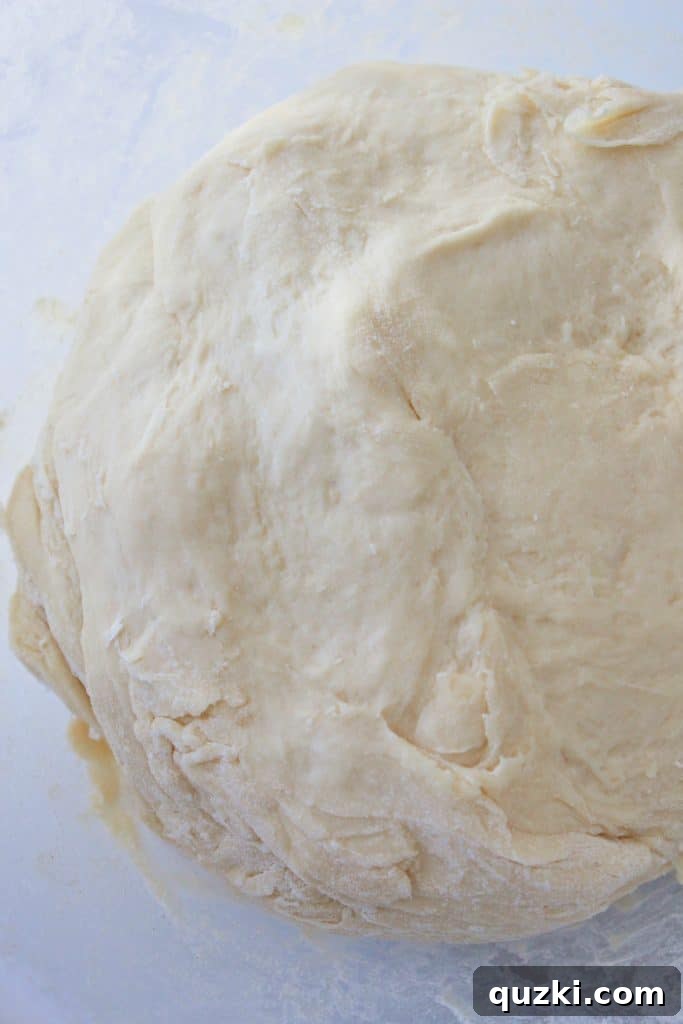
Once your yeast is bloomed, the rest of the ingredients come together quickly. You’ll incorporate salt, vegetable oil, egg yolk, and gradually add the all-purpose flour. The process is straightforward whether you’re using a stand mixer with a paddle attachment and then a dough hook, or kneading by hand. The goal is to mix until the dough just barely sticks to the sides of your bowl. This indicates the right consistency – not too sticky, not too dry. A few minutes of kneading, either with a dough hook or on a lightly floured surface, will develop the gluten, giving your bread its signature structure and chewiness. In what feels like no time at all, you’ll have a cohesive, elastic dough that’s ready for its singular rise.
The Secret to Speed: Your Oven as a Proofer
One of the key techniques that allows us to make this French bread so quickly is using your oven as a makeshift proofer. A proofer provides a warm, consistent environment crucial for yeast activation and dough rising. To prepare your oven, simply turn it on to 200 degrees Fahrenheit (approximately 93 degrees Celsius) when you first start making the dough. This brief period is just enough to create a warm, cozy space without actually baking anything. Once the oven reaches temperature, immediately turn it off. This creates the ideal warm (but not hot) environment for your dough to rise efficiently. As you begin shaping the dough, your oven will be perfectly prepped to encourage a rapid and effective rise.
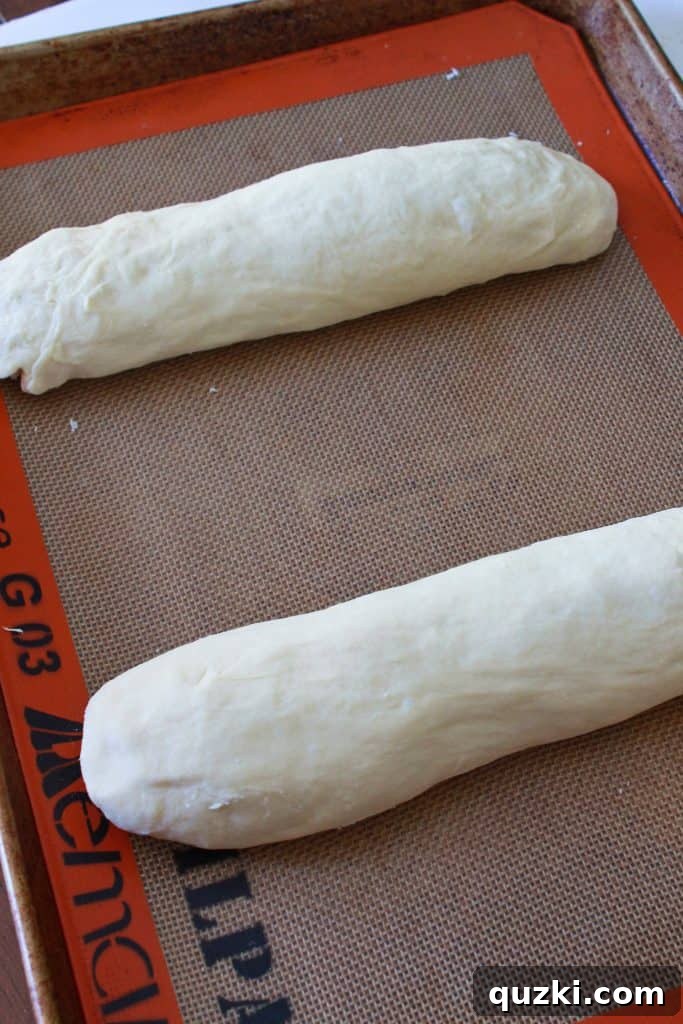
After your dough is perfectly formed and kneaded, divide it into two equal halves. Gently shape each half into long, elegant loaves, mimicking the classic French baguette form. The shaping process doesn’t need to be overly complicated; aim for an even thickness and a smooth surface. These two loaves will soon transform into golden-brown masterpieces. The care you put into shaping will reflect in the final appearance and even baking of your bread.
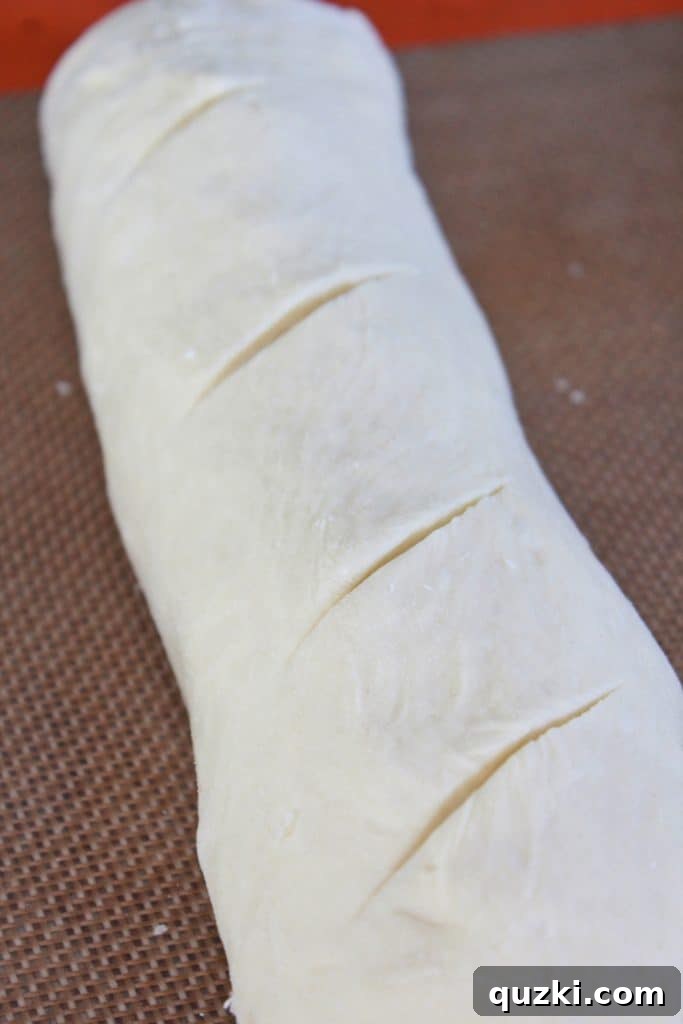
Next, grab a very sharp knife or a bread lame and carefully cut a few diagonal slits into the top of each loaf. These slashes are more than just decorative; they serve a vital purpose. During the rising and baking process, these cuts allow the bread to expand without tearing unevenly, creating that beautiful, rustic cracked crust that is so characteristic of French bread. Aim for about four even slits per loaf, ensuring they’re not too deep to maintain the loaf’s structure.
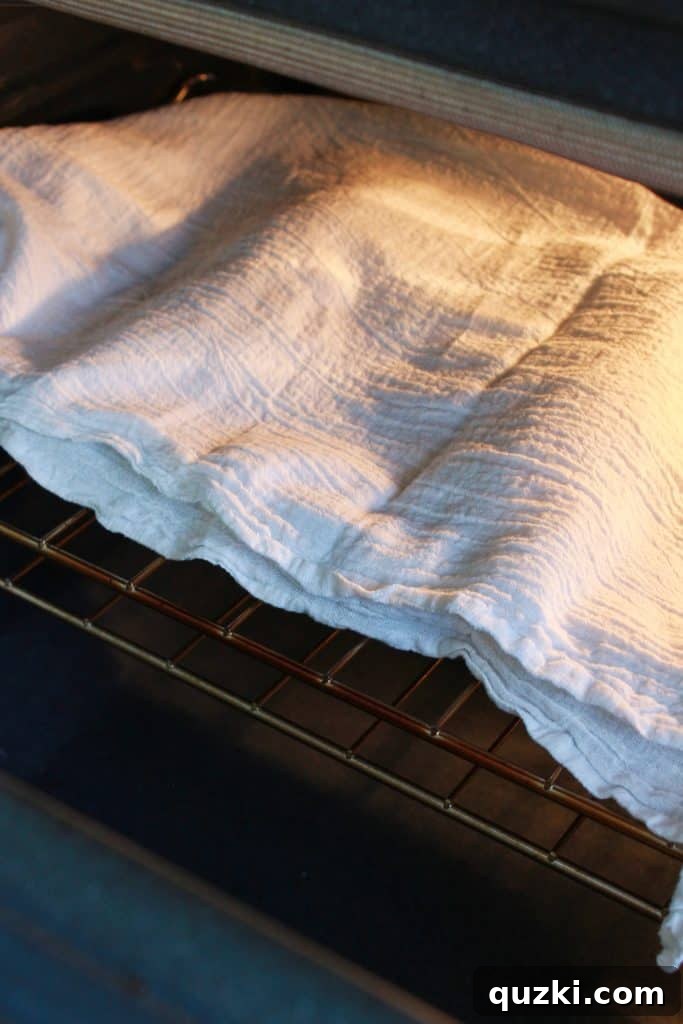
With your loaves shaped and scored, cover them with a clean kitchen towel. This helps to maintain moisture and prevent a dry skin from forming on the dough. Then, carefully place the covered loaves into your pre-warmed (and now turned off) oven to begin their single, crucial rise. The gentle warmth inside the oven acts like a professional proofing box, accelerating the yeast activity and ensuring a quick, even rise.
Baking Perfection: From Rise to Golden Brown
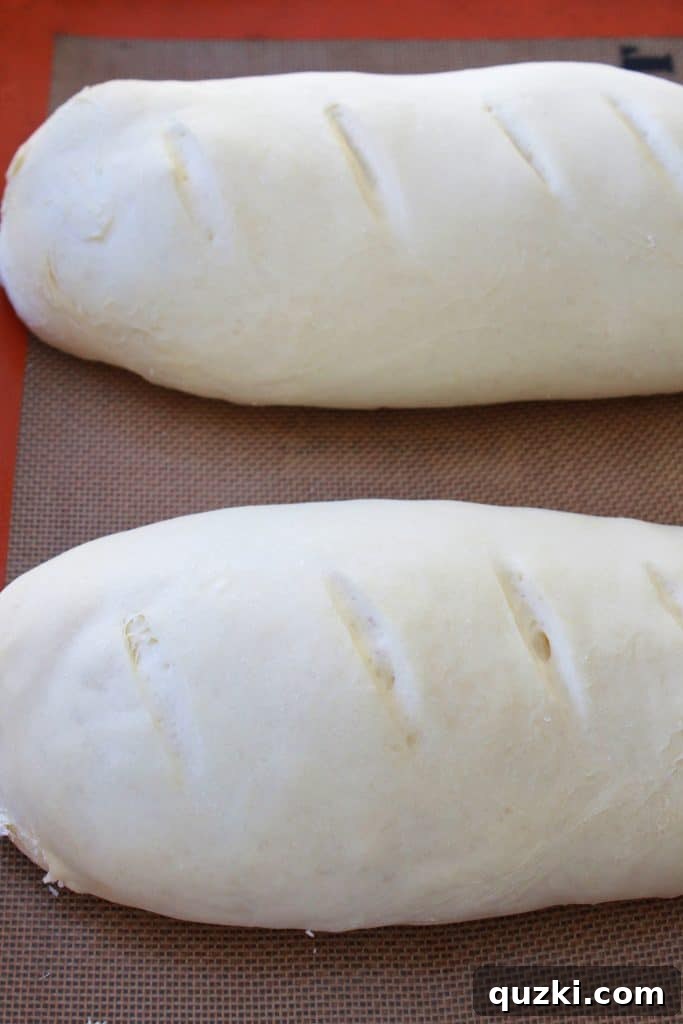
In approximately 15 to 20 minutes, your loaves will have visibly increased in size, becoming plump and airy. This is the magical moment when you remove the risen loaves from the oven. Don’t worry if they don’t double in size like some traditional recipes; a significant puff indicates a successful rise for this one-rise method. Once removed, immediately turn your oven on to 375 degrees Fahrenheit (around 190 degrees Celsius) to preheat for baking. The visual transformation of the dough after its short but effective rise is truly satisfying.
Once your oven is fully preheated to 375 degrees, it’s time for the final act. Carefully place the risen bread loaves into the hot oven. Bake them for a quick 15-18 minutes, or until they achieve a beautiful, golden-brown crust. The color is your best indicator of doneness; a deep golden hue signifies a perfectly baked, flavorful loaf. The crust will be wonderfully crisp, offering a delightful contrast to the soft, airy interior. Every kitchen should experience the joy of baking this simple, delicious French bread.
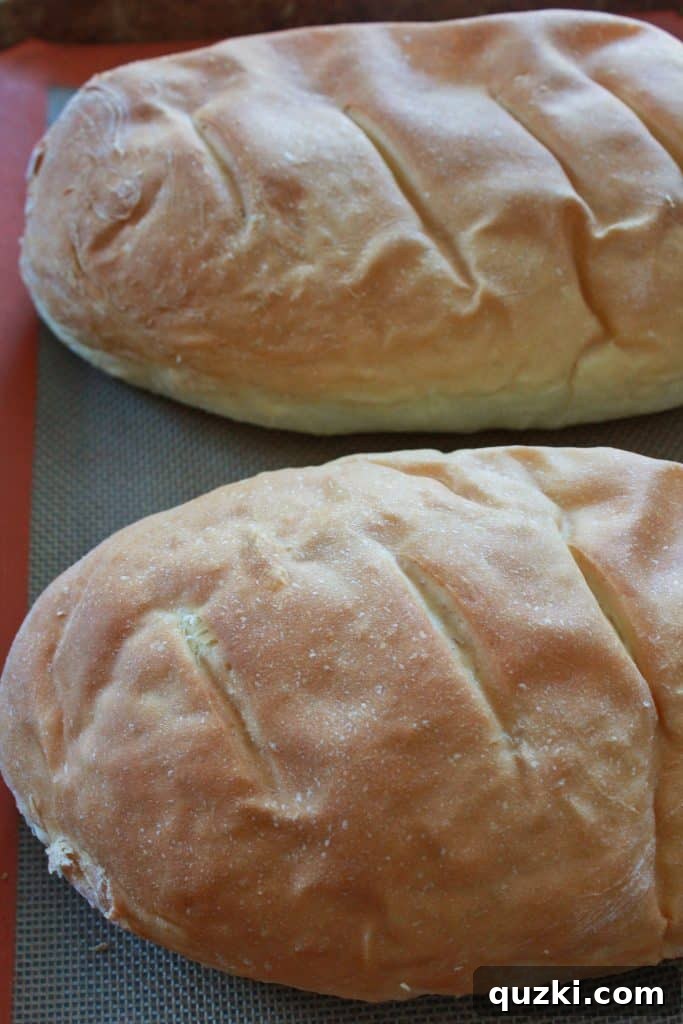
There’s nothing quite like serving this homemade French bread warm, straight from the oven, with a generous slather of melting butter. But honestly, there isn’t a bad way to enjoy this soft, delectable bread. It’s perfect for dipping into olive oil, accompanying a hearty stew, serving as the base for garlic bread, or even transforming into incredible sandwiches. The fact that you can whip up fresh bread on a busy weeknight is a testament to how truly simple and efficient this recipe is. I’m genuinely excited for you to try this recipe for yourself. It’s more than just a recipe; it’s a treasured keeper that will undoubtedly become a staple in your kitchen!
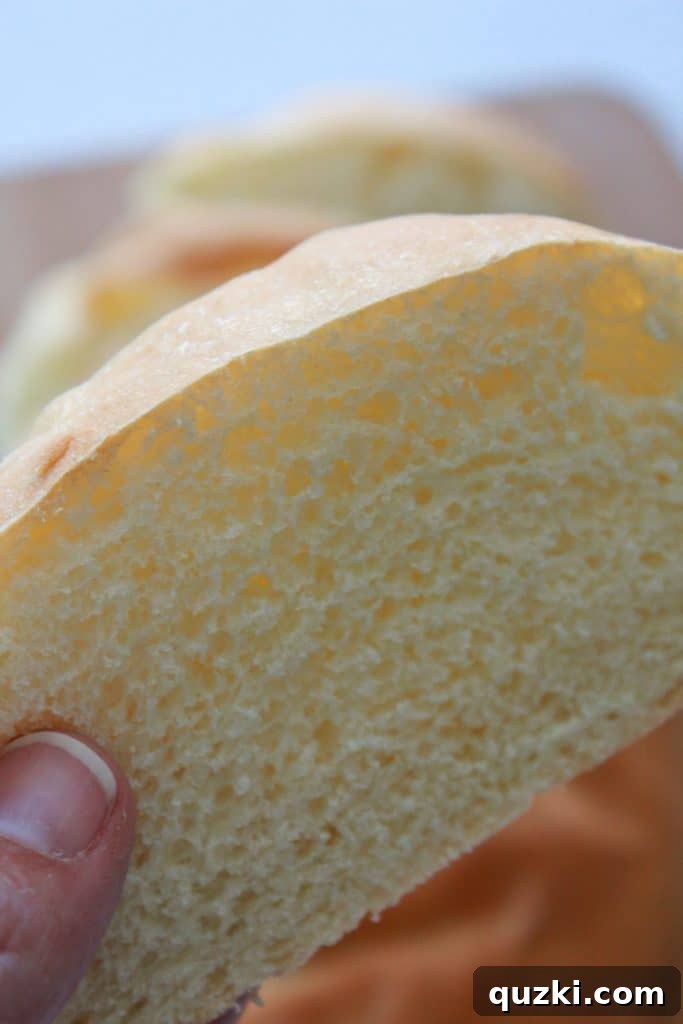

One-Rise French Bread
June Albertson-Dick
45 minutes
15 minutes
1 hour
12 servings
Rate Recipe
Print Recipe
Ingredients
- 1 pkg rapid rise yeast
- 1 1/2 cups warm water
- 1 1/2 tsp sugar
- 1 tsp salt
- 4-5 cups all-purpose flour
- 3 tbsp vegetable oil
- 1 egg yolk
Instructions
-
Prepare your oven as a proofer: Turn your oven to 200 degrees F (93 C). Once it has reached that temperature, immediately turn it off. This creates a warm environment for the dough to rise.
-
Prepare the dough: In a large mixing bowl, combine the rapid rise yeast, sugar, and warm water. Let it stand for about 10 minutes, or until the mixture becomes bubbly, indicating the yeast is active. Add the salt, vegetable oil, and egg yolk to the yeast mixture and mix together using a paddle attachment or by hand until well combined. Gradually add the all-purpose flour, one cup at a time (switching to a dough hook if using a mixer), until the dough just barely sticks to the sides of your bowl. Continue to knead with the dough hook for an additional 2-3 minutes, or turn the dough out onto a lightly floured surface and knead by hand for 2-3 minutes until smooth and elastic.
-
Shape and rise the bread: Once your dough is made, divide it evenly in half. Shape each half into a long, uniform loaf. Using a sharp knife or a bread lame, cut about 4 diagonal slits into the top of each loaf, being careful not to cut too deep. Cover the shaped dough with a clean kitchen towel and place them into your pre-warmed (and now off) oven to rise for 15-20 minutes.
-
Bake and serve: After the bread has risen for 15-20 minutes, remove it from the warm oven. Immediately turn the oven on to 375 degrees F (190 C) and allow it to preheat. Once the oven is preheated, place the bread back inside and bake for 15-18 minutes, or until the bread turns a beautiful golden brown color and sounds hollow when tapped. Serve warm with butter or your favorite accompaniments.
-
Storage: Store leftover French bread at room temperature in an airtight container or a Ziploc bag for up to 3 days. For longer storage, freeze the baked loaves for up to 3 months. To reheat, thaw at room temperature and warm in a preheated oven at 350°F (175°C) for 5-10 minutes until crust is crisp again.
Nutrition
Calories: 186kcal,
Carbohydrates: 33g,
Protein: 5g,
Fat: 4g,
Saturated Fat: 1g,
Polyunsaturated Fat: 2g,
Monounsaturated Fat: 1g,
Trans Fat: 0.02g,
Cholesterol: 1mg,
Sodium: 196mg,
Potassium: 50mg,
Fiber: 1g,
Sugar: 1g,
Vitamin A: 1IU,
Vitamin C: 0.002mg,
Calcium: 8mg,
Iron: 2mg
Nutrition information is automatically calculated, so should only be used as an approximation.
Enjoyed this recipe? Leave a comment below!
Tips for One-Rise French Bread Success
- Yeast Temperature: Ensure your warm water is between 105-115°F (40-46°C). Water that is too hot can kill the yeast, while water that is too cold won’t activate it properly, leading to a flat loaf. A kitchen thermometer is your best friend here.
- Flour Measurement: For accurate results, spoon your flour into the measuring cup and level it off with a straight edge. Scooping directly from the bag can compact the flour, resulting in too much and a dense dough.
- Dough Consistency: The dough should be soft, slightly sticky, but manageable. If it’s too sticky, add flour one tablespoon at a time. If it’s too dry, add water one teaspoon at a time. The “barely sticks to the bowl” rule is a good guide.
- Don’t Over-Knead: While kneading develops gluten, over-kneading can make the dough tough. Stick to the recommended 2-3 minutes after the ingredients are combined.
- Oven as Proofer: Remember to turn the oven OFF after it reaches 200°F. You want a warm, humid environment, not a baking one, for the rise.
- Sharp Knife for Scoring: A very sharp knife or a specialized bread lame will give you clean, beautiful cuts. Dull knives can drag and deflate the dough.
Frequently Asked Questions About One-Rise French Bread
- Q: Can I use active dry yeast instead of rapid rise yeast?
- A: While rapid rise yeast is recommended for this quick method, you can use active dry yeast. However, you might need to increase the rising time slightly to achieve the desired volume. Always bloom active dry yeast first as per package instructions.
- Q: What if my dough doesn’t rise?
- A: The most common culprits are inactive yeast (either old, or water was too hot/cold) or insufficient warmth for rising. Ensure your yeast is fresh and your water temperature is correct. The oven proofer method is designed to provide optimal warmth.
- Q: Can I add herbs or cheese to this French bread?
- A: Absolutely! This recipe provides a wonderful base for customization. Consider adding 1-2 tablespoons of dried herbs (like rosemary or Italian seasoning) or about 1/2 cup of shredded hard cheese (like Parmesan) during the final stages of kneading. This can transform your French bread into an artisanal loaf.
- Q: How do I store leftover French bread?
- A: Store the bread at room temperature in an airtight bag or container to keep it from drying out. It’s best enjoyed within 2-3 days. For longer storage, see the freezing tips below.
- Q: Is this recipe suitable for making baguettes?
- A: Yes, the dough consistency is perfect for shaping into baguettes! Just divide the dough into three or four smaller pieces and shape them into thinner, longer loaves instead of two larger ones. Adjust baking time slightly if making thinner baguettes.
Shop This Recipe: Essential Tools for Homemade Bread
To make your bread baking journey even smoother, consider these helpful tools:
- 3 Piece Baking Set: A great starter set including baking sheets perfect for your French bread.
- 5 QT KitchenAid Mixer: A stand mixer makes kneading effortless, saving you time and energy.
- Dough Scraper: Ideal for handling sticky dough and cleaning your work surface.
- Instant-Read Thermometer: Essential for accurately checking water temperature for yeast activation.
Conclusion: Fresh Bread, Faster Than Ever
This One-Rise French Bread recipe truly redefines homemade baking. It dismantles the myth that fresh, artisan-quality bread is only for experienced bakers with endless time. By streamlining the traditional process into a swift, single rise, you can enjoy the unparalleled taste and aroma of warm, crusty French bread on even the busiest of days. Whether it’s for a special dinner, a casual lunch, or simply a delicious snack, this recipe promises delightful results with minimal fuss. Embrace the joy of baking and bring the magic of a bakery into your home – faster than you ever thought possible!