
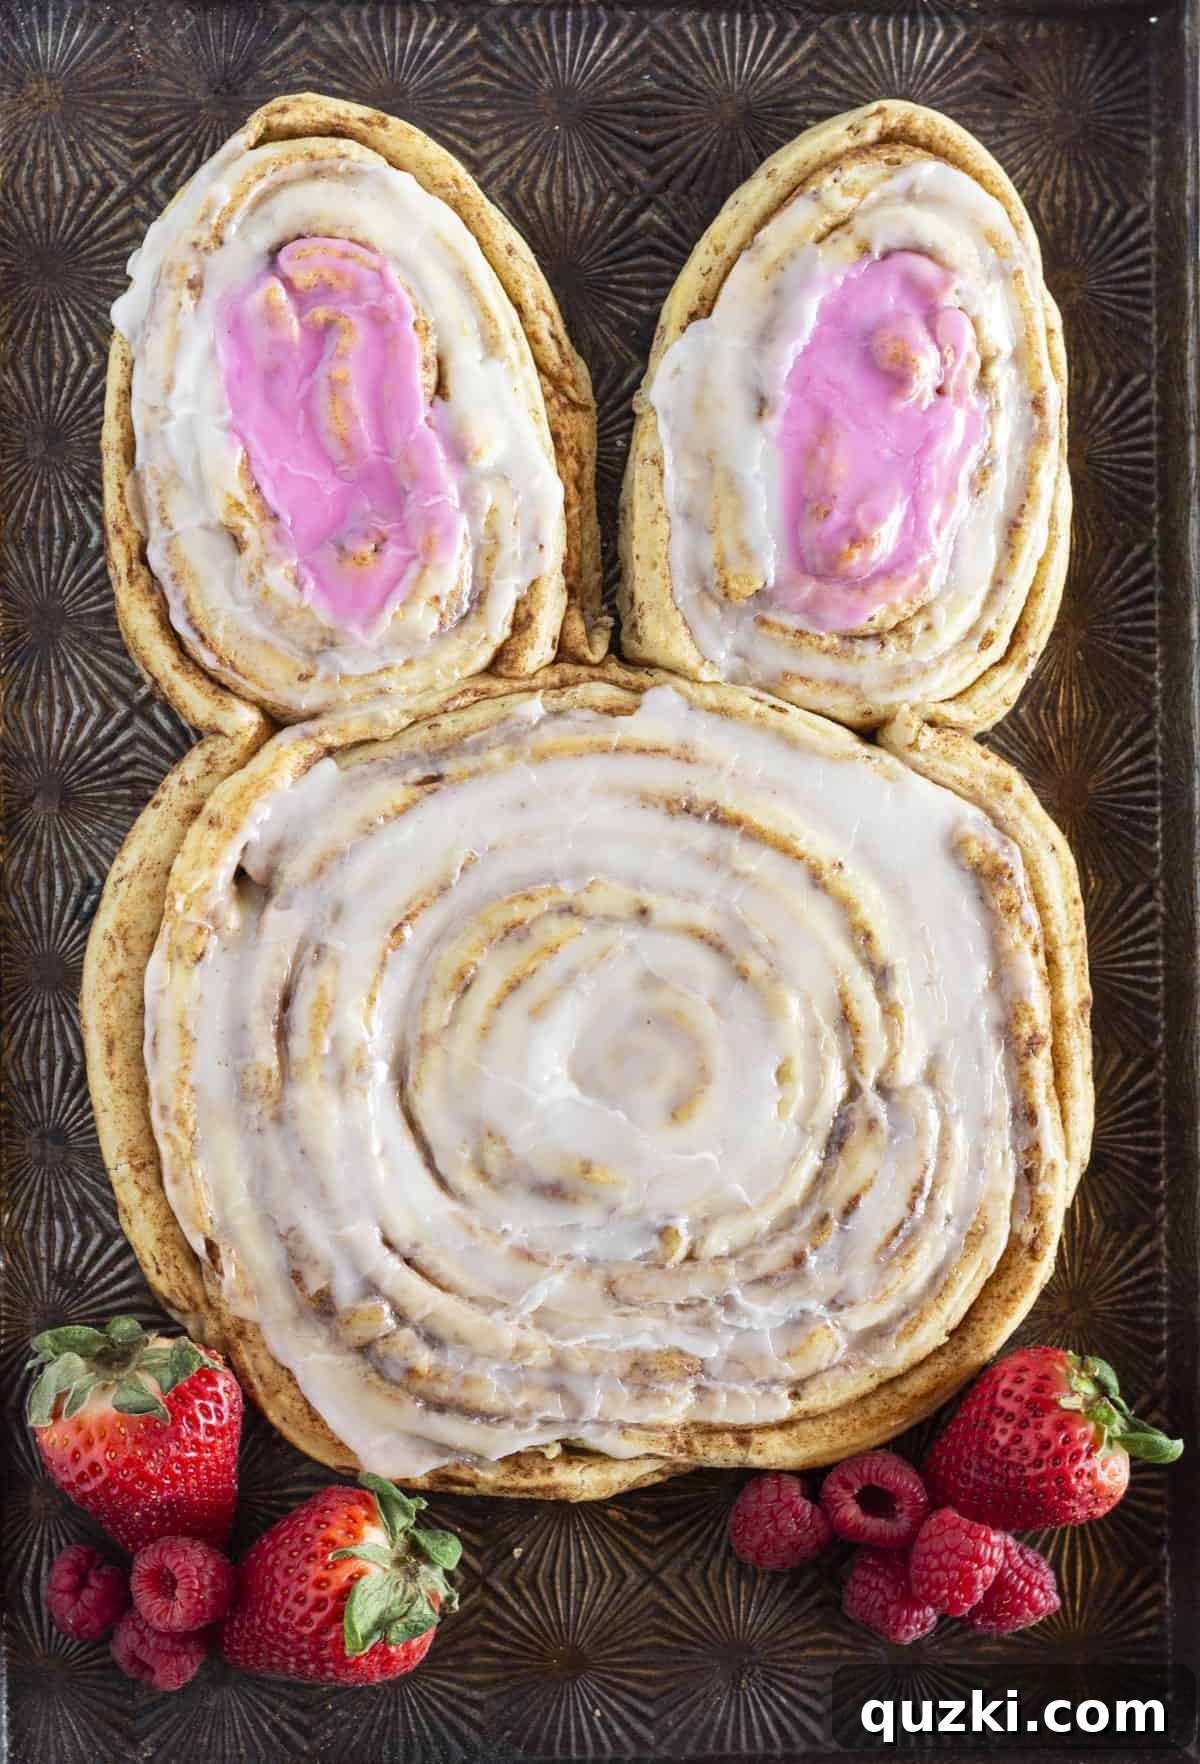
As a mom of four and a new grandma, I’ve always cherished finding simple yet magical ways to celebrate holidays. Easter, with its promise of spring and fresh beginnings, is no exception! This year, make your Easter morning extra special with these incredibly charming and undeniably delicious Bunny-Shaped Cinnamon Rolls. The best part? They start with readily available store-bought refrigerated cinnamon rolls, making them a fantastic, stress-free project that comes together in no time. Forget complicated baking – this recipe is all about creating joy and lasting memories with minimal effort, perfect for busy families looking for a festive touch.
Imagine the smiles on your loved ones’ faces when they wake up to see this giant, adorable cinnamon roll bunny, ready to be enjoyed with a hot cup of coffee or a glass of milk. It’s not just a breakfast item; it’s a centerpiece that sets a cheerful, festive tone for the entire holiday. This recipe proves that you don’t need to spend hours in the kitchen to whip up something truly special. With just a few simple steps, you can turn ordinary cinnamon rolls into an extraordinary Easter morning delight that everyone will adore. It’s a wonderful way to involve children in the kitchen, offering a fun, hands-on activity that culminates in a sweet reward.
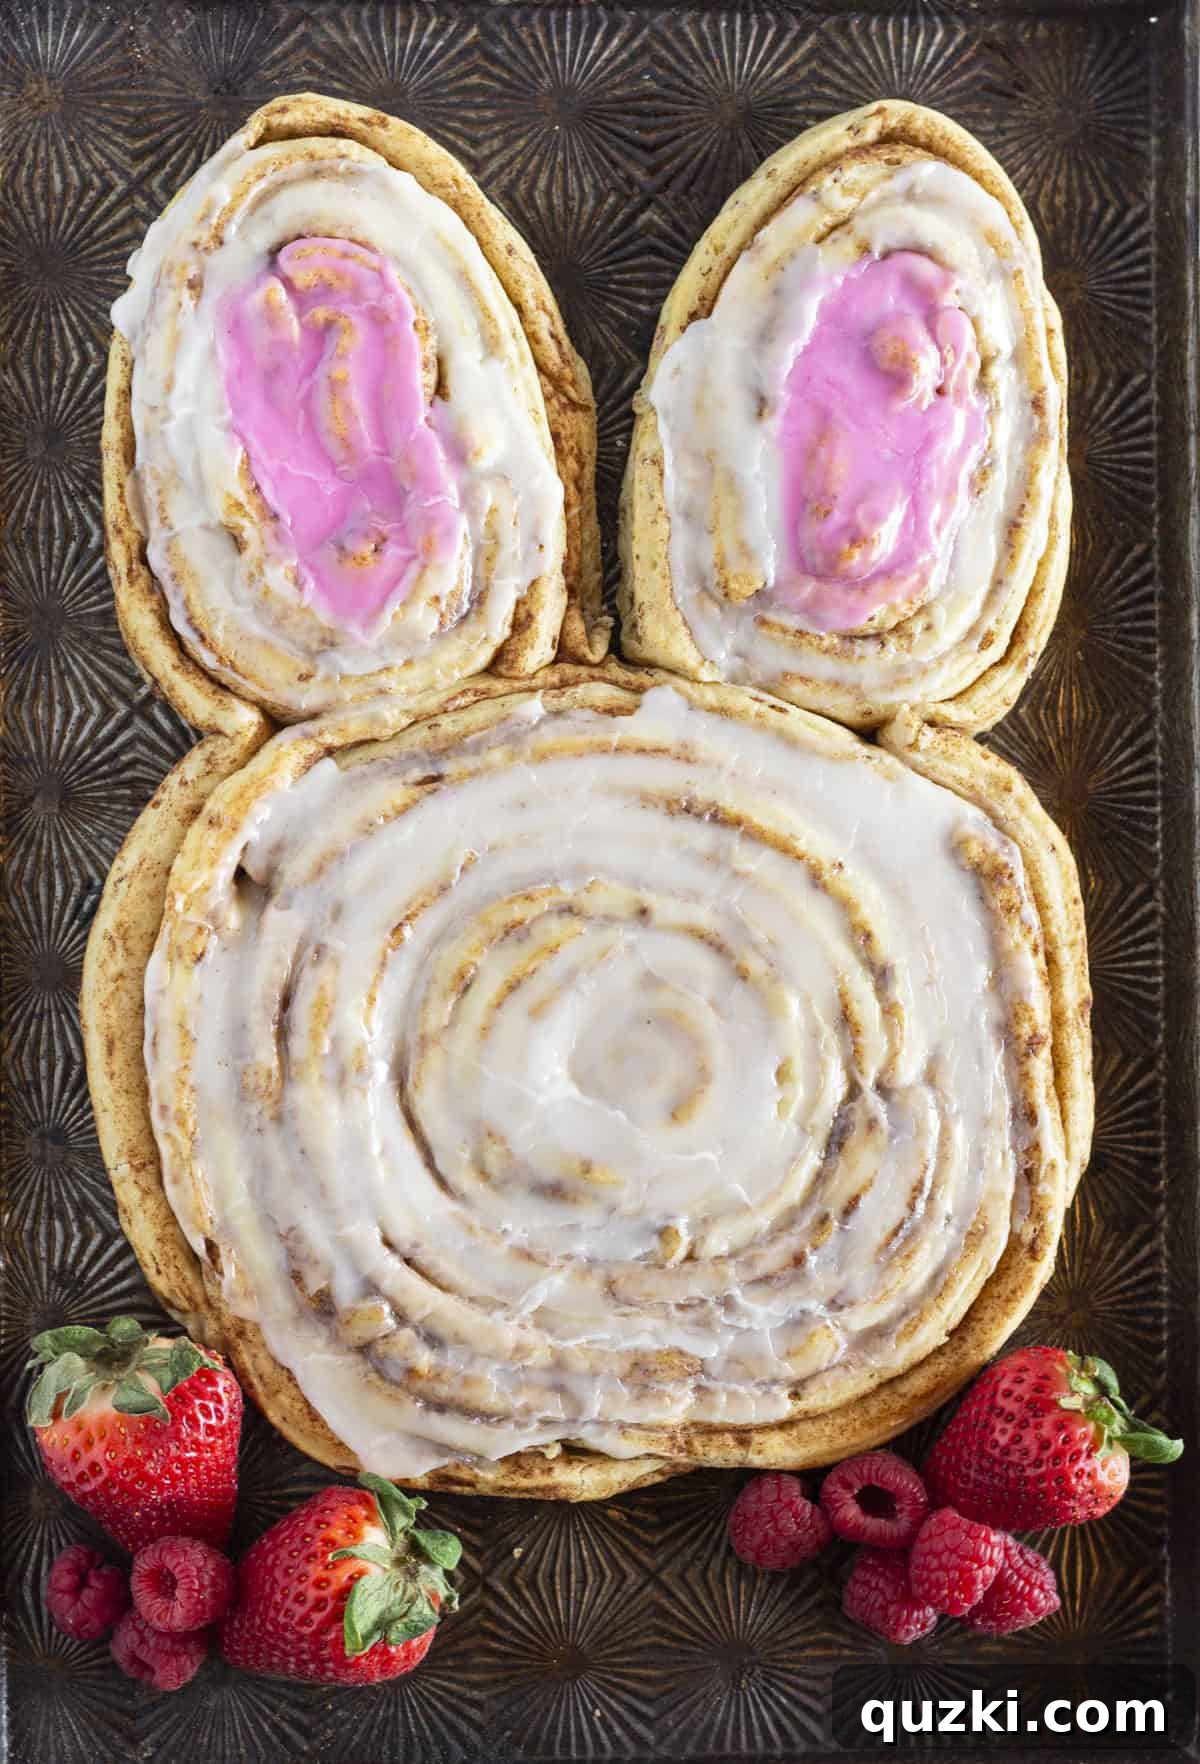
Table of Contents
- The Magic of Easter Bunny Cinnamon Rolls
- What You’ll Need for Your Cinnamon Roll Bunny
- Step-by-Step: How to Make Bunny Cinnamon Rolls
- Expert Tips for Perfect Bunny Shaped Cinnamon Rolls
- How to Store Your Delightful Bunny Cinnamon Roll
- Recipe FAQs: Easter Cinnamon Rolls
- More Irresistible Cinnamon Roll Recipes
- Bunny Cinnamon Roll Recipe Card
The Magic of Easter Bunny Cinnamon Rolls
What truly makes these Easter Bunny Cinnamon Rolls special is their universal appeal. They’re not just a treat; they’re an experience. Little hands will eagerly want to help shape the adorable bunny ears, transforming a simple baking task into a cherished family activity. This hands-on involvement makes the finished product even more rewarding, creating wonderful memories that transcend the kitchen. The process is surprisingly straightforward: with just a few clever twists and turns of the dough, you can bring your bunny to life, bake it to golden, gooey perfection, and then finish with a sweet, generous drizzle of icing.
Whether you prefer to keep things elegantly simple with the classic white icing that comes with the rolls, or you want to unleash your creativity with pastel sprinkles, candy eyes, and a mini marshmallow tail, these bunnies are guaranteed to be as cute as they are delicious. They’re perfect for a festive Easter brunch, a joyful holiday breakfast, or even a fun activity to keep the kids entertained. The aroma of warm cinnamon filling your home, coupled with the sight of these charming bunny treats, truly encapsulates the spirit of Easter.
Beyond their visual charm, these cinnamon rolls offer that comforting, warm, and sweet flavor profile that everyone loves. The soft, tender dough, infused with aromatic cinnamon and sugar, bakes into a delightful texture, perfectly complemented by the creamy, sweet frosting. It’s a sensory delight that makes Easter morning feel truly celebratory and relaxed for the whole family. This recipe offers a delightful blend of simplicity and festive flair, making it an ideal choice for busy parents and grandparents who want to add a special touch to their holiday celebrations without extensive preparation.
What You’ll Need for Your Cinnamon Roll Bunny
One of the greatest advantages of this recipe is its minimal ingredient list, focusing on convenience without sacrificing flavor or fun. You won’t need to hunt for exotic items; everything you require is likely already in your pantry or easily found at your local grocery store.
Ingredients:
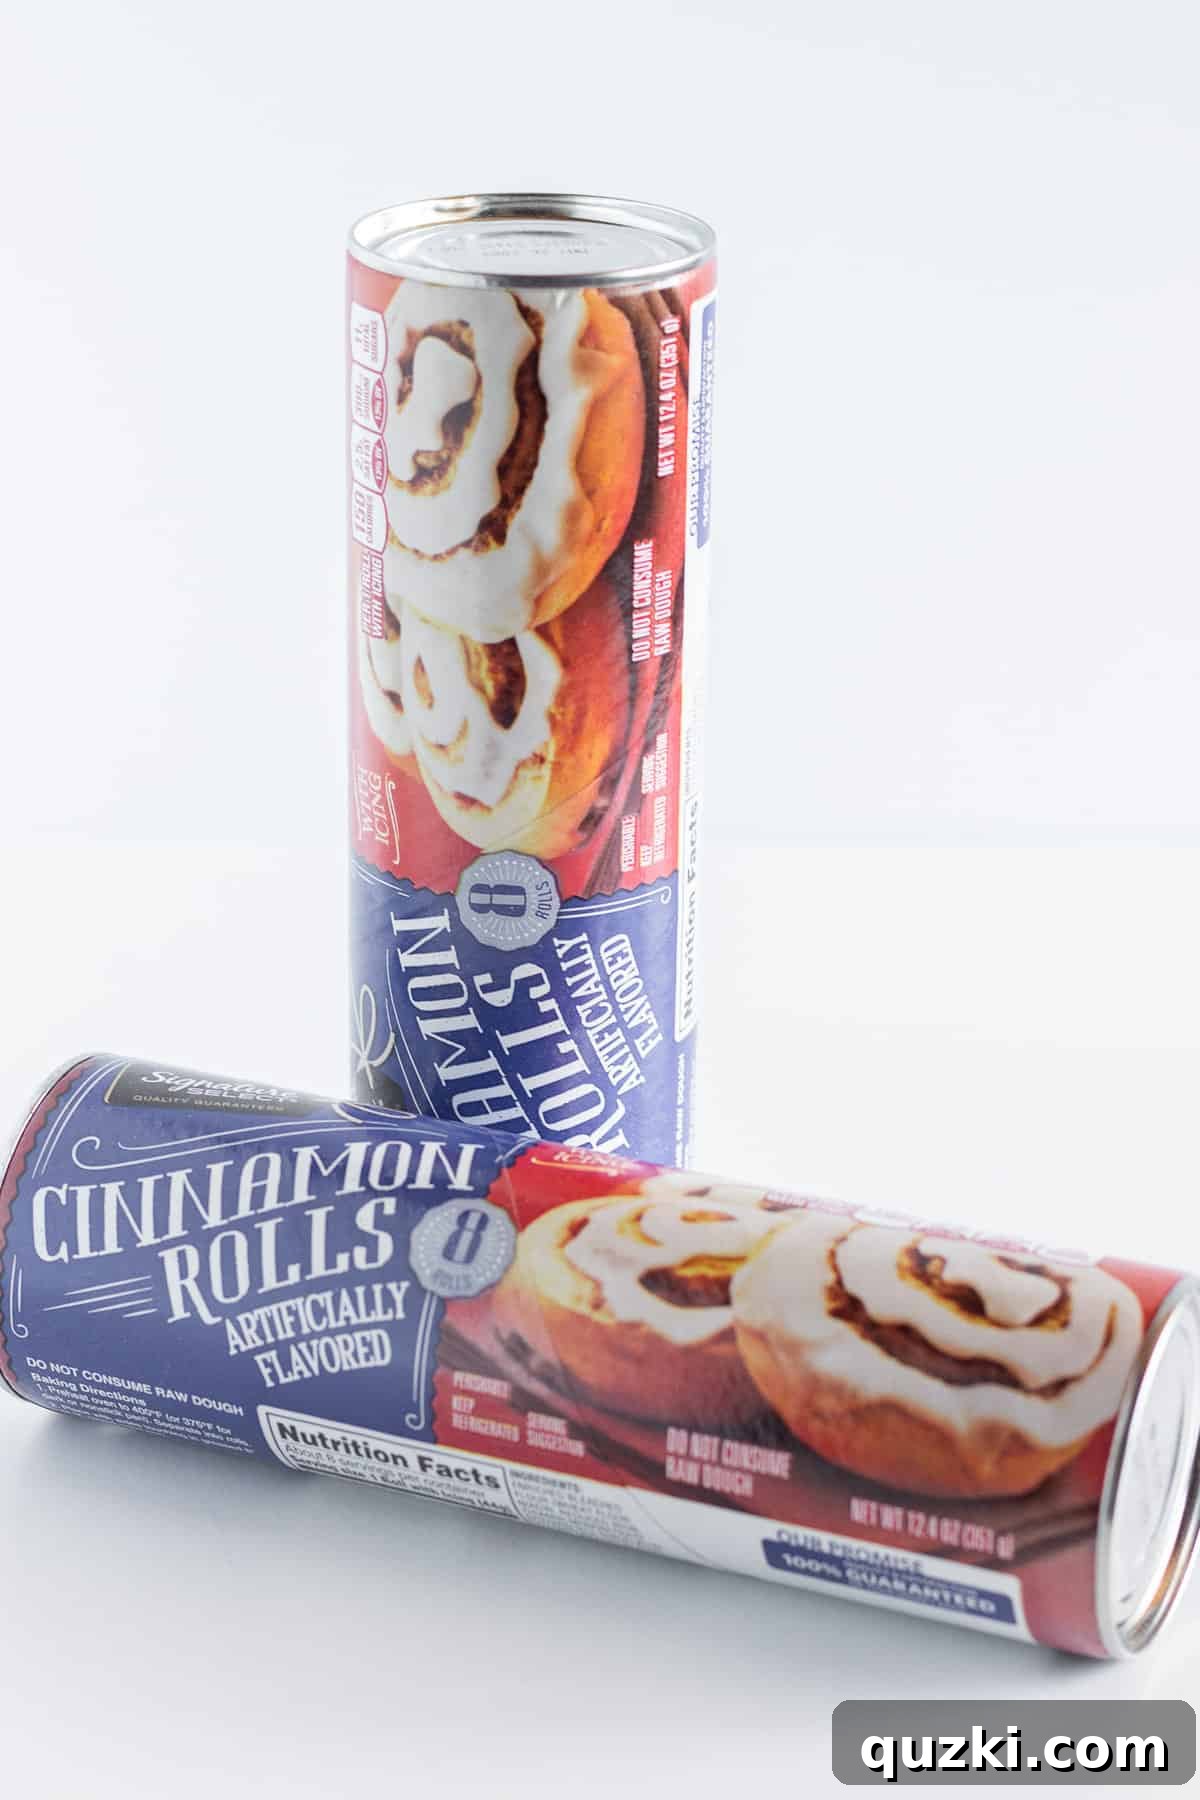
- Refrigerated Cinnamon Rolls: The star of our show! I recommend using a store-brand variety or any brand of refrigerated cinnamon buns that can be easily unrolled into a single strip of dough. Avoid brands where the rolls are pre-cut into distinct disc shapes that don’t allow for unrolling, as these won’t work for shaping. These versatile rolls are also fantastic for other creative recipes like Heart-Shaped Cinnamon Rolls or Easy Pecan Sticky Buns.
- Pink Food Coloring (optional): A single drop is all you need to create charming pink inner ears, adding an extra layer of cuteness to your bunny.
Equipment:
- Large baking sheet
- Parchment paper or a silicone baking mat
- Two small bowls (for frosting)
- Spatula or butter knife (for spreading frosting)
Refer to the recipe card below for precise quantities and additional details.
Step-by-Step: How to Make Bunny Cinnamon Rolls
Creating this festive bunny is simpler than you might think! Follow these detailed steps to bring your Easter breakfast masterpiece to life.
- Prepare Your Workspace: Begin by preheating your oven to 375°F (190°C). Line a large baking sheet with parchment paper or a silicone baking mat. This crucial step prevents sticking and ensures easy removal of your giant cinnamon roll bunny.
- Unpack and Separate: Carefully open both tubes of refrigerated cinnamon rolls and gently remove the rolls and the frosting containers. Set all the frosting aside in a safe place for later use. Make sure to gently unroll each cinnamon roll into a long strip of dough without tearing it. You will need 16 total strips (8 for the head, 8 for the ears).
- Form the Bunny’s Body: Take one unrolled cinnamon roll and place it about two-thirds of the way down the baking sheet. This will form the base of the bunny’s body, anchoring the entire shape.
- Create the Bunny’s Head: Now, take seven more unrolled cinnamon rolls. Starting from the central roll you just placed, begin spiraling these seven rolls around each other, pressing them gently together to form a large, circular spiral. This will become the adorable head of your bunny. Ensure the rolls are snug but not overly compressed, allowing for expansion during baking.
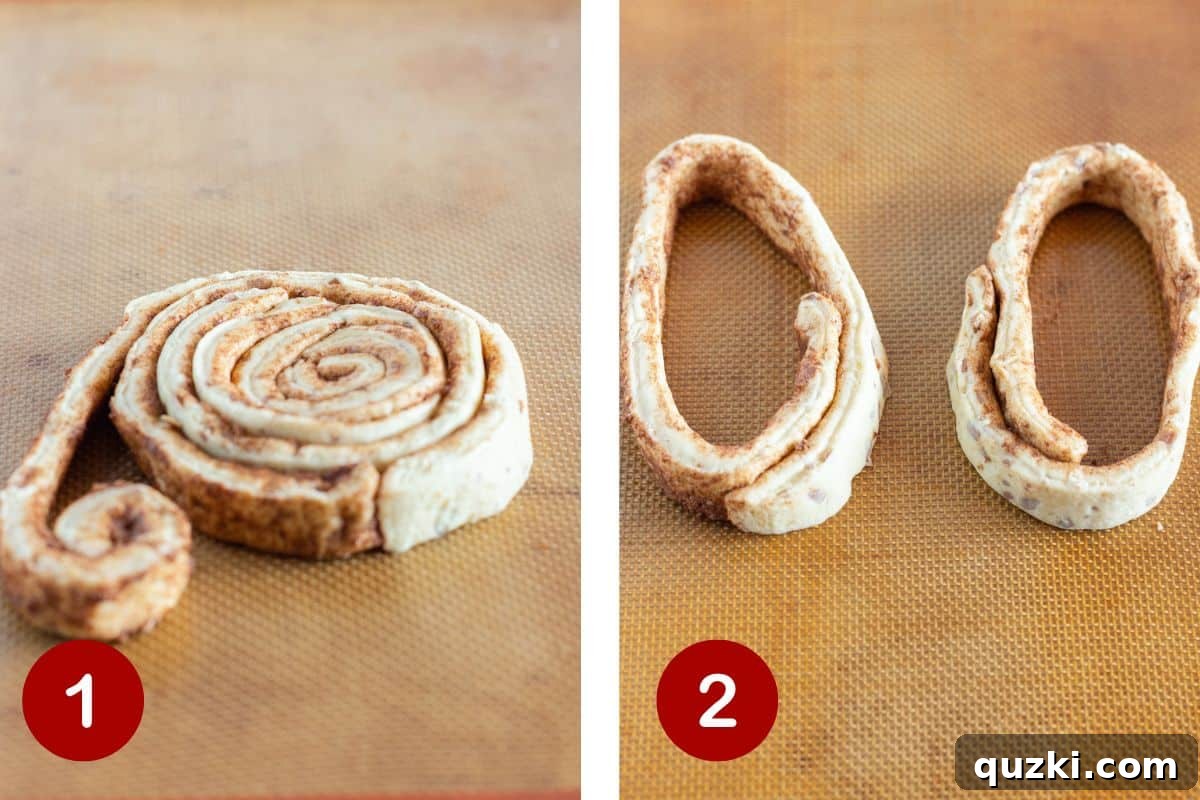
- Shape the Ears: With the bunny’s head formed, take two more unrolled cinnamon rolls. Gently shape each into a large, elongated triangle. These will be your bunny’s ears. You can take another one and a half rolls and fill in the triangular space to make the ears fuller and more prominent, giving them a more realistic and appealing look.
- Position the Ears: Carefully place the two shaped ears on the top half of the baking sheet, ensuring they are touching the top of the bunny’s head. Press them lightly into the head to help them adhere, creating a cohesive structure.
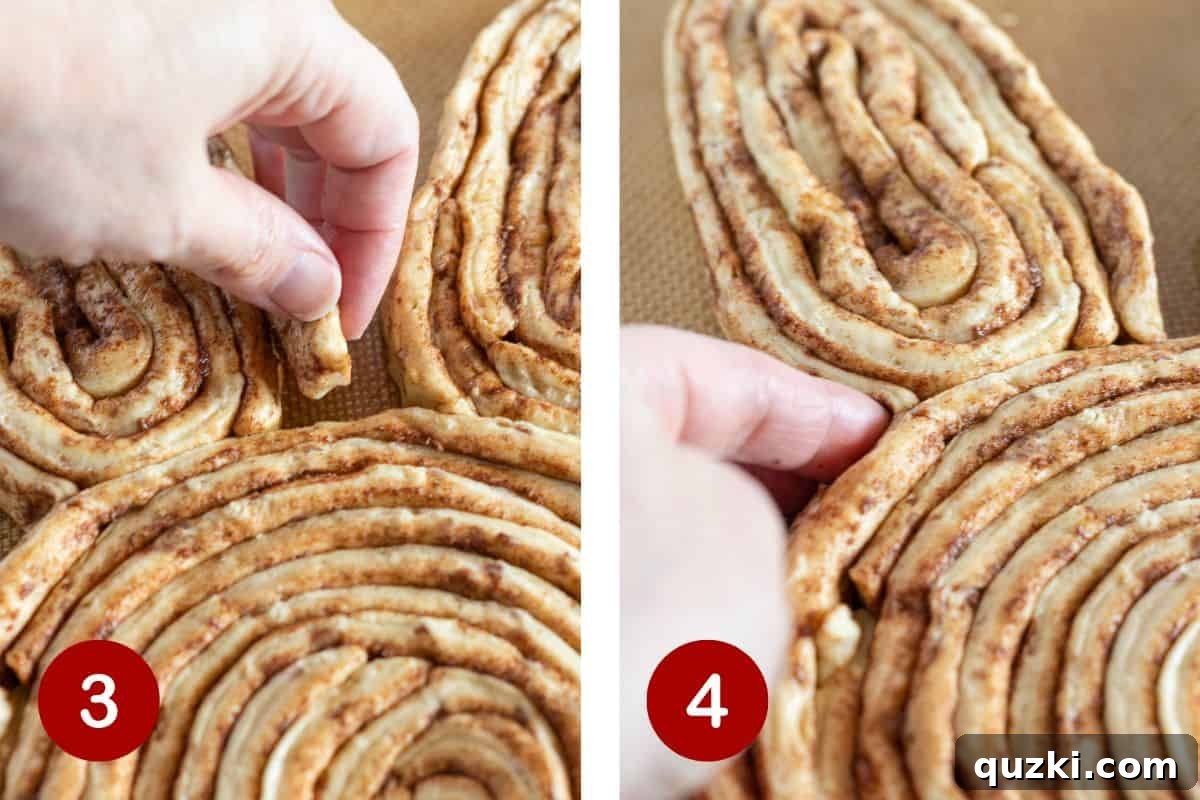
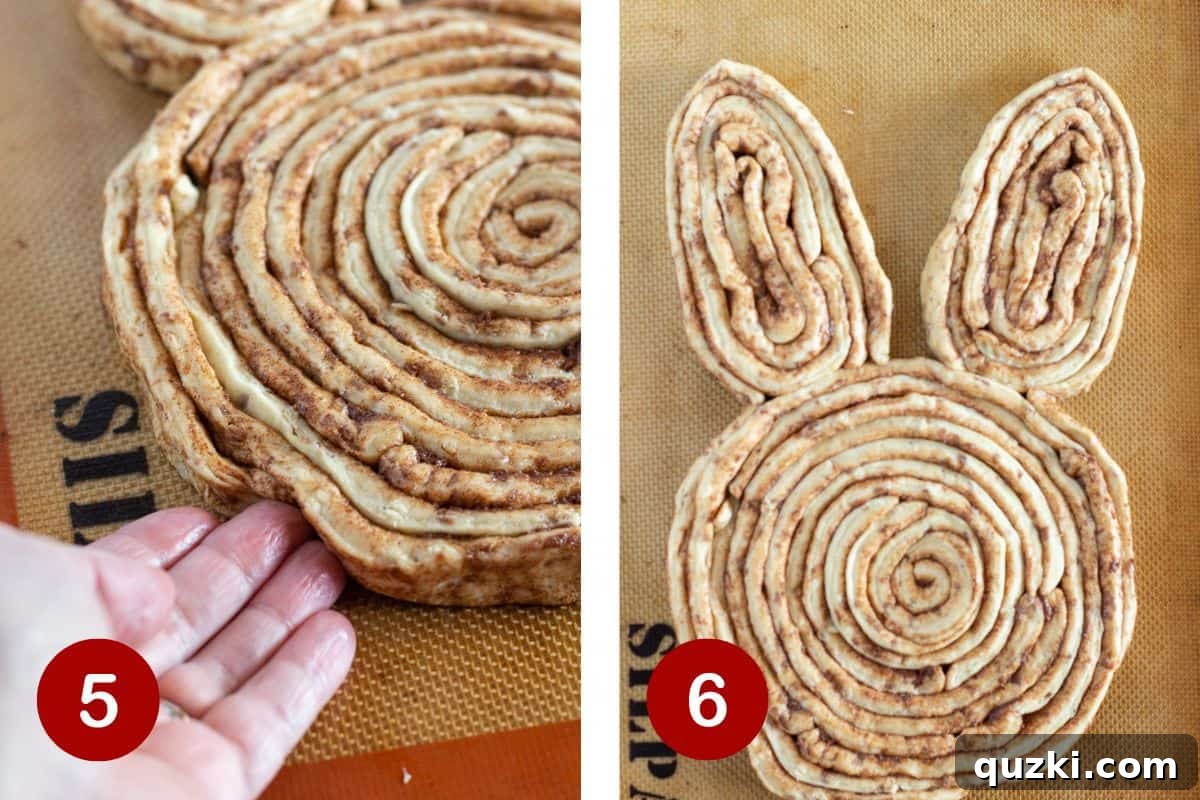
- Attach and Define the Ears: To seamlessly connect the ears to the head and give them a finished look, take the remaining two rolls. Starting from the inside base of one ear, gently wrap and press the dough strip around the outer edge of the ear and down onto the face portion of the bunny. Be sure to press firmly where the ear meets the head to secure it and prevent separation during baking. Repeat this process for the second ear, creating symmetrical and well-attached features.
- Refine the Shape: Tuck any loose ends of the cinnamon roll strips neatly underneath the large swirls of the head and ears. Go back and gently press and smooth all the connections to ensure you have a well-defined and aesthetically pleasing bunny shape. A well-shaped bunny will bake more uniformly and look more appealing.
- Bake to Golden Perfection: Place your carefully crafted bunny cinnamon roll into the preheated 375°F (190°C) oven. Bake for approximately 17-19 minutes, or until the entire bunny is golden brown and cooked through. Keep an eye on it to prevent over-browning, as oven temperatures can vary.
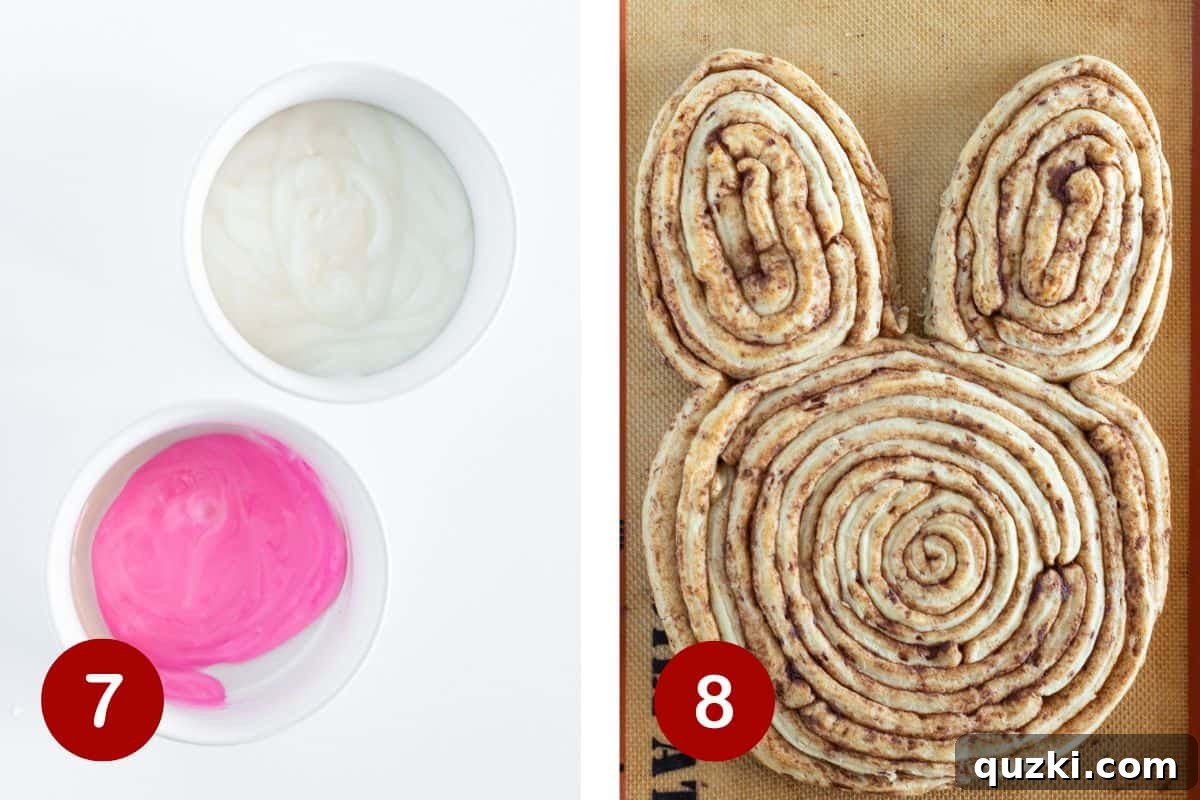
- Prepare the Frosting: While your bunny is baking, retrieve the frosting. Divide the frosting between two small bowls. Pour about three-quarters of the frosting into one bowl and the remaining quarter into the second bowl. Add just a single drop of pink food coloring to the bowl with the smaller amount of frosting and stir until a light, even pink hue is achieved.
- Cool and Frost: Once the bunny is golden and cooked, carefully remove it from the oven. Let it cool on the baking sheet for 3-4 minutes. This brief cooling period is essential; if you frost it too soon, the warm cinnamon roll will melt and absorb the icing, instead of allowing it to set into a creamy, appealing layer on top.
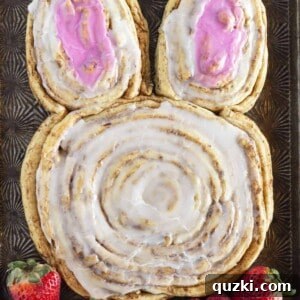
- Decorate Your Bunny: Once slightly cooled, spread the white frosting generously over the entire head and the outer edges of each ear. Then, using the pink frosting, carefully fill in the middle section of each ear to create a charming pink inner ear effect. For extra flair, you can add candy eyes or a mini marshmallow for a tail once the frosting sets a little. Serve warm and watch the joy unfold!
Expert Tips for Perfect Bunny Shaped Cinnamon Rolls
To ensure your Easter Bunny Cinnamon Rolls turn out perfectly every time, keep these helpful tips in mind:
- Choose the Right Dough: This is paramount! Always opt for refrigerated cinnamon rolls that unroll into a single, long piece of dough. Some varieties are designed as individual biscuit-like discs with cinnamon sugar filling; these will not work for shaping into a bunny. Check the packaging carefully to ensure you get the right kind.
- Divide Your Rolls Strategically: Once you remove the rolls from their packaging, count them out. You’ll typically need 8 rolls to form the large bunny head and another 8 rolls for shaping and attaching the ears. This even distribution helps maintain the bunny’s proportions and ensures a balanced appearance.
- Prevent Sticking: Always use a silicone baking mat or line your baking sheet with parchment paper. This creates a non-stick surface, making it incredibly easy to remove your delicate bunny masterpiece from the pan without any breakage. A light spray of cooking oil can also add an extra layer of protection, particularly around the edges where the dough tends to caramelize.
- The Importance of Cooling: Allow the cinnamon roll bunny to cool for at least 3-4 minutes after it comes out of the oven, but before you apply the frosting. If you frost it too soon, the residual heat will cause the frosting to melt and run, creating a less appealing finish. Patience here leads to perfectly glazed rolls.
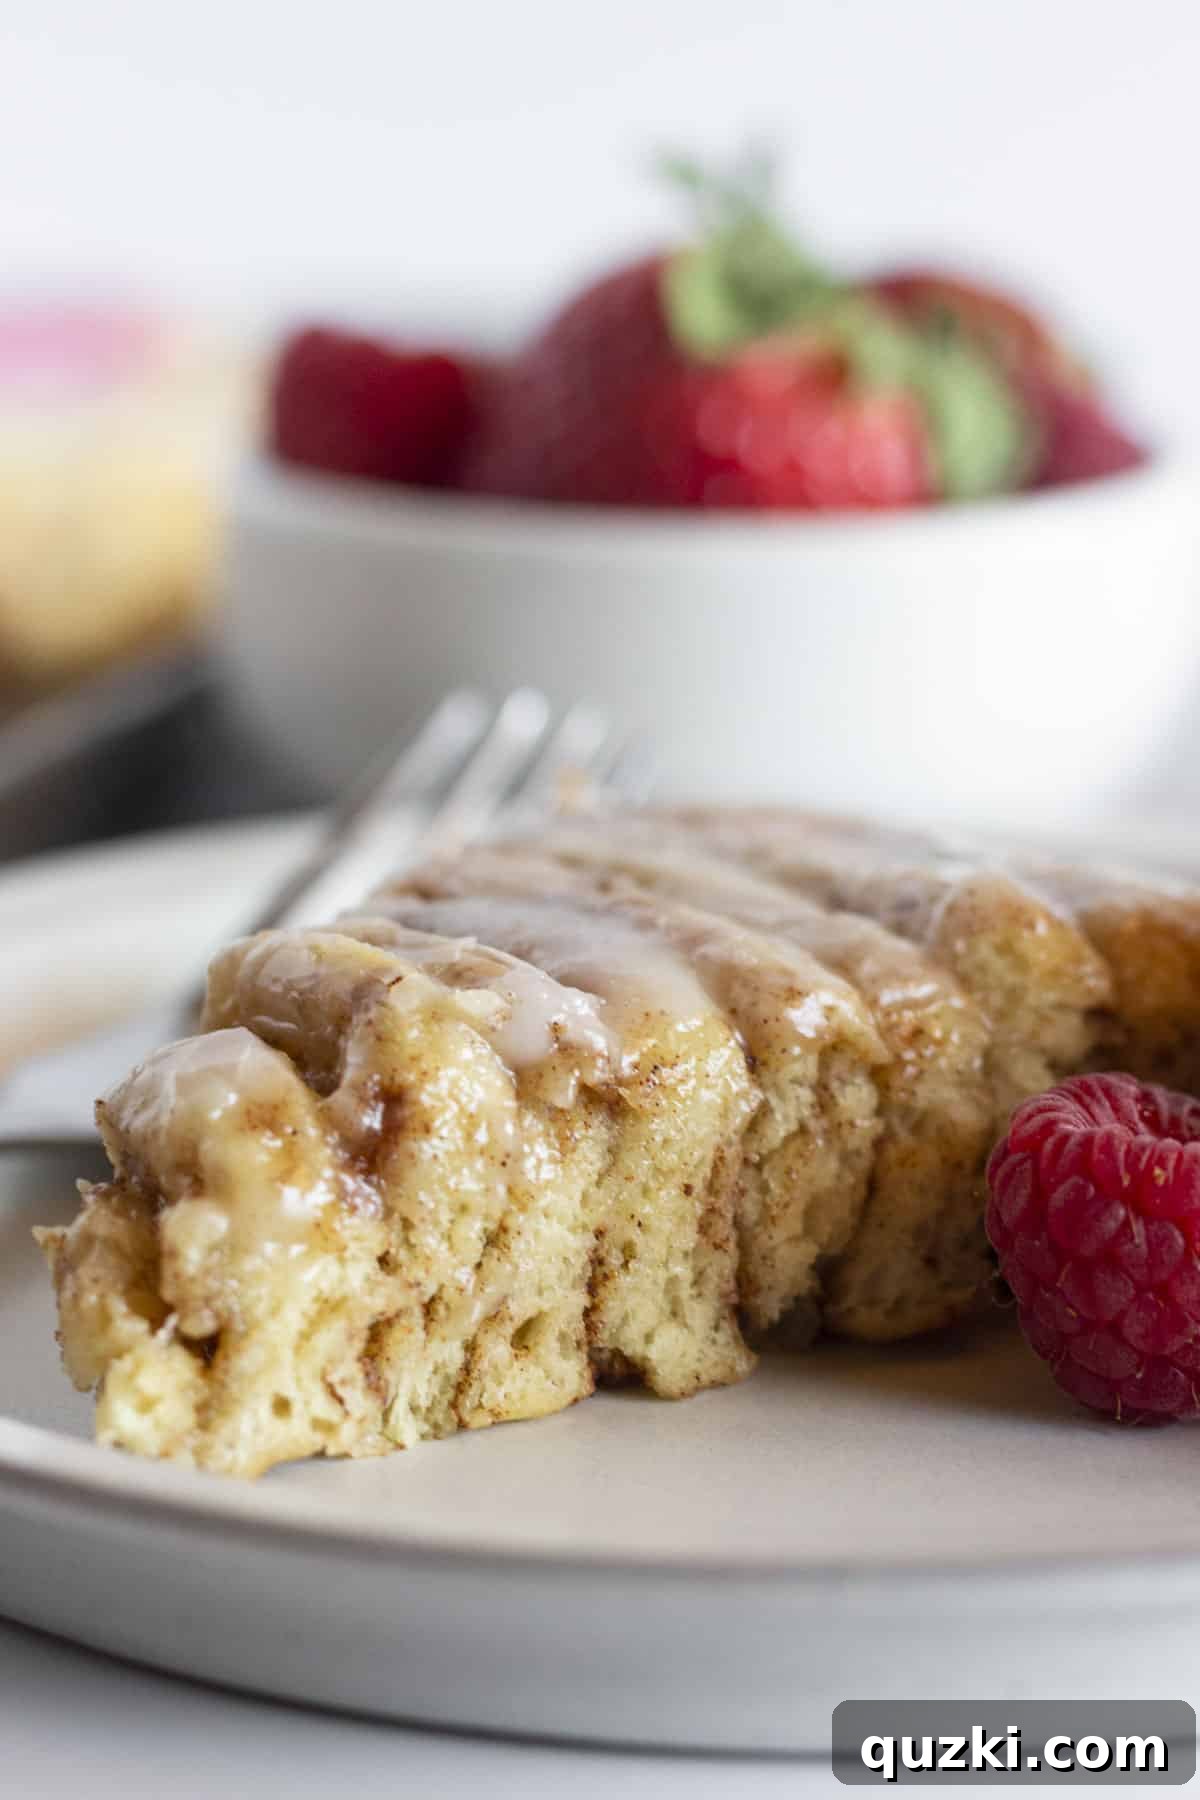
- Serving Suggestions: This giant cinnamon roll is designed to be shared! To serve, cut the large bunny head like a pizza, into individual triangular slices. The ears can then be cut into thirds or halves, depending on their size. This festive treat is generally large enough to comfortably serve 8 people, making it ideal for family gatherings.
- Even Baking is Key: While shaping, try to keep the dough thickness relatively uniform across the head and ears. This helps ensure that all parts of the bunny bake evenly, preventing some areas from being undercooked or over-browned, resulting in a consistently delicious outcome.
- Creative Decorating: Don’t limit yourself to just frosting! Once the frosting has set slightly, you can add small chocolate chips for eyes, a pink candy for a nose, or even a mini marshmallow for a fluffy tail. Edible glitter or springtime sprinkles can also add a delightful, whimsical touch, especially if you’re serving children.
- Working with Warm Dough: If your kitchen is cool, your cinnamon roll dough might be a bit stiff and prone to cracking. Let it sit at room temperature for 5-10 minutes before unrolling and shaping. This makes the dough more pliable and easier to work with, significantly reducing the risk of tearing.
How to Store Your Delightful Bunny Cinnamon Roll
If you find yourself with any delicious leftovers (which is rare, as these tend to disappear quickly!), proper storage will help maintain their freshness.
Store any remaining portions of the Bunny Cinnamon Roll in an airtight container at room temperature for up to 2 days. For extended freshness, especially in warmer climates, you can also store it in the refrigerator. Just be aware that refrigeration can sometimes alter the softness of baked goods, so allow it to come to room temperature or gently warm it before serving again for the best experience. A quick zap in the microwave can restore some of its fresh-baked warmth and gooeyness.
Can I freeze this bunny cinnamon roll?
I generally do not recommend freezing this particular cinnamon roll bunny. While some baked goods freeze well, this recipe is truly best when made and served fresh from the oven, offering that perfect gooey texture and warm aroma. Freezing can compromise the delicate texture and flavor of the dough and frosting, making it less enjoyable upon thawing. If you must freeze, consider freezing individual, unfrosted portions and adding fresh frosting after reheating.
Recipe FAQs: Easter Cinnamon Rolls
While both are sweet, delightful pastries, there are two primary differences between a honeybun and a cinnamon roll. Firstly, the texture: a traditional cinnamon roll is renowned for its soft, tender, and often gooey center, while a honeybun typically features a denser, more caramelized texture and flavor, often with a glaze that has a slightly chewy quality.
Secondly, the flavor profile differs. Cinnamon rolls are characterized by a straightforward yet irresistible combination of butter, cinnamon, and sugar in their filling. Honeybuns, on the other hand, boast a more complex flavor, often incorporating hints of honey, vanilla, and sometimes even a touch of nutmeg, creating a distinctively rich taste and often a stickier glaze.
This bunny-shaped cinnamon roll recipe is wonderfully convenient and can certainly be prepared up to a day in advance. You can assemble the bunny shape on the baking sheet, cover it loosely with plastic wrap, and refrigerate it overnight. In the morning, simply remove it from the fridge, let it sit at room temperature for about 15-20 minutes while your oven preheats, and then bake as directed. However, for the absolute best taste, texture, and warm, fresh aroma, it is always recommended to bake and serve it fresh. The slightly cool dough can help maintain its shape better before baking.
Easter brunch is a fantastic opportunity to indulge in a variety of delicious dishes, and anything goes! For savory options, I highly recommend a hearty Ham Breakfast Casserole or a fun Pigs in a Blanket Casserole, both perfect for feeding a crowd and preparing ahead.
If you’re looking to add more sweet treats alongside your bunny cinnamon rolls, consider an Easy Pancake Mix Coffee Cake, a decadent Chocolate Crumb Cake, or light and airy Blueberry Poppy Seed Muffins. These options offer a delightful balance and ensure there’s something for everyone at your Easter feast, from classic comfort foods to delightful pastries.
Absolutely! While this recipe emphasizes the convenience of refrigerated dough, you can certainly use your favorite homemade cinnamon roll dough if you prefer. Just ensure that your homemade dough can be unrolled into long strips for shaping. Adjust baking times as needed, as homemade dough may bake slightly differently than store-bought varieties. The key is to achieve that beautiful golden-brown color and cooked-through center, indicating it’s perfectly baked. Using homemade dough can add an even more personal touch to your Easter breakfast.
More Irresistible Cinnamon Roll Recipes
If you find yourself utterly enchanted by the magic of cinnamon rolls, you’re in for a treat! Their comforting aroma and sweet, spiced flavor make them a perennial favorite in many households. We’ve gathered a collection of other fantastic recipes that celebrate this beloved pastry, perfect for any time of year or occasion beyond just Easter. Whether you’re looking for another quick hack using convenience ingredients or a slightly more involved baking project, these ideas will keep your kitchen smelling heavenly and your family delighted with delicious cinnamon-infused goodness.
Discover More Cinnamon Roll Delights
Cakes
Easy Cinnamon Roll Cake Recipe
Desserts
Cake Mix Cookies: Easy Cinnamon Roll Cookies Recipe
Brunch
Easy Carrot Cake Cinnamon Rolls
Brunch
Easy Homemade Cinnamon Rolls
Did you try this recipe?
Leave a ⭐️ review below and tag @practicallyhomemade on Pinterest!
Easter Bunny Cinnamon Roll
June Albertson-Dick
10 minutes
20 minutes
4 minutes
30 minutes
8
servings
Rate Recipe
Print Recipe
Ingredients
-
2
tubes
refrigerated cinnamon rolls,
{12.4 ounce/8 count each, with icing included} -
pink food color,
{optional, for ear details}
Instructions
-
Preheat oven to 375°F (190°C). Line a large baking sheet with parchment paper or a silicone baking mat.
-
Remove cinnamon rolls and frosting from both tubes. Set frosting aside. Gently unroll all cinnamon rolls into long strips of dough.
-
Place 1 unrolled cinnamon roll about 2/3 of the way down the baking sheet. Use 7 more unrolled rolls to spiral around the first, creating a large circular head for the bunny. Press gently to secure the rolls together.
-
Take 2 unrolled rolls and shape each into a large triangle for the ears. Use 1.5 more rolls to fill in each triangle for fullness. Position these shaped ears on the top half of the baking sheet, ensuring they touch the bunny’s head.
-
With the remaining 2 rolls, take one and start from the inside base of one ear, wrapping it around the outer edge of the ear and down onto the face. Press firmly where the ear meets the head to connect. Repeat for the other ear. Tuck any loose ends underneath for a neat finish.
-
Bake for 17-19 minutes, or until the entire bunny is golden brown and cooked through.
-
While the bunny is baking, divide the frosting: put 3/4 of the white frosting into one small bowl and the remaining 1/4 into a second small bowl. Add a single drop of pink food coloring to the smaller portion and stir thoroughly until a light pink color is achieved.
-
Remove the baked bunny from the oven and allow it to cool on the baking sheet for 3-4 minutes. Then, spread the white frosting generously over the bunny’s head and the outer edges of each ear. Next, carefully fill in the middle section of each ear with the pink frosting.
-
Serve your delightful Easter Bunny Cinnamon Roll warm and enjoy! Store any leftovers in an airtight container at room temperature for up to 2 days.
Notes
- Ensure you purchase refrigerated cinnamon rolls that unroll into a single, long piece of dough. Biscuit-style rolls with cinnamon sugar will not work for shaping.
- Divide your rolls carefully: you’ll need 8 for the head and 8 for the ears to maintain ideal proportions for your bunny.
- Allow the cinnamon roll bunny to cool for 3-4 minutes after baking before applying the frosting. This prevents the frosting from melting and ensures a smooth, appealing finish.
- This large cinnamon roll is designed to feed 8 people. For serving, cut the bunny’s head like a pizza into slices, and then cut the ears into thirds.
- For an extra touch of charm, consider adding candy eyes, a small pink candy for a nose, or a mini marshmallow for a fluffy tail after the frosting has set a little.
Nutrition
Serving:
1
serving
,
Calories:
320
kcal
,
Carbohydrates:
46
g
,
Protein:
4
g
,
Fat:
14
g
,
Saturated Fat:
6
g
,
Trans Fat:
1
g
,
Sodium:
660
mg
,
Sugar:
20
g
,
Iron:
1
mg
Nutrition information is automatically calculated, so should only be used as an approximation.
Love this recipe? Leave a comment below!
Your feedback helps us create more delicious content.