
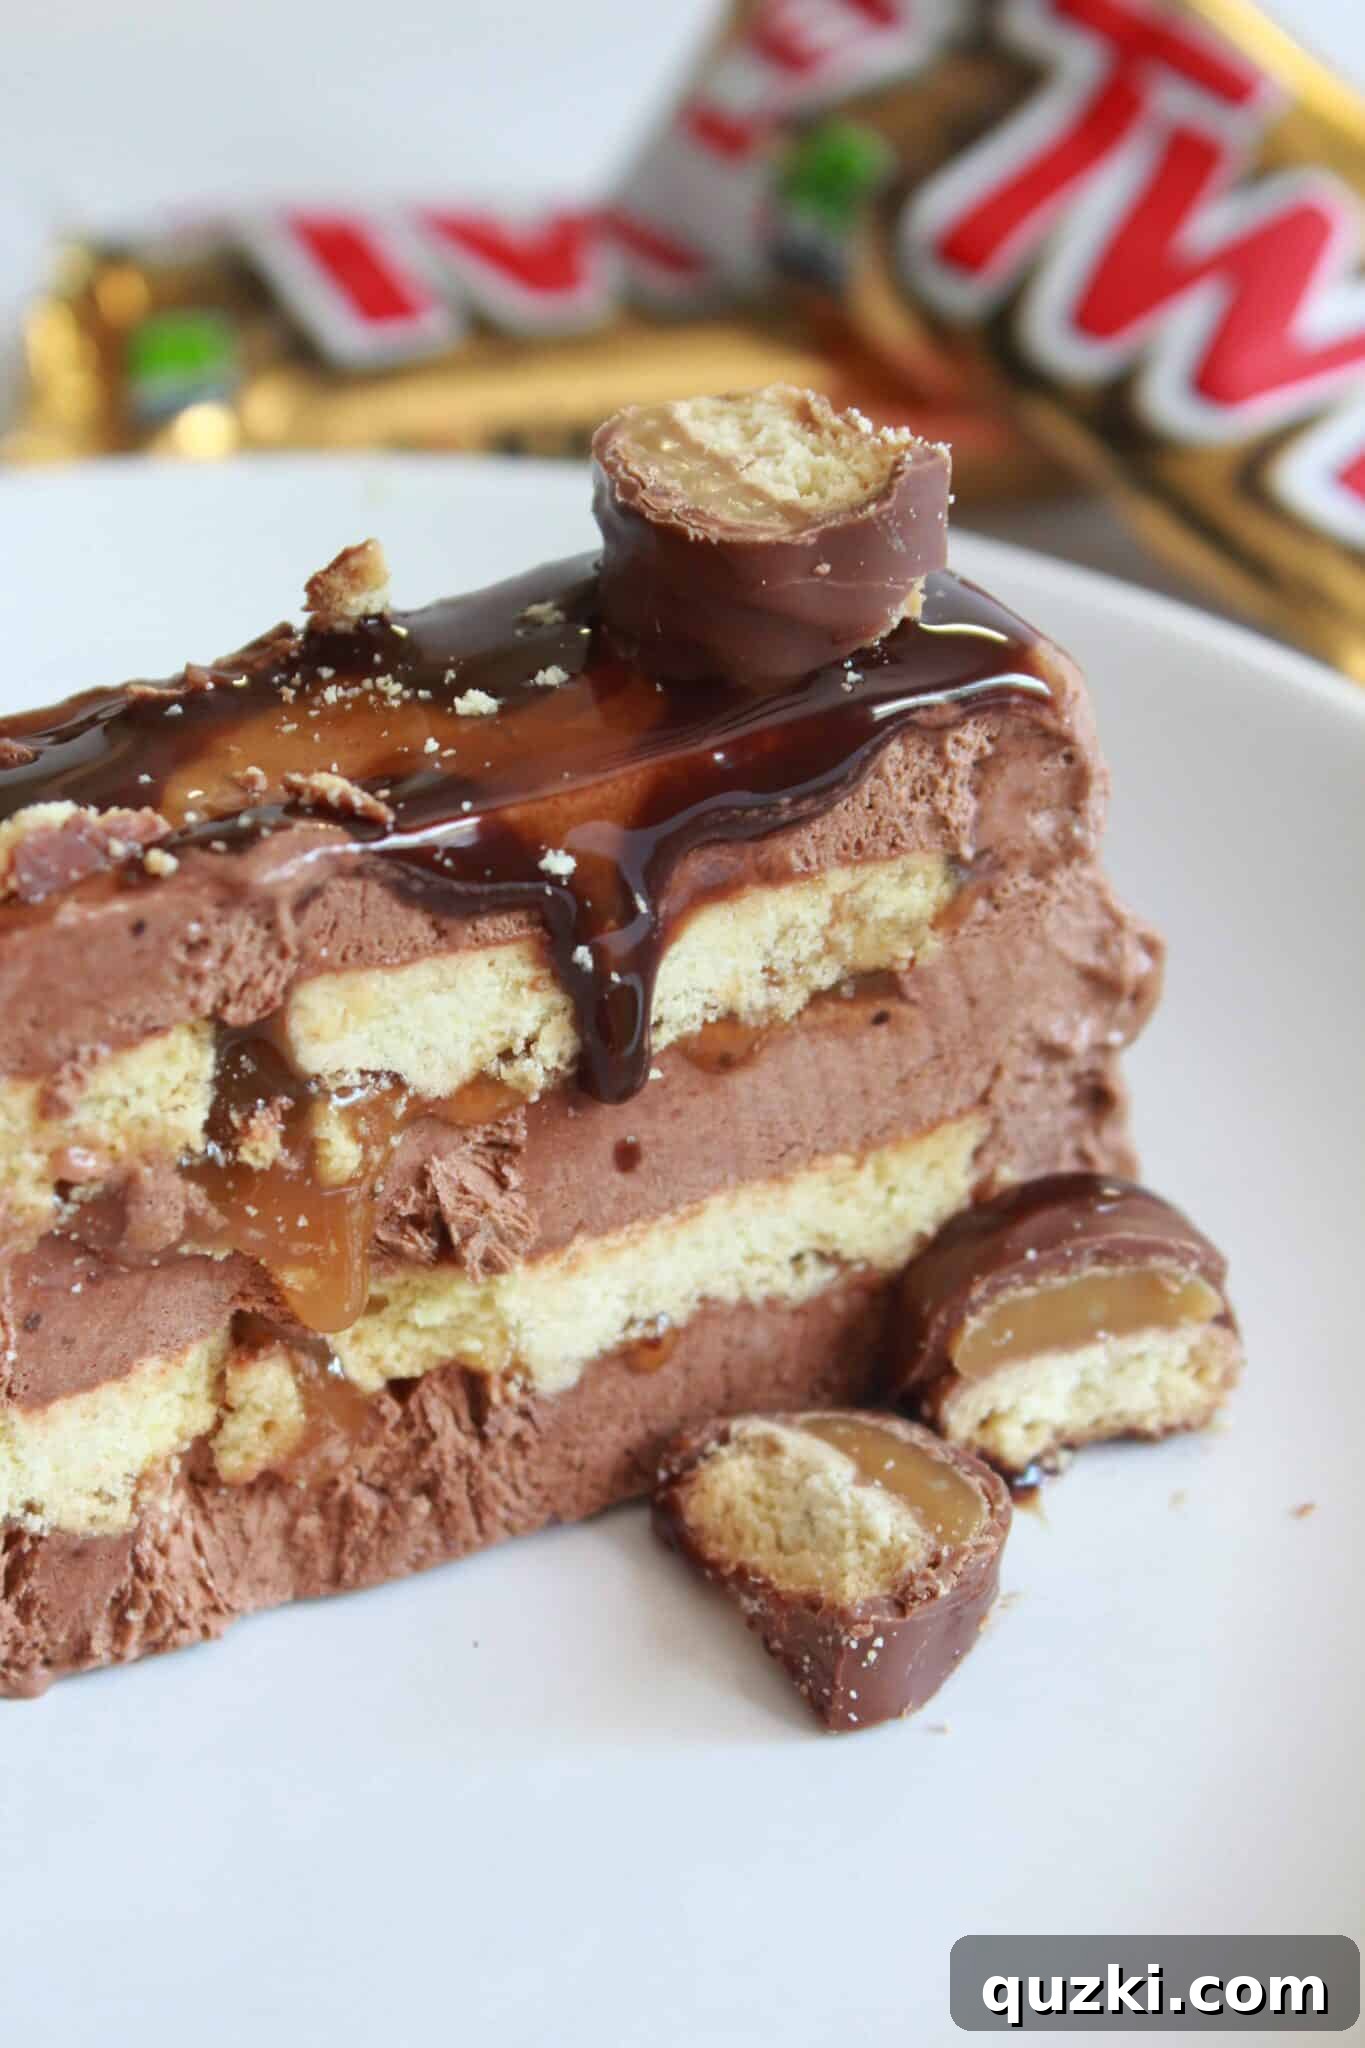
Indulge in the Ultimate No-Bake Twix Icebox Cake: Your New Favorite Summer Dessert!
There’s an undeniable charm to a dessert that comes together effortlessly, especially when the summer sun beckons us away from hot kitchens. Today, we’re not just making a dessert; we’re crafting an experience with this spectacular Twix Icebox Cake. Inspired by my step-daughter Harley’s absolute favorite candy bar, the iconic Twix, this recipe transforms the beloved trio of chocolate, caramel, and crunchy shortbread into an astonishingly easy yet elegant chilled treat. If you’ve yet to discover the sheer joy of a perfectly made icebox cake, prepare for a revelation – it’s a nostalgic delight that promises pure bliss with every spoonful.
Traditional icebox cakes are celebrated for their simplicity, typically featuring layers of crisp cookies and creamy fillings that soften beautifully in the cold, creating a texture akin to a baked cake without ever turning on the oven. While the classics hold a special place, our Twix-inspired rendition elevates this concept, offering a symphony of textures and flavors that are deeply reminiscent of that irresistible candy bar. This recipe is meticulously designed to be straightforward, relying on readily available ingredients, yet it yields a dessert so sophisticated, your guests will think you spent hours in the kitchen. It truly stands out as one of the most delightful and easy no-bake icebox cake recipes, making it the perfect choice for summer gatherings, potlucks, or simply a luxurious personal indulgence on a sweltering afternoon.
Why Choose a No-Bake Dessert? The Allure of Icebox Cakes
In the realm of desserts, no-bake options like the icebox cake offer a unique set of advantages, particularly during warmer months. The primary benefit is, of course, keeping your kitchen cool. There’s no need to preheat an oven or contend with rising temperatures, making it a perfect solution for hot summer days when you crave something sweet and refreshing. Beyond the temperature control, no-bake desserts are often incredibly forgiving and suitable for all skill levels, from novice bakers to seasoned pros looking for a quick win. They rely on simple layering and chilling, rather than precise baking times or complex techniques.
An icebox cake, in particular, is a marvel of culinary engineering. It’s essentially a magical transformation where crisp cookies absorb moisture from a creamy filling as they chill, softening into tender, cake-like layers. This process creates a dessert with a distinct texture that is both light and satisfying, often developing deeper flavors as the ingredients meld together over time. This chilled summer dessert is not just about convenience; it’s about crafting a treat that is inherently refreshing and perfectly suited to relaxed entertaining. The Twix Icebox Cake capitalized on these qualities, offering a familiar flavor profile in a surprisingly innovative and easy format.
The Secret to Icebox Cake Perfection: Patience in the Freezer
While the allure of any no-bake dessert whispers promises of immediate gratification, the true brilliance of a truly fabulous icebox cake, especially our Twix-inspired creation, hinges on one critical, often overlooked, element: time. This isn’t a last-minute confection you can assemble an hour before serving. To achieve that dreamy, melt-in-your-mouth texture where the shortbread cookies are perfectly softened, and the chocolate-caramel layers have seamlessly melded into a harmonious bliss, it absolutely demands ample chilling time in the freezer. We’re aiming for a consistency that allows for smooth, effortless slicing and, more importantly, an incredibly delightful eating experience where every layer contributes to a perfect bite.
I completely understand the temptation to rush the process; instant gratification is a powerful siren call when a delicious dessert awaits! However, I earnestly promise that the wait for this easy Twix dessert is not merely worth it, but entirely necessary for optimal results. Think of this preparation as a low-effort, exceptionally high-reward endeavor. By allowing the cake to chill thoroughly, you’re engaging in a magical process: the moisture from the creamy pudding mixture works its enchanting wonders, transforming crisp shortbread into wonderfully tender, cake-like layers that fully absorb all the magnificent flavors surrounding them. Planning ahead, perhaps making it the night before a special event or simply for a weekend treat, will unequivocally reward you with a chilled dessert that will impress and delight everyone fortunate enough to try a slice. It’s the kind of effortless elegance that makes you look like a culinary genius!
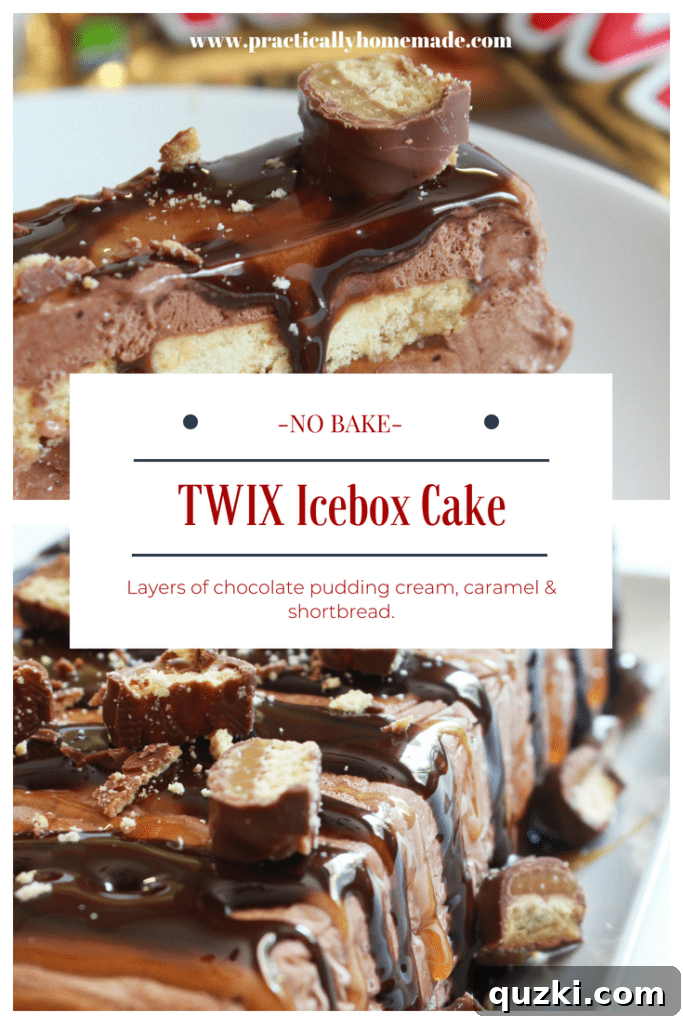
More Refreshing No-Bake Summer Dessert Ideas to Explore
Beyond our star Twix Icebox Cake, the world of cool, effortless desserts is vast and inviting. If you’re looking for other delightful ways to beat the summer heat with minimal effort in the kitchen, these tried-and-true treats are perfect additions to your seasonal dessert repertoire:
- Caramel Drumstick Ice Cream Pie: This inventive pie captures all the joy and nostalgic flavors of a classic drumstick ice cream cone, transformed into an easy-to-slice, crowd-pleasing pie. It’s rich, creamy, and wonderfully crunchy.
- Strawberry Shortcake with Sweet Biscuits: A timeless summer favorite that never goes out of style. Featuring peak-season fresh strawberries piled high on light, fluffy, sweet biscuits and crowned with whipped cream, it’s the epitome of simple summer deliciousness.
- Lemon Pound Cake with Lemon Glaze: While this one does involve a bit of baking, a zesty lemon pound cake served chilled with a bright lemon glaze is an incredibly refreshing option for lemon enthusiasts. Its dense texture and vibrant citrus flavor make it a wonderful counterpoint to heavier desserts.
These options demonstrate the versatility of summer desserts, ensuring there’s always a perfect chilled treat for any preference or occasion, whether you’re craving fruit, chocolate, or something wonderfully unique.
Crafting the Irresistible Chocolate Pudding & Whipped Topping Mixture
The very heart and soul of our exceptional Twix-inspired icebox cake lies in its gloriously rich and creamy chocolate pudding and whipped topping mixture. To genuinely capture that authentic, deep chocolate flavor profile synonymous with a Twix bar, I wholeheartedly recommend utilizing Hershey’s chocolate pudding mix. Its distinct and robust chocolate notes provide the perfect foundation, beautifully complementing the subsequent layers of gooey caramel and buttery shortbread we’ll be building upon. A crucial, yet simple, modification for this particular recipe involves slightly reducing the amount of milk typically suggested on the pudding box by approximately half a cup. For a standard 3.56 oz package, this typically means using about 1 1/2 cups of milk (I personally find 1% milk strikes an excellent balance of creaminess without being overly heavy). This subtle reduction is key to achieving a thicker, more stable pudding that maintains its structure beautifully within the layered cake, preventing a soggy outcome.
Once your chocolate pudding is thoroughly mixed until it’s perfectly smooth and all the powdered mix has completely dissolved, it’s time to introduce the magic of lightness. Gently, but thoroughly, fold in an entire 16 oz tub of thawed whipped topping. The addition of whipped topping is what transforms the pudding into an incredibly light, airy, and luscious chocolate cream. This blend is simultaneously rich and wonderfully refreshing, creating a cloud-like texture that truly elevates the dessert. Continue to stir with a gentle hand until everything is perfectly combined, resulting in a uniform color and consistently smooth texture. For an assembly process that is remarkably cleaner, considerably easier, and much more precise, transfer this delectable chocolate cream into a large, sturdy Ziploc bag. With a simple snip of one corner of the bag using kitchen scissors, you’ve instantly created a makeshift piping bag, allowing for much more controlled and less messy layering compared to attempting to spoon and level the mixture. This small step saves a lot of cleanup and ensures neat layers.
Preparing Your Loaf Pan for Seamless Assembly and Effortless Release
Before you even think about beginning the tantalizing process of layering your Twix Icebox Cake, proper preparation of your loaf pan is an absolutely essential step. This foresight will guarantee not only a smooth freezing process but, crucially, an effortlessly elegant inversion and release of your finished, frozen cake. Begin by thoroughly lining a standard-sized loaf pan with good quality plastic wrap. It’s imperative to ensure that a generous amount of plastic wrap extends over all four sides of the pan; these ample overhangs will later function as convenient “handles,” allowing you to easily lift the entire frozen cake cleanly out of the pan. Furthermore, these overhangs double as a protective and neat wrapper for the cake during its essential chilling period, safeguarding it from any potential freezer burn or odors. With your pan perfectly lined, you are now fully prepared and ready to embark on building your layered masterpiece, commencing, of course, with your very first, foundational layer of the rich and creamy chocolate pudding mixture at the bottom of the pan.
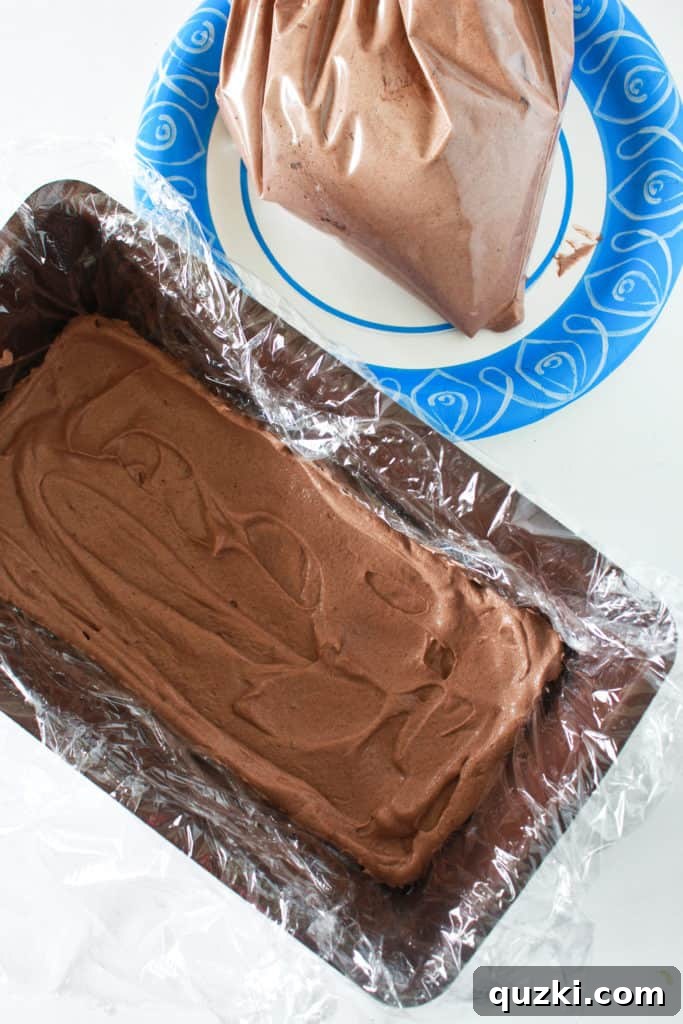
Layering Your Twix Icebox Cake: A Symphony of Flavors and Textures
Now, let’s move to the most exciting and creative stage – meticulously assembling the layers that will spectacularly mimic the beloved and iconic Twix bar! Following your initial, perfectly piped layer of rich chocolate pudding cream, it’s time to introduce the cake’s signature crispness: the shortbread. With care and precision, arrange an even layer of shortbread cookies over the chocolate pudding. These cookies are far more than just a component; they are the structural and textural backbone of our extraordinary icebox cake, destined to provide that quintessential biscuit crunch which will magically soften into a wonderfully tender, cake-like layer during the chilling process. For this specific recipe, aim to use approximately 10 shortbread cookies per layer; however, the exact number might vary slightly depending on the specific dimensions of your chosen loaf pan and the size of your shortbread cookies. The ultimate goal here is to cover the underlying pudding layer as completely and uniformly as possible, thereby creating a robust and stable base for the decadent caramel that will follow.
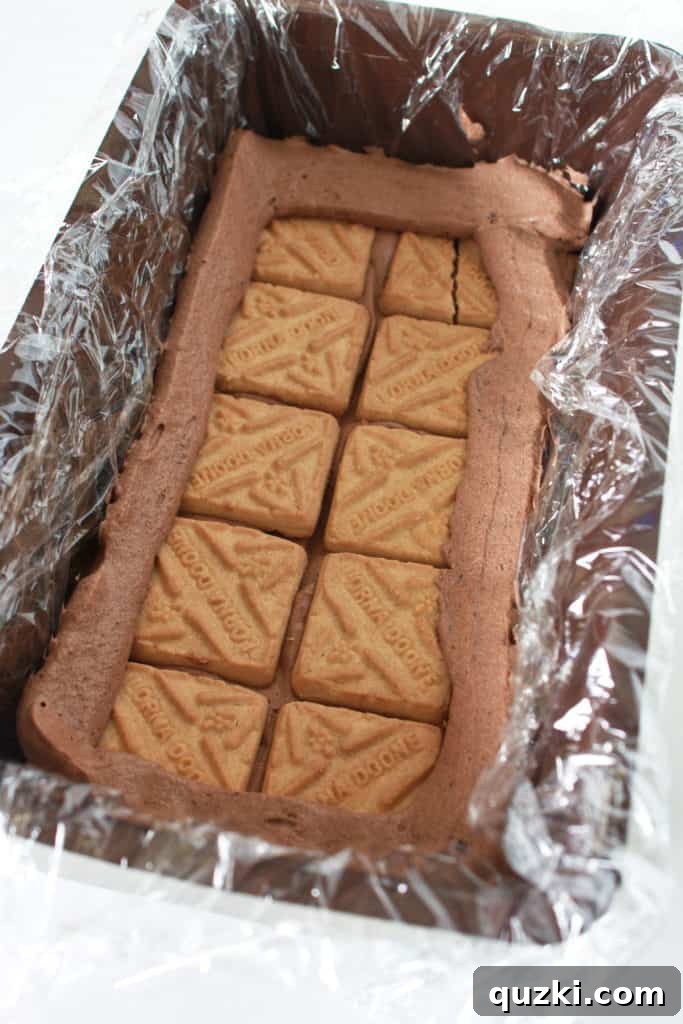
The inclusion of a luscious caramel component is truly what elevates this to an authentic Twix-inspired no-bake dessert. To ingeniously ensure that the wonderfully gooey caramel remains neatly contained within the layers and doesn’t embark on an unplanned escape down the sides of the pan, here’s a wonderfully clever and effective trick: utilize your Ziploc bag, still filled with the velvety chocolate pudding mixture, to pipe a continuous, neat ring of pudding around the entire inner edge of the loaf pan, directly on top of the shortbread layer. This ingenious technique creates a delicious, edible barrier, effectively forming a perfect “well” specifically designed to cradle the caramel. Into this carefully constructed well, gently pour approximately 1/4 cup of your favorite smooth caramel sauce, spreading it delicately over the shortbread within the confines of the pudding ring. This meticulous step guarantees that every single bite of your finished cake will deliver that exquisite, perfect balance of rich chocolate, tender shortbread, and utterly decadent caramel, just like the candy bar itself.
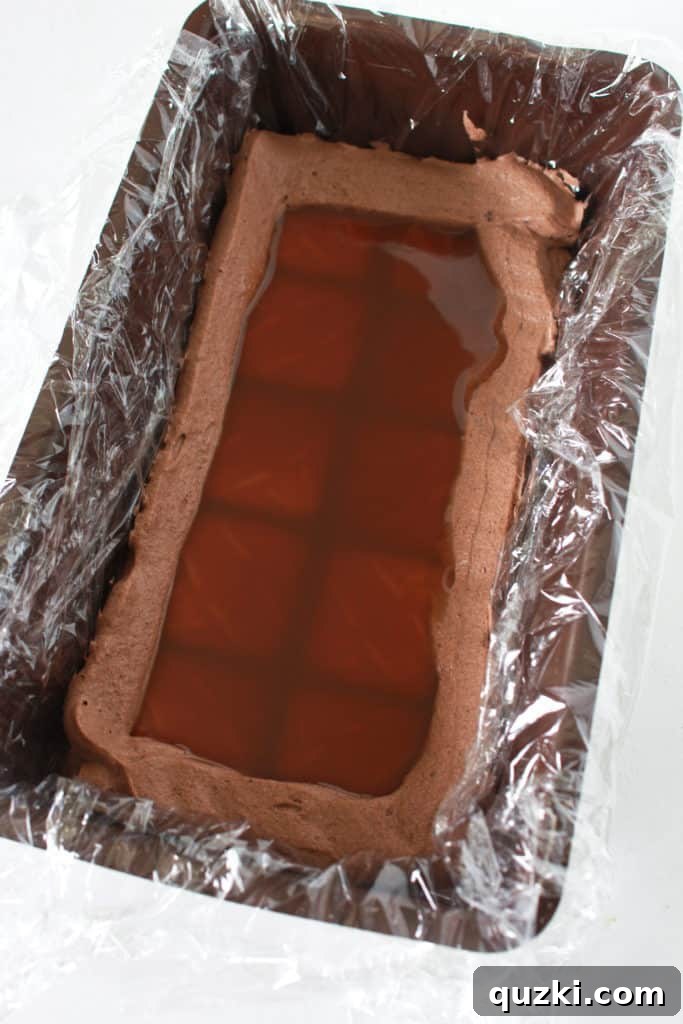
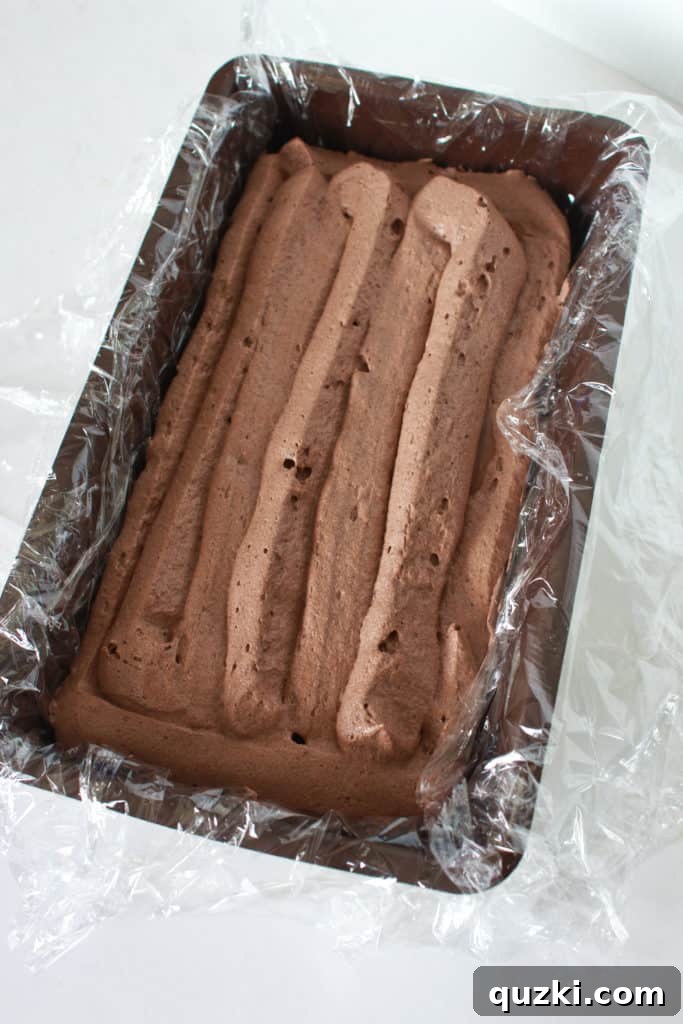
Continue the magnificent construction of your Twix Icebox Cake by meticulously repeating these delightful layers: start with another generous application of the creamy chocolate pudding mixture, followed by another perfectly arranged layer of shortbread cookies. Then, replicate the decadent caramel sauce step, ensuring it’s carefully contained within its freshly piped pudding ring. Conclude the layering process with a final, smooth, and even layer of the chocolate pudding mixture, making sure the entire top surface of the cake is beautifully and uniformly covered. This thoughtful repetition of layers not only creates a visually stunning and impressive dessert but also builds an incredibly satisfying flavor profile that truly embodies the essence and delightful texture of a classic Twix bar. Each layer contributes to a complex yet harmonious bite, making this a truly unforgettable treat.
The Crucial Freezing Process and Achieving Perfect Presentation
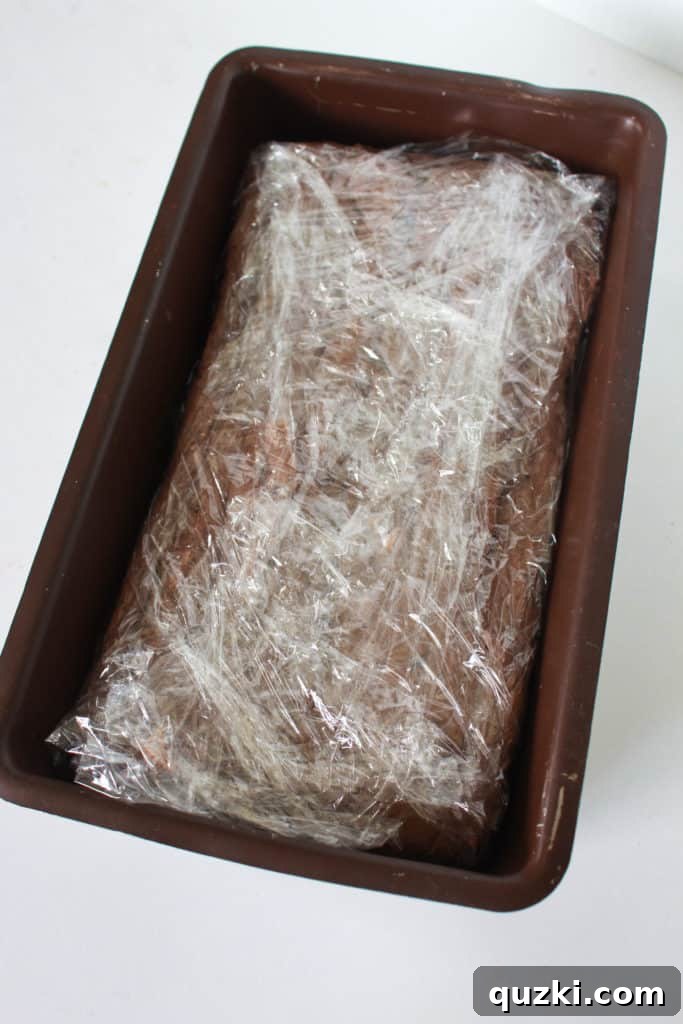
Once all your delicious layers are meticulously assembled and perfectly aligned, we arrive at arguably the most critical stage of this entire no-bake endeavor: the deep, transformative chill. With gentle hands, carefully pull the generously overhanging plastic wrap up and completely around the cake, ensuring it is wrapped tightly and sealing the entire surface. This crucial step serves multiple purposes: it prevents any unwelcome freezer burn, locks in all those incredible flavors, and most importantly, aids the cake in setting firmly and developing its signature texture. Carefully place your securely wrapped Twix Icebox Cake into the freezer. For the very best flavors, the most cohesive and appealing texture, and the absolute easiest, cleanest slicing experience, this cake demands a minimum freezing time of 8 hours. However, to achieve truly optimal results – that coveted ‘wow’ factor that will have everyone asking for the recipe – aiming for a full 24 hours in the freezer is enthusiastically recommended. This extended chilling period is where the magic truly happens, allowing the shortbread cookies to fully absorb the moisture from the creamy pudding, transforming them into wonderfully soft, cake-like layers that blend seamlessly and deliciously with the rich, creamy filling. Patience truly is a virtue in this kitchen!
Serving Your Spectacular Twix Icebox Cake: Tips for a Stunning Finale
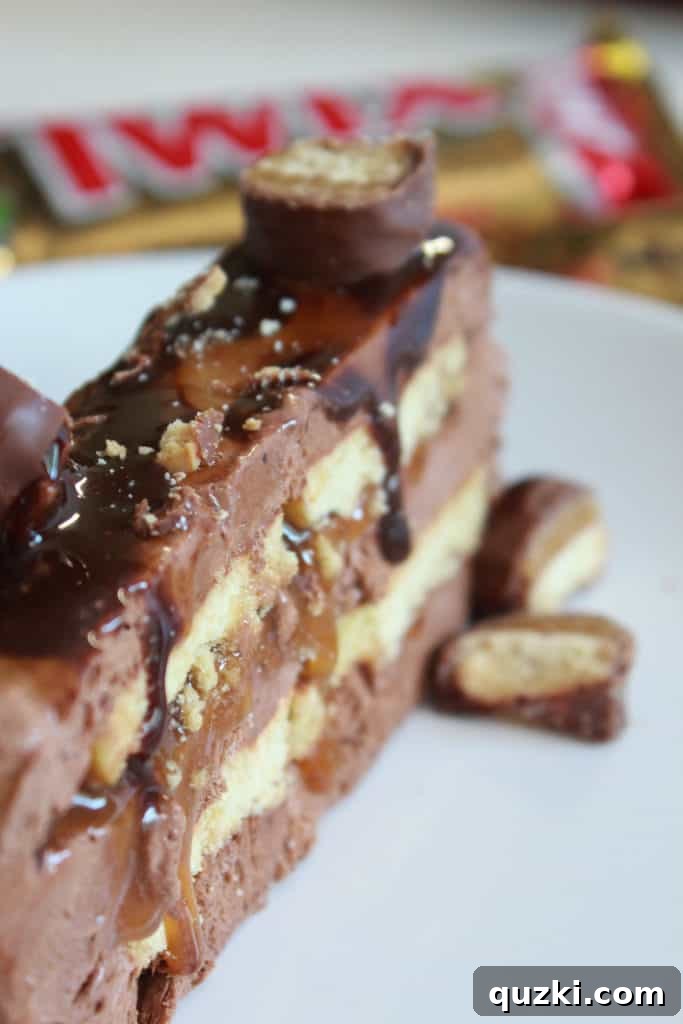
When the long-awaited moment arrives to unveil and serve your magnificent Twix Icebox Cake, the presentation is almost as much fun and anticipation-filled as the actual eating! Begin by carefully removing the chilled cake from the freezer. Utilizing those clever plastic wrap overhangs you initially created, gently lift the entire, now-solid cake cleanly out of the loaf pan. Once freed, meticulously peel away all the plastic wrap. Transfer your beautiful creation to a dedicated serving platter. Now for the grand, delicious finale: grab your chocolate syrup and caramel sauce. Apply generous, artful drizzles of both, allowing them to cascade elegantly over the top of the cake. To truly emphasize and celebrate the Twix inspiration, chop up an extra Twix bar (or two!) and generously sprinkle the delightful pieces over the top. The sensational combination of the cool, remarkably creamy cake with the added crunch, extra sweetness, and iconic flavors from these toppings is nothing short of absolutely divine and will be an instant hit.
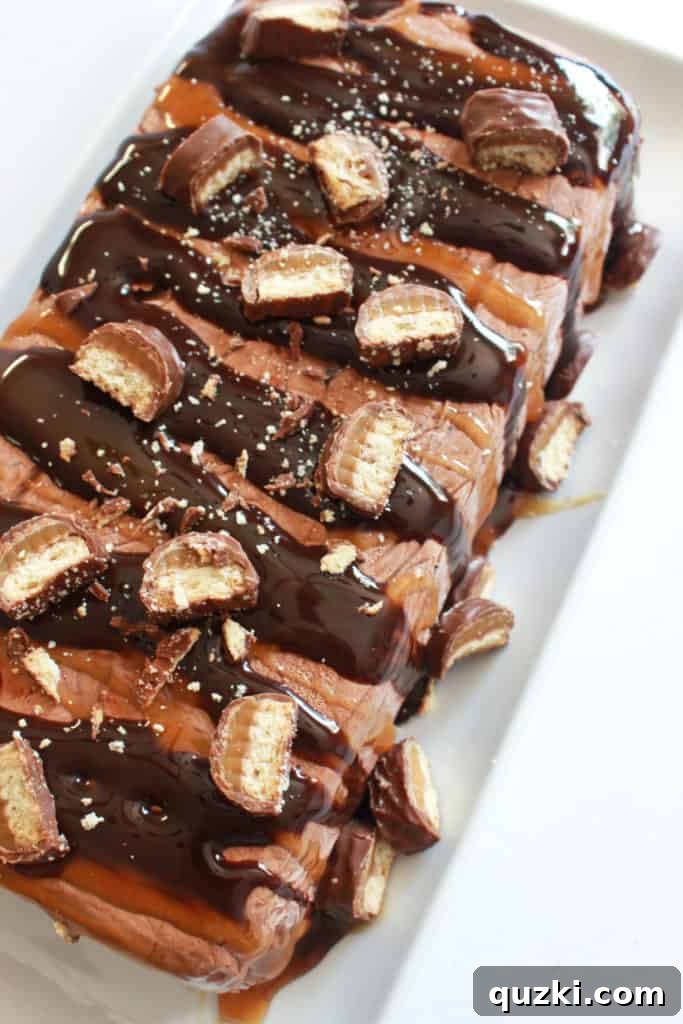
For achieving impeccably neat and perfect slices of your frozen treat, a serrated knife is undoubtedly your best friend; its gentle sawing action glides effortlessly through the layers, ensuring clean, attractive portions. However, do not despair if a serrated knife isn’t readily available – any sharp kitchen knife will certainly do the trick if you employ a careful, gentle sawing motion. Each meticulously cut slice will proudly reveal those stunning, distinct layers of rich chocolate cream, tender shortbread, and luscious caramel, creating a truly impressive and inviting dessert that tastes every bit as incredible as its visual appeal suggests. Be prepared for a chorus of compliments and requests for this easy no-bake dessert recipe, which is destined to become a summer staple and a beloved family favorite!
Conclusion: Your Go-To No-Bake Summer Delight!
Cool, refreshing desserts like this magnificent Twix Icebox Cake are truly a welcome and essential indulgence when the temperatures soar. They offer a delightful and much-needed escape from heavy, oven-baked goods and are surprisingly simple to prepare, demanding only minimal active time in the kitchen. This recipe proves that you don’t need to be a pastry chef to create a show-stopping dessert that will impress everyone. It’s the perfect blend of ease, elegance, and irresistible flavor, making it an ideal choice for any summer gathering, casual family dinner, or simply a treat for yourself.
If you’re ever in search of another fantastic chilled option to diversify your summer dessert menu, that Caramel Drumstick Ice Cream Pie we mentioned earlier is also an absolutely fabulous choice, offering a different, yet equally delightful, profile of cool indulgence. We hope this guide inspires you to try your hand at this incredible no-bake creation. Enjoy your culinary adventures, and here’s to a happy, delicious summer filled with easy, refreshing treats!
Twix Icebox Cake
June Albertson-Dick
4
4
10
servings
Print Recipe
Ingredients
- 1-3.56 oz. pkg. Hershey’s chocolate pudding mix
- 1 1/2 cups milk {I used 1%}
- 1-16 oz. tub whipped topping, thawed
- 20 shortbread cookies (approximately, depending on size)
- 1/2 cup caramel sauce
Toppings
- Chocolate syrup for drizzling
- Caramel sauce for drizzling
- 1-2 Twix bars, chopped for garnish
Instructions
-
Prepare the Pan and Pudding: Line a large loaf pan (e.g., 9×5 inch) with plastic wrap, ensuring a generous amount hangs over all four sides. In a large bowl, combine the chocolate pudding mix with 1 1/2 cups of milk. Whisk thoroughly for about 2 minutes until the pudding powder is completely dissolved and the mixture is smooth and slightly thickened. Gently fold in the entire tub of thawed whipped topping until fully incorporated and the mixture is uniform in color and texture. Transfer this creamy chocolate mixture to a large, sturdy Ziploc bag and snip off one corner (about a 1/2-inch opening) to create a convenient piping bag.
-
Assemble the Layers: Pipe a base layer of the chocolate pudding mixture onto the bottom of the plastic-wrap-lined loaf pan, spreading it evenly. Arrange approximately 10 shortbread cookies over this pudding layer, creating a solid, even base. Next, pipe a continuous ring of chocolate pudding mixture around the entire perimeter of the shortbread layer. This creates a barrier to contain the caramel. Carefully pour 1/4 cup of caramel sauce over the shortbread cookies, ensuring it stays within the piped pudding ring. Cover the caramel with another generous layer of the chocolate pudding mixture.
-
Repeat and Chill: Repeat the layering process: add another layer of shortbread cookies, then pipe another pudding ring, pour in the remaining 1/4 cup of caramel sauce, and finish with a final, smooth layer of chocolate pudding mixture on top, ensuring it covers the entire surface. Once all layers are complete, carefully pull the overhanging plastic wrap up and over the top of the cake, securing it tightly so the cake is completely covered and sealed. Place the entire loaf pan in the freezer for a minimum of 8 hours. For optimal texture and flavor development, a freezing time of 24 hours is highly recommended.
-
Serve and Garnish: When ready to serve, remove the cake from the freezer. Using the plastic wrap overhangs, gently lift the entire frozen cake out of the loaf pan. Carefully peel off and discard the plastic wrap. Transfer the cake to a clean serving platter. Drizzle generously with additional chocolate syrup and caramel sauce. For a true Twix experience, sprinkle a generous amount of chopped Twix bars over the top of the cake. Slice using a sharp serrated knife for the cleanest cuts, and serve immediately for a refreshing and decadent treat.
Notes
- Peanut Butter Twix Variation: If you’re a devoted fan of peanut butter, here’s a delicious twist: substitute creamy peanut butter for the caramel sauce. Simply microwave the peanut butter for about 20-30 seconds until it’s wonderfully soft and easily spreadable, then layer it just as you would the caramel.
- Extra Chocolate Kick: For an even more intense chocolate experience, consider adding a thin, cooled layer of melted chocolate chips over the shortbread cookies before adding the caramel. Let it set slightly before continuing.
- Cookie Choices: While shortbread cookies are classic for this recipe, feel free to experiment! Graham crackers, chocolate wafer cookies, or even vanilla wafers could offer interesting textural and flavor variations.
- Make Ahead Perfection: This Twix Icebox Cake is an ideal make-ahead dessert. Preparing it 1-2 days in advance allows the flavors to deepen and the cookies to reach their absolute peak tenderness.
Nutrition
Serving: 1 slice
Calories: 193kcal
Carbohydrates: 26g
Protein: 3g
Fat: 9g
Saturated Fat: 4g
Polyunsaturated Fat: 2g
Monounsaturated Fat: 2g
Cholesterol: 2mg
Sodium: 141mg
Potassium: 104mg
Fiber: 0.3g
Sugar: 18g
Vitamin A: 113IU
Vitamin C: 0.1mg
Calcium: 69mg
Iron: 1mg
Nutrition information is automatically calculated, so should only be used as an approximation.
Tried this incredible Twix Icebox Cake? Share your experience in the comments below!
We’d love to hear your thoughts and see your creations!