
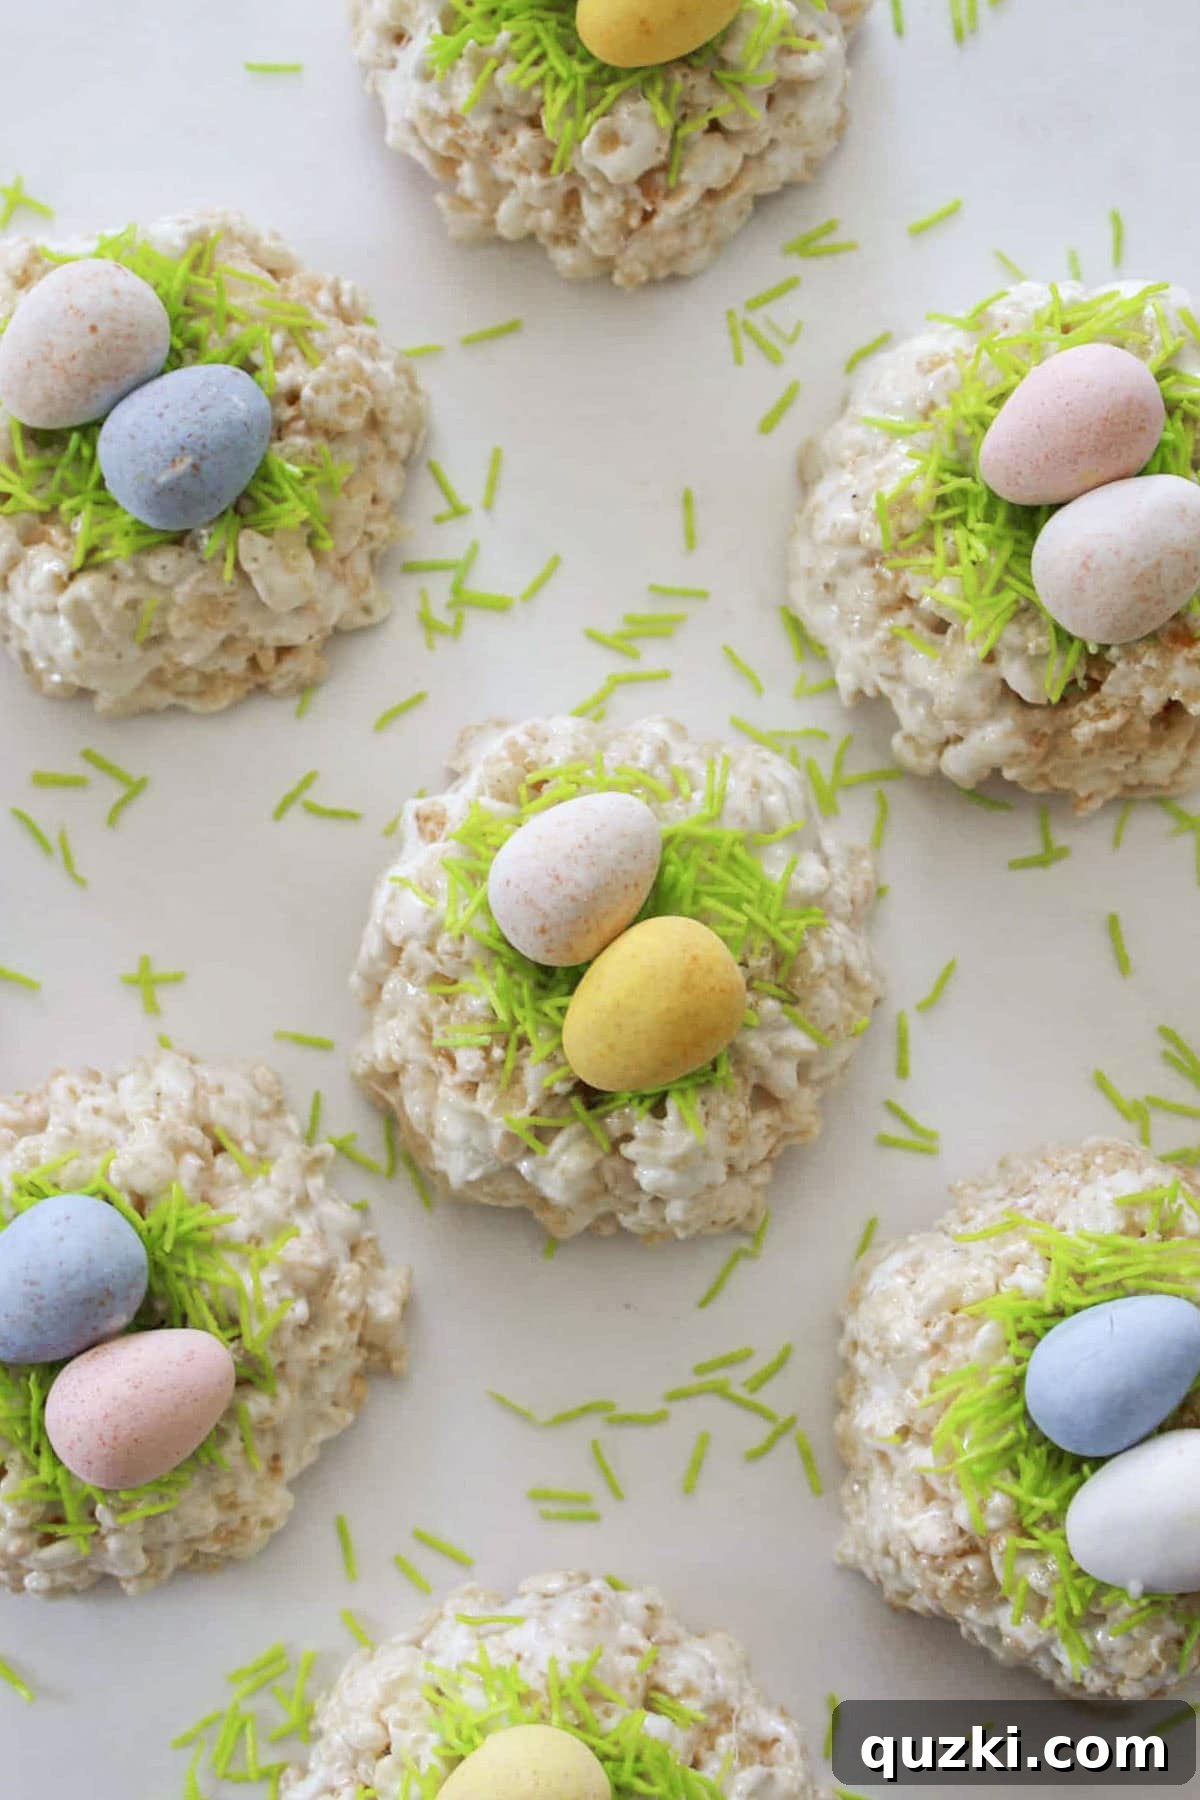
With over three decades of cherished baking experience, I’ve discovered that the most enduring memories often spring from simple, hands-on recipes that gather loved ones in the kitchen. This Easy Rice Krispie Easter Nest recipe embodies that philosophy perfectly—it’s incredibly straightforward to prepare, wonderfully festive, and a fantastic opportunity for even the littlest hands to join in the fun. These delightful no-bake nests have graced our Easter tables for years, consistently bringing smiles and a touch of seasonal charm to every celebration, whether you’re crafting them with your children, grandchildren, or simply for a sweet holiday treat.
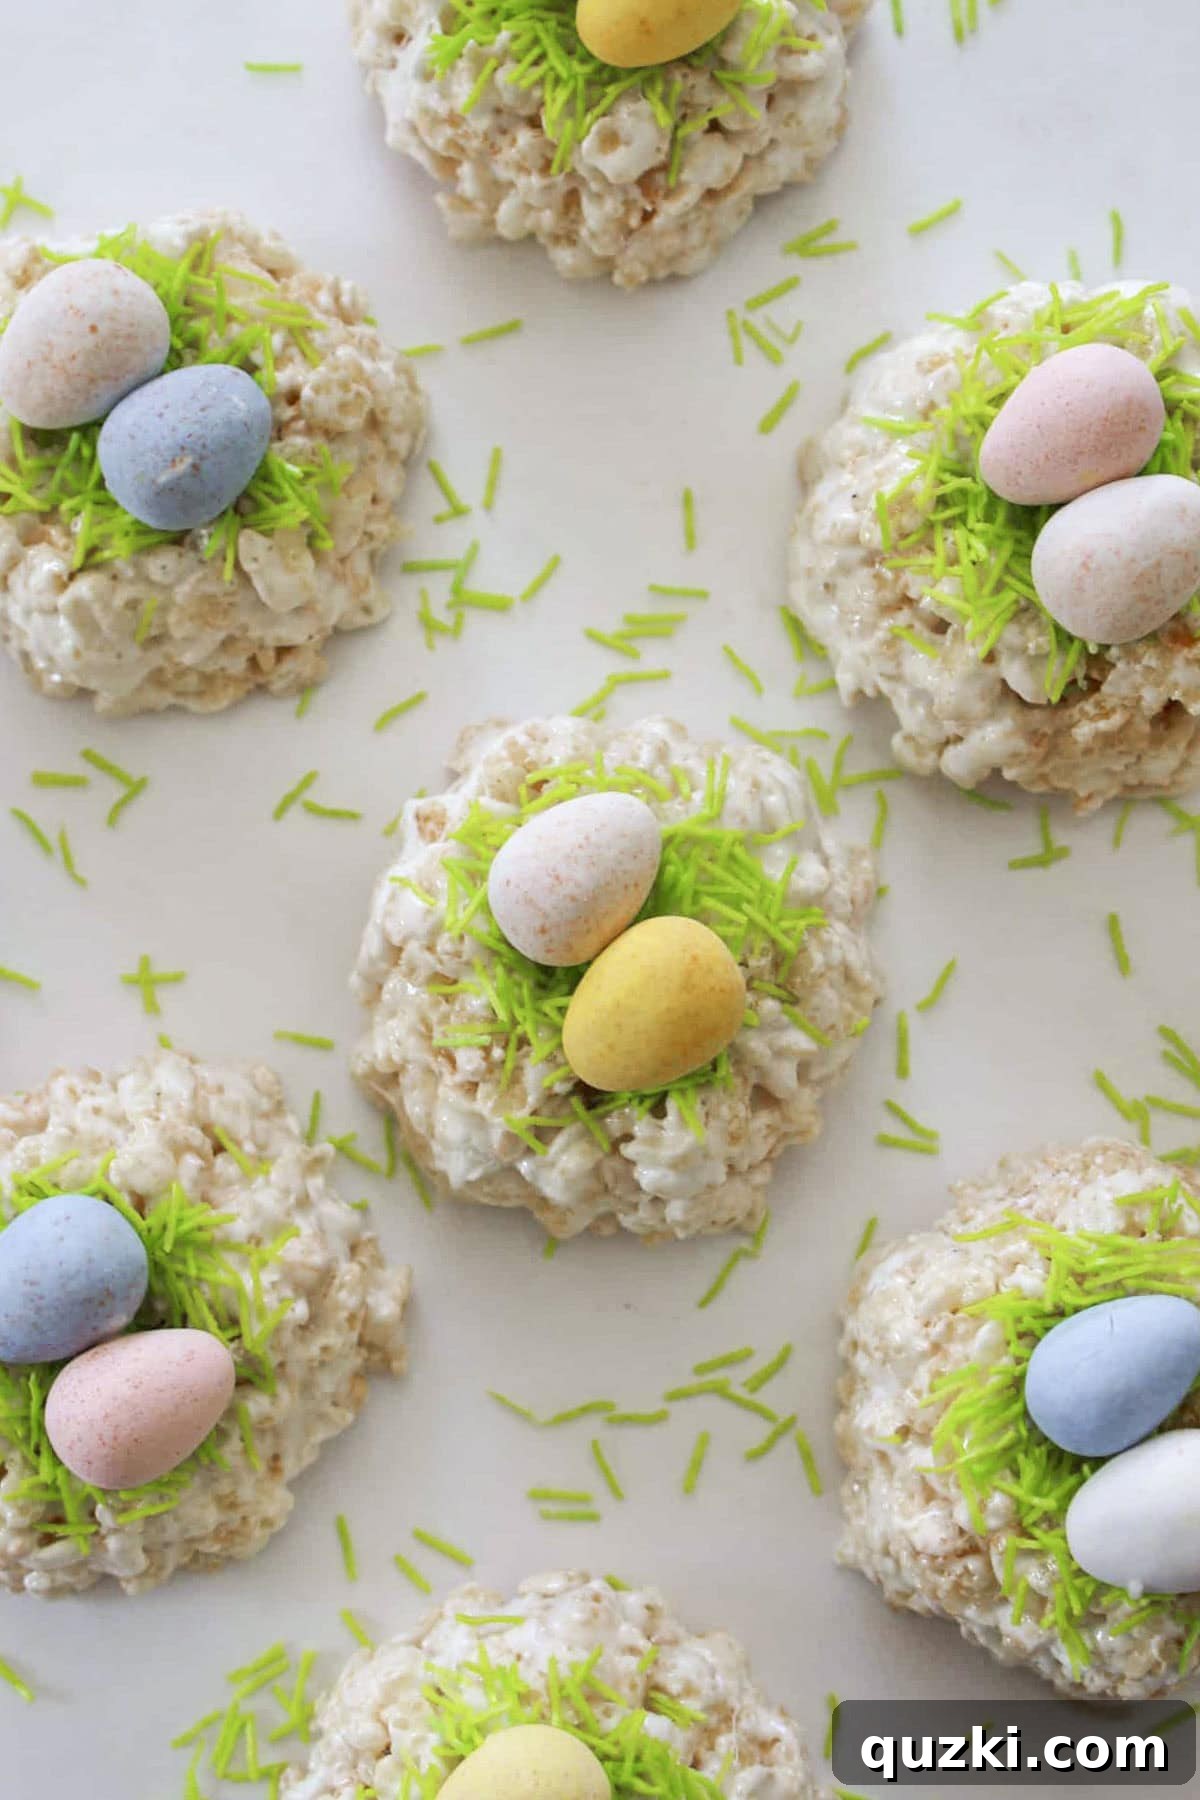
Why We Love These Easy Rice Krispie Nests with Mini Cadbury Eggs
There’s something undeniably magical about these simple, yet captivating, Rice Krispie Easter Nests. They truly capture the spirit of spring and the joy of Easter, making them a favorite in countless households. Here’s why this recipe shines:
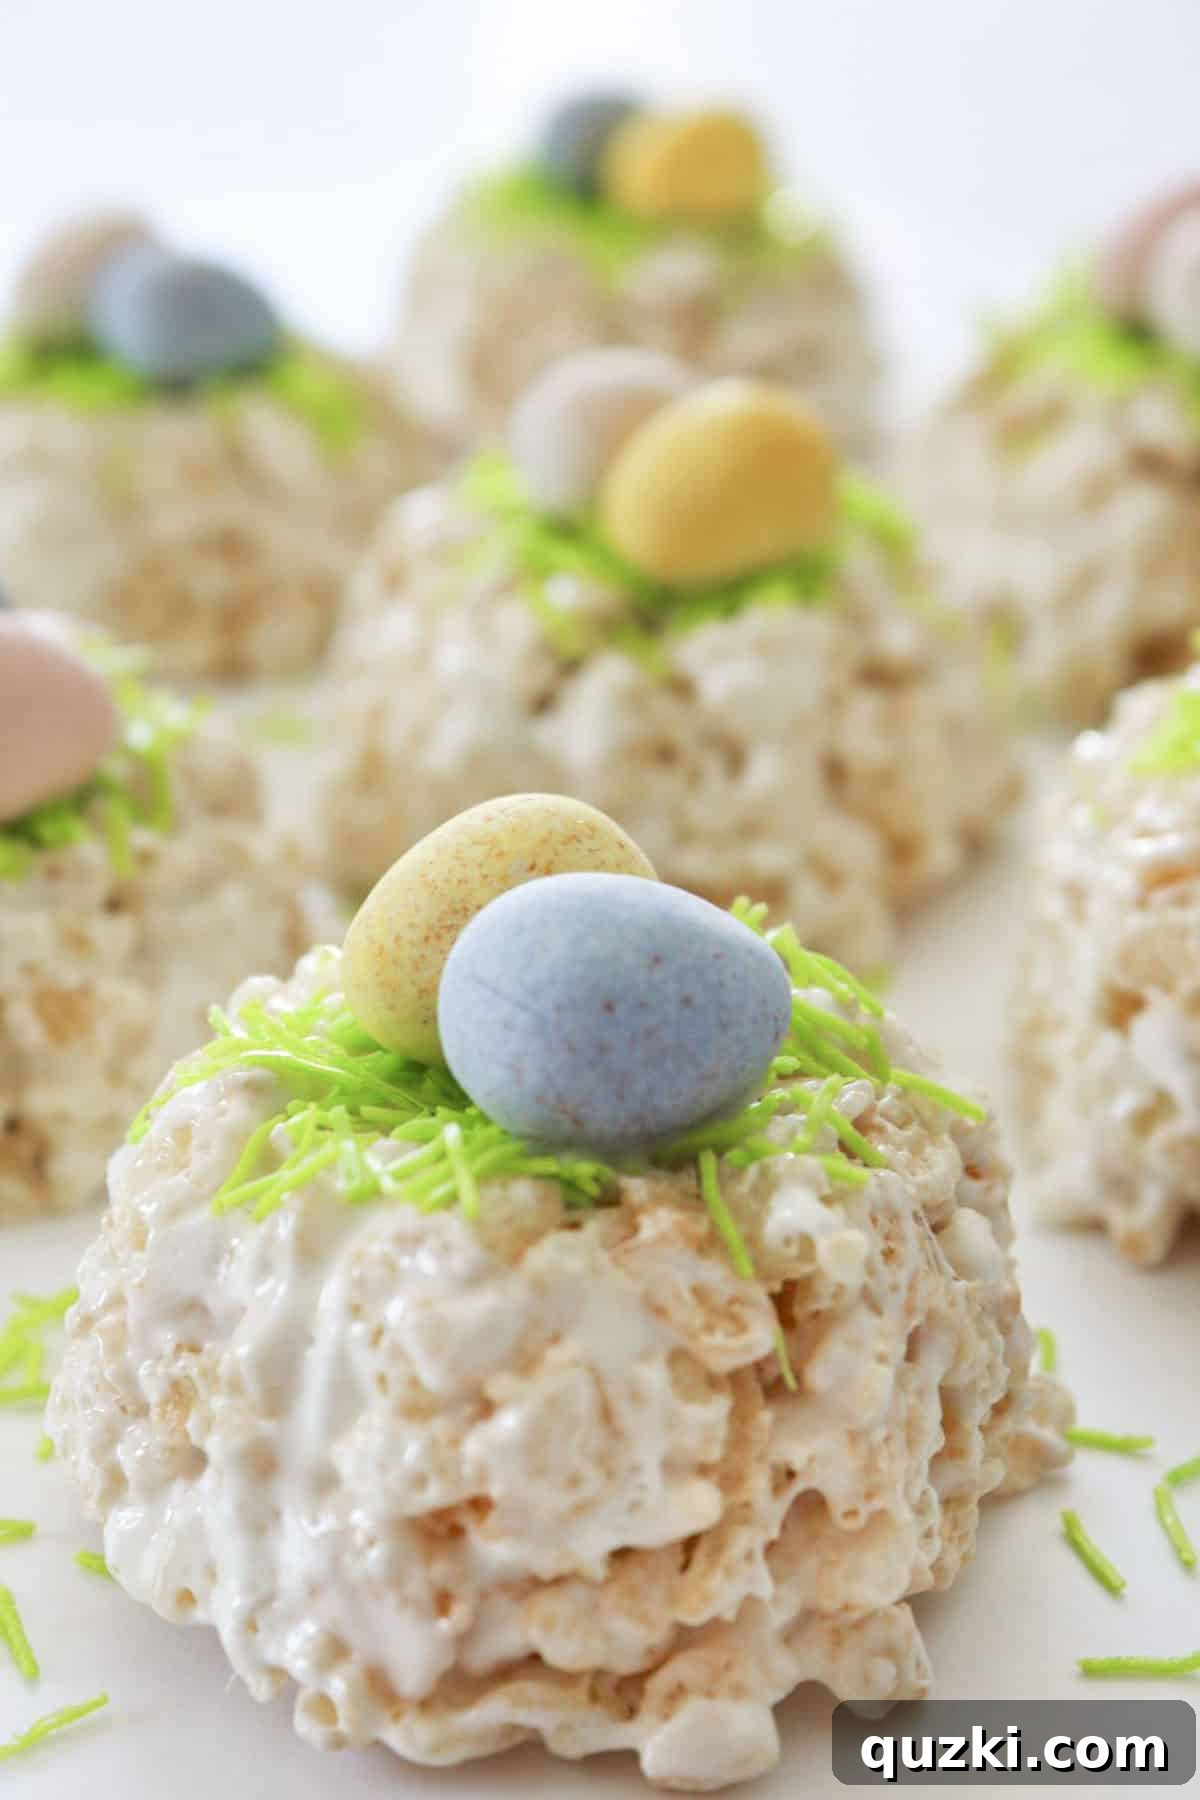
- Irresistibly Fun & Festive: The moment you see these little nests, adorned with vibrant green “grass” and colorful mini eggs, you can’t help but smile. Their pastel hues and charming bird’s nest shape make them the quintessential Easter celebration treat, perfect for adding a pop of color and whimsy to any holiday spread.
- Effortless Simplicity: This is a genuinely no-fuss recipe. Requiring only a handful of common pantry ingredients, you won’t need to hunt for exotic items or spend hours in the kitchen. Even better, it’s a completely no-bake dessert, freeing up your oven for other Easter delights and making it accessible for bakers of all skill levels, especially young helpers!
- Delightful Flavor & Texture Harmony: Each bite offers a harmonious blend of textures and tastes. You get the classic, satisfying chewy crunch of a homemade Rice Krispie treat, perfectly complemented by the creamy, candy-coated chocolate eggs nestled within. This combination is simply irresistible and keeps everyone coming back for more.
- Incredibly Versatile: These cute Easter nests aren’t just for your family’s holiday table. They are wonderfully versatile for a variety of spring occasions. Pack them for a classroom snack, feature them at an Easter brunch, or serve them as an adorable centerpiece dessert for any springtime party. They’re always a crowd-pleaser!
- A Nostalgic Touch: For many, Rice Krispie treats evoke fond childhood memories. Adding an Easter twist to this beloved classic creates new traditions while celebrating old ones, making these nests a delightful trip down memory lane.
Essential Ingredients You’ll Need
Gathering your ingredients for these festive nests is straightforward, as they all come from your local grocery store. Here’s a closer look at what you’ll need to create these delightful treats:
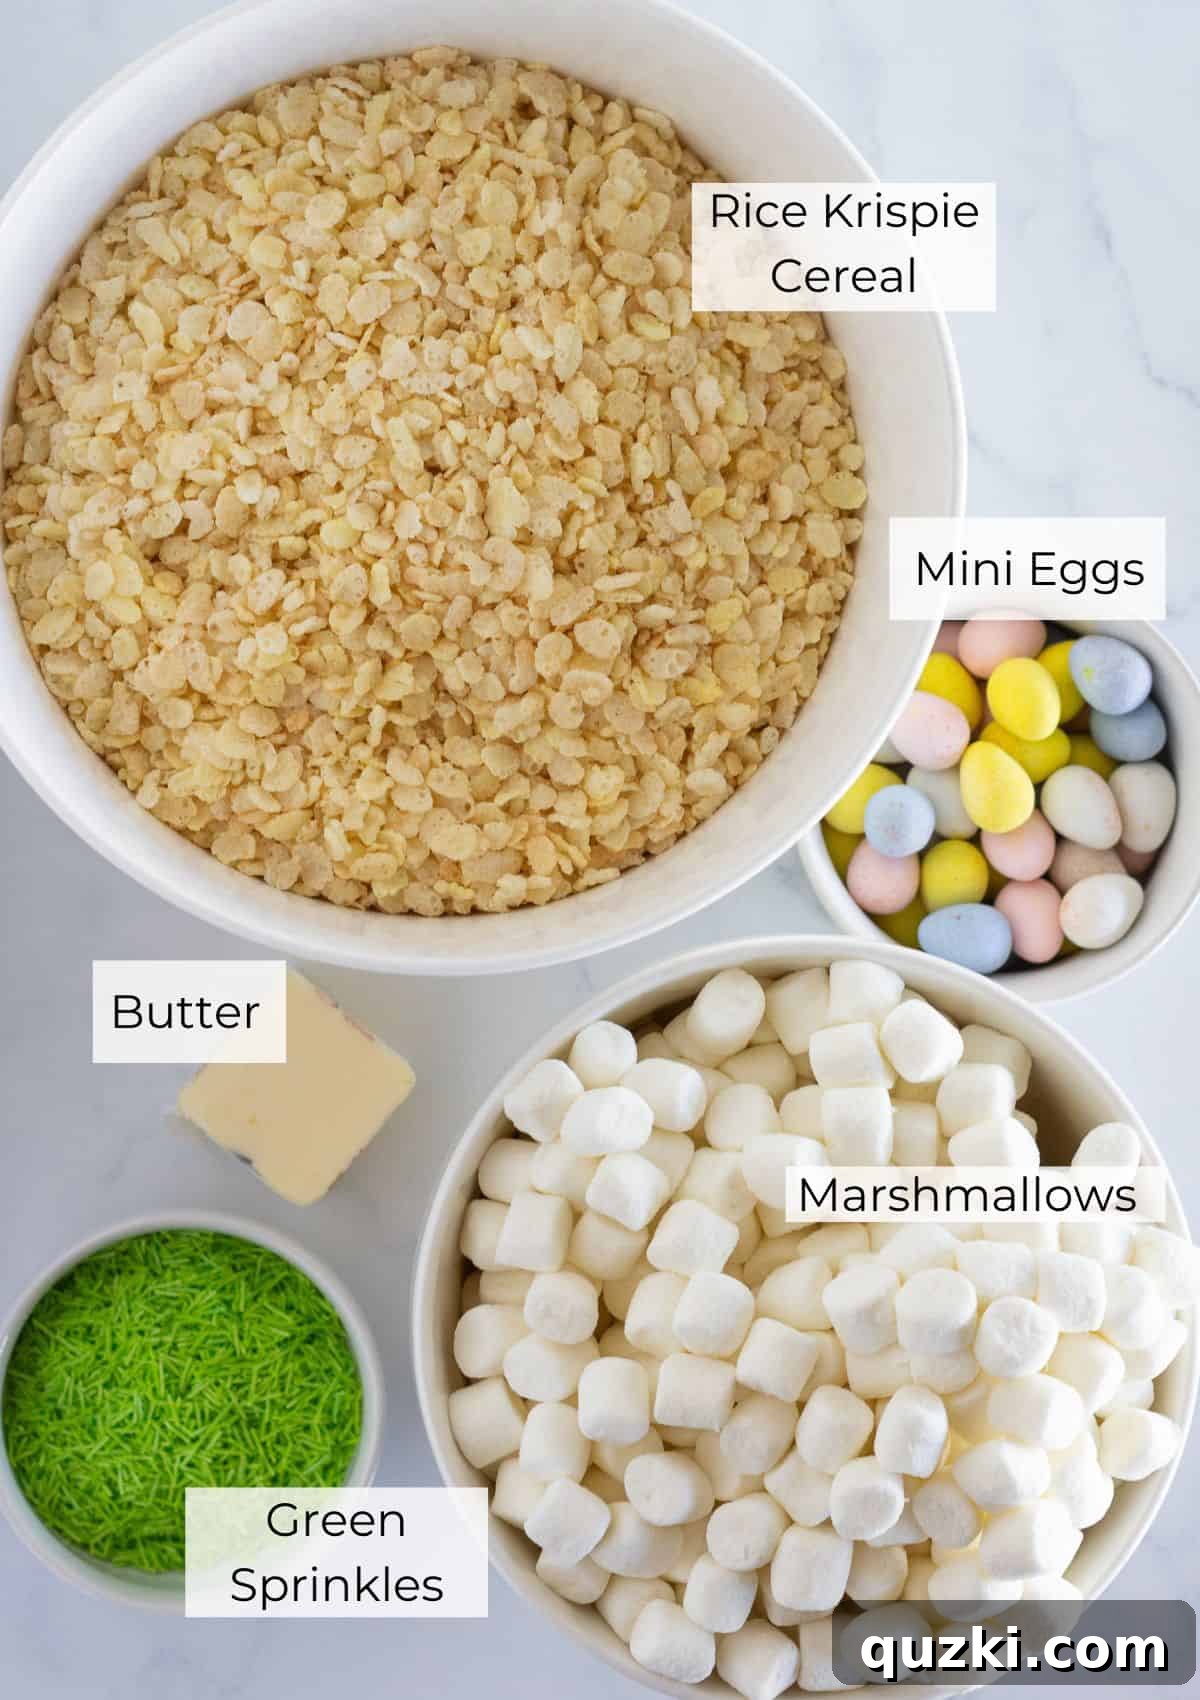
- Rice Krispie Cereal: This classic puffed rice cereal is the foundation of our nests. Its light, airy texture and impressive ability to hold shape make it ideal for molding into perfect little nests. It provides that signature crunch that everyone loves and is incredibly versatile for various no-bake treats.
- Marshmallows: The magical binder! When melted, marshmallows provide the perfect amount of sweetness and create the sticky, pliable mixture that holds the cereal together. While mini marshmallows melt more quickly and evenly, larger marshmallows can also be used; just be sure to cut them into smaller pieces for faster melting. Fresh marshmallows are key for the best texture and stretch.
- Butter: A crucial ingredient that adds richness, flavor, and helps prevent the marshmallow mixture from sticking excessively. I typically prefer using salted butter for a subtle contrast that enhances the sweetness, but unsalted butter works just as well. Just a few tablespoons make a big difference in the final taste and consistency.
- Mini Cadbury Eggs: These charming, candy-coated milk chocolate eggs are the star decoration of our Easter nests. Their festive appearance and creamy chocolate centers make them a family favorite. You can often find them in dark chocolate variations if you prefer a richer flavor. These delightful eggs instantly transform simple treats into holiday masterpieces.
- Green Sprinkles (for “Grass”): To complete the nest look, green sprinkles, especially shredded wafer sprinkles or jimmie-style green sprinkles, perfectly mimic blades of grass. They add a pop of color and an extra touch of festivity.
For precise measurements and quantities, please refer to the detailed recipe card at the bottom of this article.
Creative Variations & Substitutions for Your Easter Nests
One of the best aspects of this Rice Krispie nest recipe is its adaptability. Feel free to get creative and customize your treats to suit your taste or what you have on hand. Here are some fun ideas:
- Alternative “Eggs”: If Mini Cadbury Eggs aren’t available or you’re looking for other options, a variety of candies can fill your nests beautifully. Consider using jelly beans, mini robin eggs, small M&M’s (especially pastel-colored ones for spring), chocolate-covered pretzels, or even gumballs for a playful look. Small gummy candies in egg or bunny shapes would also be adorable!
- Cereal Choices Beyond Rice Krispies: While classic Rice Krispies are traditional, don’t be afraid to experiment with other cereals. Chocolate Rice Krispie cereal would add a delightful cocoa flavor and a darker “nest” base. You could also use half regular and half chocolate cereal for a marbled effect. For a different texture and taste, try using crushed cornflakes or even colorful fruity puffed cereals for a vibrant twist. Ensure any substitute cereal is light and crispy to maintain the classic treat texture.
- “Grass” Alternatives: Finding specific green shredded wafer sprinkles can sometimes be a challenge, but there are plenty of creative ways to achieve the edible grass effect:
- Colored Coconut: This is a fantastic alternative! Simply add shredded coconut to a resealable plastic bag with a few drops of green food coloring. Shake well until the coconut is evenly coated, and voilà – you have homemade edible grass! It also adds a lovely texture and subtle coconut flavor.
- Green Frosting: A small dollop of green-tinted buttercream or royal icing, piped with a grass tip, can create a stunning and delicious grass effect. This option also helps secure your candy eggs firmly in place.
- Other Green Sprinkles: Any green sprinkles you find, from jimmies to nonpareils, can work well. A mix of different green sprinkles can create a textured, natural-looking grass.
- Matcha Powder: For a more subtle green and unique flavor, you could lightly dust the tops of the nests with a touch of matcha powder, though this is a less common substitution for children’s treats.
- Add-ins to the Mixture: For an extra layer of flavor or texture, consider stirring in a handful of mini chocolate chips, sprinkles, or even finely chopped nuts into the Rice Krispie mixture before molding it into nests.
- Chocolate Drizzle: For an extra touch of indulgence, drizzle melted white or milk chocolate over the finished nests. You can even tint the white chocolate with food coloring for a pastel effect.
How to Make Perfect Rice Krispie Easter Nests
Creating these charming no-bake Easter nests is a simple and rewarding process. Follow these step-by-step instructions for perfect results every time:
- Melt Butter and Marshmallows: In a large, sturdy saucepan, begin by melting the butter over a gentle medium-low heat. The key here is low and slow to prevent burning. Once the butter has completely melted, add three-quarters of your mini marshmallows to the pan. Continue to stir constantly on low heat until the marshmallows have completely melted and formed a smooth, gooey mixture.
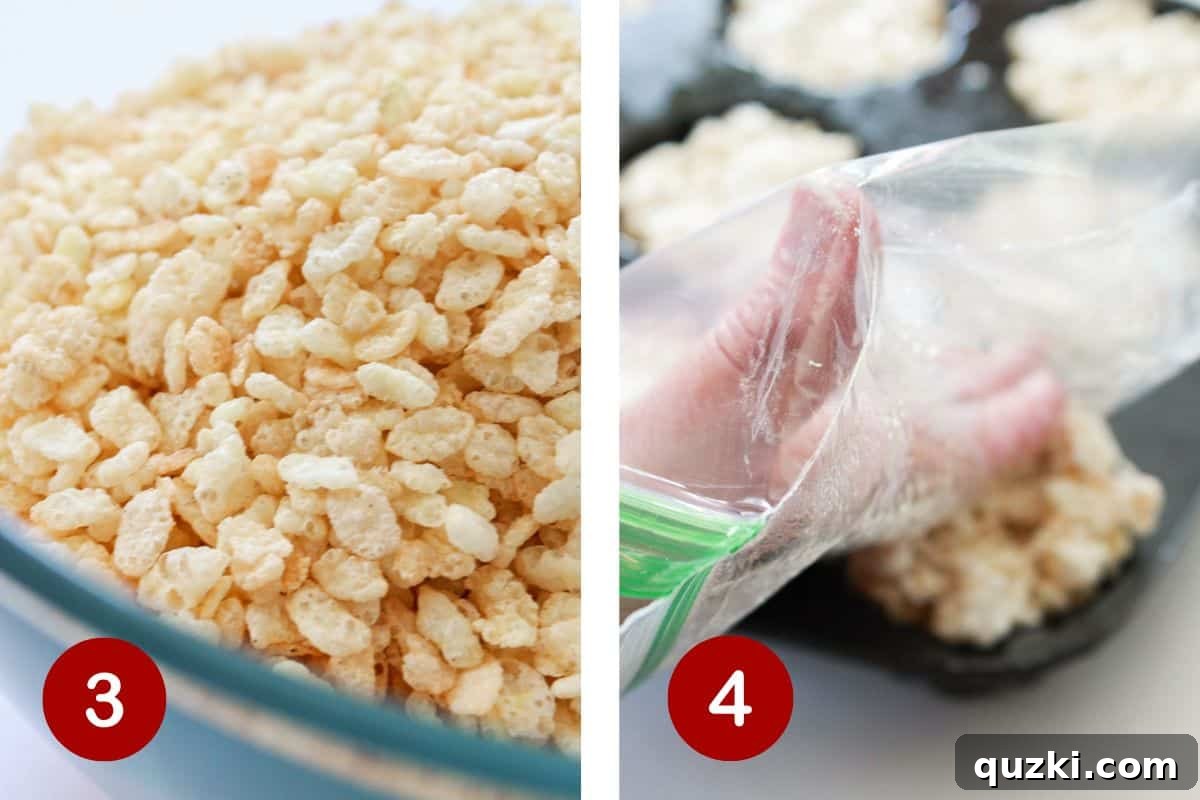
- Combine with Cereal: Remove the saucepan from the heat. Immediately add the crunchy Rice Krispie cereal and the remaining one-quarter of the mini marshmallows to the melted mixture. Stir everything together thoroughly until the Rice Krispies are completely and evenly coated with the marshmallow mixture. The marshmallows added at the end won’t fully melt, adding delightful pockets of chewy marshmallow throughout your nests.
- Form the Nests: Lightly spray the cavities of a 12-cup mini bundt pan (or a standard muffin pan) with non-stick cooking spray. This crucial step will ensure your nests release easily. For easy handling of the sticky mixture, spray one side of a clean sandwich bag with cooking spray and use it as a makeshift glove. Divide the warm Rice Krispie mixture evenly among the 12 prepared cavities. Using your greased fingers (or the greased sandwich bag), gently press the mixture firmly into each cavity, creating a hollow in the center to form the nest shape.
- Set and Release: Allow the Rice Krispie nests to set up in the pan for approximately 15 minutes at room temperature. This brief cooling period will help them firm up and hold their shape. Once set, use a butter knife or a thin offset spatula to carefully loosen the edges and pop each nest out of the pan.
- Decorate Your Nests: Now for the fun part! Gently place a small amount of green sprinkles (your edible “grass”) into the hollow center of each nest, pressing down lightly to ensure they adhere. Then, carefully arrange 2-3 Mini Cadbury Eggs or your chosen candy eggs on top of the green sprinkles. If you find the eggs aren’t sticking well, you can melt about a tablespoon of white chocolate in the microwave (in 15-second intervals, stirring in between) and use a tiny dot of melted chocolate on the bottom of each egg as edible “glue” before placing them in the nest.
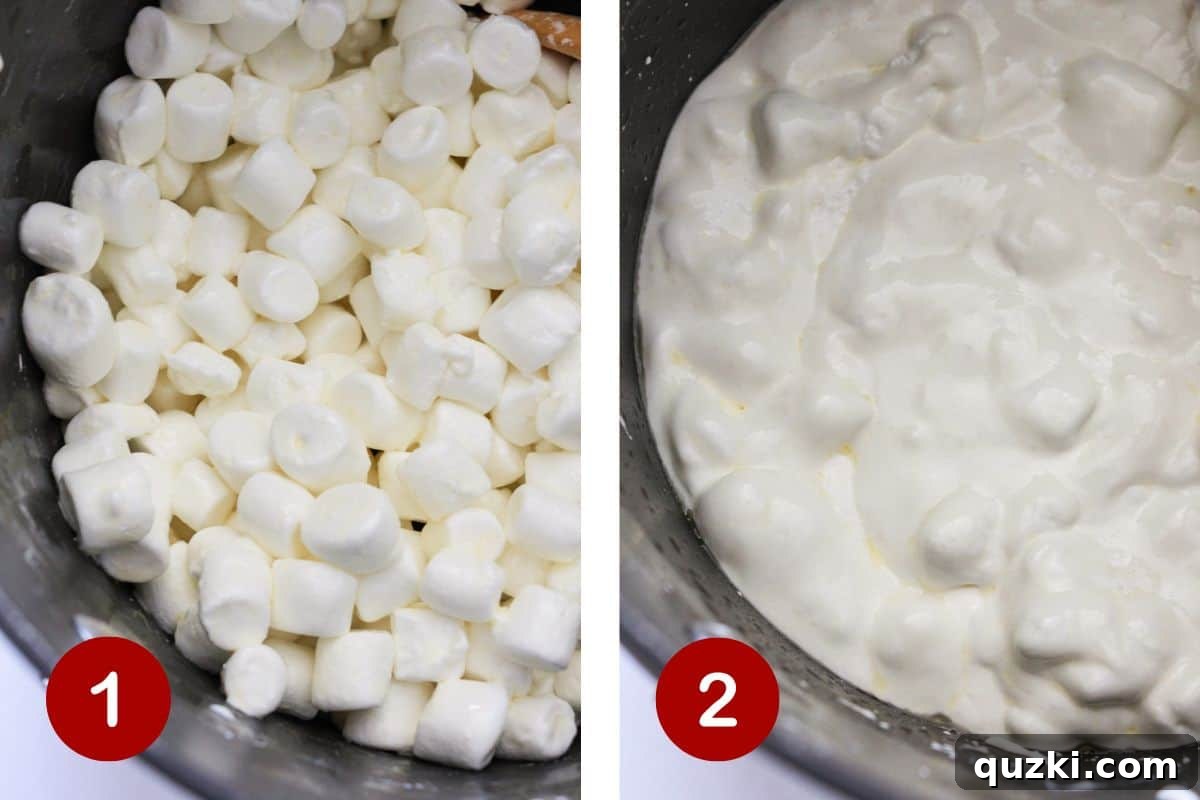
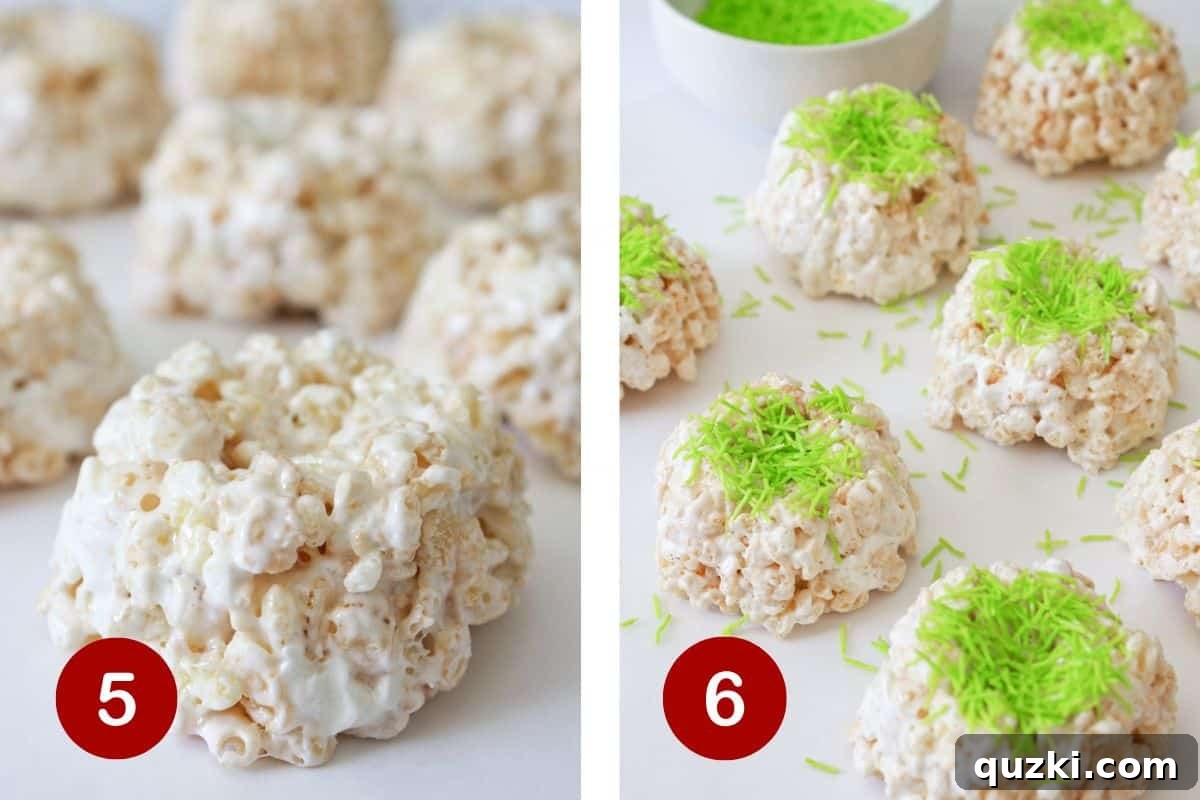
And there you have it! Adorable, delicious Rice Krispie Easter Nests ready to be shared and enjoyed.
Expert Tips for No-Bake Rice Krispie Nest Success
Achieving perfectly chewy and delightful Rice Krispie Easter Nests is simple, especially with a few insider tips. Keep these pointers in mind for best results:
- Low and Slow Melting is Key: Always melt your butter and marshmallows over a low to medium-low heat. High heat can cause the marshmallows to burn or become tough and stringy once cooled, leading to hard Rice Krispie treats. Patience is a virtue here; gentle heat ensures a smooth, pliable mixture.
- Fresh Marshmallows Make a Difference: For the chewiest, most desirable texture, always use fresh marshmallows. Stale marshmallows can result in a drier, less cohesive mixture that doesn’t bind the cereal as effectively. Check the expiration date and ensure your bag is sealed.
- Grease Everything! This mixture is notoriously sticky. Generously spray your saucepan, spatula, molding pan (mini bundt or muffin tin), and even your hands (or a sandwich bag used as a glove) with nonstick cooking spray. This proactive step will make the entire process, from mixing to molding and releasing, infinitely easier and less messy.
- Press Firmly, But Not Too Hard: When pressing the Rice Krispie mixture into your molds, apply firm but gentle pressure. You want to ensure the mixture sticks together and holds its nest shape without crumbling. However, pressing too hard can compact the cereal excessively, making the treats dense and difficult to eat. Aim for a balance that creates a well-formed nest with a pleasant chew.
- Create Your Own Edible “Grass”: If you struggle to find specialized green shredded sprinkles, making your own edible grass is simple and fun! Add about ½ cup of shredded coconut to a sealable plastic bag. Drop in a few drops of green food coloring. Seal the bag and shake vigorously until the coconut is uniformly coated in green. This adds a lovely texture and flavor dimension.
- Secure Your Toppings: If your candy eggs or sprinkles aren’t staying put in the nests, a tiny dab of melted white chocolate works wonders as edible glue. Melt a small amount in the microwave in 15-second increments, stirring until smooth, then use a toothpick or small spoon to apply it.
- Don’t Overmix the Cereal: Once the cereal is added to the melted marshmallow, mix just until it’s evenly coated. Overmixing can break down the cereal, leading to a less crunchy treat.
- Allow Proper Setting Time: Give your nests at least 15-20 minutes to set up at room temperature. Rushing this step might result in nests that crumble or don’t hold their shape when removed from the molds. For quicker setting, you can place them in the refrigerator for about 10 minutes, but avoid leaving them in there for too long, as it can make them too hard.
Storage & Make-Ahead Options
These delightful Rice Krispie Easter Nests are wonderful for preparing in advance and storing, ensuring you have a fresh batch ready for your holiday celebrations. Proper storage is key to maintaining their delicious chewy texture.
- Storing at Room Temperature: Once fully decorated, your Easter Rice Krispie Nests should be stored in an airtight container at room temperature. This will keep them fresh, chewy, and delicious for approximately 3 days. To prevent them from sticking together, you can place a layer of wax paper or parchment paper between stacked nests if your container allows.
- Freezing for Longer Shelf Life: If you plan to make these treats well in advance or have leftovers, they can be frozen! For best results, freeze the nests *without* the toppings (sprinkles and candy eggs). Place the undecorated nests in an airtight freezer-safe container, separating layers with wax paper to prevent sticking. They can be frozen for up to 3 months. When you’re ready to serve, simply thaw them at room temperature for an hour or two, then add your fresh green sprinkles and candy eggs before serving.
- Tips for Optimal Freshness:
- Avoid refrigerating the finished treats for extended periods, as the cold can make them firm and lose their signature chewiness.
- Ensure the container is truly airtight to prevent them from drying out or absorbing external odors.
- If humidity is high, a tightly sealed container is even more important to maintain crispness.
Frequently Asked Questions (FAQs) About Rice Krispie Easter Nests
Here are answers to some common questions you might have about making these charming no-bake treats:
Can I use a muffin pan to mold the nests?
Absolutely, a muffin pan works wonderfully for shaping these nests! While I love using a mini bundt pan for its distinct ridge, both standard-sized and mini muffin pans are excellent alternatives. Small tart pans can also be utilized to create these fun Easter treats, giving you a slightly different shape. Just remember to grease any pan you choose thoroughly!
What are Mini Cadbury Eggs?
Mini Cadbury Eggs are delightful, candy-coated milk chocolate eggs that have become a beloved staple during the Easter season. Known for their vibrant pastel shells and creamy chocolate centers, they were traditionally only available around Easter. However, due to their immense popularity, they are now often sold during other holidays like Christmas and Thanksgiving, with varying colors to match the specific holiday theme. They’re a perfect festive chocolate addition!
Can I double the recipe?
Yes, you can easily double this recipe! If doubling, I recommend using a larger pot or dividing the mixture into two batches to ensure all the cereal gets evenly coated with the marshmallow mixture without becoming too cumbersome to stir.
How can I make these gluten-free?
Many popular puffed rice cereals are naturally gluten-free, but always check the label to ensure they are certified gluten-free. Most marshmallows are also gluten-free. As long as your cereal and any other additions (like sprinkles) are gluten-free, this recipe can easily be adapted.
My treats are too hard/too sticky, what happened?
If your treats are too hard, you might have cooked the marshmallows over too high a heat or for too long, causing them to become brittle when cooled. For sticky treats, you might not have used enough butter or allowed them enough time to set completely. Using fresh marshmallows and melting them low and slow is key for a perfectly chewy texture.
Can I make these treats vegan?
Yes, you can! Use a plant-based butter alternative and vegan marshmallows (many brands are available). Be sure to also check that your chosen candy eggs or other toppings are vegan-friendly.
Do You Love Fun Easter Desserts? Try These Recipes…
If you enjoyed making these adorable Rice Krispie Easter Nests, you’re in for a treat! Explore more of our favorite festive desserts that are perfect for your spring celebrations:
Easter
Easy Easter Bundt Cake Recipe
Easter
Fudgy Mini Egg Brownie Recipe
Easter
Easy Easter Chocolate Chip Cookies
Easter
Easy Caramel Easter Egg Brownies
Did you try this delightful recipe? We’d love to hear from you! Leave a ⭐️ review below and tag @practicallyhomemade on Pinterest!

Rice Krispie Easter Egg Nests
By: June Albertson-Dick
These adorable no-bake Rice Krispie treats are molded into charming nest shapes and topped with edible grass and colorful mini eggs, creating the perfect festive dessert for any Easter celebration.
Prep Time: 20 mins
Cook Time: 0 mins
Total Time: 20 mins
Servings: 12 servings
Rate Recipe
Print Recipe
Ingredients
Rice Krispie Treats
- 3 Tablespoons butter
- 10 ounces mini marshmallows (or 40 large marshmallows)
- 6 cups Rice Krispie Cereal
Toppings
- 36 Mini Cadbury Eggs
- Wilton Shredded Green Wafers (or other green sprinkles/coconut)
- 1 ounce white chocolate, melted (optional, for “glue”)
Instructions
- In a large saucepan, melt butter over medium-low heat. Once melted, add three-quarters of the mini marshmallows and stir continuously until they are completely melted and smooth. Remove the pan from the heat. Add the Rice Krispie Cereal and the remaining one-quarter of the mini marshmallows. Stir vigorously until the Krispies are completely coated. Note: The marshmallows added at the end are intended to remain partially unmelted, adding extra chewiness.
- Lightly spray each cavity of a mini bundt pan (or a muffin pan) with non-stick cooking spray. For easier handling, spray one side of a small Ziploc bag with cooking spray to use as a glove; this will prevent the sticky mixture from adhering to your hands. Divide the warm Krispie mixture evenly among the 12 prepared cavities and press down gently but firmly to form the nest shape, creating a depression in the center. Allow the Krispie treats to set for at least 15 minutes at room temperature. Then, use a butter knife or a thin spatula to carefully pop them out of the pan.
- Add a small amount of shredded green wafer sprinkles (or your chosen “grass” alternative) to the hollow center of each nest, pressing down slightly to help them stick. Next, place 2-3 Mini Cadbury Eggs on top of the green sprinkles in each nest. If the eggs are not staying in place, melt one ounce of white chocolate in the microwave (in 15-second intervals, stirring after each) and use a tiny dab of this melted chocolate on the bottom of each egg as edible “glue” before positioning them. Store the finished nests in an airtight container at room temperature for up to 3 days.
Notes
- A regular sized or mini muffin pan can also be used to make the Rice Krispie nests.
- Jelly beans, M&M candies, or other small chocolate eggs are great substitutes for the Mini Cadbury Eggs.
- To make edible green “grass” from coconut: Add 1/2 cup of shredded coconut to a zipper bag, along with a few drops of green food coloring. Shake until the coconut is evenly coated.
Nutrition
Serving: 1 serving, Calories: 182kcal, Carbohydrates: 34g, Protein: 2g, Fat: 5g, Saturated Fat: 3g, Polyunsaturated Fat: 0.2g, Monounsaturated Fat: 1g, Trans Fat: 0.1g, Cholesterol: 8mg, Sodium: 120mg, Potassium: 26mg, Fiber: 0.1g, Sugar: 18g, Vitamin A: 1027IU, Vitamin C: 9mg, Calcium: 13mg, Iron: 4mg
Nutrition information is automatically calculated and should only be used as an approximation. Values may vary based on specific ingredients and brands used.
Did you love this recipe? Share your thoughts below!