
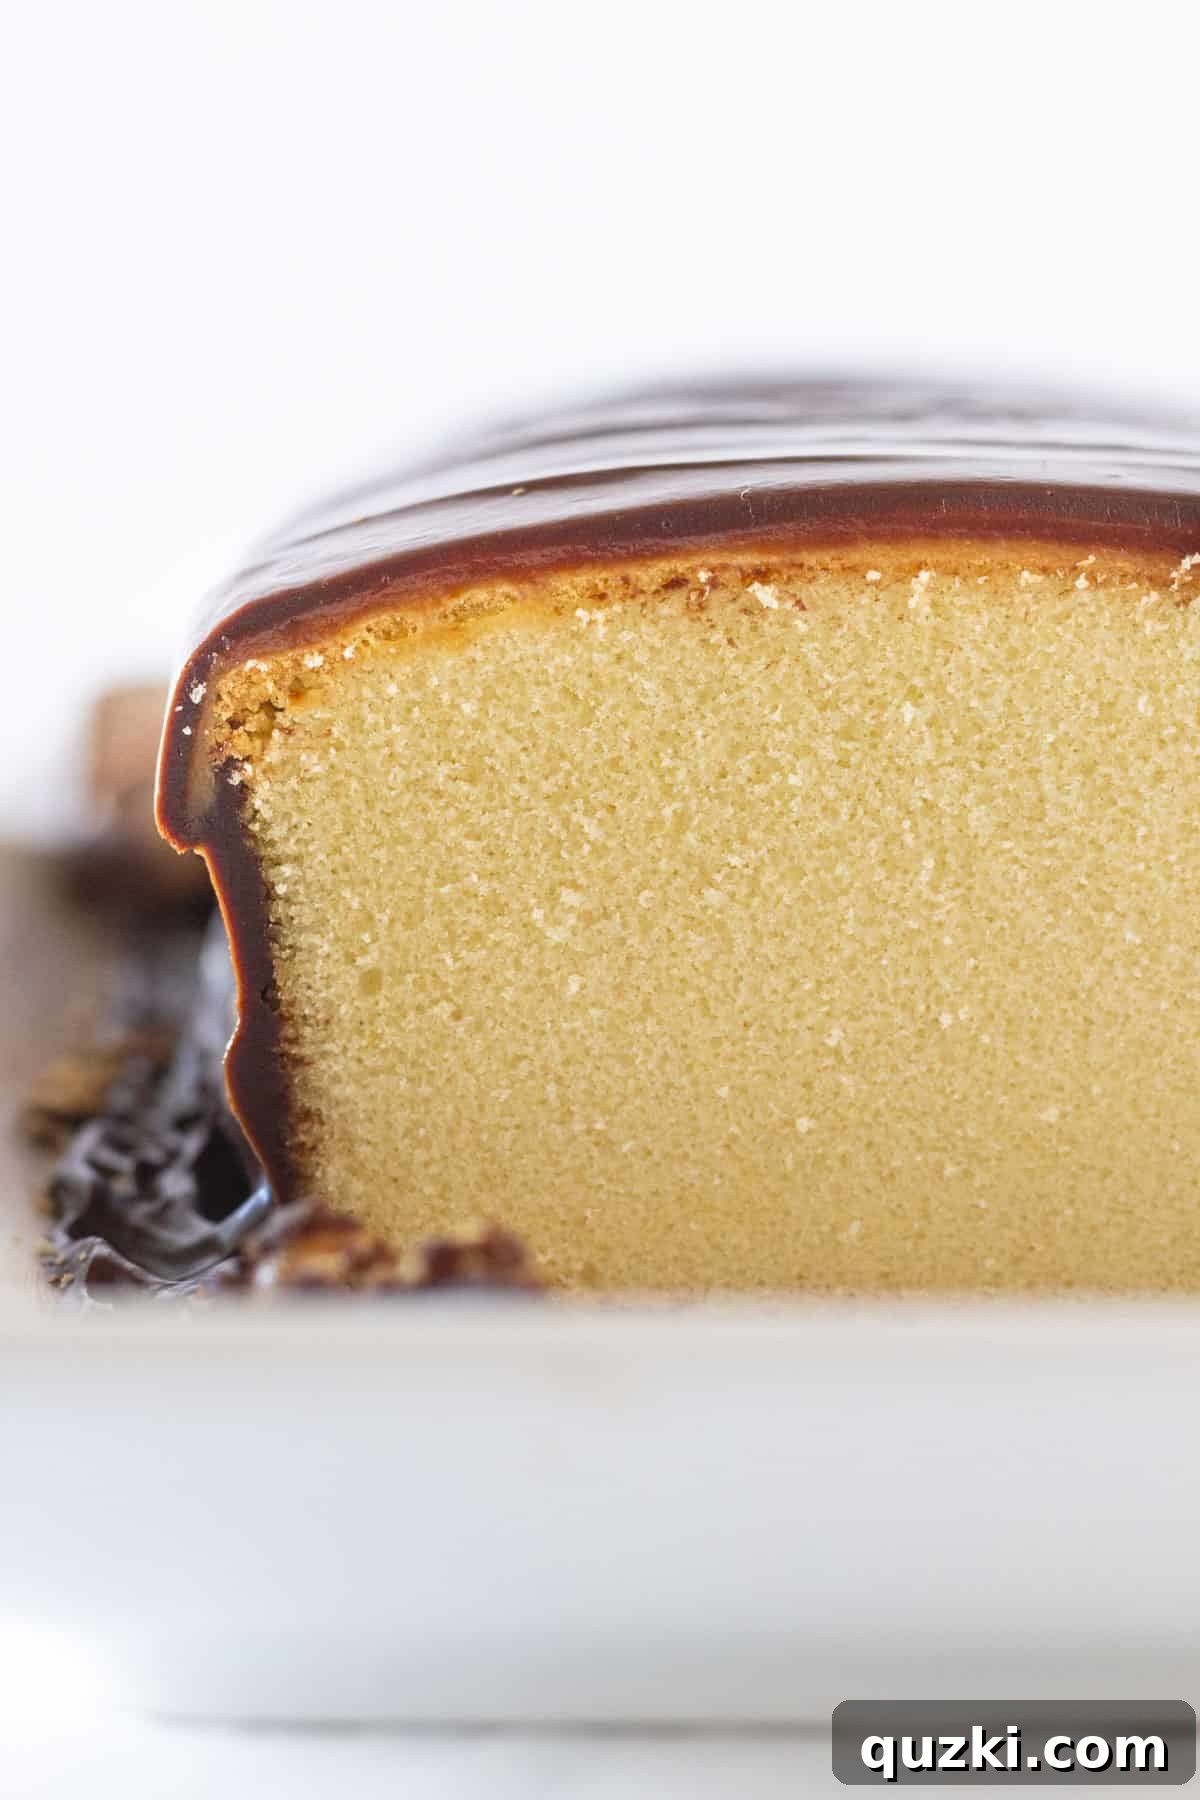
Indulge in the simplest, most satisfying dessert experience with this incredible no-bake Twix cake. Starting with a readily available store-bought pound cake, this recipe transforms ordinary into extraordinary with layers of homemade caramel sauce and a decadent chocolate ganache. The result is a symphony of flavors and textures that perfectly mimics your favorite Twix candy bar – crunchy biscuit (from the pound cake texture), chewy caramel, and smooth milk chocolate – all without ever turning on your oven!
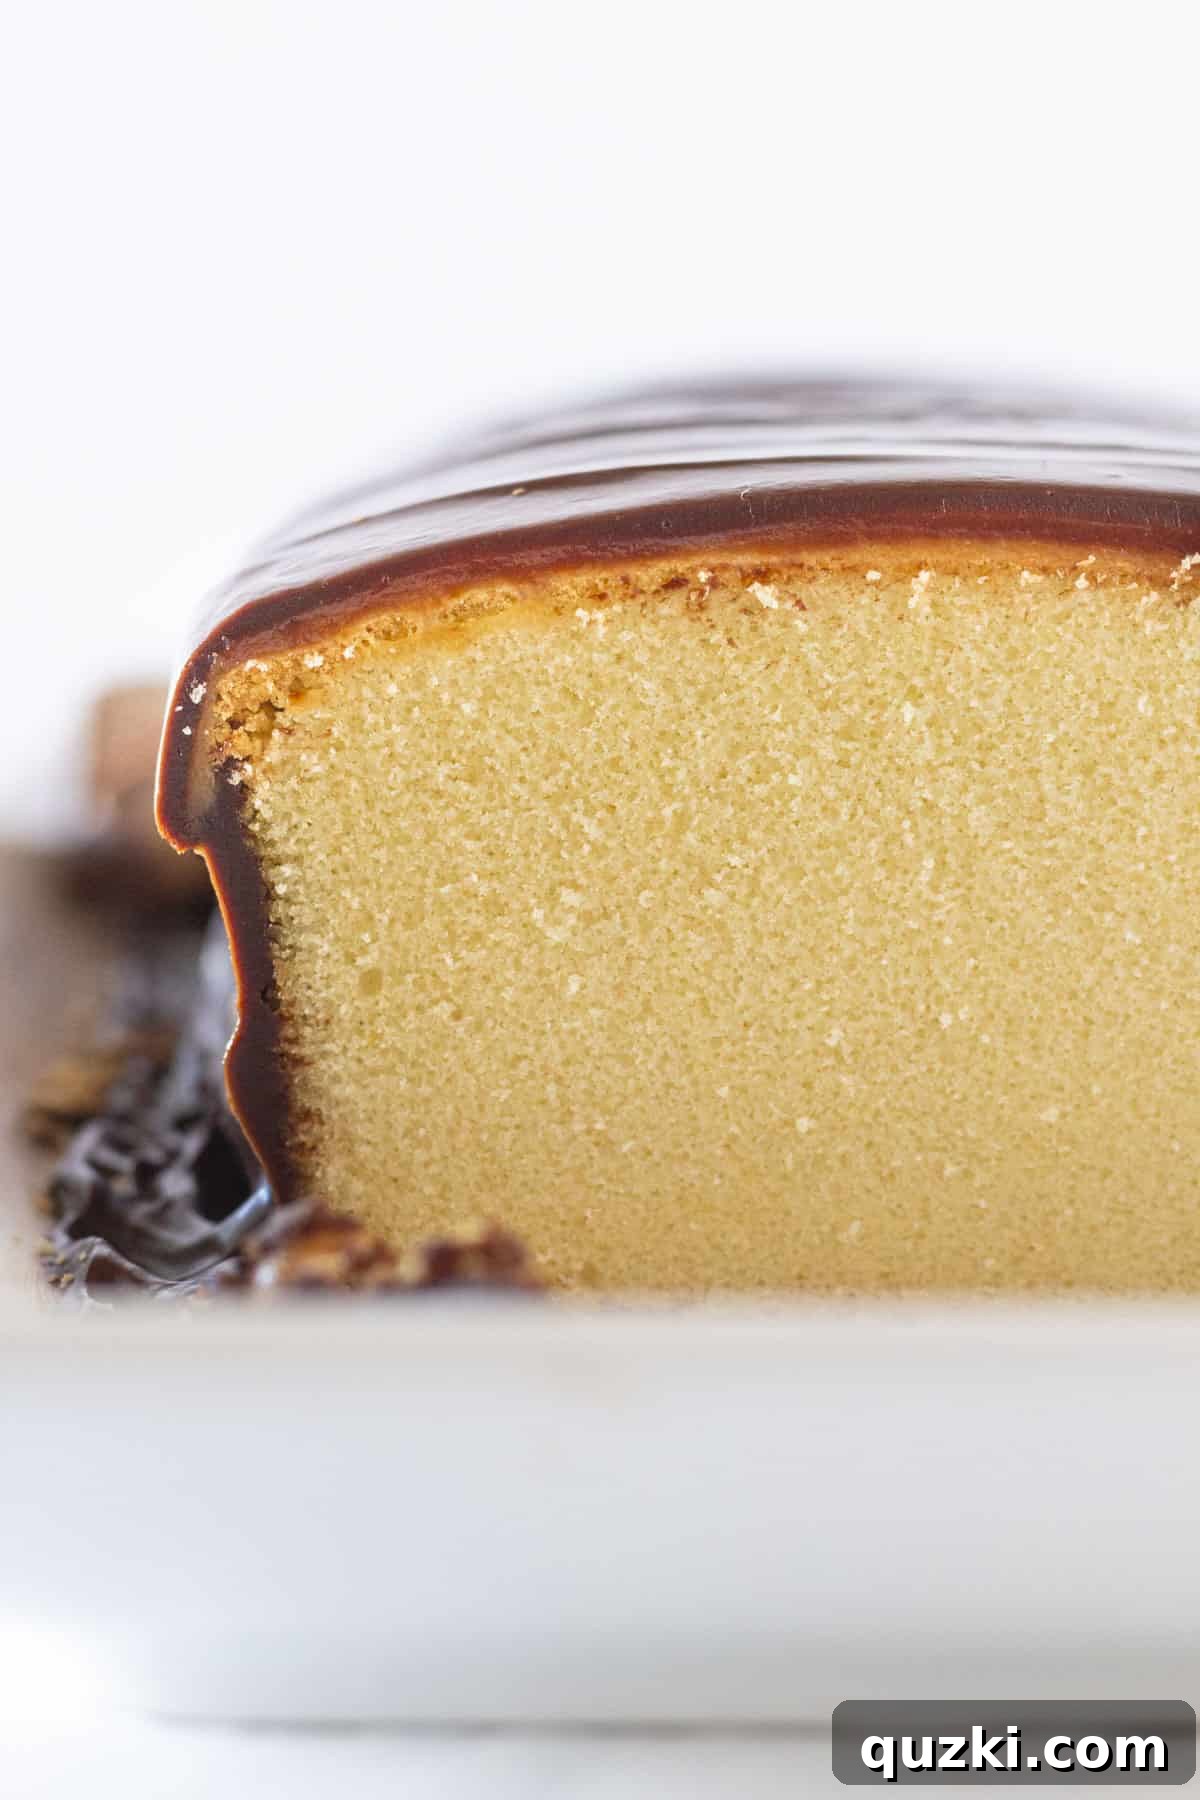
Table of Contents
- Why You’ll Love This No-Bake Twix Cake
- Essential Ingredients for Your Twix Cake
- Creative Variations to Customize Your Twix Cake
- Step-by-Step Guide to Making Your No-Bake Twix Pound Cake
- Expert Tips for a Perfect Twix Cake
- Storage and Freezing Recommendations
- Common Questions About Your Twix Cake
- More Irresistible No-Bake Dessert Recipes
- Easy No-Bake Twix Pound Cake Recipe
Forget complicated baking projects! With just four simple ingredients, this No-Bake Twix Cake is set to revolutionize your dessert game. It’s truly astonishing how effortlessly you can recreate the iconic flavors of your favorite candy bar in a decadent cake form, all thanks to the clever use of a pre-made pound cake. This recipe is a testament to how minimal effort can lead to maximum deliciousness.
There’s an abundance of reasons to adore this ultimate Twix Cake. While its incredible ease of preparation is certainly a major draw, it’s the spectacular final result that will genuinely impress. Each bite delivers that perfect balance of sweet caramel and rich chocolate, creating a dessert that feels luxurious yet comes together in minutes. It’s the ideal treat for impromptu gatherings, busy weeknights, or anytime a craving for something truly special strikes.
The secret to its simplicity lies in utilizing a frozen or fresh pound cake. This ingenious shortcut eliminates the need for measuring dry ingredients, wrestling with an electric mixer, or heating up your kitchen with the oven. All you require are a quality pound cake, a few pantry staples, and the convenience of a microwave. In hardly any time, you’ll have a beautifully layered, entirely new cake ready to delight everyone!
If you consider yourself a true Twix candy bar enthusiast, then this extraordinary cake recipe is an absolute must-try. Bursting with layers of luscious caramel and smooth milk chocolate, this almost-homemade Twix Cake is destined to become a cherished addition to your recipe collection. It offers all the beloved elements of a Twix bar, elevated into a stunning and remarkably easy-to-make dessert.
Why You’ll Love This No-Bake Twix Cake
This dessert isn’t just easy; it’s a triumph of flavor and convenience. Here’s why it deserves a spot in your recipe rotation:
- Effortless Preparation: No baking, no complex techniques, just simple layering.
- Minimal Ingredients: With only 4 core ingredients, grocery shopping is a breeze.
- Authentic Twix Flavor: The combination of pound cake, caramel, and chocolate truly mimics the beloved candy bar.
- Crowd-Pleaser: Everyone, from kids to adults, adores this familiar and comforting taste.
- Perfect for Any Occasion: Ideal for parties, potlucks, holidays, or a simple weeknight treat.
- Customizable: Easily adapt the recipe with various toppings or flavor additions.
Essential Ingredients for Your Twix Cake
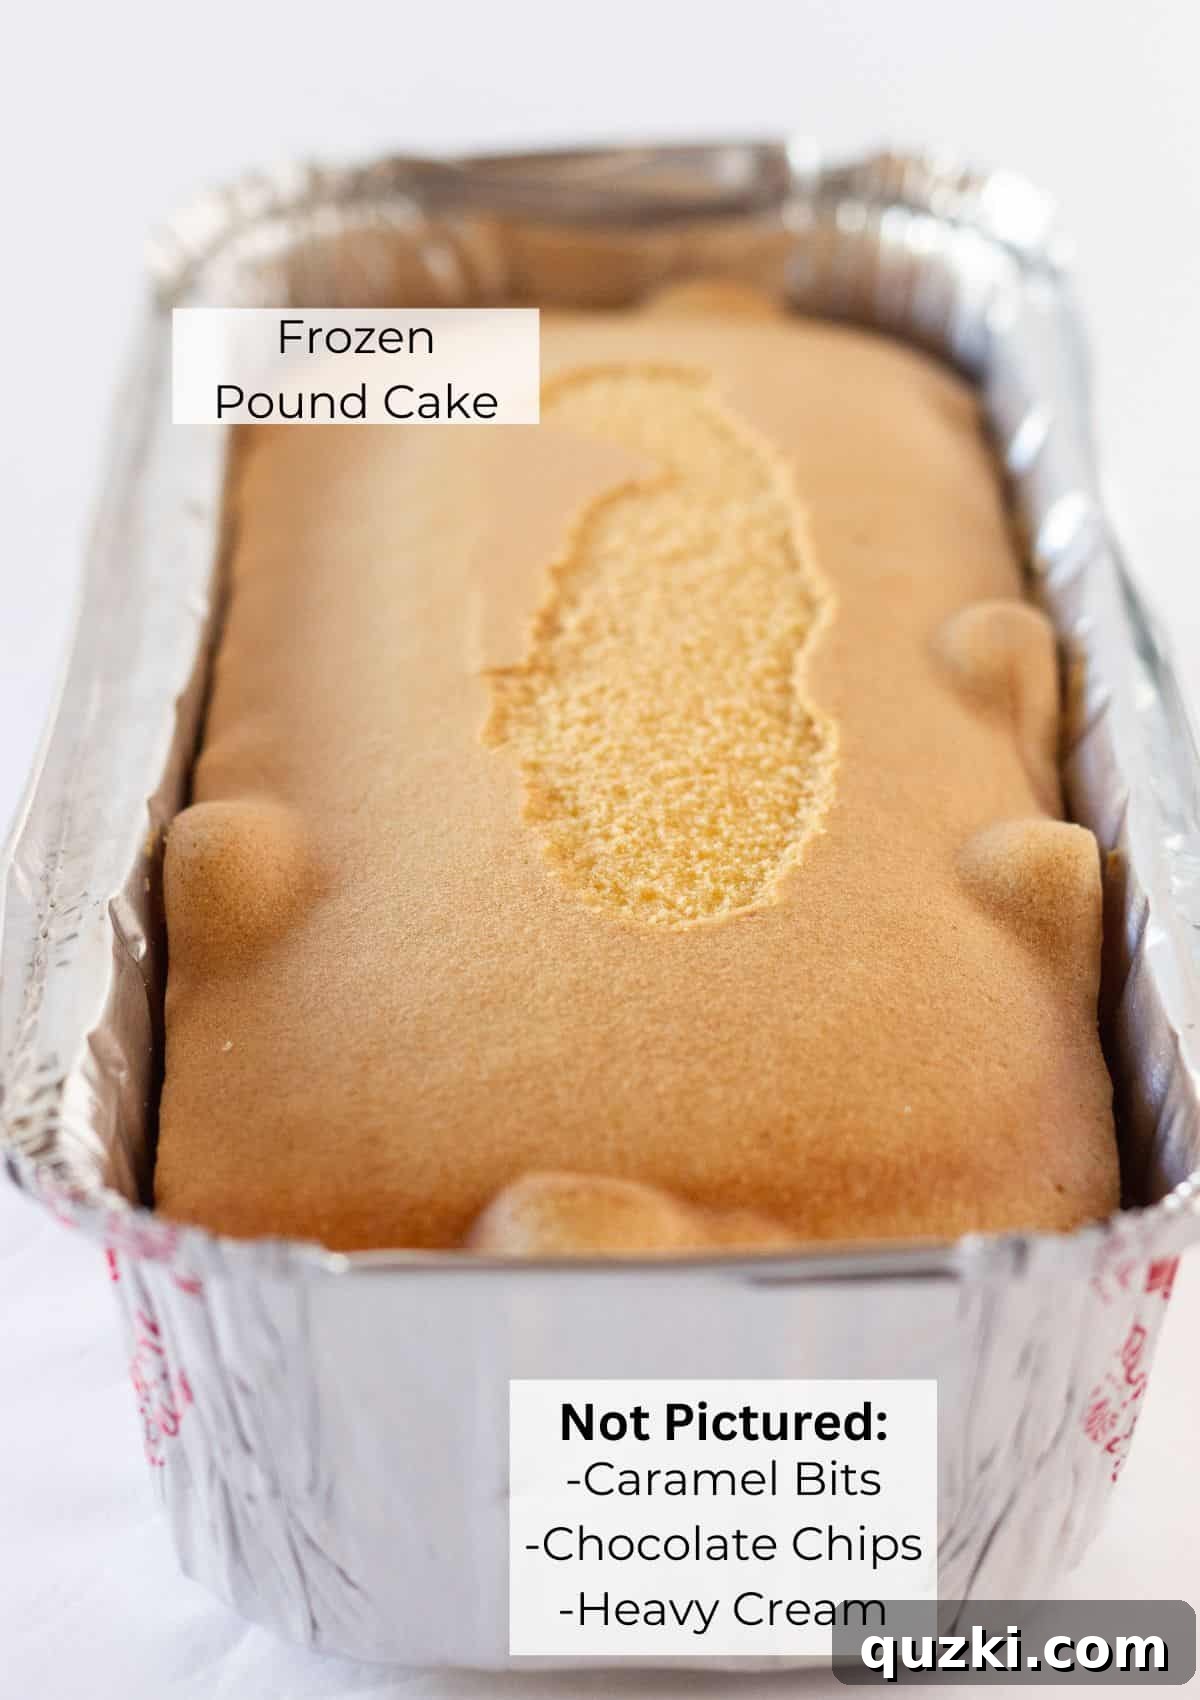
Creating this magnificent no-bake dessert requires just a handful of readily available ingredients, ensuring convenience without compromising on taste:
- Frozen or Fresh Pound Cake: The foundation of our Twix cake! I highly recommend opting for a quality butter pound cake from the freezer section of your local grocery store. Its dense, moist texture is crucial for holding up to the rich caramel and chocolate layers, creating that perfect “biscuit” like base reminiscent of a Twix bar. While a homemade pound cake or even a boxed caramel, vanilla, or chocolate cake mix baked into a pound cake shape can work, the store-bought frozen variety offers unparalleled convenience and consistent results. Ensure it’s thawed before assembly.
- Caramel Bits: These small, delightful morsels are a game-changer for melting caramel. Say goodbye to the tedious task of unwrapping individual caramels! Caramel bits melt incredibly quickly, often in under a minute in the microwave, delivering a smooth, pourable sauce perfect for coating your cake. Their convenience and consistent melting make them an ideal choice.
- Milk Chocolate Chips: To truly capture the authentic Twix experience, high-quality milk chocolate chips are essential for the top layer. When melted and combined with heavy cream, they form a luscious ganache that perfectly complements the rich caramel and provides that classic candy bar finish. The sweetness and creaminess of milk chocolate are key here.
- Heavy Cream: This vital ingredient is used in both the caramel and chocolate layers. When heated with the caramel bits, it helps create a beautifully smooth, flowing caramel sauce. Similarly, when whisked with melted chocolate chips, heavy cream transforms them into a glossy, pourable ganache, adding richness and preventing the chocolate from setting too hard.
For precise measurements and quantities, please refer to the detailed recipe card below.
Creative Variations to Customize Your Twix Cake
While the classic No-Bake Twix Cake is utterly delicious on its own, don’t hesitate to get creative with these delightful variations to make it uniquely yours:
- Elevate with Extra Twix Candy Bars: For the ultimate candy bar experience, roughly chop a few extra Twix bars and generously sprinkle them over the finished chocolate ganache before it sets. This adds an incredible crunch, extra chocolate and caramel pockets, and an undeniable “wow” factor, amplifying the Twix flavor in every single bite.
- Transform into a Poke Cake: Give this delicious cake an extra dimension of caramel goodness by turning it into a poke cake! After placing the pound cake on your serving tray, use the back of a wooden spoon or a skewer to poke holes across the top surface, about an inch apart. Pour the warm caramel sauce slowly over the cake, allowing it to seep into these delightful pockets before spreading the excess evenly over the entire top. This ensures every slice is infused with deep, gooey caramel.
- Experiment with Pudding or Frosting: If you prefer a different chocolate topping, consider using instant chocolate pudding or a store-bought chocolate frosting instead of the homemade ganache. Simply prepare the pudding according to package directions or soften the frosting slightly, then spread it over the caramel layer. This offers a quicker alternative with a slightly different texture profile.
- Add a Shortbread Cookie Crunch: To truly enhance the “biscuit” component of a Twix bar, create shortbread cookie crumbs! Simply pulse your favorite shortbread cookies in a food processor until finely crushed. Sprinkle these crumbs generously over the freshly poured milk chocolate ganache before it has a chance to set. This creates a delightful crunchy shortbread crust that perfectly complements the other layers.
- Introduce a Salty-Sweet Twist: For those who adore the salted caramel trend, a pinch of flaky sea salt can elevate this dessert. Sprinkle a quarter to a half teaspoon of flaky sea salt over the caramel layer immediately after pouring it onto the cake, or even over the finished chocolate ganache. The subtle saltiness beautifully cuts through the sweetness, balancing the rich flavors.
- Nutty Additions: Consider adding a sprinkle of finely chopped pecans, walnuts, or peanuts over the chocolate layer for an extra layer of texture and flavor. Toasted nuts would provide an even deeper, aromatic crunch.
Step-by-Step Guide to Making Your No-Bake Twix Pound Cake
Get ready for a remarkably simple process that yields an absolutely show-stopping dessert. Follow these easy steps to create your perfect No-Bake Twix Cake:
- Prepare Your Pound Cake: First, gently remove your thawed pound cake from its packaging. If it came in a foil pan, carefully slide it out. Place the pound cake directly onto your chosen serving tray, platter, or a cutting board. Ensure it’s centered and stable, as this will be its home until serving.
- Create the Luscious Caramel Layer: In a microwave-safe bowl, combine your caramel bits and the specified amount of heavy cream. Microwave this mixture in short 30-second bursts. After each interval, stir thoroughly with a spoon or spatula. Continue this process until the caramel bits are completely melted and the mixture is wonderfully smooth and easily pourable. Typically, this takes less than a minute, but microwave wattages vary, so keep a close eye on it. The goal is a consistent, flowing caramel sauce.
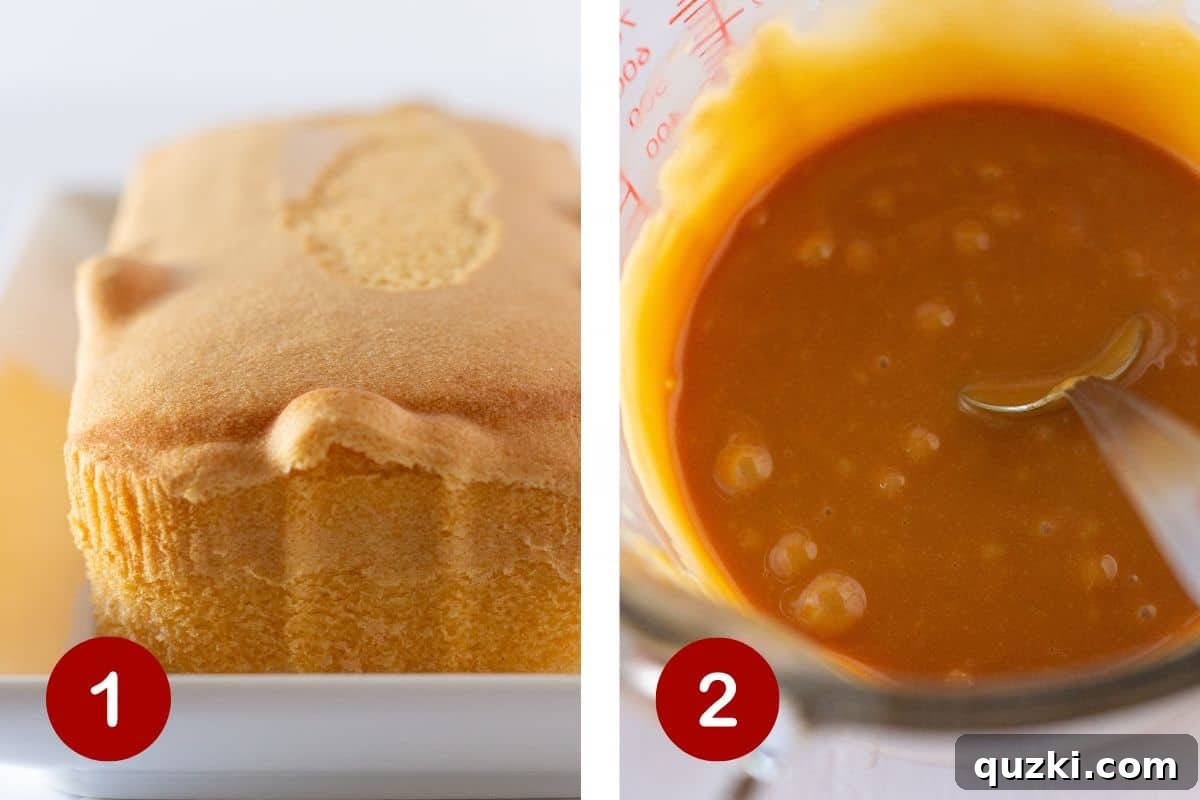
- Pour and Spread the Caramel: Once your caramel sauce is ready, immediately pour it over the top surface of the pound cake. Using an offset spatula or the back of a spoon, gently and evenly spread the caramel across the entire top. Work quickly as caramel can begin to set as it cools. Don’t worry if some caramel drips down the sides; it adds to the homemade charm!
- Prepare the Decadent Chocolate Ganache: In a separate microwave-safe bowl, combine your milk chocolate chips and the remaining heavy cream. Just like with the caramel, microwave in 30-second increments. After the first 30 seconds, remove and whisk vigorously. The chocolate chips may not look fully melted yet, but the whisking helps distribute the heat and encourages them to melt into the warm cream. Continue microwaving in short bursts and whisking until you achieve a thick, smooth, and glossy chocolate ganache that is easily pourable.
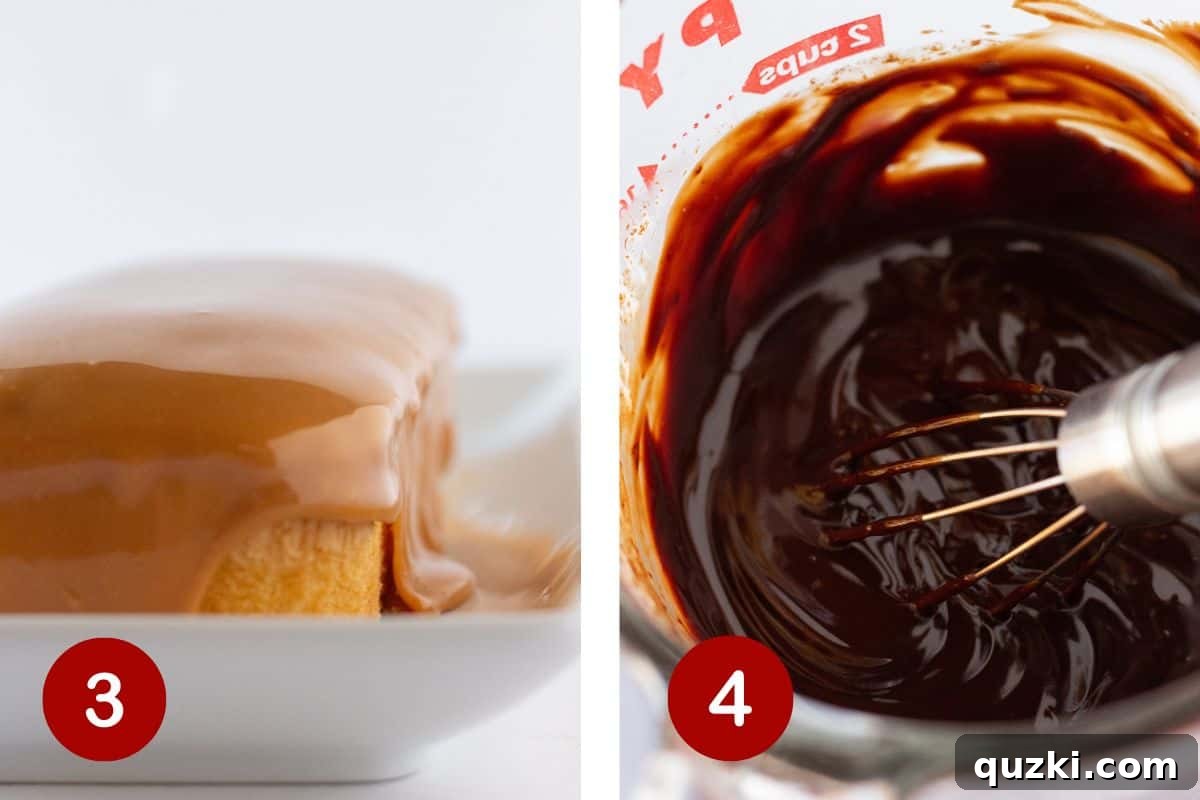
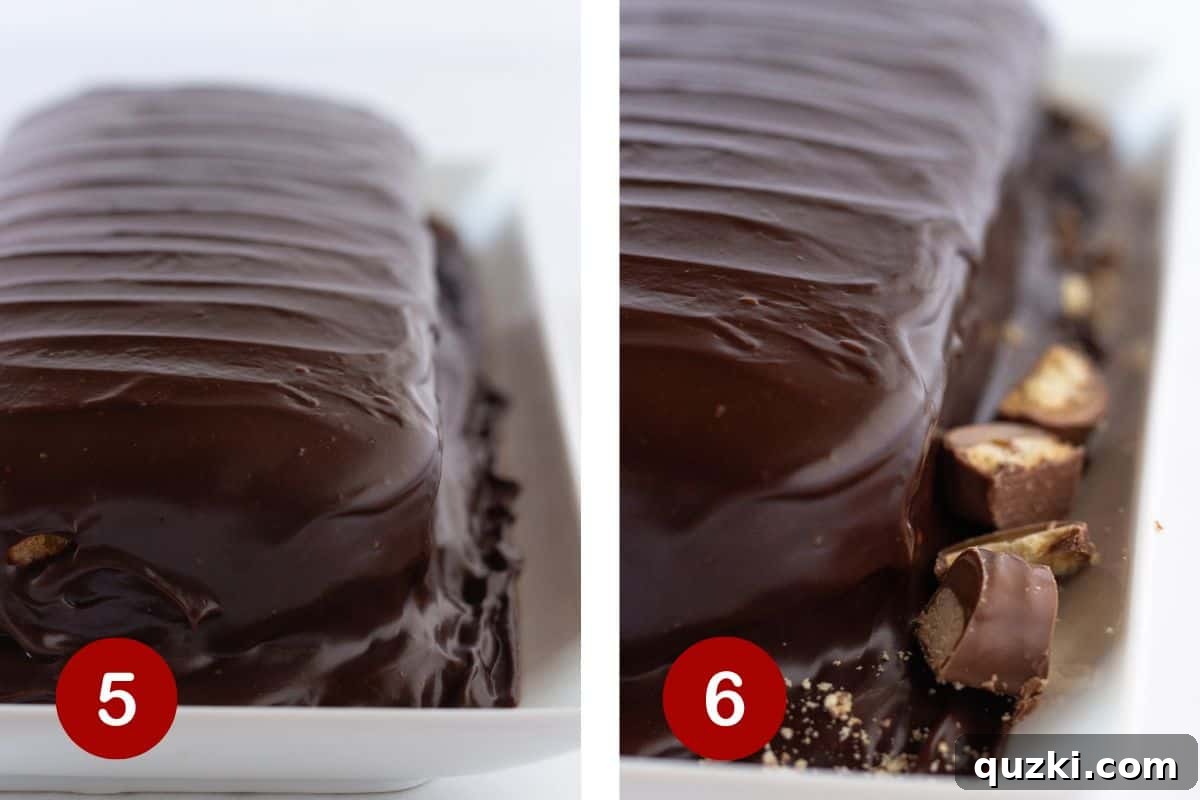
- Layer with Chocolate and Chill: Carefully pour the freshly made chocolate ganache over the caramel layer on top of the pound cake. Use your offset spatula to gently spread it into an even, consistent layer. Allow some of the ganache to gracefully drip down the sides of the cake, creating an appealing, rustic look. Once layered, place the entire cake in the refrigerator for at least 1 hour. This crucial step allows both the caramel and chocolate to properly set, making for cleaner slices and a firmer texture.
- Garnish and Serve: Before serving, for an extra touch of Twix authenticity and visual appeal, you can finely chop a couple of additional Twix bars. Arrange these chopped candy pieces artfully around the base or on top of the finished cake. Slice with a sharp, serrated knife for clean cuts, and serve chilled. Enjoy your incredibly easy and delicious No-Bake Twix Cake!
Expert Tips for a Perfect Twix Cake
Achieve an absolutely flawless No-Bake Twix Cake every time with these valuable insights and professional tricks:
- Embrace Caramel Bits for Efficiency: Using caramel bits is not just a time-saver, it’s a genius hack! The biggest advantage is completely bypassing the laborious task of unwrapping individual caramels. Beyond that, their smaller size means they melt significantly faster and more evenly in the microwave, resulting in a perfectly smooth, lump-free caramel sauce every single time.
- Craving Salted Caramel? If your palate delights in the sophisticated balance of sweet and salty, a simple addition can transform your cake. Stir in a 1/2 teaspoon of flaky sea salt directly into your melted caramel mixture just before pouring it over the cake. This subtle enhancement will cut through the sweetness and add a delightful dimension of flavor that elevates the entire dessert.
- Mastering Microwave Chocolate Ganache: Crafting a gorgeous chocolate ganache in the microwave is surprisingly simple, but a few key steps ensure success. For the best results, always microwave your chocolate chips and heavy cream in short intervals of 20-30 seconds. Crucially, whisk vigorously after each interval. This gentle, consistent stirring helps to emulsify the chocolate and cream, creating that coveted smooth, glossy, and perfectly pourable ganache without any burning or seizing.
- The Importance of Chilling: Patience is a virtue, especially when it comes to setting this cake. Be sure to refrigerate the assembled cake for a minimum of one hour, though two hours or more is even better if time allows. This critical chilling period enables both the caramel and chocolate layers to firm up properly. The result? Beautifully distinct layers and clean, neat slices when you go to serve your masterpiece, preventing any messy slumping.
- Room Temperature for Optimal Cake: While the pound cake can be thawed from frozen, aim for it to be at room temperature when you begin assembling. A room-temperature cake will absorb a small amount of the caramel and chocolate, creating a slightly more cohesive dessert, and the toppings will spread more smoothly.
- Precision with an Offset Spatula: An offset spatula is your best friend for spreading the caramel and chocolate layers evenly. Its angled blade makes it easy to smooth out the toppings without disturbing the delicate pound cake beneath, ensuring a professional-looking finish.
Storage and Freezing Recommendations
To keep your No-Bake Twix Cake tasting fresh and delicious, proper storage is key:
Store: The absolute best way to store this delectable No-Bake Twix Cake is within an airtight container in the refrigerator. This method prevents the cake from drying out and helps maintain the integrity of the caramel and chocolate layers. If you notice that the caramel has become a bit firmer than you prefer after refrigeration, simply take the cake out of the fridge about 10-15 minutes before serving. This brief period at room temperature will soften the caramel slightly, bringing it back to that perfect chewy consistency. When stored correctly, your cake should remain fresh and enjoyable for 4-5 days.
Freeze: As this recipe typically utilizes a thawed frozen pound cake as its base, I generally do not recommend freezing the assembled dessert. Freezing a second time, especially with the delicate caramel and chocolate layers, can alter the texture of the cake and make the caramel grainy or overly hard upon thawing. For the best experience, enjoy this delightful cake fresh from the refrigerator within its recommended storage period.
Common Questions About Your Twix Cake
Absolutely! If you have a tried-and-true homemade pound cake recipe that you love, feel free to use it. The primary reason for recommending a frozen store-bought pound cake is its unparalleled convenience, allowing this to be a truly no-bake dessert. Frozen pound cakes also tend to have a wonderfully dense texture, which is ideal for supporting the weight and richness of the heavy caramel and chocolate layers without becoming soggy or crumbling. They are incredibly easy to find, typically located in the freezer section alongside other frozen desserts, often packaged in a convenient foil pan.
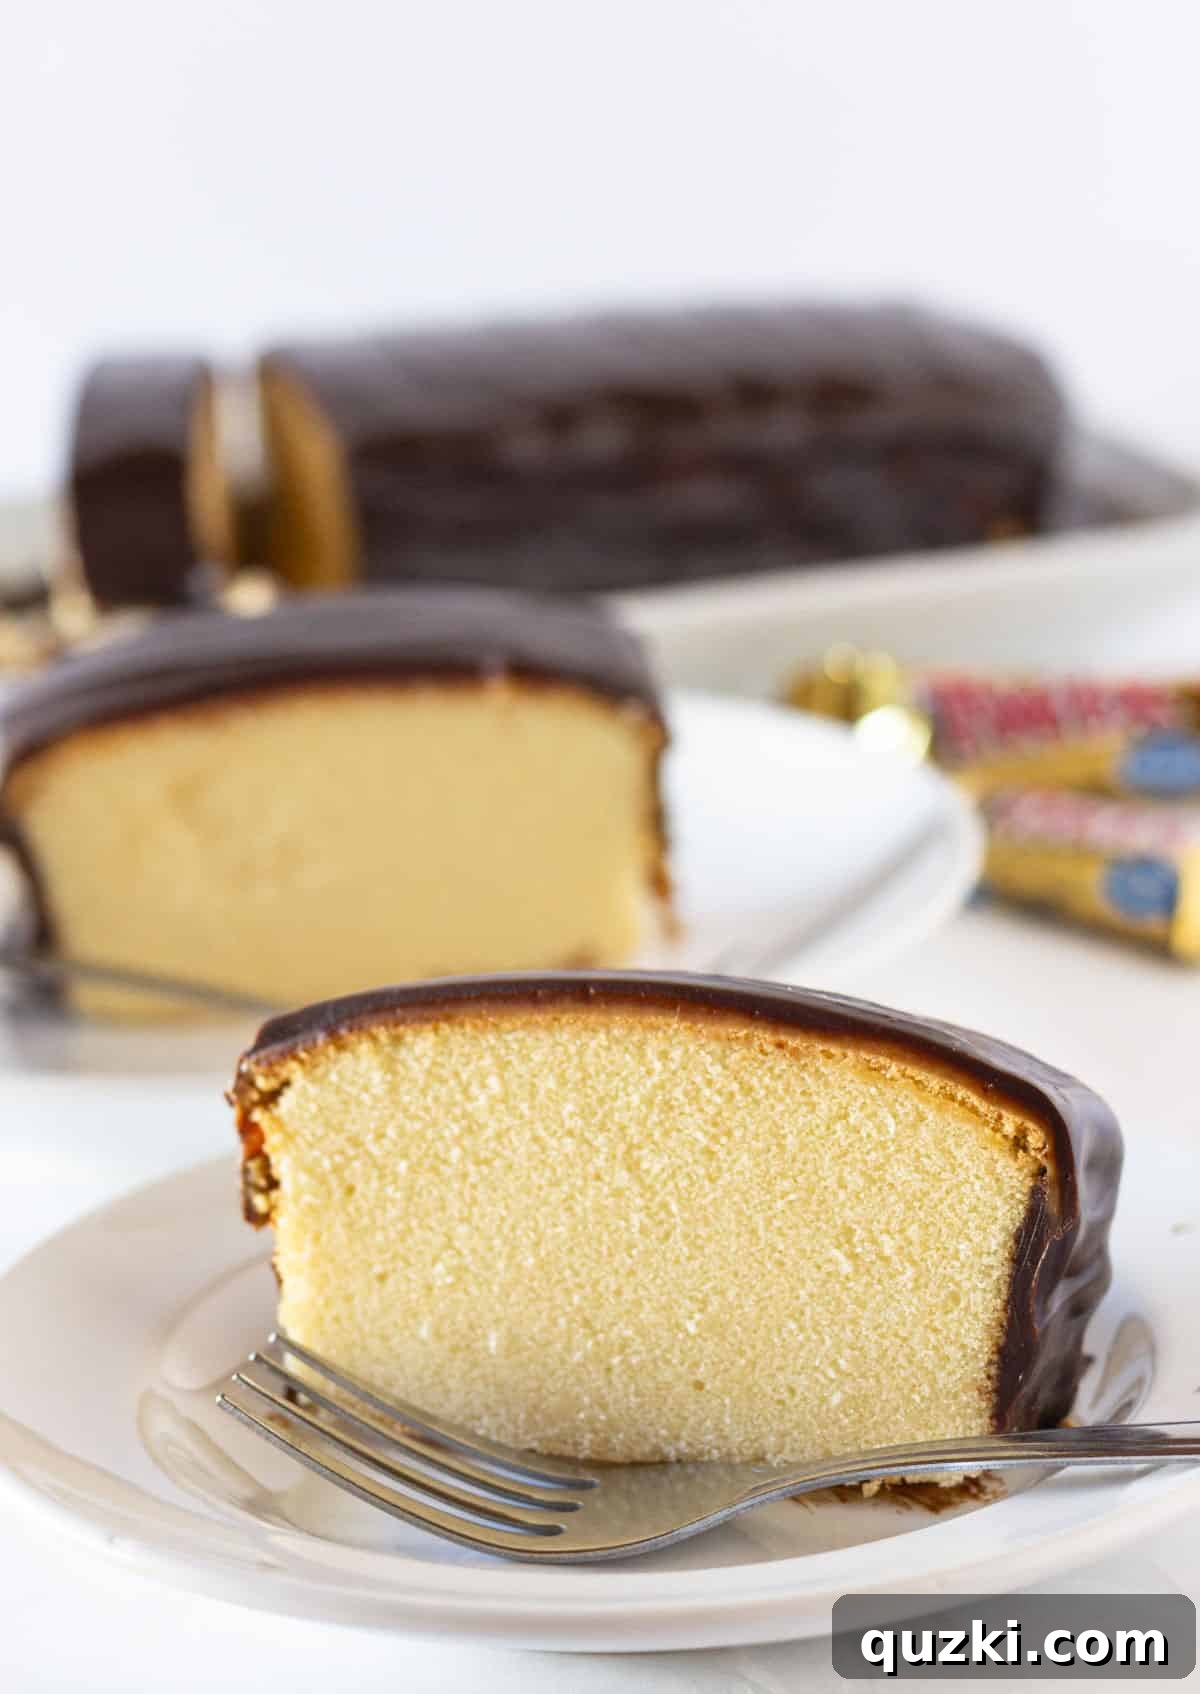
Serving this quick and easy no-bake dessert is surprisingly simple, especially if you follow one crucial step. After allowing the cake at least one hour (preferably longer) in the refrigerator to fully set, use a sharp serrated knife to cut slices to your desired thickness. A serrated knife works best for gliding through the layers without squishing them. For extra clean cuts, wipe your knife with a warm, damp cloth between each slice. This cake is absolutely wonderful on its own, but it also pairs beautifully with a scoop of creamy vanilla ice cream, a dollop of freshly whipped cream, or even a sprinkle of extra Twix pieces for added indulgence. The key is ensuring that hour of refrigeration; it’s what guarantees those clean, beautiful slices every time.
Yes, this No-Bake Twix Cake is an excellent make-ahead dessert, which is one of its many charms! You can fully assemble the cake, including both the caramel and chocolate layers, up to 2-3 days in advance. Simply cover it tightly with plastic wrap or place it in an airtight container and store it in the refrigerator. In fact, making it a day ahead often allows the flavors to meld and the layers to set even more perfectly, resulting in an even more delicious and stable cake for serving.
Achieving the right consistency for your caramel and chocolate ganache is important. If your caramel mixture seems too thick after melting, add heavy cream one teaspoon at a time and microwave for 10-15 seconds, stirring until it reaches a pourable consistency. If it’s too thin, unfortunately, it’s harder to thicken without more caramel bits, but it will still taste great, just be a bit messier. For the chocolate ganache, if it’s too thick, add a tiny bit more warm heavy cream (half a teaspoon) and stir well. If it’s too thin, letting it sit for a few minutes at room temperature or in the fridge for 5-10 minutes can help it thicken slightly before pouring.
More Irresistible No-Bake Dessert Recipes
If you’ve fallen in love with the ease and deliciousness of this No-Bake Twix Cake, you’re in for a treat! There’s a whole world of simple, oven-free desserts waiting to be discovered. Here are some more fantastic no-bake recipes to satisfy your sweet tooth and keep your kitchen cool:
Discover More Easy No-Bake Treats
Desserts
No Bake Strawberry Crunch Strawberries
Pies
The Best Easy No Bake Peanut Butter Pie
Cheesecakes
The Best No Bake Cherry Cheesecake
Desserts
Easy Pecan Pie No Bake Cheesecake
Did you try this recipe?
Leave a ★ review below and tag @practicallyhomemade on Pinterest!
Easy No-Bake Twix Pound Cake Recipe
Ingredients
- 16 ounce thawed pound cake , {or a fresh pound cake from the bakery section}
Caramel Layer
- 1 cup caramel bits , {or individual caramels}
- 2 Tablespoons heavy whipping cream
Chocolate Layer
- 1 cup milk chocolate chips
- ½ cup heavy whipping cream
Instructions
-
Begin by removing the thawed frozen pound cake from its packaging and carefully placing it onto your desired serving plate or platter. Ensure it is stable and centered.
Caramel Layer
-
In a microwave-safe bowl, combine the caramel bits and 2 tablespoons of heavy cream. Microwave in 30-second increments, stirring thoroughly after each interval, until the caramel is completely melted and beautifully smooth. Promptly pour the warm caramel over the top of the pound cake. Using an offset spatula or the back of a spoon, gently spread it out to create an even layer, allowing some to drip gracefully over the sides if desired.
Chocolate Layer
-
Combine the milk chocolate chips and ½ cup heavy whipping cream in another microwave-safe bowl. Microwave in 30-second increments, whisking well after each, until the chocolate chips have completely melted into the cream, forming a thick, smooth, and glossy ganache. Pour this luscious chocolate mixture over the set caramel layer and spread evenly, allowing it to naturally drip over the sides of the cake, creating an appealing outer coating for your Twix Cake.
-
Refrigerate the cake for at least 1 hour to allow both the caramel and chocolate layers to fully set. Once chilled, slice and serve. Cover any leftovers and store them in the refrigerator for up to 4 days.
Notes
- Crafting a perfect chocolate ganache in the microwave is straightforward. For optimal results, heat your mixture in brief 20-30 second intervals, ensuring you whisk thoroughly after each. This technique helps achieve a beautifully smooth and glossy melted chocolate without overheating.
- It’s essential to refrigerate the cake for at least one hour before serving. This crucial chilling time allows both the caramel and chocolate layers to firm up properly, which in turn facilitates neat, clean, and elegant slices when you’re ready to present your dessert.
- Consider adding a small pinch of flaky sea salt to the caramel layer if you enjoy a salted caramel flavor. This subtle addition beautifully balances the sweetness of the dessert.
- Ensure your pound cake is completely thawed and at room temperature before beginning assembly. This helps the toppings spread more smoothly and integrate better with the cake.
Nutrition
Nutrition information is automatically calculated, so should only be used as an approximation.