

Spooktacularly Easy: No-Mixer Halloween Chocolate Chip Cookies
Halloween is the perfect excuse to dive into ghoulishly good treats, and these Creepy Halloween Chocolate Chip Cookies are truly spellbinding! What makes them even better? They start with melted butter, eliminating the need for a mixer and making them incredibly quick to whip up. Perfect for busy ghouls and goblins!
Did you know that the humble chocolate chip cookie holds the title of the world’s most popular cookie? It’s no wonder that festive variations, like these frightfully fun Halloween cookies, become instant hits! If you love celebrating with themed treats, be sure to also try our Valentine Chocolate Chip Cookies and Easter Chocolate Chip Cookies for other holidays.

Quick Recipe Overview
- Recipe Name: Halloween Chocolate Chip Cookies
- Prep Time: 10 minutes
- Cook Time: 8-10 minutes per batch
- Yields: Approximately 20 cookies
- Signature Halloween Touches: Vibrant orange M&M’s or Reese’s Pieces and whimsical Edible Eyeballs.
READER REVIEW: Amy, a Halloween party host, raves, “Everyone loves a good chocolate chip cookie, so I knew these would be a monstrous hit at my Halloween party!” ⭐️⭐️⭐️⭐️⭐️
Table of Contents
- Quick Recipe Overview
- Key Ingredients for Spooky Cookies
- Creative Add-In Variations
- Step-by-Step: Crafting Your Creepy Cookies
- Baking Secrets: Expert Tips for Success
- Storage and Freezing Guidelines
- Frequently Asked Questions
- More Halloween Dessert Inspirations
- Printable Spooky Halloween Chocolate Chip Cookies Recipe Card
Key Ingredients for Spooky Cookies
Creating these delightful Halloween chocolate chip cookies relies on a few core ingredients, each playing a vital role in achieving that perfect chewy texture and festive appearance. The beauty of this recipe lies in its simplicity and the clever use of melted butter, which means you won’t even need to pull out your electric mixer!
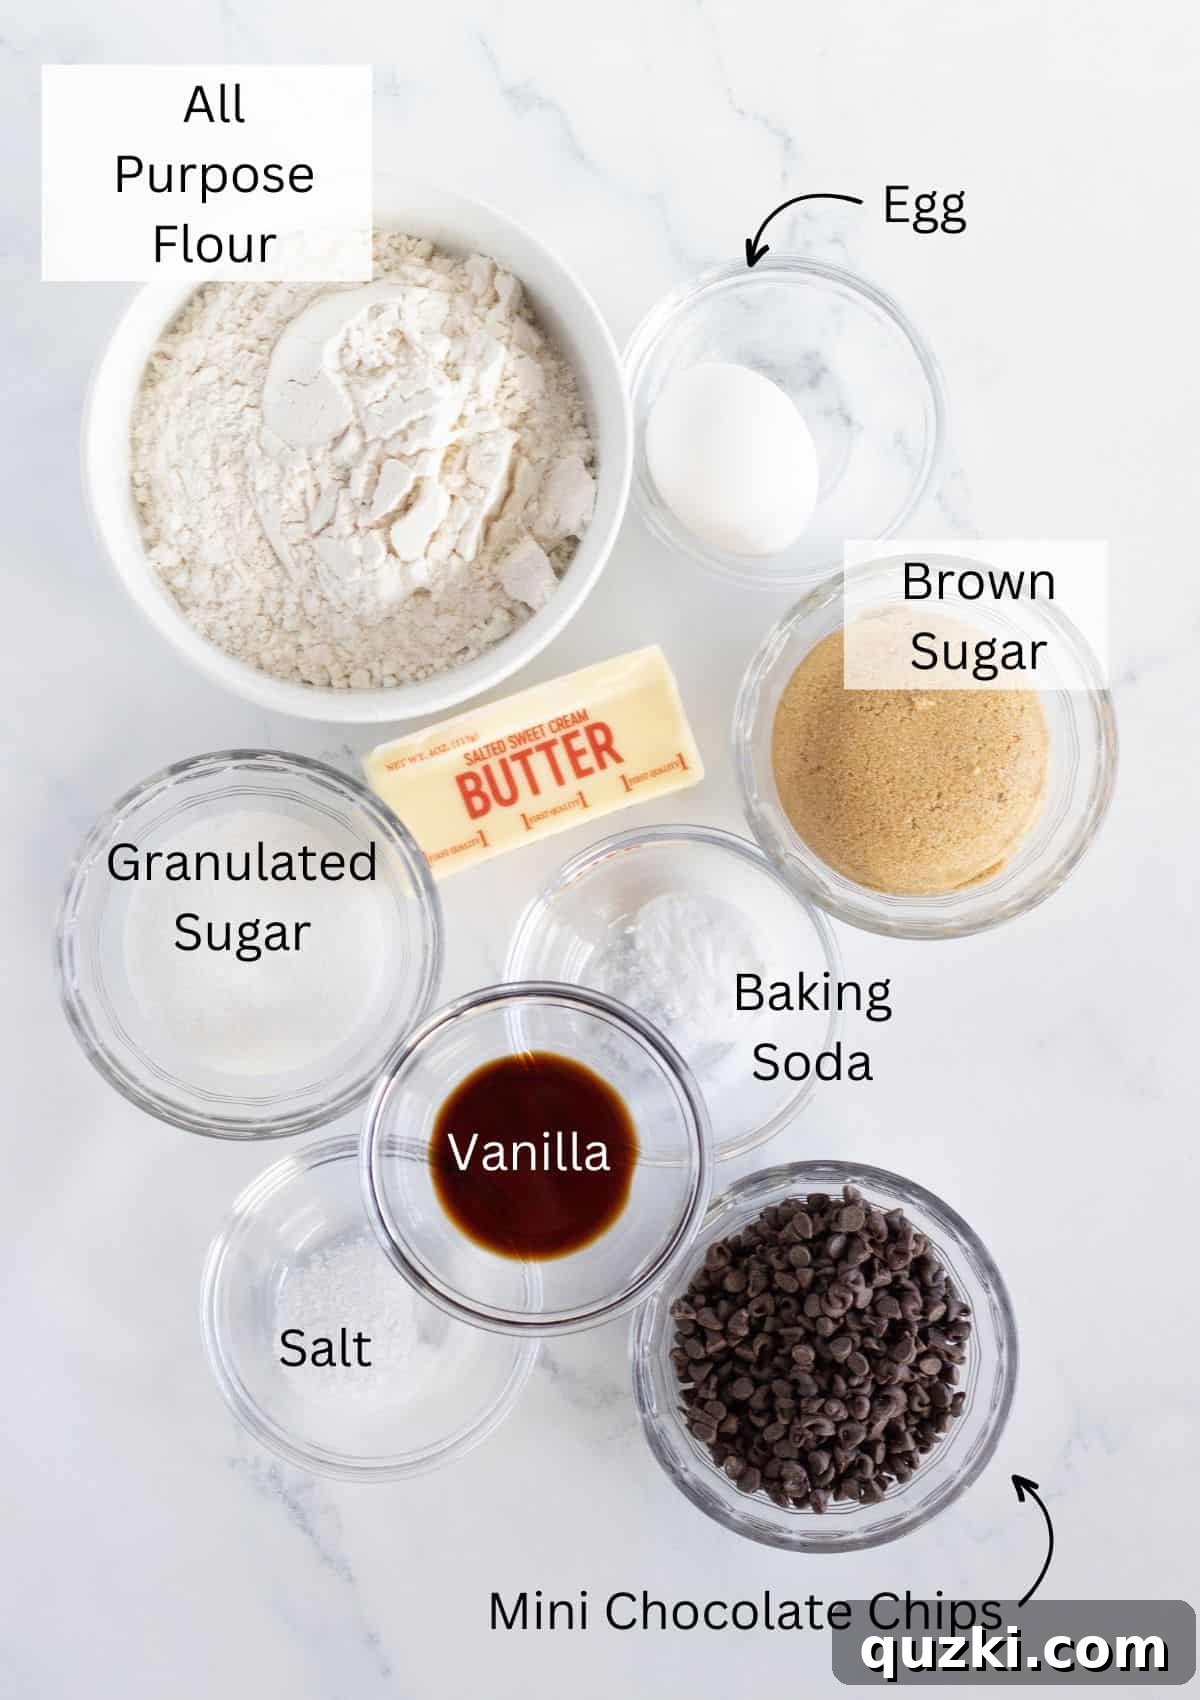
- Butter: Opting for melted butter is the secret behind our no-mixer method. It makes the dough incredibly easy to combine by hand, ensuring a quick and hassle-free preparation. Melted butter also contributes to a wonderfully chewy cookie texture.
- Brown Sugar: We use a higher ratio of brown sugar to white sugar here. This isn’t just a preference; brown sugar introduces moisture and a rich, molasses-like flavor, which is key to achieving those irresistibly soft and chewy centers that everyone loves in a chocolate chip cookie.
- Granulated Sugar: While brown sugar provides chewiness, a touch of granulated sugar ensures the cookies have a crisp edge and helps with spreading just enough to achieve that classic cookie shape.
- Mini Chocolate Chips: While any chocolate chips work, mini chocolate chips are my personal favorite for these cookies as they distribute more evenly throughout the dough, ensuring a chocolatey bite in every mouthful. Feel free to experiment with dark chocolate chips, milk chocolate chips, or even white chocolate chips for a different flavor profile.
- Orange Candy-Coated Chocolates: This is where the Halloween magic truly begins! Using chopped orange Reese’s Pieces or M&M’s not only infuses a burst of vibrant seasonal color but also adds a delightful crunch and extra sweetness.
- Candy Eyeballs: The pièce de résistance for creating genuinely creepy and adorable cookies! These edible googly eyes transform ordinary cookies into whimsical monsters, adding a playful, spooky touch that makes them perfect for Halloween parties.
- Vanilla Extract: A staple in almost any cookie recipe, vanilla extract enhances all the other flavors, adding a warm, aromatic depth that makes these cookies taste truly homemade.
- Egg: Acts as a binder, holding all the ingredients together and contributing to the cookie’s structure and richness.
- All-Purpose Flour: The primary dry ingredient, providing the structure for our cookies.
- Baking Soda: This leavening agent helps the cookies rise slightly and spread, ensuring they don’t turn out too dense.
- Salt: A pinch of salt is crucial for balancing the sweetness and enhancing the overall flavor of the chocolate.
For a complete list of precise quantities, please refer to the detailed recipe card at the end of this article.
Creative Add-In Variations
While our classic Halloween Chocolate Chip Cookies are fantastic as is, don’t hesitate to unleash your inner mad scientist and experiment with different add-ins to customize your spooky treats! The base recipe is incredibly versatile, making it easy to swap out ingredients for new flavors and textures.
- Peanut Butter & Candy Corn: For a delightful twist, consider replacing the mini chocolate chips with creamy peanut butter chips and mixing in festive candy corn instead of orange M&M’s or Reese’s Pieces. This combination offers a unique nutty flavor profile that’s perfect for autumn.
- White Chocolate & Sprinkles: Swap out the mini chocolate chips for white chocolate chips and fold in a generous amount of Halloween-themed sprinkles (black, orange, purple). The contrast of white chocolate against colorful sprinkles creates a striking visual.
- Pretzel Bits & Caramel Drizzle: For a sweet and salty surprise, add crushed pretzel bits to the dough. After baking, once the cookies are cool, drizzle them with a decadent caramel sauce. This elevates the flavor and adds another layer of texture.
- Chopped Nuts: If you’re a fan of nuts, toasted pecans or walnuts can add a lovely crunch and earthy flavor. Pair them with milk chocolate chips for a comforting, classic combination.
- Spice It Up: Introduce a hint of autumn spices by adding a pinch of cinnamon or nutmeg to the dry ingredients. This will give your cookies a warm, cozy feel that’s perfect for a crisp October evening.
Remember, the goal is to have fun and make these cookies uniquely yours. Don’t be afraid to mix and match your favorite Halloween candies and baking staples!
Step-by-Step: Crafting Your Creepy Cookies
Creating these no-mixer Halloween Chocolate Chip Cookies is a breeze, even for novice bakers. Follow these simple steps to bring your spooky cookie creations to life!
1. Prepare the Wet Ingredients
Begin by preheating your oven to 350°F (175°C) and lining a baking sheet with a silicone mat or parchment paper. In a large bowl, gently melt the butter. You can do this in the microwave for about 40 seconds; be careful not to let it get hot, just melted, to prevent the egg from scrambling later. Once melted, add both brown sugar and granulated sugar to the butter. Stir vigorously by hand until the sugars are fully incorporated and the mixture is smooth and creamy. Next, crack in the large egg and pour in the vanilla extract. Continue stirring until these are perfectly combined. Avoid overmixing at this stage, as it can lead to a stiffer dough.
2. Combine Dry Ingredients and Fold in Mix-Ins
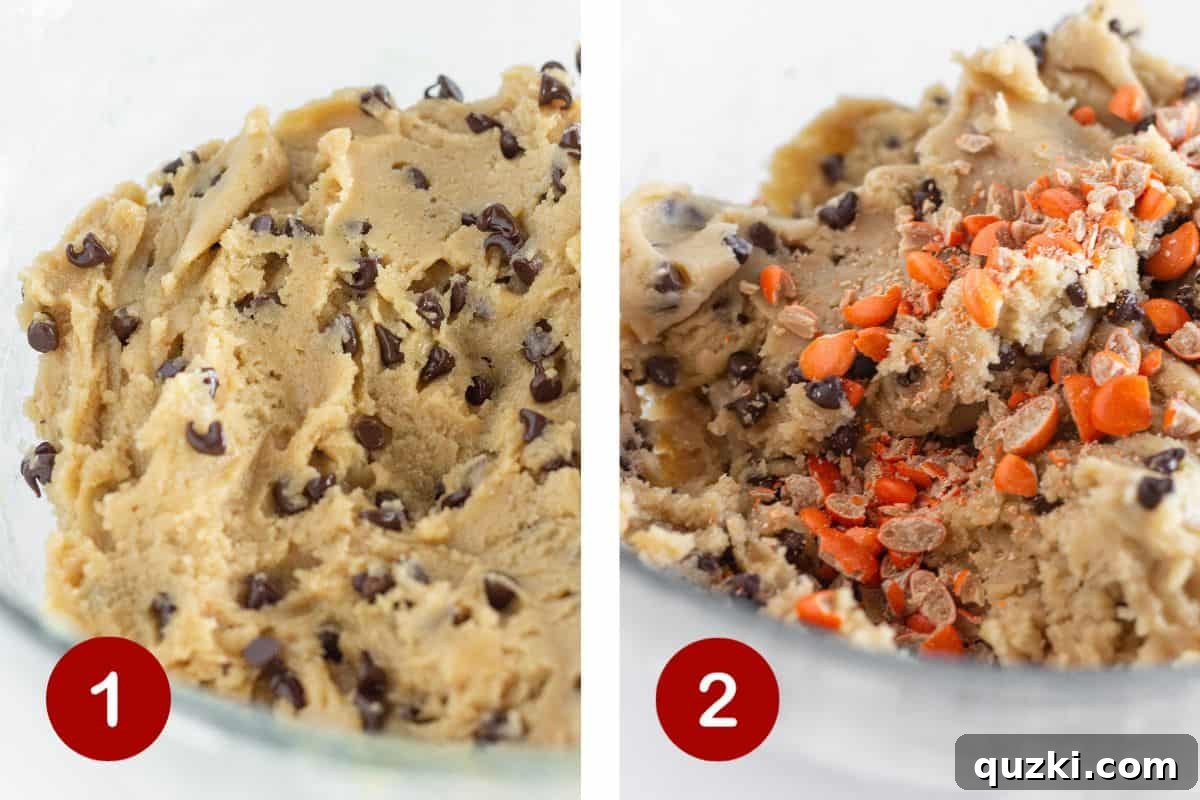
In a separate bowl, whisk together your dry ingredients: all-purpose flour, baking soda, and salt. Gradually add this dry mixture to your wet ingredients, mixing by hand until a thick, cohesive dough forms. Make sure there are no pockets of dry flour remaining, but again, don’t overmix. Now for the fun part! Add your mini chocolate chips to the dough. Stir them in until they are evenly distributed throughout. Finally, incorporate the chopped orange-coated chocolate candies (Reese’s Pieces or M&M’s) into the dough, mixing until they add their festive colors and flavors throughout.
3. Scoop, Shape, and Bake to Perfection
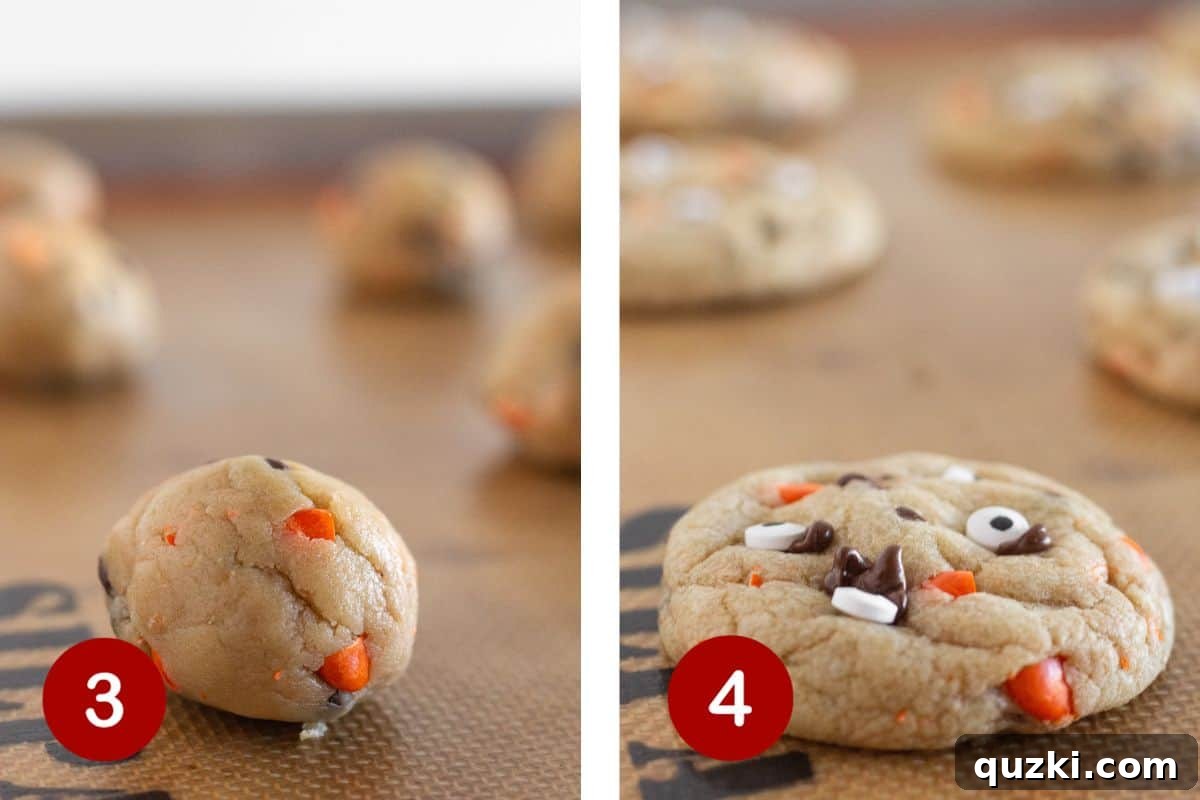
Using a medium cookie scoop (approximately 1.5 tablespoons), scoop out portions of the dough into your hand. Gently roll each portion into a smooth, uniform ball. This helps them bake evenly and look professional. Place the cookie dough balls onto your prepared baking sheet, leaving ample space between each to allow for spreading. If you desire, press a few additional mini chocolate chips onto the tops of the dough balls before baking for an extra aesthetic touch.
Bake the cookies for 8-10 minutes. The key to super soft, chewy cookies is to avoid overbaking. You want to remove them from the oven when their edges are just beginning to turn golden brown and their centers still look slightly puffy and soft. They will continue to set as they cool. Immediately after removing the hot cookies from the oven, quickly but carefully press 3-4 edible eyeballs onto the top of each cookie. The residual heat will help them adhere. Allow the cookies to cool completely on the baking sheet. This crucial step ensures they finish setting, developing those wonderfully chewy centers and firm edges, and keeps the edible eyes securely in place.
Baking Secrets: Expert Tips for Success
Achieving cookie perfection for your Halloween bash is easier than you think with these expert tips:
- For Thicker, Chewier Cookies: If you prefer a more substantial cookie, try refrigerating your dough for at least 30 minutes (or up to 24 hours) before baking. Chilled dough spreads less, resulting in a thicker, chewier cookie. Alternatively, explore our Thick Chocolate Chip Cookie recipe for a dedicated solution.
- Amplify the Halloween Hues: Don’t limit yourself to just orange! To infuse even more vibrant color into your cookies, seek out different colored Halloween M&M’s. Purple and neon green varieties are readily available during the season and would add a fantastic, playful touch to your monster creations.
- Uniformity for Even Baking: Using a cookie scoop is not just for convenience; it’s essential for consistent results. Scooping ensures that all your cookies are the same size, allowing them to bake evenly. You can find small scoops for mini cookies or large scoops for bakery-style giants. Remember to adjust baking times: Mini Chocolate Chip Cookies might need only 7-9 minutes, while larger cookies could take 9-12 minutes.
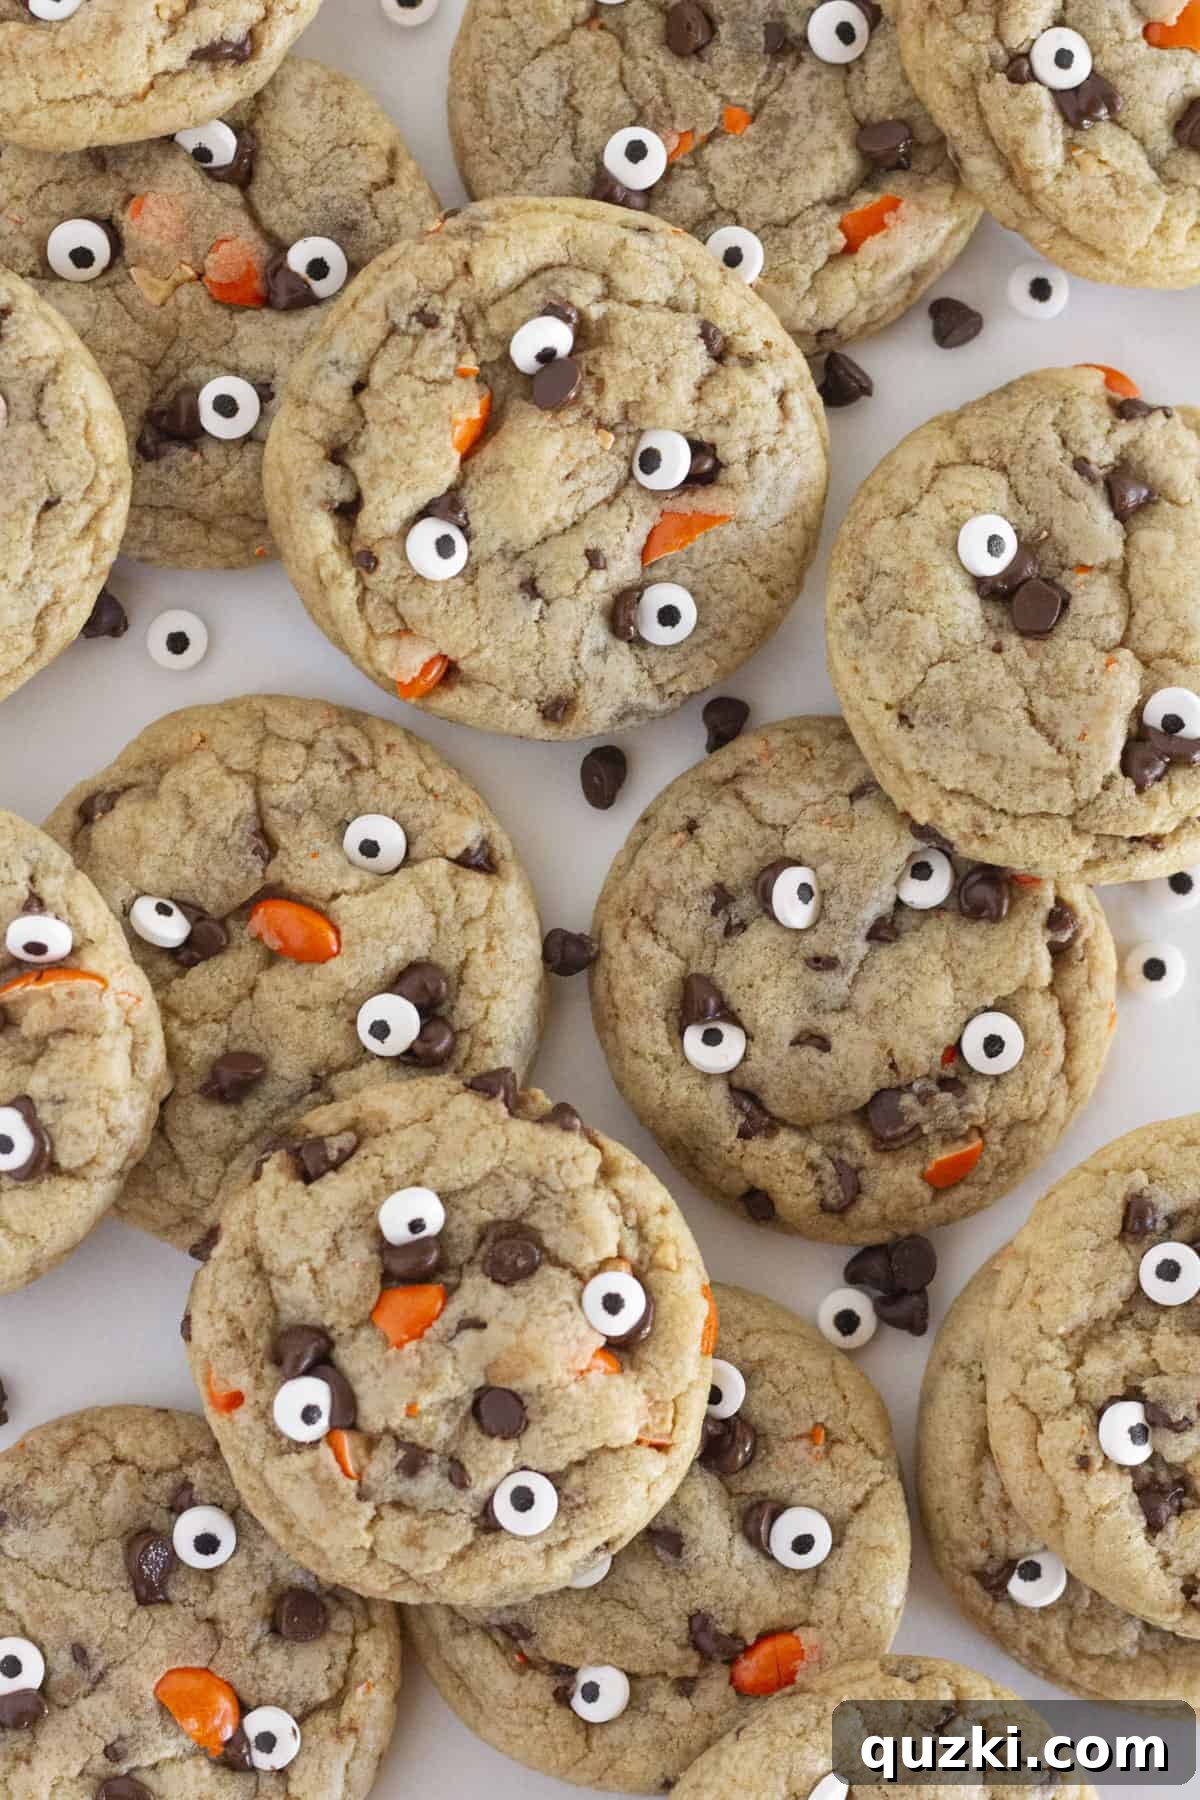
- Post-Bake Decorating: For precise placement and a pristine look, always add additional chocolate chips and the edible eyeballs immediately after the cookies come out of the oven. The warmth of the freshly baked cookie will gently melt the chocolate chips just enough to secure them (and the eyeballs) exactly where you want them, giving you full creative control over your monster faces.
- Eyeball Adhesion Trick: To ensure your candy eyes stay put, gently press them onto the still-warm cookies, ideally placing them directly on or right next to any melty chocolate chips. As the chocolate cools and hardens, it will act as a natural “glue,” firmly holding the edible eyes in place.
- Don’t Overmix the Dough: When combining wet and dry ingredients, mix just until combined. Overmixing develops the gluten in the flour, which can lead to tough, dry cookies instead of soft and chewy ones.
- Quality Ingredients Matter: While simple, the quality of your ingredients can significantly impact the final taste. Use good quality butter, fresh eggs, and your favorite brand of chocolate chips for the best results.
Storage and Freezing Guidelines
To keep your Halloween Chocolate Chip Cookies fresh and delicious for as long as possible, follow these storage recommendations:
Storing Baked Cookies: Store the cooled cookies in an airtight container or a heavy-duty zipper-lock bag at room temperature for up to 4 days. If you live in a warm or humid climate, or simply prefer to extend their freshness, you can store them in the refrigerator for up to 5 days. Be sure they are completely cool before storing to prevent condensation, which can make them soggy.
Freezing Baked Cookies: These cookies freeze exceptionally well, allowing you to enjoy a spooky treat anytime. Once fully cooled, place them in a single layer on a baking sheet and flash freeze for about 30 minutes until firm. Then, transfer the frozen cookies to a freezer-safe bag or airtight container, separating layers with parchment paper to prevent sticking. They will remain fresh for up to 3 months. When ready to enjoy, simply thaw at room temperature or warm slightly in the microwave for a fresh-baked feel.
Freezing Cookie Dough: You can also prepare the dough ahead of time and freeze it. Scoop the dough into balls and place them on a parchment-lined baking sheet. Flash freeze until solid, then transfer the frozen dough balls to a freezer-safe bag. When you’re ready to bake, place the frozen dough balls on a prepared baking sheet and bake for a few extra minutes (usually 10-14 minutes) until golden brown. This is a fantastic way to always have fresh cookies on hand!
Frequently Asked Questions
Absolutely! The beauty of these Halloween cookies is their adaptability. While our soft chocolate chip cookie base is fantastic, you can certainly use other cookie doughs. Consider a classic sugar cookie (like these cake mix sprinkle sugar cookies), rich dark chocolate cookies, or even chewy peanut butter cookies. The key is to incorporate the orange candies and edible eyeballs to create that distinct Halloween vibe.
These Halloween cookies are perfect on their own, a delightful treat for any occasion. They’re particularly striking when arranged on a Halloween Dessert Table, adding a playful and spooky element. You could also transform them into festive ice cream sandwiches by filling them with your favorite ice cream and rolling the edges in Halloween sprinkles for an extra special dessert.
No problem! If edible eyeballs are hard to come by, you can get creative. Use small white candy melts with a tiny dot of black icing for the pupil, or even small white chocolate chips with a tiny edible marker dot. Alternatively, you can simply focus on the orange candies and other colorful sprinkles for a festive, non-eyed cookie!
Yes, absolutely! Preparing the dough in advance is a great time-saver. Once you’ve mixed the dough and incorporated all the add-ins, cover the bowl tightly with plastic wrap and refrigerate for up to 2-3 days. Chilling the dough can also enhance the flavors and create an even chewier cookie. When you’re ready to bake, let the dough sit at room temperature for about 10-15 minutes to soften slightly before scooping and baking as directed.
More Halloween Dessert Inspirations
If you’re still craving more eerie-sistible treats for your Halloween festivities, be sure to explore these other fantastic recipes:
Desserts
Easy and Spooky Halloween Chocolate Covered Oreos
Halloween
Easy Halloween Bundt Cake
Halloween
Easy Halloween Desserts: Candy Corn Bundt Cake Recipe with a Cake Mix
Desserts
Halloween Treats: Spooky Brownie Bats Bites Recipe
Did you conjure up this recipe? We’d love to hear about it! Leave a ⭐️ review below and tag @practicallyhomemade on Pinterest!

Spooky Halloween Chocolate Chip Cookies
June Albertson-Dick
10 minutes
40 minutes
47 minutes
20
cookies
Rate Recipe
Print Recipe
Ingredients
-
½ cup butter, {melted} -
½ cup brown sugar, {packed} -
¼ cup granulated sugar -
1 teaspoon vanilla extract -
1 large egg -
1 ½ cups all purpose flour -
½ teaspoon baking soda -
½ teaspoon salt -
½ cup mini chocolate chips -
⅓ cup orange coated chocolate candies {Reese’s Pieces or M&M’s}, {chopped} -
80 mini edible eyeballs
Instructions
-
Preheat the oven to 350 degrees F (175 C).
-
Microwave the butter for about 40 seconds to just barely melt it. If there is still a piece of butter that isn’t melted then swirl it until it melts {you don’t want the butter to be hot or the eggs will curdle}.
-
Add both sugars and mix until creamy {by hand works great}. Add the vanilla and the egg, mix until incorporated but do not over mix or the dough will be stiff.
-
Add the flour, baking soda, and salt. Mix until everything is incorporated. Add the chocolate chips and stir until they are evenly distributed. Finally add the chopped orange coated chocolates and stir it into the dough.
-
Scoop the dough with a medium cookie scoop {or about 1 ½ tablespoons} into your hand and roll until smooth. Place on a silicone {or parchment} lined baking sheet and add a few additional mini chocolate chips to the top {if desired}.
-
Bake for 8-10 minutes. You want to remove them from the oven when they are puffy and just starting to turn golden. The key to getting the super soft cookie is to not over bake them. Once you remove them from the oven, add the edible eyeballs to the top of each cookie and let them cool completely on the cookie sheet {if you can wait that long}. This will allow them to set up perfectly.
-
Store in an airtight container at room temperature {or in the refrigerator} for up to 4 days or freeze for up to 3 months.
Notes
- If you want to add more color to the cookies add different colored chocolates. You can find purple and neon green Halloween M&M’s and they would be super fun.
- Place the candy eyes on or next to chocolate chips. Once the chocolate chips harden they will hold the edible eyes in the cookie.
Nutrition
Serving:
1
cookie
,
Calories:
166
kcal
,
Carbohydrates:
24
g
,
Protein:
2
g
,
Fat:
7
g
,
Saturated Fat:
4
g
,
Polyunsaturated Fat:
0.3
g
,
Monounsaturated Fat:
1
g
,
Trans Fat:
0.2
g
,
Cholesterol:
23
mg
,
Sodium:
133
mg
,
Potassium:
23
mg
,
Fiber:
0.5
g
,
Sugar:
17
g
,
Vitamin A:
173
IU
,
Vitamin C:
0.05
mg
,
Calcium:
18
mg
,
Iron:
1
mg
Nutrition information is automatically calculated, so should only be used as an approximation.
Like this? Leave a comment below!