
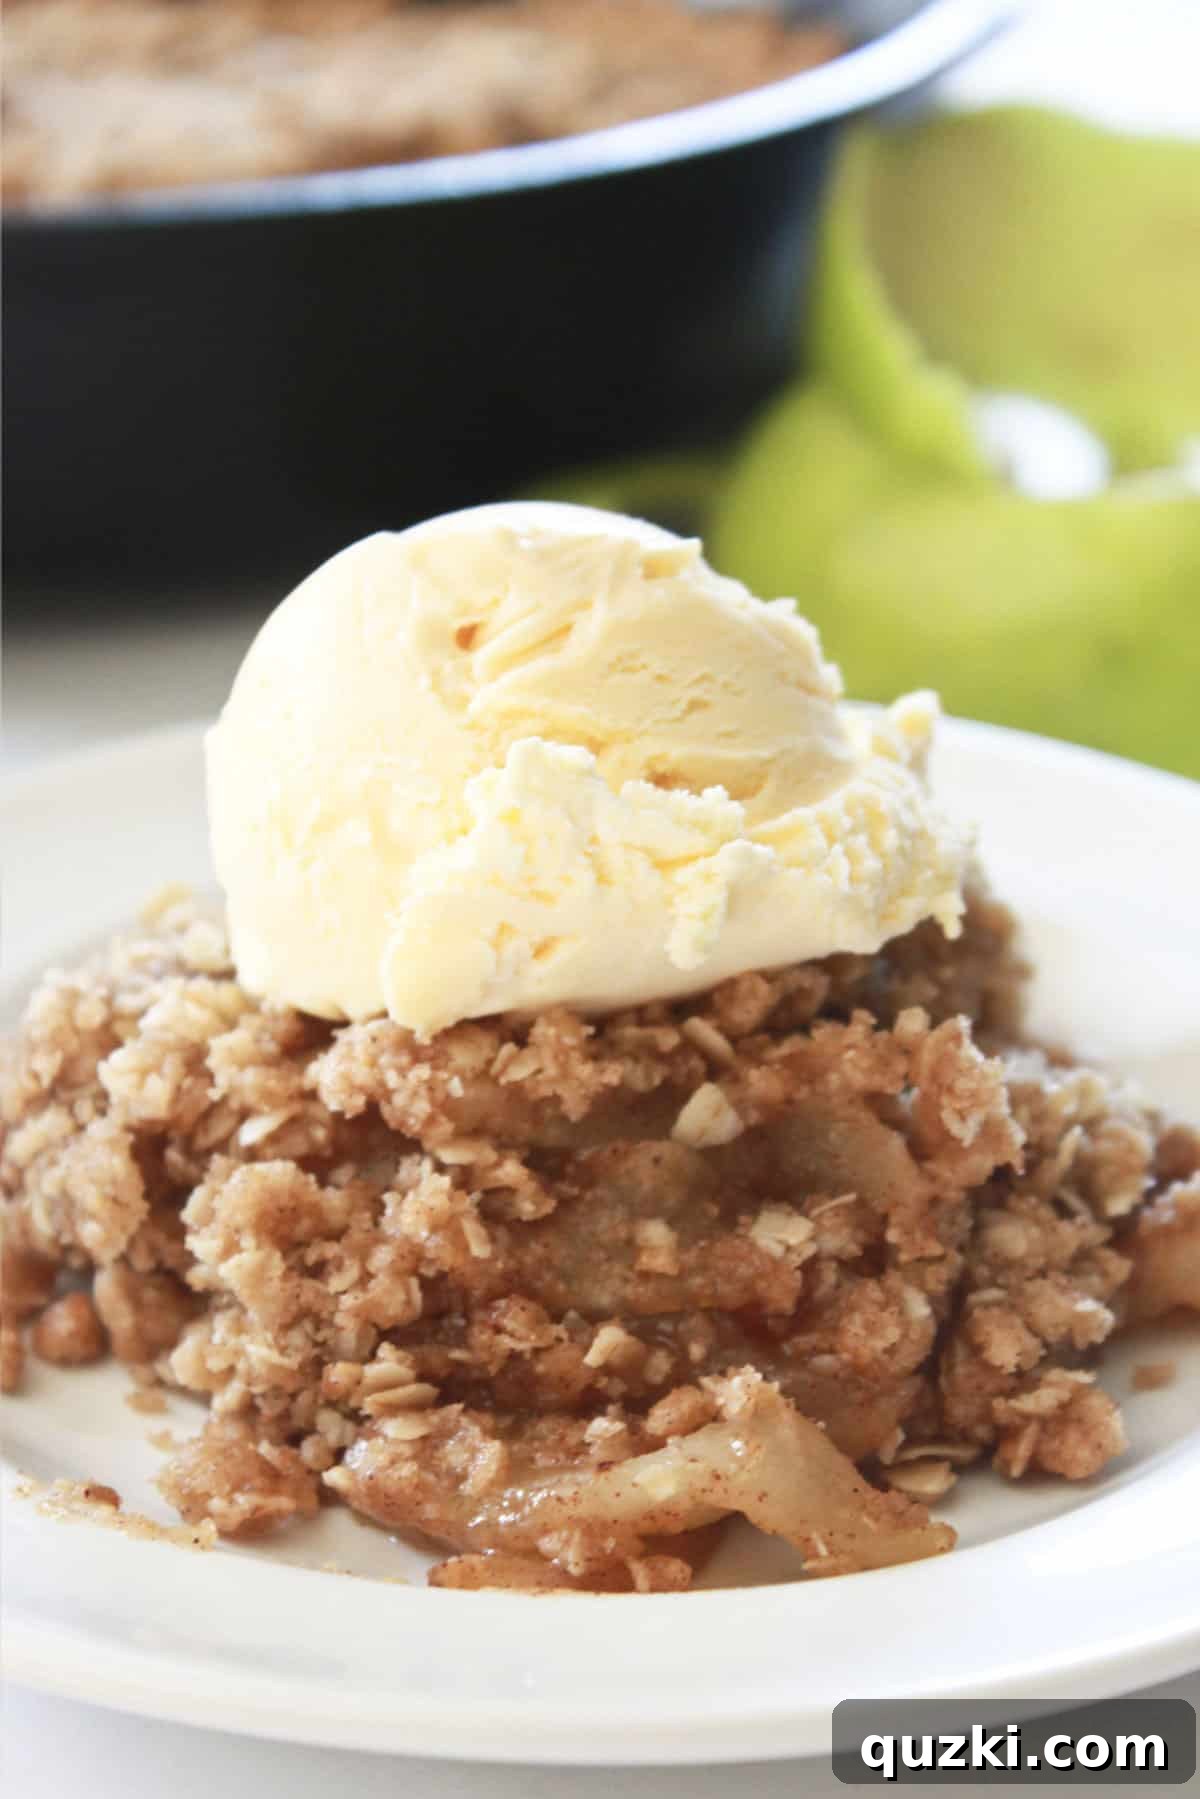
As the crisp air of autumn settles in and the leaves begin their vibrant transformation, there’s a particular warmth that only a freshly baked dessert can bring. Fall officially means apple season is upon us, and what better way to celebrate nature’s bounty than with a heartwarming, utterly delicious skillet apple crisp? This classic comfort food is not just a dessert; it’s an experience, embodying the very essence of cozy evenings and cherished moments. Forget complicated baking; this recipe offers an incredibly easy and flavorful way to enjoy the season’s finest apples, all prepared in a single cast iron skillet for minimal fuss and maximum flavor.
Our star ingredient is the tart and firm Granny Smith apple, expertly sliced and mixed with a harmonious blend of brown sugar, aromatic cinnamon, and a hint of nutmeg. This creates a sweet and tangy filling that bubbles beautifully as it bakes. Crowned with a perfect homemade buttery crisp topping, rich with oats, this dessert promises a delightful textural contrast with every bite. The topping bakes to a golden-brown perfection, providing that irresistible crunch that gives apple crisp its name. For the ultimate indulgence, serve this warm skillet apple crisp with a generous scoop of creamy vanilla ice cream, allowing it to melt slightly into the warm fruit, and a luscious drizzle of warm caramel sauce. It’s a simple pleasure that truly elevates any autumn gathering or quiet night in.
If you love the simplicity and deliciousness of this cast iron apple crisp, you might also enjoy exploring other fruit crisp variations. For a delightful change, consider trying a peach crisp made with canned peaches.
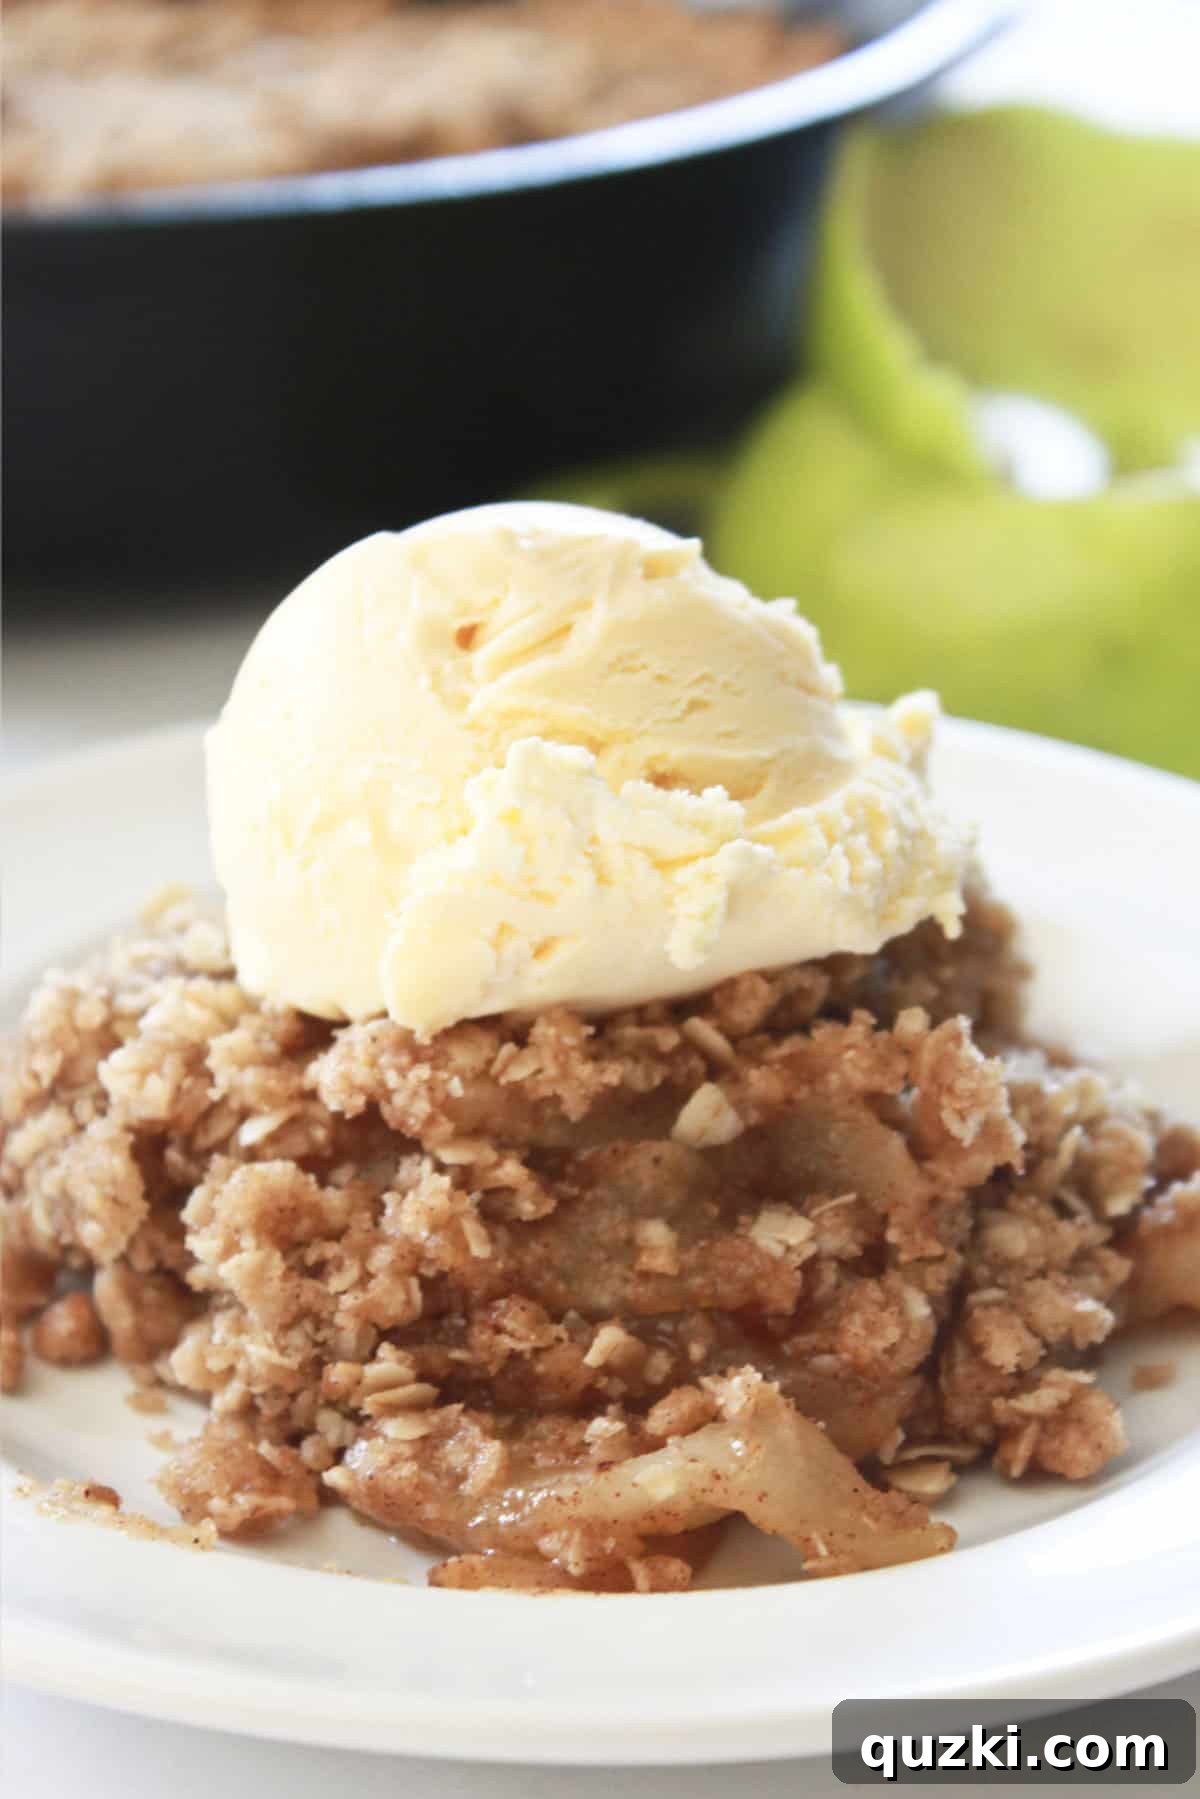
Understanding Apple Crisp: A Classic Fall Dessert
At its heart, apple crisp is a beloved American dessert featuring a tender, spiced apple filling topped with a crumbly, oven-baked mixture, traditionally made with oats. It’s often compared to other fruit-based desserts, but apple crisp holds a special place due to its distinct characteristics and relative ease of preparation.
While many dessert lovers might draw parallels between apple crisp and Dutch Apple Pie Bars, it’s important to note the key differences. Both desserts celebrate the classic apple and spice flavor profile, but their construction and resulting textures are quite distinct. Apple pie, whether traditional or in bar form, relies on a pastry crust for both its bottom and sometimes its top (as in a lattice or full crust). This often involves dough preparation, chilling, and rolling, which can be time-consuming and intimidating for novice bakers. Apple crisp, by contrast, simplifies this process dramatically. It skips the dough entirely, opting for a streusel-like topping that is typically made from a blend of flour, sugar, butter, and, crucially, oats. This oat-based topping provides a delightfully crunchy, “crisp” texture that is much lighter and less sweet than a traditional pie crust.
The beauty of a skillet apple crisp lies in its straightforwardness. There’s no complex dough to manage, no intricate lattice work. This makes it a significantly easier and quicker dessert to whip up, perfect for those evenings when you crave a warm, comforting treat without spending hours in the kitchen. The rustic charm of baking and serving directly from a cast iron skillet also adds to its appeal, making it an ideal choice for a comforting weeknight dessert or a casual gathering. It’s a win-win in the dessert world – incredible flavor with minimal effort!
Why You Will Love This Easy Skillet Apple Crisp
This cast iron skillet apple crisp isn’t just another dessert; it’s a testament to simple, wholesome ingredients transforming into something truly extraordinary. Here’s why this recipe deserves a permanent spot in your fall baking rotation:
- Effortlessly Simple: Forget intricate techniques or endless dirty dishes. This recipe is designed for ease, coming together quickly with minimal fuss. It’s perfect for beginner bakers or anyone looking for a stress-free dessert.
- One-Pan Wonder: The magic of baking in a cast iron skillet isn’t just about rustic charm; it’s about practicality. The skillet ensures even cooking, a beautifully golden-brown crust, and the best part – you can serve it right from the pan! Less cleanup means more time to enjoy your delicious creation.
- Perfectly Balanced Flavors: The combination of tart Granny Smith apples, sweet brown sugar, and warm fall spices like cinnamon and nutmeg creates a symphony of flavors. It’s sweet, but not overly so, allowing the natural apple taste to shine through.
- Irresistible Texture: The tender, soft apple filling perfectly contrasts with the crunchy, buttery oat crumble topping. Every spoonful offers a delightful mix of gooey, spiced apples and a satisfying crisp texture.
- Ultimate Comfort Food: There’s something inherently comforting about a warm apple crisp, especially on a cool autumn evening. The aroma filling your kitchen alone is enough to bring a smile to your face.
- Versatile Serving: While incredible on its own, this crisp is taken to the next level with a scoop of vanilla ice cream or a drizzle of warm caramel. It’s also fantastic with a dollop of whipped cream or even a simple custard.
- Great for Any Occasion: Whether it’s a cozy family dinner, a potluck with friends, or a holiday gathering, this apple crisp is always a crowd-pleaser. Its rustic elegance makes it suitable for both casual and more festive settings.
- Customizable: Easily adapt the recipe to your preferences. Add nuts for extra crunch, vary the spices, or even mix in other fruits.
Essential Ingredients for Your Skillet Apple Crisp
Crafting the perfect apple crisp begins with selecting the right ingredients. Each component plays a vital role in achieving that coveted balance of sweet, tart, and crunchy. Here’s a detailed look at what you’ll need and why it matters:
- Apples: For this recipe, I highly recommend using Granny Smith apples. Their distinct tartness provides a wonderful counterpoint to the sweetness of the brown sugar, preventing the dessert from becoming cloyingly sweet. Moreover, their firm texture holds up exceptionally well during baking, ensuring that your apple slices remain tender but not mushy. However, feel free to experiment with other firm, tart-sweet varieties like Honeycrisp, Braeburn, Fuji, or even Gala apples for a slightly different flavor profile. The key is to avoid overly soft apples, which can turn to applesauce when baked.
- Brown Sugar: This ingredient is crucial for both the apple filling and the crisp topping. In the filling, brown sugar not only sweetens the apples but also contributes a rich, molasses-like depth of flavor and helps create a lovely, syrupy consistency as it bakes. In the crisp topping, it enhances the caramel notes and ensures a perfectly golden-brown finish. You can use either light or dark brown sugar, with dark brown sugar offering a more intense caramel flavor.
- Flour: A small amount of all-purpose flour is used in the apple filling to help thicken the juices released by the apples during baking. This prevents the filling from becoming watery and ensures a delightful, cohesive texture. For the topping, flour provides structure and forms the base for the crisp crumble. If you’re making this gluten-free, substitute with a 1:1 gluten-free flour blend.
- Cinnamon and Nutmeg: These are the quintessential fall spices, and they are absolutely essential for giving your apple crisp its classic, warm, and inviting flavor. Cinnamon provides a comforting sweetness, while nutmeg adds a subtle, earthy depth. Together, they perfectly complement the natural sweetness of the apples. For an extra layer of complexity, you could also add a pinch of ground cloves or allspice.
- Oatmeal: This is the defining ingredient of the “crisp” topping. Rolled oats (or old-fashioned oats) are preferred for their chewy texture and ability to create substantial clumps in the topping. If you’re in a pinch, quick oats can be used, but they might result in a slightly finer, less chewy crumble. Steel-cut oats are generally not suitable as they don’t soften enough during the baking time.
- Butter: Cold, unsalted butter is key for creating a perfectly crumbly, tender, and rich oat topping. When cut into the dry ingredients, the cold butter melts slowly in the oven, creating pockets of steam that result in that desired crispy texture. Using room temperature butter for the topping can sometimes lead to a more paste-like consistency if overmixed. For the filling, butter adds richness and helps the apples cook down beautifully.
- Salt: Often overlooked, a pinch of salt is a secret weapon in both the filling and the topping. It doesn’t make the dessert salty, but rather acts as a flavor enhancer, balancing the sweetness and bringing out the vibrant notes of the apples and spices. It’s truly a non-negotiable ingredient for a well-rounded flavor profile.
For precise measurements and quantities, please refer to the detailed recipe card at the end of this article.
Crafting Your Homemade Skillet Apple Crisp: Step-by-Step Guide
Creating this delicious apple crisp is a straightforward process, broken down into a few simple steps. Follow these instructions to ensure your dessert turns out perfectly golden, bubbly, and utterly irresistible.
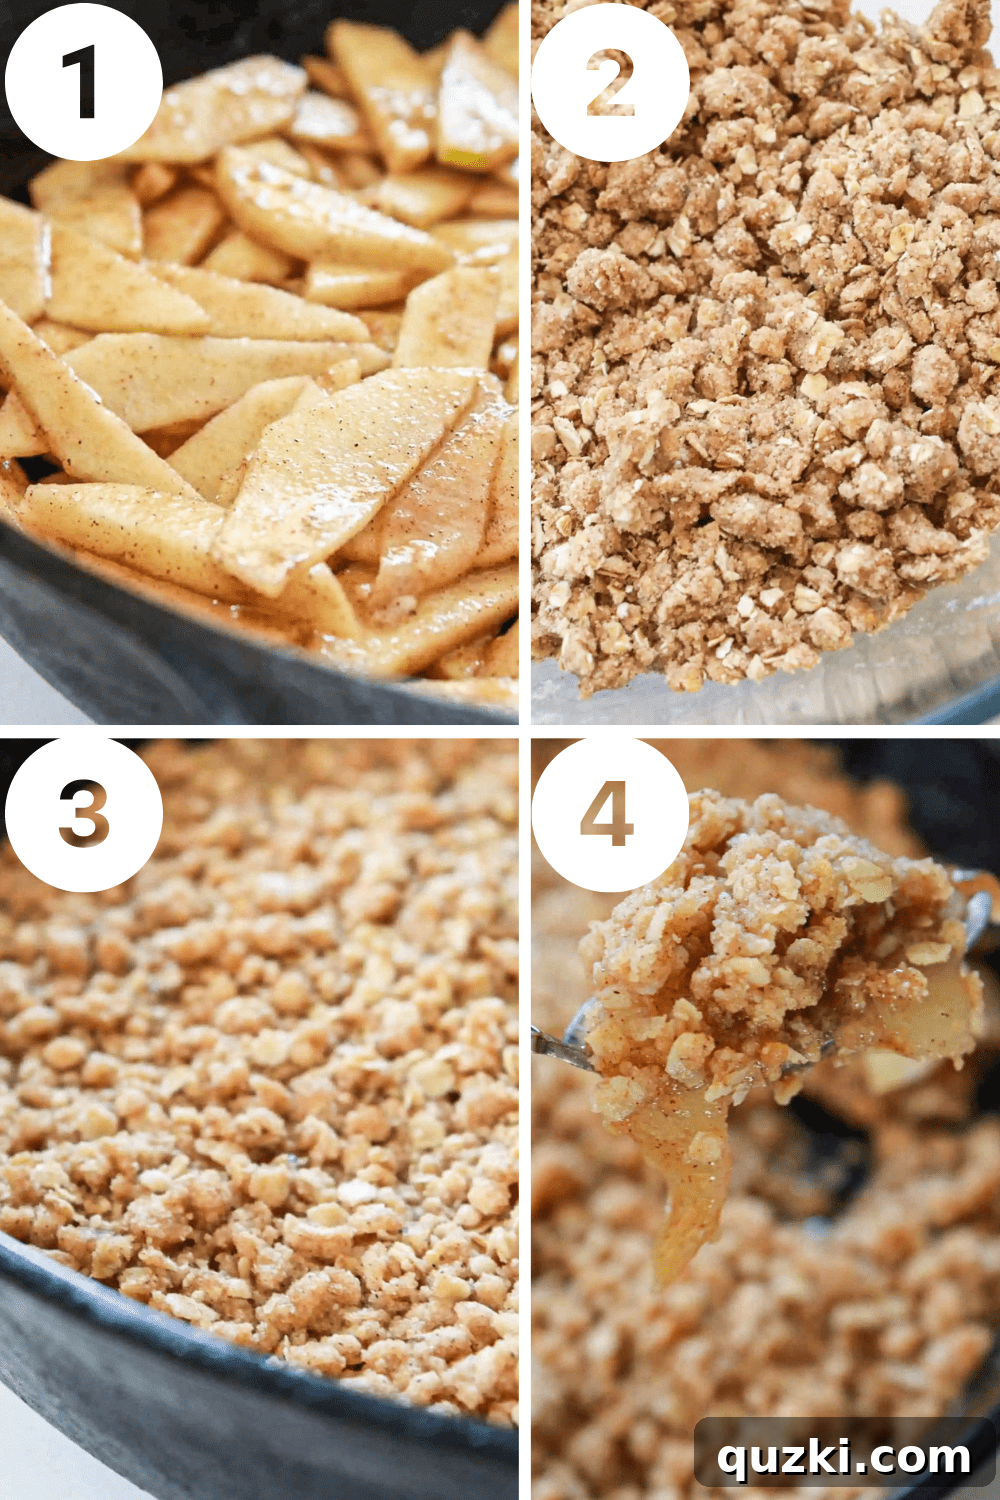
- Prepare the Apple Filling: Begin by preparing your apples. Carefully peel all four large Granny Smith apples, then core them. Once peeled and cored, slice the apples thinly, aiming for uniform slices about ⅛ to ¼ inch thick. Thin slices ensure even cooking and a tender texture throughout. In a large mixing bowl, combine the thinly sliced apples with ⅓ cup packed brown sugar, 2 tablespoons of all-purpose flour, ¾ teaspoon of ground cinnamon, ¼ teaspoon of ground nutmeg, and ¼ teaspoon of salt. Toss everything gently until the apple slices are thoroughly coated with the sugar and spice mixture. This coating will create a luscious, thickened sauce as the crisp bakes. Once coated, pour the apple mixture into a greased 10-inch cast iron skillet, spreading the apples out evenly to form an even layer.
- Prepare the Oat Crumble Topping: In a separate medium bowl, start by combining all the dry ingredients for the topping: ¾ cup packed brown sugar, ⅔ cup all-purpose flour, ⅔ cup rolled oats (quick cook oats work well for a crisper texture), 1 teaspoon of ground cinnamon, and ½ teaspoon of salt. Stir these dry ingredients together until they are well incorporated.
- Incorporate the Butter into the Topping: Next, add ½ cup of room temperature butter to the dry topping ingredients. Using a fork, your fingertips, or a pastry blender, work the butter into the dry mixture until it resembles coarse crumbs with some pea-sized pieces remaining. The key here is to avoid overmixing; if you overwork the butter, it can become a paste rather than a light, crumbly topping. You want distinct buttery crumbs that will bake up perfectly crisp.
- Assemble and Bake: Evenly sprinkle the prepared oat crumble topping over the apple mixture in the cast iron skillet. Ensure the topping covers the apples from edge to edge. Transfer the skillet to a preheated oven at 350°F (175°C). Bake for 25-30 minutes, or until the topping is beautifully golden brown and the apples underneath are tender and bubbling. You can test the apple tenderness by carefully inserting a small knife or fork into the center of the crisp.
Expert Tips for the Perfect Skillet Apple Crisp
To ensure your homemade apple crisp is nothing short of spectacular, consider these invaluable baking tips:
- Choose the Right Apples: Always opt for firm, tart apples like Granny Smith, Honeycrisp, Braeburn, or Fuji. These varieties maintain their structure and offer a delightful tang that balances the sweetness of the crisp. Softer apples, such as Red Delicious, can break down too much during baking, resulting in a mushy, applesauce-like filling rather than distinct tender slices.
- Slice Apples Uniformly and Thinly: Consistency is key for even cooking. Slice your apples thinly, about ⅛ to ¼ inch thick, and ensure all slices are roughly the same size. This prevents some pieces from being undercooked and crunchy while others are perfectly tender. No one wants an unexpected raw apple bite in their otherwise perfect crisp!
- Prepare Your Skillet: If you’re using a cast iron skillet, ensure it is well-seasoned to prevent sticking and to impart a subtle, desirable flavor. If you don’t own a cast iron skillet, a regular 9×9 inch or 8×8 inch oven-safe baking dish will work just as well. Just make sure to grease it properly.
- Quick Oats for Maximum Crisp: While old-fashioned rolled oats can be used, quick oats often yield a crispier topping due to their smaller, flatter texture. They also tend to brown more quickly, potentially saving a few minutes on your overall baking time. Experiment to see which texture you prefer!
- Don’t Overmix the Crumble: When incorporating the butter into the dry ingredients for the oat topping, use a light hand. Work the butter in until the mixture resembles coarse crumbs with some larger, pea-sized bits of butter remaining. Overmixing will develop the gluten in the flour and melt the butter too much, leading to a dense, pasty topping rather than the light, crumbly texture you desire.
- Make It Gluten-Free: Adapting this recipe for gluten-free diets is incredibly simple. Just swap the all-purpose flour in both the filling and the topping for a 1:1 gluten-free baking flour blend. Additionally, ensure you use certified gluten-free rolled oats to avoid cross-contamination. These two simple substitutions will make the crisp accessible to everyone.
- Add a Nutty Crunch: For an extra layer of texture and flavor, consider adding ¼ cup of chopped walnuts or pecans to your crumble topping mixture. The nuts will toast beautifully in the oven, providing a satisfying crunch and a rich, earthy note that complements the apples and spices.
- Temperature Matters: Ensure your oven is fully preheated to 350°F (175°C) before placing the crisp inside. An accurately preheated oven ensures the crisp topping browns evenly and the apples cook consistently.
- Rest Before Serving: While it’s tempting to dive in immediately, allowing the apple crisp to rest for 10-15 minutes after it comes out of the oven allows the filling to set slightly. This makes it easier to serve and prevents it from being too runny.
Serving Your Delicious Skillet Apple Crisp
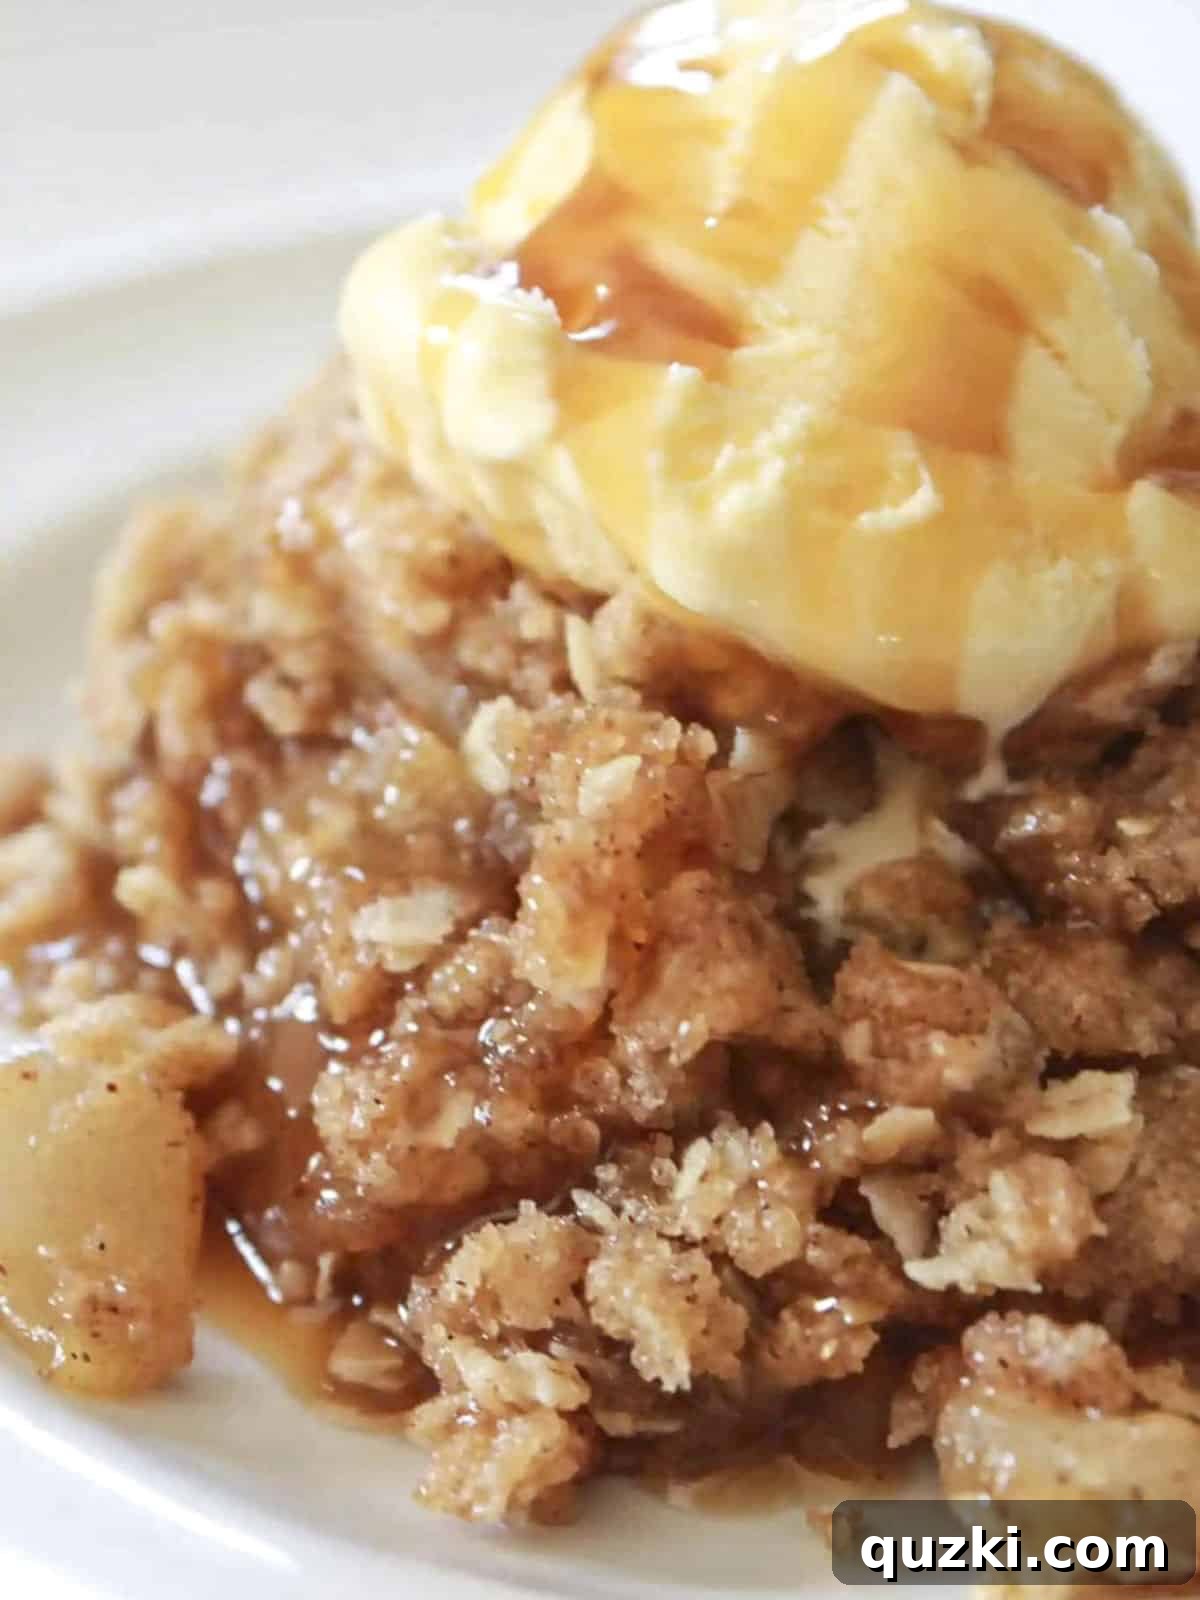
This homemade apple crisp is at its absolute best when served warm, straight from the oven. The warmth intensifies its comforting aromas and softens the apple filling to a delightful tenderness. The classic pairing is, of course, a generous scoop of creamy vanilla bean ice cream. The cold, melting ice cream creates a beautiful contrast with the warm, spiced apples and crunchy topping, a truly heavenly combination. For an extra touch of decadence, finish it with a luscious drizzle of warm caramel sauce, allowing it to weave through the crisp and ice cream.
Beyond the classic ice cream and caramel, there are other delightful ways to enjoy your apple crisp:
- Whipped Cream: A dollop of freshly whipped cream, perhaps lightly sweetened with a touch of vanilla, offers a lighter, airy complement.
- Custard or Crème Anglaise: For a more sophisticated touch, serve it with a warm vanilla custard or a delicate crème anglaise.
- Greek Yogurt: For a slightly healthier option, a spoonful of plain Greek yogurt can add a tangy creaminess that beautifully cuts through the sweetness.
- Hot Beverages: A cup of hot cider, a comforting chai latte, or a classic black tea would also be a lovely addition to this fall dessert, creating a truly cozy experience.
Storing Your Apple Crisp
Proper storage ensures you can enjoy your delicious apple crisp for days to come. Once baked, allow the crisp to cool completely at room temperature. This step is crucial, as covering it while still warm can trap moisture, leading to a soggy topping. Once cool, cover the skillet tightly with plastic wrap or transfer the crisp to an airtight container. Refrigerate it for up to 3-5 days. For reheating, a quick warm-up in the oven or microwave will bring back its comforting warmth.
Can I Freeze Apple Crisp? Yes, You Can!
Absolutely! This apple crisp recipe freezes exceptionally well, making it a fantastic make-ahead option for future cravings or unexpected guests. To freeze, prepare the recipe as directed and allow it to cool completely after baking. For ease of freezing and portioning, consider baking it in a disposable aluminum pan. Once cooled, wrap the pan tightly with several layers of plastic wrap, followed by a layer of aluminum foil, ensuring it’s completely airtight to prevent freezer burn. Label with the date and freeze for up to 3 months.
When you’re ready to enjoy your frozen apple crisp, transfer it from the freezer to thaw. You can defrost it at room temperature for about 1 hour, or for a slower thaw, place it in the refrigerator for 4-5 hours or even overnight. Once thawed, you can reheat it in a preheated oven at 350°F (175°C) until warm and bubbly, typically 15-20 minutes, or microwave individual portions until heated through.
Frequently Asked Questions About Skillet Apple Crisp:
Can I make apple crisp in a slow cooker?
While it is technically possible to make apple crisp in a slow cooker, I generally don’t recommend it if you’re aiming for that signature crispy topping. The moist environment of a slow cooker tends to make the oat topping more soft and porridge-like rather than delightfully crunchy. However, if you prefer a softer crisp or need the convenience of a slow cooker, here’s how you can adapt it: cook the apple filling on low for 3-4 hours, or until the apples are tender. During the last hour of cooking, prepare the oat topping separately and sprinkle it over the top of the softened apples. Then, switch the slow cooker to high and cook for the final hour, or until the topping appears golden brown and has firmed up as much as possible. Keep in mind that the topping might not achieve the same crispness as oven-baked.
Can I use canned apples?
You can certainly use canned apples as a shortcut, but for the best flavor and texture, I highly recommend using fresh apples for this recipe. When you use fresh apples, you have complete control over the sweetness, tartness, and overall flavor profile. Additionally, fresh apples hold their shape better during baking, contributing to that desired tender-but-firm texture. Canned apples are often softer and pre-cooked, which means they can become overly mushy or even resemble applesauce when baked further, losing their distinct apple slice integrity. If you do choose to use canned apples, be sure to drain them very well before adding them to the filling mixture to prevent the crisp from becoming watery.
Can this apple recipe be made ahead of time?
Yes, absolutely! This skillet apple crisp is a great make-ahead dessert, perfect for entertaining or simplifying your meal prep. You can prepare the apple filling and the crumble topping completely, then assemble them in your cast iron skillet. Once assembled, cover the skillet tightly with plastic wrap and store it in the refrigerator for up to 3 days. When you’re ready to bake, remove the crisp from the refrigerator and let it sit at room temperature for about 30 minutes to an hour before baking as directed. This allows for more even cooking. Baking it from a chilled state might require an extra 5-10 minutes of baking time.
Craving More Apple Delights? Explore These Awesome Recipes!
If you’re an apple enthusiast, the possibilities for delicious desserts are endless. Once you’ve mastered this skillet apple crisp, be sure to try these other fantastic apple-centric recipes:
- Apple Upside Down Cake With Cake Mix
- No-Bake Caramel Apple Cheesecake
- Cake Mix Apple Cobbler Recipe
- Apple Crumb Cake
- Caramel Apple Turnovers
- Apple Cream Cheese Breakfast Braid
Did you try this delicious Skillet Apple Crisp recipe? We’d love to hear from you! Leave a ⭐⭐⭐⭐⭐ review below and tag @practicallyhomemade on Pinterest! Your feedback helps us and other home bakers!

Apple Crisp in Cast Iron Skillet
By: June Albertson-Dick
Sweet apples covered in a brown sugar oatmeal crumble and baked to perfection in a cast iron skillet. A comforting and easy fall dessert!
Prep Time: 10 mins
Cook Time: 30 mins
Total Time: 40 mins
Servings: 4 servings
Rate Recipe
Print Recipe
Ingredients
Filling
- 4 large apples, thinly sliced (Granny Smith recommended)
- ⅓ cup brown sugar, packed
- 2 Tablespoons all-purpose flour
- ¾ teaspoon ground cinnamon
- ¼ teaspoon ground nutmeg
- ¼ teaspoon salt
Crumble Topping
- ¾ cup brown sugar, packed
- ⅔ cup all-purpose flour
- ⅔ cup oatmeal (quick cook or old-fashioned)
- 1 teaspoon ground cinnamon
- ½ teaspoon salt
- ½ cup butter, room temperature
Optional Toppings
- Vanilla ice cream
- Caramel sauce
Instructions
Filling Preparation
- In a large bowl, combine sliced apples, brown sugar, flour, cinnamon, nutmeg, and salt. Stir gently to ensure apples are thoroughly coated. Pour the mixture into a greased 10-inch cast iron skillet, spreading the apples evenly.
Oatmeal Crumble and Baking
- In a medium bowl, combine brown sugar, flour, oatmeal, cinnamon, and salt. Stir until all dry ingredients are incorporated. Add the room temperature butter and, using a fork or pastry blender, work the butter into the dry ingredients until it forms a coarse crumble with pea-sized pieces. Be careful not to overmix, or you will end up with a paste.
- Evenly pour the crumble mixture over the top of the apples in the skillet.
- Bake in a preheated 350°F (175°C) oven for 25-30 minutes, or until the topping is golden brown and the apples are tender and bubbling. Serve warm with vanilla ice cream and caramel topping, if desired.
Notes
- To freeze crisp: Bake the crisp in a disposable pan, allow it to cool completely, then cover it well with plastic wrap and foil. Freeze for up to 3 months. To defrost, let it sit at room temperature for 1 hour or in the fridge for 4-5 hours before reheating.
- For added crunch and flavor, consider adding a ¼ cup of chopped pecans or walnuts to the crumble mixture.
Nutrition (Approximate)
Serving: 1 serving
Calories: 666 kcal
Carbohydrates: 113g
Protein: 4g
Fat: 24g
Saturated Fat: 15g
Polyunsaturated Fat: 1g
Monounsaturated Fat: 6g
Trans Fat: 1g
Cholesterol: 61mg
Sodium: 640mg
Potassium: 383mg
Fiber: 7g
Sugar: 81g
Vitamin A: 832 IU
Vitamin C: 10mg
Calcium: 86mg
Iron: 2mg
Nutrition information is automatically calculated and should only be used as an approximation.
Liked this recipe? We’d love to hear from you! Please consider leaving a comment and rating below. Your feedback helps others discover and enjoy this delicious recipe!