
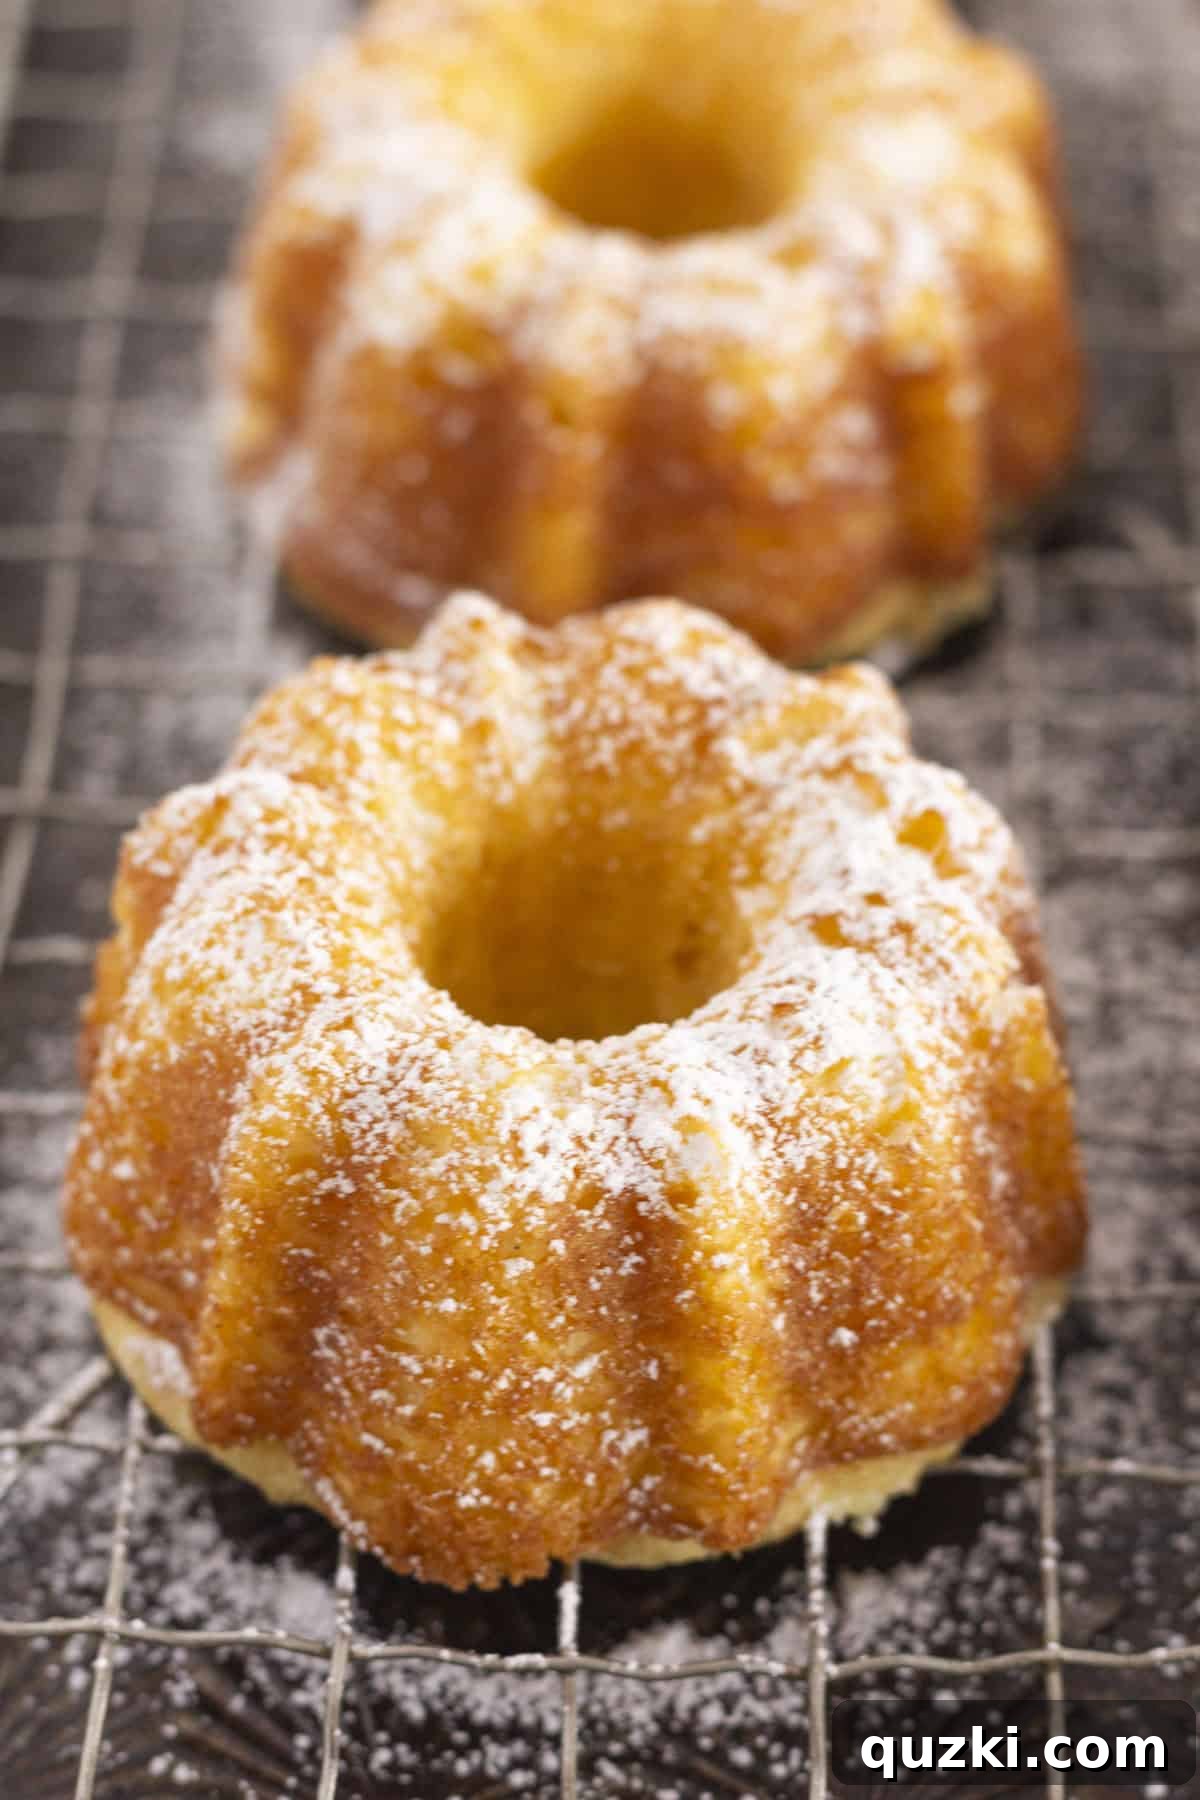
There’s something truly special about having your very own individual dessert, and after over 30 years of baking, I can confidently say people absolutely adore them. These delectable Mini Pound Cakes elevate any gathering, making entertaining a breeze, and the best part is they don’t demand extra time or effort. Forget the lengthy process of traditional baking; this recipe brings you homemade taste with smart shortcuts, resulting in moist, velvety mini bundt cakes that are simply irresistible.
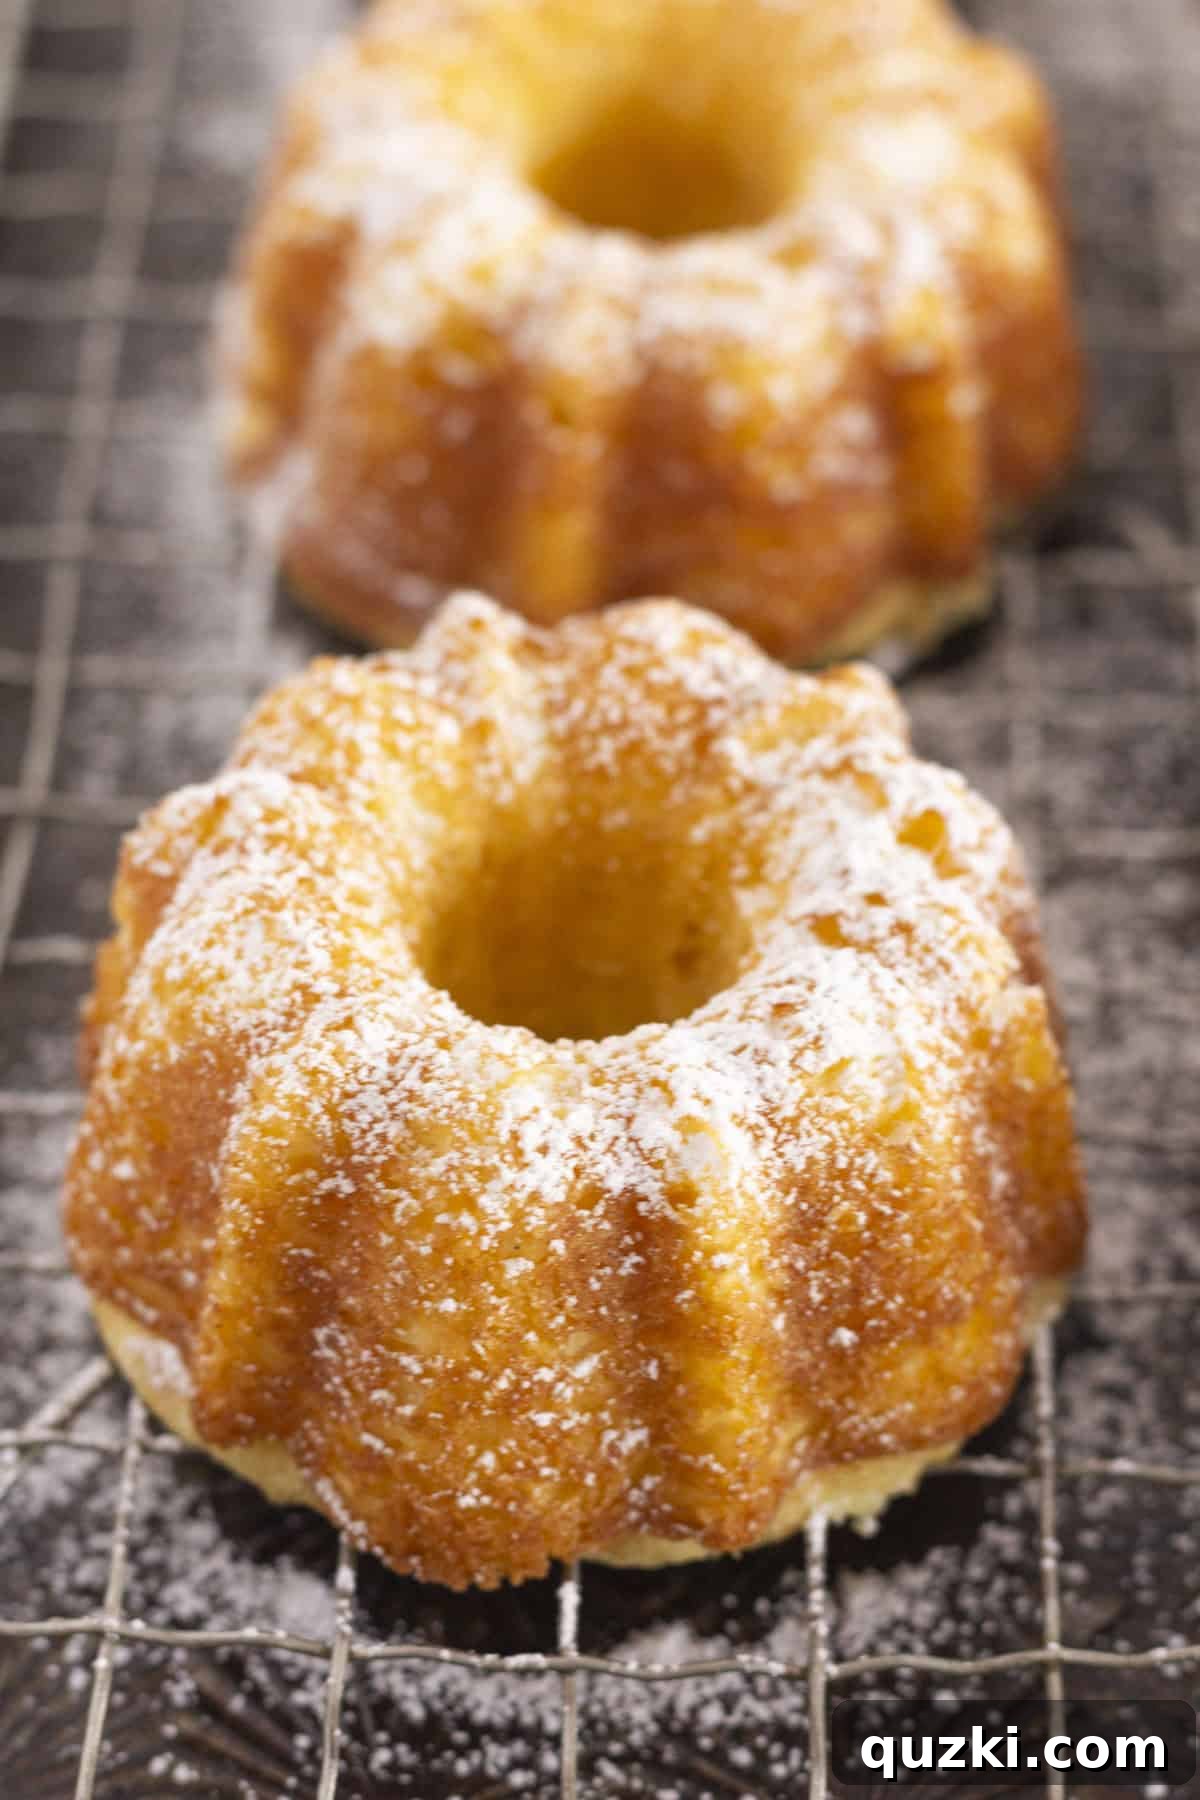
Table of Contents
- Why Is It Called Pound Cake?
- Mini Pound Cake Ingredients: A Deep Dive
- How to Make Mini Pound Cakes: Step-by-Step Guide
- Expert Tips for Perfect Mini Pound Cakes
- Serving Suggestions for Your Mini Pound Cakes
- Storage and Freezing for Freshness
- Recipe FAQs for Mini Pound Cakes
- Do You Love Mini Desserts? Try These…
- The Best Mini Pound Cakes Recipe Card
I find myself making these charming mini pound cakes for nearly every imaginable celebration—from vibrant birthday parties and elegant bridal showers to cozy family brunches and festive holiday gatherings. They are a guaranteed crowd-pleaser, delivering individual portions of pure joy without the fuss. The beauty of the classic pound cake recipe truly shines when transformed into these adorable mini bundt cakes, leaving guests delighted and thoroughly impressed.
What sets this particular mini pound cake recipe apart is its ingenious ability to elevate a simple boxed cake mix into a dessert that tastes utterly homemade. The secret lies in a few key additions that create an unbelievably rich, moist, and velvety texture, so enticing that everyone will be asking for your baking secrets. Get ready to bake a batch of happiness with these easy, delicious mini pound cakes!
Why Is It Called Pound Cake? Understanding the Classic
The intriguing name “pound cake” is a delightful nod to its historical origins, dating back to the 1700s. The traditional recipe called for a straightforward, easy-to-remember ratio: one pound each of flour, butter, eggs, and sugar. This simple formula made it an accessible and beloved recipe for bakers everywhere, especially in an era before kitchen scales were commonplace. The robust, dense nature of these early pound cakes made them a staple for travel and special occasions.
While our modern mini pound cake recipe embraces a few clever shortcuts with contemporary ingredients, it meticulously preserves that iconic dense, rich character that made the original so revered for centuries. It’s a tribute to the enduring appeal of a classic dessert, reimagined for today’s busy baker. Each mini bundt cake offers a taste of this rich history, delivering a comforting and deeply satisfying experience that harks back to its humble, well-proportioned beginnings.
Mini Pound Cake Ingredients: The Secret to Perfection
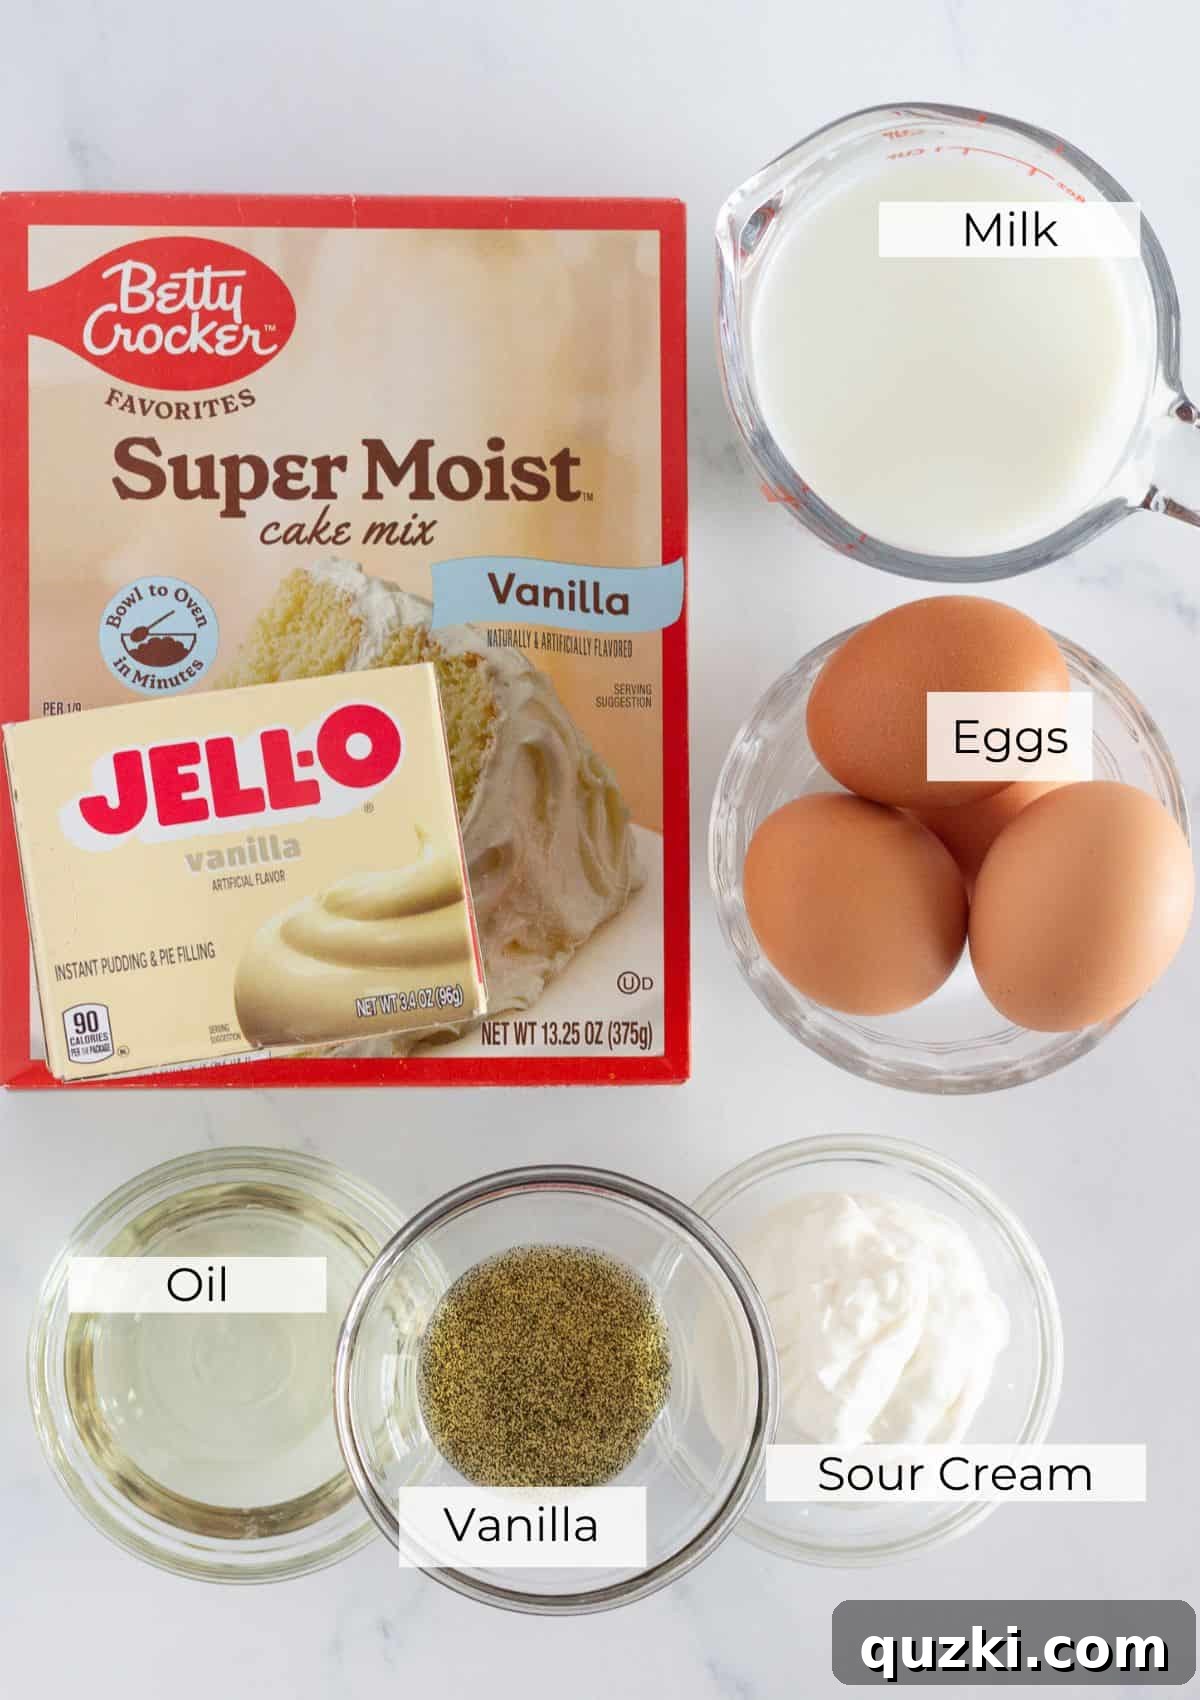
Our recipe for the best mini pound cakes relies on a carefully selected blend of ingredients, each playing a crucial role in achieving that perfect, moist, and flavorful outcome. Here’s a closer look at what makes these small pound cakes so exceptional:
- Vanilla Cake Mix: This is the brilliant foundation for our easy mini pound cakes. It drastically cuts down on prep time without compromising on that beloved vanilla flavor. Think of it as your gourmet shortcut to a truly delicious dessert. It’s also incredibly versatile, forming the base for other delightful treats like Raspberry Cheesecake Cookies.
- Instant Vanilla Pudding Mix: This is my absolute non-negotiable secret ingredient! The pudding mix is a game-changer, infusing these mini bundt cakes with unparalleled moisture, tenderness, and a rich, melt-in-your-mouth crumb that tastes utterly homemade. It’s what gives them that “wow” factor.
- Milk: Any regular milk you have on hand will work wonderfully here. I typically use 2%, but feel free to use whole or even skim milk; its primary role is to provide essential liquid for the batter’s consistency and to help activate the dry ingredients.
- Sour Cream: Trust me on this one – sour cream is the magic touch! Its high-fat content and subtle tang contribute immense moisture, creating an incredibly tender crumb and a depth of flavor that takes these mini cakes from good to absolutely phenomenal. It’s a key player in ensuring your pound cakes stay moist for days.
- Vegetable Oil: Unlike butter, which can sometimes make cakes denser when cooled, vegetable oil guarantees that these mini pound cakes remain incredibly moist and tender for a longer period. It helps achieve a soft texture that you’ll adore.
- Vanilla Bean Paste: For an extra touch of gourmet elegance, vanilla bean paste is fantastic. Those tiny black specks not only enhance the visual appeal but also deliver a more intense, complex vanilla flavor. If you don’t have paste, good quality vanilla extract works perfectly fine and will still yield delicious results!
For precise quantities and measurements, please refer to the comprehensive recipe card below.
How to Make Mini Pound Cakes: Your Step-by-Step Guide
Creating these delightful individual desserts is incredibly simple, even for novice bakers. Follow these detailed steps to achieve perfectly moist and flavorful mini pound cakes every time:
- Prepare Your Dry Ingredients: In a generously sized mixing bowl, combine the vanilla cake mix and the instant vanilla pudding mix. Whisk these dry ingredients together thoroughly until they are uniformly blended. This forms the perfect, lump-free base for your mini bundt pound cakes. Set this bowl aside for a moment.
- Combine Wet Ingredients: In a separate medium-sized bowl, crack in your eggs, then add the vegetable oil, milk, sour cream, and vanilla extract or paste. Using a whisk or an electric mixer on low speed, mix these wet ingredients until they are completely smooth and well-incorporated. Ensure there are no streaks of sour cream or unincorporated egg.
- Bring Them Together: Gently pour the dry ingredient mixture into the bowl containing your wet ingredients. Stir the mixture until all the dry streaks have just disappeared. It’s crucial not to overmix the batter at this stage; overmixing can lead to a tough cake. A few small lumps are perfectly fine and will bake out.
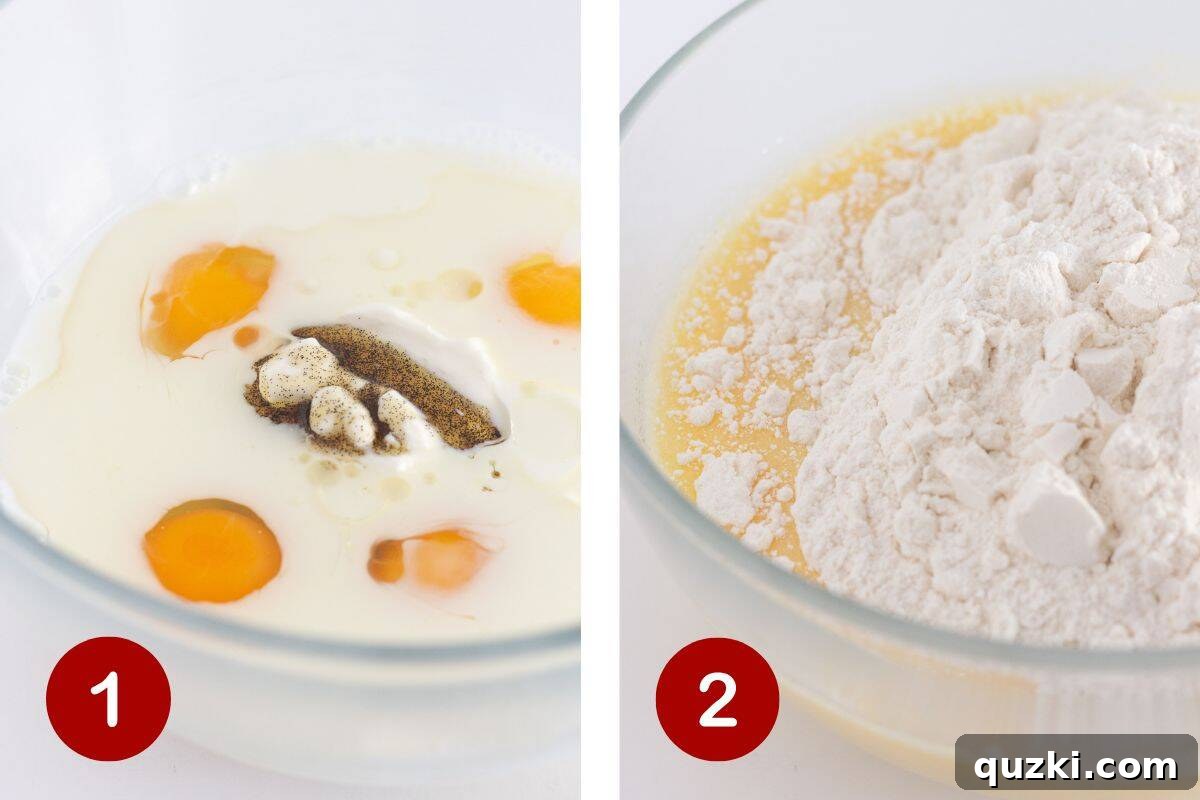
- Batter Consistency: Your finished cake batter should have a thick but pourable consistency, smooth and consistent throughout. This indicates it’s ready for baking.
- Prepare Your Pan: Liberally spray your mini bundt pan with a high-quality nonstick cooking spray. Pay extra attention to getting into all the intricate nooks and crannies of each cavity; this is absolutely critical for ensuring your small pound cakes release easily without sticking.
- Fill the Cavities: Using a spoon or a measuring cup, carefully fill each cavity in your mini bundt pan about 2/3 full. This allows room for the cakes to rise without overflowing. If you have any leftover batter, cover it loosely at room temperature until your first batch has finished baking and cooled slightly, allowing you to use the pan again.
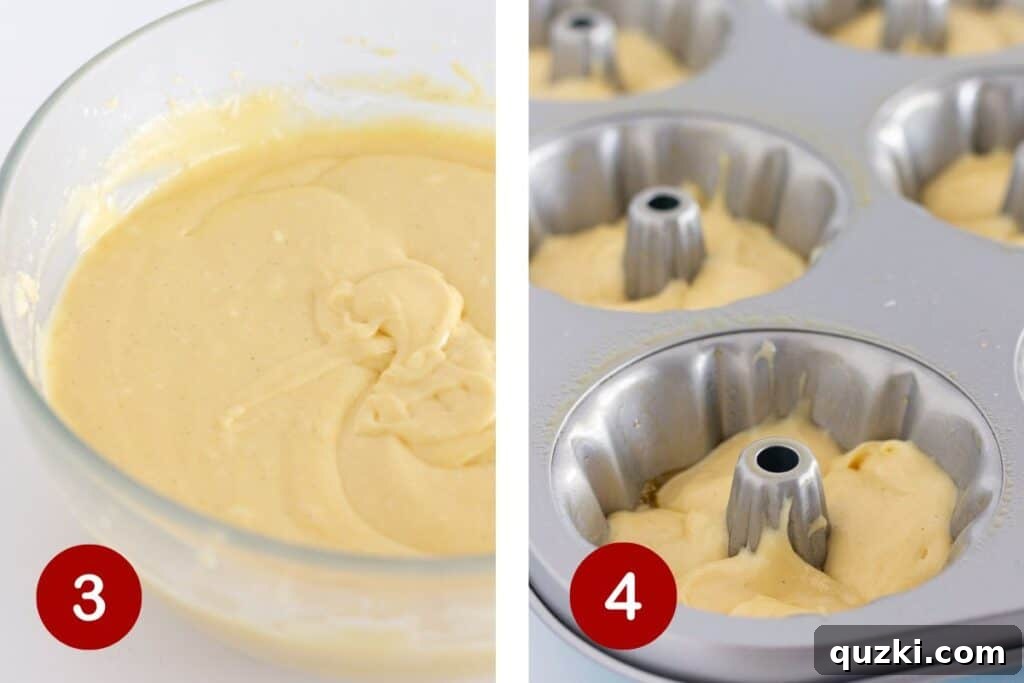
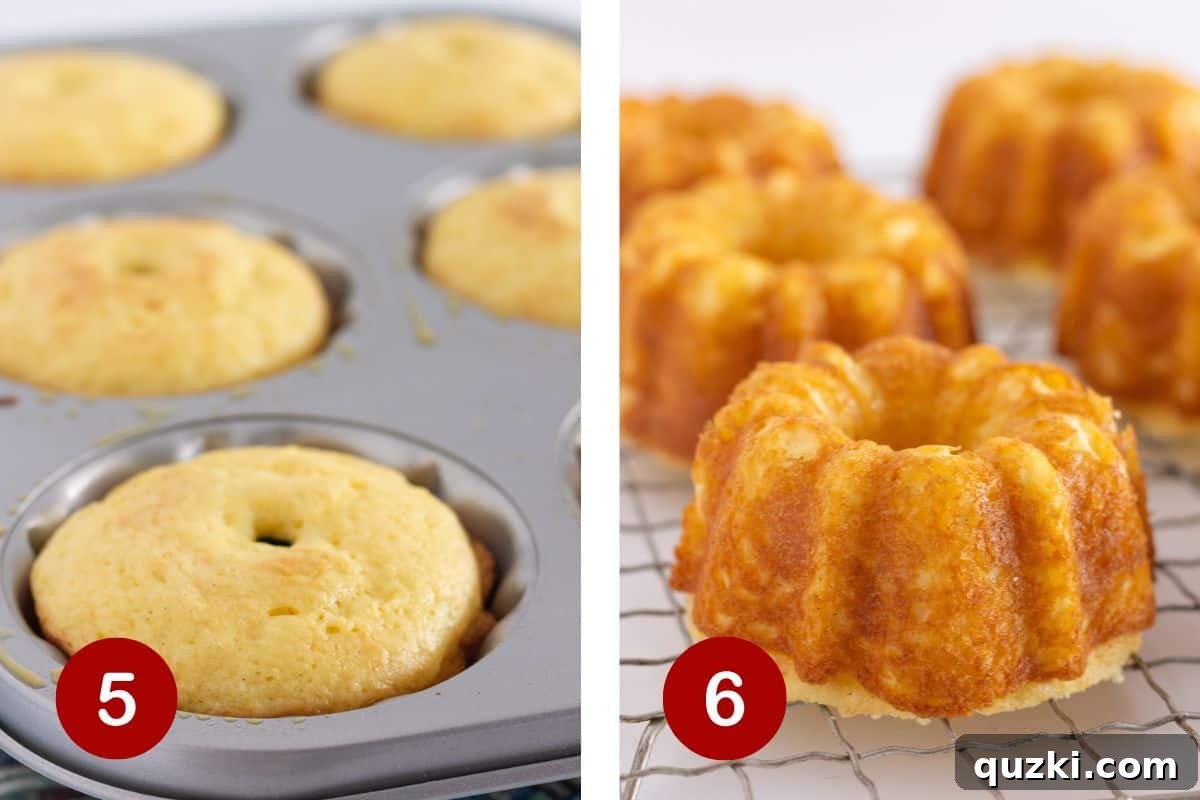
- Bake to Perfection: Place the filled pan into your preheated oven and bake for approximately 20-25 minutes. The mini cakes are done when they are a beautiful light golden brown and spring back gently when lightly touched in the center. For the best results, set a timer for 20 minutes and check their doneness, then continue baking in short intervals if needed.
- Cool and Release: Once baked, remove the pan from the oven and allow the mini pound cakes to cool in the pan for exactly 5 minutes. This brief cooling period helps them firm up. After 5 minutes, carefully invert the pan onto a wire rack. Give the pan a gentle shake to encourage the cakes to release. Let them cool completely on the wire rack before dusting with confectioners’ sugar, glazing, or decorating.
Expert Tips for Perfect Mini Pound Cakes
Achieving bakery-quality mini pound cakes is easier than you think with these professional baking tips:
- Invest in a Quality Mini Bundt Pan: For truly exceptional results, I highly recommend using a good-quality metal mini bundt pan. While silicone pans are convenient, metal pans tend to create a more defined shape and a superior crust that adds to the overall texture and appeal of your mini pound cakes.
- Generous Greasing is Key: Do not underestimate the power of a well-greased pan! A liberal application of nonstick cooking spray, ensuring every crevice and intricate detail of the bundt pan is covered, is crucial for a smooth and clean release of your cakes. This prevents sticking and preserves their beautiful shape.
- Enhance Vanilla Flavor: To truly elevate the vanilla experience, consider using both vanilla extract and vanilla bean paste. The paste offers a more intense, complex vanilla flavor and those charming little black flecks that make your mini bundt cakes look and taste extra special.
- Explore Citrusy Twists: For an exquisite flavor variation, try incorporating fresh lemon zest into your batter. About 1 tablespoon of finely grated lemon zest pairs beautifully with the classic vanilla pound cake flavor, adding a bright, aromatic lift. You could even adapt a Lemon Pound Cake recipe for mini bundt pans.
- Room Temperature Ingredients: Ensure your eggs, milk, and sour cream are at room temperature before mixing. This allows them to emulsify more effectively, creating a smoother, more uniform batter and a finer-textured cake.
- Avoid Overmixing: Once you’ve combined the wet and dry ingredients, mix just until no dry streaks remain. Overmixing develops gluten, which can lead to a tough, dry cake. A gently mixed batter yields a tender, moist result.
Serving Suggestions for Your Individual Pound Cakes
These adorable mini pound cakes are delightful on their own, but with a few simple additions, you can transform them into an even more impressive dessert. Here are some elegant and delicious serving suggestions:
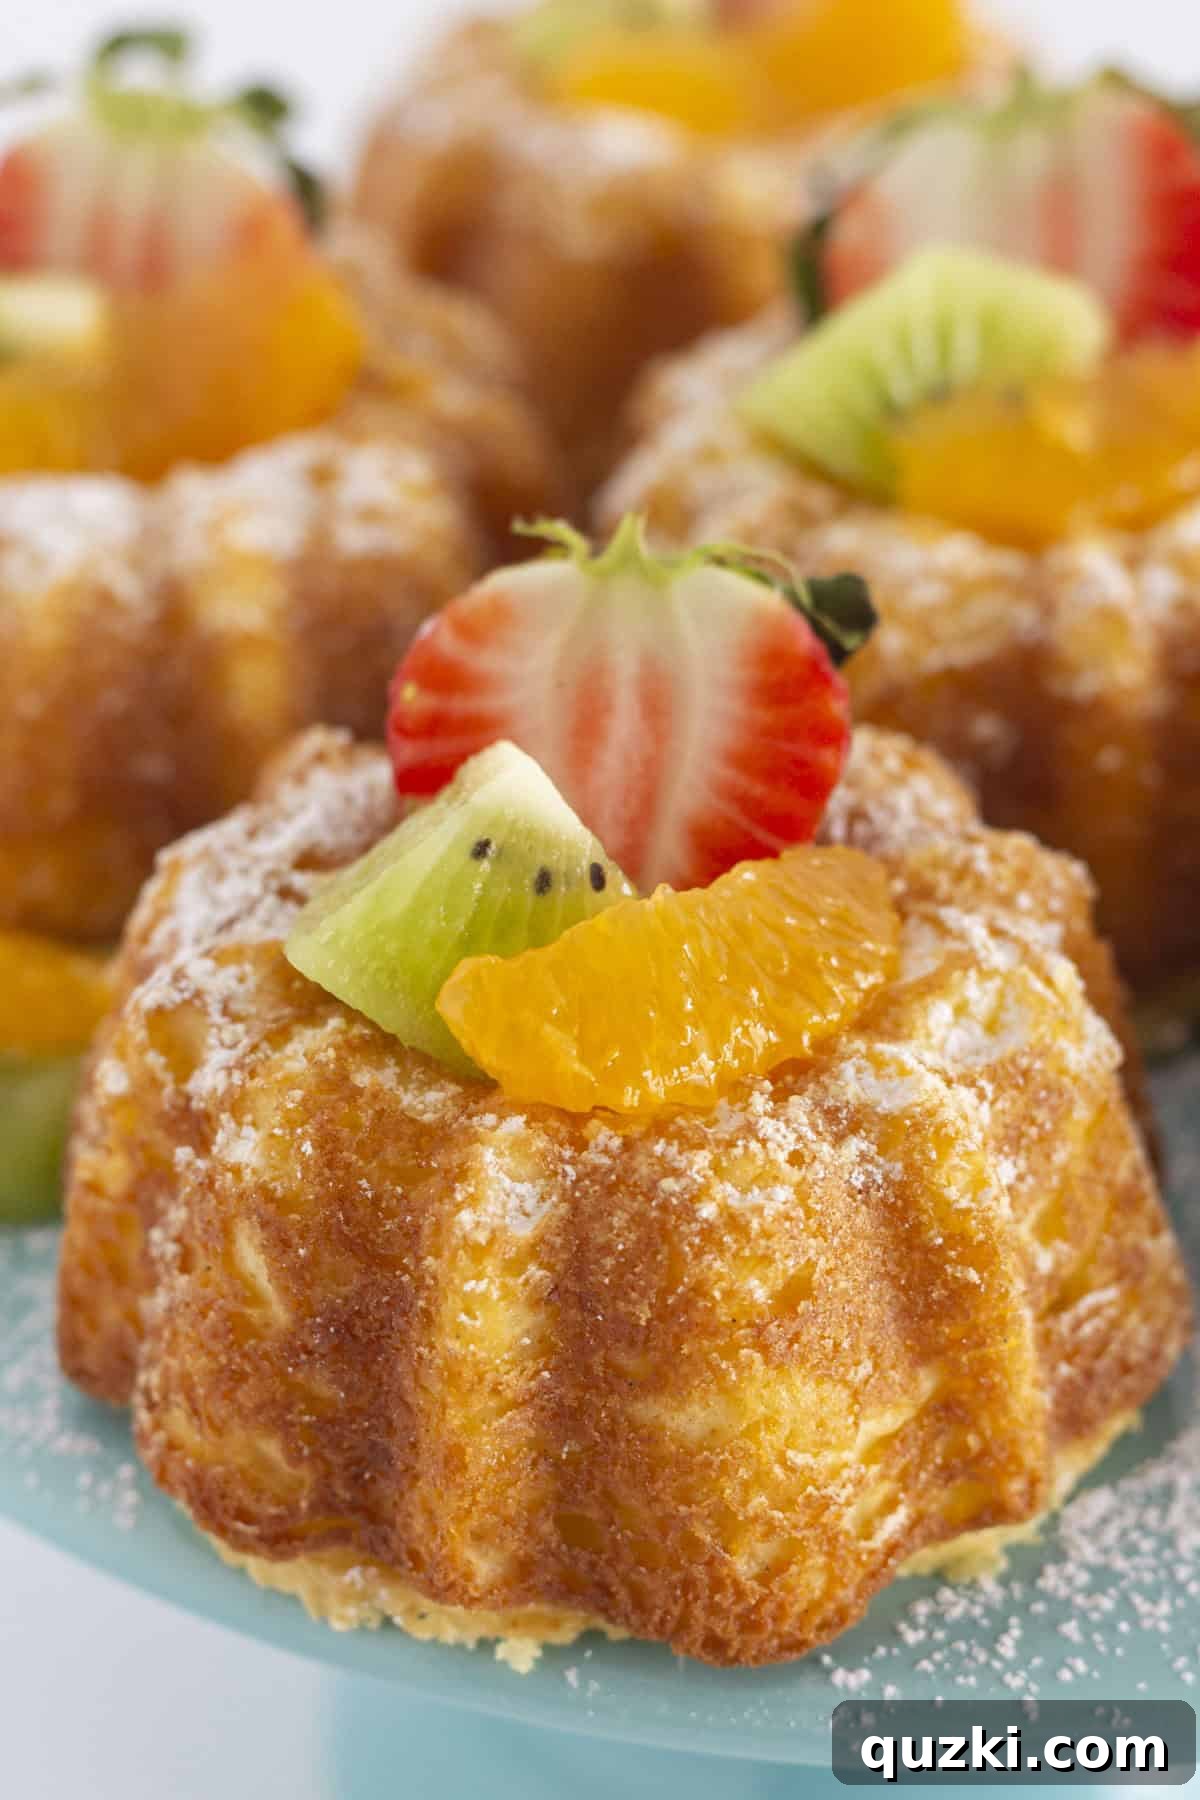
- Classic Powdered Sugar Dusting: A simple dusting of confectioners’ sugar is timeless and elegant, allowing the pure flavor of the pound cake to shine.
- Fresh Berries and Whipped Cream: Pair your cooled mini pound cakes with a generous dollop of homemade whipped cream and a medley of fresh seasonal berries like strawberries, raspberries, or blueberries for a light and refreshing combination.
- Lemony Glaze: Whisk together powdered sugar with a splash of fresh lemon juice and a tiny bit of milk or water for a bright, tangy glaze that beautifully complements the vanilla notes of the cake. Drizzle it over cooled cakes.
- Chocolate Drizzle: A simple melted chocolate drizzle, either dark or milk, adds a touch of decadence.
- Caramel or Fruit Sauce: A warm drizzle of caramel sauce or a homemade berry compote (made by simmering berries with a little sugar) makes for a comforting and indulgent treat.
- Ice Cream Pairing: Serve warm or room-temperature mini pound cakes with a scoop of your favorite vanilla bean, strawberry, or even coffee ice cream for a truly decadent experience.
- Tea Party Elegance: Arrange a selection of these mini bundt cakes on a tiered stand for a charming addition to any tea party or brunch spread.
Storage and Freezing for Optimal Freshness
Ensuring your delicious mini pound cakes stay fresh and moist is simple with these storage tips:
- Room Temperature Storage: Keep any leftover mini pound cakes in an airtight container at room temperature for up to 3 days. This helps maintain their tender texture and rich flavor.
- Refrigeration: For slightly extended freshness, especially in warmer climates, you can refrigerate leftover pound cakes. Just be sure to bring them back to room temperature before serving to restore their optimal texture and moistness.
- Freezing for Later: These small pound cakes freeze beautifully, making them perfect for meal prep or unexpected guests. To freeze, wrap individual cakes tightly in plastic wrap, then place them in a freezer-safe container or a heavy-duty freezer bag. They will stay fresh in the freezer for up to 3 months.
- Thawing Instructions: When you’re ready to enjoy a frozen mini pound cake, simply remove it from the freezer and let it thaw at room temperature for a couple of hours. Once thawed, they’re ready to be enjoyed as if freshly baked.
Recipe FAQs for Mini Pound Cakes
While it’s possible, the instant pudding mix is a key ingredient for achieving that incredibly moist, velvety texture that makes these mini pound cakes stand out. If you choose to omit it, the cakes might be slightly less moist. To compensate, I recommend adding an extra 1/4 cup of the vanilla cake mix and increasing the sour cream to 1/2 cup to help maintain some of that crucial moisture and richness.
Absolutely! Don’t let the lack of a mini bundt pan stop you. You can easily use a mini loaf pan, a muffin tin (for mini cupcakes), or even a regular 9×13 inch baking pan. The shape will, of course, be different, and you’ll need to adjust the baking time accordingly. Mini loaf pans might require an extra few minutes of baking, while muffin tins might bake faster (around 15-20 minutes). A regular 9×13 inch pan will bake for about 40-50 minutes. Always check for doneness with a toothpick.
Yes, this recipe is wonderfully versatile! Feel free to experiment with different flavor combinations. Lemon cake mix with lemon pudding, chocolate cake mix with chocolate or vanilla pudding, or even a spice cake mix with butterscotch pudding would make fantastic variations. Just ensure the pudding mix is “instant” to achieve the desired moistness and texture. Get creative and discover your favorite flavor pairings!
The key to non-stick mini bundt cakes is proper pan preparation. First, use a high-quality nonstick mini bundt pan. Second, and most importantly, spray it liberally with a baking spray that contains flour (like Baker’s Joy or a similar product). Make sure to get into all the grooves. You can also lightly dust the greased pan with flour after spraying. After baking, let the cakes cool in the pan for exactly 5 minutes before inverting them onto a wire rack. This allows them to firm up slightly and release more easily.
Certainly! To customize your mini pound cakes, feel free to fold in about 1/2 cup of your favorite mix-ins. Mini chocolate chips, chopped nuts (like pecans or walnuts), sprinkles for a festive touch, or even finely diced dried fruit (such as cranberries or apricots) would be delicious additions. Add them to the batter just before filling the pan.
Do You Love Mini Desserts? Try These Other Delightful Recipes…
If you’re as fond of individual-sized treats as I am, you’ll adore these other fantastic mini dessert recipes. They’re perfect for any occasion and always a joy to make and share:
Cakes
Easy Mini Black Forest Cakes Recipe
Cookies
Best Mini M&M Cookies
Desserts
Easy No Bake Mini Cheesecakes
Cakes
Easy Mini Carrot Bundt Cake Recipe
Did you try this recipe? We’d love to hear your thoughts!
Leave a ⭐️ review below and tag @practicallyhomemade on Pinterest!
The Best Mini Pound Cakes
June Albertson-Dick
These traditional mini pound cakes, made effortlessly from a cake mix, are the perfect individual dessert to celebrate any occasion with maximum flavor and minimum fuss.
10 mins
50 mins
1 hr
12 mini cakes
Print Recipe
Ingredients
- 1 box vanilla cake mix (13.25 ounces)
- 1 box instant vanilla pudding mix (3.4-4 ounces)
- 4 large eggs
- ¼ cup vegetable oil
- 1 cup milk (2% recommended)
- ⅓ cup sour cream
- 1 teaspoon vanilla bean paste (or vanilla extract)
Instructions
- Preheat your oven to 350°F (175°C).
- In a large bowl, whisk together the vanilla cake mix and instant pudding mix until well combined. In a separate mixing bowl, add the eggs, vegetable oil, milk, sour cream, and vanilla extract or paste, then mix until smooth. Pour the dry mixture into the wet mixture and stir gently until just combined. Be careful not to overmix.
- Liberally spray a mini bundt cake pan with nonstick cooking spray, ensuring all crevices are covered. Spoon the prepared batter into each bundt cake cavity, filling them approximately 2/3 full. If you need to bake a second batch, loosely cover the remaining batter and keep it at room temperature until the pan is ready again.
- Bake for 20-25 minutes, or until the mini cakes are a beautiful light golden brown and spring back when lightly poked with your finger. Remove the pan from the oven and allow the cakes to cool in the pan for 5 minutes. Carefully invert the pan onto a wire rack and give it a gentle shake to release the cakes. Let the bundt cakes cool completely on the rack before serving or decorating.
- Store any leftover mini pound cakes in an airtight container at room temperature for up to 3 days, or in the refrigerator for extended freshness. These mini cakes also freeze exceptionally well for up to 3 months when individually wrapped and stored properly.
Notes
If you do not have a mini bundt pan, a mini loaf pan can be used instead! Just be aware that baking times may vary slightly—mini loaf pans might require an extra few minutes in the oven. Always perform a toothpick test to ensure they are fully baked.
Nutrition
Serving:
1mini cake
Calories:
281kcal
Carbohydrates:
44g
Protein:
5g
Fat:
10g
Saturated Fat:
3g
Polyunsaturated Fat:
3g
Monounsaturated Fat:
2g
Trans Fat:
0.2g
Cholesterol:
68mg
Sodium:
383mg
Potassium:
90mg
Fiber:
1g
Sugar:
26g
Vitamin A:
163IU
Vitamin C:
0.1mg
Calcium:
136mg
Iron:
1mg
Nutrition information is automatically calculated, so should only be used as an approximation.
Enjoyed this recipe? Leave a comment below!