
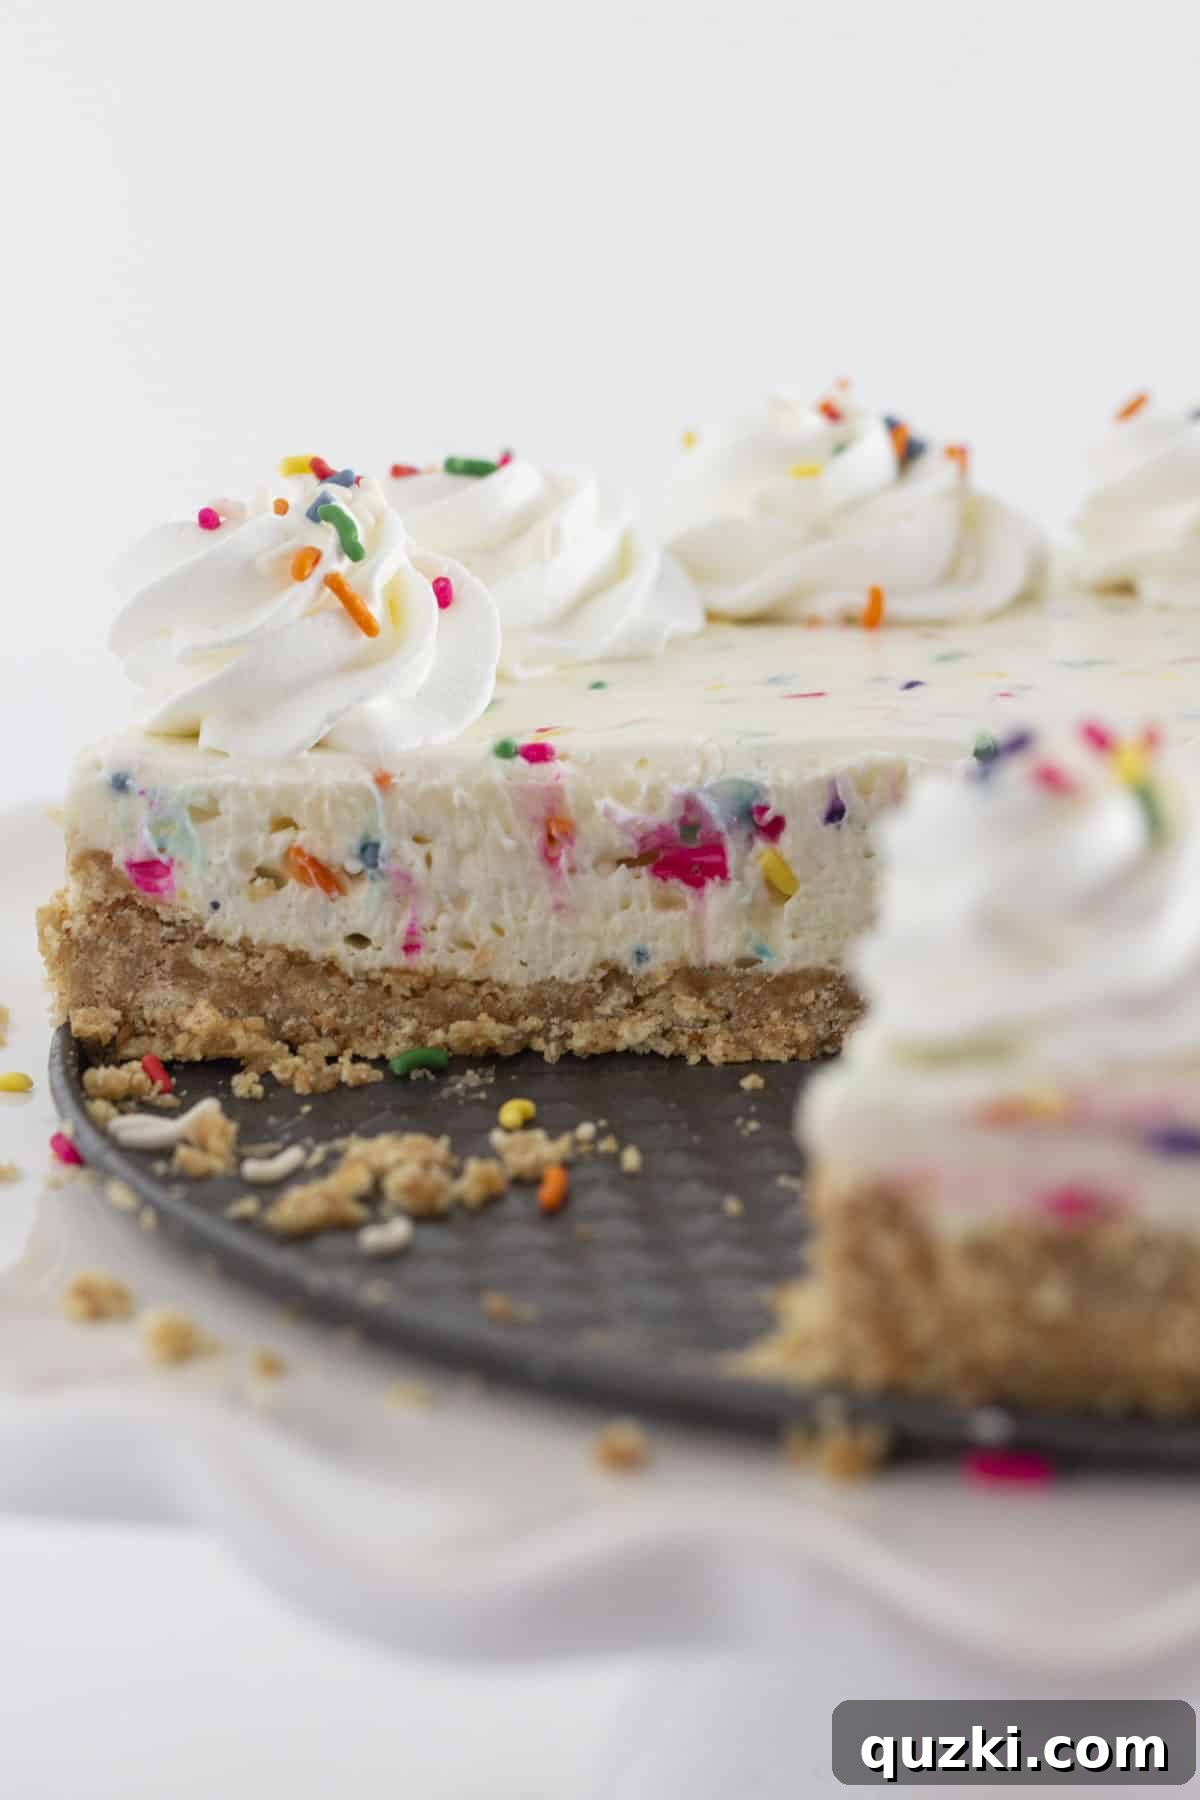
Dive into a world of pure delight with this No-Bake Funfetti Cheesecake – a truly ultimate party dessert that combines the joy of vibrant sprinkles with the creamy indulgence of cheesecake, all without ever turning on your oven! This sensational treat features a rich, buttery vanilla wafer crust perfectly complementing a smooth, velvety no-bake cheesecake filling, generously studded with colorful, playful sprinkles. It’s an effortlessly elegant dessert, ideal for any celebration, gathering, or simply to brighten a regular day. Forget complicated baking; this recipe brings maximum flavor and festive charm with minimal effort, making it a favorite for home cooks of all skill levels.
Table of Contents
- Why This Funfetti Cheesecake is a Must-Make
- Key Ingredients for Your No-Bake Masterpiece
- Essential Tools for Cheesecake Success
- Step-by-Step Guide: Crafting Your Funfetti Cheesecake
- Expert Tips for a Flawless No-Bake Cheesecake
- Storing and Freezing Your Delicious Creation
- Frequently Asked Questions
- Creative Variations & Serving Suggestions
- Discover More Irresistible No-Bake Cheesecake Recipes
- The Best No-Bake Funfetti Cheesecake Recipe
Why This Funfetti Cheesecake is a Must-Make
This delightful rainbow sprinkle cheesecake, resting on an exquisite vanilla wafer crust, has been a cherished favorite for countless years. It’s a recipe that has consistently brought smiles and sweet memories, proving its timeless appeal since its original posting back in November of 2017. What truly makes this creamy, sprinkle-filled dessert so incredibly special? It’s the perfect harmony of simplicity and spectacular flavor, making it a go-to choice for any festive occasion, especially birthday celebrations where it consistently outshines the traditional birthday cake. Its vibrant appearance and irresistibly smooth taste make it an instant crowd-pleaser, and the fact that it’s a no-bake dessert means you can whip up this amazing treat with absolute ease, leaving you more precious time to enjoy the party and your guests.
Imagine a dessert that’s not only profoundly delicious but also visually stunning, radiating pure joy with every slice. This Funfetti Cheesecake embodies everything you could possibly want in a celebratory treat: it’s wonderfully light, incredibly airy, delightfully creamy, and generously packed with playful, colorful sprinkles that add a burst of vibrant color and a whimsical touch to every bite. It truly is the ultimate hassle-free dessert for entertaining, allowing you to prepare it well ahead of time and simply chill it until the moment you’re ready to serve. This particular recipe is meticulously designed to be straightforward and accessible, ensuring that even the most novice bakers can achieve a truly show-stopping dessert that will undoubtedly leave everyone asking for second, and perhaps even third, helpings. From intimate family dinners to grand celebrations, this no-bake wonder is absolutely guaranteed to be a resounding success, creating unforgettable sweet moments for all.
Key Ingredients for Your No-Bake Masterpiece
Crafting the perfect no-bake funfetti cheesecake begins with selecting high-quality ingredients, each playing a pivotal role in achieving that dreamy texture and unforgettable flavor. Here’s a closer look at the essential components that go into this delightful recipe, along with tips for choosing the best ones:
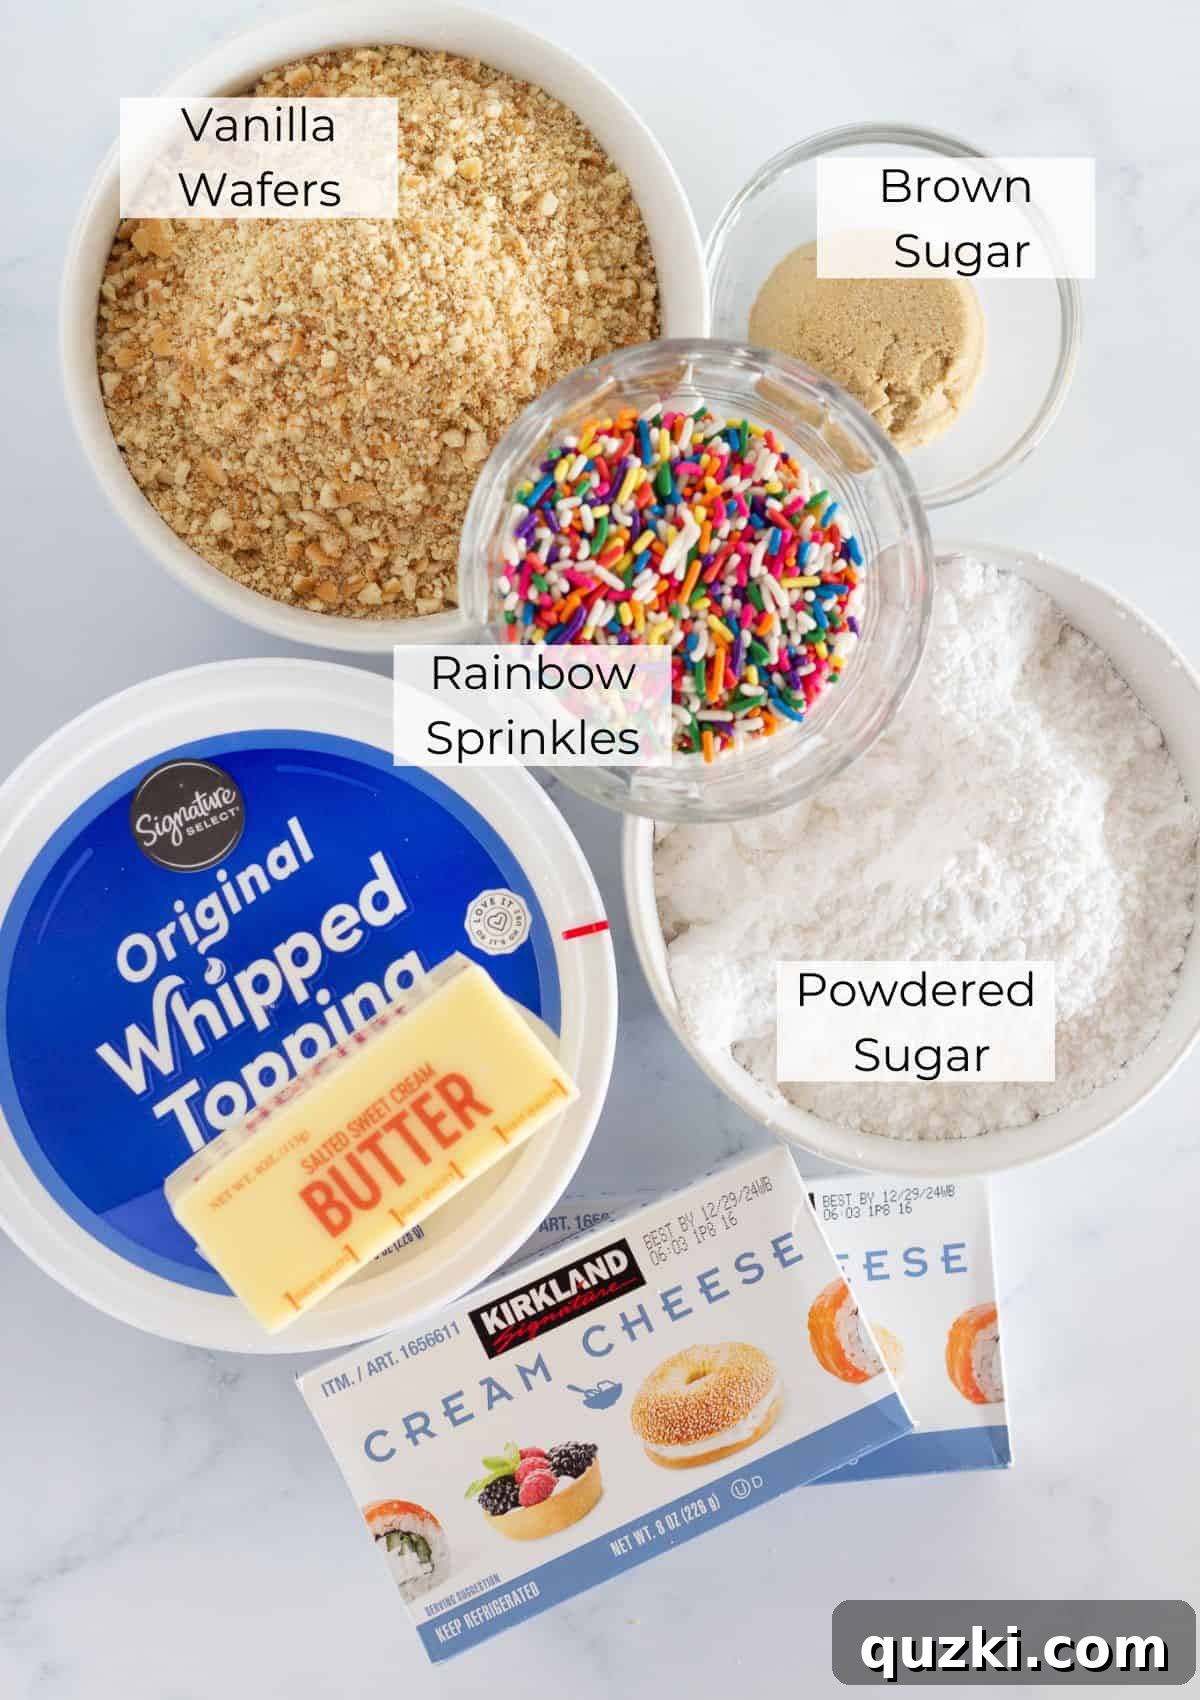
- Cream Cheese: The undisputed star of any cheesecake! For the smoothest, richest, and most authentic cheesecake filling, always opt for full-fat block cream cheese. It provides the necessary structure and tangy flavor. Ensure it’s softened to room temperature before you begin mixing. This crucial step prevents lumps and ensures a silky-smooth, uniform consistency. Avoid low-fat or whipped cream cheese, as they contain more water and can significantly alter the texture and setting of your no-bake cheesecake.
- Powdered Sugar (Confectioners’ Sugar): This incredibly fine sugar is absolutely essential for both sweetening the filling and contributing to its velvety-smooth texture. Unlike granulated sugar, powdered sugar dissolves instantly into the cream cheese, preventing any grainy mouthfeel in your finished no-bake cheesecake. It also plays a vital role in helping to thicken the mixture, giving it that perfect, stable consistency that holds its shape beautifully when sliced.
- Whipped Topping (like Cool Whip): The secret ingredient to the light, airy, and wonderfully mousse-like texture of this no-bake filling. Gently folding in a good quality whipped topping lightens the dense cream cheese mixture, making the cheesecake wonderfully fluffy, delicate, and incredibly easy to eat. Make sure your whipped topping is completely thawed but still cold before incorporating it into the cream cheese mixture for optimal results.
- Funfetti Sprinkles: What’s funfetti without a generous shower of dazzlingly colorful sprinkles? These little bursts of pure joy are not just for decoration; they infuse every single bite with a playful crunch and an irresistible festive visual appeal. Opt for good quality rainbow jimmie sprinkles, as they tend to hold their color much better and are far less likely to bleed into the filling compared to nonpareils. They are also a fantastic addition to other celebratory treats, such as these Birthday Cake Cookies, for that extra touch of cheer.
- Vanilla Wafer Cookies: These form the foundation of our irresistibly buttery and flavorful crust. Finely crushed vanilla wafer cookie crumbs create a stable yet tender base that offers a delightful contrast to the creamy, soft filling. They lend a classic, comforting vanilla flavor that perfectly complements the rich cheesecake. If you’re looking for more creative crust inspiration, don’t hesitate to explore this easy no-bake vanilla cookie crust recipe for future projects.
- Brown Sugar (for the crust): A touch of packed brown sugar adds wonderful depth and a subtle, warm caramel note to the vanilla wafer crust, significantly enhancing its overall flavor profile and making it even more delectable.
- Melted Butter (for the crust): Unsalted butter, melted to a liquid state, acts as the crucial binding agent for the cookie crumbs and brown sugar, creating a firm and delicious crust that holds its shape beautifully when chilled and sliced.
For precise measurements and quantities of all these fantastic ingredients, please refer to the detailed recipe card conveniently located below.
Essential Tools for Cheesecake Success
Making this incredible no-bake cheesecake is surprisingly simple, and the good news is you likely already have most of the necessary tools readily available in your kitchen. Having the right equipment on hand can make the preparation process even smoother and more enjoyable:
- 9-inch Springform Pan: This is an absolutely crucial piece of equipment for easy removal and a beautiful, professional presentation of your cheesecake. A good quality springform pan ensures your dessert comes out perfectly intact, with clean edges, every single time.
- Electric Hand Mixer or Stand Mixer: Essential for beating the cream cheese until it’s perfectly smooth and for thoroughly incorporating the powdered sugar. An electric hand mixer is perfectly sufficient and convenient, or you can opt to use a stand mixer fitted with a paddle attachment for larger batches or more frequent use.
- Large Mixing Bowls: You’ll need at least two: one specifically for preparing the buttery cookie crust and another generously sized bowl for mixing the creamy cheesecake filling.
- Rubber Spatula: An indispensable tool for gently folding in the delicate whipped topping and the vibrant sprinkles, ensuring you don’t overmix and maintain the airy texture and bright colors.
- Measuring Cups and Spoons: Crucial for accurate ingredient measurements, which are key to achieving the perfect balance of flavors and consistency in your cheesecake.
- Food Processor (optional but highly recommended): For finely crushing the vanilla wafer cookies quickly and efficiently, resulting in uniform crumbs for a perfect crust. If you don’t own one, placing the cookies in a sturdy Ziploc bag and crushing them with a rolling pin works just as well!
- Plastic Wrap: For tightly covering the cheesecake during its essential chilling period, preventing it from absorbing any unwanted refrigerator odors and maintaining its freshness.
- Sharp Knife: For clean, professional-looking slices.
Step-by-Step Guide: Crafting Your Funfetti Cheesecake
Creating this show-stopping no-bake funfetti cheesecake is an absolute breeze. Follow these straightforward steps to assemble your vibrant, creamy, and utterly delicious dessert, ensuring perfect results every time:
Part 1: Preparing the Buttery Vanilla Wafer Crust
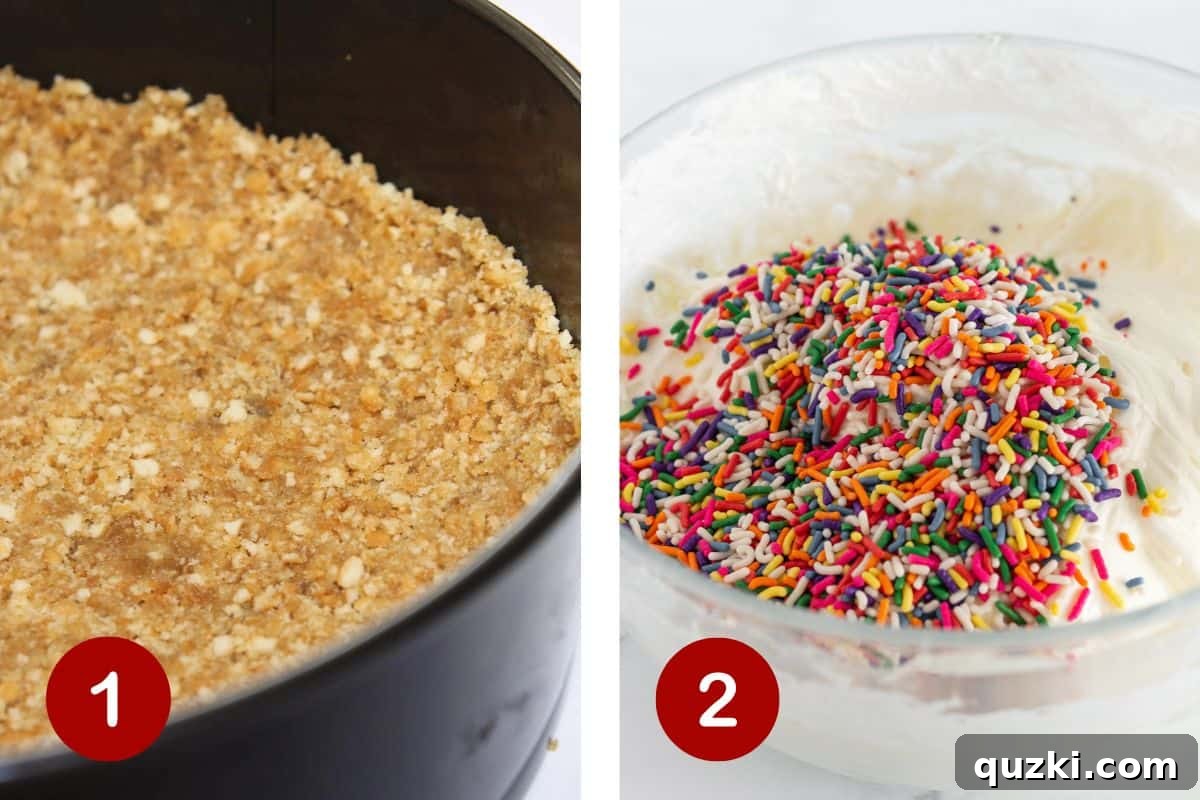
- Crush the Cookies: Begin by finely crushing your vanilla wafer cookies. For the most uniform crumbs, process them quickly in a food processor. Alternatively, place them in a sturdy plastic bag and crush them thoroughly with a rolling pin until they are very fine, like sand.
- Combine Crust Ingredients: In a medium-sized mixing bowl, combine the finely crushed vanilla wafer cookie crumbs, packed brown sugar, and melted unsalted butter. Mix all these ingredients thoroughly with a fork or your clean hands until all the crumbs are evenly moistened and resemble wet sand. This ensures a firm and cohesive crust.
- Press into Pan: Transfer the prepared crumb mixture to a 9-inch ungreased springform pan. Using the bottom of a flat glass or your fingers, firmly press the crumb mixture evenly across the bottom of the pan and slightly up the sides. A well-pressed crust is absolutely key to prevent crumbling when you slice and serve your cheesecake.
- Chill the Crust: Place the prepared crust in the refrigerator for at least 10-15 minutes while you prepare the creamy filling. This initial chill helps the butter solidify, setting the crust and making it more stable.
Part 2: Crafting the Creamy Funfetti Filling
- Beat Cream Cheese: In a large mixing bowl, using an electric hand mixer or a stand mixer with a paddle attachment, beat the softened full-fat cream cheese on medium speed for 2-3 minutes. Continue beating until it is completely smooth, wonderfully creamy, and entirely free of any lumps. This step is absolutely crucial for achieving a perfectly smooth, lump-free filling.
- Gradually Add Powdered Sugar: Slowly add the powdered sugar to the beaten cream cheese, incorporating about one cup at a time. Mix on low speed until it is fully incorporated and the mixture becomes smooth and slightly thickened. Remember to scrape down the sides of the bowl as needed to ensure everything is thoroughly combined.
- Fold in Whipped Topping: Gently fold in the thawed whipped topping into the cream cheese mixture using a rubber spatula. Use a very light hand and fold just until combined, being extremely careful not to deflate the whipped topping. This delicate folding technique helps maintain the incredibly light and airy texture of the cheesecake filling.
- Add Sprinkles: This is where the fun and festivity truly begin! Carefully fold in the funfetti sprinkles by hand with your rubber spatula. Be very gentle and actively avoid overmixing, as excessive stirring can cause the delicate colors of the sprinkles to bleed into the cheesecake, potentially leading to a dull, grayish, or mottled appearance. Just fold until the sprinkles are evenly distributed throughout the luscious filling.
Part 3: Chilling and Serving Your Masterpiece
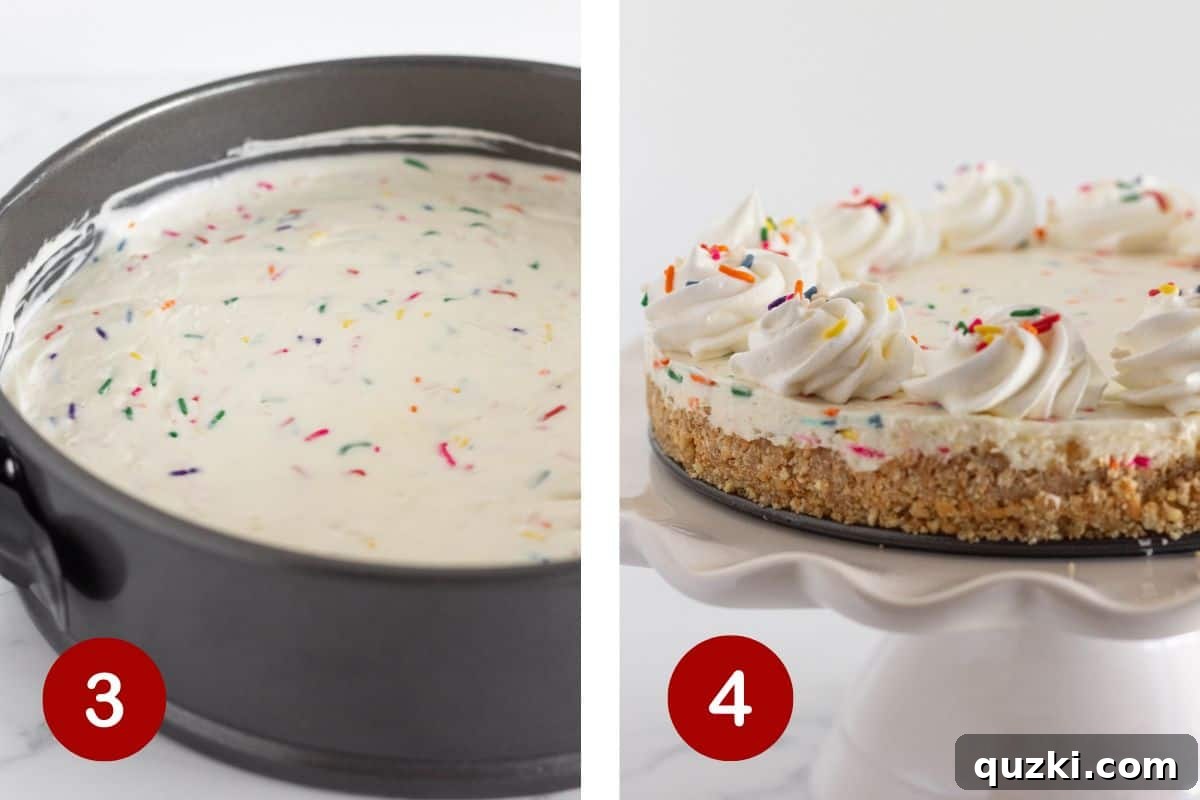
- Pour and Chill: Pour the vibrant, creamy funfetti cheesecake filling over your already chilled vanilla wafer crust in the springform pan. Gently spread the top evenly with your spatula. Cover the entire pan tightly with plastic wrap to prevent any odors from the refrigerator from affecting the delicate flavor and to maintain moisture.
- Refrigerate Thoroughly: Refrigerate the cheesecake for a minimum of 4 hours. For the absolute best results, however, an overnight chill is highly recommended. This extended chilling time is absolutely essential for the cheesecake to firm up properly, allowing it to set completely, and to develop its full, rich flavor and a perfect, sliceable texture. Your patience here will be abundantly rewarded!
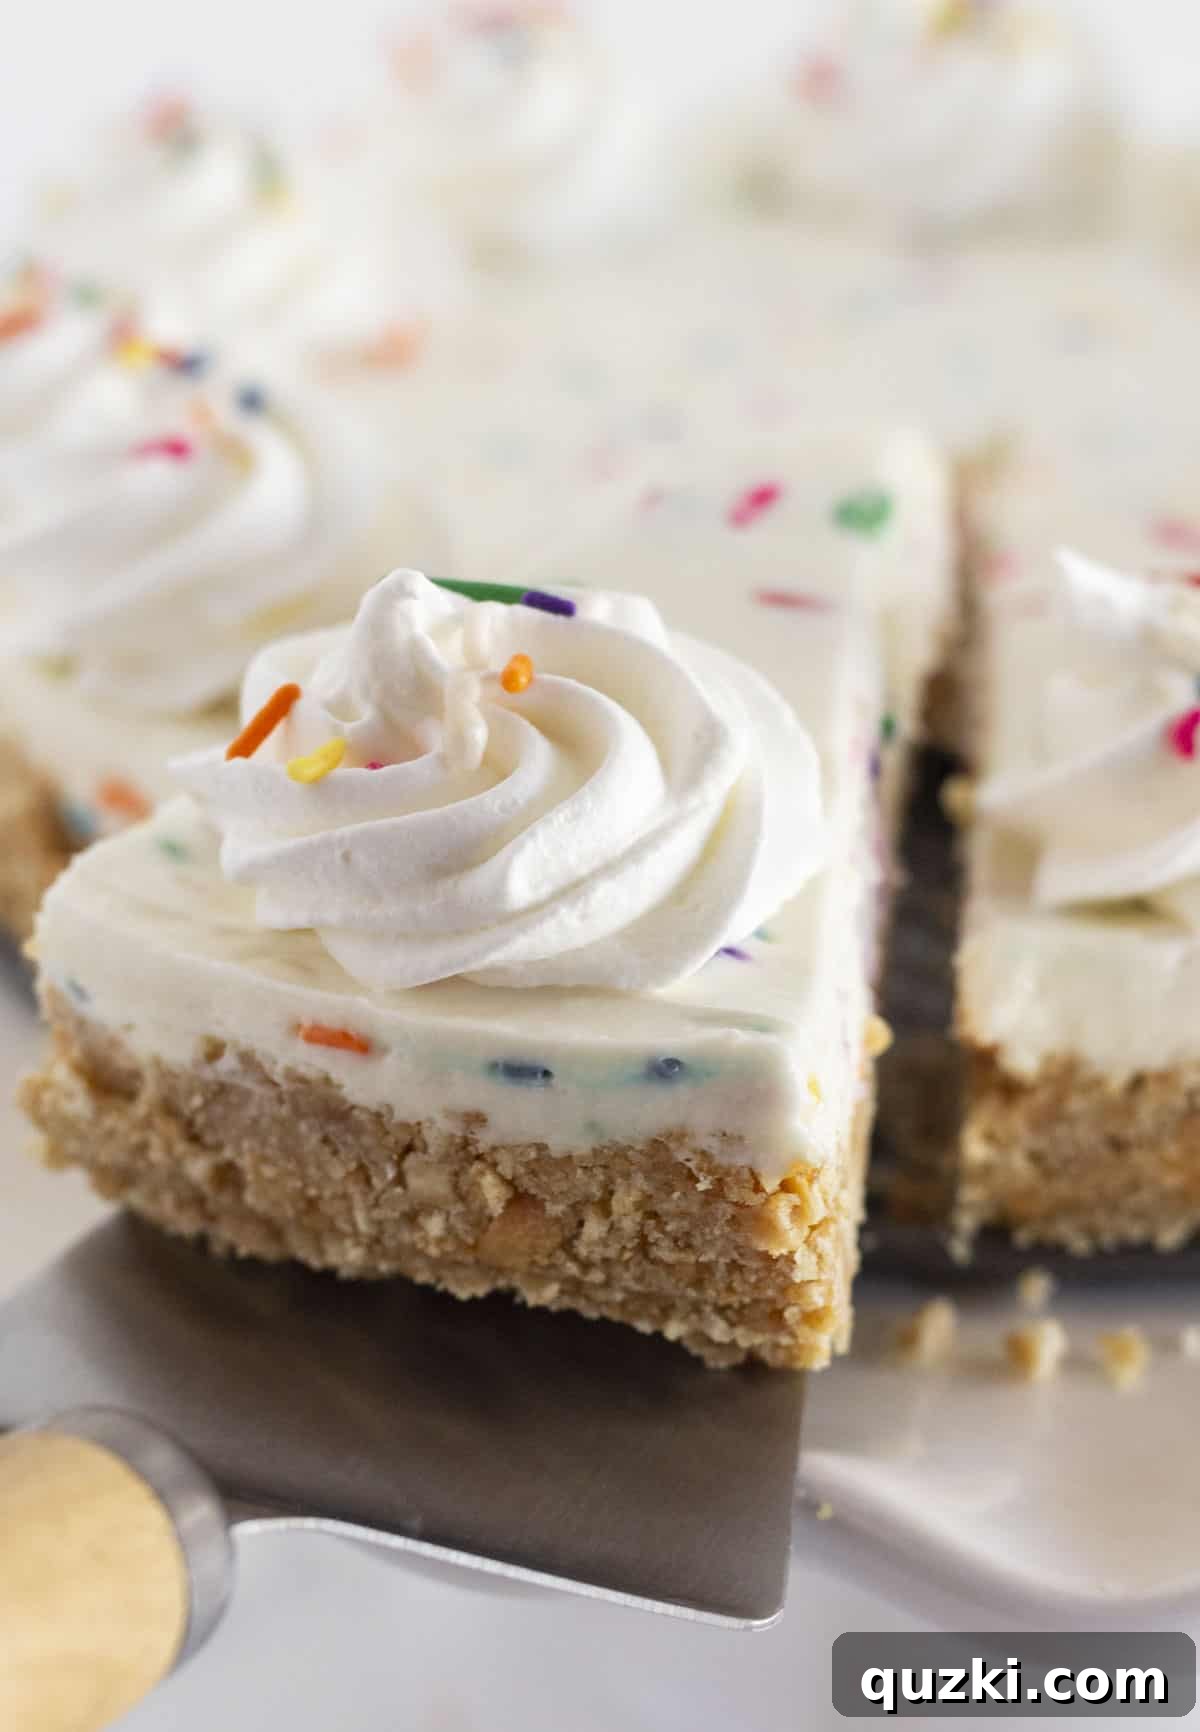
- Serve with Flair: Once thoroughly chilled and set, carefully remove the sides of the springform pan. For the cleanest, most professional-looking slices, use a sharp knife dipped in hot water and wiped clean between each cut. For the ultimate finishing touch and a truly festive presentation, top each slice with a generous dollop of fresh whipped cream and a sprinkle of extra funfetti sprinkles just before serving. Now, prepare to enjoy the cheers and compliments!
Expert Tips for a Flawless No-Bake Cheesecake
Achieving a flawless no-bake funfetti cheesecake is simpler than you might think, especially when armed with a few insider tips and tricks:
- Embrace Room Temperature Cream Cheese: This is perhaps the most crucial tip for a truly smooth filling. Softened cream cheese is significantly easier to beat until perfectly smooth, preventing any unsightly lumps or unmixed pockets in your final filling. Remember to take it out of the refrigerator at least 30-60 minutes before you plan to start mixing.
- Handle Sprinkles with Utmost Care: Overmixing the funfetti sprinkles is the quickest way to end up with a muddy or dull-looking cheesecake. Always fold them in gently and quickly with a rubber spatula, just until they are evenly distributed. This careful technique preserves their vibrant, distinct colors and their festive visual appeal. Generally, jimmie-style sprinkles tend to hold their color better and bleed less than nonpareils.
- Chill, Chill, Chill (and then chill some more!): Resist the strong urge to cut into your cheesecake too soon! A minimum of 4 hours, or even better, an overnight chill, allows the cheesecake to firm up completely and properly set. This extended chilling time is absolutely essential for ensuring beautiful, clean slices and achieving the best possible texture and flavor. Patience truly is a virtue here and will be richly rewarded.
- Prepare Your Pan for Success: While a springform pan is ingeniously designed for easy release, for extra insurance and an even smoother release, you can lightly grease the bottom (or line it with a circle of parchment paper) before pressing in the crust. This is especially helpful if you plan to transfer the finished cheesecake to a serving platter.
- Clean Cuts for Beautiful Slices: For those coveted, picture-perfect slices, always dip your sharp knife in hot water and thoroughly wipe it clean between each cut. This simple trick creates crisp, clean edges and prevents the creamy cheesecake from sticking to the knife, ensuring every slice looks impeccable.
- Get Creative with Toppings: While a dollop of whipped cream and a sprinkle of extra funfetti are classic and undeniably delightful, feel free to let your imagination run wild and experiment! Fresh seasonal berries, a luscious drizzle of chocolate or caramel sauce, or even crushed pieces of your favorite candy bars can add an exciting and personalized twist to your funfetti masterpiece.
- Don’t Over-Process the Crust: When crushing your vanilla wafers, aim for fine, even crumbs, but be careful to avoid turning them into a paste. You want a fine, crumbly texture that binds together well, not a doughy consistency.
Storing and Freezing Your Delicious Creation
This no-bake funfetti cheesecake is a fantastic dessert for making ahead, and it stores beautifully, ensuring you can enjoy its delightful flavors for days to come or save it for a special occasion:
- Storing Leftovers: Any leftover slices of this delicious funfetti cheesecake should be stored meticulously in an airtight container. Place the container in the refrigerator promptly. When properly stored in this manner, the cheesecake will maintain its freshness, creamy texture, and vibrant flavor for up to 5 days. Ensure it’s covered tightly to prevent it from absorbing any unwanted odors from other items in your refrigerator, which could compromise its taste.
- Freezing for Later Enjoyment: Yes, you can absolutely freeze this creamy dessert, making it an excellent option if you wish to prepare it far in advance or simply save some for a future craving! To freeze, wrap the entire cheesecake (or individual slices if preferred) tightly in several layers of plastic wrap, followed by an additional layer of heavy-duty aluminum foil. This double-layer protection is crucial for preventing freezer burn and maintaining the cheesecake’s quality. It can be stored safely in the freezer for up to 2 months without significant loss of quality.
- Thawing Frozen Cheesecake: When you’re ready to indulge in your frozen cheesecake, transfer it directly from the freezer to the refrigerator. Allow it to thaw slowly and gently overnight. This gradual thawing process is key to helping the cheesecake maintain its smooth, creamy texture. Avoid thawing at room temperature, as this can cause the cheesecake to become too soft or even watery, negatively impacting its consistency. Once fully thawed, simply serve as usual with your favorite fresh toppings.
Frequently Asked Questions About No-Bake Funfetti Cheesecake
Here are answers to some common questions you might have when preparing and serving this delightful no-bake funfetti cheesecake, ensuring your success and enjoyment:
Absolutely! The wonderful beauty of a no-bake crust lies in its incredible versatility. While vanilla wafers provide a classic and beloved flavor that pairs perfectly with cheesecake, you can certainly experiment with other types of cookies to customize your dessert. Crushed graham crackers make a fantastic traditional cheesecake crust, offering a subtly spiced flavor. For an extra indulgent twist, you could try crushed golden Oreos (vanilla sandwich cookies) for a richer, more decadent base. Just ensure you finely crush your chosen cookies in a food processor and then mix them with enough melted butter (and potentially a bit of sugar, depending on the cookie’s sweetness) to create a cohesive crust that holds together firmly when pressed into the pan.
This funfetti cheesecake is truly an ideal make-ahead dessert, which makes it absolutely perfect for busy hosts or when you’re planning a party! You can fully prepare the cheesecake, including both the crust and the filling, up to 2 days in advance of when you plan to serve it. Simply keep it tightly covered with plastic wrap and stored securely in the refrigerator until you’re ready to bring it out. For the best possible presentation, always wait to add the final dollop of whipped cream and any extra sprinkle toppings until just before you plan to present and serve the cheesecake. This amazing convenience makes it an outstanding choice for dinner parties, birthday celebrations, holiday gatherings, or any special occasion where you want to minimize last-minute kitchen stress.
You most certainly can! If you prefer the fresh taste and luxurious texture of homemade whipped cream, it makes a lovely substitute for store-bought whipped topping in this funfetti cheesecake recipe. To prepare it, simply combine 1 cup of very cold heavy cream, 2-3 tablespoons of powdered sugar (adjust to your sweetness preference), and 1/2 teaspoon of pure vanilla extract in a chilled mixing bowl. Whip the mixture with an electric mixer until firm peaks gracefully form. However, do keep in mind that homemade whipped cream is generally less stable and holds its structure for a shorter period compared to stabilized store-bought whipped topping. This may potentially result in a slightly softer cheesecake that is more prone to melting or losing its shape if left at room temperature for too long. For optimal results when using homemade whipped cream, ensure the cheesecake remains well-chilled in the refrigerator right up until the very moment you plan to serve it.
Sprinkle bleeding, which can result in a less vibrant or even muddy appearance, typically occurs due to two main reasons: overmixing or using types of sprinkles that are particularly prone to dissolving their colors. Nonpareils, for instance, with their very thin candy shells, tend to bleed more easily than jimmie-style sprinkles. To prevent this common issue, always fold sprinkles into the filling very gently and quickly, just enough to distribute them evenly throughout the mixture. Using good quality jimmie-style sprinkles, which typically have a thicker, more resilient shell, can also significantly help minimize color bleeding. Additionally, ensure your cheesecake mixture isn’t too warm, as heat can accelerate the dissolution of sprinkle colors.
Yes, absolutely! For a delightful and elegant individual dessert presentation, you can easily make this funfetti cheesecake in mini versions. You can use muffin tins lined with paper cupcake liners (for easy removal), small ramekins, or mini springform pans. When preparing individual servings, you’ll need to adjust the amount of crust and filling per portion accordingly. Keep in mind that smaller portions will also require a slightly reduced chilling time compared to a full-sized cheesecake, but they will still need to be thoroughly chilled until firm. These individual cheesecakes are perfect for parties, gatherings, or simply for convenient portion control and a charming presentation.
Creative Variations & Serving Suggestions
While the classic No-Bake Funfetti Cheesecake is absolutely perfect and delightful on its own, here are some inspiring ideas to add your unique touch and make it even more special, tailored to various tastes and occasions:
- Themed Sprinkles: Take advantage of the versatility of sprinkles! Tailor your sprinkles to perfectly match any holiday or specific event. Use festive red and green for Christmas, soft pastels for Easter celebrations, vibrant orange and black for Halloween, or even specific team colors for an exciting game day treat. The possibilities for customization are endless and fun!
- Add a Fruity Twist: For a delightful hint of natural fruit flavor and a burst of color, gently fold in finely chopped fresh strawberries or raspberries (ensure they are very dry to prevent excess moisture) into the cheesecake filling. Alternatively, you could elegantly top individual slices with a vibrant homemade berry compote or a fresh fruit salsa.
- Chocolate Lover’s Dream: Elevate this dessert for chocolate enthusiasts! Drizzle a generous amount of rich chocolate syrup over each slice, or for an extra decadent touch, gently fold mini chocolate chips into the creamy filling along with the funfetti sprinkles. For the crust, a crushed chocolate cookie base (like classic crushed Oreos) would also be an absolutely fantastic and complementary choice.
- Citrus Zest Boost: A little bit of finely grated lemon or orange zest, delicately folded into the cream cheese filling, can add a wonderfully bright, refreshing, and tangy counterpoint to the sweetness of the cheesecake, making each bite even more complex and invigorating.
- Cookie Dough Funfetti: For an adventurous and utterly irresistible twist, gently fold small, safe-to-eat chunks of edible cookie dough into the filling just before chilling. This adds an amazing textural contrast and another layer of sweet indulgence.
- Serving Suggestions: Beyond the classic whipped cream and sprinkles, consider serving your funfetti cheesecake with a side of elegantly sliced fresh fruit, a luxurious scoop of high-quality vanilla bean ice cream, or a light and tangy berry coulis. This versatile cheesecake also pairs wonderfully with a warm cup of coffee, a refreshing glass of iced tea, or a celebratory glass of sparkling cider.
Discover More Irresistible No-Bake Cheesecake Recipes
If you’ve utterly fallen in love with the sheer ease, convenience, and deliciousness of this no-bake funfetti cheesecake, then you are truly in for an exciting treat! The expansive world of no-bake cheesecakes is vast and wonderfully diverse, offering endless possibilities for effortlessly delicious desserts that are perfect for any occasion. These recipes are fantastic for when you want a show-stopping dessert without the hassle of baking. Here are some other fantastic and equally irresistible no-bake cheesecake recipes to inspire your next culinary adventure and delight your taste buds:
Desserts
No Bake Strawberry Crunch Cheesecake Recipe
Cheesecakes
The Best Oreo No Bake Cheesecake
Desserts
Easy Berry No Bake Cheesecake
Desserts
No Bake Cheesecake Waffle Cones Recipe
Did you try this amazing recipe? We’d absolutely love to hear from you!
Please take a moment to leave a ⭐️ review below and don’t forget to tag @practicallyhomemade on Pinterest to share your delightful culinary creation with our community!
The Best No-Bake Funfetti Cheesecake
By: June Albertson-Dick
Creamy no-bake cheesecake, generously filled with festive sprinkles and nestled in a perfectly crunchy Nilla Wafer crust… This dessert is pure perfection and an absolute delight, ideal for any celebration!
Prep time: 10 minutes
Chill time: 4 hours
Total time: 4 hours 10 minutes
Servings: 10 slices
Rate Recipe |
Print Recipe
Ingredients
Crust
- 2 ¼ cups vanilla wafer cookies, (finely crushed crumbs)
- ¼ cup brown sugar, (packed)
- ½ cup butter, (melted)
Filling
- 16 ounces cream cheese, (softened, full-fat block)
- 1 ¾ cups powdered sugar
- 2 cups whipped topping, (thawed, like Cool Whip)
- ½ cup funfetti sprinkles, (jimmie-style recommended)
Instructions
Crust Preparation
- In a medium bowl, thoroughly mix together the finely crushed vanilla wafer cookie crumbs, brown sugar, and melted butter until everything is nicely incorporated and the mixture resembles wet sand.
- Pour the crumb mixture into a 9-inch lightly greased springform pan. Press the crumbs firmly and evenly into the bottom and slightly up the sides of the pan. Refrigerate the crust for at least 10 minutes while you prepare the filling.
Filling Preparation & Assembly
- In a large mixing bowl, using an electric hand mixer, beat the softened cream cheese on medium speed for 2-3 minutes until it is completely smooth and creamy, with no lumps.
- Gradually add the powdered sugar, one cup at a time, mixing until it is fully incorporated and the mixture is smooth. Scrape down the sides of the bowl as needed to ensure all ingredients are well combined.
- Gently fold in the thawed whipped topping into the cream cheese mixture using a rubber spatula until just combined. Be careful not to overmix and deflate the whipped topping, as this maintains the airy texture.
- Finally, carefully fold in the funfetti sprinkles by hand using a rubber spatula. Mix only until the sprinkles are evenly distributed throughout the filling, avoiding over-stirring to prevent the colors from bleeding into the cheesecake.
- Pour the prepared cheesecake mixture into the chilled Nilla Wafer crust. Cover the springform pan tightly with plastic wrap.
- Refrigerate the cheesecake for a minimum of 4 hours, or ideally overnight, until it is firm and well-set.
- To serve, carefully remove the sides of the springform pan. Slice the cheesecake with a sharp knife (wiped clean between slices for neatness) and top each piece with a dollop of whipped cream and extra sprinkles for the perfect festive finish.
Notes
- Leftover no-bake funfetti cheesecake can be stored in an airtight container in the refrigerator for up to 5 days, maintaining its freshness and flavor.
- This cheesecake freezes beautifully! To freeze, wrap it tightly in plastic wrap and then aluminum foil before placing it in the freezer. It can be stored for up to 2 months. Thaw overnight in the refrigerator before serving.
Nutrition Information (Approximate per slice)
Serving: 1 slice
Calories: 525kcal
Carbohydrates: 58g
Protein: 4g
Fat: 31g
Saturated Fat: 18g
Polyunsaturated Fat: 3g
Monounsaturated Fat: 8g
Trans Fat: 0.4g
Cholesterol: 71mg
Sodium: 328mg
Potassium: 106mg
Fiber: 0.3g
Sugar: 46g
Vitamin A: 904IU
Calcium: 62mg
Iron: 0.1mg
Nutrition information is automatically calculated, so it should only be used as an approximation. Individual results may vary.
Enjoyed this recipe? We’d love to hear your thoughts and see your creations!
Leave a comment below to share your experience with this delightful Funfetti Cheesecake!