
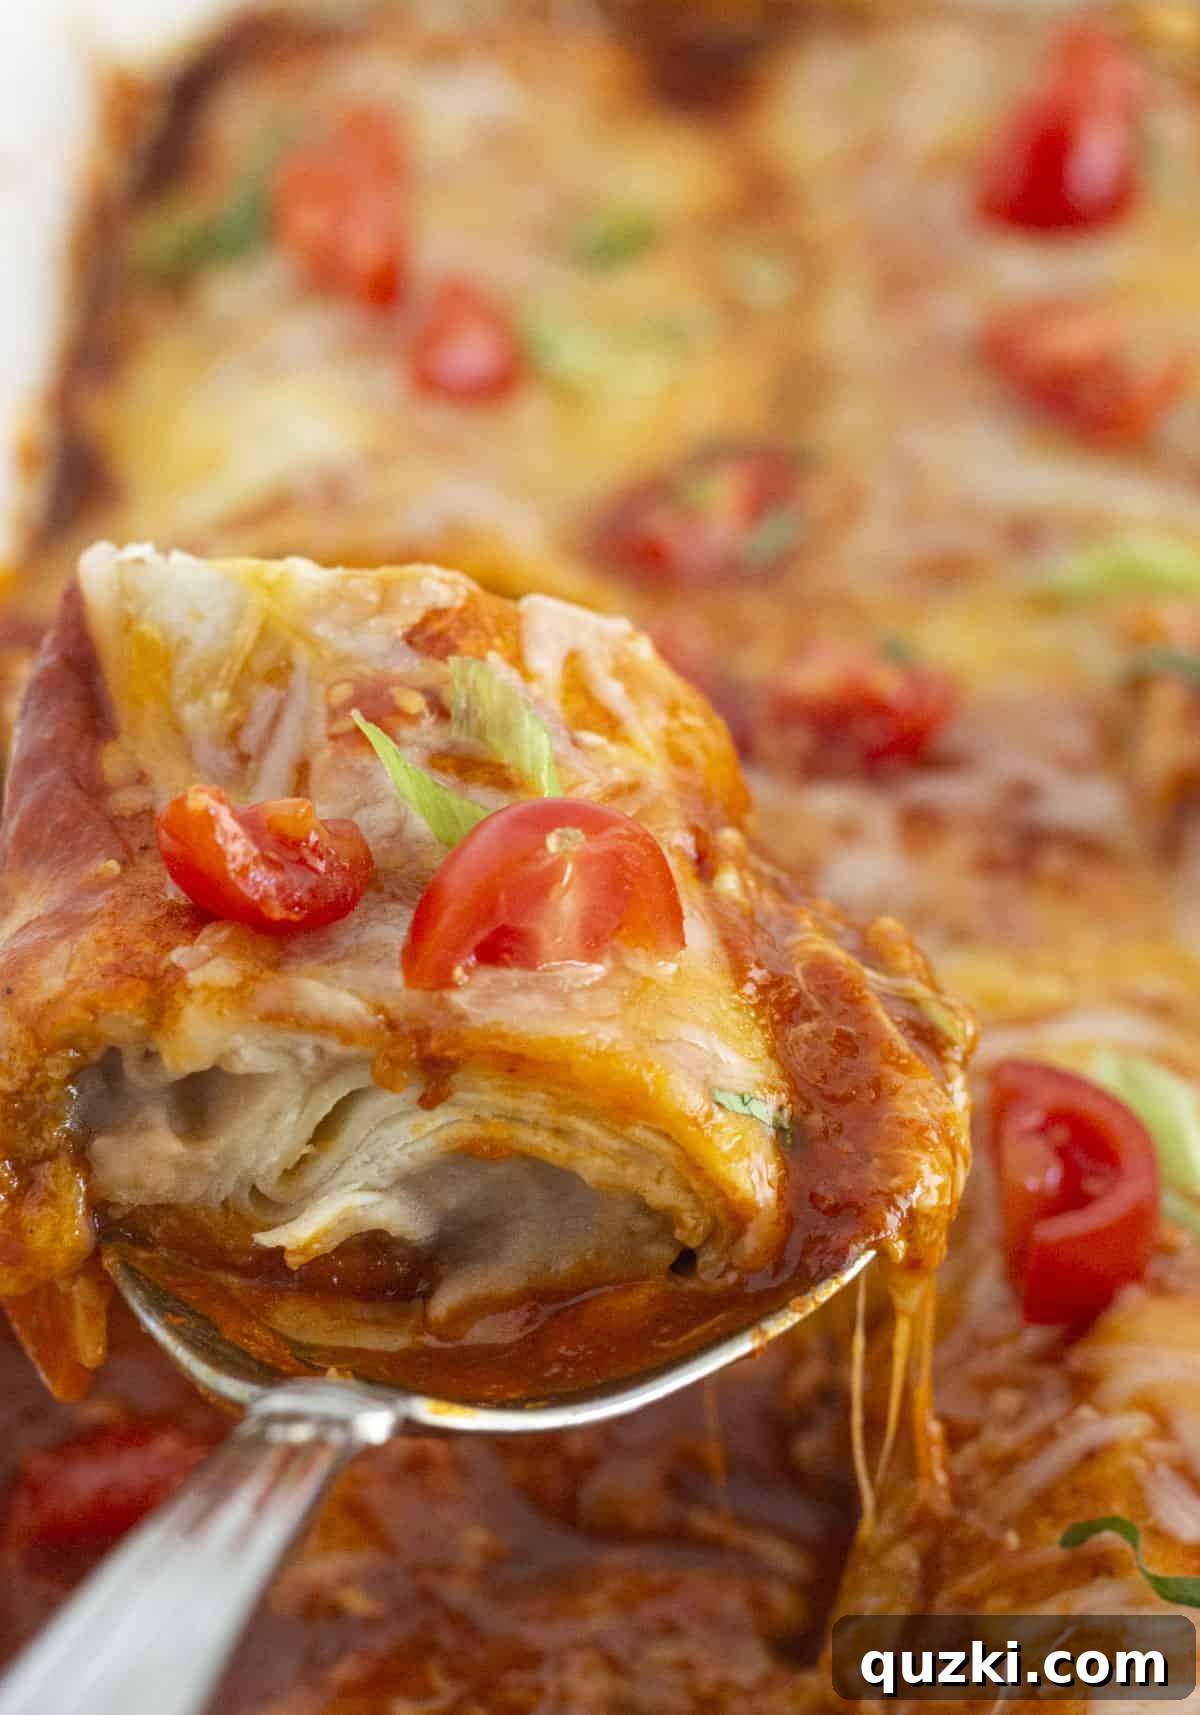
Effortless Frozen Burrito Casserole: Your Ultimate Weeknight Dinner Solution
Craving a hearty, satisfying meal that tastes like it took hours but comes together in minutes? Look no further than this incredible Frozen Burrito Casserole. Born from the need for a simpler alternative to traditional enchiladas on bustling weeknights, this recipe is a true lifesaver for busy families and individuals alike. By cleverly utilizing readily available frozen burritos and common pantry ingredients, you can effortlessly assemble and bake a delicious, family-friendly dinner with minimal fuss. Forget the tedious rolling, messy filling, and extensive prep work – this casserole redefines convenience without compromising on flavor or that comforting, homemade feel.
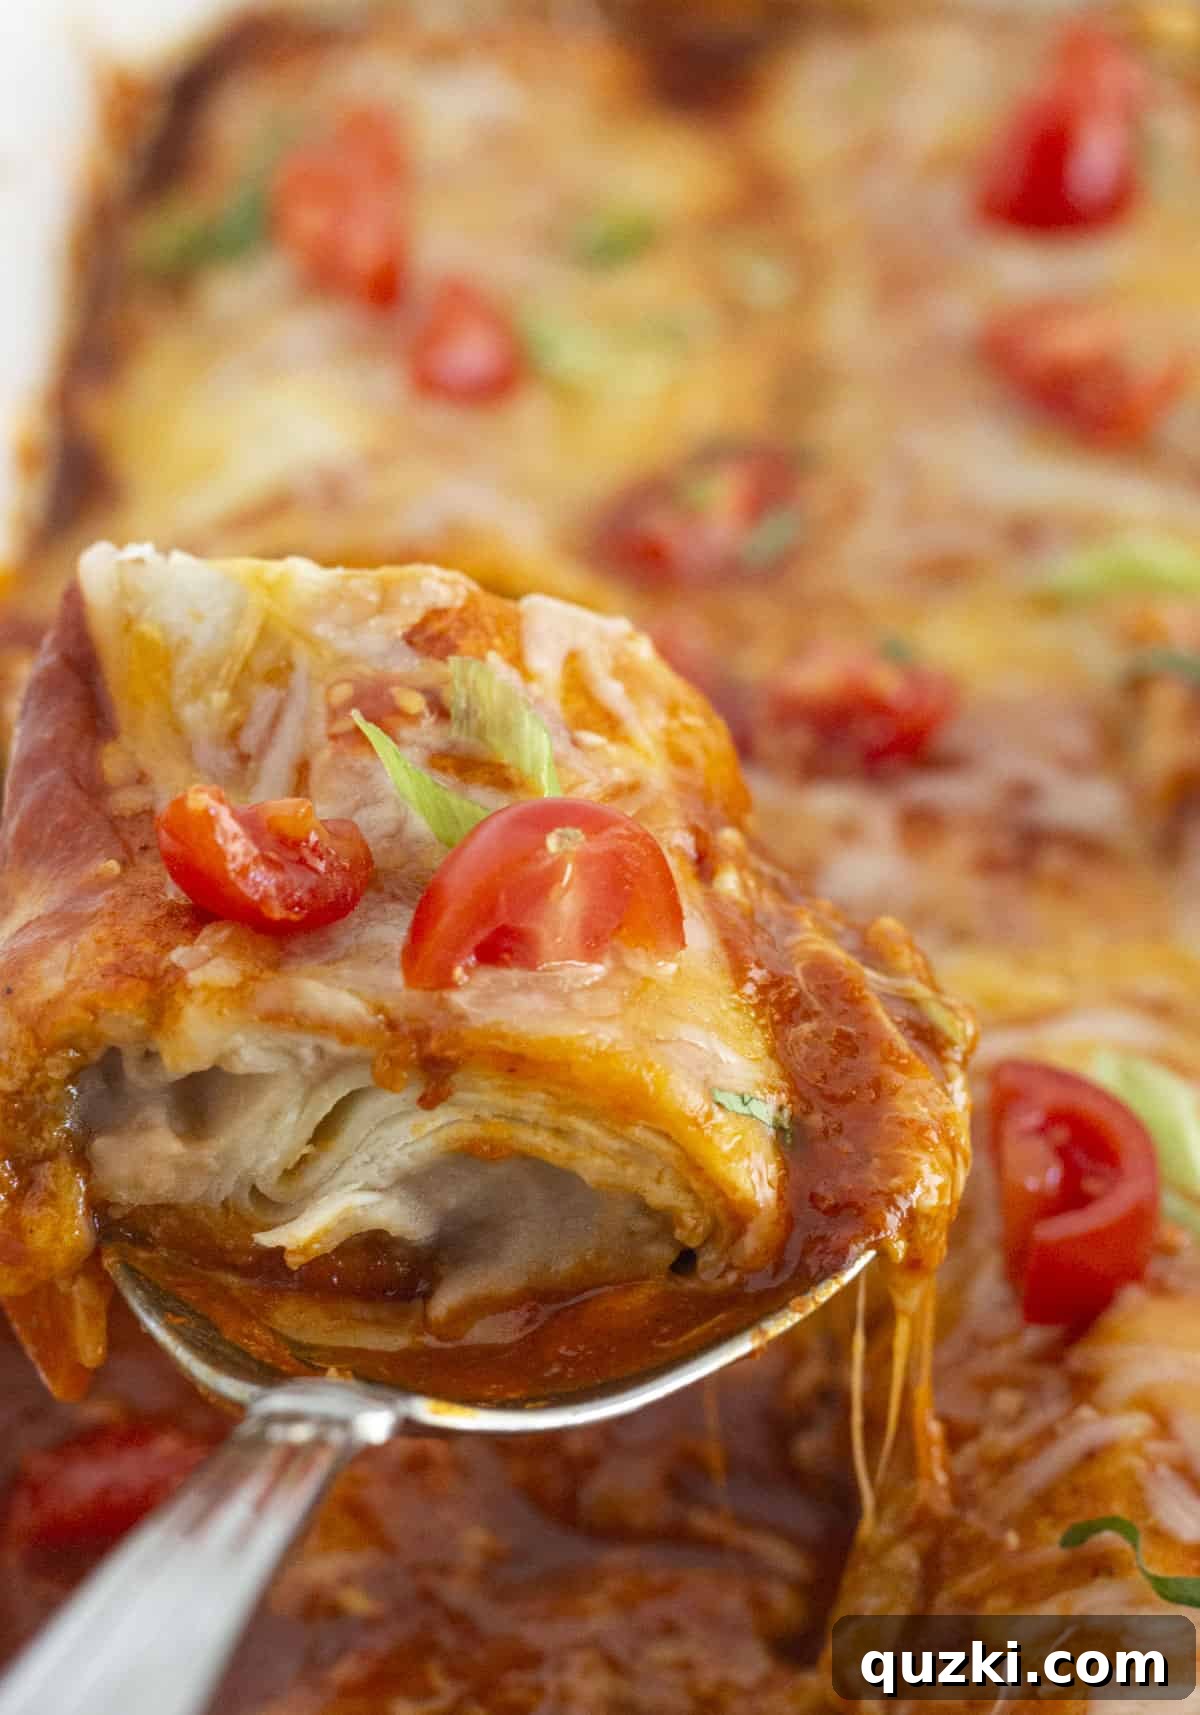
This casserole is a true culinary hack that never compromises on taste or satisfaction. Each bite delivers that irresistible cheesy, saucy goodness, especially when crowned with your favorite fresh toppings like cool sour cream, creamy avocado slices, or vibrant green onions. Whether you’re feeding a bustling family, hosting an impromptu gathering, or simply craving a comforting dinner with minimal cleanup, this frozen burrito casserole is an absolute game-changer. It offers all the cozy, satisfying warmth of a home-cooked meal, yet it’s dramatically simpler than preparing traditional enchiladas from scratch. The best part? Your delighted diners will never guess you took a few clever shortcuts to create such a spectacular dish.
Why You’ll Love This Frozen Burrito Casserole
This recipe is more than just a quick meal; it’s a brilliant solution to common weeknight dinner dilemmas, offering maximum flavor with minimum effort. Here’s why this Frozen Burrito Casserole deserves a permanent spot in your regular meal rotation:
- Unbeatable Convenience: This is truly a “dump and bake” recipe. There’s no need to thaw the burritos, no complex layering, and certainly no intricate rolling. Simply unwrap, arrange, and let your oven do the rest. It saves you precious time and mental energy on busy evenings.
- Family-Friendly Appeal: Everyone loves burritos, making this casserole an instant hit with both kids and adults. It brings together familiar, comforting Mexican-inspired flavors in a format that’s easy to serve and enjoy, even for picky eaters.
- Minimal Cleanup: With just one baking dish required for the main event, cleanup is an absolute breeze. Spend less time scrubbing pots and pans and more quality time with your family or simply relaxing after dinner.
- Highly Customizable: This recipe is incredibly adaptable. Easily change up the burritos, sauces, or add-ins to suit different tastes, dietary preferences, or whatever ingredients you have on hand. From mild to spicy, vegetarian to meat-lover, the possibilities for customization are vast.
- Budget-Friendly Meal: Frozen burritos and common pantry staples like enchilada sauce and salsa are typically very affordable. This makes the casserole an economical choice for feeding a crowd or for managing your weekly grocery budget without sacrificing flavor.
- Hearty & Satisfying: Packed with protein, cheese, and flavorful sauce, this casserole is a truly filling and satisfying meal. It’s perfect for fueling up after a long day and will keep hunger at bay.
- Delicious Leftovers: If you’re lucky enough to have any leftovers, they reheat wonderfully, making for excellent lunches or quick dinners throughout the week.
Key Ingredients for Your Burrito Casserole
The magic of this casserole lies in its straightforward approach and reliance on easily accessible ingredients. You won’t need any obscure items to create this flavor-packed dish:
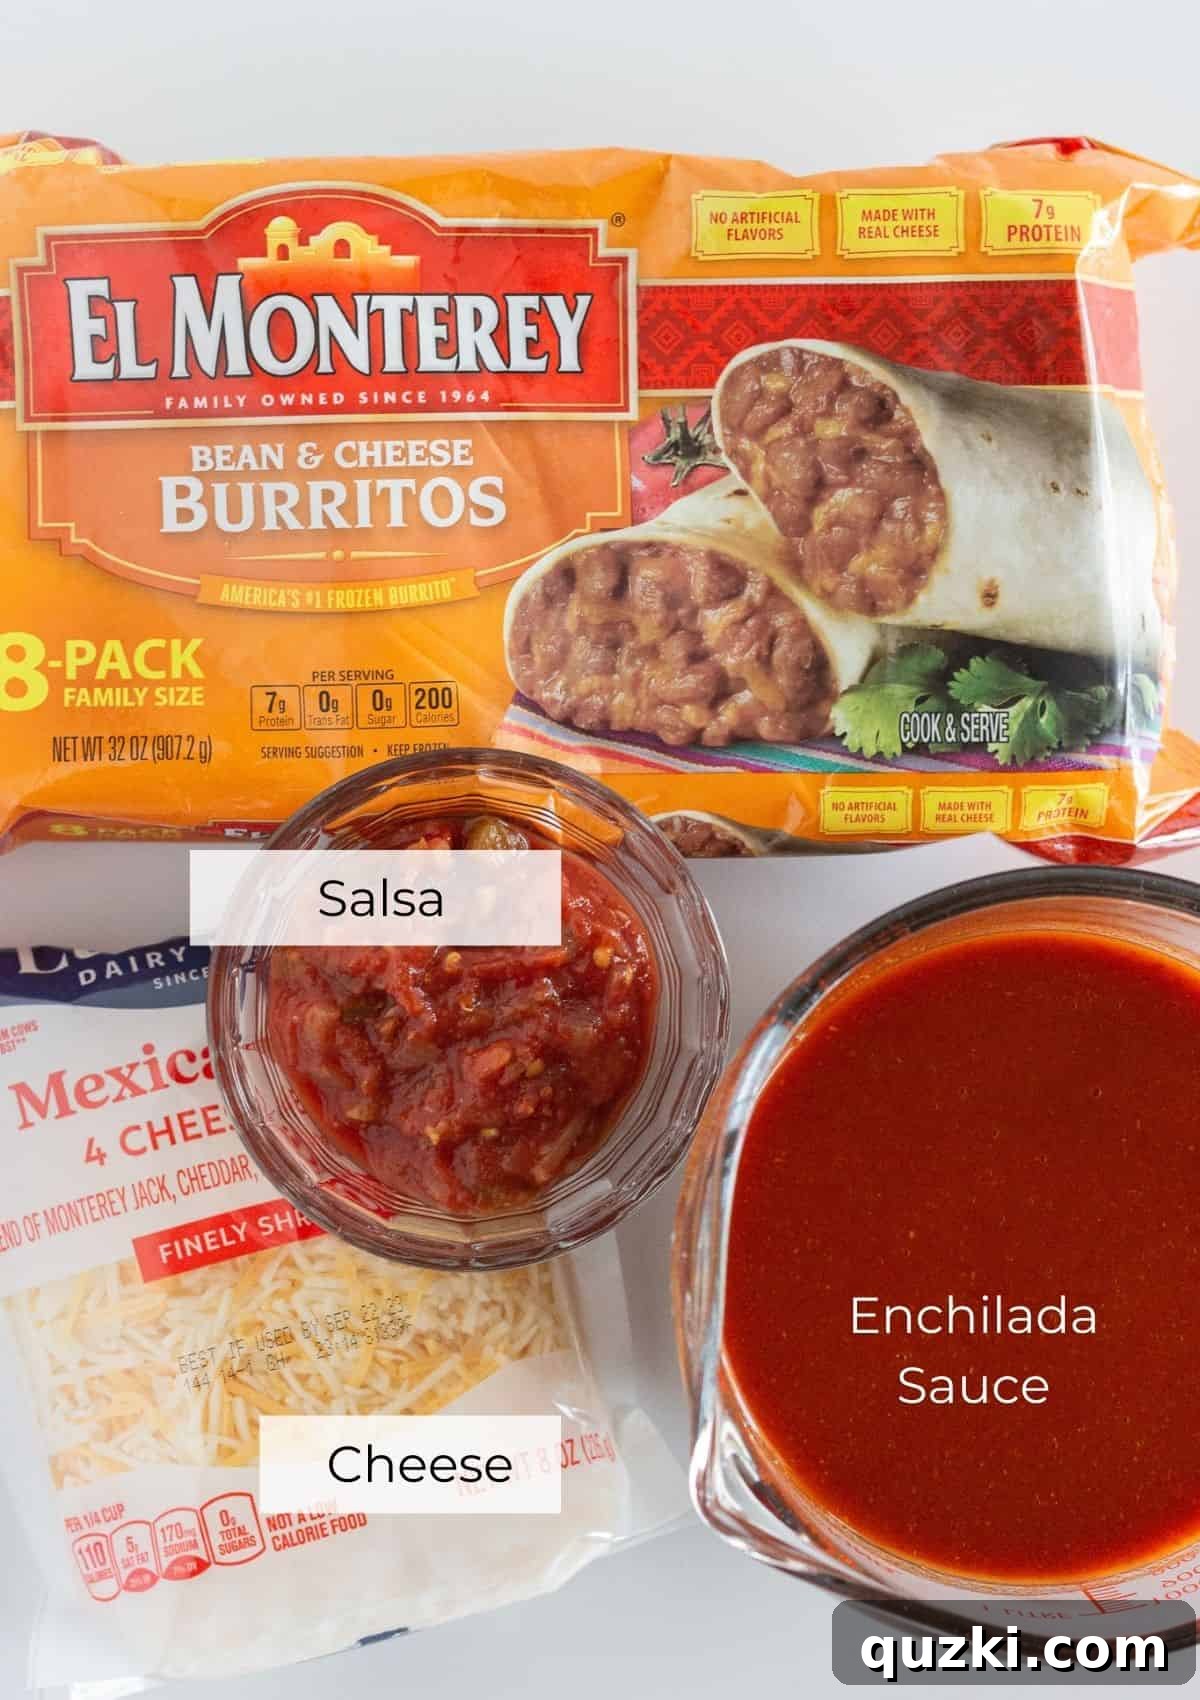
- Frozen Burritos: These are the undeniable stars of our show! The frozen food aisle offers an incredible variety of frozen burrito flavors and fillings. From classic bean and cheese to savory chicken, beef, or even plant-based options, you’re sure to find something that your family will love. Opt for burritos that are relatively similar in size to ensure even baking throughout the casserole. Remember, no thawing required!
- Enchilada Sauce: This ingredient forms the rich, vibrant base of your casserole, infusing it with authentic Mexican-inspired flavor. You have the flexibility to adjust the casserole’s spice level by choosing a mild, medium, or hot variety of enchilada sauce. While traditional red enchilada sauce is fantastic, a green enchilada sauce (salsa verde) can offer a brighter, tangier profile for a delicious twist.
- Salsa: Adding salsa to the enchilada sauce mixture contributes extra flavor, texture, and a touch of freshness. A thick and chunky salsa works best here, as it adds substance and a pleasant mouthfeel to the sauce. Whether you prefer a mild, tomato-heavy salsa, a medium salsa with roasted corn and black beans, or a fiery habanero variety, your choice will beautifully enhance the overall taste.
- Shredded Cheese: No casserole is complete without a generous, gooey layer of melted cheese. Cheddar cheese is a perennial favorite for its sharp flavor and excellent melting properties. However, Monterey Jack for a milder, creamier melt, a convenient Mexican blend, or even a spicy Pepper Jack for an added kick are all superb options. The goal is a cheese that melts smoothly to create a bubbling, golden topping that binds all the delicious components together.
Endless Variations and Smart Substitutions
The beauty of this frozen burrito casserole recipe isn’t just its ease, but also its incredible adaptability. Don’t be afraid to experiment and customize it to suit your specific tastes, dietary needs, or whatever ingredients you happen to have on hand. Here are some fantastic ways to switch things up:
- Burrito Base Bonanza:
- Mix and Match: Feel free to use different types of frozen burritos in the same casserole for variety. Chicken, beef, bean, cheese, or even vegetarian and vegan burritos will all work wonderfully.
- Chimichanga Twist: For a fun, slightly crispier texture, try using frozen chimichangas instead of burritos. They bake up beautifully in the same way and provide a delightful alternative.
- Homemade Option: If you enjoy making burritos from scratch, you can certainly use homemade versions. If they are fresh, adjust baking times (see Expert Tips); if they’ve been frozen, follow the standard frozen burrito instructions.
- Sauce & Spice Sensations:
- Green is Great: Swap the red enchilada sauce for a vibrant green enchilada sauce or zesty salsa verde. This will give your casserole a different, often tangier, flavor profile.
- Homemade Sauce: If you have a bit of extra time and want to elevate the flavor, consider making your own red enchilada sauce from scratch. Many recipes are surprisingly simple and yield incredibly rich results.
- Add Some Heat: For those who love a spicy kick, stir in a dash of cayenne pepper, a pinch of chili powder, or some finely diced jalapeños (fresh or pickled) into your enchilada sauce and salsa mixture.
- Creamy Texture: Blend a tablespoon or two of cream cheese or a splash of heavy cream into your sauce for an extra rich and creamy consistency.
- Salsa Swaps:
- Texture and Flavor: Experiment with different types of salsa. A fresh pico de gallo can add bright, garden-fresh notes, while a corn and black bean salsa introduces lovely texture and sweetness. A smoky chipotle salsa can add depth and a hint of spice.
- Roasted Salsa: Use a roasted tomato or tomatillo salsa for a deeper, more complex smoky flavor.
- Cheesy Choices:
- Beyond Cheddar: While cheddar is a classic, explore other melty cheeses. Monterey Jack provides a mild creaminess, a Mexican blend offers a convenient combination of flavors, and Pepper Jack is perfect for adding a little extra heat.
- Cotija Crumbles: Sprinkle some crumbled cotija cheese on top after baking for a salty, crumbly authentic Mexican touch.
- Add-Ins & Extras:
- Veggies Galore: Before laying down your burritos, consider spreading a layer of sautéed bell peppers and onions, black beans, corn, or roasted zucchini at the bottom of the dish for added nutrition and flavor.
- Extra Protein: If your burritos are primarily cheese or bean, you can add a layer of cooked and seasoned ground beef, shredded chicken, or pulled pork over the burritos before pouring the sauce for an extra protein boost.
- Refried Bean Layer: For an even heartier casserole, spread a thin layer of refried beans over the burritos before adding the sauce.
Step-by-Step Guide: How to Make Frozen Burrito Casserole
Crafting this delicious and convenient casserole is incredibly simple, making it perfect for even the busiest of evenings. Just follow these straightforward steps for a perfectly baked, flavorful meal every time:
- Prepare Your Oven and Baking Dish: Begin by preheating your oven to a consistent 375°F (190°C). While the oven heats, lightly spray the bottom and inner sides of a standard 9×13 inch rectangular baking dish with your preferred non-stick cooking spray. This crucial step will prevent the burritos and the rich sauce from sticking, ensuring effortless serving and cleanup later.
- Combine the Flavorful Sauce Base: In a medium-sized mixing bowl, pour in the entire can of enchilada sauce. Add your chosen thick and chunky salsa to the bowl. Using a spoon or whisk, stir these two ingredients together thoroughly until they are well-combined and form a homogeneous, vibrant sauce mixture. This blend will infuse your casserole with its signature Mexican-inspired taste.
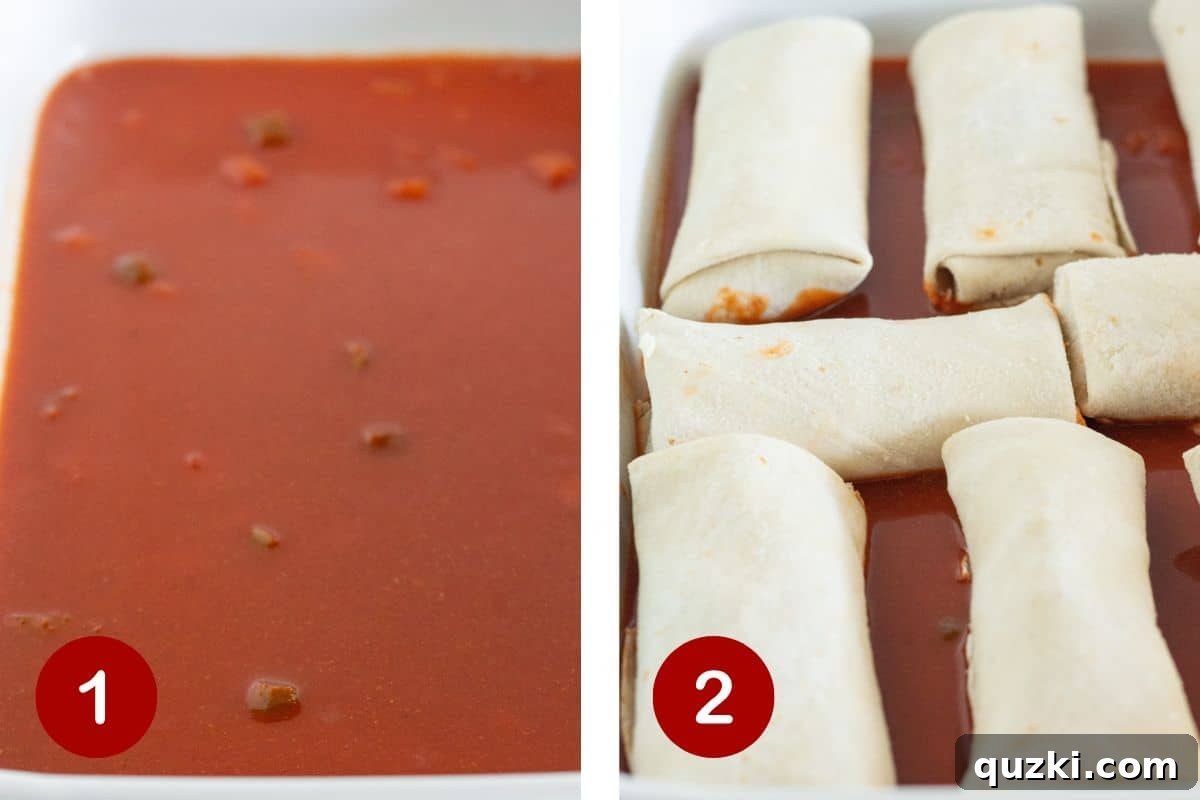
- Create the Bottom Sauce Layer: Pour approximately half a cup of your freshly mixed enchilada and salsa sauce evenly into the bottom of the prepared baking dish. Spread it around with the back of your spoon or a spatula to create a thin, consistent layer. This foundational layer ensures that the underside of the burritos remains moist and absorbs flavor as they bake, preventing any dryness.
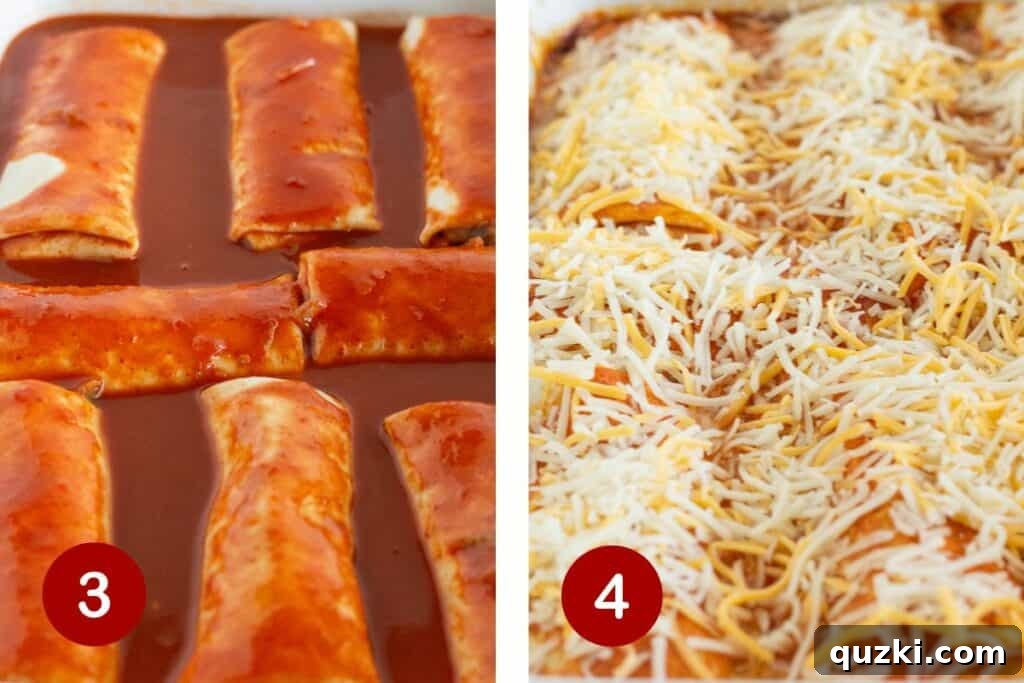
- Arrange the Frozen Burritos: Carefully unwrap each of your frozen burritos. Arrange them snugly in a single layer within the baking dish, directly on top of the sauce base. It’s important to place them side-by-side without significant overlapping. Arranging them in a single layer is key to promoting even heat distribution, ensuring that every burrito bakes thoroughly and warms perfectly from the inside out.
- Top with Remaining Sauce: Once all the burritos are arranged, generously pour the remaining enchilada sauce and salsa mixture over the entire surface of the burritos. Use your spoon to gently spread the sauce, making sure each burrito is well-coated and submerged in the rich, flavorful liquid. This will create a luscious, saucy topping that seeps into the burritos as they cook.
- Initial Bake – Covered: Tightly cover the baking dish with aluminum foil. This covering acts like a mini-steamer, helping the frozen burritos to heat through evenly and thoroughly without drying out. Carefully place the covered dish into your preheated oven and bake for an initial period of 30 minutes.
- Add the Cheese Layer: After the initial 30 minutes of baking, carefully remove the casserole from the hot oven. With caution, peel back and remove the aluminum foil covering. Evenly sprinkle the shredded cheese over the top of all the burritos. Ensure a good, consistent layer for maximum cheesy goodness.
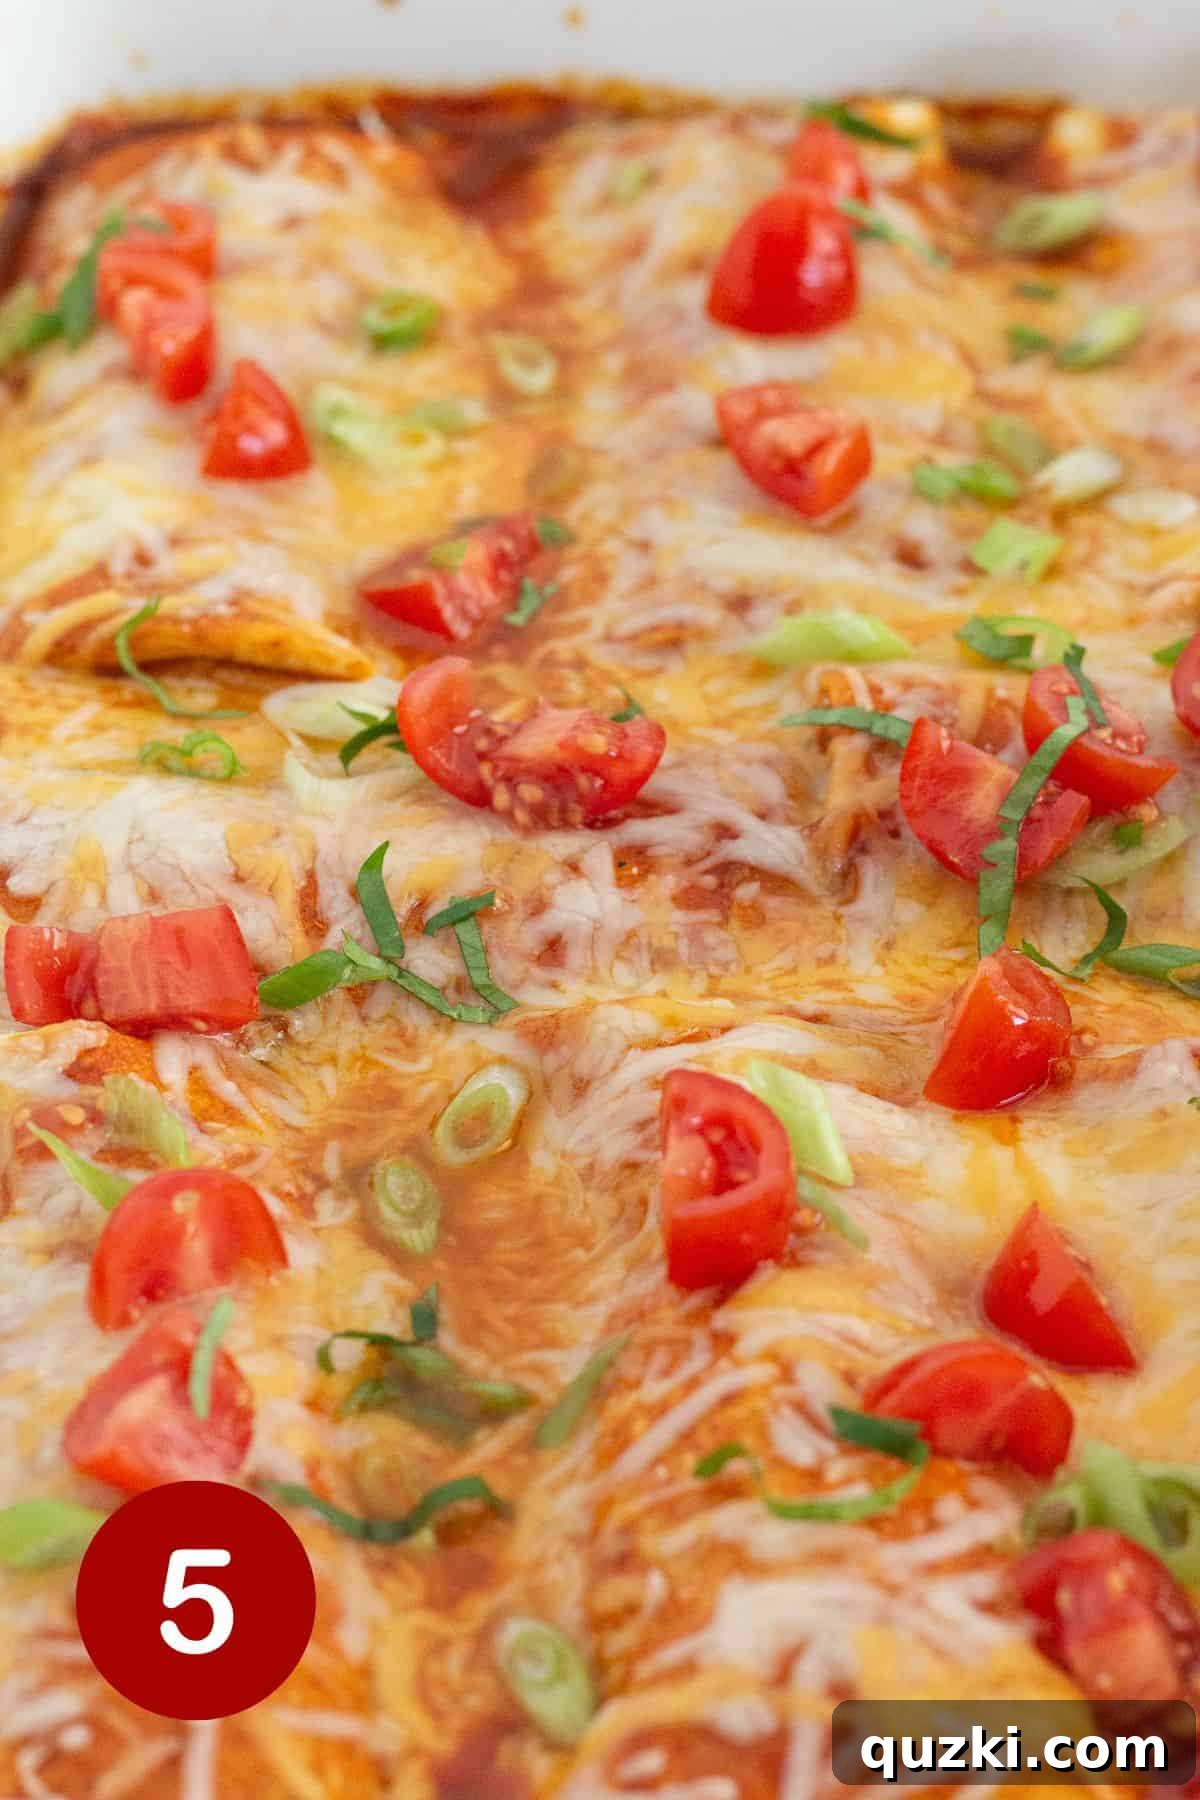
- Final Bake – Uncovered: Return the now uncovered dish to the oven. Continue baking for an additional 5-10 minutes. Keep a close eye on it during this stage. The casserole is ready when the cheese is completely melted, beautifully bubbly, and has developed a slight golden hue, signaling a delicious, irresistible crust.
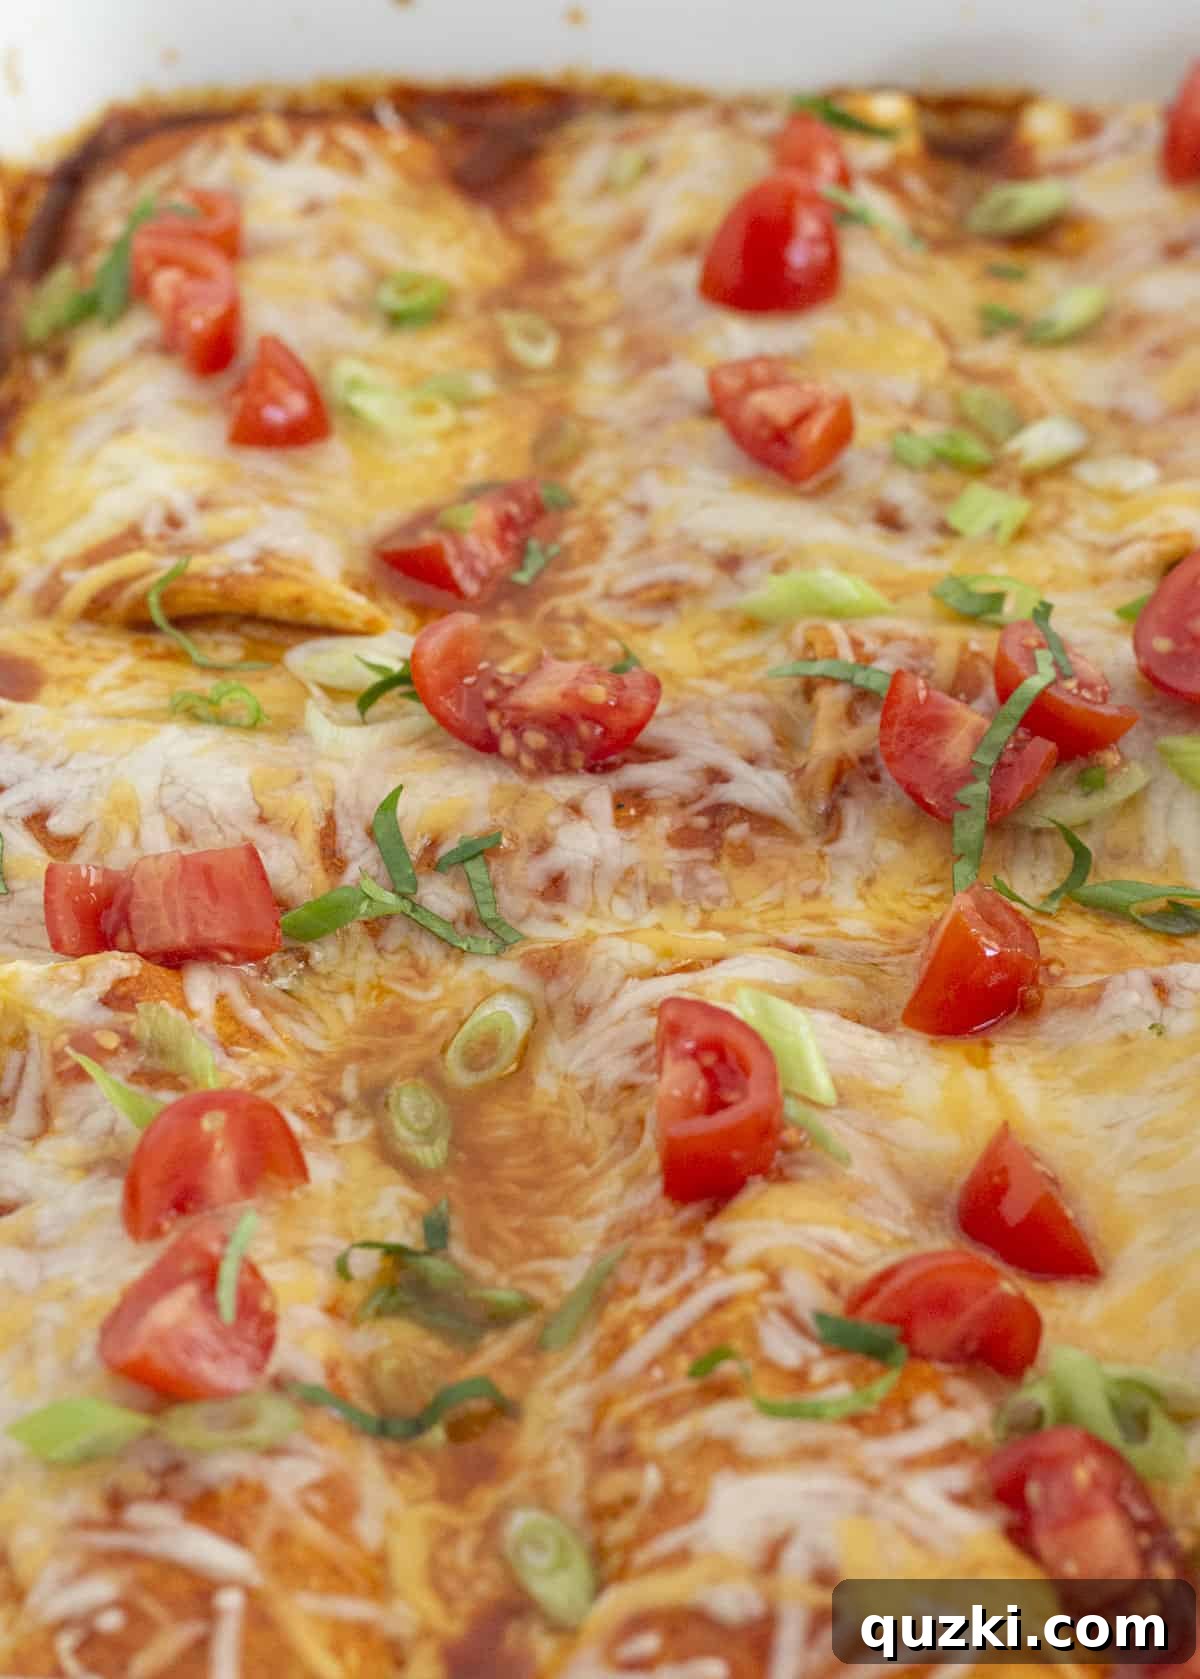
- Garnish and Serve: Once baked to perfection, carefully remove the casserole from the oven. For easier and cleaner serving, allow it to rest for a few minutes. Then, scoop out generous portions and top them with your favorite fresh garnishes such as chopped fresh tomatoes, vibrant sliced green onions, a dollop of cool sour cream (or Greek yogurt), and fragrant fresh cilantro. Serve warm and enjoy your effortless, delicious meal!
Serving Suggestions for a Complete Meal
This easy frozen burrito casserole is wonderfully satisfying and substantial on its own, making it a fantastic quick lunch or dinner option. However, pairing it with a few simple side dishes can effortlessly transform it into a more elaborate and complete Mexican-inspired feast. Here are some ideas to complement your delicious casserole:
- Classic Mexican Companions:
- Fluffy Spanish Rice: A side of warm, flavorful Spanish or Mexican rice is a timeless and comforting accompaniment that pairs perfectly with the rich casserole.
- Creamy Refried Beans: Serve a bowl of creamy refried beans on the side, or for an extra hearty dish, consider spreading a thin layer of refried beans over the burritos before adding the sauce.
- Crisp Tortilla Chips: A generous bowl of crisp tortilla chips is ideal for scooping up any extra sauce or for simply enjoying a crunchy texture alongside your meal. Serve with extra salsa, fresh guacamole, or a warm queso dip.
- Fresh and Light Additions:
- Simple Green Salad: A light, crisp green salad dressed with a refreshing lime vinaigrette can cut through the richness of the casserole, offering a welcome balance.
- Zesty Mexican Corn Skillet: For a vibrant and flavorful vegetable side, a creamy Mexican street corn skillet or a simple serving of grilled corn on the cob provides sweetness and texture.
- Fresh Pico de Gallo: A bowl of fresh pico de gallo, with its finely diced tomatoes, onions, cilantro, and jalapeños, adds a burst of freshness and tang to each bite.
- Avocado Slices: Creamy avocado slices or a simple scoop of guacamole provide a cool, rich contrast.
- The Ultimate Topping Bar: Elevate the dining experience by setting up a “topping bar” and allowing everyone at the table to customize their own serving. Beyond the essential sour cream, green onions, and cilantro, consider offering:
- Extra diced tomatoes or cherry tomatoes
- Thinly sliced black olives
- Freshly shredded iceberg or romaine lettuce
- Additional cooked black beans or pinto beans
- Pickled jalapeño slices (for those who love extra heat!)
- A drizzle of your favorite hot sauce
- Crumbled cotija cheese or feta
- A squeeze of fresh lime juice for brightness
- Boosted Protein Sides: If your chosen frozen burritos are primarily vegetarian (bean and cheese), consider offering a side of perfectly seasoned ground beef, tender shredded chicken, or savory carnitas to satisfy meat lovers and add an extra layer of protein.
Expert Tips for Burrito Casserole Perfection
While this recipe is incredibly forgiving and designed for ease, a few expert tips can help you achieve the absolute best possible results, ensuring your Frozen Burrito Casserole is a resounding success every time and making your cooking experience even smoother:
- Embrace the Frozen State: This is a cornerstone of the recipe’s convenience! There is absolutely no need to thaw your frozen burritos before assembling the casserole. Using them directly from the freezer is precisely what makes this recipe so quick and ideal for busy weeknights. If, by chance, you end up with thawed burritos (perhaps they were in the fridge), simply reduce the initial baking time to approximately 20 minutes before adding the cheese, as they will heat through faster.
- Single Layer is Key for Even Baking: For optimal cooking and to ensure every burrito is heated through perfectly, arrange them in a single layer in your baking dish. Avoid stacking or significantly overlapping the burritos, as this can lead to uneven cooking – some might remain cool in the center while others are piping hot. A spacious 9×13 inch dish usually accommodates 6-8 standard-sized burritos comfortably in a single layer.
- Cheese, Please! (And Plenty of It): A generous amount of cheese is essential for that classic, irresistible casserole appeal. Don’t be shy with your shredded cheese! For an extra gooey, bubbling, and delicious experience, consider adding a little more shredded cheese than the recipe calls for during the final uncovered baking stage. It melts quickly and creates a beautiful golden crust.
- Customizable Toppings Make All the Difference: Setting up a topping bar is a fantastic way to cater to individual preferences and elevate the meal. Offering a variety of fresh ingredients like chopped tomatoes, diced avocado, vibrant sliced green onions, fragrant cilantro, and a dollop of cool sour cream or Greek yogurt allows everyone to personalize their own serving. A squeeze of fresh lime juice just before eating can also brighten all the flavors.
- Excellent Make-Ahead Option: This casserole is an ideal candidate for meal prep! You can assemble the entire dish (following steps 1-5, but do not bake) up to 24 hours in advance. Cover it tightly with plastic wrap and refrigerate. When you’re ready to bake, add an extra 10-15 minutes to the initial covered baking time to account for starting from a chilled state. If your burritos have thawed in the fridge during this prep, adjust the initial bake time to 20-25 minutes before adding cheese.
- Achieve a Crispy Top with a Broiler: If you adore a slightly crispy, wonderfully golden-brown cheese crust, here’s a pro tip: after the cheese has fully melted during the final uncovered bake, you can carefully place the casserole under the broiler for 1-2 minutes. Watch it very closely during this short period, as cheese can go from perfectly golden to burnt in a flash!
- Adjust Spice to Your Preference: The spice level of your casserole is entirely in your hands. Choose a mild, medium, or hot enchilada sauce and salsa to match your family’s preference. For extra heat, finely dice some fresh or pickled jalapeños and sprinkle them over the burritos before baking. For less heat, ensure you use mild sauces.
- Allow for a Brief Rest: Once the casserole comes out of the oven, resist the urge to immediately dig in. Letting it rest for 5-10 minutes allows the sauces to settle and the cheese to set slightly. This makes for much easier and cleaner serving, ensuring each portion holds its shape beautifully.
Storage, Freezing, and Reheating Made Easy
This casserole isn’t just easy to make; it’s also incredibly convenient for meal planning and enjoying delicious leftovers. Knowing how to properly store, freeze, and reheat your Frozen Burrito Casserole ensures you can savor its comfort for days or even months to come:
- Storage (Refrigeration):
- Cool Completely: Always allow any leftover casserole to cool completely to room temperature before storing. This prevents condensation and helps maintain food safety.
- Airtight Container: Transfer the cooled leftovers to an airtight container. Alternatively, if storing in the original baking dish, cover it very tightly with at least two layers of plastic wrap, or a layer of foil followed by plastic wrap.
- Duration: Stored properly, the casserole will keep fresh and delicious in the refrigerator for up to 3 days.
- Freezing: This casserole freezes exceptionally well, making it a fantastic option for future busy nights or meal prepping.
- To Freeze Cooked Casserole: Once the baked casserole has cooled completely, you have a couple of options. You can either freeze individual portions in freezer-safe containers for convenient grab-and-go meals, or wrap the entire cooled casserole tightly in several layers of plastic wrap, followed by a layer of heavy-duty aluminum foil. This double-wrapping helps prevent freezer burn.
- To Freeze Unbaked Casserole: If you’re planning ahead, you can assemble the casserole as directed (following all steps up to topping with cheese, but do not bake). Cover it tightly with plastic wrap and then aluminum foil. Label the package with the date and baking instructions.
- Duration: Whether cooked or unbaked, the casserole will maintain its best quality in the freezer for up to 3 months.
- Reheating: There are a couple of convenient ways to reheat your frozen burrito casserole, depending on your schedule and preference:
- Oven Reheating (Recommended for Best Texture): For the best results, especially to maintain a pleasant texture and crispiness, preheat your oven to 350°F (175°C). If reheating from the refrigerator, place the casserole (covered with foil to prevent drying) in the oven and bake for 20-25 minutes, or until it’s thoroughly heated through and bubbling around the edges. If reheating from a frozen state, you’ll need to increase the baking time significantly, often to 45-60 minutes, still covered with foil, until heated to the center. Remove foil for the last few minutes if you want to crisp the cheese.
- Microwave Reheating (Quick & Easy): For quick individual servings, place a portion of the casserole on a microwave-safe plate. Heat on high for 1-2 minutes. After this initial period, check if it’s warmed through. If not, continue heating in 30-second intervals until it reaches your desired temperature. Be aware that microwave reheating might result in a slightly softer texture compared to oven reheating.
Frequently Asked Questions About Burrito Casserole
Here are answers to some common questions you might have about making and enjoying this delicious frozen burrito casserole:
How long do you bake frozen burritos by themselves?
If you’re baking frozen burritos individually, the typical method is to wrap them loosely in aluminum foil to prevent them from drying out. Then, bake them in a preheated 350°F (175°C) oven for approximately 25-30 minutes, or until they are heated completely through to the center. Cooking times can vary slightly based on the size, thickness, and filling of the specific burritos you are using.
What else can you do with frozen burritos?
Frozen burritos are incredibly versatile and can be transformed in many ways! Beyond this delightful casserole, you can deep-fry them for a crispy, homemade chimichanga experience, serving them with all your favorite taco toppings. Another simple option is to warm them and then top them with a generous serving of chili, plenty of cheese, and crushed tortilla chips for a hearty “burrito bowl” style meal. They’re also great for a quick snack wrapped in a fresh tortilla and lightly grilled, or simply microwaved and enjoyed on the go as a quick, filling bite.
What is the best kind of burrito to use for this casserole?
The beauty of this recipe is that almost any kind of frozen burrito works well! The “best” kind truly comes down to personal preference. Whether you grab a bag of individually wrapped burritos or a larger family pack, varieties like chicken, beef, bean and cheese, or even vegetarian options will all create an amazing frozen burrito casserole. The most important thing is to choose a flavor profile that you and your family enjoy and that you think will complement the enchilada sauce and salsa you’re using.
Can I use homemade burritos instead of frozen ones?
Absolutely! Using homemade burritos would be an incredibly delicious and fresh addition to this casserole, taking it to another level. If your homemade versions have been prepped and frozen, you can follow the same baking times as you would for store-bought frozen burritos. However, if you’re using fresh, unfrozen homemade burritos, you’ll need to adjust the bake time down to approximately 20-25 minutes before adding the cheese, as they won’t require as long to heat through from a cold state.
Explore More Easy Casserole Recipes
If you loved the simplicity, comforting flavors, and sheer deliciousness of this Frozen Burrito Casserole, then you’re undoubtedly a fan of easy, hearty meals! Casseroles are the ultimate comfort food solution and an ideal choice for effortless weeknight dinners or feeding a crowd. Here are some other fantastic and easy casserole recipes that you might enjoy adding to your culinary repertoire:
Dinner
Hearty Cowboy Cornbread Casserole
Dinner
Easy Weeknight Chili Tater Tot Casserole
Casseroles
Simple Chicken Taco Casserole
Casseroles
Easy Doritos Casserole with Ground Beef
Recipe Card: Quick and Easy Frozen Burrito Casserole
Quick and Easy Frozen Burrito Casserole
By: June Albertson-Dick
This incredibly easy frozen burrito casserole is the ultimate shortcut to a satisfying meal. Simply assemble with pantry staples and bake for a delicious, comforting weeknight dinner that requires minimal effort!
Prep Time: 5 mins
Cook Time: 35-40 mins
Total Time: 40-45 mins
Yields: 8 servings
Print Recipe
Ingredients
Casserole
- 8 frozen burritos, unwrapped (choose your favorite flavor: beef, chicken, bean, or cheese)
- 19 ounces (approx. 2.5 cups) enchilada sauce (red or green, mild or hot)
- ½ cup chunky salsa (your preferred mild, medium, or hot)
- 2 cups shredded cheese (Cheddar, Monterey Jack, a Mexican blend, or Pepper Jack)
Suggested Toppings (Optional)
- ¼ cup diced fresh tomatoes
- 3 green onions, thinly sliced
- 1 cup sour cream or plain Greek yogurt
- ¼ cup fresh cilantro, chopped
- Diced or sliced avocado
- Black olives
- Pickled jalapeños
- Crumbled cotija cheese
Instructions
- Preheat your oven to 375°F (190°C). Lightly spray a 9×13 inch baking pan with non-stick cooking spray.
- In a small bowl, combine the enchilada sauce and salsa. Stir them together until well mixed.
- Pour about ½ cup of the sauce mixture into the bottom of the prepared baking pan, spreading it evenly.
- Unwrap the frozen burritos and arrange them in a single layer in the baking dish.
- Pour the remaining enchilada sauce mixture evenly over the tops of the burritos, ensuring they are well-coated.
- Cover the dish tightly with aluminum foil and bake for 30 minutes.
- Carefully remove the casserole from the oven. Remove the foil covering and evenly sprinkle the shredded cheese over the burritos.
- Return the uncovered dish to the oven and bake for an additional 5-10 minutes, or until the cheese is completely melted, bubbly, and slightly golden.
- Allow the casserole to rest for a few minutes before serving. Garnish generously with diced tomatoes, sliced green onions, sour cream, fresh cilantro, and any other desired toppings. Enjoy warm!
Notes
- No Thawing: There is no need to thaw the frozen burritos; use them straight from the freezer for maximum convenience. If you use thawed burritos, reduce the initial baking time to approximately 20 minutes.
- Make Ahead: This casserole can be assembled (without baking) up to 24 hours in advance. Cover tightly and refrigerate. If baking from a chilled, prepped state (with thawed burritos), bake for 20-25 minutes before adding the cheese. If starting from frozen, add an extra 10-15 minutes to the initial covered bake time.
- Storage: Refrigerate any leftovers in an airtight container for up to 3 days.
- Freezing: The casserole freezes well for up to 3 months when stored in a freezer-safe, airtight container or tightly wrapped.
- Reheating (Oven): Cover with foil and bake at 350°F (175°C) for 20-25 minutes (from fridge) or 45-60 minutes (from frozen) until heated through.
- Reheating (Microwave): For individual servings, heat on a microwave-safe plate for 1-2 minutes, then in 30-second intervals until warmed.
Nutrition Information (Approximate)
Serving: 8 servings
Calories: 425 kcal
Carbohydrates: 9g
Protein: 8g
Fat: 12g
Saturated Fat: 7g
Polyunsaturated Fat: 0.5g
Monounsaturated Fat: 3g
Cholesterol: 39mg
Sodium: 877mg
Potassium: 128mg
Fiber: 2g
Sugar: 7g
Vitamin A: 983 IU
Vitamin C: 4mg
Calcium: 181mg
Iron: 1mg
Nutrition information is automatically calculated and should only be used as an approximation. Actual values may vary based on ingredients used and preparation methods.
Loved this recipe? Share your thoughts in the comments below! Your feedback helps us grow!