
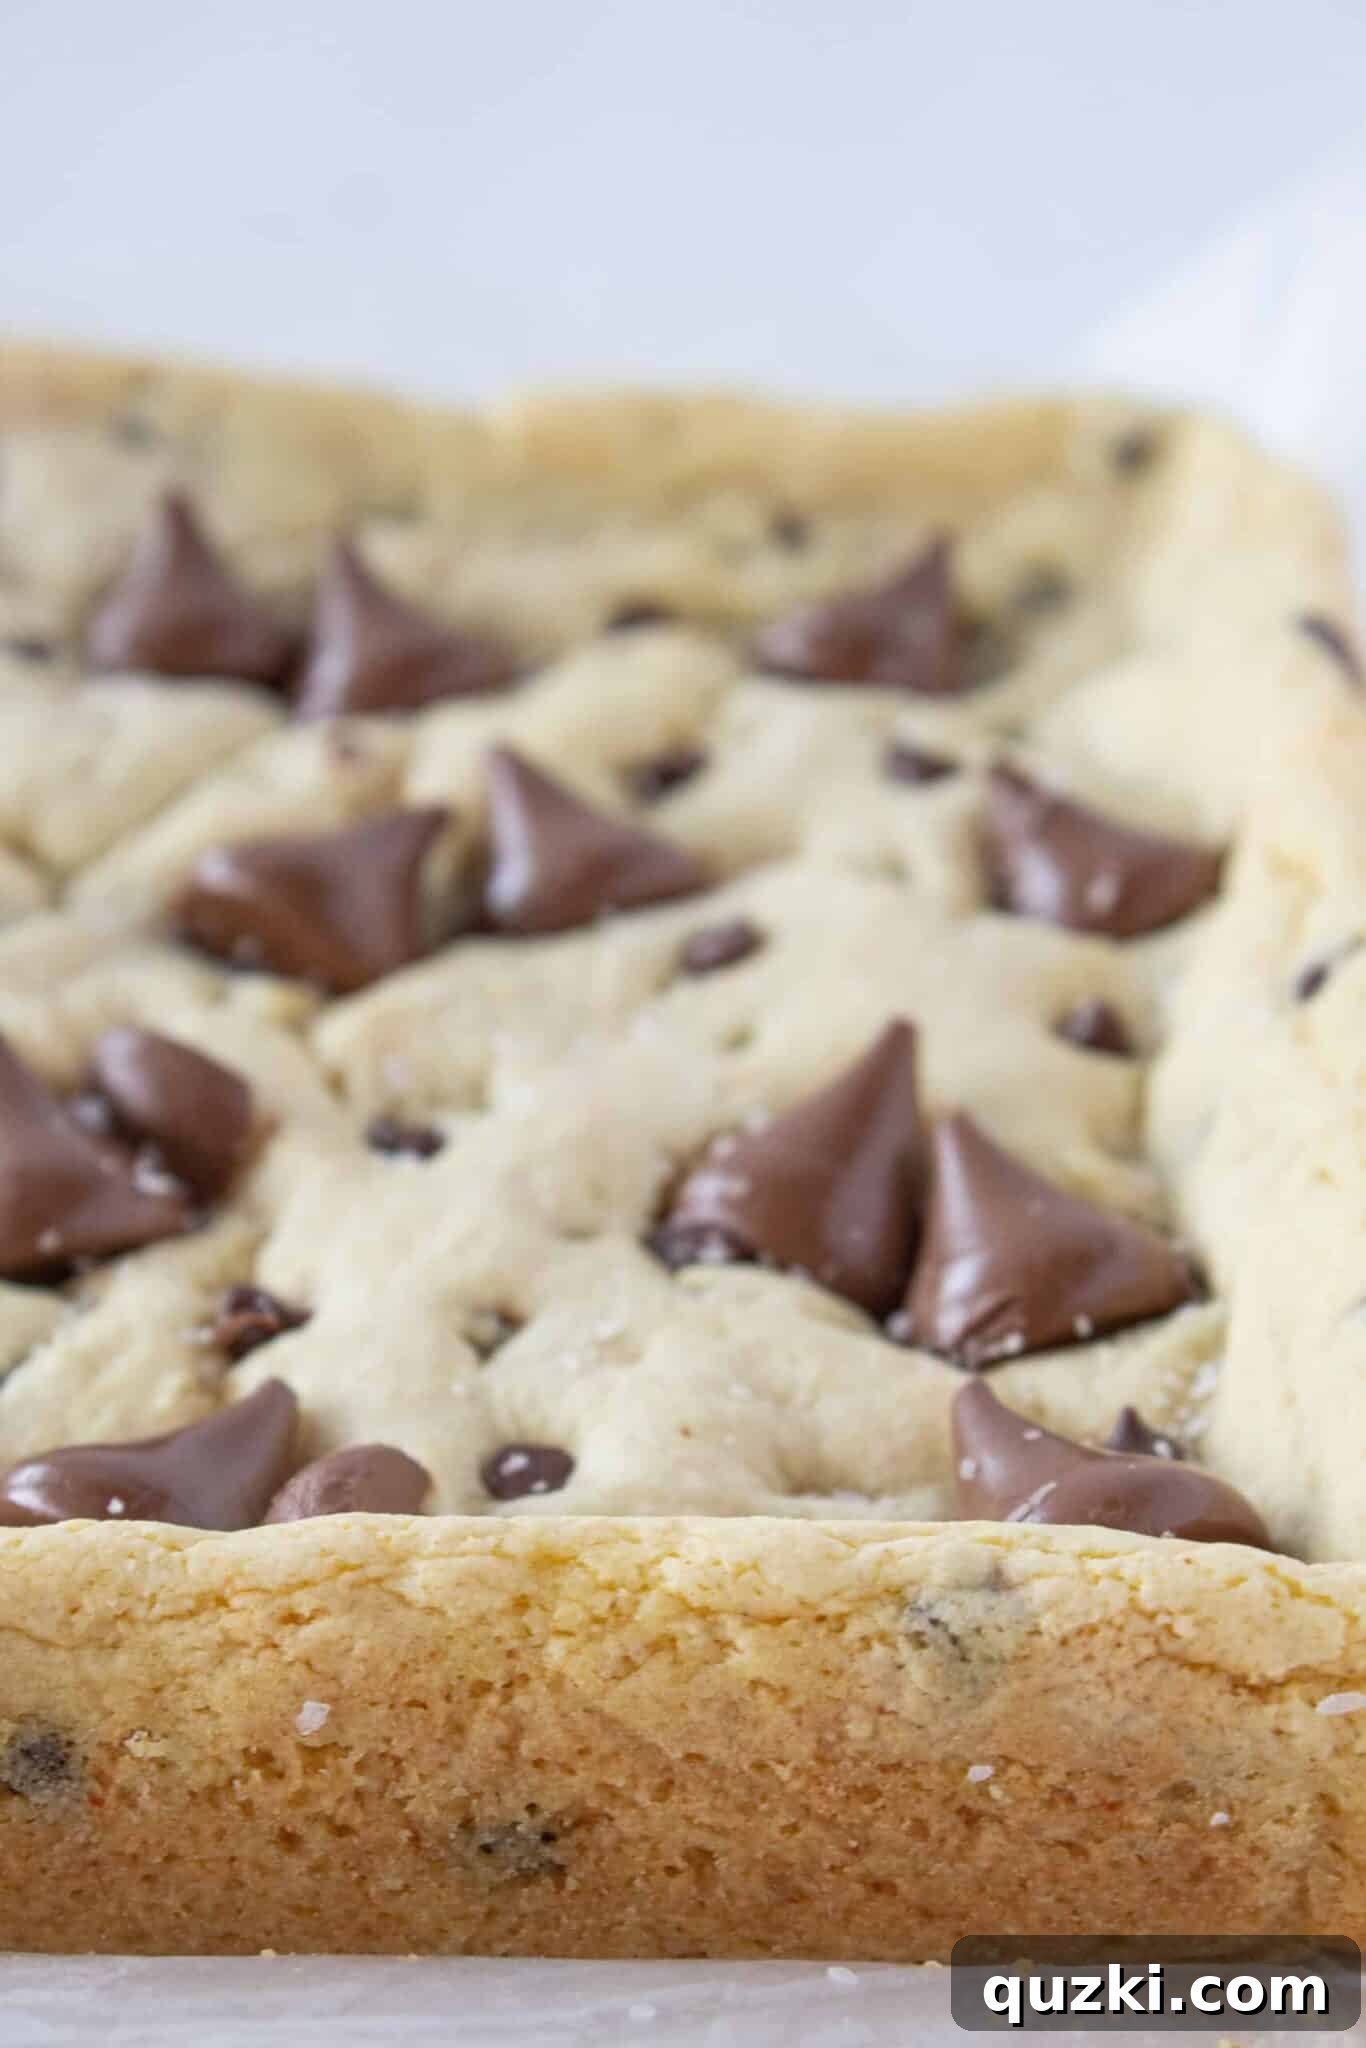
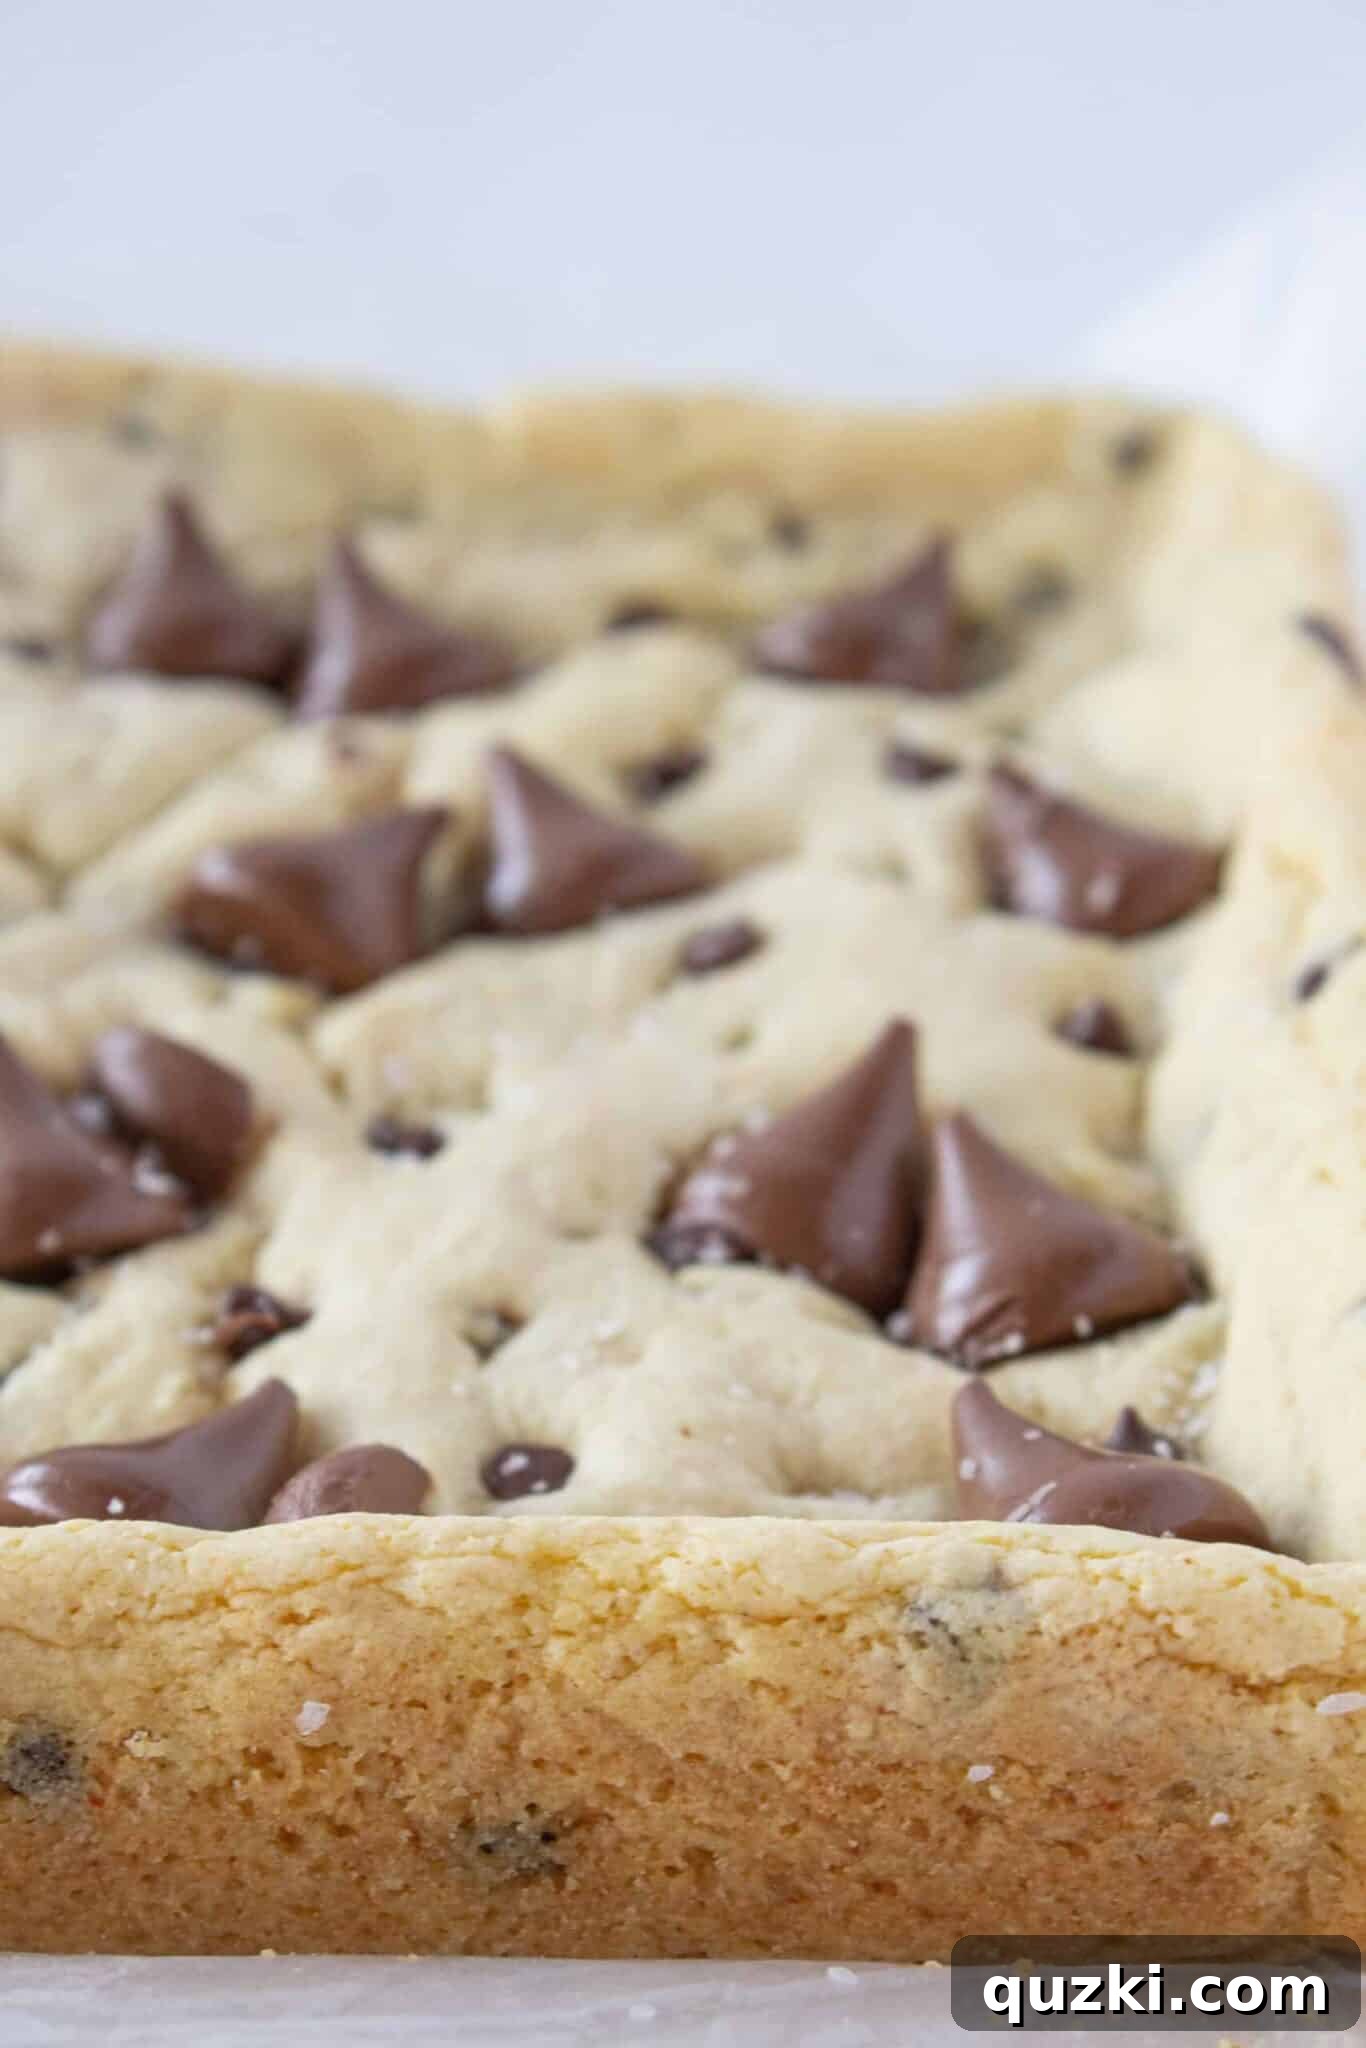
Prepare to be amazed by the most irresistible dessert bars you’ll ever bake! Imagine combining the convenience of a simple cake mix with the rich, complex flavor of brown butter, then topping it all off with classic Hershey’s Kisses and a hint of flaky sea salt. The result? These phenomenal Brown Butter Hershey’s Kiss Cookie Bars that are guaranteed to become a new favorite. They’re incredibly easy to make, yet taste like they came straight from a gourmet bakery, making them perfect for any occasion – from a casual family treat to a festive holiday gathering. Get ready to discover a dessert that’s simple to whip up but utterly unforgettable!
Unlocking the Irresistible Flavor of Brown Butter
If you’re new to the world of brown butter, prepare for a culinary awakening. Browning butter is a deceptively simple technique that transforms ordinary butter into a golden, nutty, and deeply aromatic ingredient. This process, known as beurre noisette in French cuisine, involves gently heating butter until its milk solids caramelize, imparting a toasted, almost caramel-like flavor that elevates any dish or dessert. My personal journey into brown butter obsession began with delights like these Butter Pecan & Milk Chocolate Chip Cookies, and its magic has only deepened since. Whether it’s enriching savory pasta dishes or adding an extraordinary depth to sweet treats like these Hershey’s Kiss Cookie Bars, brown butter is a game-changer. It’s remarkably easy to achieve, turning a good recipe into an extraordinary one with minimal effort but maximum flavor impact. This subtle yet profound nutty undertone is precisely what makes these cookie bars stand out from the crowd.
The beauty of brown butter lies in its versatility and the sophisticated flavor it introduces. It adds a layer of depth that cannot be replicated by plain melted butter. In these cookie bars, it creates a wonderfully moist and chewy texture, while infusing every bite with its signature warmth and toasted notes. This seemingly small step in the recipe makes a monumental difference, taking the humble cake mix base to new heights of deliciousness. You’ll quickly understand why so many bakers are enchanted by its rich, irresistible aroma and unique flavor profile. Once you master the art of brown butter, you’ll find yourself eager to incorporate it into countless other recipes, from cookies and cakes to sauces and glazes, constantly elevating your culinary creations.
The Ultimate Cake Mix Hack for Effortless Baking
One of the true joys of these Brown Butter Hershey’s Kiss Cookie Bars is their incredible ease of preparation, thanks to a simple cake mix base. Using a boxed cake mix isn’t just about saving time; it’s about guaranteeing a consistently tender and delicious foundation for your dessert. It removes the guesswork from measuring flour, sugar, and leavening agents, allowing even novice bakers to achieve professional-level results with minimal effort. This clever shortcut means you can enjoy homemade goodness without the extensive effort typically associated with from-scratch baking. It’s the perfect solution for busy weeknights, impromptu gatherings, or when you simply crave a delicious treat without spending hours in the kitchen.
The cake mix provides a wonderfully soft and chewy texture that perfectly complements the melty Hershey’s Kisses and the robust flavor of brown butter. It serves as a fantastic blank canvas, ready to be infused with additional flavors and textures. The simplicity of starting with a cake mix means you can focus your creative energy on perfecting the brown butter and the placement of the Kisses, rather than worrying about the fundamentals of the dough. It’s a testament to how simple ingredients, when combined thoughtfully, can create something truly spectacular. Don’t let the simplicity fool you; these cookie bars are anything but basic. They offer a delightful blend of textures and flavors that will impress everyone who tries them, proving that semi-homemade can be absolutely gourmet.
Why These Brown Butter Hershey’s Kiss Cookie Bars Are Irresistible
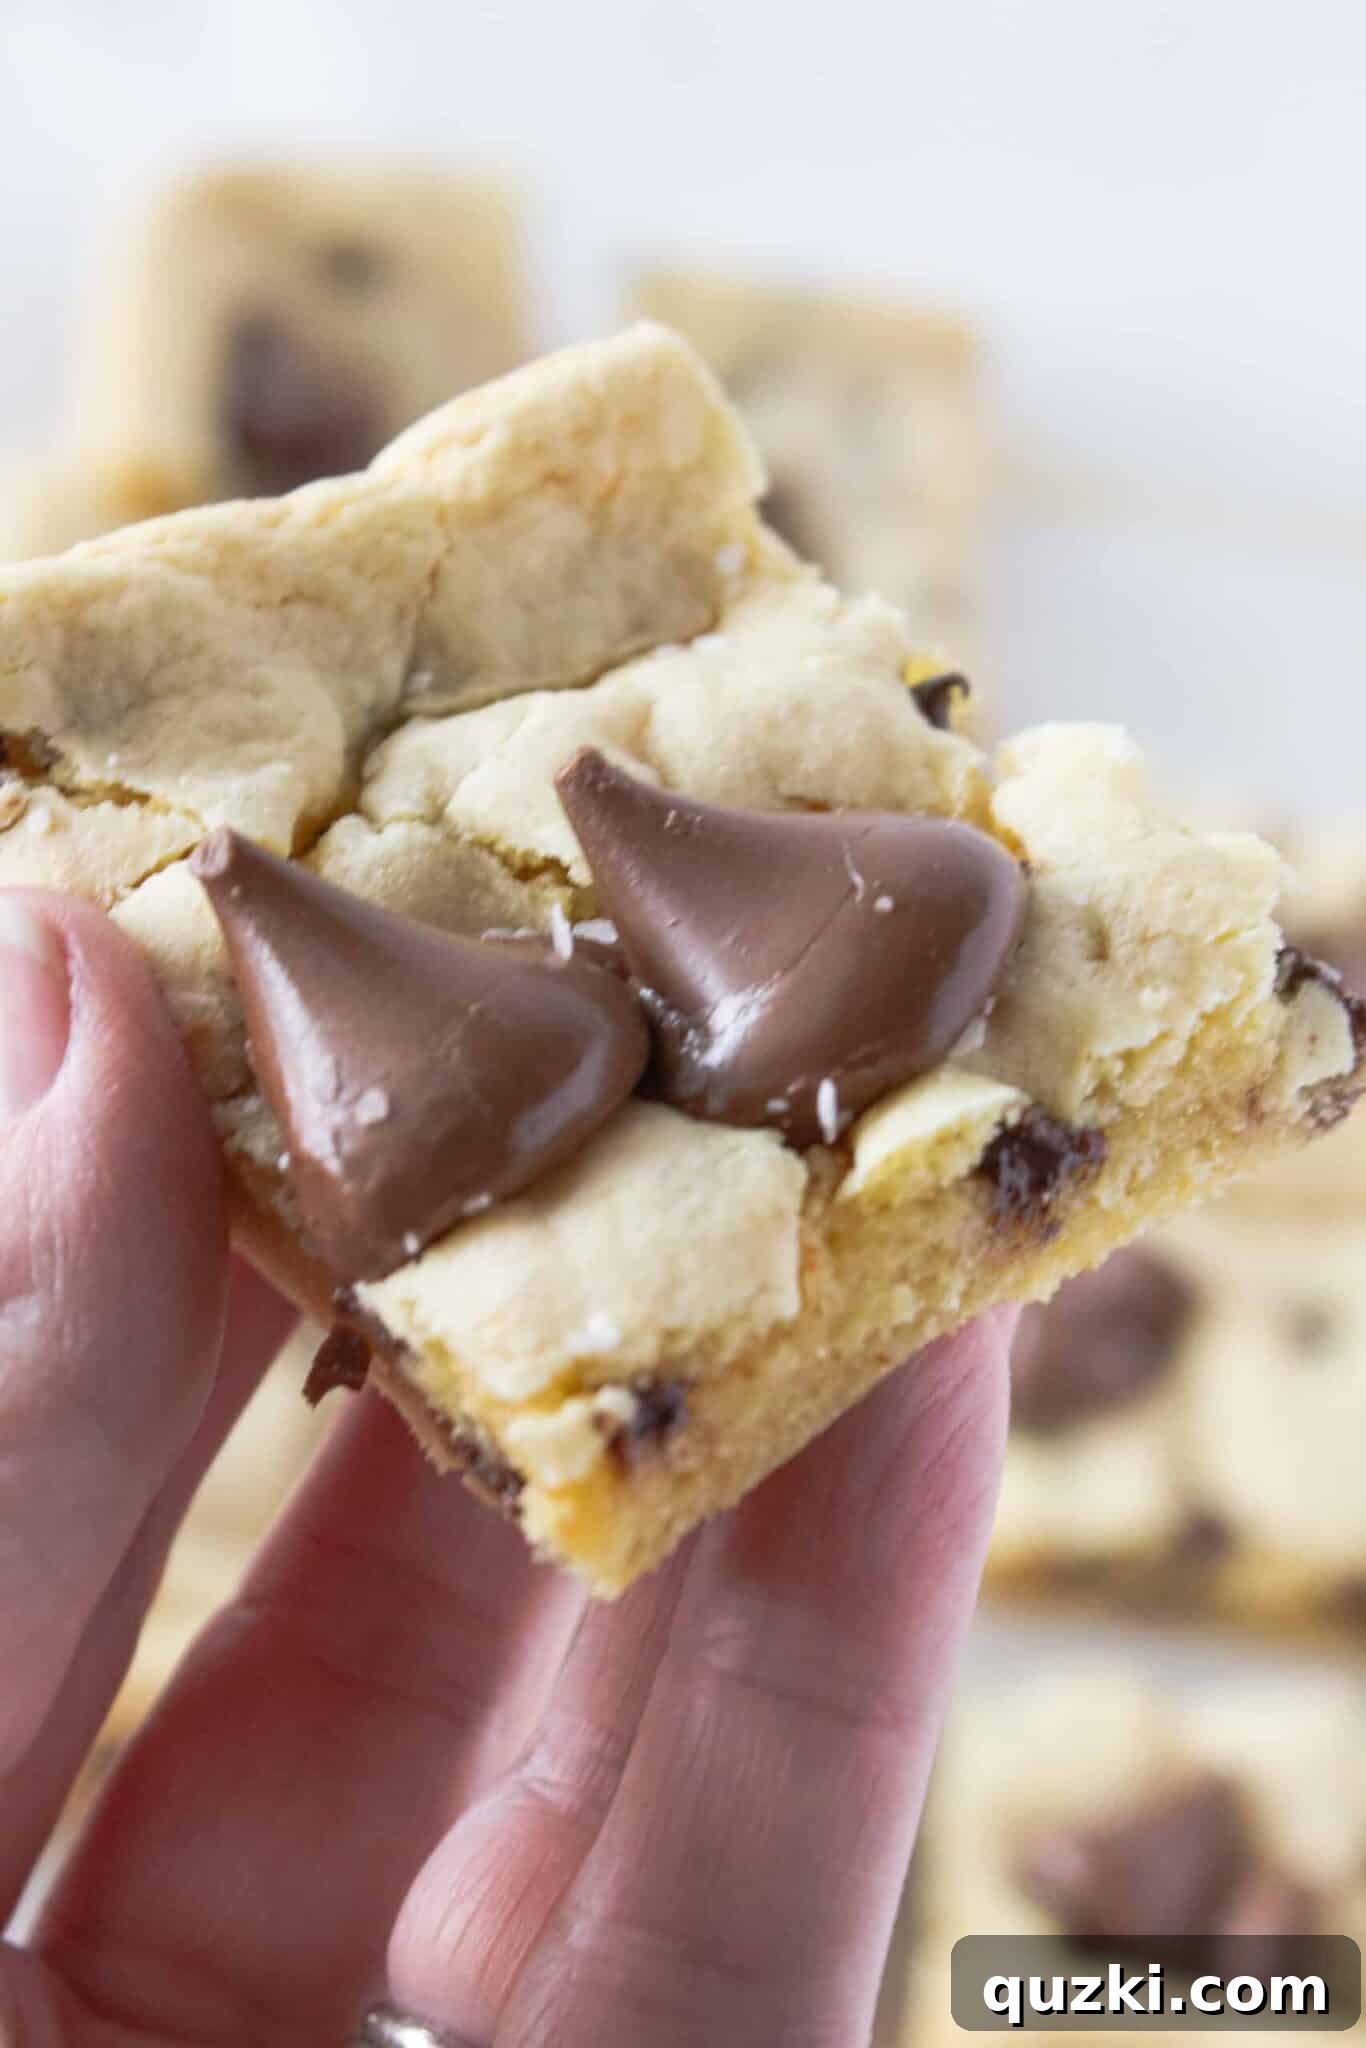
Beyond their ease and the star ingredients, what truly sets these Brown Butter Hershey’s Kiss Cookie Bars apart is the harmonious blend of flavors and textures that tantalize your taste buds. The deep, nutty notes of the brown butter provide a sophisticated counterpoint to the sweet, iconic milk chocolate of the Hershey’s Kisses. But the real secret weapon that elevates these bars to legendary status? A delicate sprinkling of kosher salt over the warm Kisses. This touch of saltiness doesn’t just cut through the sweetness; it enhances the chocolate flavor, creates a tantalizing contrast, and leaves a wonderfully balanced aftertaste that keeps you coming back for more. It’s that perfect sweet and salty combination that makes these bars utterly addictive and uniquely satisfying.
Each bite offers a delightful experience: a soft, wonderfully chewy cookie bar base infused with rich, toasted brown butter, yielding to the creamy melt of a classic Hershey’s Kiss, all balanced by a subtle savory sprinkle of salt. The aroma alone as they bake is enough to make your mouth water. They are ideal for potlucks, bake sales, holiday cookie platters, or simply a comforting dessert at home after a long day. These bars bring joy, inspiring a happy dance with every delicious morsel. They’re not just cookie bars; they’re a celebration of flavor, convenience, and pure delight, destined to be a crowd-pleaser and a recipe you’ll revisit again and again.
Crafting Your Own Brown Butter Hershey’s Kiss Cookie Bars: A Step-by-Step Guide
Making these decadent cookie bars is a straightforward process, even for beginners. Follow these detailed steps to ensure perfectly baked, flavorful results every time.
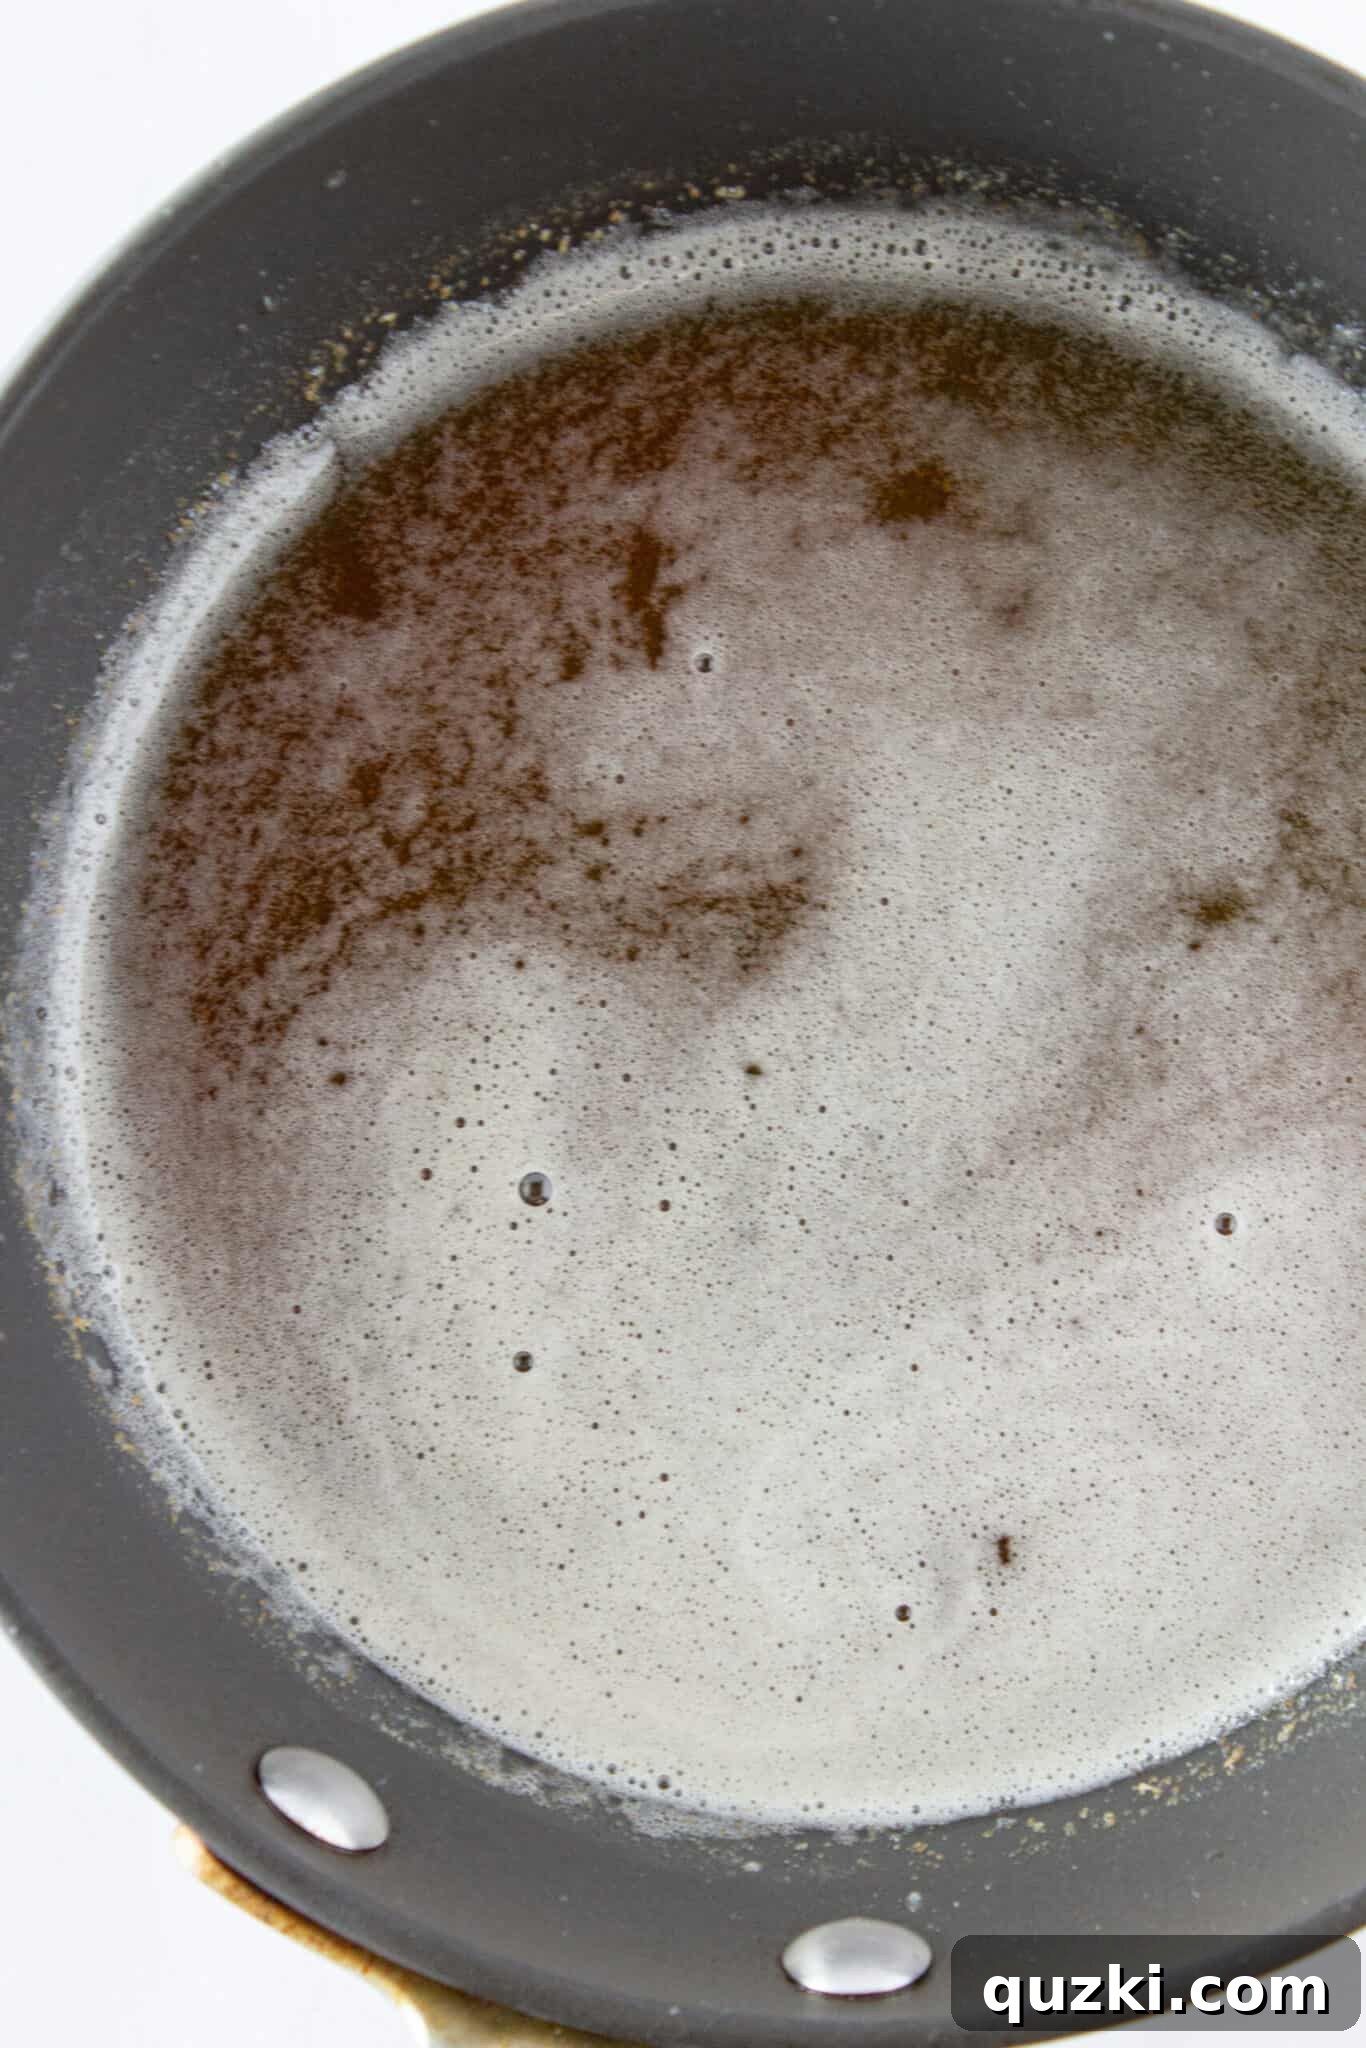
- Prepare the Brown Butter: Begin by adding your butter to a light-colored skillet or saucepan over medium heat. A light-colored pan is especially helpful because it allows you to easily monitor the butter’s color as it browns. As the butter melts, gently swirl or stir it continuously for about 5-8 minutes. You’ll observe a clear progression: the butter will first melt, then begin to foam, and finally, the milk solids at the bottom of the pan will start to turn golden brown. Once you detect a distinct, rich nutty aroma and the butter takes on a beautiful amber hue, immediately remove it from the heat to prevent burning. Pour the browned butter into a heatproof bowl and allow it to cool completely before incorporating it into your recipe. This cooling step is absolutely crucial to avoid scrambling the eggs in the next stage of dough preparation.
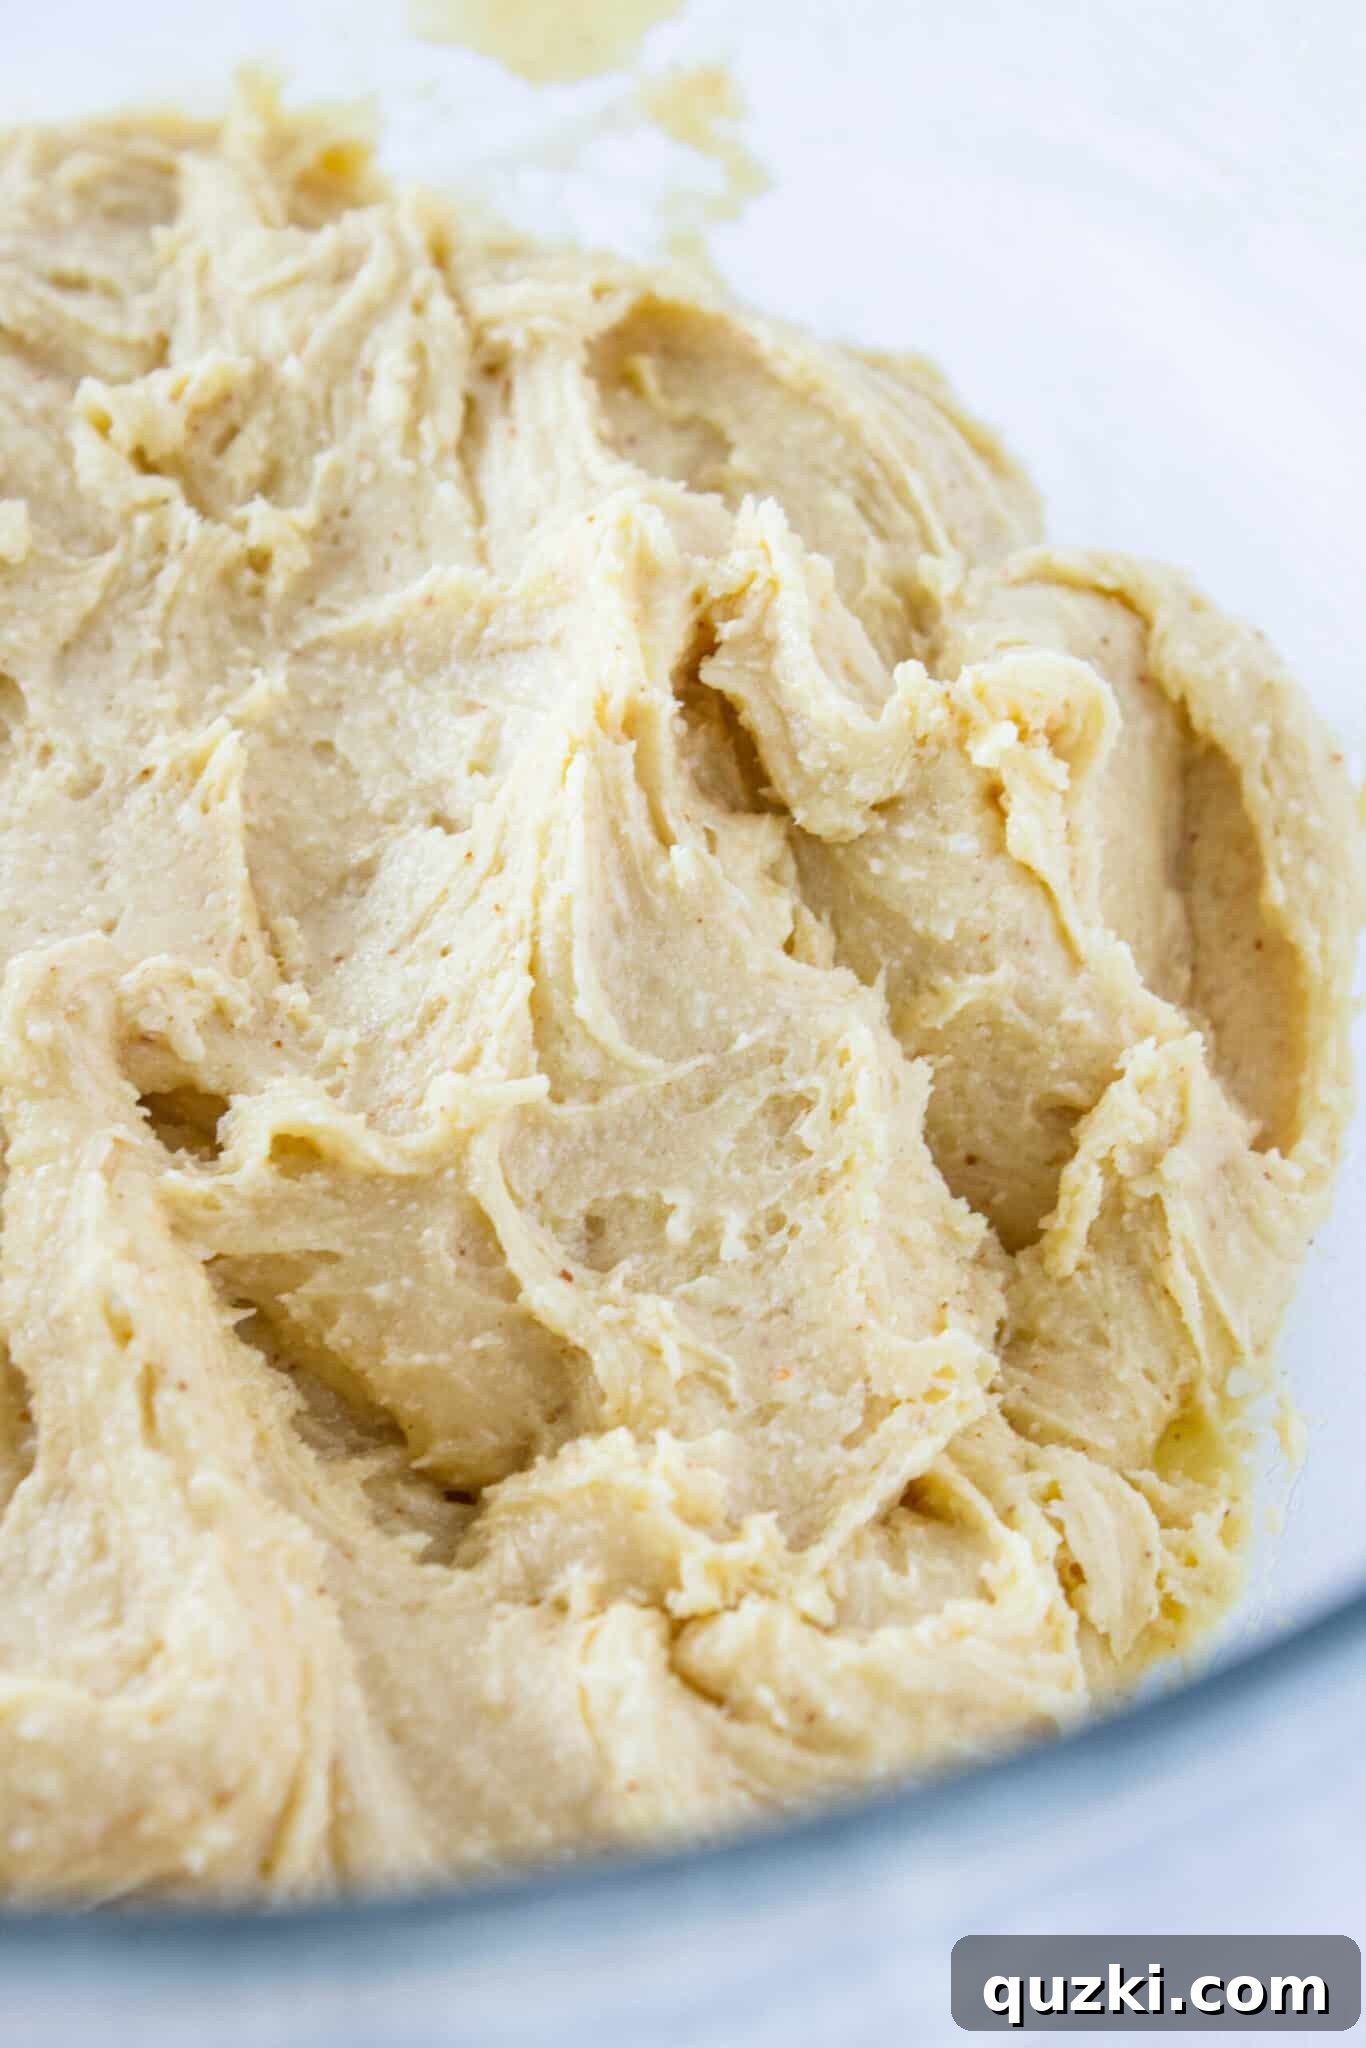
- Mix the Dough: In a large mixing bowl, combine the contents of the yellow butter cake mix, the now-completely-cooled brown butter, ⅓ cup of milk, and one large egg. Using a handheld electric mixer on low speed, or a sturdy spoon and some elbow grease, mix these ingredients until they are thoroughly combined and form a thick, sticky dough. Continue mixing until no dry streaks of cake mix remain and the dough is uniform in consistency. The texture should be thick enough to hold its shape but still pliable.
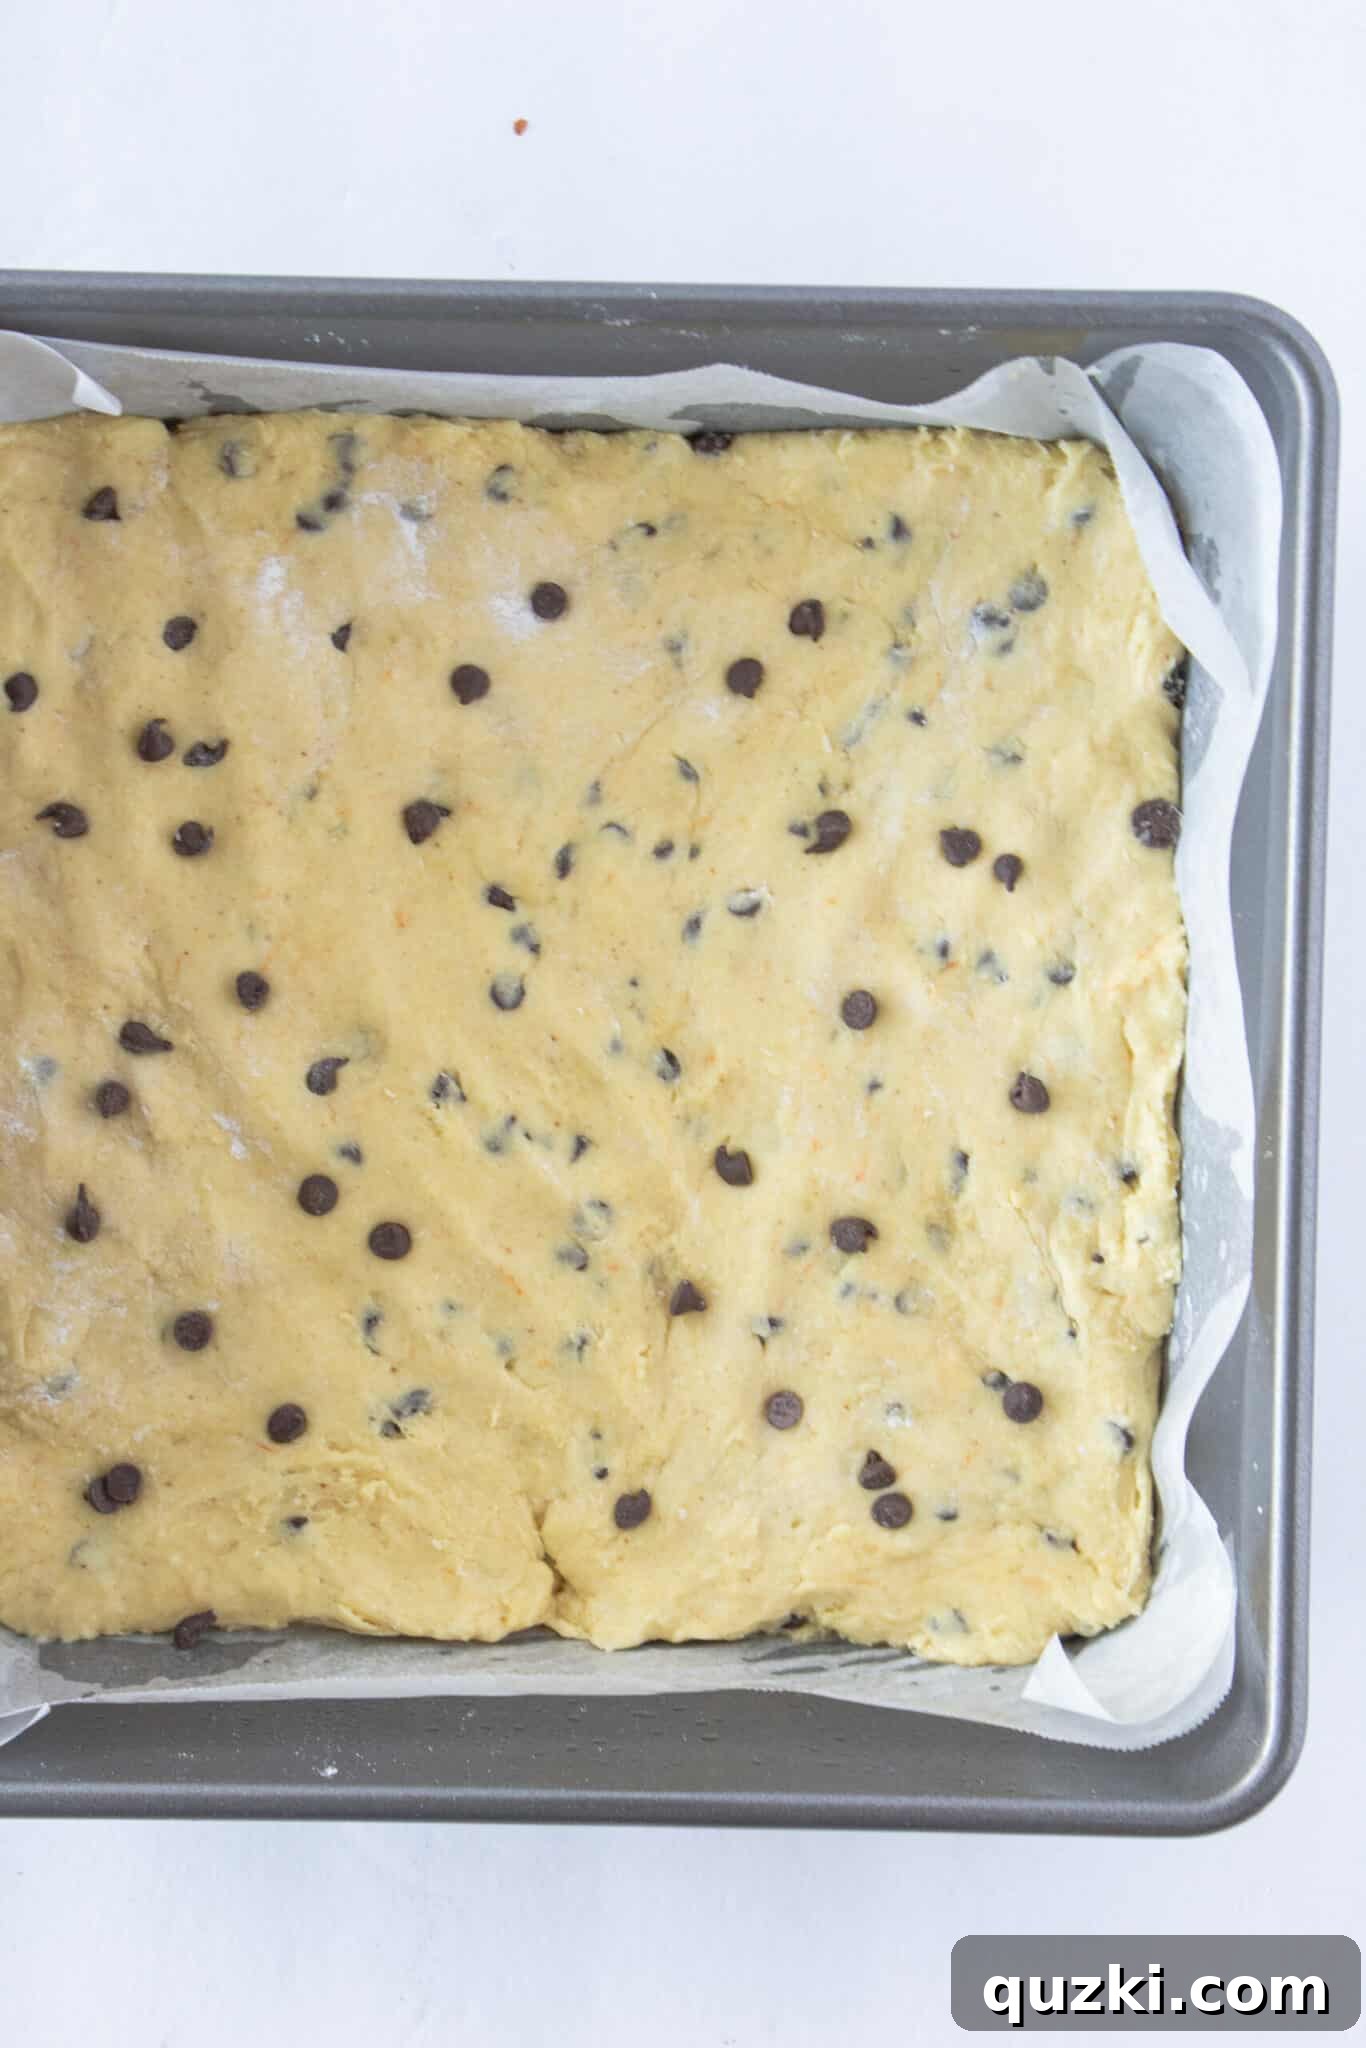
- Incorporate Chocolate Chips and Press Dough: Gently fold the mini chocolate chips into the prepared dough using a spatula or spoon until they are evenly distributed throughout. This ensures every bite gets a delightful burst of chocolatey goodness. Next, prepare your baking pan: lightly spray a 9×9 inch baking pan with nonstick cooking spray, or for the easiest removal and cleanup, line it completely with parchment paper, leaving an overhang on two sides to create “handles.” Press the thick cookie dough evenly into the bottom of the prepared pan, spreading it all the way to the edges. For an extra touch of chocolate, you can sprinkle a few additional mini chocolate chips over the top of the pressed dough before baking.
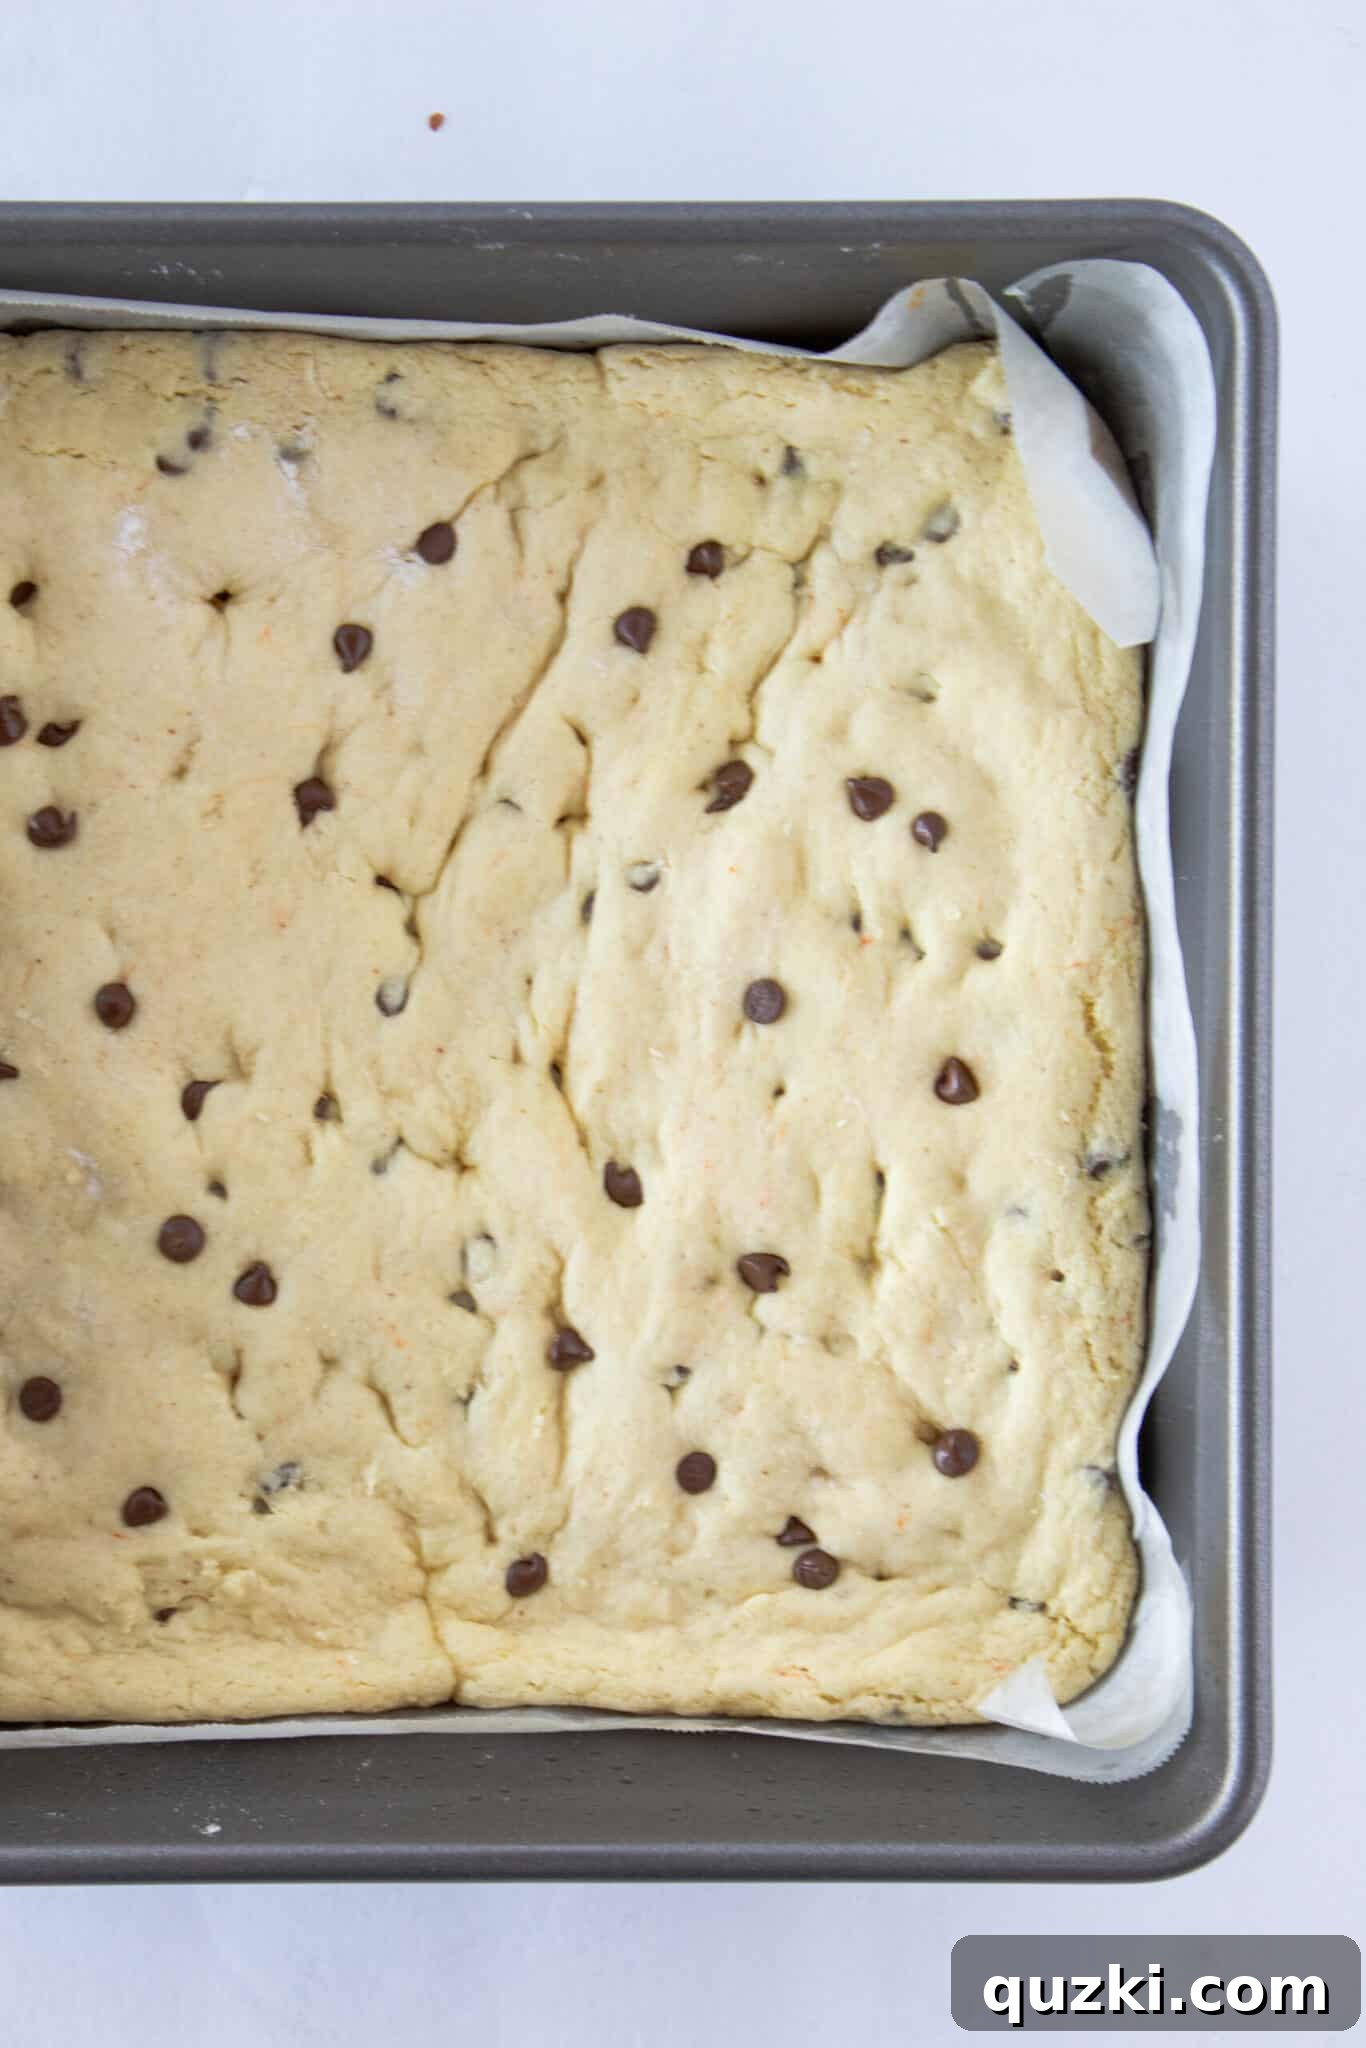
- First Bake: Place the prepared pan with the cookie dough in a preheated 350°F (175°C) oven and bake for precisely 15 minutes. At this point, the cookie bars will appear set around the edges and slightly puffy, but the center will still be notably soft and not fully baked through. This partial bake creates the perfect slightly firm yet pliable foundation for adding the delicate Hershey’s Kisses without them sinking completely. Remove the pan from the oven after the 15-minute mark.
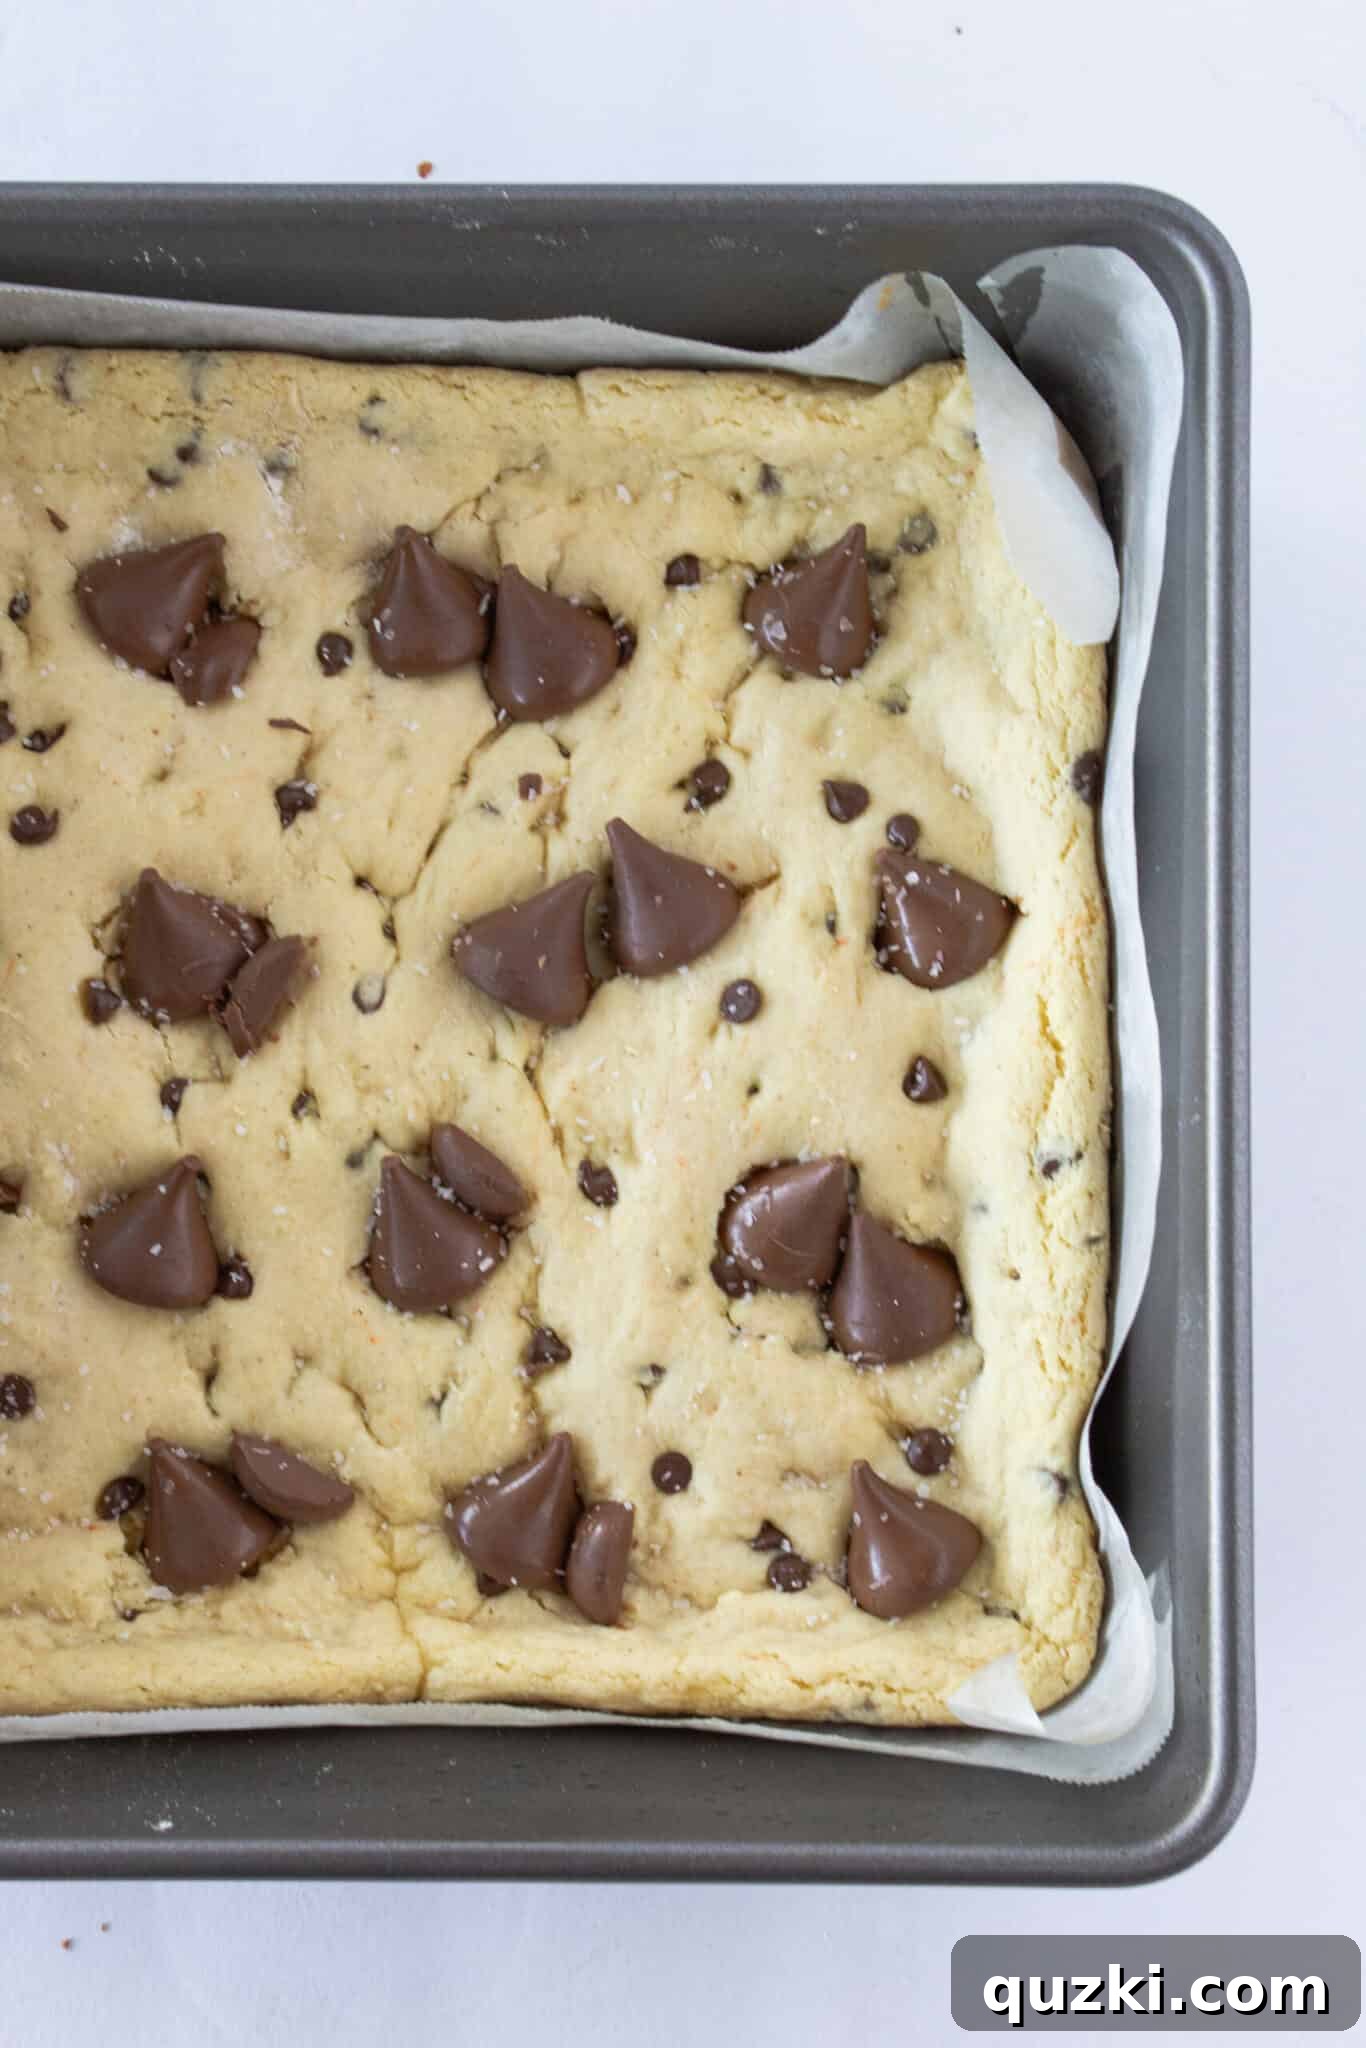
- Add Kisses and Final Bake: Carefully unwrap your Hershey’s Kisses and gently press them into the warm, partially baked cookie bars. Arrange them strategically across the surface of the bars, keeping in mind where you will eventually slice them, aiming for a Kiss to be nestled within each finished bar. Once the Kisses are in place, lightly sprinkle the top of the bars with kosher salt. Return the pan to the oven for an additional 5 minutes. This final baking period allows the cookie bars to finish cooking through, and the residual heat in the oven gently softens and slightly melts the Hershey’s Kisses, allowing the cookie dough to bake perfectly around them, creating a truly gooey, chocolatey center.
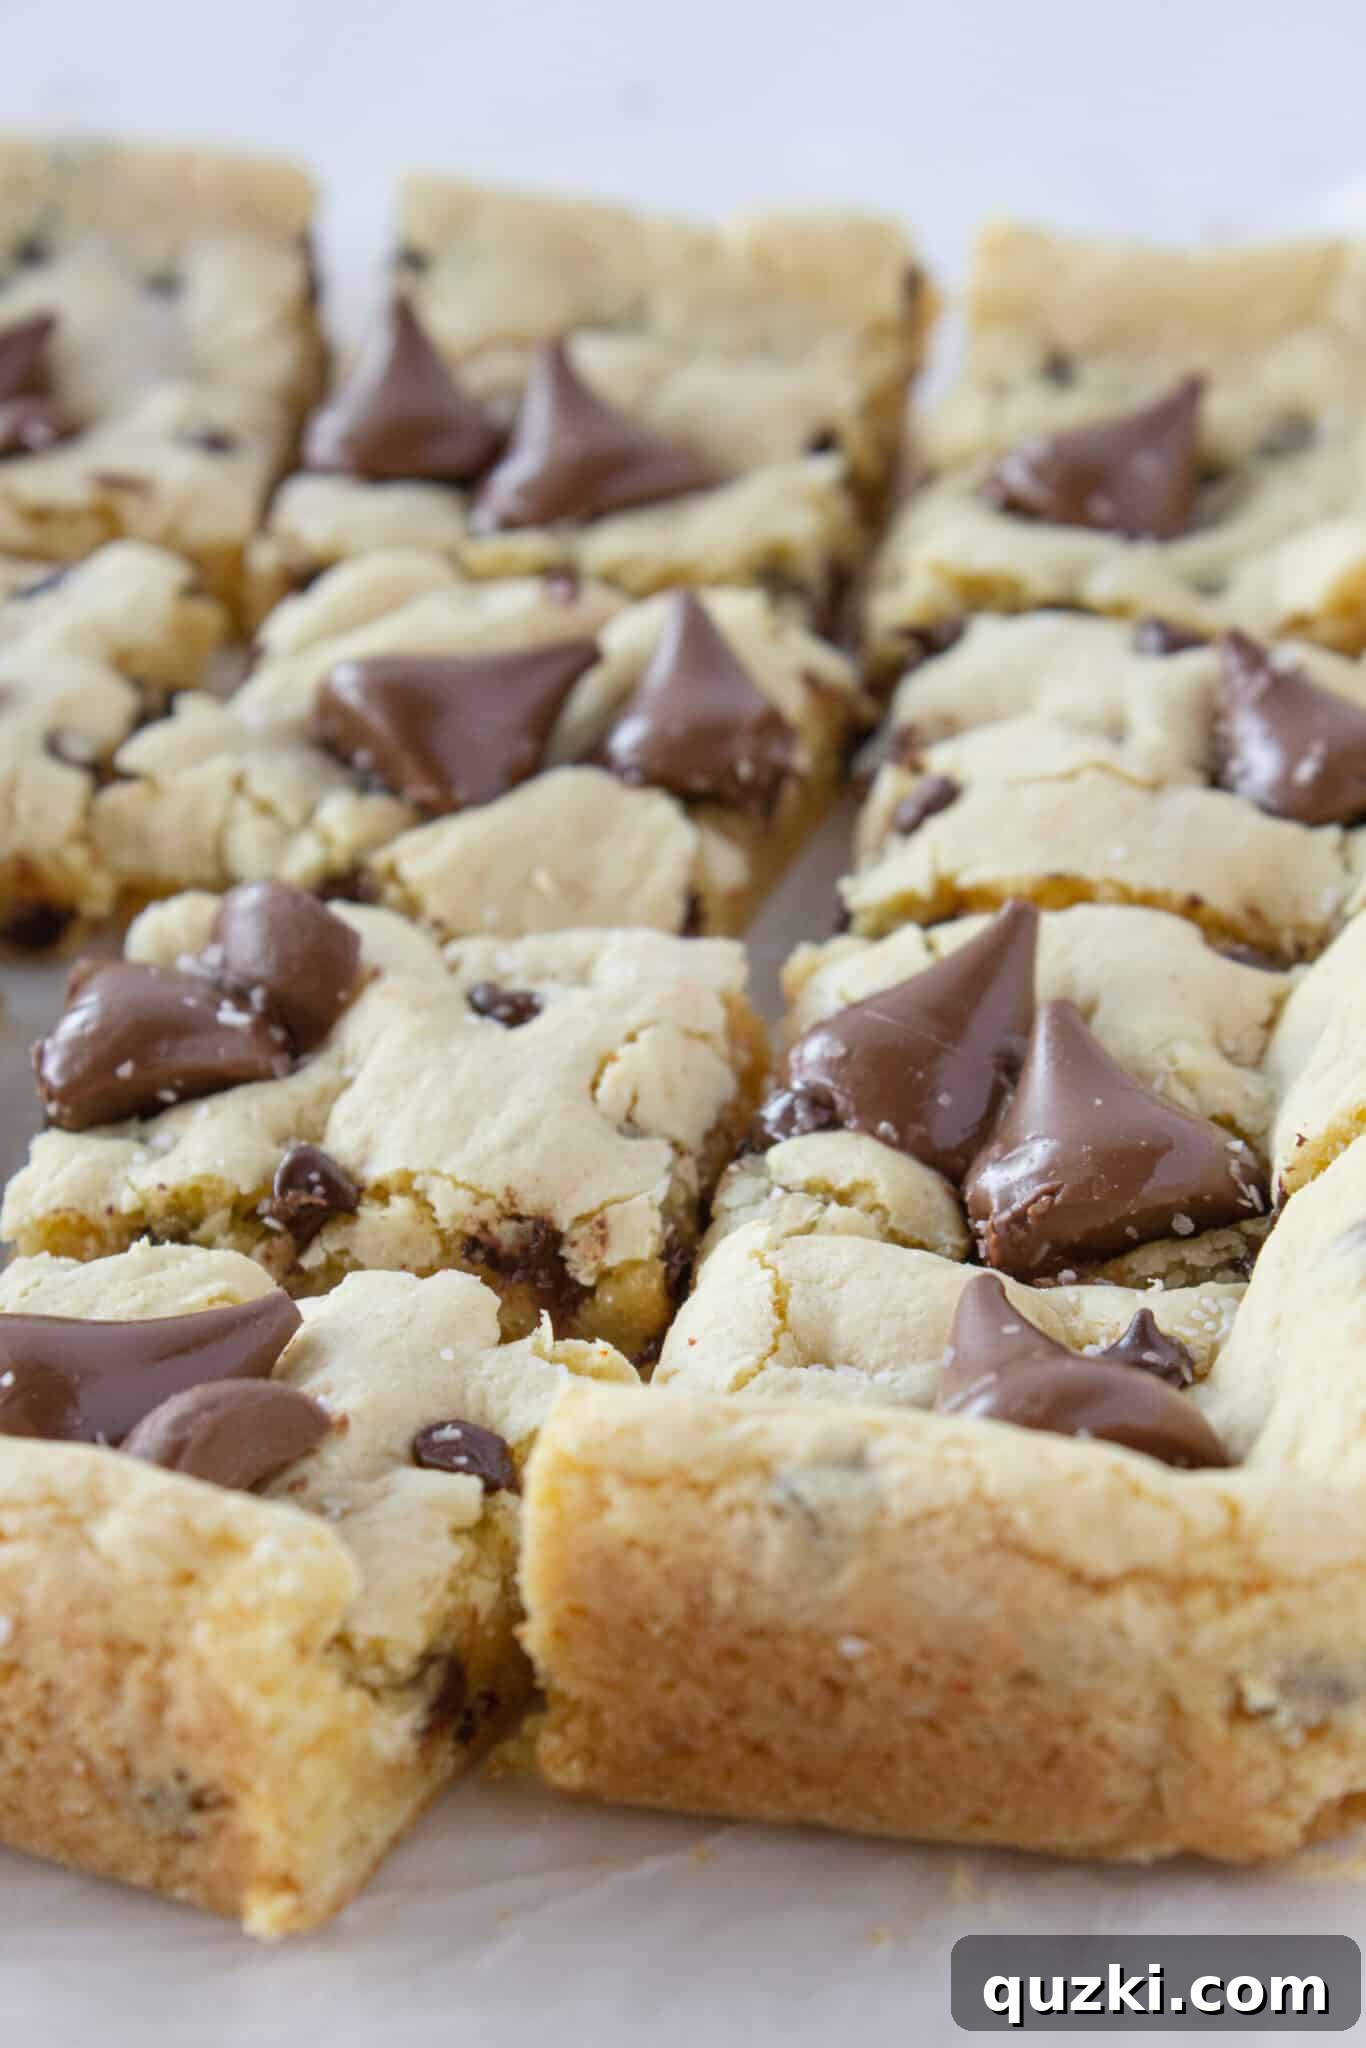
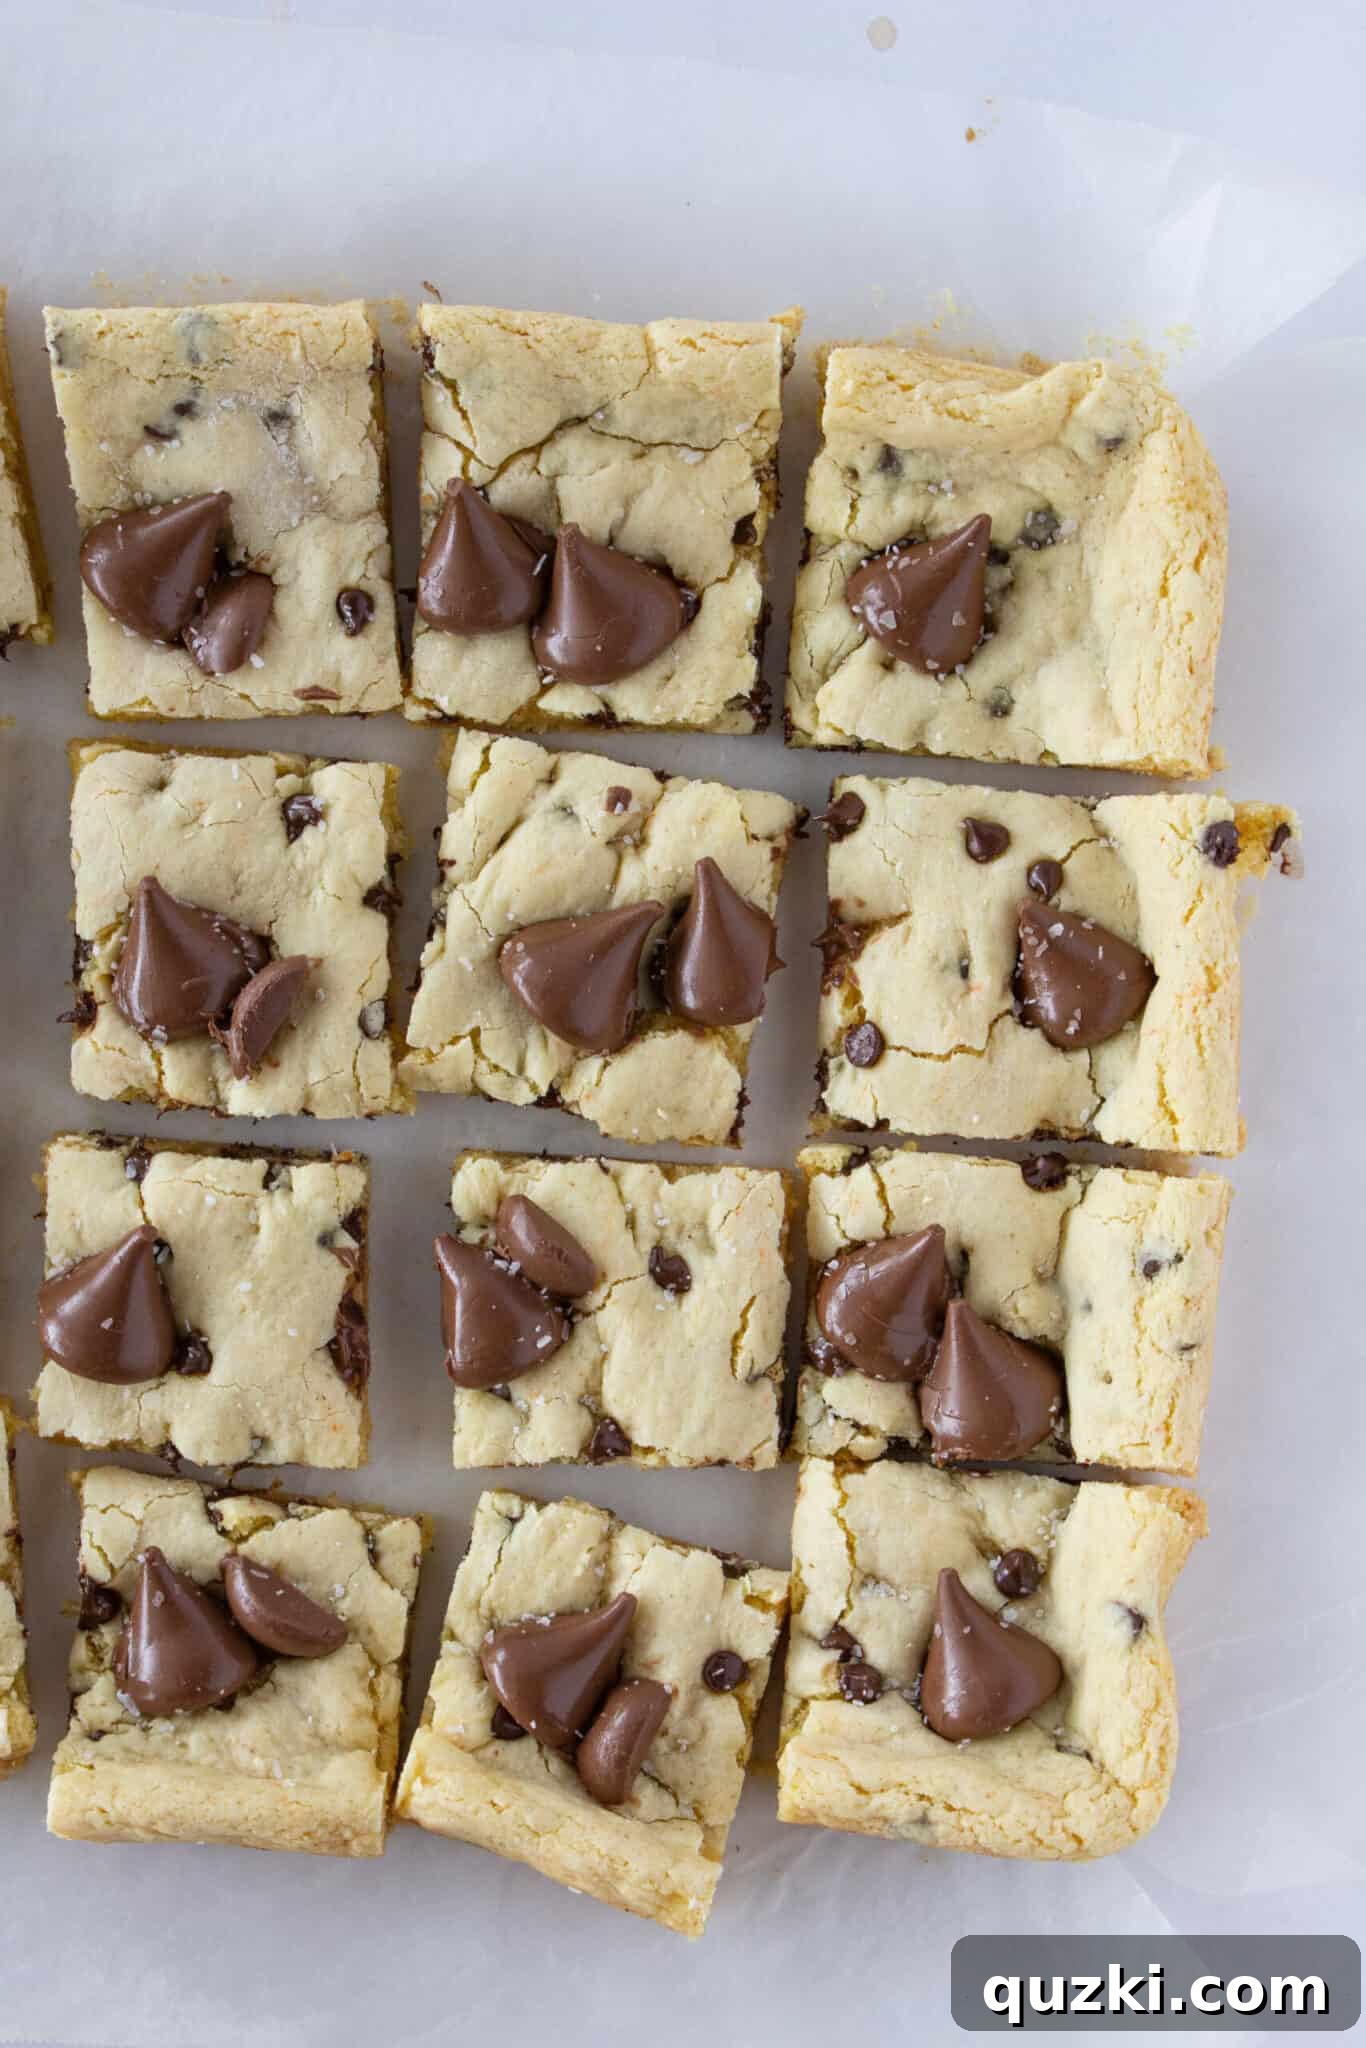
- Cool and Cut: Once the bars have completed their final bake, remove the pan from the oven and immediately place it on a wire cooling rack. It is absolutely essential to allow the bars to cool completely in the pan before attempting to cut them. Attempting to cut them while warm will result in crumbly, messy bars and smeared, melty Kisses. For best results, allow them to cool for at least an hour, or even longer, until they are firm to the touch. If you lined your pan with parchment paper, you can easily lift the entire slab of cooled cookie bars out and transfer them to a cutting board before slicing into neat 12-16 squares. Otherwise, you can carefully cut them directly in the baking pan.
Expert Tips for the Best Brown Butter Hershey’s Kiss Cookie Bars
- Mastering Brown Butter is Key: This is the star ingredient that truly elevates these bars! Always use a light-colored skillet or saucepan to make brown butter. This critical step allows you to clearly see the color change of the milk solids as they caramelize. Stir constantly to ensure even browning and prevent any part from burning. The process can go from perfectly nutty to burnt very quickly, so stay attentive! Once you smell a rich, toasted, nutty aroma and see beautiful amber-colored flecks at the bottom of the pan, remove it from heat immediately. Pour the hot butter into a separate heatproof bowl and allow it to cool thoroughly before adding it to your dough to prevent cooking (scrambling) the egg.
- Strategic Kiss Placement: When pressing the Hershey’s Kisses into the warm, partially baked bars, take a moment to consider where you’ll be cutting them. Aim to place the Kisses in a somewhat organized grid pattern so that each finished cookie bar square will have a beautiful, melty Kiss right in its center. This not only looks incredibly appealing but also ensures that every serving gets that iconic chocolatey goodness, making each bite a delightful surprise.
- Whole or Trimmed Kisses: You have the option to use whole Hershey’s Kisses, which will create a slightly taller, more prominent chocolate mound on top of each bar. Alternatively, you can snip off the bottom third of each Kiss. This minor adjustment allows the Kisses to sit a bit flatter and more uniformly on the cookie bar, which can be particularly useful if you plan to stack the bars or package them neatly for gifting. Both methods work perfectly, so choose what you prefer based on your aesthetic preference.
- Patience for Perfect Cooling: Resisting the urge to cut these bars while they are still warm is paramount for success! Warm Kisses will smear and create a messy appearance, and warm cookie bars will crumble easily, making neat slices impossible. Allowing them to cool completely in the pan ensures clean, crisp cuts and perfectly set, chewy bars. For the absolute best results, let them cool for at least an hour, or even longer (up to two hours), before slicing. You can even place the cooled pan in the refrigerator for 15-20 minutes to firm them up further before cutting.
- The Magic of Kosher Salt: The recipe specifically calls for kosher salt for a reason. Its larger flakes and milder, cleaner flavor provide a pleasant textural crunch and a burst of savory contrast without being overwhelmingly salty. It beautifully balances the sweetness of the chocolate and cookie base. If you only have fine table salt, use a very small pinch (about half the amount), as it’s much finer and saltier, and can easily overpower the dessert.
Storage and Make-Ahead Tips
These Brown Butter Hershey’s Kiss Cookie Bars are fantastic for making ahead and storing, ensuring you always have a delightful treat on hand. Once completely cooled, store them in an airtight container at room temperature for up to 3-4 days. To maintain their freshness and prevent them from drying out, you can place a piece of parchment paper between layers if stacking. For longer storage, you can freeze them for up to 3 months. To freeze, wrap individual bars tightly in plastic wrap, then place them in a freezer-safe bag or an airtight container. Thaw at room temperature for a quick and easy treat whenever a craving strikes, or pop them in the microwave for a few seconds for a warm, gooey experience.
Delicious Variations to Explore
While this recipe for Brown Butter Hershey’s Kiss Cookie Bars is absolutely perfect as is, feel free to get creative and experiment with these delicious variations to customize them to your taste:
- Add a Nutty Twist: For an extra layer of nutty flavor and texture that complements the brown butter beautifully, try adding 1/4 to 1/2 cup of finely chopped pecans, walnuts, or even almonds to the dough along with the mini chocolate chips. Toasting the nuts lightly before adding them will intensify their flavor even more.
- Explore Different Kisses: Hershey’s offers a wide array of Kisses flavors throughout the year! Experiment with variations like caramel-filled Kisses for a gooey surprise, milk chocolate Hugs (white chocolate swirled with milk chocolate) for a softer flavor, or even dark chocolate Kisses for a richer, more intense chocolate experience. Seasonal Kisses, like mint or pumpkin spice, could also be fun to try!
- Enhance with Extracts: A teaspoon of pure vanilla extract or almond extract, added to the dough along with the liquid ingredients, can further deepen the overall flavor profile of these cookie bars. You could even try a hint of coffee extract to really bring out the chocolate notes.
- Chocolate Drizzle Finish: Once the cookie bars are completely cooled and sliced, you can add an elegant touch by melting some extra chocolate chips (milk, dark, or white chocolate) and drizzling them artistically over the top. This adds another layer of visual appeal and chocolatey goodness.
- Swap Chocolate Chips: Instead of mini chocolate chips, consider using white chocolate chips, butterscotch chips, or a mix of different chocolate varieties to change up the flavor profile of the cookie base.
More Time-Saving Cake Mix Recipes You’ll Adore
If you loved the simplicity and deliciousness of using a cake mix for these Brown Butter Hershey’s Kiss Cookie Bars, then you’re in for a treat! Cake mixes are a baker’s secret weapon, offering a quick and easy foundation for an endless variety of desserts. From cookies to cakes and everything in between, these convenient boxes can transform into stunning and satisfying treats with minimal fuss. Explore more fantastic recipes that leverage the power of a boxed cake mix to simplify your baking and delight your taste buds:
Discover More Easy Desserts
Desserts
Easy Boston Cream Pie Cookie Bites Recipe
Bars
Salted Caramel Butter Bars made with a Cake Mix
Cookies
Cake Mix Peanut Butter Cookies
Cakes
Black Bottom Bundt Cake Recipe
Brown Butter Hershey’s Kiss Cookie Bars
Print Recipe
Ingredients
- 15.25 ounces yellow butter cake mix
- ¼ cup unsalted brown butter, cooled
- ⅓ cup milk
- 1 large egg
- ¼ cup mini chocolate chips, plus more for sprinkling
- Approx. 24-30 Hershey’s Kisses, unwrapped
- ⅛ teaspoon kosher salt, for sprinkling
Instructions
-
Preheat your oven to 350°F (175°C). Prepare a 9×9 inch baking pan by spraying it with nonstick cooking spray or lining it completely with parchment paper, leaving an overhang on two sides for easy removal. Set aside.
-
Make the Brown Butter: In a light-colored saucepan over medium heat, melt ¼ cup of butter. Continue cooking, stirring frequently, until the butter foams, turns golden brown, and emits a rich, nutty aroma (approximately 5-8 minutes). Immediately remove from heat and transfer to a heatproof bowl to cool completely.
-
In a large bowl, combine the yellow butter cake mix, the cooled brown butter, ⅓ cup milk, and 1 egg. Mix with a handheld electric mixer or by hand until a thick, uniform dough forms and no dry streaks remain. Stir in ¼ cup of mini chocolate chips until well distributed.
-
Evenly press the dough into the prepared 9×9 inch baking pan, spreading it all the way to the edges. If desired, sprinkle a few extra mini chocolate chips on top. Bake for 15 minutes. The edges will be set, but the center will still be soft.
-
Remove the partially baked cookie bars from the oven. Carefully press the unwrapped Hershey’s Kisses onto the top of the warm bars. You can use them whole or snip off the bottom third for a flatter, more even appearance. Lightly sprinkle the bars with ⅛ teaspoon of kosher salt.
-
Return the pan to the oven and bake for an additional 5 minutes. This allows the cookie bars to finish baking through and the Kisses to soften and melt slightly, settling into the dough.
-
Remove the pan from the oven and place it on a wire rack to cool completely. This cooling step is critical for clean cuts and perfectly set bars. Once fully cooled (at least 1 hour), lift the bars out using the parchment paper overhangs or cut directly in the pan, then slice into 12-16 squares. Store leftovers in an airtight container at room temperature for up to 4 days, or freeze for up to 3 months.
Notes
Nutrition
Nutrition information is automatically calculated and should only be used as an approximation. It may vary based on specific ingredients and preparation methods.