

Effortless Cannoli Cookie Cups: Your New Favorite Easy Italian Dessert
Are you a fan of the iconic Italian cannoli but often short on time? Imagine savoring all those beloved flavors in a delightful, bite-sized cookie form, without the traditional fuss of frying pastry shells. Our Cannoli Cookie Cups recipe offers exactly that – a wonderfully simple, yet incredibly satisfying dessert that brings the taste of Italy right to your kitchen in record time. Get ready to impress your family and friends with these charming little treats!

Finding new cookie recipes that truly stand out can be a challenge, but this one is an absolute game-changer. These Cannoli Cookie Cups deliver an explosion of flavors that will have everyone reaching for more. What makes them so special? It’s the harmonious blend of rich, creamy textures and vibrant, aromatic notes.
The secret to the filling’s irresistible tang and velvety smoothness lies in the perfect combination of both ricotta and cream cheese. While these two ingredients lay a fantastic foundation, it’s the bright, fragrant orange zest that truly elevates this cookie cup, adding a delicate citrusy perfume that cuts through the richness beautifully. And of course, no cannoli-inspired treat would be complete without the delightful addition of mini chocolate chips, scattered throughout the creamy filling like tiny jewels. Their subtle sweetness and slight crunch provide the perfect contrast.
Traditionally, making cannolis from scratch can be a labor-intensive process, often taking hours to prepare the shells, filling, and assembly. However, this innovative Cannoli Cookie Cups recipe drastically cuts down on preparation time without compromising on flavor or authenticity. Utilizing a simple cake mix for the cookie base makes this recipe not just easy, but remarkably quick, making it a perfect choice for busy weeknights, last-minute gatherings, or when you simply crave a delicious homemade treat without the extensive effort. Adding this recipe to your baking repertoire will undoubtedly be one of the best decisions you make all week!

Why You’ll Adore These Cannoli Cookie Cups
These aren’t just any cookie cups; they’re a celebration of flavor and convenience. Here’s why they’ll quickly become a cherished recipe in your collection:
- Incredibly Easy: Starting with a cake mix simplifies the baking process significantly, making them accessible even for novice bakers.
- Authentic Cannoli Flavor: Despite the shortcut, the homemade ricotta and cream cheese filling, infused with orange zest, delivers a taste remarkably similar to traditional cannolis.
- Perfectly Portioned: Each cookie cup is a delightful single serving, ideal for parties, dessert platters, or a satisfying individual treat.
- Visually Appealing: Their charming cup shape and vibrant toppings make them a beautiful addition to any dessert spread.
- Versatile: Easy to customize with different toppings and flavor variations to suit your preference.
- Crowd-Pleaser: They disappear quickly at any gathering, guaranteed to receive rave reviews from guests.
Recipe Ingredients
Gathering your ingredients is the first step to creating these delightful Italian-inspired treats. We’ve divided them into categories for clarity, ensuring you have everything you need for both the tender cookie cups and the luscious cannoli filling.
For the Cookie Cups:
- 1 box vanilla cake mix (13.25 ounces): The ultimate shortcut for a consistently soft and flavorful cookie base. Yellow or white cake mix can also work!
- 2 large eggs: Essential for binding the dough and contributing to the cookies’ tender texture.
- ⅓ cup butter (softened): Provides richness and moisture, making the cookies deliciously chewy. Ensure it’s softened to room temperature for easy blending.
For the Cannoli Filling:
- 1 cup ricotta cheese (part-skim recommended): The star of any cannoli filling, offering a subtly sweet and creamy texture. For an extra thick filling, you can drain the ricotta in a fine-mesh sieve lined with cheesecloth for an hour or two prior to use.
- 6 ounces cream cheese (softened): Adds a wonderful tang and stability to the filling, preventing it from being overly sweet.
- ½ cup powdered sugar: Sweetens the filling and ensures a smooth, lump-free consistency.
- ½ teaspoon vanilla extract: A classic flavor enhancer that complements the dairy and citrus notes beautifully.
- 1 teaspoon orange zest: The secret ingredient that truly elevates the cannoli flavor, imparting a bright, aromatic essence. Don’t skip this for authentic taste!
- ¼ cup mini chocolate chips: These tiny morsels melt slightly in your mouth and are the perfect size for scattering throughout the creamy filling.
For Topping and Garnish:
- ¼ cup additional mini chocolate chips: For an extra sprinkle of chocolatey goodness on top.
- ¼ cup chopped pistachios: Adds a lovely crunch, nutty flavor, and a pop of vibrant green color, reminiscent of traditional cannolis.
How to Make Cannoli Cookies with a Cake Mix: Step-by-Step Guide
Creating these delightful Cannoli Cookie Cups is a straightforward process, broken down into three main stages: preparing the cookie base, crafting the luscious filling, and assembling your beautiful treats. Follow these steps for perfect results every time!
Part 1: Crafting the Perfect Cookie Cups
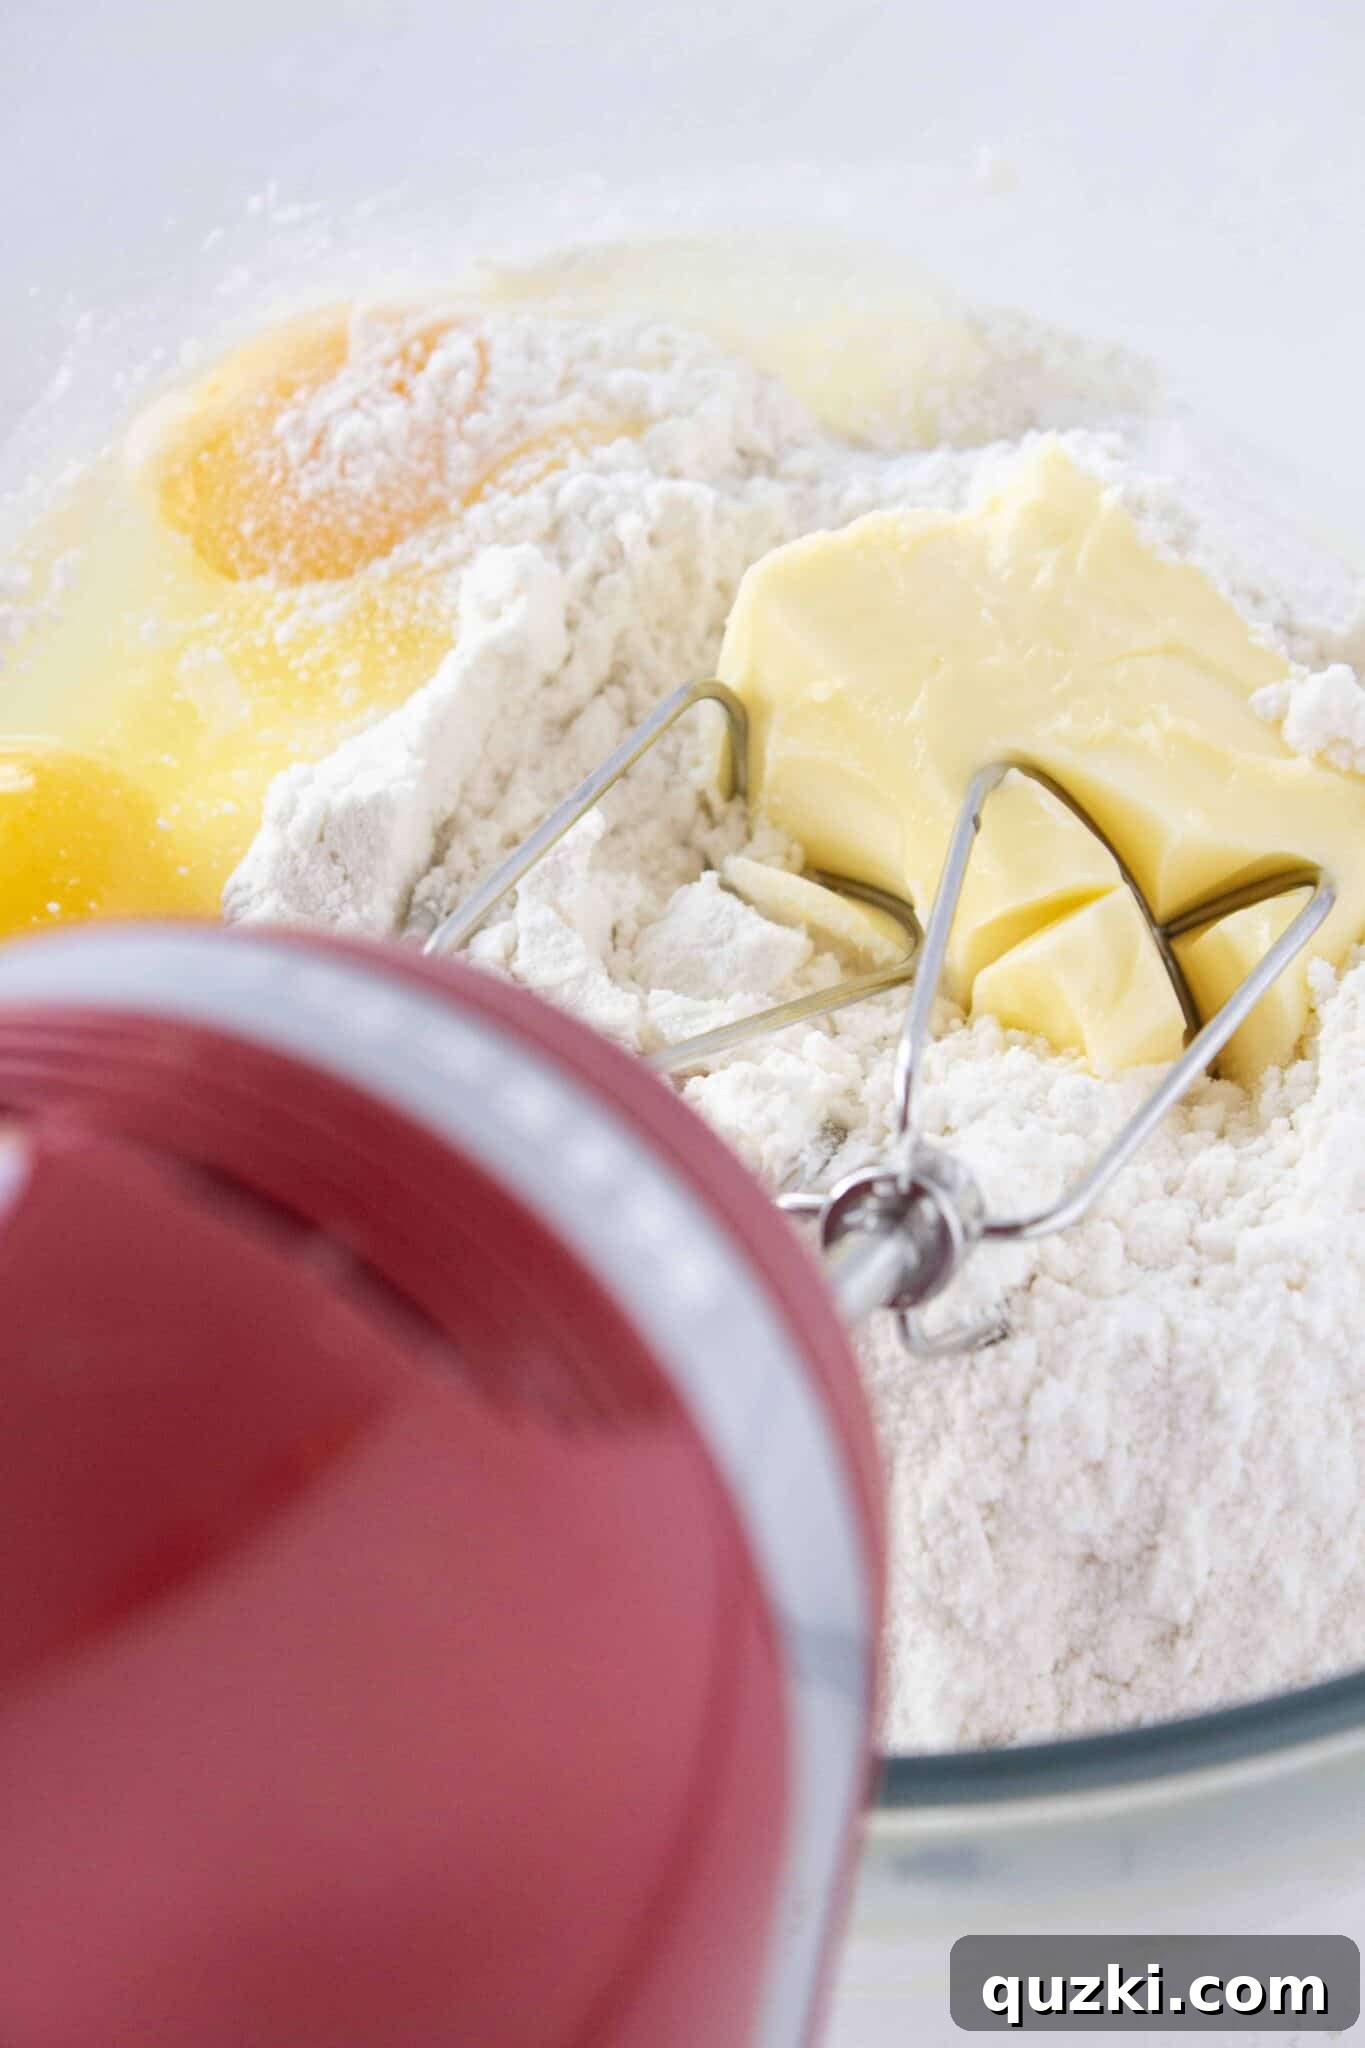
1. Prepare Your Dough: Begin by preheating your oven to 350°F (175°C). In a medium-sized mixing bowl, combine the cake mix, softened butter, and eggs. It’s easiest to use a handheld mixer for this step, as it quickly brings the ingredients together into a thick, uniform dough. However, if you don’t have a mixer, a sturdy spoon and a bit of elbow grease will work just fine, especially if your butter is adequately softened.
2. Achieve the Right Consistency: Continue mixing until all ingredients are thoroughly incorporated, and you have a thick, somewhat sticky cookie dough. It should be firm enough to scoop but still pliable.
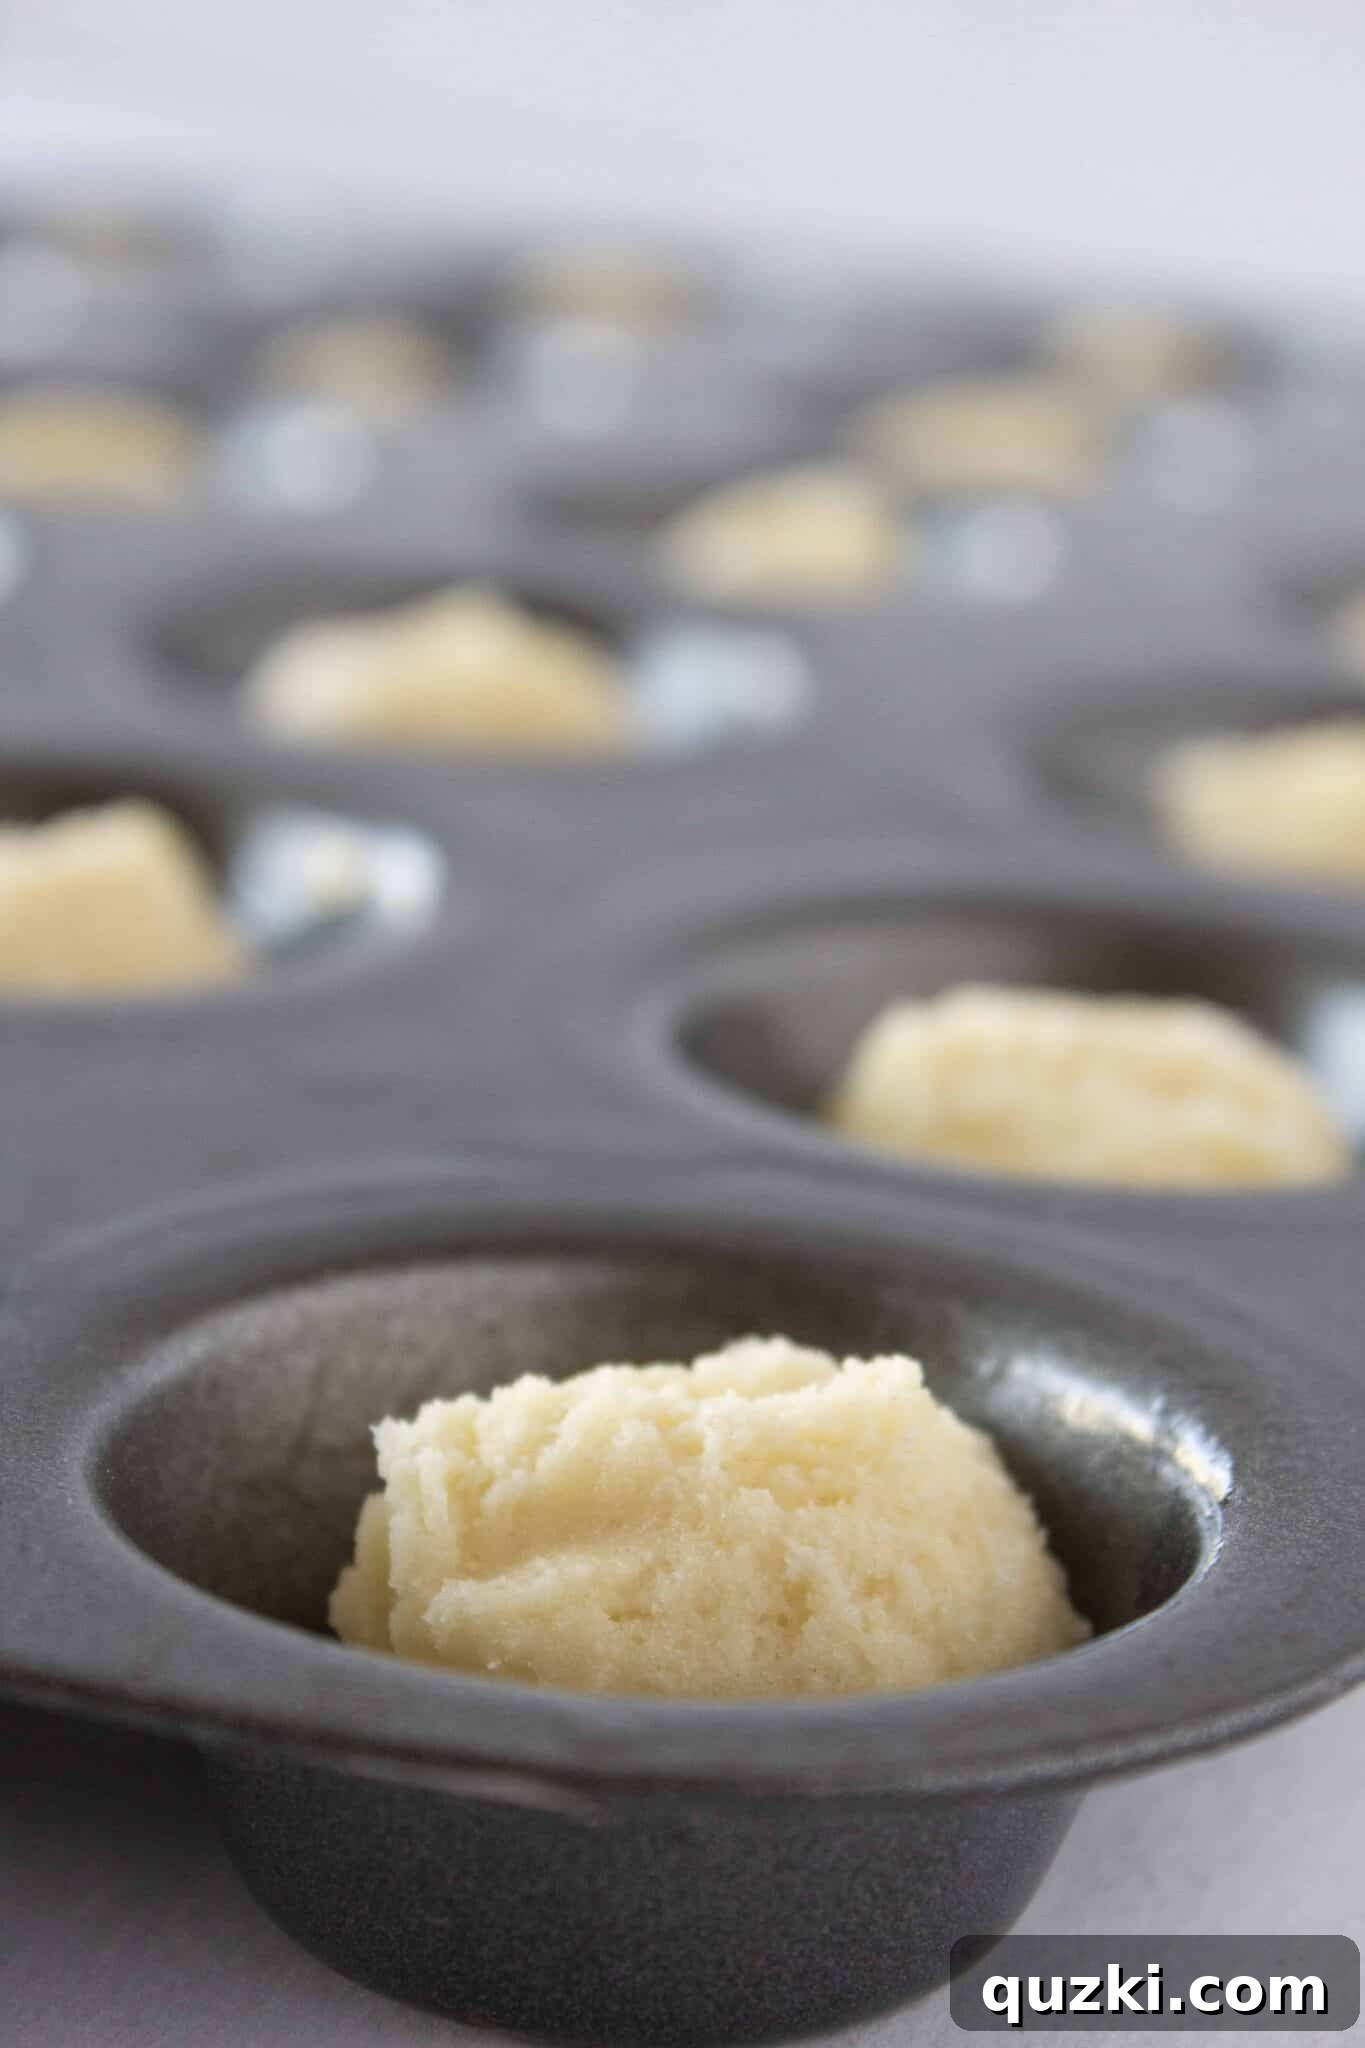
3. Prepare Your Muffin Pan: Grab a mini muffin pan. This recipe yields approximately 36 cookie cups, so you may need to use multiple pans or bake in batches. Liberally spray each cup with a nonstick cooking spray. This crucial step ensures your cookie cups will release easily after baking.
4. Scoop the Dough: Using a small cookie scoop (which typically holds about 1/2 tablespoon of dough), place a mound of cookie dough into each prepared muffin cup. Aim for even amounts to ensure consistent baking.
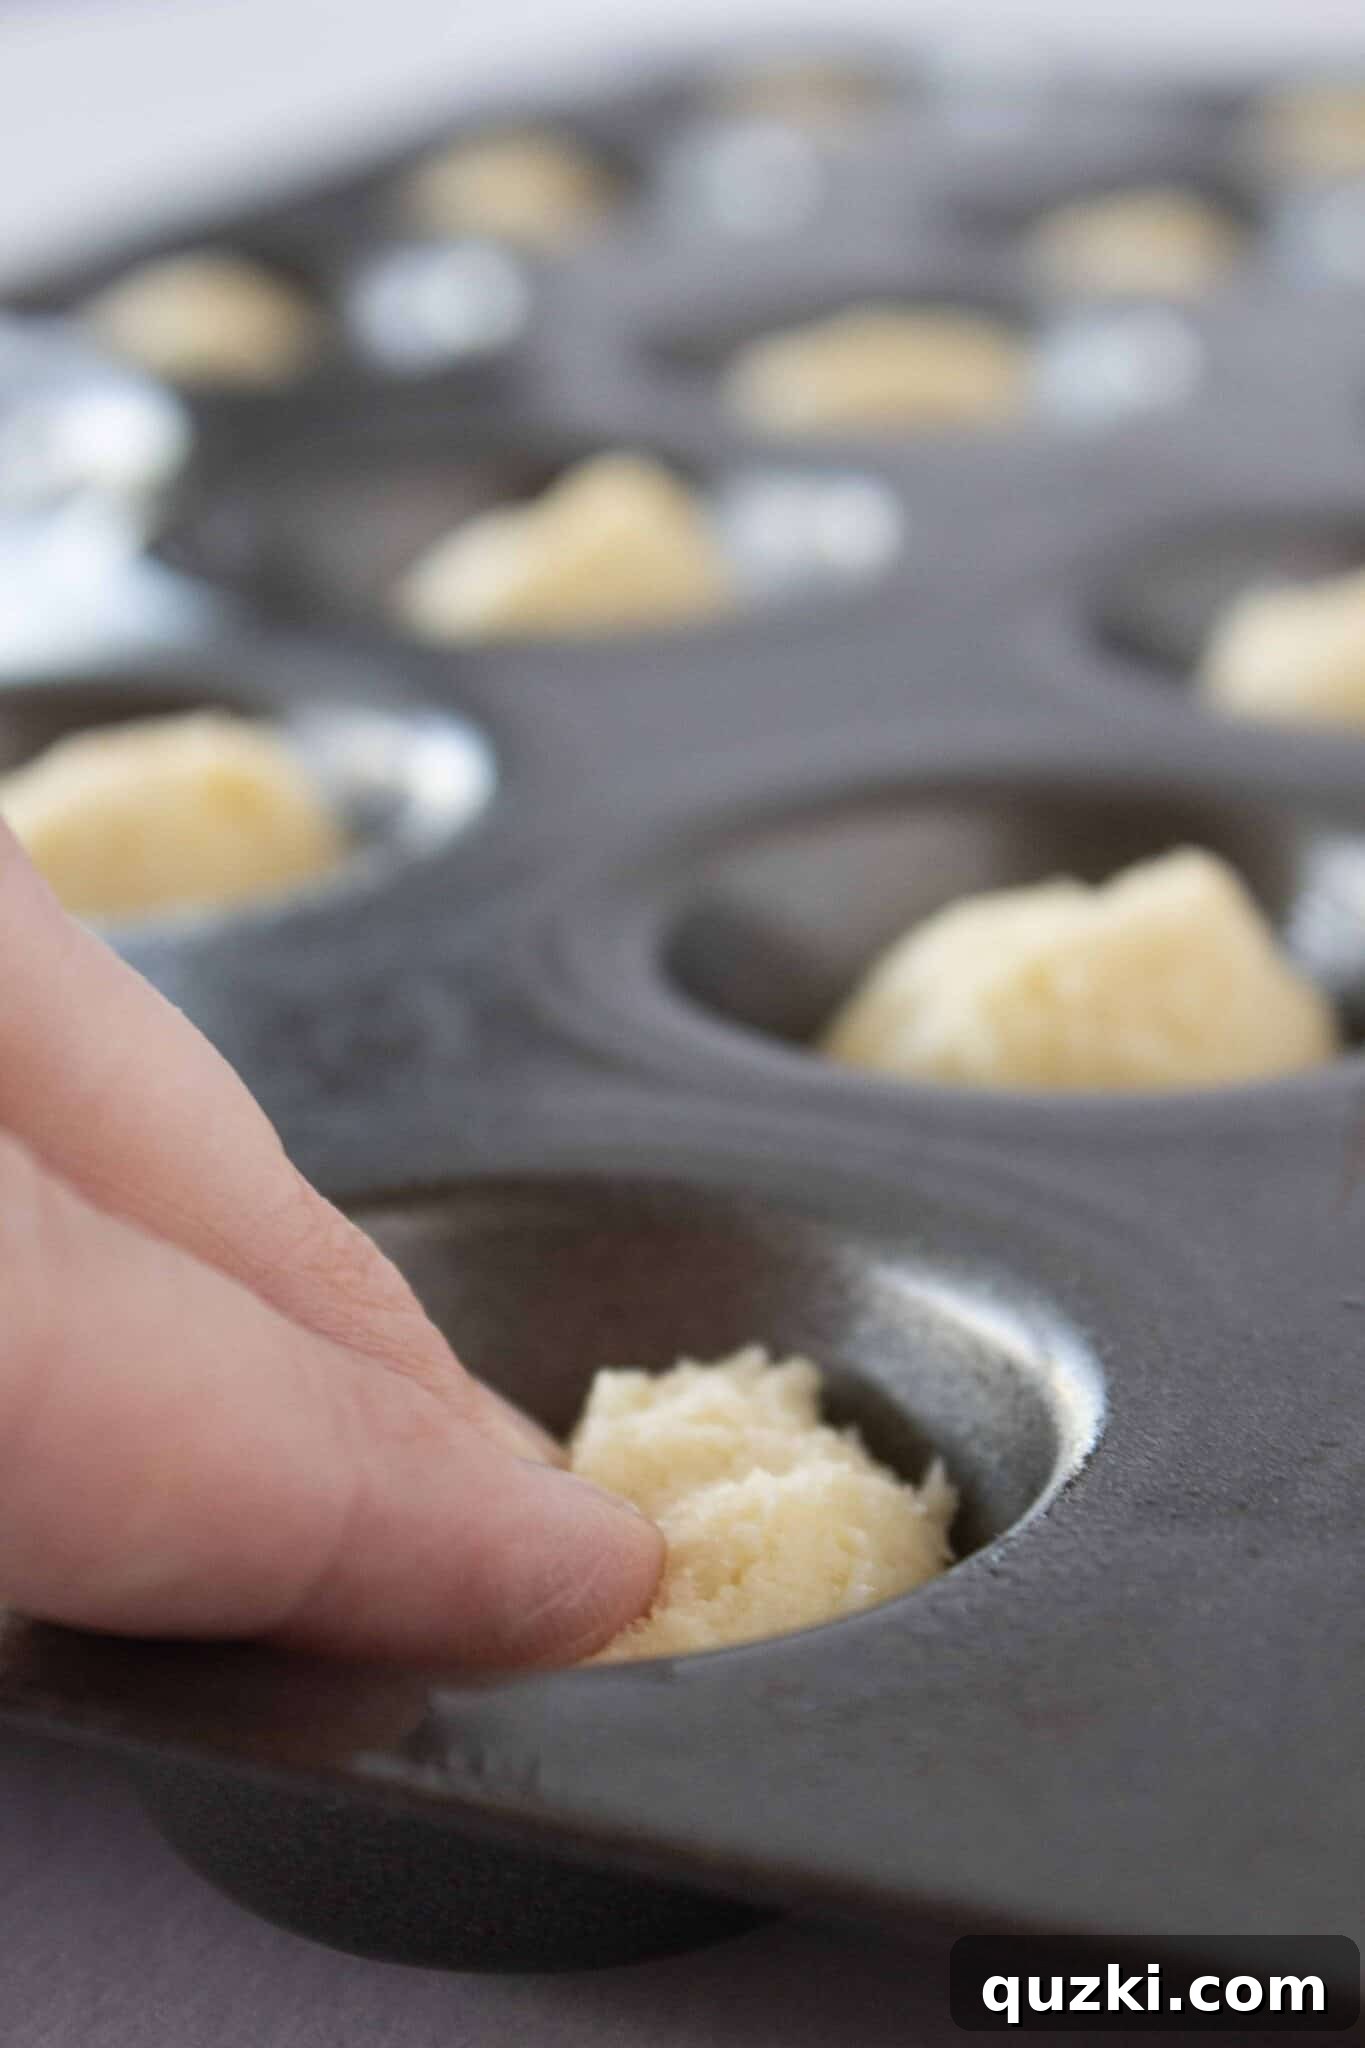
5. Form the Cups: With clean fingertips, gently press each mound of dough down into the muffin cup. You want to create a relatively flat, level base for your cookie cups. This ensures a consistent shape and enough space for the filling.
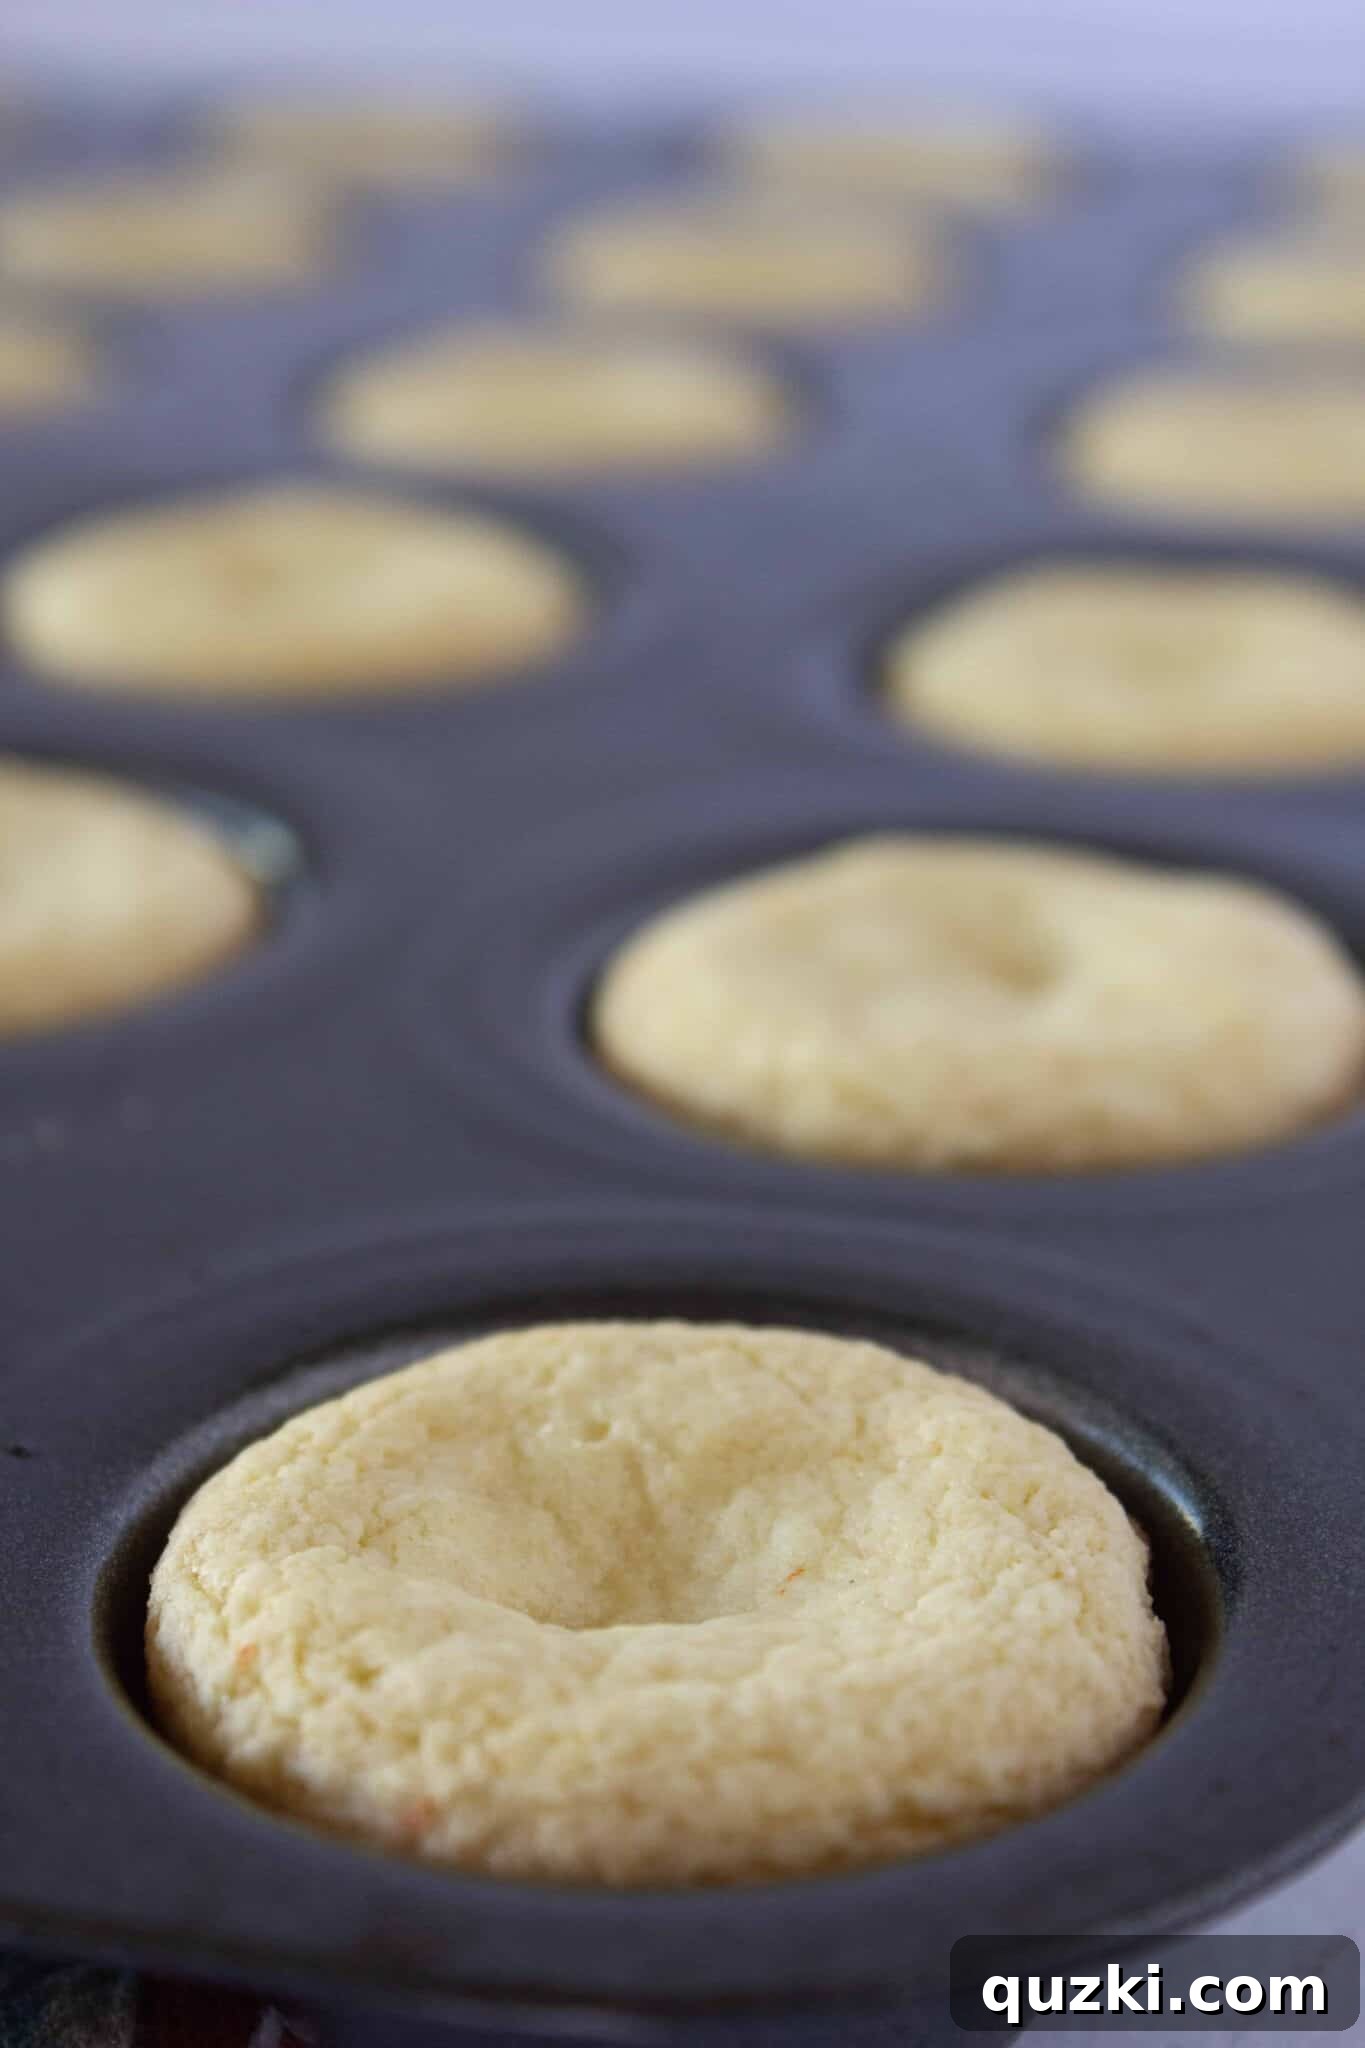
6. Bake to Golden Perfection: Bake the cookie cups in your preheated 350°F (175°C) oven for 9-11 minutes. Keep a close eye on them; you’re looking for the tops and edges to just begin turning a light golden brown. It’s important not to overbake, as they will continue to set and firm up as they cool.
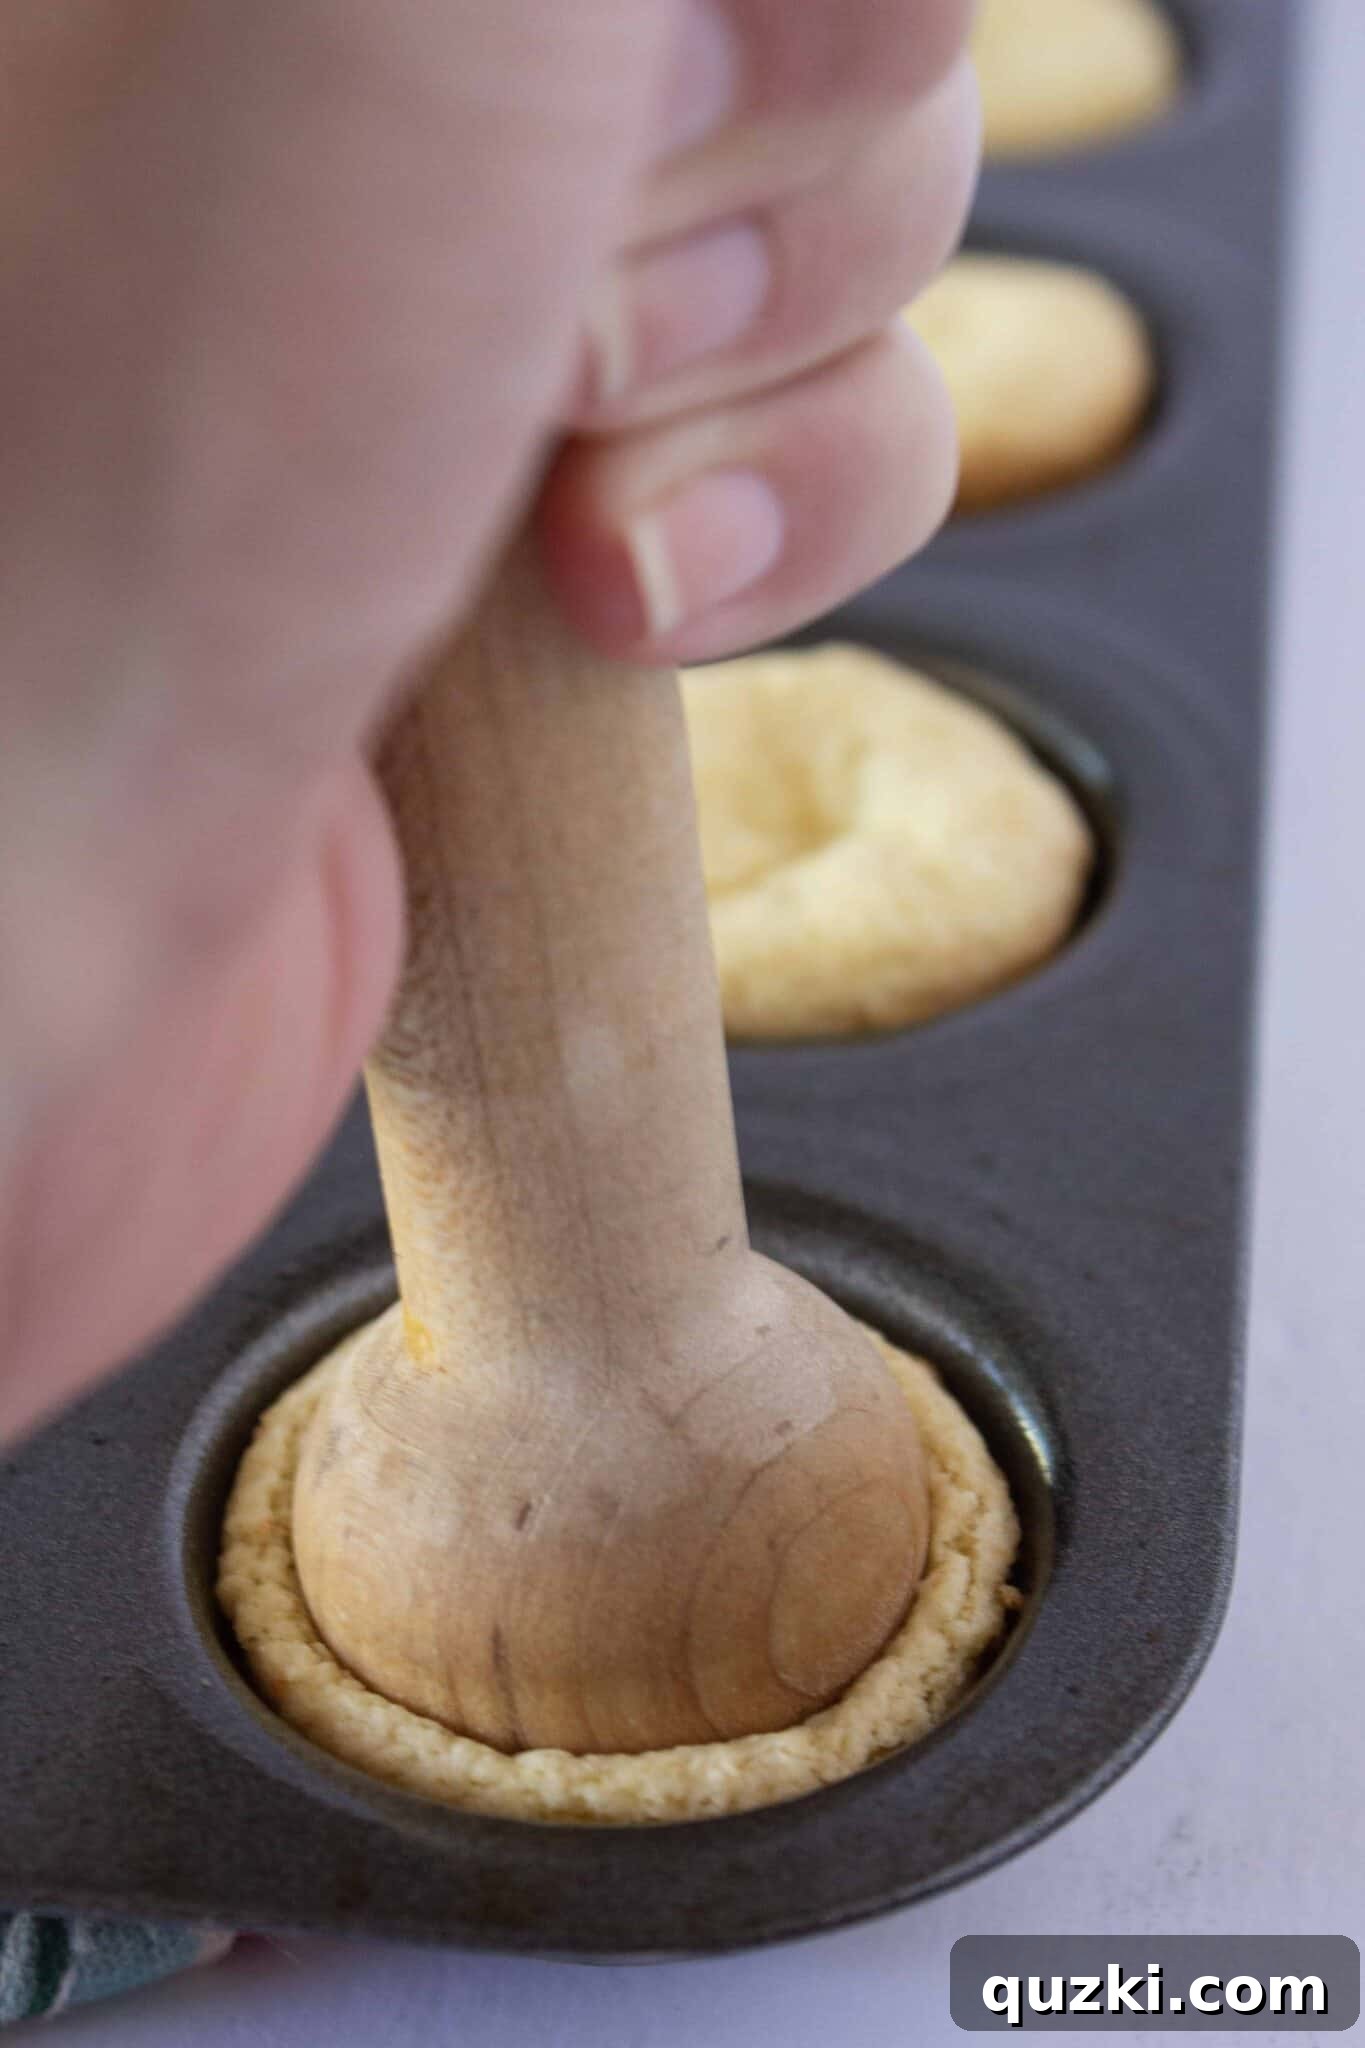
7. Loosen and Indent: Immediately upon removing the pan from the oven, use a thin knife or an offset spatula to gently run around the edge of each cookie cup. This helps to loosen them from the pan and prevents sticking as they cool. After a few minutes of cooling in the pan, while they are still warm and pliable, use a tart shaper or the rounded end of a wooden spoon to create a deep indentation in the center of each cookie, forming the “cup” for your filling.
8. Cool and Repeat: Allow the shaped cookie cups to cool completely on a wire rack. If you have a second batch of dough, continue the baking process until all your cookie cups are ready.
Part 2: Preparing the Easy and Delicious Cannoli Filling
1. Cream the Cheeses: In a clean mixing bowl, combine the ricotta cheese and softened cream cheese. Using a handheld mixer on medium speed (or a whisk if mixing by hand), beat the cheeses together until the mixture is beautifully smooth and well-incorporated. Ensure there are no lumps for a truly luxurious filling.
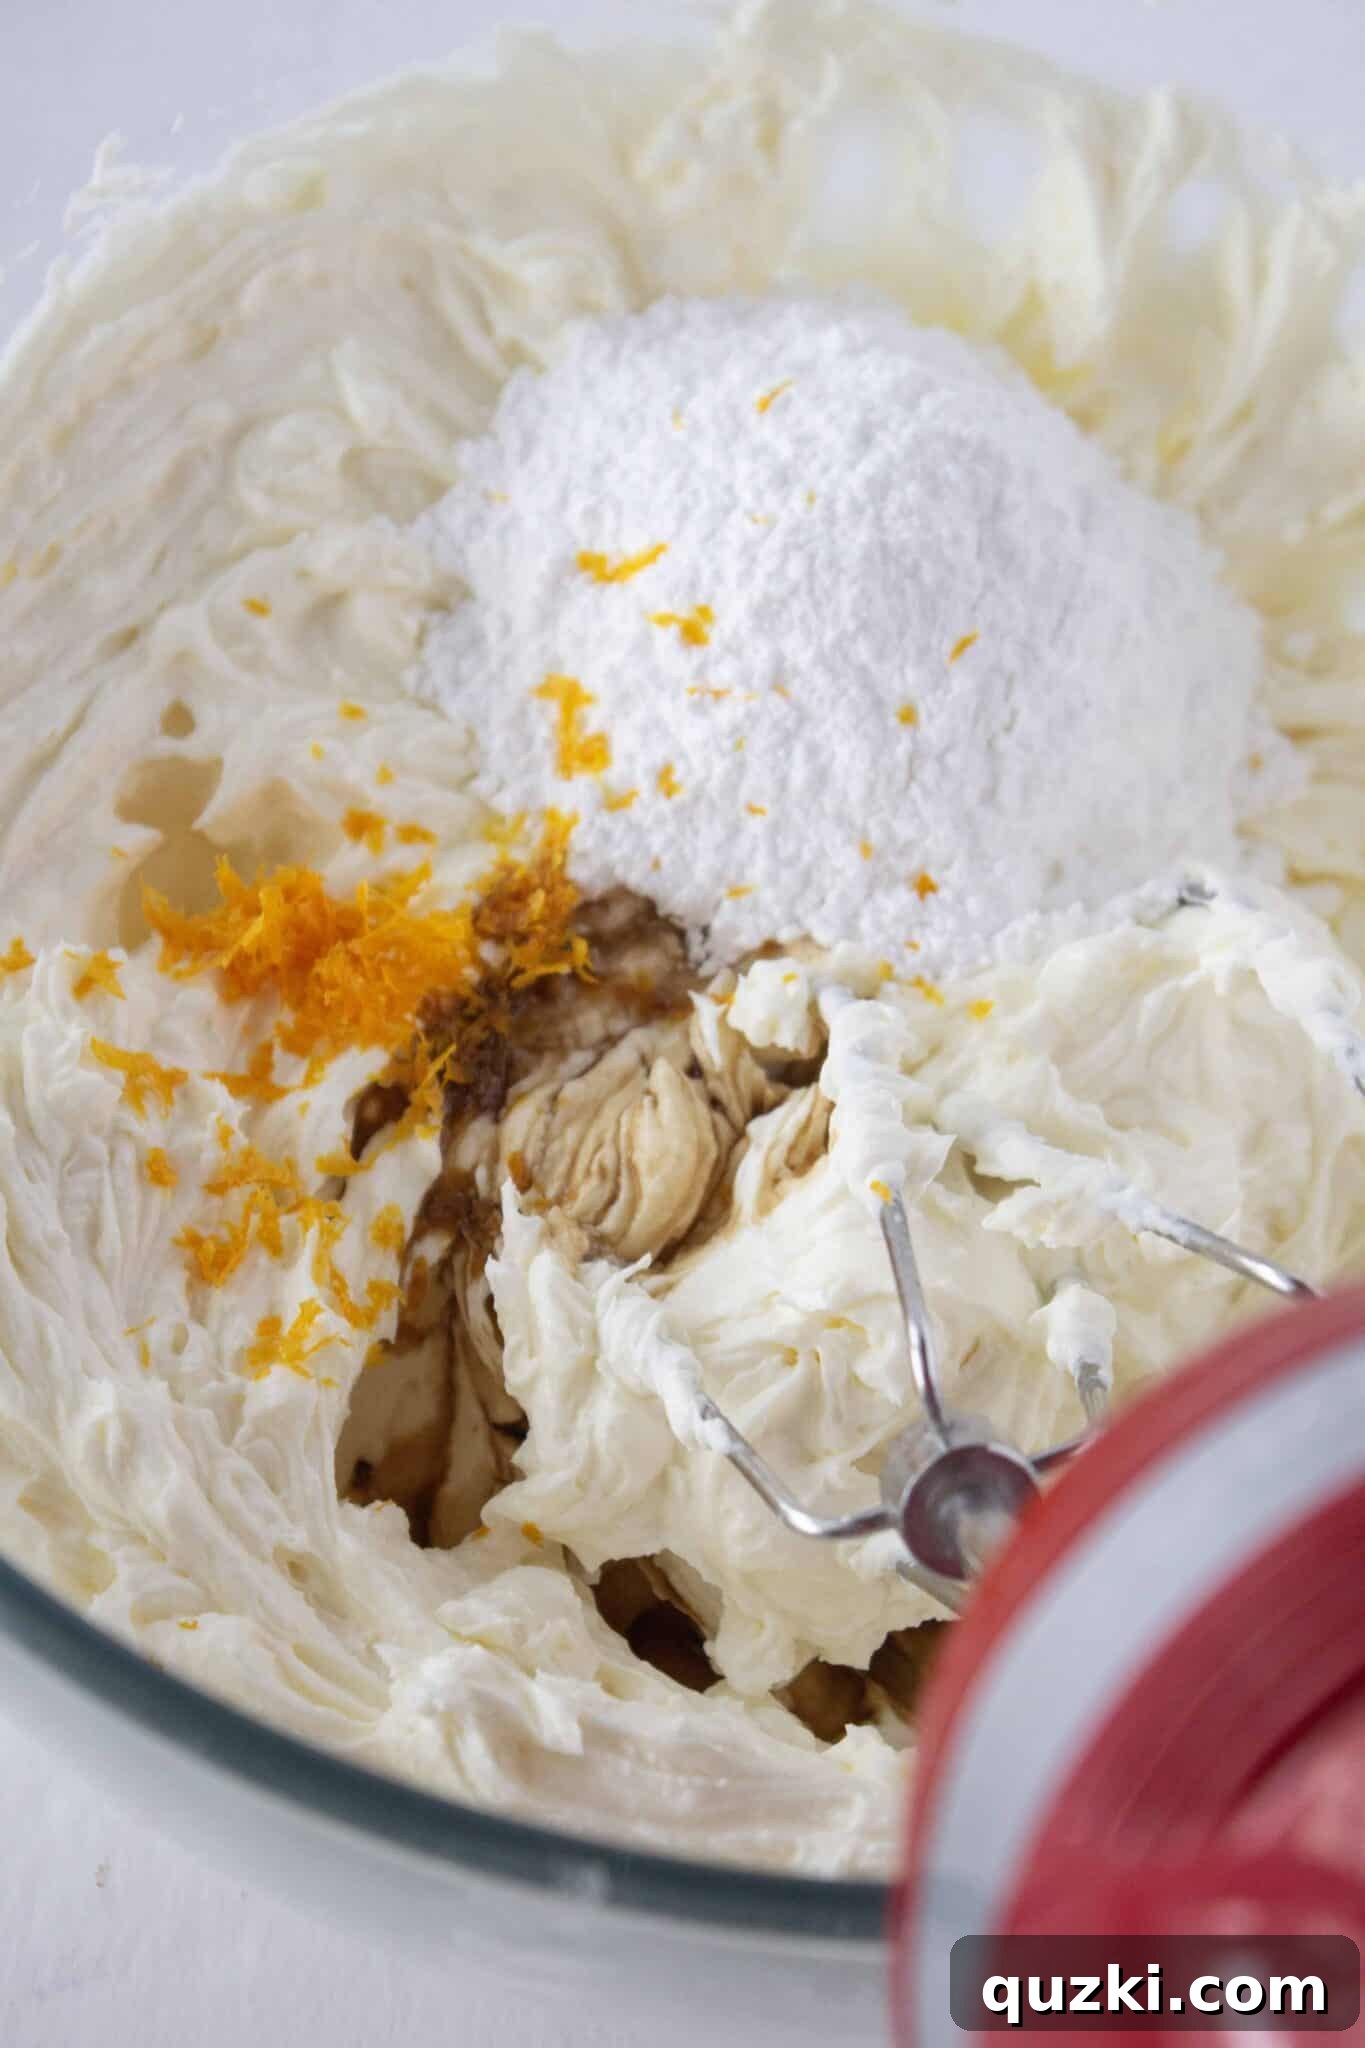
2. Sweeten and Flavor: Next, add the powdered sugar, vanilla extract, and that essential orange zest to the cheese mixture. Continue to mix on low speed until all these ingredients are fully combined and the filling is evenly sweetened and fragrant.
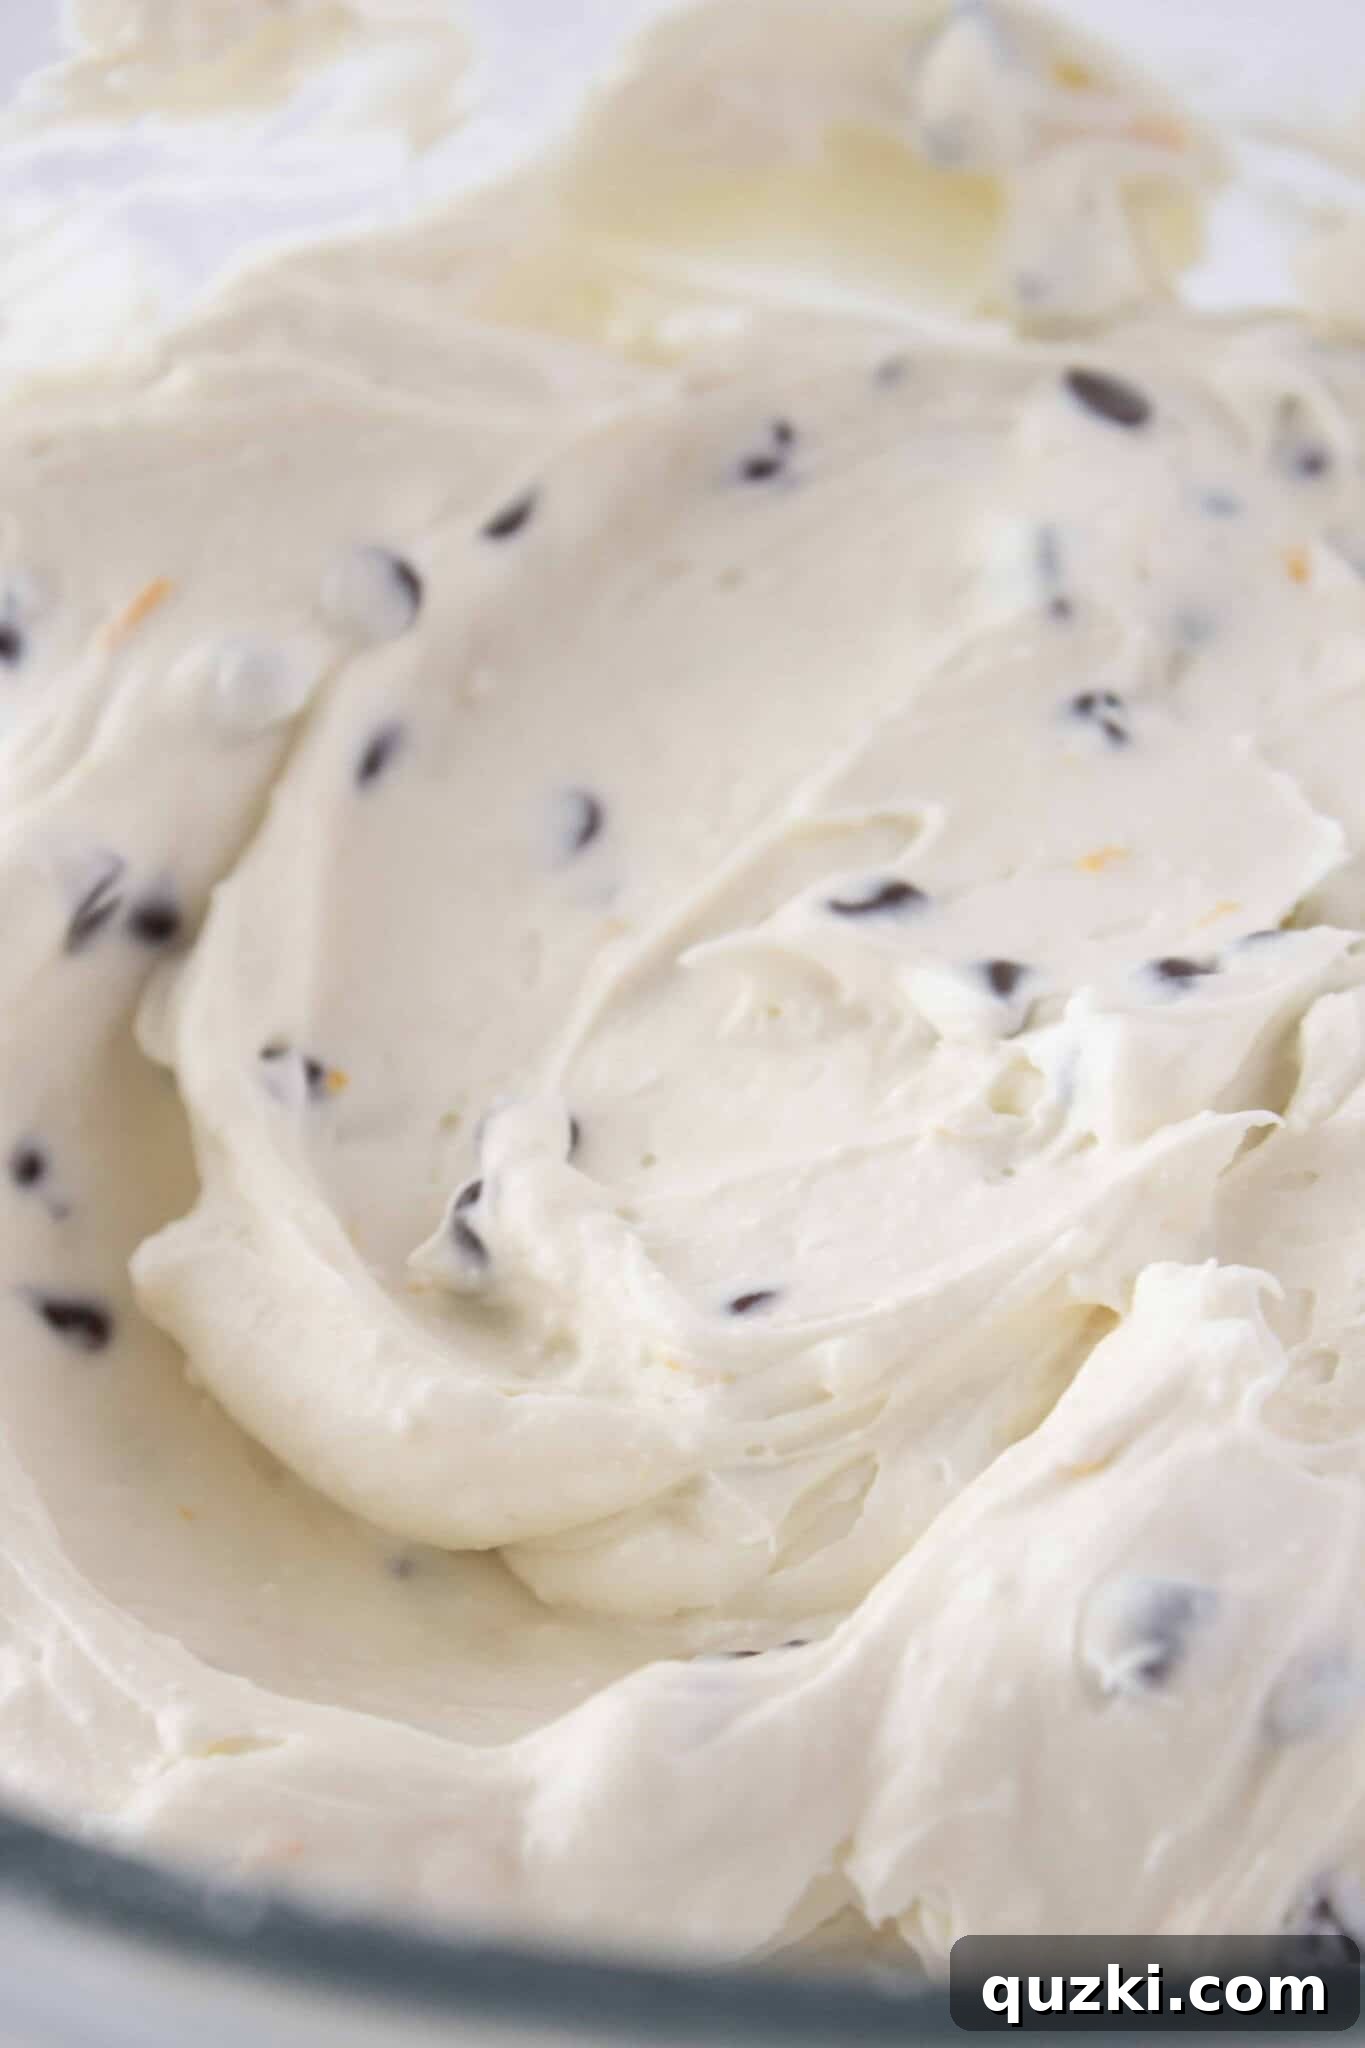
3. Fold in Chocolate Chips: Finally, gently fold in the mini chocolate chips using a wooden spoon or spatula. It’s best to avoid using an electric mixer for this step, as the powerful blades can break up the delicate chocolate chips, which we want to keep intact for texture and visual appeal. Once combined, cover the bowl and refrigerate the filling for at least 30 minutes. Chilling allows the flavors to meld and the filling to firm up slightly, making it easier to pipe or spoon into the cookie cups.
Part 3: Assembling Your Cannoli Cookie Cups
1. Fill the Cups: Once your cookie cups are completely cooled and your filling is chilled, it’s time for assembly. You have two main options for filling: you can either spoon a generous amount of the creamy mixture into each cookie cup using a small spoon, or for a neater and more professional look, use a piping bag. If you don’t have a piping bag, a large Ziploc bag with one corner snipped off (make sure the opening is wide enough for the mini chocolate chips to pass through) works perfectly as a homemade alternative. Pipe the filling directly into the indentation of each cookie cup.
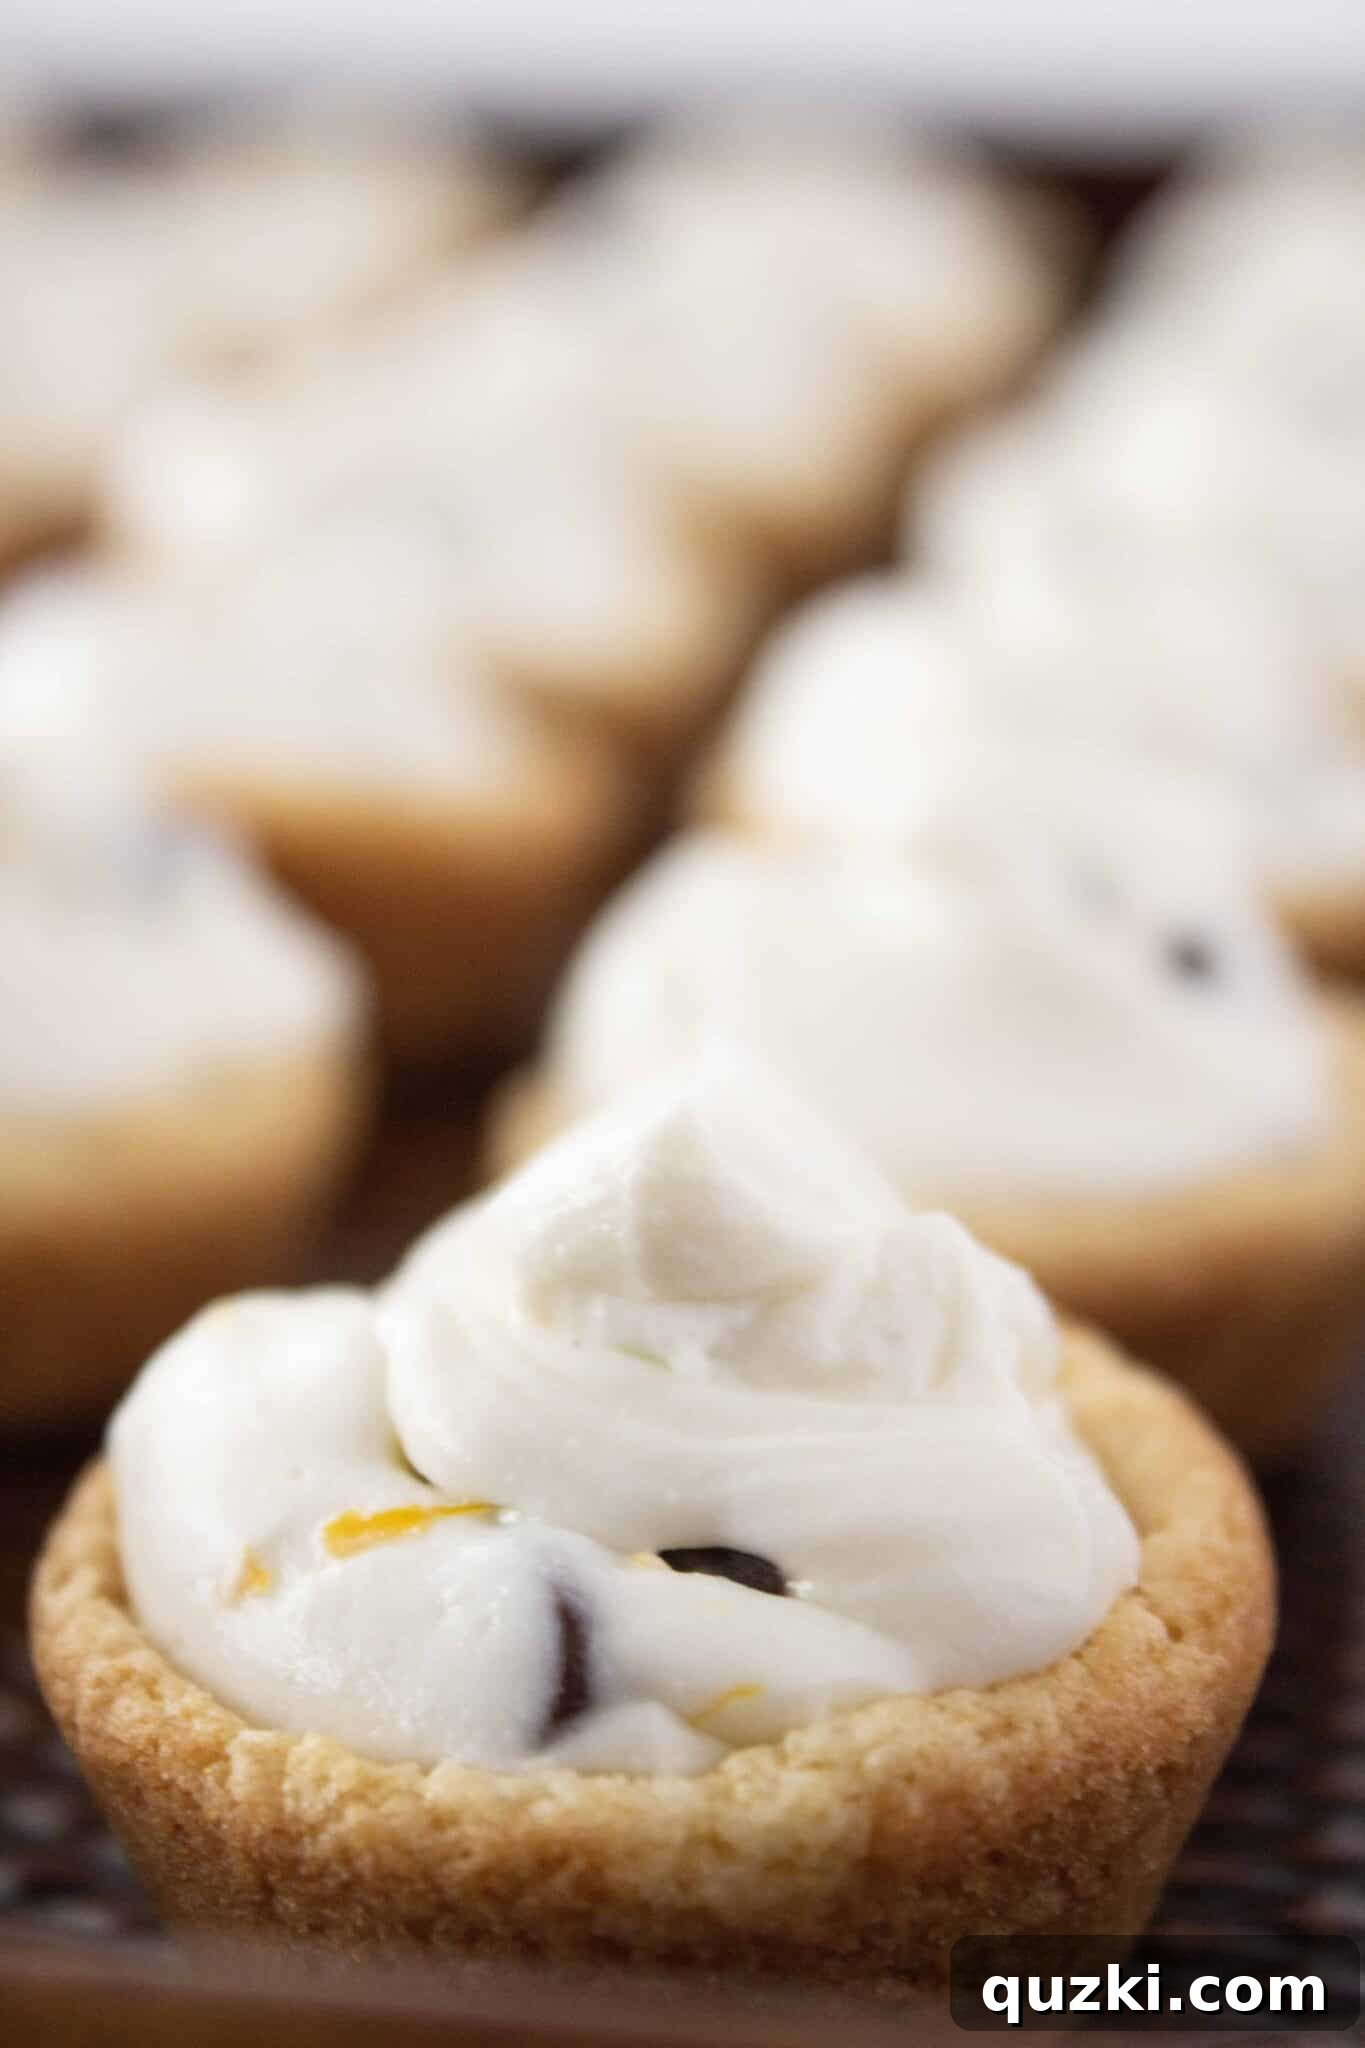
2. Garnish and Serve: To give your Cannoli Cookie Cups that extra touch of elegance and flavor, sprinkle a few additional mini chocolate chips and some chopped pistachios over the top of each filled cookie. These not only add visual appeal but also enhance the texture and taste. Serve immediately or keep chilled until ready to enjoy.

These sweet little bites of heaven are truly magical. The bright hint of orange zest perfectly complements the creamy filling and the delightful crunch of mini chocolate chips, creating a fabulous combination that’s hard to resist. Each cookie cup is a miniature masterpiece, offering a balanced medley of textures and flavors in every bite.

Plus, who doesn’t love bite-sized desserts? They are always a huge hit and are quick to disappear whenever I make them for family gatherings or casual get-togethers with friends. These Cannoli Cookie Cups are destined to become a new family favorite, whether you choose to bake them for holiday celebrations, special occasions, or simply as a delightful treat on an ordinary day throughout the year. Their unique charm and incredible flavor profile make them a memorable dessert that everyone will adore.

Tips for Perfection
- Softened Butter and Cream Cheese: Ensure these are at true room temperature for smooth mixing and a lump-free filling.
- Drain Ricotta: For the creamiest, thickest filling, place your ricotta in a fine-mesh sieve lined with cheesecloth over a bowl for at least 30 minutes (or up to a few hours in the fridge) to drain excess liquid.
- Don’t Overbake Cookies: The cookie cups should be just set and slightly golden. Overbaking can make them hard and crumbly.
- Shape While Warm: Creating the indentation immediately after baking is key. As the cookies cool, they will harden and be less pliable.
- Chill the Filling: Refrigerating the filling for 30 minutes helps it firm up, making it easier to handle and preventing it from being too runny.
- Mini Chocolate Chips are Best: Their size is perfect for the delicate cookie cups and ensures a good chocolate-to-filling ratio in every bite.
Variations & Customizations
While delicious as is, these Cannoli Cookie Cups are also incredibly versatile! Here are a few ideas to switch things up:
- Citrus Zest: Instead of orange zest, try lemon or lime zest for a different citrusy kick.
- Nutty Toppings: Experiment with finely chopped almonds, walnuts, or hazelnuts in addition to (or instead of) pistachios.
- Chocolate Options: Use white chocolate chips, dark chocolate shavings, or even a drizzle of melted chocolate for an elegant touch.
- Spice It Up: A tiny pinch of cinnamon or nutmeg in the filling can add a warm, traditional Italian flair.
- Flavor Extracts: A drop of almond extract in the filling can give it a marzipan-like nuance.
- Cookie Base: While vanilla cake mix is recommended, a lemon or even a chocolate cake mix could create interesting flavor profiles for the cookie cups.
How to Store Your Cannoli Cookie Cups
To maintain their freshness and delicious taste, proper storage is essential. Store your Cannoli Cookie Cups in an airtight container. Because of the dairy-based filling, it’s crucial to keep them refrigerated. They will stay fresh and delightful for up to 4 days. While technically you might freeze the cookie base, the filled cookie cups are best enjoyed fresh, as freezing can alter the texture of the ricotta filling. If you plan to make them ahead, bake and shape the cookie cups, then store them in an airtight container at room temperature for up to 2-3 days, and prepare the filling closer to serving time.
Frequently Asked Questions (FAQ)
Q: Can I use regular chocolate chips instead of mini ones?
A: Yes, you can, but mini chocolate chips are recommended as they integrate better into the filling and provide a more balanced chocolate distribution in each small cookie cup. Regular chips might be a bit too large and overwhelm the delicate balance of flavors.
Q: Do I need to drain the ricotta cheese?
A: Draining the ricotta is highly recommended for a thicker, creamier filling that holds its shape better. If your ricotta is particularly watery, skipping this step might result in a thinner filling. Simply place it in a fine-mesh sieve lined with cheesecloth over a bowl and let it sit for at least 30 minutes, or even a few hours in the refrigerator.
Q: Can I make the cookie cups ahead of time?
A: Absolutely! You can bake and shape the cookie cups 1-2 days in advance. Store them in an airtight container at room temperature. Prepare the cannoli filling and assemble the cookie cups just before serving for the best texture and freshness.
Q: How many cookie cups does this recipe make?
A: This recipe typically yields about 36 mini cannoli cookie cups, making it perfect for sharing or enjoying over several days.
Q: What if I don’t have orange zest?
A: While orange zest adds an authentic and vibrant flavor that truly elevates these cookie cups, you can substitute it with lemon zest for a similar citrusy brightness. If you prefer to omit citrus altogether, the recipe will still be delicious, but you might miss that signature cannoli note.
More Delightful Cookie Cup Recipes to Explore!
If you’ve fallen in love with the convenience and charm of cookie cups, you’re in for a treat! Here are some other fantastic cookie cup recipes that you might enjoy adding to your baking repertoire:
- Banana Pudding Cookie Cups: A southern classic transformed into a bite-sized delight.
- Black Forest Cookie Cups: Indulge in rich chocolate, cherry, and cream flavors in a convenient cup.
- Coconut Cream Pie Cookie Cups: A tropical twist on a traditional pie, perfectly portioned.
- Boston Cream Pie Cookie Bites: All the creamy goodness of Boston Cream Pie in a delightful mini cookie.
- Ice Cream Sundae Cookie Bites: Fun, customizable, and perfect for a playful dessert.

Cannoli Cookie Cups Recipe
June Albertson-Dick
50
25
1
15
36
cookie cups
Ingredients
Cookie Cups
- 1 box vanilla cake mix, {13.25 ounces}
- 2 large eggs
- ⅓ cup butter , {softened}
Cannoli Filling
- 1 cup ricotta cheese , {I used part skim}
- 6 ounces cream cheese, {softened}
- ½ cup powdered sugar
- ½ teaspoon vanilla extract
- 1 teaspoon orange zest
- ¼ cup mini chocolate chips
Toppings
- ¼ cup mini chocolate chips
- ¼ cup pistachios , {chopped}
Instructions
Cookie Cups
-
Preheat oven to 350 degrees F (175°C). Prepare mini muffin pan by spraying each cup liberally with non-stick cooking spray. Pour vanilla cake mix into a medium bowl and whisk (or sift) to remove any lumps. Add softened butter and eggs to the cake mix and combine with a hand held mixer (or by hand) until dough is thick and sticky. Using a small cookie scoop (or 1/2 tbsp.), put a mound of cookie dough into each muffin cup. Using your fingers, go back and press the mound of dough down to create a level cookie. Bake for 9-11 minutes. (Do not over bake, they will set up as they cool.) Remove from oven and immediately run a knife around the edge of each cookie cup (a butter knife works well). Go back and use a tart shaper (or end of a wooden spoon) to press the middle of the cookie down and create an indentation. Move cookies to a cooling rack and let them cool completely. Continue to bake a second batch if necessary.
Cannoli Filling
-
Combine ricotta and cream cheese with a hand held mixer (or by hand) until creamy and smooth. Add powdered sugar, vanilla, and orange zest and mix to combine. Finally, add the mini chocolate chips and stir until evenly distributed. Cover and refrigerate for 30 minutes to allow flavors to meld and the filling to firm up.
Assembly
-
Take a heaping teaspoon of filling and place it into the indentation of each cookie cup. (For a neater presentation, consider adding the filling to a Ziploc bag, cutting the corner from one bottom, and piping the filling into the cookie cups). Top with additional mini chocolate chips or chopped pistachios and serve. Store in an airtight container in the refrigerator for up to 4 days.
Nutrition
Serving: 1 cookie, Calories: 125kcal, Carbohydrates: 16g, Protein: 2g, Fat: 6g, Saturated Fat: 3g, Polyunsaturated Fat: 0.4g, Monounsaturated Fat: 2g, Trans Fat: 0.1g, Cholesterol: 24mg, Sodium: 139mg, Potassium: 36mg, Fiber: 0.3g, Sugar: 10g, Vitamin A: 171IU, Vitamin C: 0.1mg, Calcium: 56mg, Iron: 0.4mg
Nutrition information is automatically calculated, so should only be used as an approximation.
We hope you enjoy making and sharing these delightful Cannoli Cookie Cups as much as we do. They truly embody the joy of Italian desserts with an accessible, modern twist. Buon appetito!