
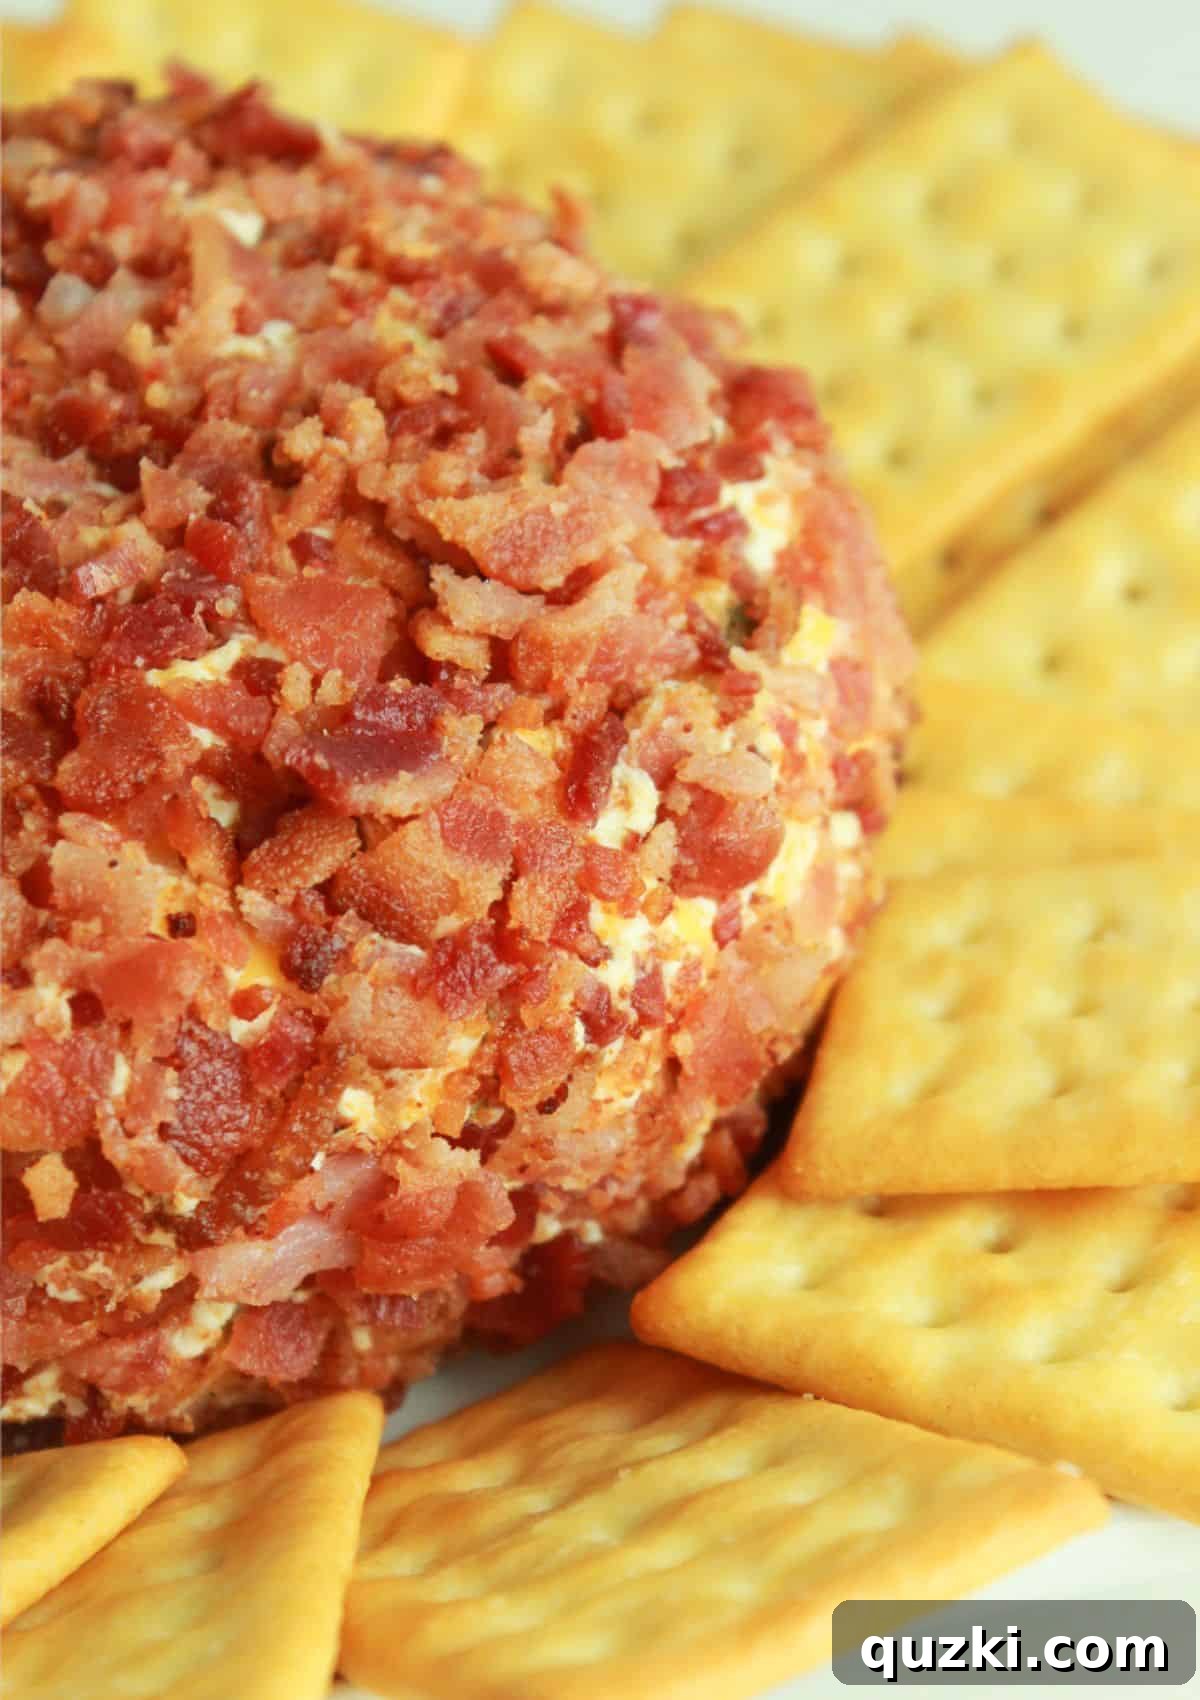
Introducing the incredible Jalapeño Popper Cheese Ball – a legendary appetizer that has graced my recipe box for decades and consistently steals the spotlight at any gathering. This irresistible creation is so profoundly delicious that the first time I whipped it up for a major game day, it vanished entirely before the guests even set foot in the door! Thankfully, this culinary marvel can be prepared in mere minutes, allowing a second batch to be ready and waiting long before kickoff. It’s the perfect blend of creamy, spicy, and savory, guaranteed to be the star of your next party, tailgate, or casual get-together. Prepare yourself for endless compliments and requests for this truly addictive cheese ball recipe.
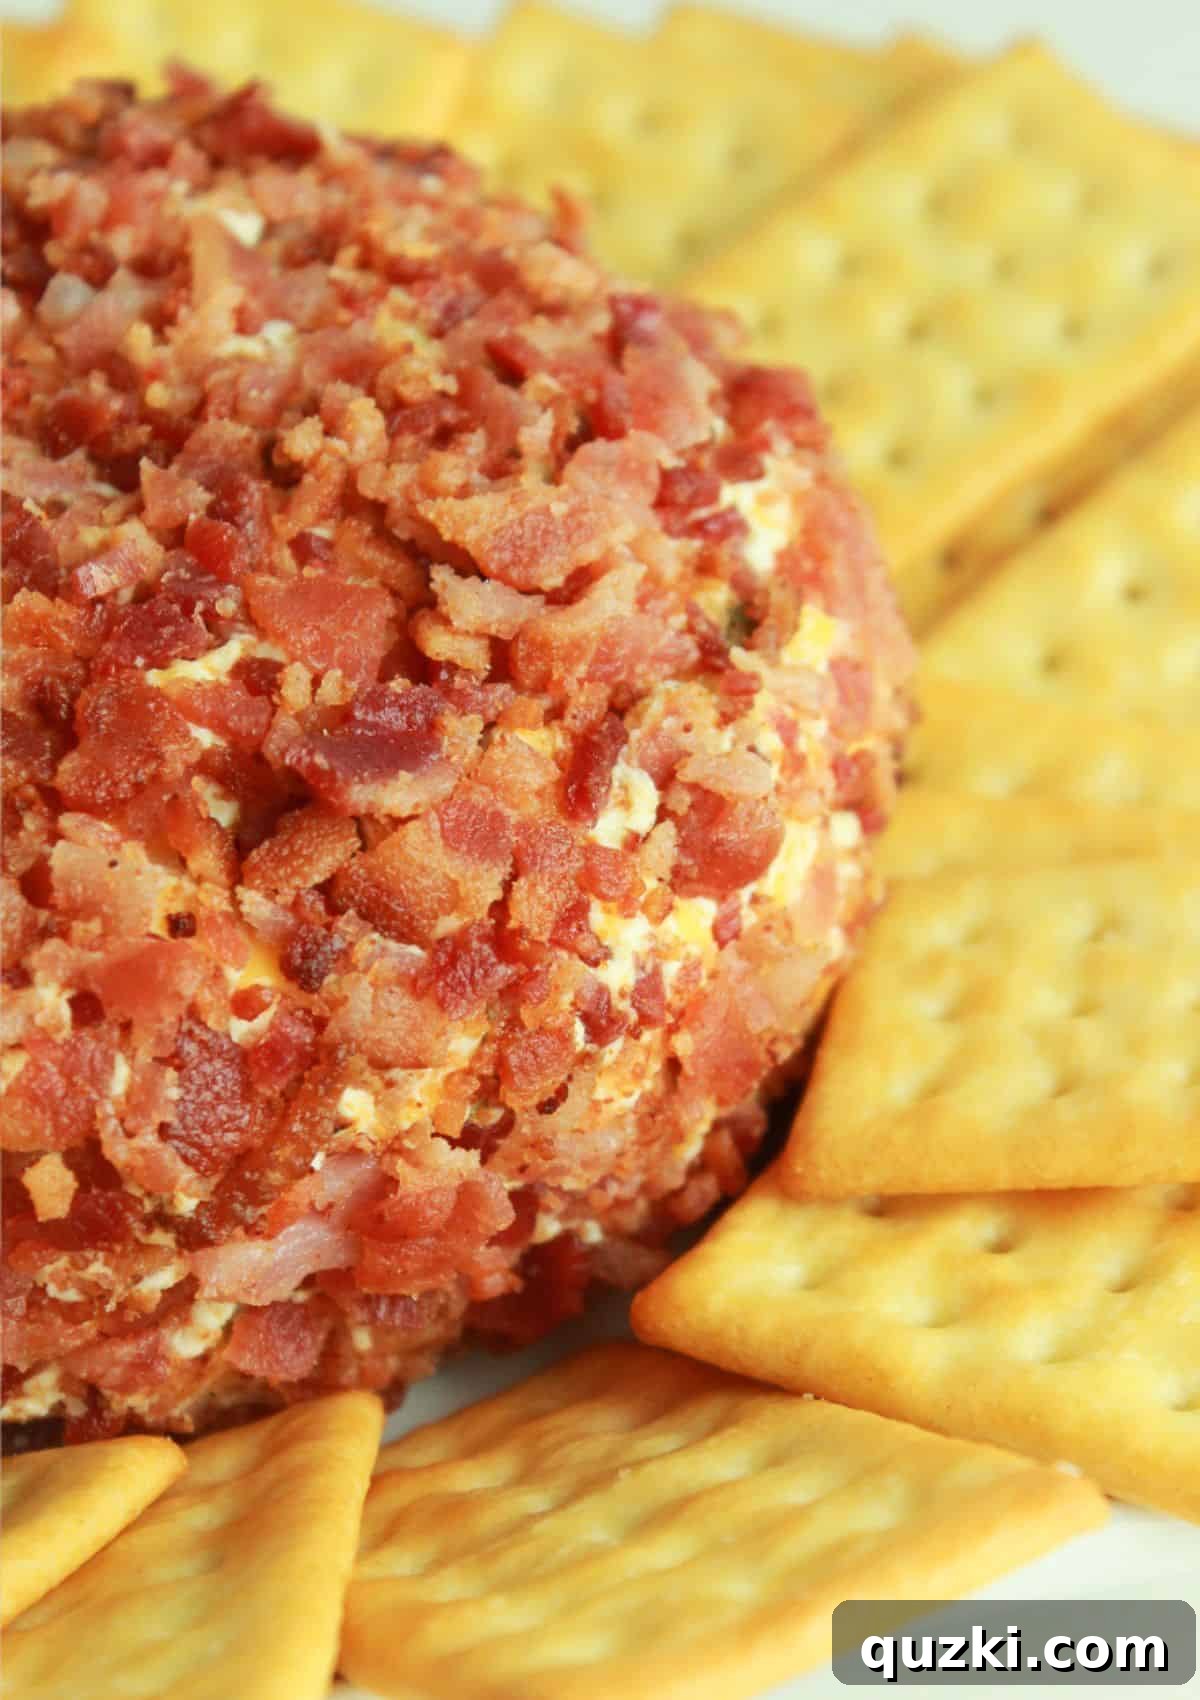
Table of Contents
- Why This Jalapeño Popper Cheese Ball Recipe is a Must-Try
- Essential Ingredients for Your Perfect Cheese Ball
- Step-by-Step Guide to Making a Jalapeño Popper Cheese Ball
- Chef’s Secrets: Expert Tips for the Best Cheese Ball
- Storing and Freezing Your Cheese Ball for Future Enjoyment
- Frequently Asked Questions About Jalapeño Popper Cheese Balls
- More Easy Appetizer Recipes You’ll Adore
- Jalapeño Popper Cheese Ball Recipe
Why This Jalapeño Popper Cheese Ball Recipe is a Must-Try
This isn’t just any cheese ball; it’s a culinary masterpiece that brings together the beloved flavors of classic jalapeño poppers in a convenient, spreadable form. Here’s why this recipe consistently earns rave reviews and disappears faster than you can say “appetizer”:
- Unbeatable Flavor Fusion: The harmonious blend of creamy cheese, zesty jalapeños, and savory spices creates an explosion of flavor with every bite. The mild heat from the pickled jalapeños perfectly balances the richness of the cheese, making it universally appealing. It’s a taste sensation that will have everyone coming back for more.
- Crispy Bacon Perfection: What truly elevates this cheese ball is the generous coating of crispy, finely chopped bacon on the outside. This isn’t just a garnish; it adds a crucial textural contrast and a deep, smoky flavor that complements the creamy interior beautifully. It’s the perfect finishing touch that makes this appetizer truly unforgettable.
- The Ultimate Make-Ahead Appetizer: Life is busy, especially when hosting. This jalapeño popper cheese ball is your secret weapon for stress-free entertaining. You can prepare it a day or two in advance, allowing the flavors to meld and deepen in the refrigerator. This frees up your time on party day to focus on other preparations or simply enjoy your guests.
- A Guaranteed Crowd-Pleaser: From casual family gatherings to major holiday parties or game day events, this cheese ball is always a hit. Its vibrant appearance and irresistible taste make it a centerpiece that guests gravitate towards. Be prepared for a flurry of compliments and eager requests for the recipe – it’s that good!
- Effortless Preparation: Despite its impressive presentation and complex flavors, this jalapeño popper cheese ball is surprisingly easy to make. With just a few simple steps and readily available ingredients, even novice cooks can create a show-stopping appetizer in minutes.
Essential Ingredients for Your Perfect Cheese Ball
Crafting the perfect Jalapeño Popper Cheese Ball starts with selecting the right high-quality ingredients. Each component plays a vital role in achieving that signature creamy texture and tantalizing flavor profile. Here’s a closer look at what you’ll need:
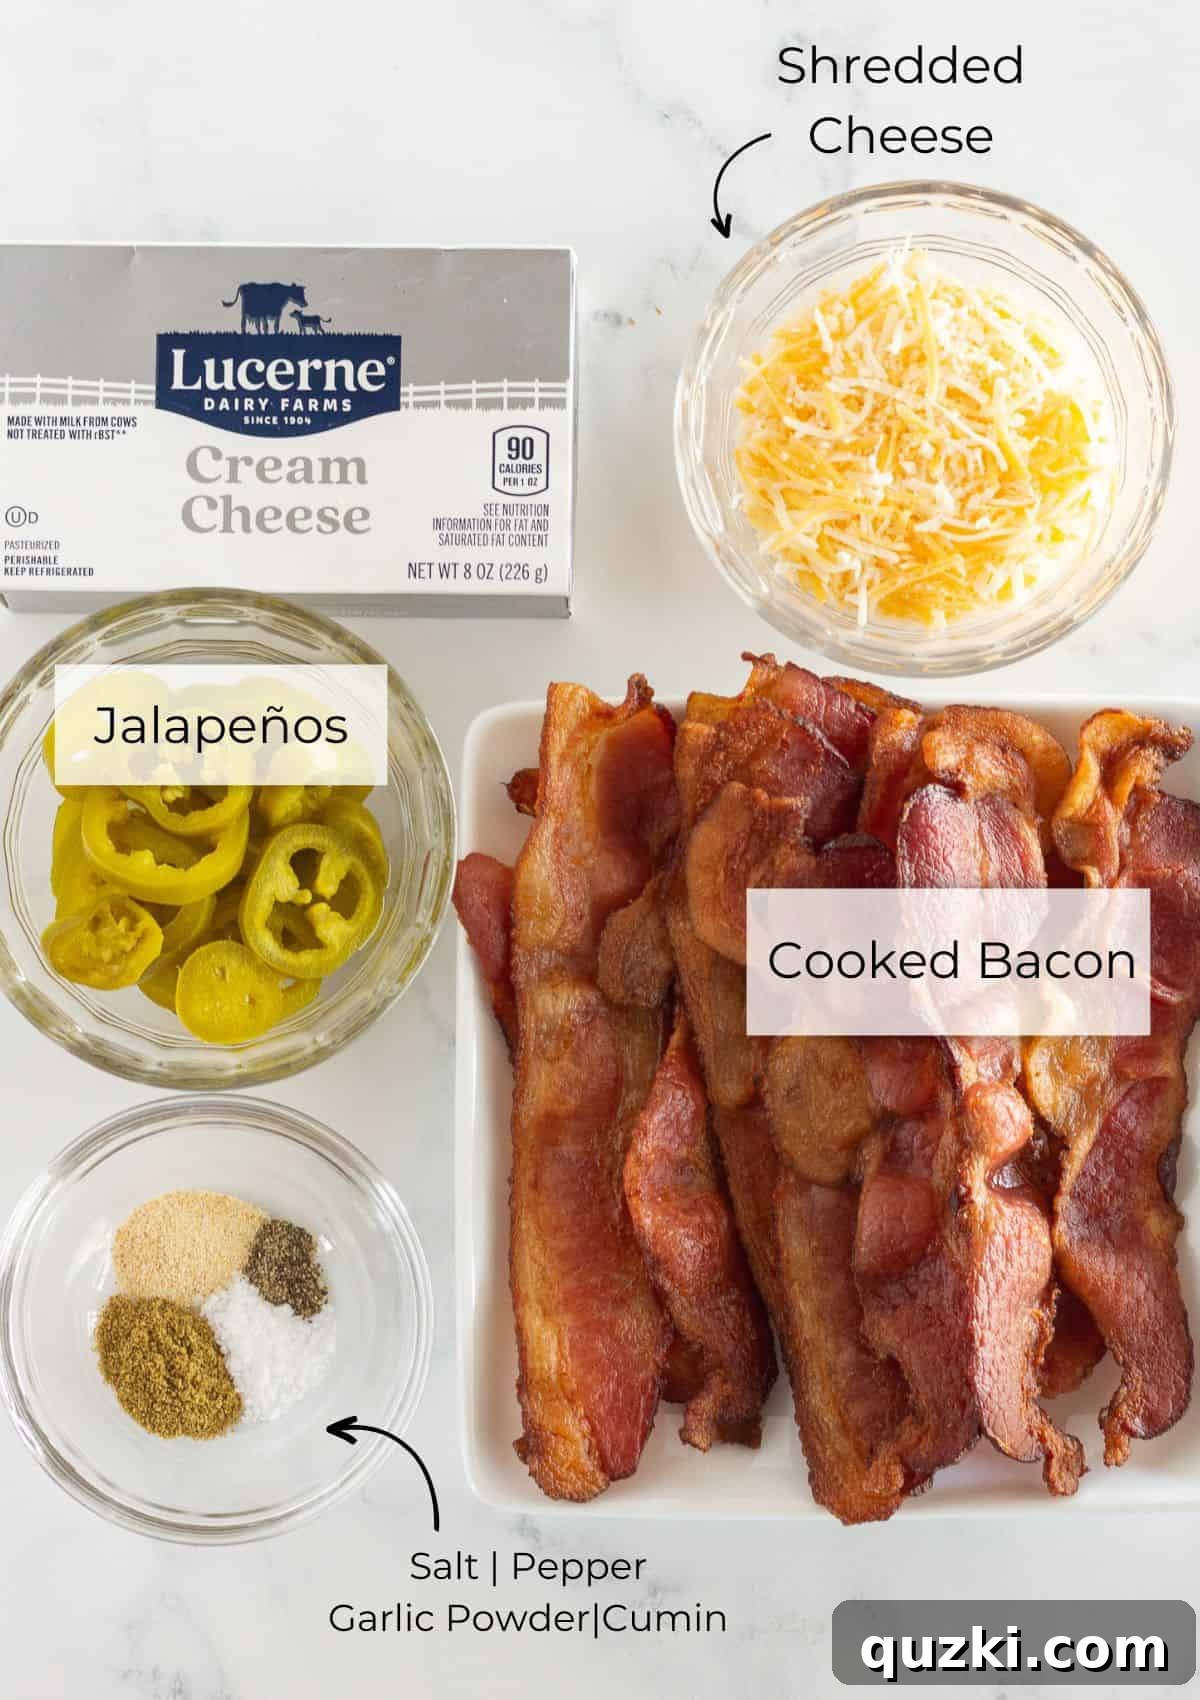
- Cream Cheese: The foundation of our cheese ball is softened cream cheese. Opt for full-fat cream cheese for the best results, as it provides a richer flavor and a smoother, more luxurious texture that holds its shape beautifully. Softening it to room temperature is crucial for easy mixing and a uniform consistency. This versatile base is also featured in other delightful appetizers like a Pepperoni Pizza Cheese Ball.
- Shredded Cheese: To add another layer of cheesy goodness and a beautiful color, I recommend using either Colby-Jack or a sharp cheddar cheese. Colby-Jack offers a mild, buttery flavor and excellent meltability, while cheddar provides a more robust, tangy kick. Feel free to experiment with a blend of your favorite cheeses to customize the flavor.
- Jalapeños: Pickled jalapeños are the secret weapon for this recipe, delivering that characteristic jalapeño popper zest and a manageable level of heat. The pickling process mellows the spice while infusing a tangy flavor that complements the rich cheese. Finely chopping them ensures an even distribution throughout the cheese ball. These also shine in recipes like Jalapeño Popper Crescent Bites.
- Cooked Bacon: Crispy bacon is non-negotiable for this recipe. It’s not only mixed into the cheese ball for an extra burst of smoky flavor, but also generously coated on the exterior, providing an irresistible crunch and savory depth. Ensure the bacon is cooked until extra crispy, then drained well and finely chopped for optimal texture and distribution.
- Spices (Garlic Powder, Cumin, Black Pepper, Salt): A carefully selected blend of spices enhances the overall flavor profile. Garlic powder adds an aromatic warmth, cumin brings an earthy, slightly smoky note that pairs wonderfully with the jalapeños, and a touch of black pepper and salt balances all the flavors, making them pop.
Refer to the comprehensive recipe card below for the exact quantities and detailed ingredient information.
Step-by-Step Guide to Making a Jalapeño Popper Cheese Ball
Creating this crowd-pleasing Jalapeño Popper Cheese Ball is surprisingly straightforward. Follow these simple steps for a perfect appetizer every time:
-
Prepare the Cheese Mixture: Begin by combining your softened cream cheese, shredded cheese (Colby-Jack or cheddar works wonderfully), finely chopped pickled jalapeños, garlic powder, cumin, black pepper, and salt in a large mixing bowl. Ensure your cream cheese is at room temperature to make this step much easier.
Stir all the ingredients thoroughly. You can use a sturdy spoon, a spatula, or even a hand mixer on low speed to ensure everything is well incorporated and the mixture is smooth and evenly blended. Scrape down the sides of the bowl as needed to guarantee no ingredient is left out. -
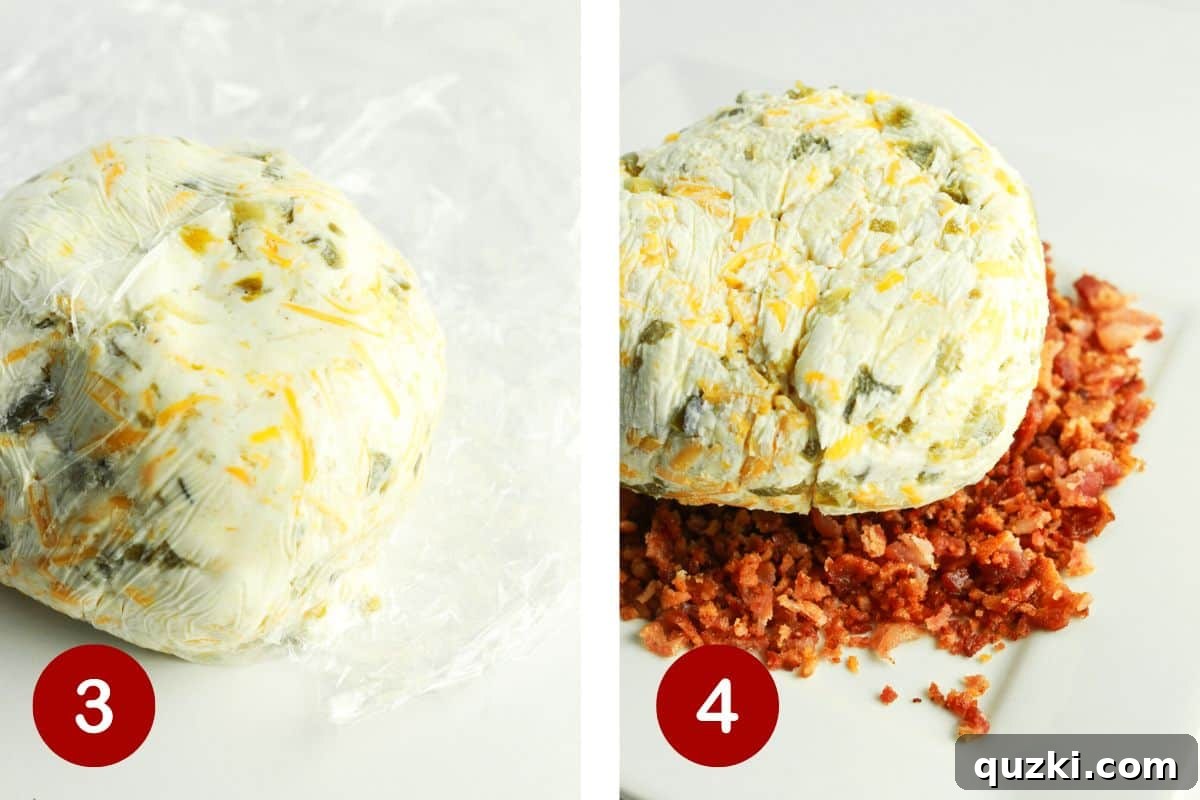
Shape the Cheese Ball: Once your mixture is perfectly combined, lay a large piece of plastic wrap flat on a clean counter surface. Spoon the entire cream cheese mixture into the center of the plastic wrap.
Carefully gather the corners and edges of the plastic wrap, bringing them up and over the cheese mixture. Gently but firmly shape the mixture into a compact ball. The plastic wrap acts as a helpful tool, allowing you to achieve a smooth, round shape without making a mess.
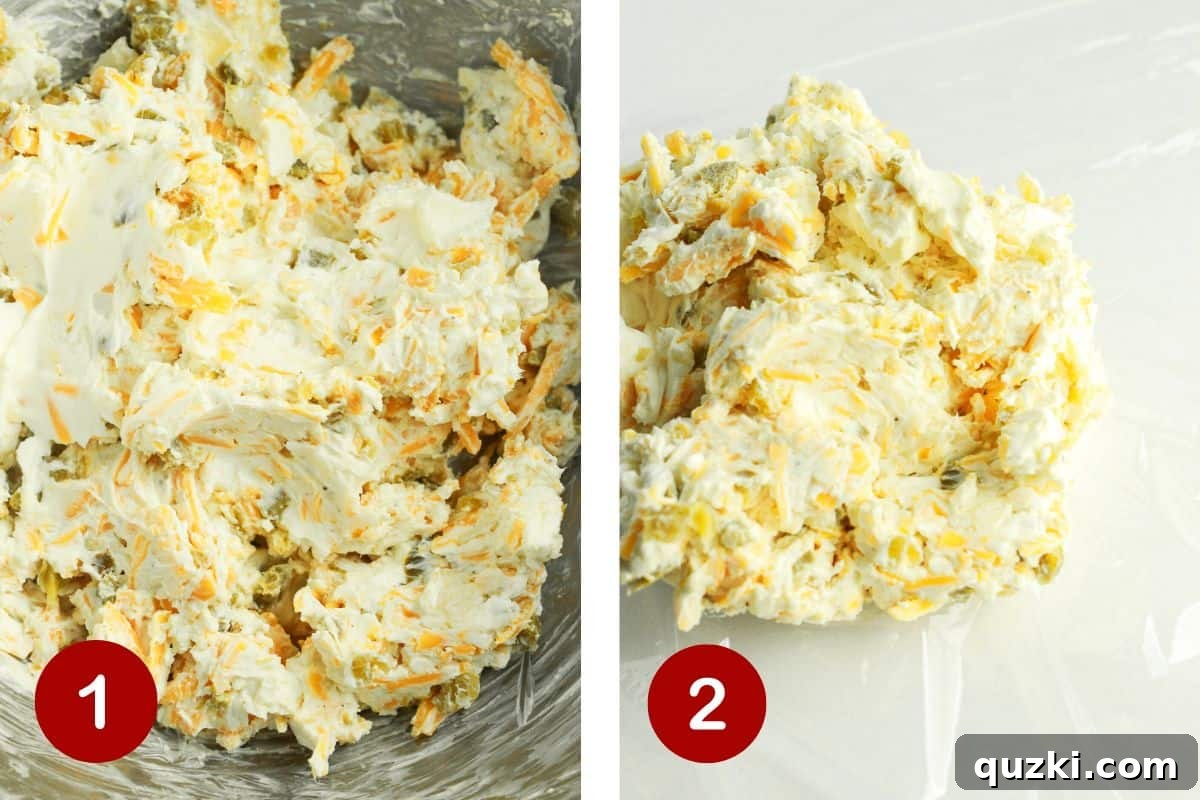
- Chill and Set: Once shaped, wrap the cheese ball tightly in the plastic wrap, ensuring it’s completely sealed. Place it in the refrigerator for at least 10 minutes. This chilling period is crucial as it allows the cheese ball to firm up, making it easier to handle and ensuring it holds its shape when served. You can also refrigerate it for several hours or even overnight if preparing in advance.
-
Coat with Bacon and Serve: When you’re ready to serve, spread your finely chopped, crispy cooked bacon onto a large, flat plate in an even layer. Carefully unwrap the chilled cheese ball and place it directly on top of the bacon.
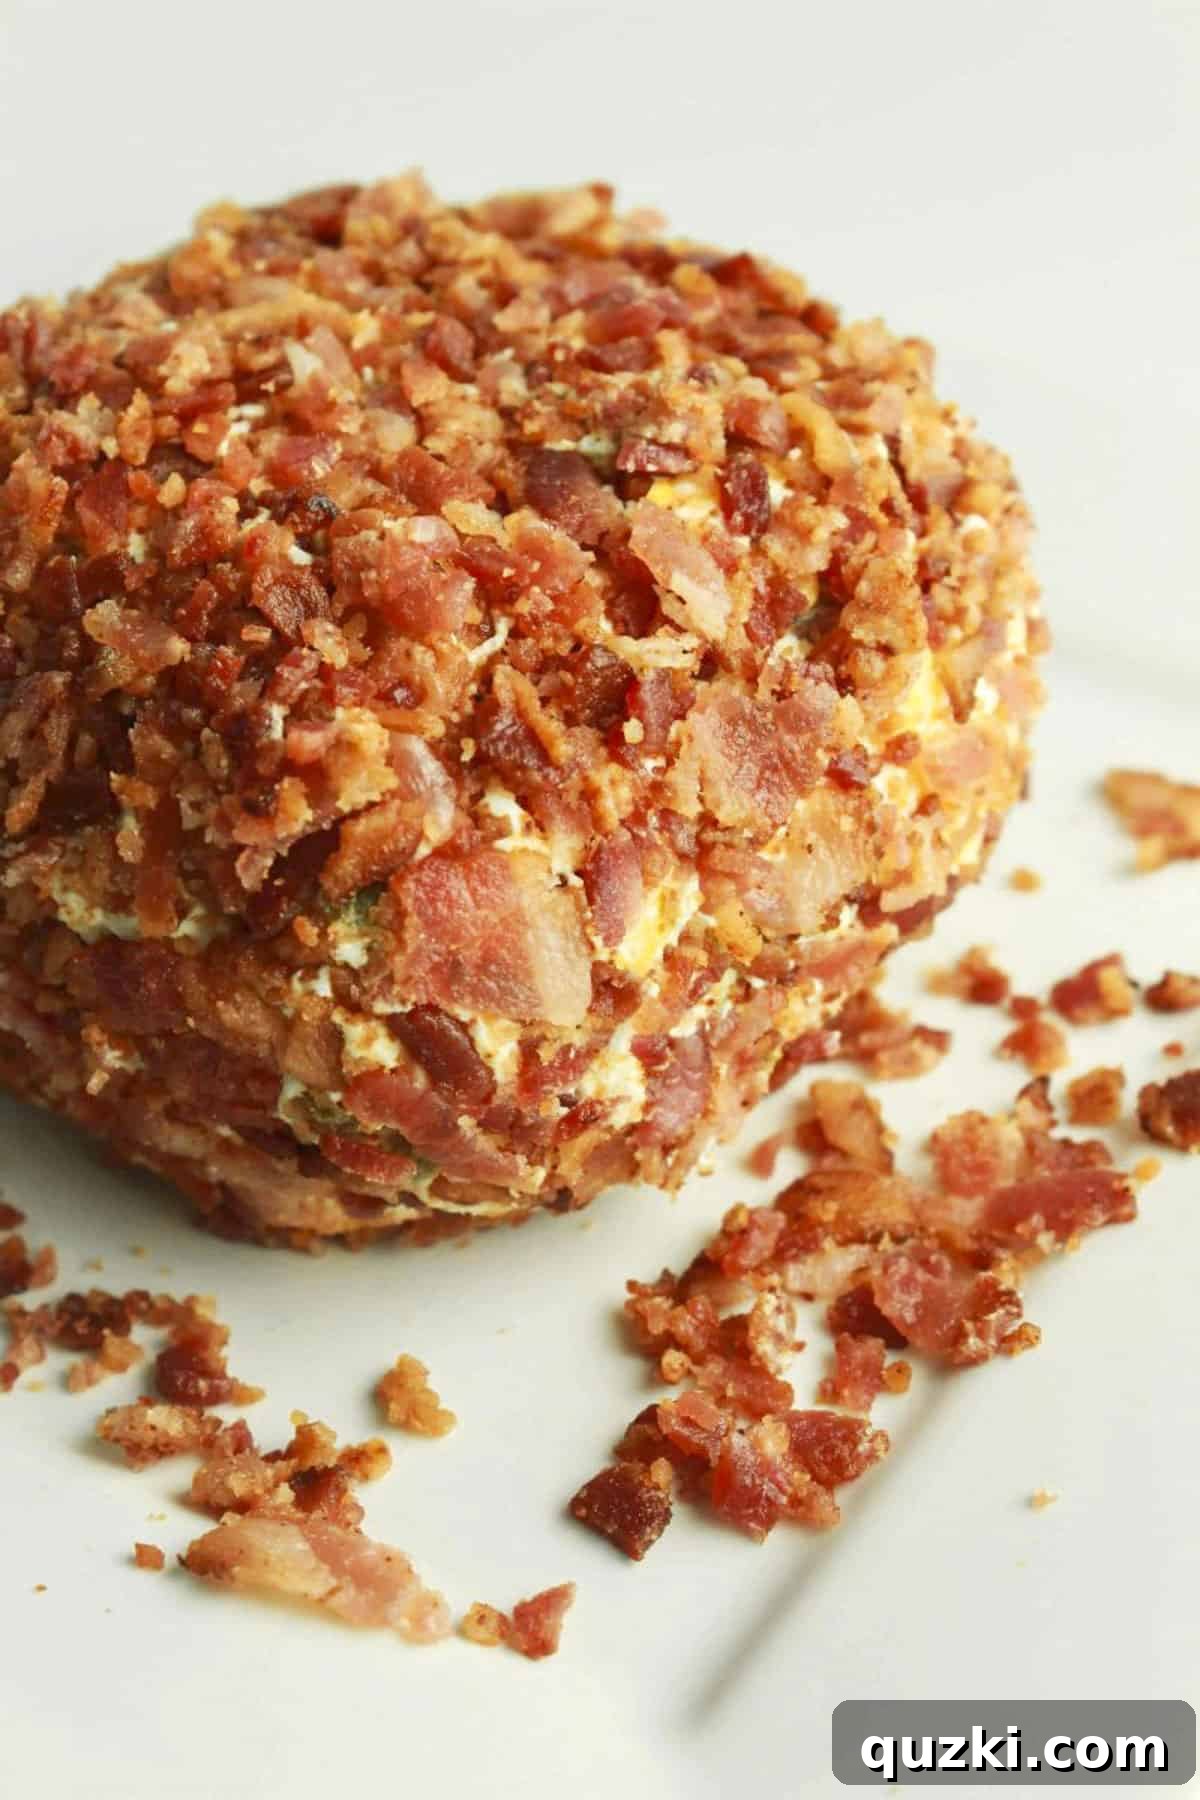
Gently roll the cheese ball in the bacon, pressing lightly to ensure the bacon bits adhere completely and evenly cover the entire surface. Don’t hesitate to use your hands to gently press any loose bacon onto the ball for a thorough coating.
Finally, transfer your beautifully coated Jalapeño Popper Cheese Ball to a serving platter. Arrange an assortment of your favorite crackers, tortilla chips, or fresh vegetable sticks around it. Serve immediately and watch it disappear!
Chef’s Secrets: Expert Tips for the Best Cheese Ball
Achieving a truly outstanding Jalapeño Popper Cheese Ball is simple with these expert tips that ensure perfect texture, flavor, and presentation:
- Always Use Full-Fat Cream Cheese: This is a non-negotiable for the best results. Full-fat cream cheese provides the rich, creamy texture and superior flavor that is essential for this jalapeño popper cheese ball recipe. Low-fat or fat-free varieties may result in a thinner, less satisfying consistency and can make the cheese ball difficult to shape and serve. Allow it to soften completely at room temperature before mixing for a smooth, lump-free base.
- Incorporate Sliced Green Onions for Freshness: For an added layer of flavor and a touch of fresh bite, consider folding a few tablespoons of thinly sliced green onions into your cheese mixture. The subtle oniony note beautifully complements the zest of the jalapeños and the richness of the cheese, adding a vibrant freshness that truly elevates the appetizer.
- Leverage Plastic Wrap for Perfect Shaping: The plastic wrap is your best friend when it comes to shaping the cheese ball. Not only does it help you form a perfectly round and smooth ball, but it also significantly minimizes mess during the process. Once the mixture is on the wrap, simply gather the edges and use the plastic to gently mold and compress the cheese into your desired shape.
- Prioritize Chilling Time: Do not skip or rush the refrigeration step. Allowing the cheese ball to chill for at least 10 minutes (and preferably longer, up to an hour) in the refrigerator is crucial. This time allows the cream cheese to firm up, ensuring the ball holds its shape beautifully when removed from the wrap and when guests start dipping into it. A well-chilled cheese ball is much easier to coat with bacon and prevents it from becoming too soft or melty at room temperature too quickly.
- Finely Chop Your Ingredients: For a harmonious blend of flavors and textures, ensure your pickled jalapeños and cooked bacon are finely chopped. Smaller pieces integrate better into the cream cheese mixture and create a more pleasant mouthfeel, allowing you to get a taste of everything in each bite.
- Season to Taste: While the recipe provides guidelines, always taste your cheese mixture before shaping. Depending on the saltiness of your cheese and bacon, you might want to adjust the salt and pepper. A little extra pinch can make all the difference!
- Serve with a Variety of Dippers: Offer a range of options beyond just crackers. Crusty bread slices, pretzel crisps, celery sticks, carrot sticks, bell pepper strips, or even sturdy tortilla chips can provide different textures and enhance the dipping experience.
Storing and Freezing Your Cheese Ball for Future Enjoyment
This Jalapeño Popper Cheese Ball is not only a fantastic make-ahead appetizer but also stores beautifully, making it perfect for preparing in advance or saving leftovers. Here’s how to ensure it stays fresh and delicious:
Storage (Refrigeration): This cheese ball with jalapeño recipe keeps exceptionally well in the refrigerator. For optimal freshness and to prevent it from absorbing other food odors, make sure it is stored in an airtight container or wrapped very tightly in several layers of plastic wrap. When stored correctly, it will maintain its delicious flavor and creamy texture for up to 5 days. If you’ve already coated it in bacon, it’s best to store it wrapped without the bacon getting soggy. If you want truly crisp bacon for serving, you can store the bacon separately and coat just before serving. However, the bacon will still be delicious if stored with the cheese ball, just a little softer.
Freezing: Yes, you can absolutely freeze this jalapeño popper cheese ball recipe for future gatherings! It freezes wonderfully for up to 4 weeks, making it an excellent option for long-term meal planning or unexpected guests.
For the best results when freezing, ensure the cheese ball is not yet coated with bacon. Wrap it tightly first in plastic wrap, pressing out any air, then wrap it again in aluminum foil to provide an extra layer of protection against freezer burn. Finally, place the double-wrapped cheese ball into a freezer-safe bag, expelling as much air as possible before sealing.
To thaw, simply transfer the frozen cheese ball to the refrigerator and allow it to thaw slowly overnight or for at least 8-12 hours. Once thawed, unwrap it, coat it with freshly cooked and chopped bacon, and serve as desired with your favorite dippers. This method ensures you have a ready-to-go gourmet appetizer with minimal effort.
Frequently Asked Questions About Jalapeño Popper Cheese Balls
Got questions about making the perfect Jalapeño Popper Cheese Ball? We’ve got answers to help you troubleshoot and succeed:
If your cheese ball isn’t holding its shape well, it’s likely that the cream cheese was too soft when you started, or it didn’t get enough chilling time. To firm it up, simply return the cheese ball, tightly wrapped, to the refrigerator. Allow it to chill for a longer period, ideally for at least an hour or two, or even overnight. The colder temperature will help the cream cheese and other ingredients solidify, ensuring a firm, sliceable, and dippable cheese ball.
Absolutely! This jalapeño popper cheese ball is an ideal make-ahead appetizer, perfect for reducing stress on the day of your event. You can easily prepare the cheese ball mixture, shape it, and refrigerate it a day or two in advance. Store it tightly wrapped in plastic wrap in the fridge. On the day of serving, simply unwrap it, roll it in the crispy bacon, and present it to your guests. This allows the flavors to meld beautifully and saves you precious time.
The Jalapeño Popper Cheese Ball pairs wonderfully with a variety of other appetizers, creating a diverse and exciting spread. Its bold flavors make it a great addition to a simple summer charcuterie board, alongside an assortment of cured meats, cheeses, fruits, and nuts. It also complements lighter dips like a fresh bruschetta dip, offering a contrast in flavors and textures. For a complete party spread, consider serving it with classic options like mini quiches, vegetable spring rolls, or a simple fruit platter. Don’t forget a variety of dippers such as butter crackers, carrot sticks, celery sticks, and tortilla chips to enhance the experience.
Yes, you can easily customize the heat level to your preference. For a milder cheese ball, reduce the amount of pickled jalapeños or opt for milder green chilies. For those who love extra heat, you can increase the amount of jalapeños, add a pinch of cayenne pepper, or even mix in a bit of finely minced fresh jalapeño (just be sure to remove the seeds and membranes for less intense heat, or leave them in for a fiery kick).
Buttery, rich crackers like Ritz or Club crackers are a classic choice and pair perfectly with the creamy and savory cheese ball. However, feel free to offer a variety! Water crackers, whole-wheat crackers, pita chips, pretzel thins, or even sturdy vegetable sticks like carrots, celery, and bell peppers make excellent dippers. A crusty baguette, sliced and lightly toasted, also works wonderfully.
More Easy Appetizer Recipes You’ll Adore
If you’re a fan of simple, crowd-pleasing appetizers, you’re in the right place! Beyond our fantastic Jalapeño Popper Cheese Ball, there’s a world of delicious and easy-to-make starters waiting to elevate your next gathering. Explore these other delightful options that are just as straightforward and packed with flavor:
Appetizer Inspiration
Creamy Spinach Artichoke Dip
A classic, warm, and cheesy dip perfect for any occasion, served with crusty bread or tortilla chips.
Quick Bites
Easy Caprese Skewers with Balsamic Glaze
Fresh mozzarella, cherry tomatoes, and basil leaves drizzled with balsamic glaze for a light and elegant bite.
Party Starters
Spicy Buffalo Chicken Dip
A hot and cheesy dip with shredded chicken and buffalo sauce, ideal for game nights and big crowds.
Simple Spreads
Garlic Herb Cream Cheese Spread
A versatile and savory spread that’s fantastic on bagels, crackers, or as a vegetable dip.
We hope you tried this incredible Jalapeño Popper Cheese Ball recipe! If you did, please consider leaving a ⭐️ review below and don’t forget to tag @practicallyhomemade on Pinterest with your beautiful creations!
Jalapeño Popper Cheese Ball Recipe
Rating: 5 out of 5 stars (based on 2 votes)
By: June Albertson-Dick
Full of all the great flavors that Jalapeño poppers offer, but made in a fraction of the time. It is perfect for your football game spread, holiday party, or any casual gathering. This creamy, spicy, and savory appetizer is guaranteed to be a crowd-pleaser!
Prep Time: 10 minutes
Cook Time: 10 minutes (for bacon)
Total Time: 20 minutes (plus chilling)
Yields: 8 servings
Pin Recipe |
Rate Recipe |
Print Recipe
Ingredients
- 8 ounces cream cheese, softened
- ½ cup shredded cheese (Colby-Jack or cheddar recommended)
- ¼ cup pickled jalapeños, finely chopped
- ½ teaspoon garlic powder
- ½ teaspoon cumin
- ⅛ teaspoon black pepper
- ¼ teaspoon salt
- 10 slices bacon, cooked until crispy, drained, and finely chopped
Instructions
- In a large mixing bowl, combine the softened cream cheese, shredded cheese, finely chopped pickled jalapeños, garlic powder, cumin, black pepper, and salt. Stir vigorously (or use a hand mixer on low speed) until all the ingredients are thoroughly combined and the mixture is smooth.
- Lay a large piece of plastic wrap flat on a clean counter. Spoon the entire cheese mixture into the center of the plastic wrap. Gather the corners and edges of the plastic wrap, bringing them up and over the cheese mixture. Gently but firmly use the plastic wrap to shape the mixture into a compact, round ball.
- Wrap the cheese ball tightly in the plastic wrap and place it in the refrigerator for at least 10 minutes, or longer if you have time, to allow it to firm up. This step is essential for the cheese ball to hold its shape.
- When ready to serve, spread the finely chopped, crispy bacon onto a large, flat plate in an even layer. Remove the chilled cheese ball from the plastic wrap and place it on top of the bacon. Gently roll the cheese ball in the bacon, pressing lightly to ensure it is completely coated. You may need to use your hands to cover any sparse areas.
- Transfer the bacon-coated cheese ball to a serving plate and arrange it with an assortment of crackers, tortilla chips, or fresh vegetables like carrot sticks and celery sticks. Serve immediately and enjoy!
Notes
- For the best texture and flavor, always use full-fat cream cheese.
- For an added burst of freshness, consider mixing in a few tablespoons of finely sliced green onions into the cheese mixture.
- The plastic wrap is an excellent tool for shaping the cheese ball and keeping your hands clean. Don’t be afraid to use it to firmly mold the cheese.
- Ensure the cheese ball chills adequately in the refrigerator; this firming up time is key to a perfectly presentable appetizer.
- Adjust the amount of jalapeños to suit your preferred spice level.
Nutrition
Nutrition information is automatically calculated and should be used as an approximation.
- Serving: 1 serving
- Calories: 134 kcal
- Carbohydrates: 2g
- Protein: 3g
- Fat: 13g
- Saturated Fat: 7g
- Polyunsaturated Fat: 1g
- Monounsaturated Fat: 4g
- Cholesterol: 35mg
- Sodium: 279mg
- Potassium: 56mg
- Fiber: 0.1g
- Sugar: 1g
- Vitamin A: 502IU
- Vitamin C: 0.4mg
- Calcium: 65mg
- Iron: 0.2mg
Like this recipe? We’d love to hear from you! Leave a comment or review below!