
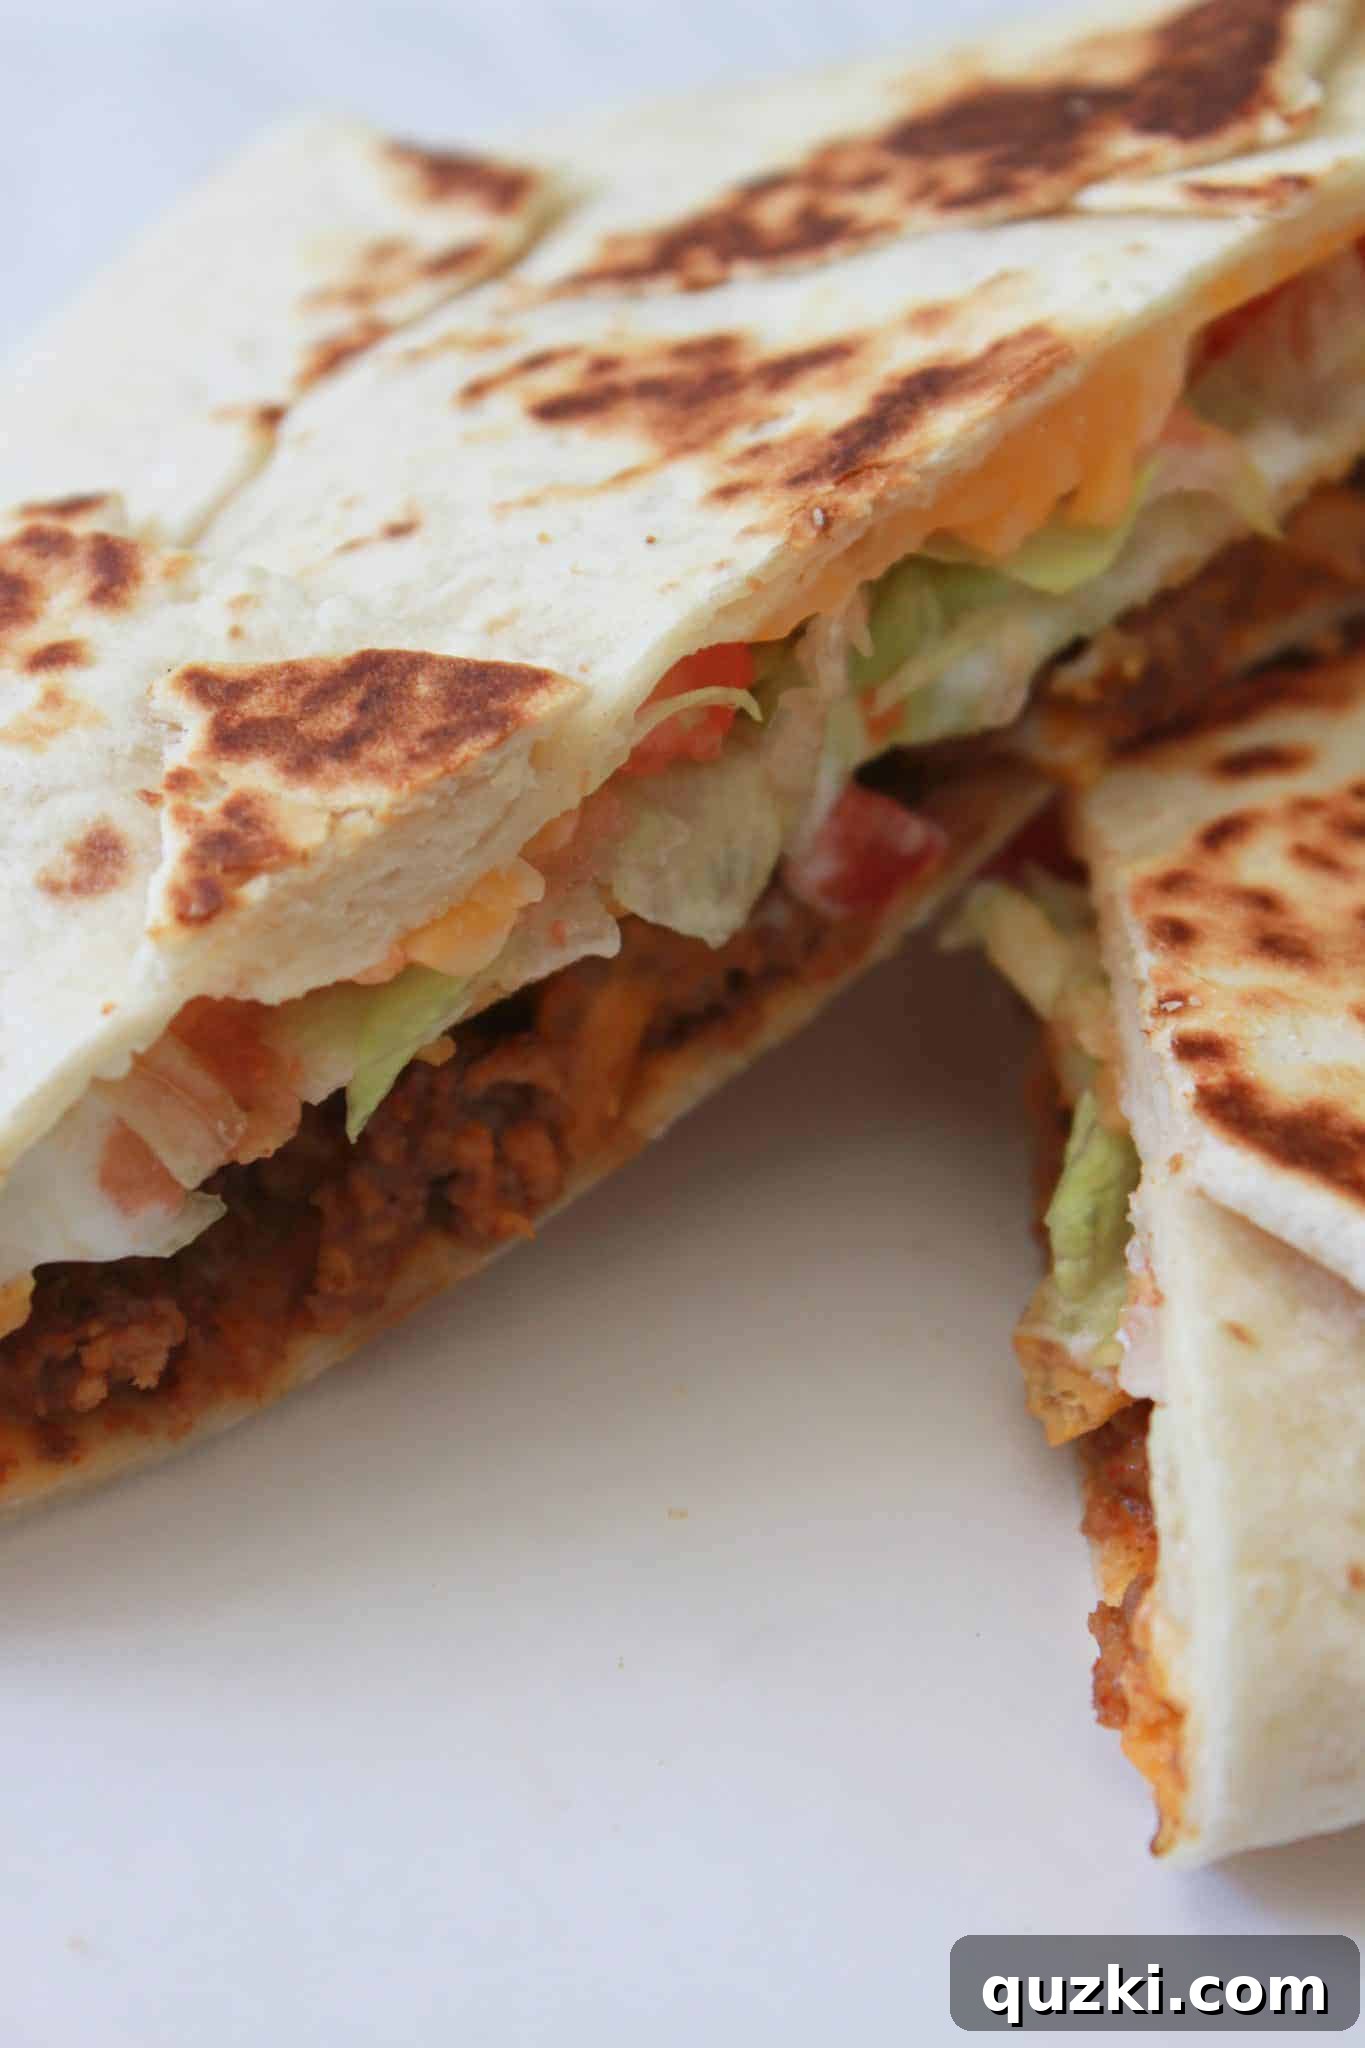
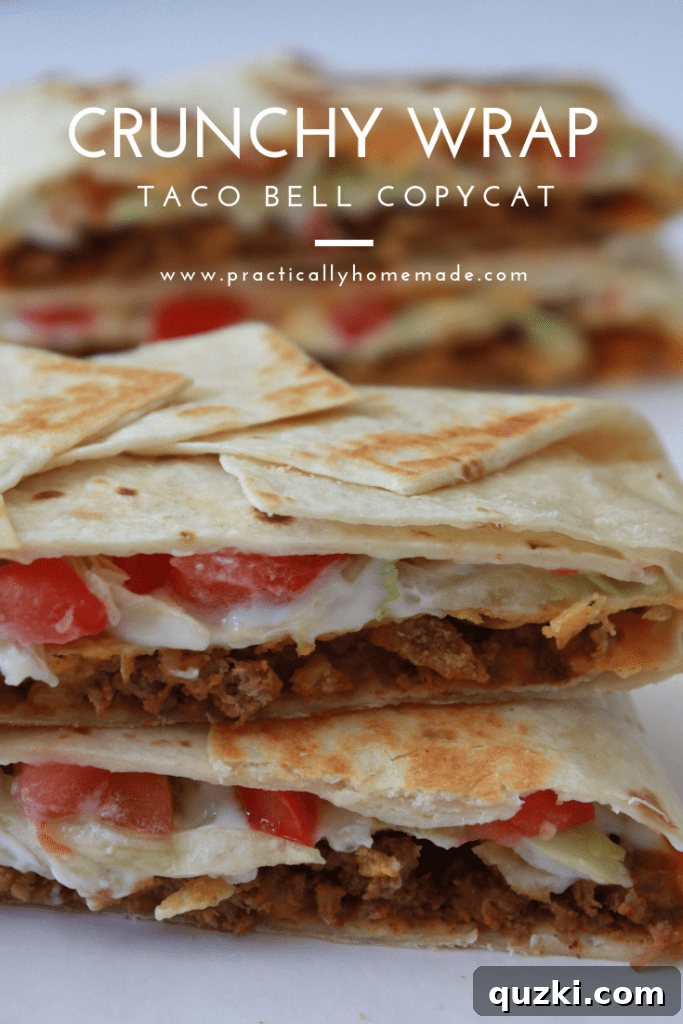
Craving that iconic Taco Bell Crunchwrap Supreme but want the comfort and control of a homemade meal? You’re in the right place! This ultimate guide to making your very own Homemade Crunchy Wrap (as we affectionately call it) brings all the beloved flavors and textures of the fast-food favorite right to your kitchen. Get ready for a delicious, crispy, and fully customizable experience that will have your family raving.
The Crunchwrap has long been a staple on the Taco Bell menu, celebrated for its unique combination of a warm tortilla, savory seasoned beef, cool sour cream, crisp lettuce, fresh tomatoes, melty cheese, and, of course, that satisfying crunchy tostada shell all wrapped up and grilled to perfection. While a trip to Taco Bell is always an option, there’s something incredibly rewarding about recreating such a popular dish at home. Not only do you get to enjoy a fresh, hot meal tailored exactly to your preferences, but you also save money and can easily feed a crowd.
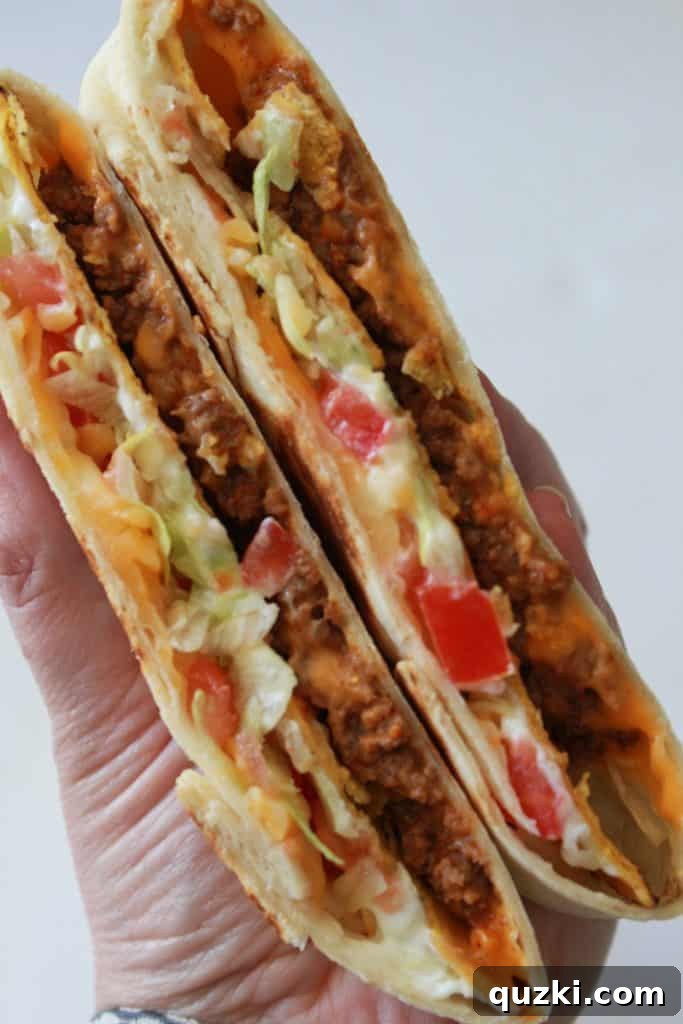
Our “Crunchy Wrap” recipe captures the essence of the original, delivering an explosion of flavors and textures in every bite. It’s incredibly easy to assemble and cook, making it a perfect weeknight dinner or a fun activity for a gathering. If you already love tacos, this is simply the next level of deliciousness, combining all your favorite taco fixings into one convenient, handheld package.
Why Make Your Own Crunchy Wrap at Home?
Beyond the sheer joy of cooking, there are numerous benefits to crafting your own Crunchy Wraps:
- Customization: Dietary restrictions, picky eaters, or just personal preference? You’re in control! Adjust the seasoning, swap out proteins, add more veggies, or experiment with different cheeses and sauces. The possibilities are endless.
- Freshness & Quality: Choose high-quality ingredients, fresh produce, and lean meats. You know exactly what’s going into your meal, without any mystery additives or preservatives.
- Cost-Effective: Making several Crunchwraps at home is often far more economical than buying them individually from a fast-food restaurant, especially when feeding a large family or group.
- Fun for All Ages: Assembling Crunchy Wraps can be a fantastic interactive cooking experience. Kids and adults alike will love layering their ingredients and watching their creation come to life. I’ve even made them with my students, and they were always a huge hit!
- Perfect for Gatherings: Whether it’s a casual dinner, a game night, or a festive celebration like Cinco de Mayo, homemade Crunchy Wraps are a crowd-pleasing option that will impress your guests.
Our Little Cinco de Mayo Tradition
Every year, Cinco de Mayo holds a special place in my heart – it marks the day my husband, Darb, and I first started dating. Seven years ago, I was hosting a casual get-together at my house, serving up a classic taco spread. Darb showed up, and well, the rest, as they say, is history! We’ve continued our tradition of celebrating with a delicious Mexican dinner at home, and for the past year, the Homemade Crunchy Wrap has become a beloved centerpiece of our festivities. It’s a dish that brings smiles, warmth, and a touch of our personal history to the table.
Disclaimer: This post may contain affiliate links and I will receive a small commission from any purchases you may make from these links. It’s one of the ways I support my site.
The Essential Ingredients for Your Crunchy Wrap
Creating the perfect Crunchy Wrap relies on a balance of fresh ingredients and flavorful components. Here’s what you’ll need, along with some tips:
- Large Burrito-Sized Flour Tortillas: These are crucial for wrapping all the delicious fillings. Make sure they are fresh and pliable. You’ll also need one extra tortilla, torn into sixths, to act as a crucial “lid” for the wrap.
- Nacho Cheese Sauce: The creamy, tangy heart of the Crunchwrap. You can use store-bought or easily make your own for an extra layer of flavor. Warm it slightly for easier spreading.
- Cooked and Seasoned Ground Beef: A classic choice. Season it well with taco seasoning for that authentic Tex-Mex taste. You could also substitute with ground turkey, chicken, or even plant-based mince.
- Tostada Shells: The secret to that iconic “crunch”! Look for flat, sturdy shells that won’t crumble too easily when wrapped.
- Sour Cream: Adds a cool, creamy contrast to the warm, savory fillings. Light sour cream or plain Greek yogurt can be used as alternatives.
- Fresh Shredded Lettuce: Provides a refreshing crispness. Iceberg lettuce is traditional, but romaine or a mix of greens works too.
- Diced Tomatoes: Adds a burst of fresh flavor and juiciness.
- Shredded Cheese: A blend of cheddar and Monterey Jack is perfect for melting, but feel free to use your favorite Mexican cheese blend.
Preparing Your Ingredients for Assembly
Before you begin assembling, ensure all your ingredients are prepped:
- Cook your ground beef: Brown the ground beef in a skillet, drain any excess fat, and season it generously with your favorite taco seasoning mix according to package directions. Keep it warm.
- Warm your tortillas: Slightly warm the large flour tortillas in the microwave for 10-15 seconds or on a dry skillet for a few seconds per side. This makes them more pliable and less likely to tear during folding.
- Prepare your toppings: Shred the lettuce, dice the tomatoes, and have your sour cream and shredded cheese ready to go.
- Warm the nacho cheese: Ensure your nacho cheese sauce is warm and easily spreadable.
Step-by-Step Assembly: How to Craft Your Homemade Crunchy Wrap
The magic of the Crunchy Wrap lies in its layered construction. Follow these steps to build your perfect wrap:
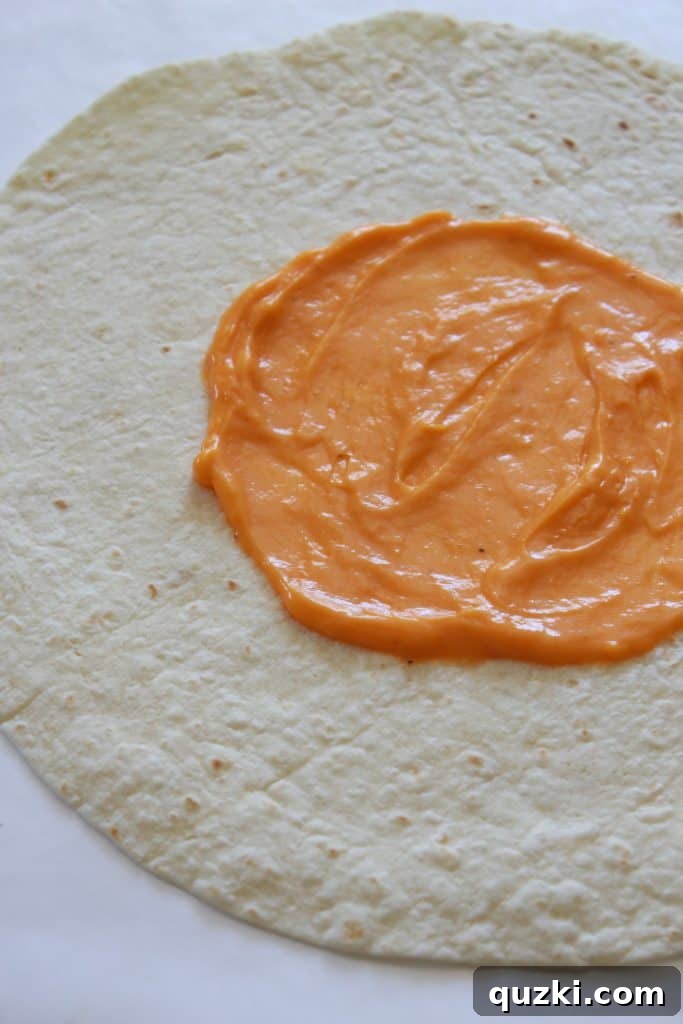
1. Start with the Base: Lay one large burrito-sized flour tortilla flat on a clean surface. Spoon 1-2 tablespoons of warm nacho cheese sauce into the center. Spread it out into a circle, leaving about an inch or two around the edge. Aim for a circle roughly the size of your tostada shell.
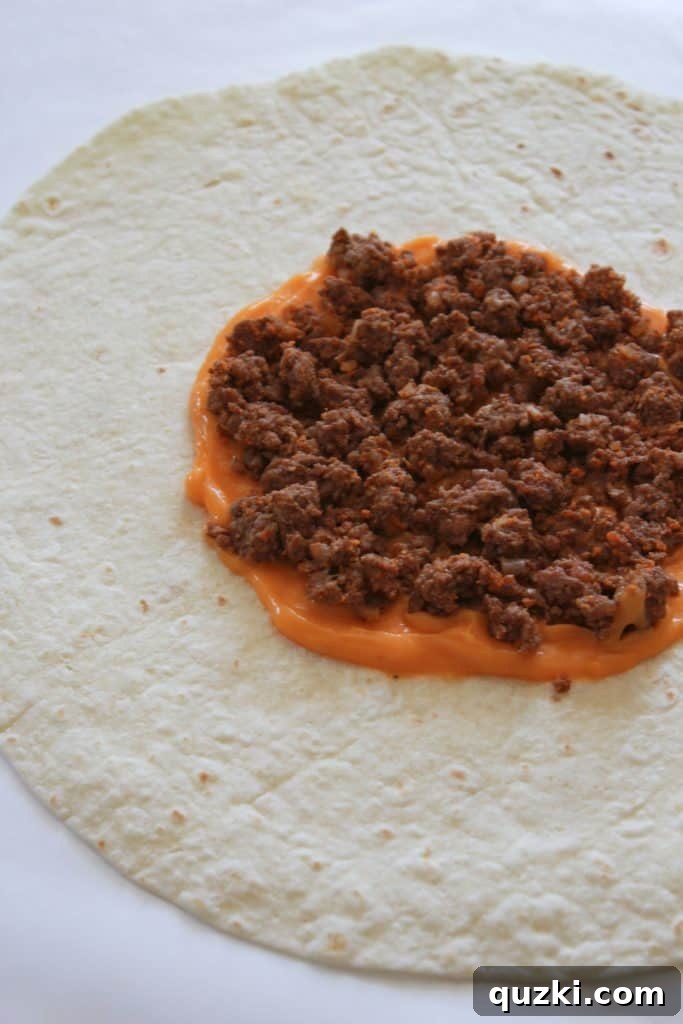
2. Add the Protein: Spoon a generous amount of your cooked and seasoned ground hamburger meat directly on top of the nacho cheese sauce. Distribute it evenly within the cheese circle.
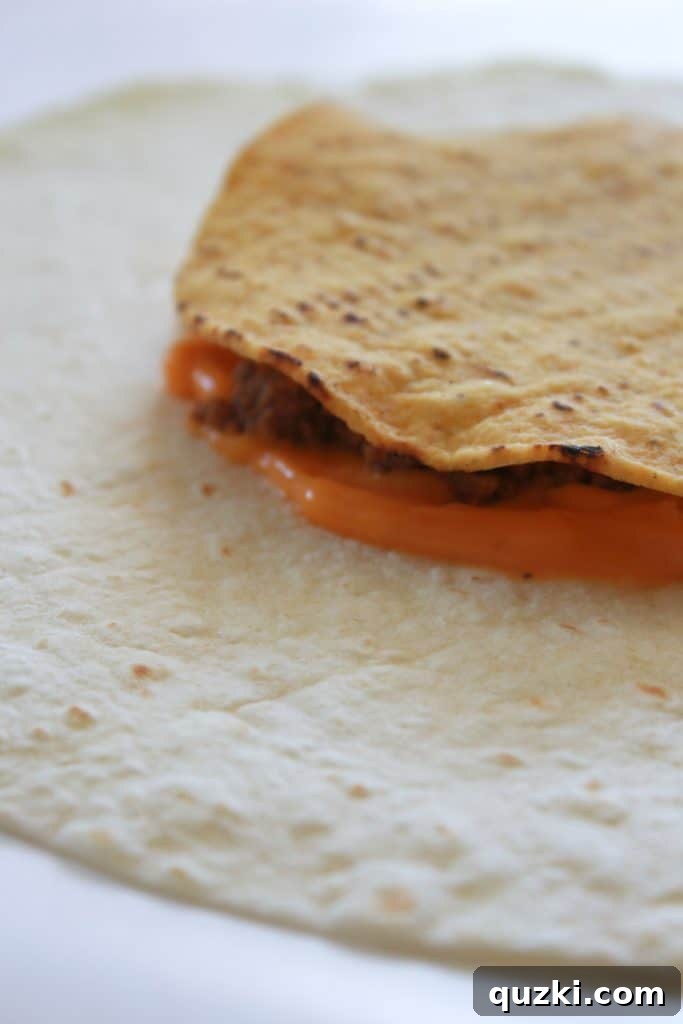
3. The Crucial Crunch: Carefully place one tostada shell directly over the ground beef. Press it down gently to secure it. This is the structural heart of your Crunchy Wrap, providing that signature crispy layer.
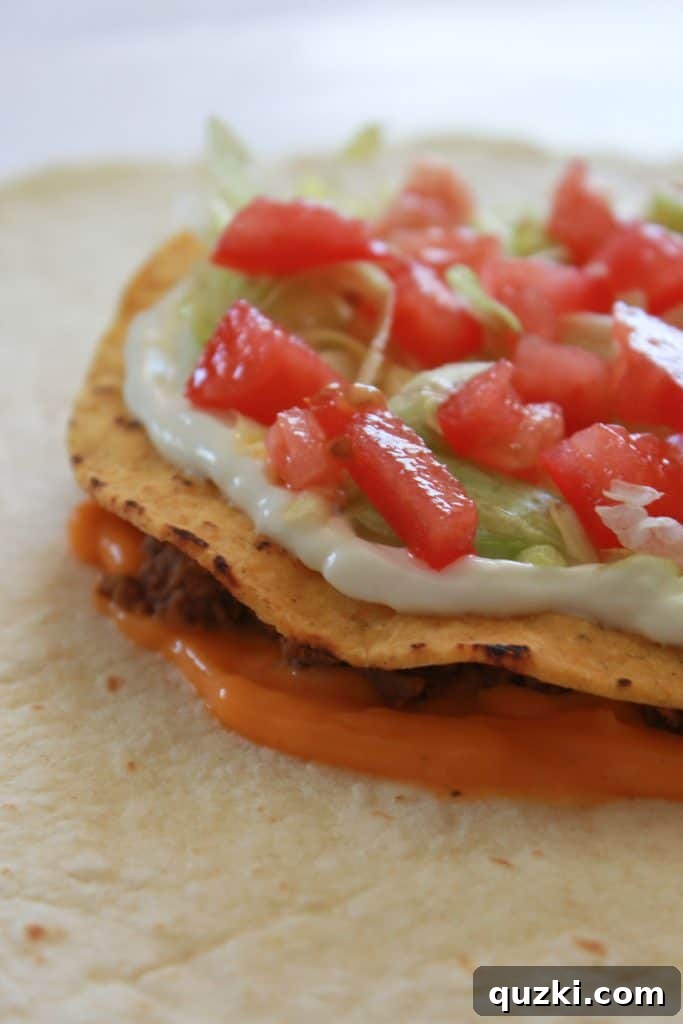
4. Fresh & Cool Layers: On top of the tostada shell, spread a tablespoon of sour cream. Then, layer your fresh chopped lettuce and diced tomatoes. Don’t overload it, as you still need to fold the wrap.
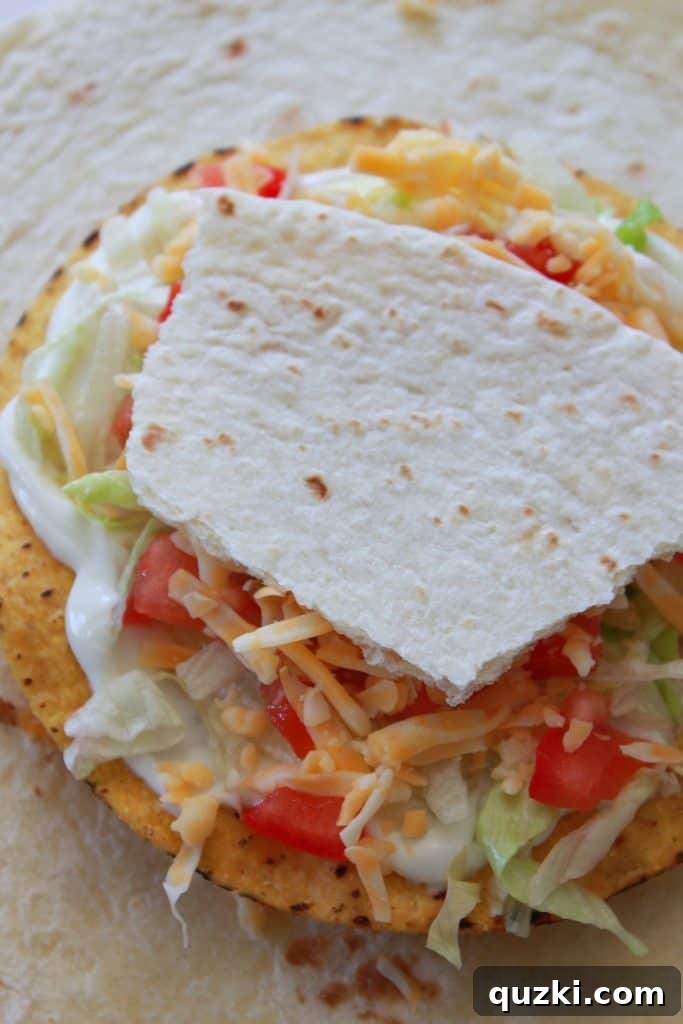
5. More Cheese & The “Lid”: Sprinkle a generous amount of shredded cheese over the fresh toppings. Finally, take one of the torn pieces from your extra flour tortilla and place it in the center, directly on top of the cheese. This small piece of tortilla will cover the opening in the center once you start folding, preventing any fillings from spilling out.
How to Fold a Crunchy Wrap for a Perfect Seal
Achieving a tight, secure fold is key to a well-contained and crispy Crunchy Wrap. Here’s how:
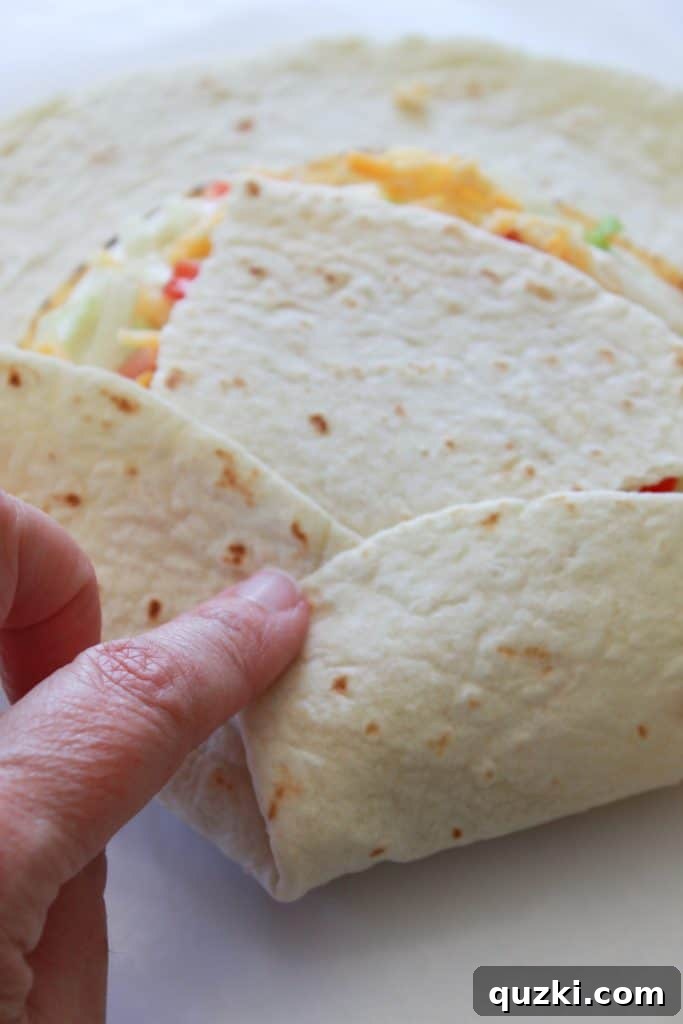
1. Initiate the Folds: Begin by folding one edge of the large tortilla inward, over the filling. Press it down firmly. The torn tortilla piece in the center provides the extra coverage you need to keep your filling secure.
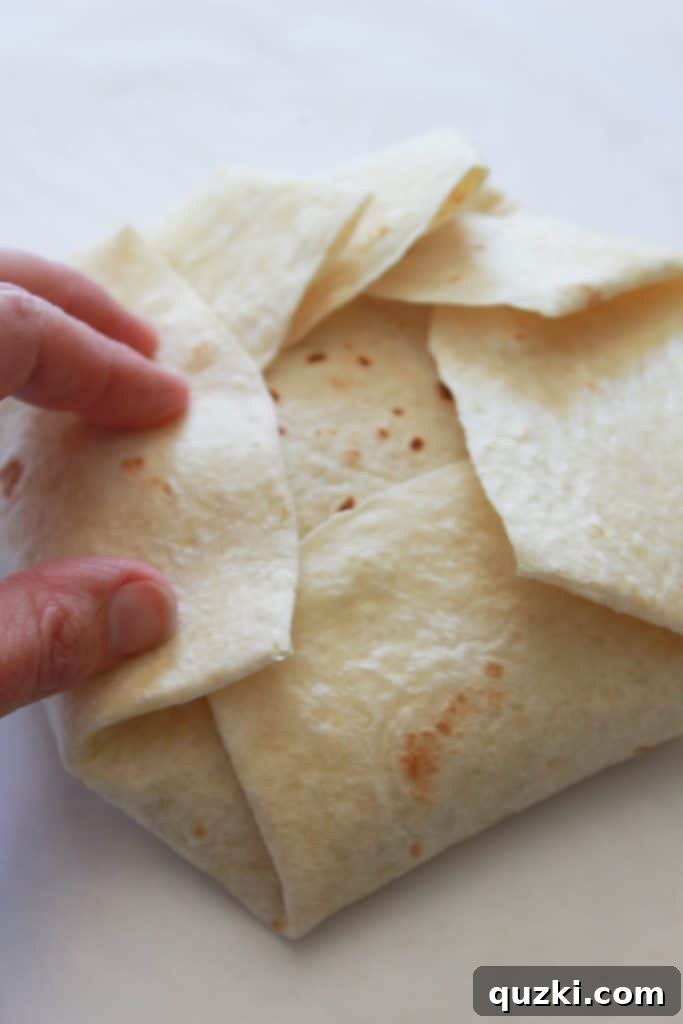
2. Continue Around: Continue folding the tortilla in sections, working your way around the entire circle. Each fold should overlap the previous one slightly, creating a tight, somewhat hexagonal or octagonal packet. Ensure the folds are snug and secure to prevent any filling from escaping during cooking. Once folded, you can lightly press down on the wrap to ensure everything is compact. If you’re not cooking immediately, you can place it folded side down on a plate to help maintain its shape.
Cooking Your Crunchy Wrap to Golden Perfection
The final step brings everything together, creating that irresistible golden-brown crust and melting the cheese inside.
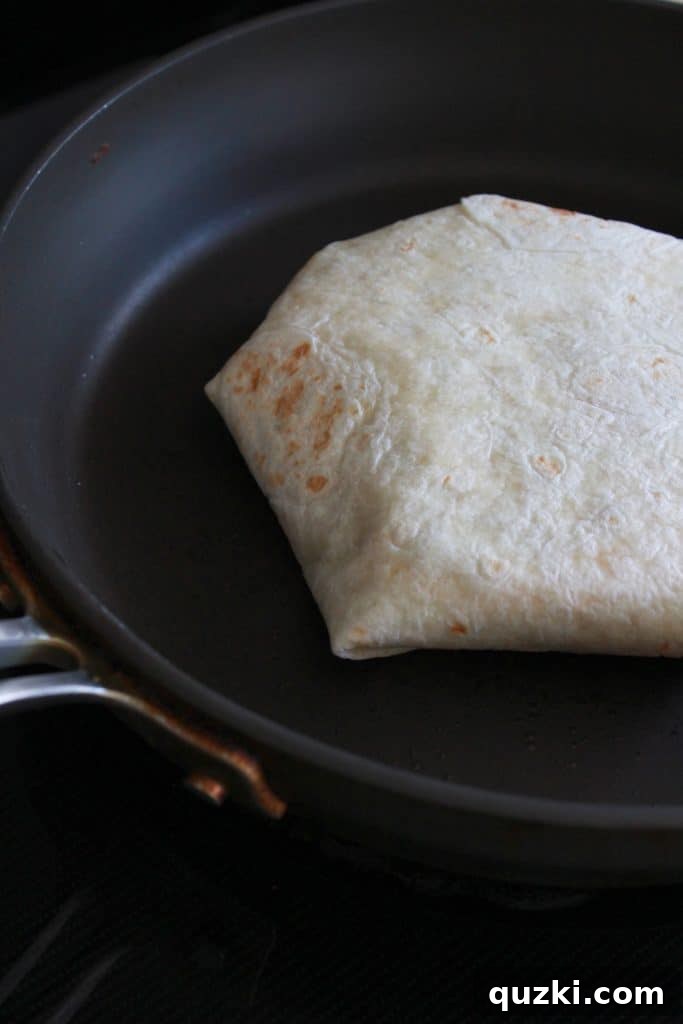
1. Heat the Pan: Place a non-stick pan (lightly sprayed with non-stick cooking spray or a small amount of oil) over medium heat. Allow it to heat up for a minute or two.
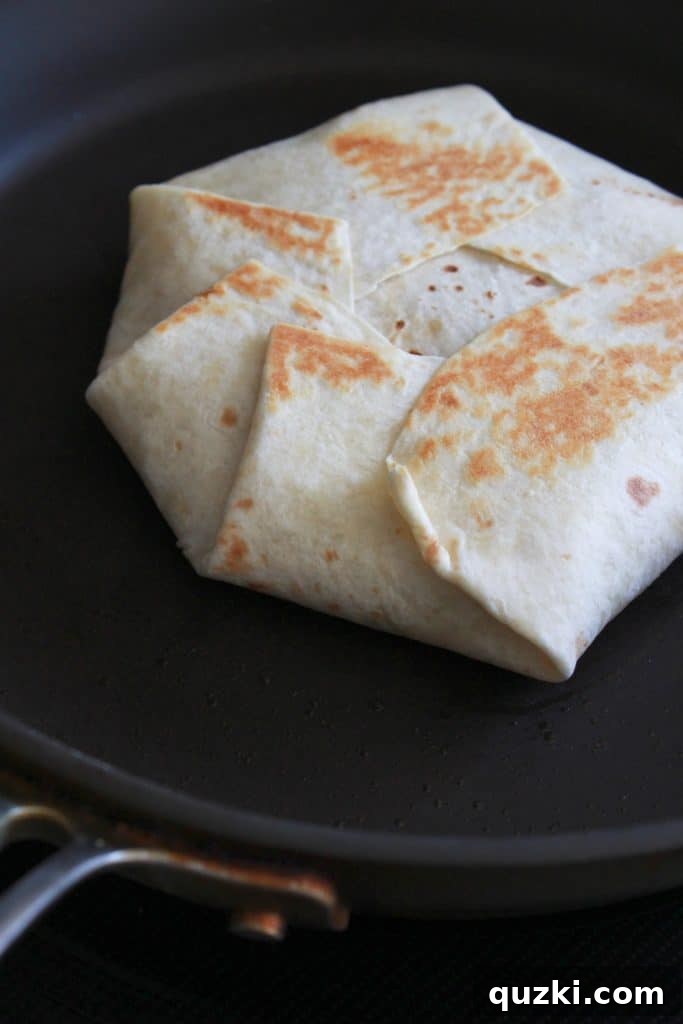
2. Grill to Golden: Carefully place the folded Crunchy Wrap into the hot pan, seam-side down. This helps to seal the wrap as it cooks. Cook for about 3-5 minutes, or until the bottom is beautifully golden brown and crispy. The exact time will depend on your stove and pan, so keep an eye on it. You’re looking for a rich, golden color and a firm texture.
3. Flip and Finish: Once the first side is perfectly golden, gently flip the wrap over to cook the other side. Cook for another 3-5 minutes, or until that side is also golden brown and the cheese inside is melted and gooey. The goal is a warm interior and a delightfully crispy exterior.
4. Serve Immediately: Remove from the pan and serve warm. For the best experience, enjoy your Crunchy Wraps right away while they’re hot and crispy!
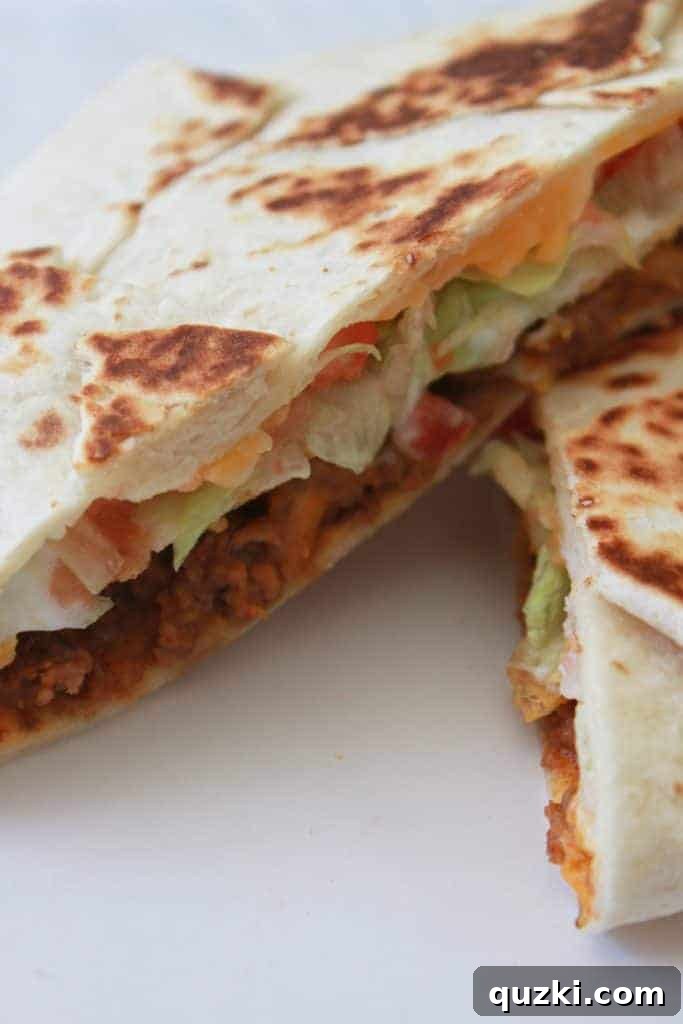
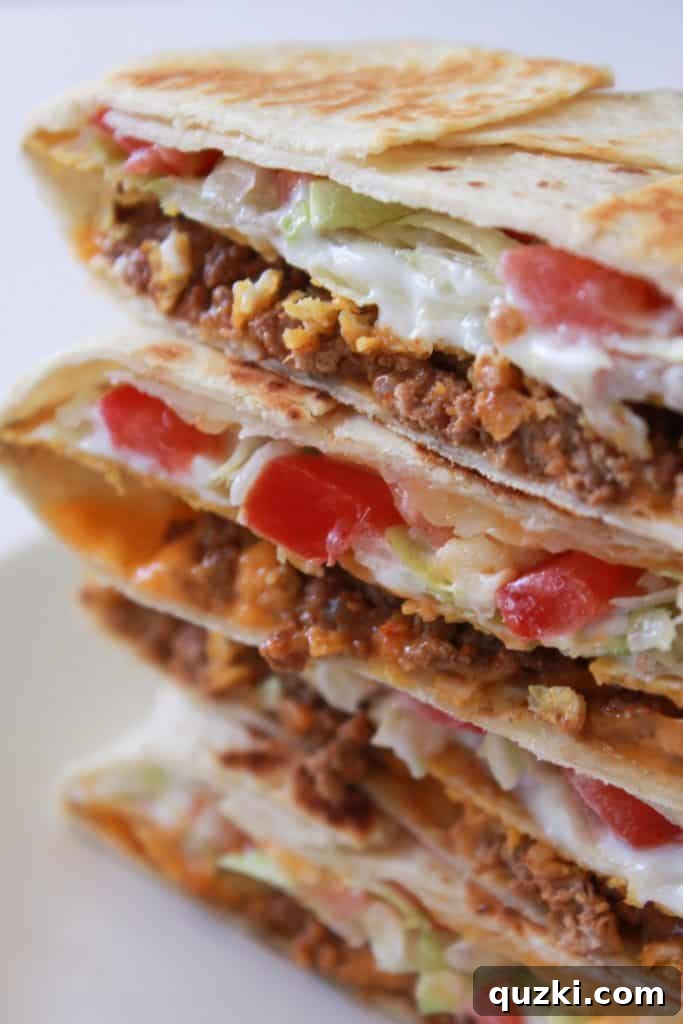
There are so many elements to love about this wrap. The satisfyingly crunchy outside, the rich, extra cheese, the crispy tostada shell, the cool, refreshing sour cream and fresh vegetables, and the savory seasoned beef. But perhaps the best part is the ability for everyone at the table to customize their own, ensuring every bite is exactly to their liking. We know everyone at our house will absolutely adore them on Sunday when we celebrate another year of our special tradition. I sincerely hope you and your family will try making them too!
Variations and Customization Ideas
Don’t be afraid to get creative with your Crunchy Wraps! Here are some ideas to inspire you:
- Protein Power: Swap ground beef for seasoned shredded chicken, slow-cooked carnitas, grilled steak, or even black beans for a vegetarian option.
- Spice It Up: Add a dash of cayenne pepper to your ground beef seasoning, include sliced jalapeños or a drizzle of hot sauce for an extra kick.
- Cheese Please: Experiment with different cheese varieties like pepper jack for spice, or cotija for a salty, crumbly texture.
- Veggie Boost: Incorporate sautéed bell peppers and onions, corn, or even finely chopped spinach.
- Sauce Sensations: Try a dollop of guacamole, a spoonful of salsa verde, or a drizzle of chipotle mayo instead of or in addition to sour cream.
- Healthier Twist: Use whole wheat tortillas, lean ground turkey, and extra fresh vegetables.
Serving Suggestions: What to Pair with Your Crunchy Wrap
A delicious Crunchy Wrap deserves equally delicious sides! Here are some fantastic options that complement the flavors perfectly:
- Quick Queso Blanco
- Fiesta Wedge Salad
- The Perfect Margarita
- Mexican Street Corn Salad
- No Bake Key Lime Pie
- Mexican Hot Chocolate Cookies
- Easy Baked Churros
- Pinata Cupcake
- Authentic Mexican Rice
Frequently Asked Questions About Homemade Crunchy Wraps
- Can I prepare Crunchy Wraps ahead of time?
- You can prepare some components in advance, like cooking and seasoning the ground beef, chopping vegetables, and warming the nacho cheese. However, for the crispiest result, it’s best to assemble and cook the wraps right before serving. Assembled wraps can become soggy if left to sit too long before cooking.
- How do I prevent my Crunchy Wrap from becoming soggy?
- The key is a hot pan and cooking immediately after assembly. Also, ensure your nacho cheese and meat aren’t excessively greasy or watery. The tostada shell acts as a barrier, but swift cooking helps maintain crispness.
- What if I can’t find tostada shells?
- You can make your own! Simply cut corn tortillas into circles and fry or bake them until crispy. Alternatively, you can use a handful of tortilla chips in the center for a similar crunch, though it might be a bit messier.
- How do I store and reheat leftovers?
- Leftover Crunchy Wraps can be stored in an airtight container in the refrigerator for 1-2 days. To reheat, place them in a dry skillet over medium heat for a few minutes per side until heated through and the tortilla crisps up again. Avoid the microwave, as it will make them soggy.
- Can I make this vegetarian?
- Absolutely! Swap the ground beef for seasoned black beans, refried beans, or a plant-based ground meat alternative. Ensure your nacho cheese sauce is also vegetarian if preferred.
Crunchy Wrap
Rate Recipe
Print Recipe
Ingredients
- 1 cup nacho cheese sauce
- 1 lb hamburger {cooked and seasoned}
- 6 tostada shells
- 1/2 cup sour cream
- 1 cup lettuce {shredded}
- 1/2 cup tomato {diced}
- 1 cup cheese {shredded}
- 6 burrito sized flour tortillas
- 1 burrito sized flour tortilla {torn into 6ths}
Instructions
-
On a large burrito-sized flour tortilla, add 1-2 tablespoons of warm nacho cheese sauce to the middle, spreading it in a circular shape about the size of a tostada. Top the nacho cheese with cooked and seasoned hamburger, then place a tostada shell firmly on top of the hamburger. Spread a tablespoon of sour cream onto the tostada shell, followed by shredded lettuce and diced tomato. Finish with a layer of shredded cheese and a torn piece of an additional flour tortilla in the center.
-
Begin folding the edges of the large flour tortilla inward over the filling, working your way around the entire wrap to create a secure packet. Place the folded wrap seam-side down into a non-stick pan (sprayed with non-stick spray) over medium heat. Cook until the bottom is golden brown and crispy, about 3-5 minutes. Flip the wrap over and cook the other side until it is also golden brown. Serve warm immediately.
Nutrition
Nutrition information is automatically calculated, so should only be used as an approximation.
Shop Our Favorite Tools for This Recipe:
Enhance your cooking experience with these helpful kitchen essentials:
- Meat Chopper: Perfect for breaking up ground beef evenly.
- High-Quality Non-Stick Pan: Essential for achieving that perfect golden crust without sticking.
- Electric Slicer/Shredder: Great for quickly preparing large quantities of cheese and vegetables.