
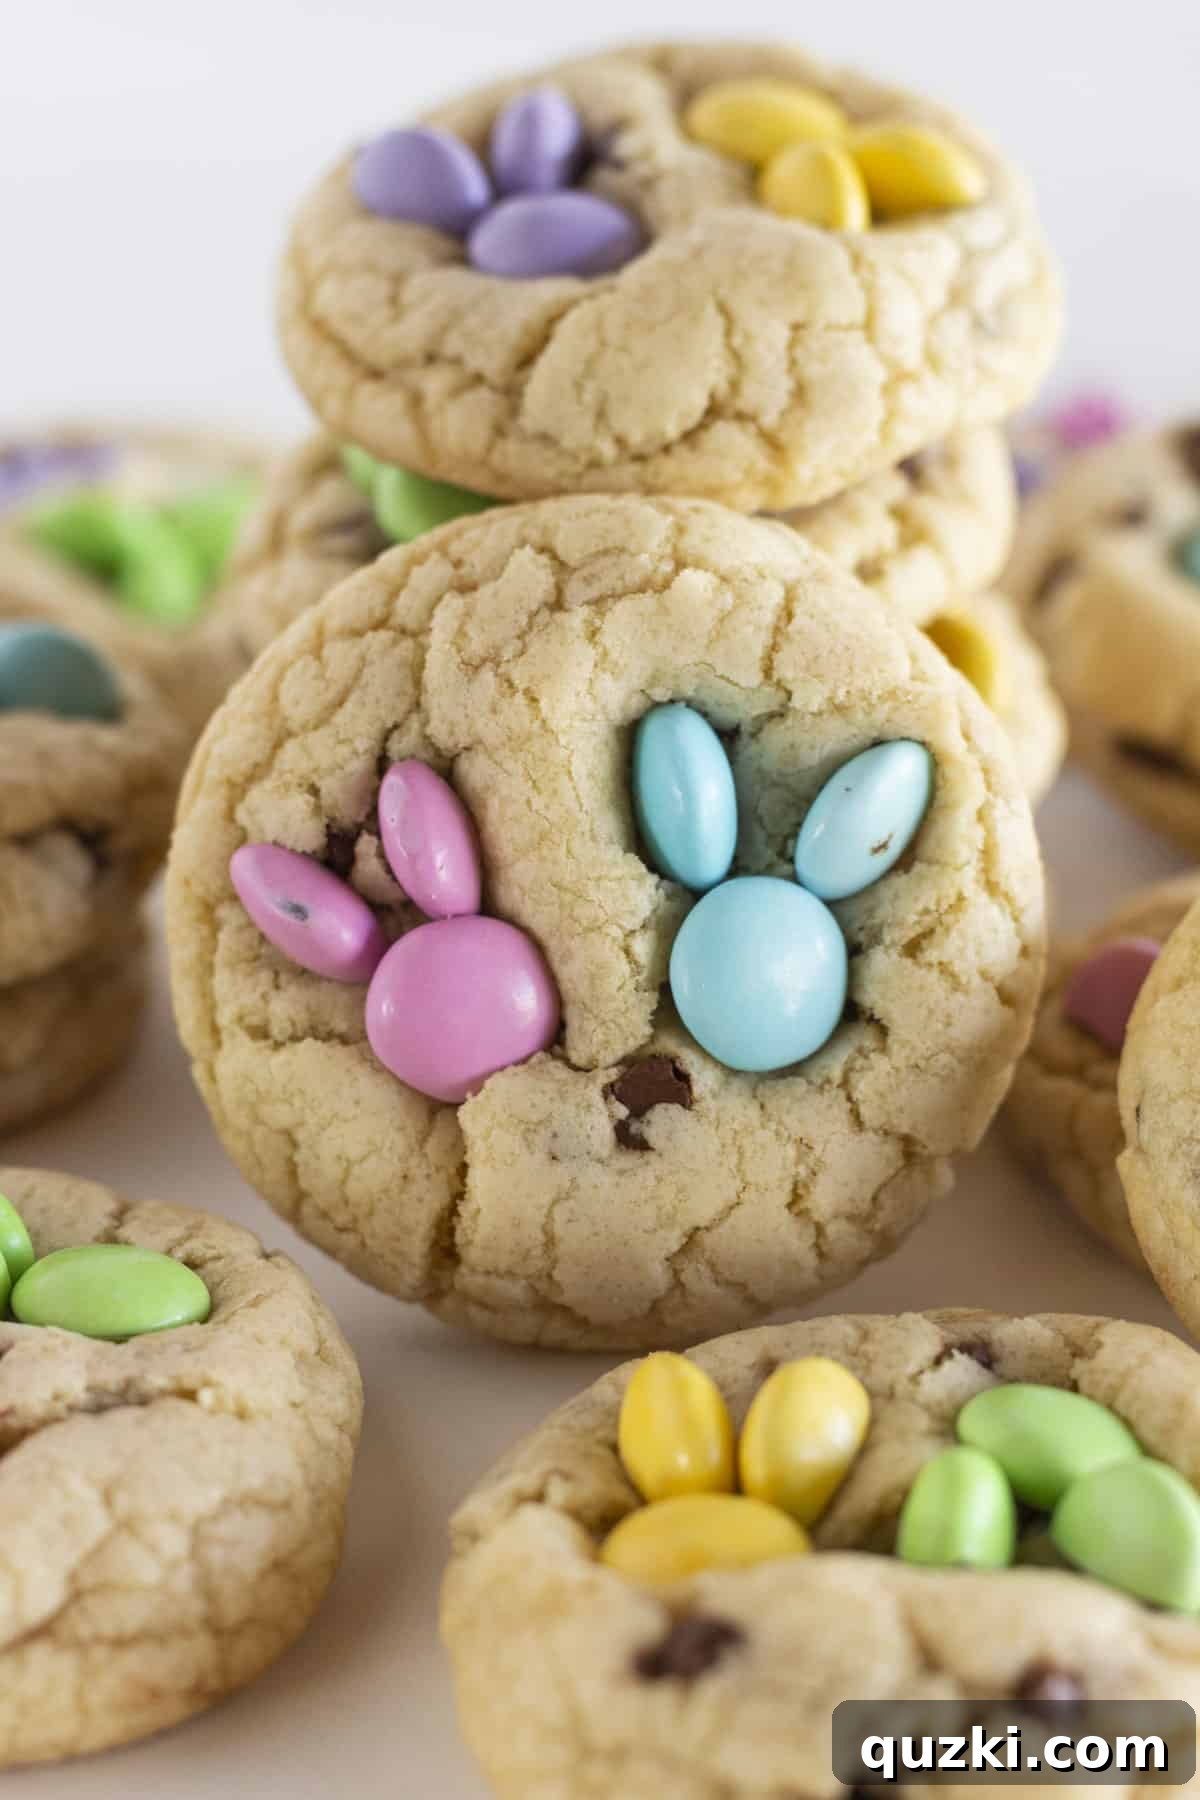
Every holiday calls for a special culinary touch, and Easter is no exception. We firmly believe that each festive occasion deserves its own unique chocolate chip cookie recipe – one that incorporates a truly special element perfect for celebrating. For Easter, what could be more charming than these Easy Easter Chocolate Chip Cookies? With vibrant, holiday-themed M&M’s, we’ve crafted a delightful treat that’s not only incredibly simple to make but also visually adorable, bringing a burst of spring cheer to your dessert table.
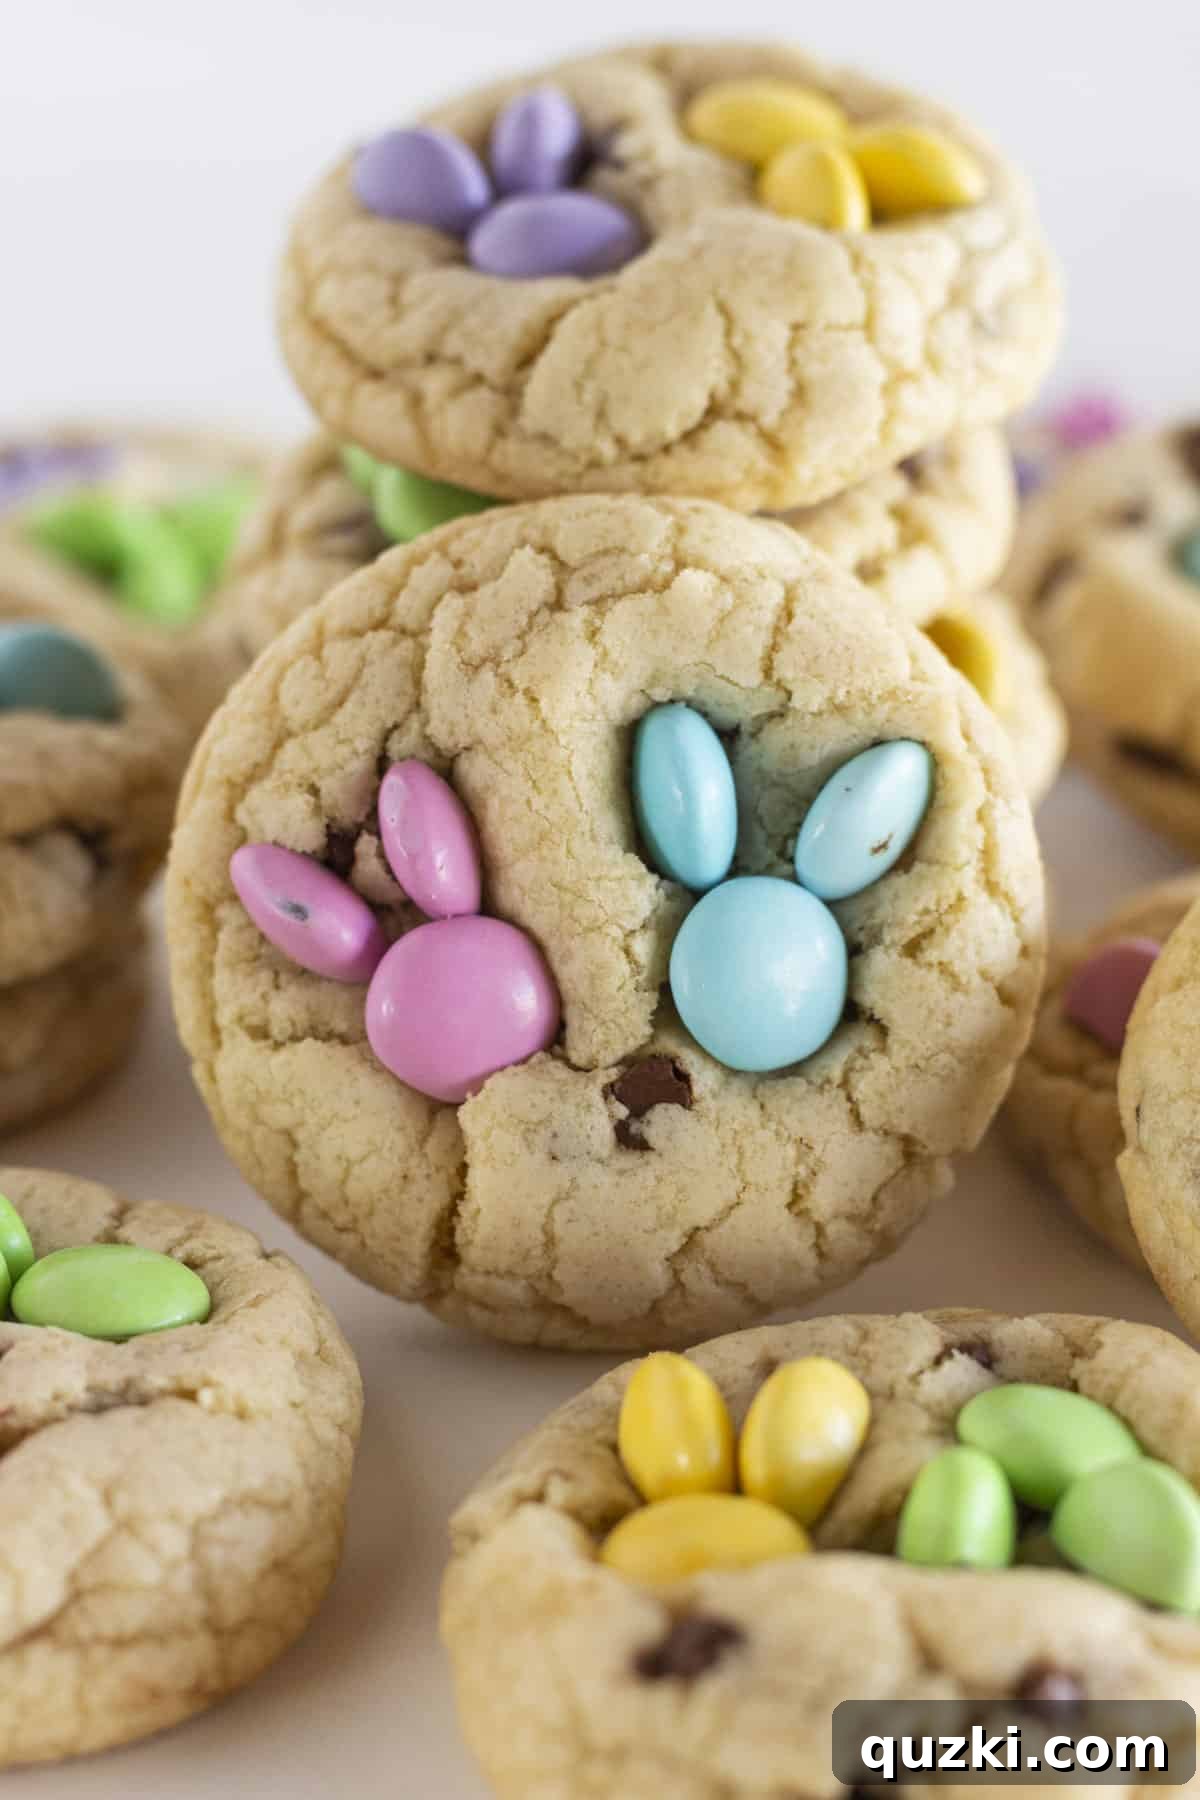
Table of Contents
- The Ultimate Easter Chocolate Chip Cookies
- Essential Ingredients for Your Easter Cookies
- Creative Variations and Substitutions
- Step-by-Step Guide to Making Easter Chocolate Chip Cookies
- Expert Baking Tips for Perfect Easter Cookies
- Storage and Freezing Your Easter Cookies
- Frequently Asked Questions About Easter Chocolate Chip Cookies
- More Easter Dessert Inspiration
- Easy Easter Chocolate Chip Cookies Recipe
The Ultimate Easter Chocolate Chip Cookies
When I think of holiday cookies, I prioritize a few key qualities: simplicity, festive appeal, and, of course, outstanding taste. This recipe for Easy Easter Chocolate Chip Cookies ticks all those boxes and more. Unlike many complex holiday baking projects, these cookies are designed to be straightforward, ensuring a stress-free experience from start to finish. They are a delightful embodiment of what makes holiday baking so special – creating joy without the fuss.
These cookies are truly a triple threat: easy to prepare, irresistibly festive, and utterly delicious. The secret to their charm lies in the adorable candy-coated chocolate bunnies that adorn each cookie. Much like our beloved Valentine’s Day Chocolate Chip Cookies, which capture the spirit of love, these Easter cookies infuse the joy of spring into a classic treat. The pastel hues of Easter M&M’s instantly transform an ordinary chocolate chip cookie into a whimsical work of art, perfect for your holiday spread.
Beyond their charming appearance, these cookies offer a symphony of textures and flavors. Each bite delivers a chewy cookie base, rich with chocolate chips, perfectly complemented by the sweet crunch of the M&M’s. The balance of sweetness and classic cookie flavor makes them a universal crowd-pleaser. Whether you’re serving them at an Easter brunch, packing them into holiday baskets, or simply enjoying them with a cup of coffee, they are guaranteed to be a hit with family and friends. For another fun bunny-themed treat, you might also enjoy these adorable Bunny Cookies!
This recipe proves that festive baking doesn’t have to be complicated. It’s about taking a familiar comfort food and adding a touch of holiday magic. The simple act of adding M&M’s in a creative way elevates these cookies from everyday treats to memorable Easter delights. They’re perfect for involving younger bakers, making it a wonderful family activity to kick off your spring celebrations.
Essential Ingredients for Your Easter Cookies
Creating truly outstanding chocolate chip cookies, especially for a special occasion like Easter, depends on understanding the role each ingredient plays. We’ve carefully selected components that not only ensure a perfect texture and flavor but also simplify the overall baking process. Here’s a closer look at what goes into these delightful cookies:
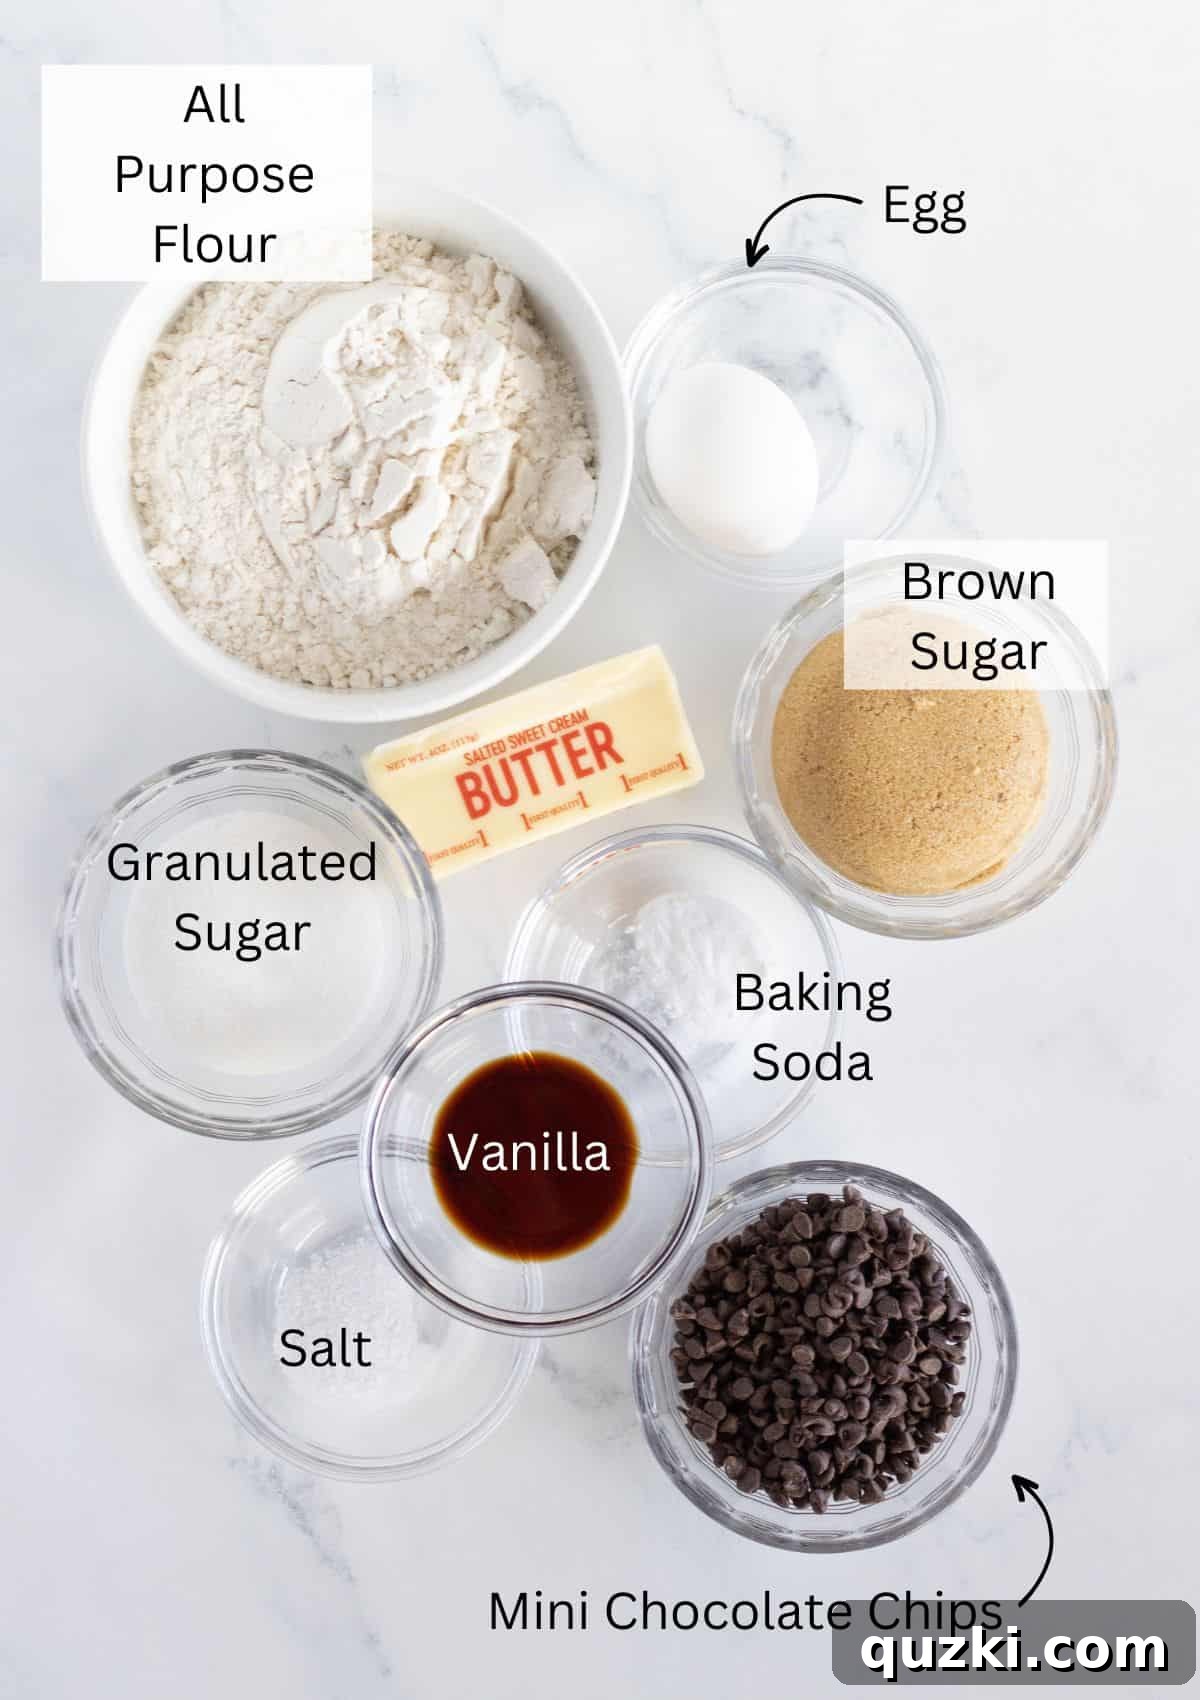
- Melted Butter: This is a cornerstone of our easy recipe. Using melted butter eliminates the need for an electric mixer, allowing you to whip up the dough with just a wooden spoon or spatula. Melted butter also contributes to a wonderfully chewy cookie texture by helping the sugars dissolve thoroughly. Remember, it should be just melted and slightly cooled, not hot, to avoid scrambling the eggs when added.
- Granulated Sugar and Brown Sugar: The combination of these two sugars is essential for both the taste and texture of your cookies. Granulated sugar provides a classic sweetness and helps with the cookie’s structure and spread. Brown sugar, with its molasses content, adds moisture, a rich caramel-like flavor, and contributes significantly to that irresistible soft and chewy center. Always make sure to lightly pack your brown sugar when measuring for consistent results.
- Large Eggs: Eggs serve multiple critical functions in our cookie dough. They act as a binding agent, holding all the ingredients together, and contribute to the cookie’s structure. They also add moisture and richness, enhancing the tender crumb. Using large eggs at room temperature can help them incorporate more smoothly into the butter and sugar mixture, resulting in a more cohesive dough.
- Vanilla Extract: A dash of high-quality vanilla extract is indispensable in any great chocolate chip cookie. It elevates and deepens all the other flavors, adding a warm, aromatic note that makes the cookies truly irresistible. We recommend using pure vanilla extract for the best flavor profile.
- All-Purpose Flour: This forms the primary structure of our cookies. Properly measuring the flour is key to avoiding dry or dense cookies. The best method is to spoon the flour into your measuring cup and then level it off with a straight edge, rather than scooping directly, which can compact the flour and lead to over-measurement.
- Baking Soda: This acts as our leavening agent. When combined with the acidic brown sugar, baking soda helps the cookies rise slightly, creating a softer texture, and contributes to the golden-brown color. It ensures your cookies are tender and not too dense.
- Salt: Often underestimated, salt plays a vital role in balancing the sweetness of the sugars and chocolates. It enhances all the other flavors, making the chocolate taste richer and preventing the cookies from being cloyingly sweet.
- Mini Chocolate Chips: The choice of mini semi-sweet chocolate chips is intentional and highly beneficial for this Easter cookie recipe. Their smaller size ensures that chocolate is evenly distributed throughout every bite, delivering a consistent flavor. Crucially, mini chips also leave more surface area on the top of each cookie, providing the perfect canvas for adding our festive M&M bunny decorations without overwhelming the cookie.
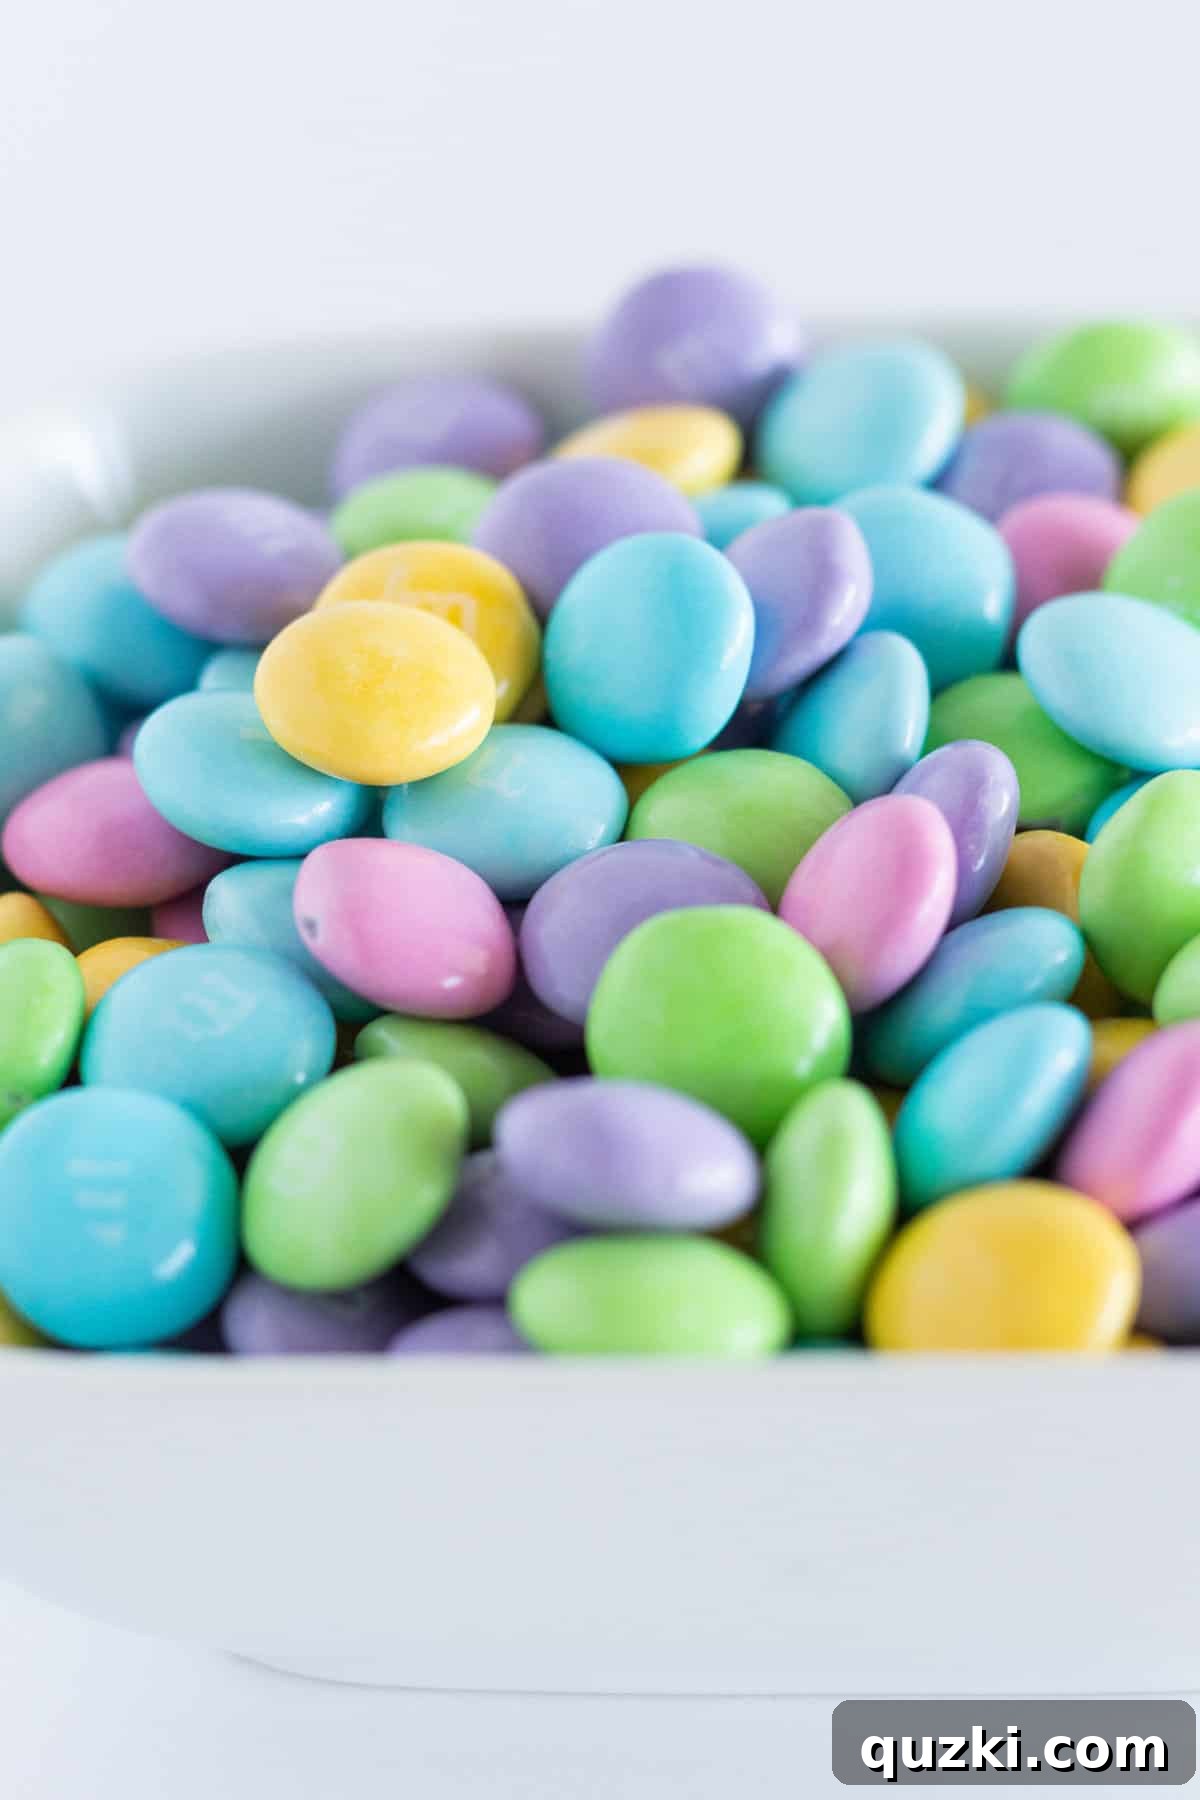
- M&M’s Candy: These are the star of the show, transforming simple chocolate chip cookies into Easter masterpieces! Utilizing Easter-colored M&M’s, with their charming pastel shades of pink, blue, green, and yellow, adds an extra layer of festivity and vibrancy. However, don’t worry if you can’t find specific Easter M&M’s; any color variation will work wonderfully for creating the adorable bunny faces. The candy-coated shell not only provides a lovely color contrast but also a satisfying textural crunch.
Please consult the comprehensive recipe card provided below for exact measurements and detailed instructions to ensure your cookies are perfect.
Creative Variations and Substitutions
While our foundational recipe for Easy Easter Chocolate Chip Cookies yields consistently delicious results, baking is an art that encourages experimentation. Feel free to customize this recipe to your taste, dietary needs, or whatever ingredients you have on hand. Here are some inspiring variations and substitutions:
- For a Larger and Thicker Cookie: If your preference leans towards a more substantial, less spread-out cookie, there are a couple of approaches you can take. One popular method is to slightly chill your cookie dough. Even 30 minutes in the refrigerator can help the butter solidify, leading to less spread during baking and a thicker cookie. For an even more dramatic effect, chill the dough for several hours or overnight. Alternatively, some bakers prefer a recipe that starts with cold, cubed butter and uses an electric mixer to cream it thoroughly with the sugars until light and fluffy. While our recipe uses melted butter for ease, switching to a cold butter method would result in a different, often thicker, cookie texture – perhaps exploring my favorite thick chocolate chip cookie recipe is a good starting point if that’s your goal.
- Exploring Different Chocolate Types: The classic mini semi-sweet chocolate chips are perfect here, but don’t limit your imagination when it comes to chocolate!
- Milk Chocolate Chips: For a sweeter, creamier profile that harmonizes beautifully with the pastel shades of Easter M&M’s, substitute some or all of the mini semi-sweet chips with milk chocolate.
- Dark Chocolate Chunks or Chips: If you prefer a richer, more intense chocolate flavor to balance the sweetness of the M&M’s, dark chocolate is an excellent choice. Roughly chopped dark chocolate bars create luxurious pockets of melted chocolate within the cookies.
- White Chocolate Chips: These can add a lovely visual contrast, especially with darker M&M’s, and contribute a sweet, creamy flavor that works well with spring themes.
- Mix and Match: Create a unique flavor profile by combining different types of chocolate chips – mini semi-sweet with white chocolate, or a blend of milk and dark for a more complex taste.
- Adding Other Delicious Mix-Ins: Elevate your cookies by incorporating other delightful ingredients into the dough:
- Chopped Nuts: A handful of finely chopped walnuts, pecans, or almonds can add a wonderful crunch and earthy flavor that pairs well with chocolate.
- Dried Fruits: For a touch of fruity sweetness and chewiness, consider adding dried cranberries, cherries, or finely chopped apricots.
- Seasonal Sprinkles: To boost the festive factor, gently fold in some spring-themed or pastel sprinkles into the dough alongside the chocolate chips. You can also press them onto the cookies with the M&M’s for extra sparkle.
- M&M’s Alternatives: If Easter-specific M&M’s aren’t readily available, fear not! Regular M&M’s in any color will work just as well for the bunny decoration. You could also experiment with other small, candy-coated chocolates. Mini Cadbury Eggs, carefully halved, might offer a different whimsical look, though their adherence might require a little more care.
- Gluten-Free Option: For those with dietary restrictions, many high-quality 1:1 gluten-free baking flour blends can be successfully substituted for all-purpose flour in this recipe. Ensure your chosen blend contains xanthan gum for optimal texture.
Remember, your kitchen is your playground! These suggestions are merely starting points. Feel empowered to experiment and tailor these cookies to create your signature Easter treat.
Step-by-Step Guide to Making Easter Chocolate Chip Cookies
Making these festive Easter chocolate chip cookies is a straightforward and enjoyable process. This guide provides detailed instructions to ensure your cookies are perfectly baked, soft, chewy, and adorned with adorable M&M bunnies every time. Let’s get baking!
1. Combine Butter and Sugars: Begin by combining the just-melted butter, granulated sugar, and lightly packed brown sugar in a large mixing bowl. Using a sturdy wooden spoon or a spatula, stir these ingredients together until the mixture is smooth, creamy, and well-combined. The melted butter makes this step incredibly easy and eliminates the need for an electric mixer.
2. Incorporate Wet Ingredients: Add the vanilla extract and the eggs to the butter and sugar mixture. Stir gently until all the ingredients are fully incorporated. Be careful not to overmix at this stage; overworking the dough can develop too much gluten, which may result in tougher cookies. Mix just until everything comes together smoothly.
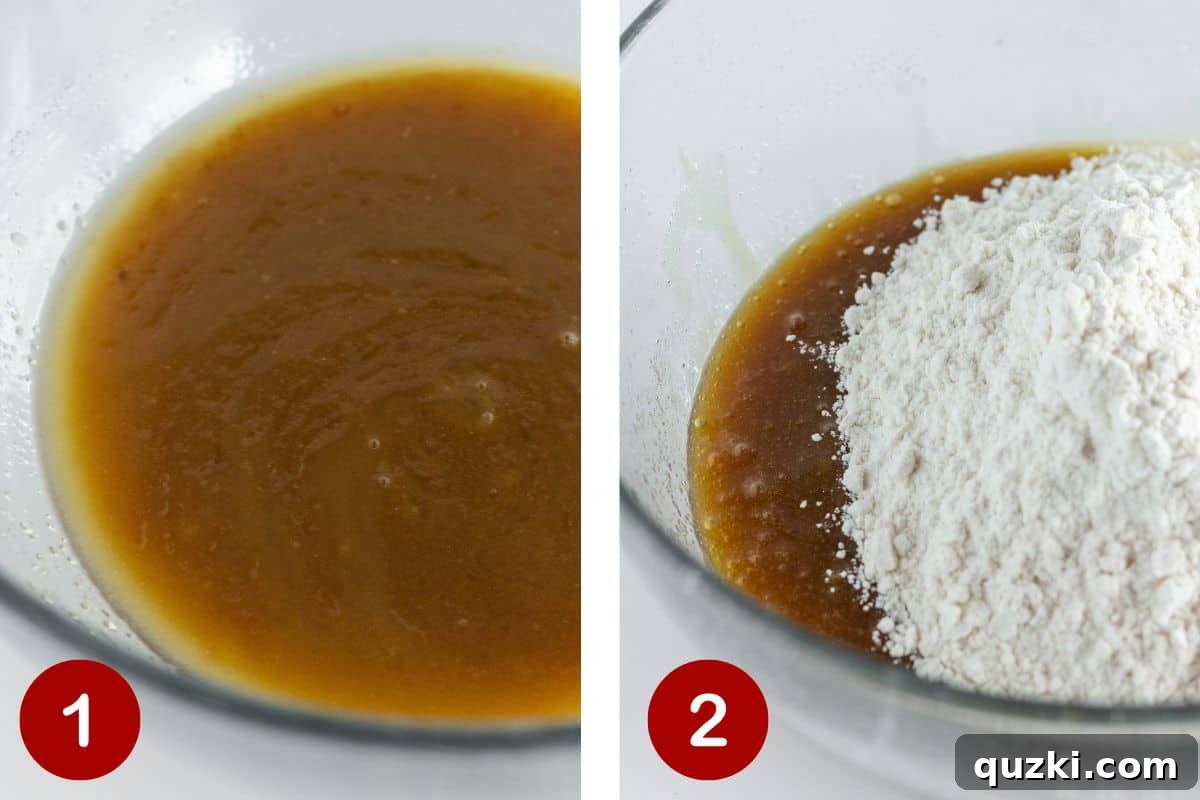
3. Add Dry Ingredients: Now, add the all-purpose flour, baking soda, and salt to the wet mixture all at once. Mix with your wooden spoon until the dry ingredients are just incorporated into the wet, forming a thick, cohesive cookie dough. Again, avoid overmixing. The goal is to mix just enough until no streaks of dry flour are visible. This crucial step is similar to preparing our Mini Chocolate Chip Cookies, where gentle mixing ensures tenderness.
4. Fold in Mini Chocolate Chips: Once your dough is ready, add the mini chocolate chips. Stir them gently into the dough until they are evenly distributed. The mini size of the chips is important here, ensuring you get chocolate in every bite without overcrowding the cookie surface, leaving ample space for the M&M decorations.
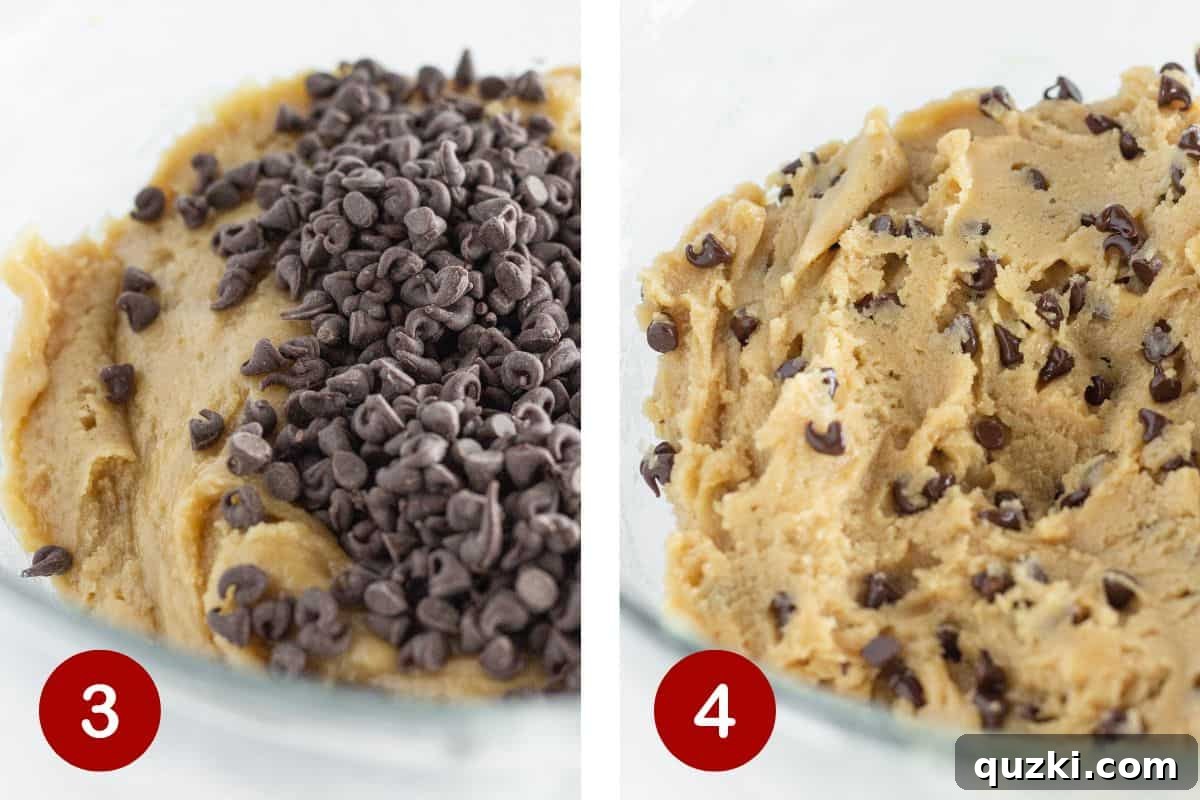
5. Portion and Prepare for Baking: Using a medium cookie scoop (approximately 1.5 to 2 tablespoons of dough), portion out your cookie dough. Gently roll each scoop between your palms to form a smooth, uniform ball. This creates a neater cookie and facilitates easier decoration later. Place the cookie dough balls onto a baking sheet lined with parchment paper or a silicone mat, ensuring enough space between them for spreading.
6. Bake to Chewy Perfection: Preheat your oven to 350°F (175°C). Bake the cookies for 9-11 minutes. Keep a close watch; you want to remove them from the oven when their edges are just beginning to turn a light golden brown, and the centers still look slightly soft and puffy. This slight under-baking is the key to achieving those wonderfully soft and chewy cookies. They will continue to set as they cool.
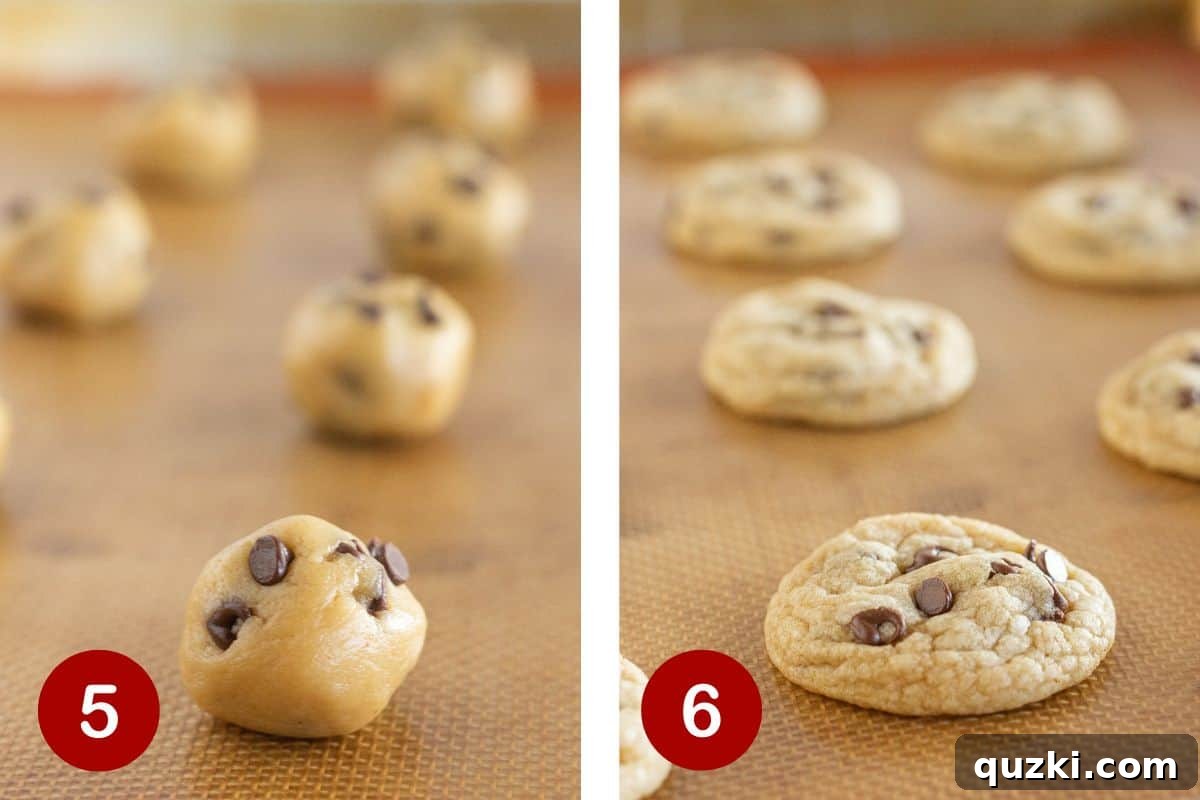
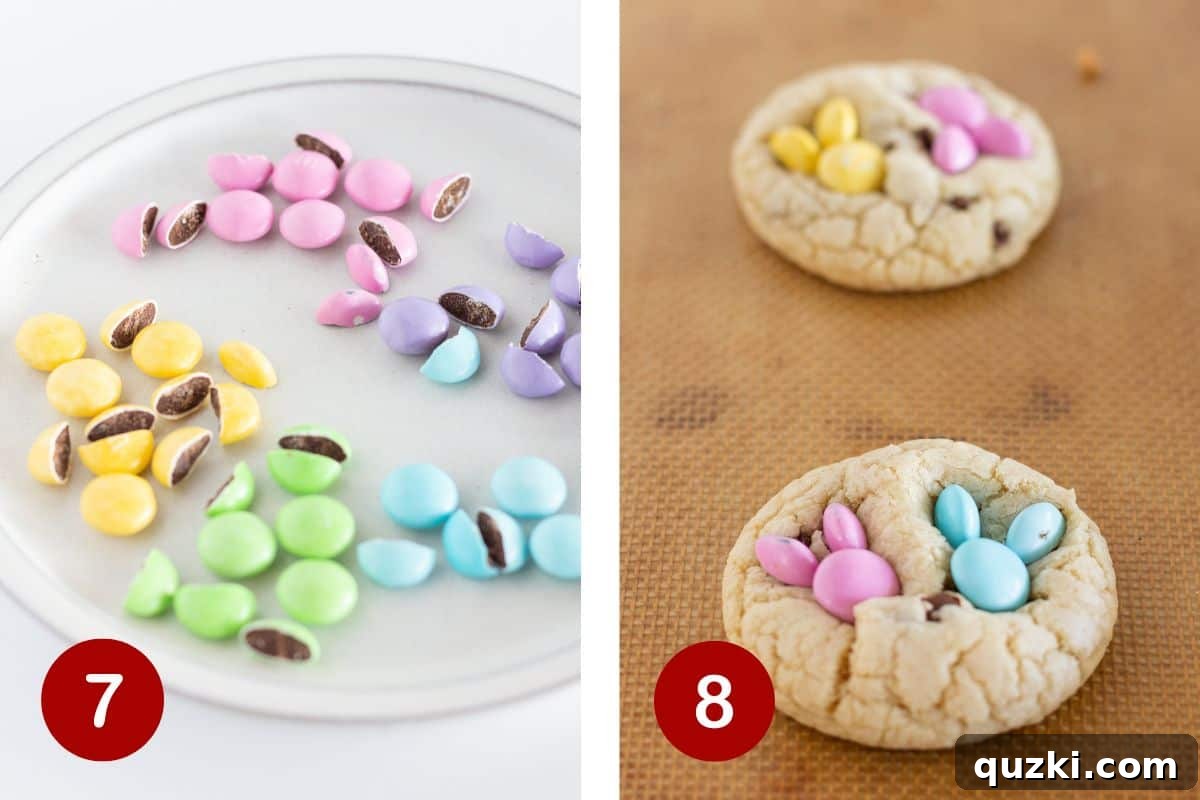
7. Prepare M&M Bunny Ears: While your cookies are baking, get a head start on preparing your M&M’s. For approximately 24 cookies, you’ll need to cut about 22-24 M&M candies in half lengthwise. A sharp knife works best for this. Have these halves ready on a plate so you can quickly decorate once the cookies are out of the oven.
8. Decorate with M&M Bunnies: This is the fun part! Immediately after removing the baked cookies from the oven, quickly place two whole M&M candies at the top center of each cookie to form the “bunny face.” Then, take two of the pre-cut M&M halves (ideally of the same color as the whole ones) and position them cut-side down just above the “face” to create the “bunny ears.” Gently press the candies into the warm cookie dough. The residual heat from the cookies will slightly melt the candy, helping it adhere securely. Allow the decorated cookies to cool completely on the baking sheet; this is essential for them to firm up and for the M&M’s to set in place.
Expert Baking Tips for Perfect Easter Cookies
Even the simplest cookie recipe can benefit from a few expert tips to ensure professional-looking and tasting results. Follow these pointers to make your Easy Easter Chocolate Chip Cookies truly exceptional, perfectly soft, chewy, and irresistibly adorable.
- Opt for Mini Chocolate Chips: While any chocolate chips are tasty, using mini chocolate chips instead of regular-sized ones is a game-changer for this specific recipe. Their smaller size allows for a higher chocolate-to-dough ratio in each bite, providing fantastic chocolate flavor. More importantly, mini chips create a smoother, less bumpy cookie surface, leaving ample room for you to artfully place the M&M candy bunnies without them getting lost or falling off. If you only have larger chips, a quick chop with a knife can create similar smaller pieces.
- Roll Dough for Smoothness: After scooping your cookie dough, take a few seconds to roll each portion gently between your hands to form a smooth, uniform ball. This simple step helps the cookies bake into a more perfectly rounded shape and provides a clean, even surface for decorating. A smooth surface ensures the M&M’s adhere better and create a more polished bunny design.
- Never Overbake: This is the golden rule for soft, chewy cookies. Keep a watchful eye on your oven and remove the cookies just as their edges begin to turn a light golden brown. The centers may still appear slightly soft or underbaked, but trust the process! They will continue to firm up and set as they cool on the hot baking sheet. Overbaking, even by a minute or two, can lead to dry, hard cookies.
- Prepare M&M’s in Advance for Immediate Decoration: Time is of the essence when it comes to decorating with M&M’s. Have all your Easter M&M’s, including those cut in half for the ears, laid out and ready *before* your cookies come out of the oven. The moment the hot cookies are removed, you need to work quickly. The residual heat from the freshly baked cookies will slightly melt the chocolate coating of the M&M’s, allowing them to fuse securely into the cookie as it cools. Hesitation can result in the candies not adhering properly.
- Use Corn Syrup for Extra Adhesion: If you find that your M&M candies aren’t sticking as well as you’d like (perhaps the cookies cooled too quickly, or your kitchen is chilly), a tiny dab of corn syrup can come to the rescue. Apply a minuscule drop to the back of the M&M (especially the halved ones) with a toothpick, and then gently press it onto the cookie. The corn syrup acts as a natural, edible adhesive, ensuring your bunny ears and faces stay put.
- Cool Completely on the Baking Sheet: While many cookie recipes suggest transferring to a wire rack after a few minutes, for these M&M-decorated cookies, it’s best to allow them to cool *completely* on the baking sheet. This extended cooling time on the warm surface helps the M&M’s set firmly into the cookie structure and prevents any breakage or dislodging of the decorations when you eventually move them.
By incorporating these expert tips into your baking routine, you’ll consistently achieve perfectly soft, chewy, and utterly charming Easy Easter Chocolate Chip Cookies that will be the talk of your holiday celebration.
Storage and Freezing Your Easter Cookies
Once you’ve baked a batch of these delightful Easter Chocolate Chip Cookies, knowing how to store them properly is key to keeping them fresh and enjoyable for as long as possible. Whether you plan to savor them over a few days or save some for later, here’s how to ensure their deliciousness endures.
- Storing at Room Temperature: The best way to store baked Easter cookies is in an airtight container at room temperature. A good quality cookie jar with a tight-fitting lid, or even a plastic container sealed tightly, will keep them fresh. To maintain their soft, chewy texture, you can even add a slice of plain bread into the container; the cookies will absorb moisture from the bread. Stored this way, your cookies will remain wonderfully fresh and delicious for 4-5 days. Ensure they are completely cooled before storing to prevent condensation, which can make them soggy.
- Freezing Baked Cookies: These Easter cookies freeze beautifully, making them perfect for meal prep or saving leftovers. You can store them in the freezer for up to 3 months. To freeze, ensure the cookies are entirely cooled first. Place them in a single layer on a baking sheet and flash freeze for about 30 minutes until they are solid. This prevents them from sticking together. Then, transfer the frozen cookies to a freezer-safe airtight container or a heavy-duty freezer bag, separating layers with parchment paper if stacking.
- Important Note on Freezing M&M’s: Be aware that the chocolate-coated candies (M&M’s) used for decoration may occasionally “bleed” or smudge their colors slightly when frozen and then defrosted. This phenomenon is usually due to condensation. While it doesn’t affect the taste, it might subtly alter the cookie’s appearance. To minimize this, ensure cookies are completely cool before freezing and thaw them slowly in their sealed container at room temperature to reduce moisture buildup.
- Freezing Cookie Dough: For ultimate convenience, you can also freeze the raw cookie dough. Scoop the dough into balls as if you were going to bake them, then flash freeze them on a baking sheet. Once solid, transfer the frozen dough balls to a freezer-safe bag. When you’re ready for fresh cookies, simply place the frozen dough balls on a baking sheet and bake as directed, adding an extra 2-3 minutes to the baking time. This is a fantastic way to have warm, homemade cookies whenever a craving strikes!
With these storage tips, you can enjoy the delightful taste of your Easy Easter Chocolate Chip Cookies long after the holiday has passed.
Frequently Asked Questions About Easter Chocolate Chip Cookies
Here, we address some common questions bakers frequently ask about making these delightful Easter Chocolate Chip Cookies. These answers will help clarify any uncertainties and ensure you bake a perfect batch every time.
One of the most appealing aspects of this particular recipe is that it is a no-chill cookie dough! Unlike some recipes that require refrigeration, you can prepare the dough and bake these cookies almost instantly. This makes it a quick and convenient option for holiday baking, saving you valuable time and allowing you to enjoy fresh, warm cookies sooner.
To achieve a truly super chewy cookie, there are a few key strategies. First, using melted butter, as this recipe does, contributes significantly to a chewy texture. Second, the generous amount of brown sugar, with its natural molasses content, adds moisture and tenderness. For an even chewier result, you can incorporate an extra egg yolk into your dough; egg yolks are rich in fat, which keeps cookies soft and prolongs their chewiness. Additionally, adding about a teaspoon of cornstarch to your dry ingredients can help create a lighter, yet distinctly chewier, texture. Finally, and crucially, avoid overbaking. Remove cookies from the oven when they are just set and still look slightly soft in the center, allowing them to cool completely on the baking sheet.
These versatile cookies are perfect for almost any spring occasion! Their festive appearance and delicious taste make them an ideal addition to an Easter brunch dessert bar, a charming treat for school parties, or a thoughtful homemade gift. For Easter festivities, consider bagging them individually in clear cellophane with a pretty ribbon to add to Easter baskets. You can also place them inside larger plastic Easter eggs for a delightful surprise. The entire family, young and old, will undoubtedly go crazy for these perfectly themed chocolate chip cookies!
Cookies spreading excessively can be a common baking challenge. Several factors can contribute to this. Firstly, ensure your melted butter was not too hot; very warm butter can cause the dough to spread rapidly. Secondly, accurate flour measurement is crucial; too little flour means less structure, leading to thin, flat cookies. Overmixing the dough can also develop gluten excessively, resulting in a more spread-out cookie. Lastly, ensure your oven temperature is accurate; an oven that runs too cool will allow cookies to spread more before they begin to set. Using a silicone baking mat or parchment paper helps prevent sticking but doesn’t necessarily stop spreading if other factors are off.

More Easter Dessert Inspiration
If you’ve loved making these Easy Easter Chocolate Chip Cookies and are searching for more sweet ideas to grace your holiday table, you’re in luck! Here’s a selection of other delightful Easter-themed dessert recipes that are perfect for welcoming spring and celebrating with loved ones.
Easter
Easy Cadbury Mini Egg Cookies
Easter
Easy Caramel Easter Egg Brownies
Easter
Easy No Bake Mini Egg Cheesecake Recipe
Easter
Easy Rice Krispie Easter Nests
Did you try this recipe?
Leave a ⭐️ review below and tag @practicallyhomemade on Pinterest!

Easy Easter Chocolate Chip Cookies
By: June Albertson-Dick
A no-chill chocolate chip cookie recipe made festive with the addition of M&M’s candies on top, designed to look like adorable bunnies. These are the most delicious and charming Easter Chocolate Chip Cookies perfect for your holiday celebration.
Prep Time: 15 minutes
Cook Time: 45 minutes
Total Time: 1 hour
Servings: 24 cookies
Rate Recipe |
Print Recipe
Ingredients
- 1 cup butter, melted
- 1 cup granulated sugar
- ½ cup brown sugar, lightly packed
- 2 large eggs
- 1 ½ teaspoons vanilla extract
- 3 cups all-purpose flour
- 1 teaspoon baking soda
- ½ teaspoon salt
- ¾ cup mini chocolate chips
- ½ cup Easter M&M’s candies
Instructions
- Preheat the oven to 350°F (175°C). Line a baking sheet with parchment paper or a silicone mat.
- Microwave the butter for approximately 40 seconds, just until it’s barely melted. Swirl any unmelted pieces until fully melted, ensuring the butter is not hot (this prevents eggs from curdling).
- In a large bowl, combine the melted butter with both granulated sugar and brown sugar. Mix by hand with a wooden spoon or spatula until the mixture is creamy and smooth.
- Add the vanilla extract and the eggs. Mix until just incorporated, being careful not to overmix to keep the dough from becoming stiff.
- Add the all-purpose flour, baking soda, and salt to the wet mixture. Stir until everything is just combined and no dry streaks of flour remain.
- Fold in the mini chocolate chips until they are evenly distributed throughout the cookie dough.
- Using a medium cookie scoop (about 1.5 to 2 tablespoons), scoop the dough into your hand and roll it into smooth balls. Place them onto the prepared baking sheet, leaving some space between each cookie.
- Bake for 9-11 minutes, or until the edges are lightly golden and the centers appear slightly puffy but still soft. Do not overbake to ensure soft, chewy cookies.
- While the cookies are baking, cut half of your Easter M&M’s candies in half lengthwise; you’ll need two halves per cookie for the bunny ears. Keep the other half of the M&M’s whole for the bunny faces.
- Immediately after removing the baked cookies from the oven, quickly place two whole M&M’s at the top center of each cookie to form the bunny’s face. Then, position two of the same-colored candy halves, cut side down, just above the whole M&M’s to create the bunny ears. Gently press the candies into the warm cookies to help them adhere.
- Allow the cookies to cool completely on the baking sheet. This helps them set and ensures the M&M’s remain securely in place.
- Store cooled cookies in an airtight container at room temperature for up to 4-5 days, or freeze for up to 3 months.
Notes
- Mini Chips are Best: Avoid substituting regular-sized chocolate chips for mini chips. Mini chips allow better spacing for the M&M decorations while still providing excellent chocolate flavor. If only large chips are available, chop them finely.
- Don’t Overbake: For the softest, chewiest cookies, remove them from the oven when they are just starting to turn golden brown at the edges, even if the centers look slightly underdone.
- Prep M&M’s in Advance: Have all your M&M’s cut and ready *before* the cookies come out of the oven. Speed is crucial for the candies to adhere properly to the warm cookies.
- Use Corn Syrup if Needed: If the candies aren’t sticking well, apply a tiny drop of corn syrup to the bottom of the M&M’s before pressing them onto the cookies. It acts as a natural glue.
Nutrition
Nutrition information is automatically calculated and should be used as an approximation.
- Serving: 1 cookie
- Calories: 230 kcal
- Carbohydrates: 32g
- Protein: 3g
- Fat: 11g
- Saturated Fat: 6g
- Polyunsaturated Fat: 0.4g
- Monounsaturated Fat: 2g
- Trans Fat: 0.3g
- Cholesterol: 35mg
- Sodium: 169mg
- Potassium: 31mg
- Fiber: 1g
- Sugar: 19g
- Vitamin A: 278IU
- Vitamin C: 0.1mg
- Calcium: 22mg
- Iron: 1mg
Like this recipe? We’d love to hear from you! Leave a comment or review below and let us know what you think of these delightful Easter Chocolate Chip Cookies. Your feedback helps us share more delicious recipes!