
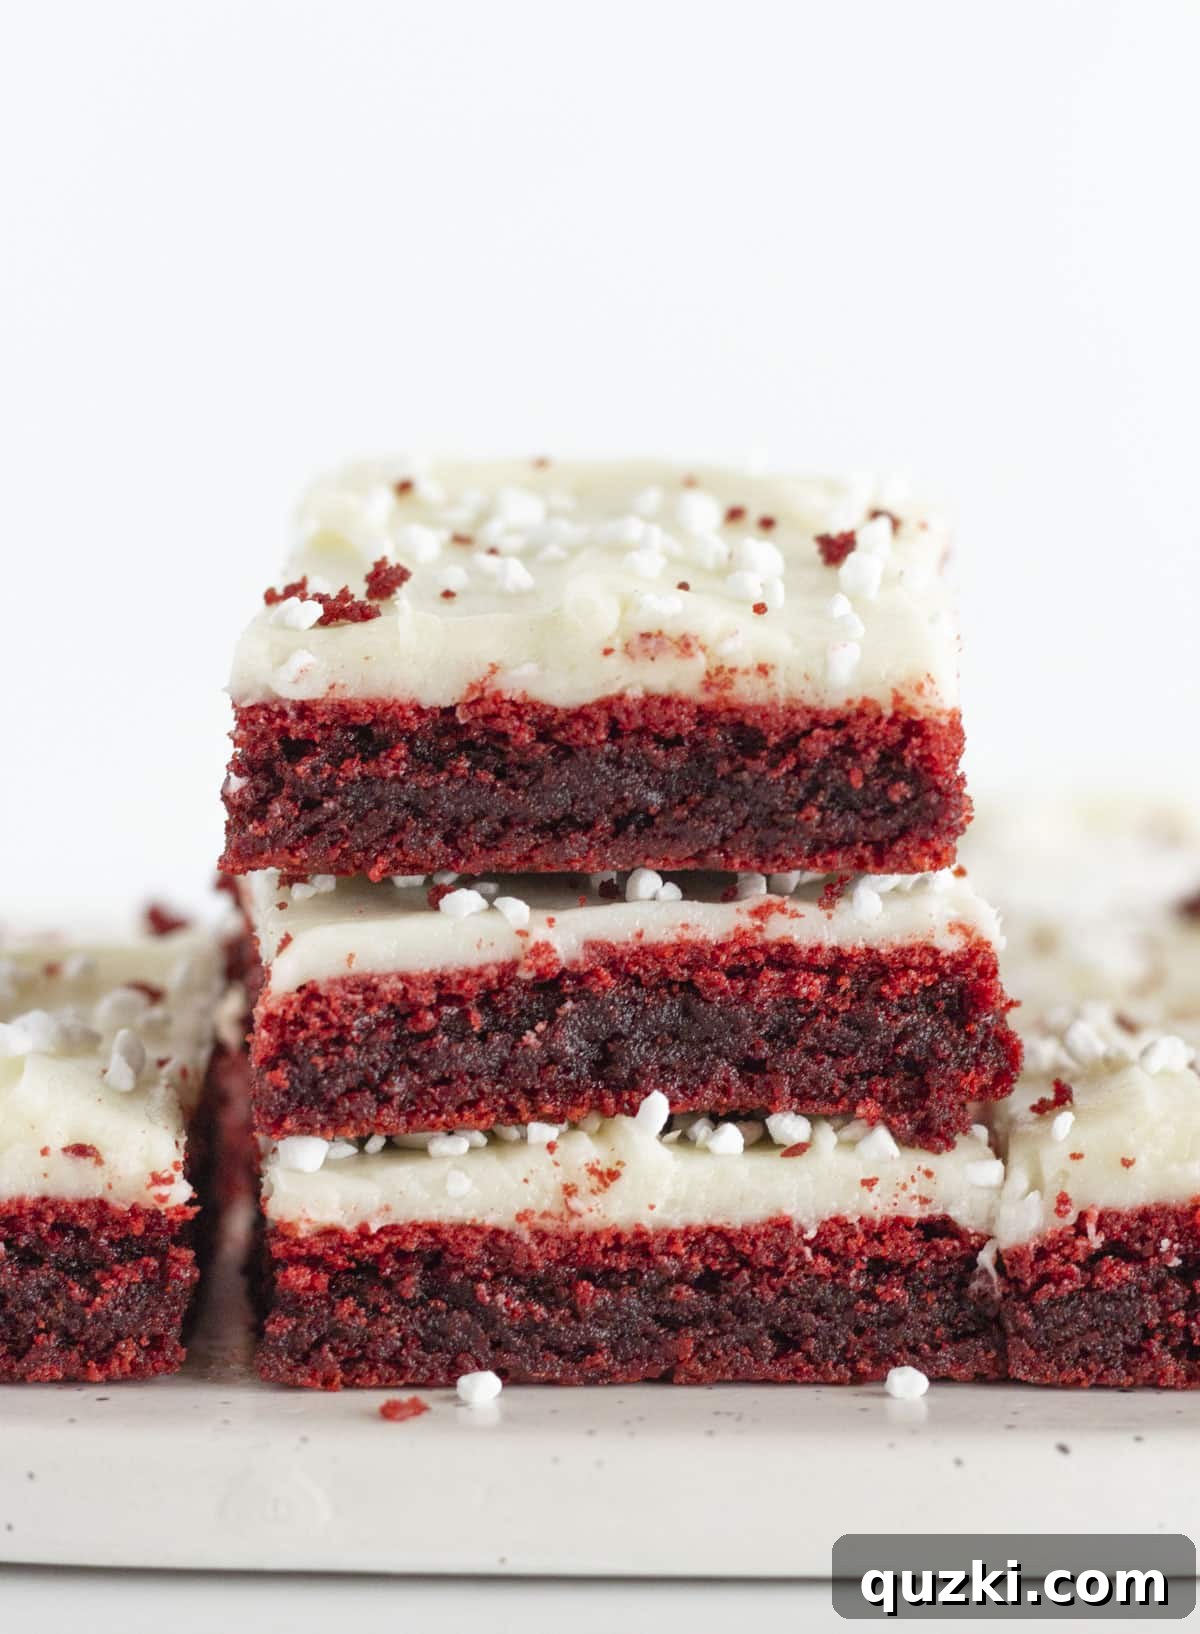
These Red Velvet Brownies with Cake Mix are an absolute dream for anyone craving a rich, fudgy, and visually stunning dessert. Infused with the iconic flavor and vibrant hue of red velvet, these brownies are effortlessly crafted from a simple cake mix, making them a perfect choice for bakers of all skill levels. Topped with a luscious, tangy cream cheese frosting, they transform into a truly irresistible treat, ideal for spreading joy on special occasions like Valentine’s Day, Christmas, or any gathering where a touch of elegance and indulgence is desired.
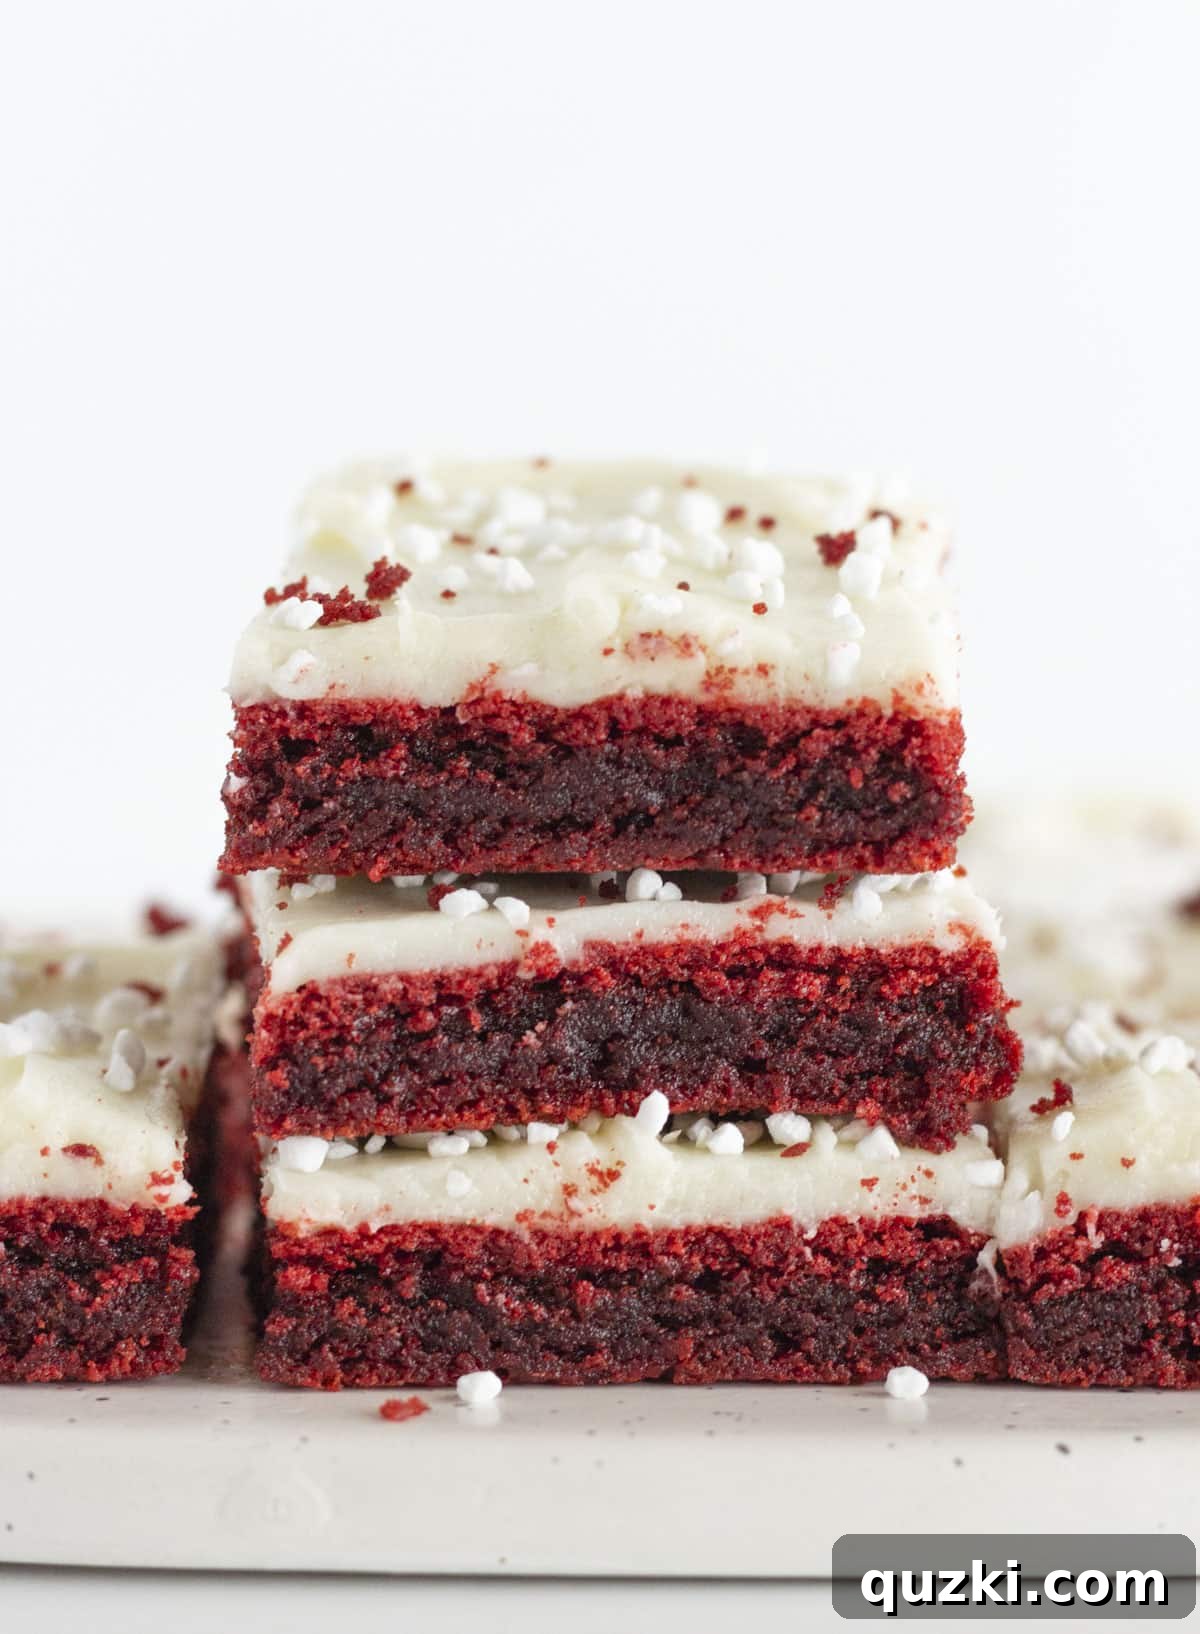
Table of Contents
- Why You’ll Adore These Red Velvet Brownies
- The Magic Behind the Mix: Essential Ingredients
- Elevate Your Brownies: Additions and Variations
- Step-by-Step Guide: How to Make Red Velvet Brownies with a Cake Mix
- Expert Baking Tips for Perfect Red Velvet Brownies
- Storage and Freezing Tips
- Frequently Asked Questions About Red Velvet Brownies
- Super Easy Red Velvet Brownies with a Cake Mix Recipe
- More Irresistible Brownie Recipes to Try
Why You’ll Adore These Red Velvet Brownies
Prepare to be captivated by this incredible red velvet brownie recipe! Imagine sinking your teeth into a rich, decadent brownie that boasts a gorgeously moist, fudgy texture and a captivating ruby-red hue. These brownies aren’t just delicious; they’re a visual spectacle, making them the ultimate showstopper for any festive occasion. Whether it’s the romantic allure of Valentine’s Day or the festive cheer of Christmas, these delightful squares are guaranteed to leave a lasting impression.
What sets this red velvet brownie recipe apart and makes it an absolute winner in the dessert world? It’s remarkably simple to prepare, requiring minimal effort and common pantry staples. Forget the complexity of scratch baking; with a convenient red velvet cake mix as your base, along with a touch of oil, eggs, and a hint of vanilla, you’ll have a batch of these glorious brownies ready for the oven in no time. This ease of preparation makes it a go-to recipe for busy weeknights or when you need a quick, impressive dessert.
The outcome is nothing short of spectacular: a rich, tender brownie with satisfyingly chewy edges and an irresistibly gooey center. But the true crowning glory of these red velvet brownies is the generous layer of tangy, silky-smooth cream cheese frosting. This classic pairing perfectly complements the subtle chocolate notes and sweetness of the brownie, elevating each bite to a new realm of deliciousness. Whether you’re indulging in a personal treat or sharing the love at a special gathering, these easy red velvet brownies are a surefire way to gratify your sweet tooth and have everyone clamoring for more. They truly embody the perfect balance of convenience and gourmet taste.
The Magic Behind the Mix: Essential Ingredients
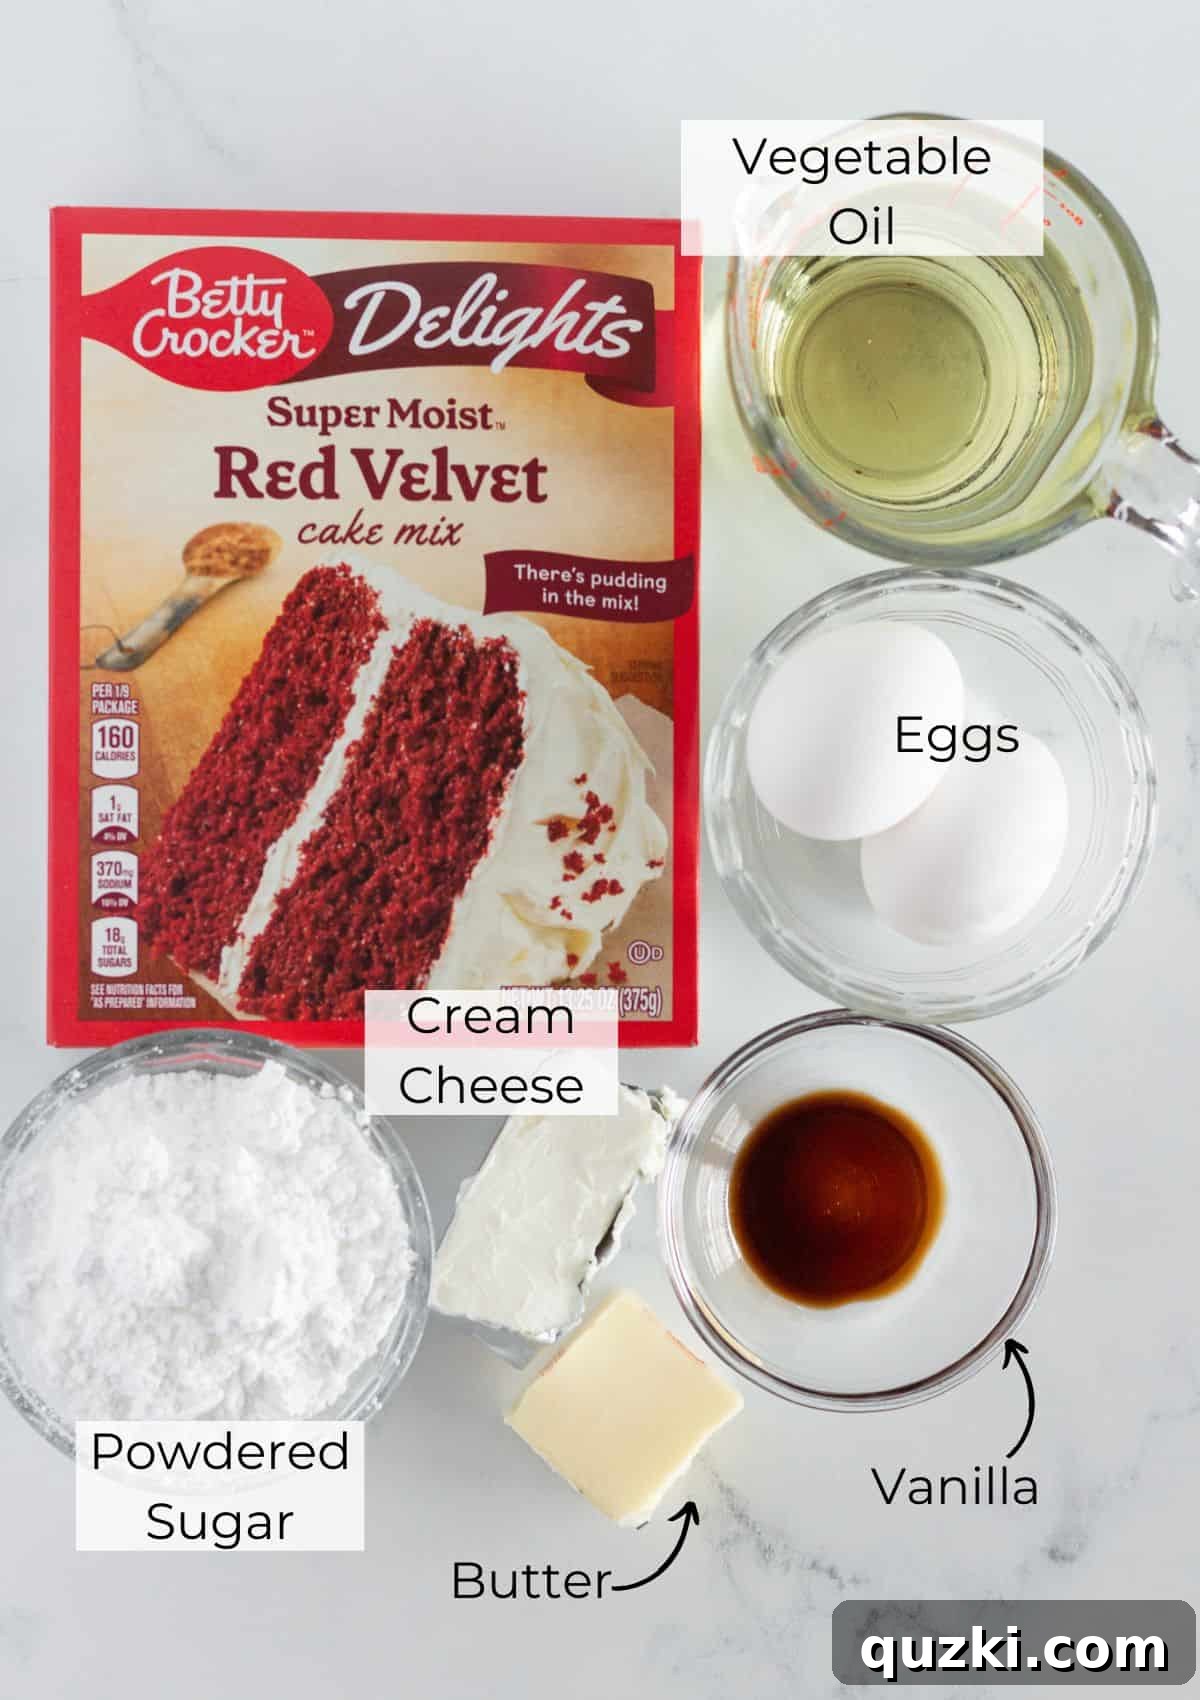
Crafting these delectable Red Velvet Brownies is surprisingly simple, thanks to a thoughtfully curated list of ingredients that work harmoniously to create their signature taste and texture. Each component plays a vital role in achieving that perfect fudgy brownie and luscious frosting.
Brownie Base Ingredients:
- Red Velvet Cake Mix (13.25 ounces): This is the star ingredient that makes this recipe incredibly easy and ensures a consistent, beautiful red color and classic red velvet flavor without the hassle of measuring multiple dry ingredients or adding red food coloring. It delivers that signature mild cocoa flavor with a hint of vanilla and tang, crucial for authentic red velvet taste. Using a cake mix also guarantees a reliably moist and tender crumb for your brownies.
- Vegetable Oil (¾ cup): Essential for achieving the wonderfully moist and fudgy texture that defines a great brownie. Vegetable oil contributes a neutral flavor, allowing the red velvet notes to shine, while keeping the brownies incredibly tender and rich. It helps prevent dryness, ensuring every bite is soft and decadent.
- Large Eggs (2): Eggs are critical for providing structure to the brownies, binding the ingredients together, and contributing to that desirable chewy texture. They also add richness and moisture, helping the brownies set properly while retaining their fudgy interior.
- Vanilla Extract (1 Tablespoon): A generous splash of vanilla extract enhances the overall flavor profile of the brownies. It deepens the mild chocolate and subtle tang of the red velvet, adding a comforting warmth and aromatic sweetness that rounds out the taste perfectly.
Creamy Cream Cheese Frosting Ingredients:
- Cream Cheese (2 ounces, softened): The cornerstone of the iconic cream cheese frosting. When softened to room temperature, it whips up into an incredibly creamy, smooth, and tangy frosting. The slight tartness of the cream cheese perfectly balances the sweetness of the brownies, creating a delightful contrast that is characteristic of red velvet desserts.
- Butter (2 Tablespoons, softened): Working in tandem with the cream cheese, softened butter adds richness, body, and a luxurious smoothness to the frosting. It helps to create a spreadable consistency and contributes to the overall melt-in-your-mouth texture.
- Powdered Sugar (¾ cup): Also known as confectioners’ sugar, this finely milled sugar dissolves beautifully into the cream cheese and butter, resulting in a smooth, lump-free frosting. It provides the necessary sweetness and helps to thicken the frosting to a spreadable consistency.
- Vanilla Extract (½ teaspoon): Just a hint of vanilla in the frosting enhances its sweetness and complements the cream cheese flavor. It adds another layer of aromatic warmth, making the frosting even more irresistible.
This simple combination of ingredients, particularly starting with a red velvet cake mix, makes preparing these fudgy red velvet brownies a delightful and stress-free baking experience. For precise measurements and step-by-step instructions, please refer to the full recipe card below.
Elevate Your Brownies: Additions and Variations
While these Red Velvet Brownies are spectacular on their own, a few simple additions or creative variations can transform them into an even more personalized and festive treat. Get ready to unleash your inner baker and explore these delicious twists:
- Amplify with Chocolate Chips: Red velvet already boasts a subtle chocolate flavor, but for true chocolate lovers, extra chocolate is always a good idea!
- Mini Chocolate Chips: Gently fold mini semi-sweet, milk, or dark chocolate chips into the brownie batter before baking. They melt into pockets of gooey goodness, adding an extra layer of chocolatey richness.
- White Chocolate Chips: For a delightful contrast in color and flavor, white chocolate chips are a fantastic choice. Their creamy sweetness pairs beautifully with the mild tang of red velvet. You could even sprinkle them on top of the frosting for a visually appealing finish.
- Chocolate Chunks: For larger, more intense bursts of chocolate, consider using chopped chocolate chunks.
- Crunchy Nutty Goodness: Add a textural dimension with your favorite nuts.
- Pecans or Walnuts: Chopped pecans or walnuts are classic additions to brownies, offering a lovely crunch and earthy flavor that complements the red velvet. Stir them directly into the brownie batter for an integrated crunch.
- Toasted Nuts: For an even deeper, richer nutty flavor, lightly toast your pecans or walnuts in a dry pan for a few minutes before adding them to the batter.
- On the Frosting: Sprinkle chopped nuts over the creamy cream cheese frosting for an attractive garnish and added texture.
- Festive Peppermint Twist for the Holidays: If you’re baking these red velvet brownies for the Christmas season, infuse them with the refreshing taste of peppermint.
- Peppermint Extract: Add a few drops of peppermint extract to the brownie batter along with the vanilla. Start with a small amount (e.g., ¼ teaspoon) and add more to taste, as peppermint can be quite potent.
- Crushed Candy Canes: After frosting, sprinkle crushed candy canes or peppermint candies generously over the top. This adds a beautiful red and white visual, a delightful crunch, and an invigorating minty kick.
- Espresso for Depth: A teaspoon of instant espresso powder or finely ground coffee can enhance the chocolate notes in the red velvet, making them taste richer without adding a coffee flavor. Add it directly to the dry cake mix.
- Citrus Zest Brightness: For a subtle zesty lift, especially if serving in warmer months, finely grate a teaspoon of orange or lemon zest into the brownie batter. It provides a fresh, aromatic counterpoint.
- Coconut Flakes: For a tropical twist, fold in some shredded coconut into the batter. Toasted coconut flakes on top of the frosting would also be delicious.
- Swirls of Joy: Before baking, dollop a spoonful of cream cheese frosting (or even melted white chocolate) onto the brownie batter and swirl it gently with a knife for a beautiful marbled effect. This will slightly change the frosting texture on top, but it’s a fun variation.
- Sprinkle Wonderland: For an extra festive touch, especially for birthdays or specific holidays, shower the top of the cream cheese frosting with colorful sprinkles. Red, white, and pink for Valentine’s Day, or red and green for Christmas!
Experiment with these suggestions to make these easy red velvet brownies uniquely yours. Remember, baking is an art, and personal touches make it even more enjoyable!
Step-by-Step Guide: How to Make Red Velvet Brownies with a Cake Mix
Creating these delightful fudgy red velvet brownies is a straightforward process, thanks to the cake mix shortcut. Follow these detailed steps to ensure perfectly baked brownies crowned with luscious cream cheese frosting.
Part 1: Preparing the Red Velvet Brownies
- Preheat and Prepare Your Pan: Begin by preheating your oven to 350°F (175°C). This ensures a consistent baking temperature from the moment your brownies enter the oven. Next, prepare a 9×9 inch square baking pan. For easy removal of your brownies and clean slices, line the pan with parchment paper, leaving an overhang on two sides to create “handles.” Lightly spray the parchment paper and any exposed pan sides with nonstick cooking spray. This crucial step prevents sticking and simplifies the post-baking cleanup.
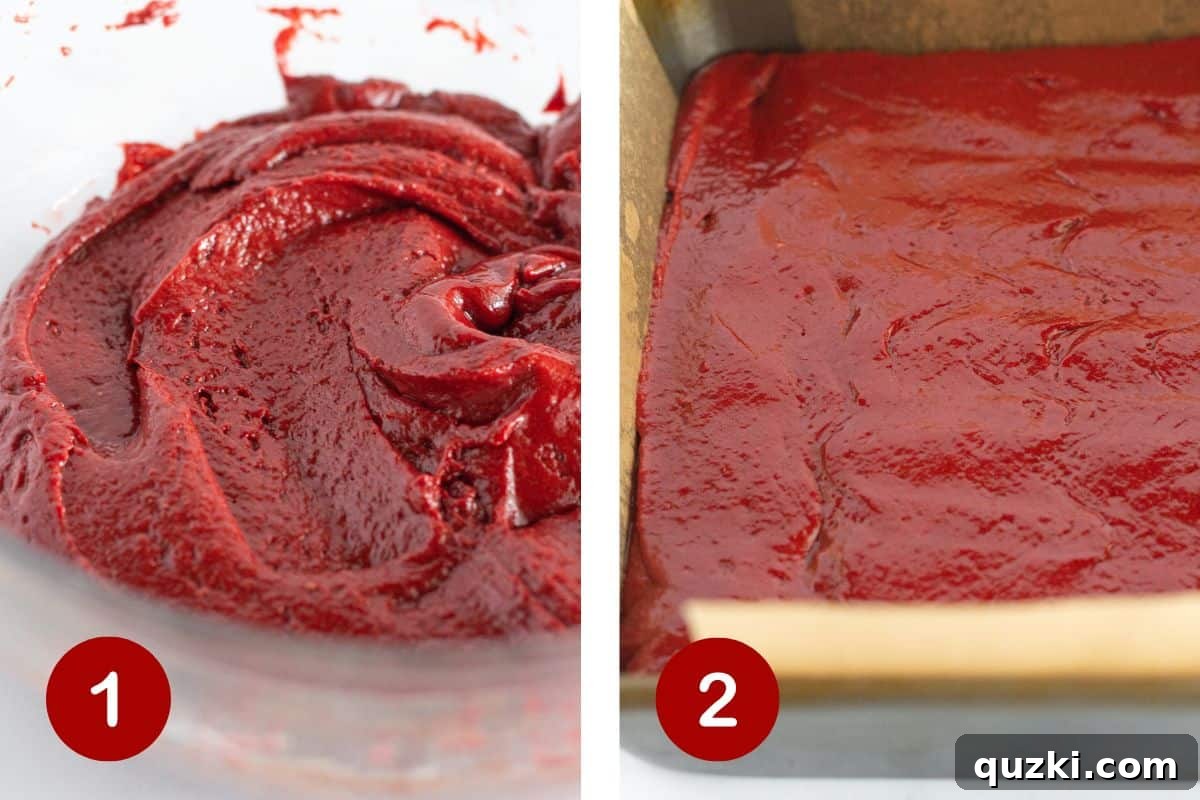
- Combine Brownie Ingredients: In a large mixing bowl, combine the entire box of red velvet cake mix, ¾ cup of vegetable oil, 2 large eggs, and 1 Tablespoon of vanilla extract. You can mix these ingredients either by hand with a sturdy spatula or spoon, or you can use an electric mixer on low speed. Mix until all ingredients are just combined and no dry streaks of cake mix remain. Be careful not to overmix, as this can develop the gluten in the flour and lead to a tougher brownie texture. A few lumps are perfectly fine.
- Pour and Spread the Batter: Carefully pour the thick red velvet brownie batter into your prepared 9×9 inch baking pan. Use a spatula to spread the batter evenly across the bottom of the pan, ensuring it reaches all corners for uniform baking.
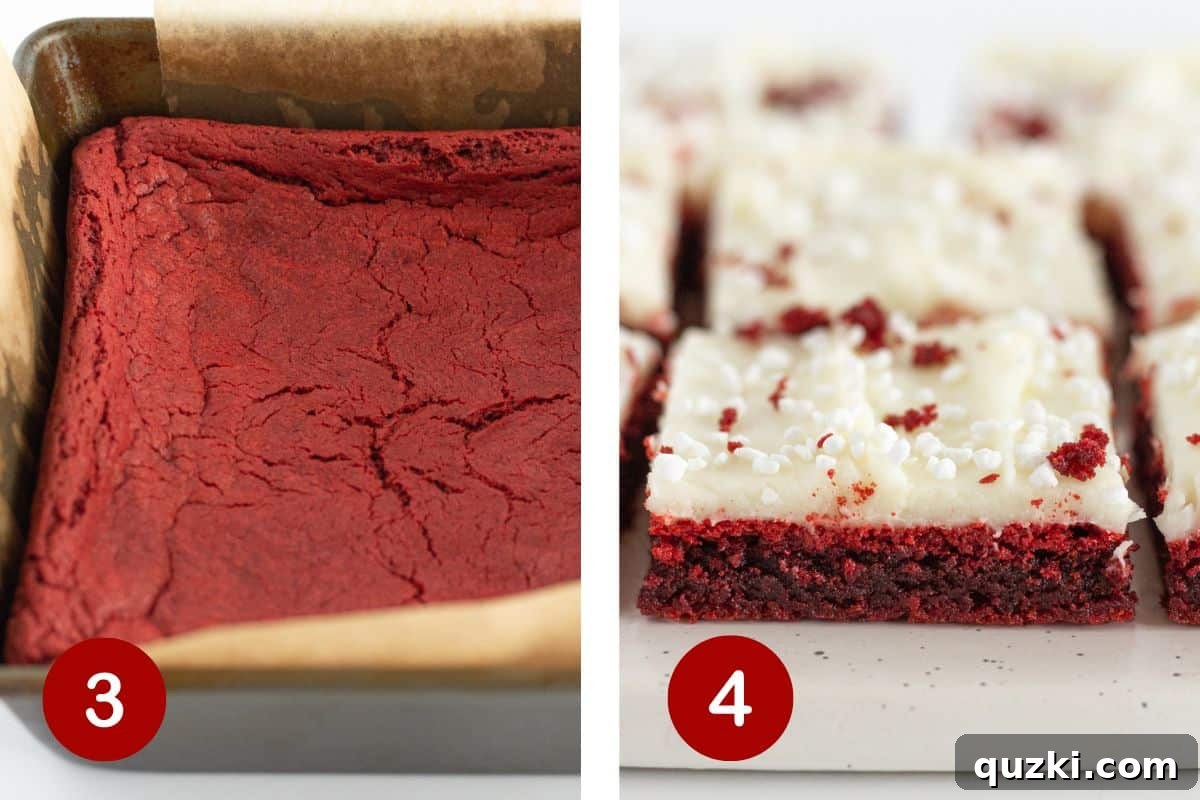
- Bake to Perfection: Place the pan in the preheated oven and bake for 20-25 minutes. The key to achieving that coveted fudgy texture is to avoid overbaking. You’ll know they’re done when the edges appear set and firm, but the center still has a slight jiggle when you gently shake the pan. A toothpick inserted into the center should come out with moist crumbs, not wet batter. Remove the brownies from the oven and immediately transfer the pan to a wire cooling rack. Allow them to cool completely in the pan for at least an hour, or preferably longer. This cooling time is essential for the brownies to set and become truly fudgy.
Part 2: Crafting the Cream Cheese Frosting and Finishing
- Prepare the Cream Cheese Frosting: Once your brownies are fully cooled, it’s time to make the glorious cream cheese frosting. In a medium mixing bowl, combine the 2 ounces of softened cream cheese and 2 Tablespoons of softened butter. Using an electric mixer (or a whisk and some elbow grease), beat these two ingredients together until the mixture is completely smooth and creamy. Scrape down the sides of the bowl as needed.
- Add Powdered Sugar and Vanilla: Gradually add the ¾ cup of powdered sugar to the cream cheese mixture, mixing on low speed until it’s fully incorporated. The frosting may initially appear dry and crumbly, but don’t worry! Continue mixing, and it will magically come together into a wonderfully creamy and smooth frosting. Finally, add the ½ teaspoon of vanilla extract and mix one more time until it’s thoroughly combined and aromatic.
- Frost, Chill, and Serve: Spread the luscious cream cheese frosting evenly over the completely cooled red velvet brownies. For best results and clean cuts, refrigerate the frosted brownies for at least one to two hours. This chilling time allows the frosting to firm up and the brownies to fully set. Once chilled, use the parchment paper overhang to lift the entire slab of brownies out of the pan. Place them on a cutting board and slice into 12 even squares using a sharp knife. For extra clean cuts, wipe your knife with a warm, damp cloth between each slice. Serve immediately and savor every bite.
Expert Baking Tips for Perfect Red Velvet Brownies
Achieving bakery-quality red velvet brownies at home is entirely possible with a few insider tips. These expert suggestions will help you produce fudgy, moist brownies with a beautifully smooth frosting every single time.
- Always Line Your Pan with Parchment Paper: This is a game-changer for hassle-free removal. Line your 9×9 inch baking pan with parchment paper, leaving an overhang on two opposite sides. This creates convenient “handles” that allow you to lift the entire slab of cooled brownies effortlessly out of the pan. A light spray of nonstick cooking spray on the parchment ensures absolutely no sticking, making clean cuts and serving incredibly simple.
- Do NOT Overbake for Ultimate Fudginess: This is arguably the most critical tip for perfect brownies. Overbaking leads to dry, cakey brownies, losing that signature fudgy texture we all crave. Pull the brownies from the oven when the edges are set and firm, but the very center still has a slight, barely perceptible jiggle. A toothpick inserted into the center should come out with moist crumbs attached, not wet batter, and certainly not completely clean. The brownies will continue to set as they cool on the wire rack, resulting in that perfectly fudgy, irresistible middle.
- Ensure Room Temperature Cream Cheese and Butter for Frosting: For a silky-smooth, lump-free cream cheese frosting, it is absolutely essential that both your cream cheese and butter are at proper room temperature. This means soft enough to easily indent with a finger, but not melted. If they are too cold, they won’t emulsify properly, leading to a lumpy, grainy frosting. If they are too warm, the frosting might be too runny. Plan ahead and take them out of the refrigerator about 30-60 minutes before you start making the frosting.
- Don’t Rush the Cooling Process: It’s tempting to frost warm brownies, but resist the urge! Spreading cream cheese frosting on warm brownies will cause the frosting to melt and slide right off, creating a messy situation. Allow the brownies to cool completely – ideally for at least one hour, or even longer – before applying the frosting. Patience here is key to a beautiful, stable frosted brownie.
- Use a Warm Knife for Clean Cuts: Once your frosted brownies have chilled sufficiently (allowing the frosting to firm up), use a sharp knife for cutting. For exceptionally clean, neat squares, dip your knife in hot water and wipe it clean between each cut. This slight warmth helps glide through both the frosting and the dense brownie, preventing dragging and crumbling.
- Sift Your Powdered Sugar for Smooth Frosting: To guarantee an ultra-smooth, velvety cream cheese frosting free of any tiny lumps, sift your powdered sugar before adding it to the cream cheese and butter mixture. This extra step takes only a moment but makes a noticeable difference in the final texture of your frosting.
- Consider a Store-Bought Frosting for Ultra-Convenience: If time is of the essence or you’re looking for an even quicker shortcut, don’t hesitate to use a good quality store-bought cream cheese frosting. Many brands offer delicious options that can save you precious minutes in the kitchen without sacrificing flavor. Just ensure it’s soft enough for easy spreading.
- Don’t Overmix the Brownie Batter: While the cake mix simplifies things, vigorous overmixing can still develop too much gluten, leading to a denser, tougher brownie. Mix only until the ingredients are just combined and no dry pockets of flour remain.
- Chill Frosted Brownies Before Serving: Chilling the frosted brownies for at least an hour (or two) in the refrigerator allows the cream cheese frosting to set perfectly and makes the brownies easier to slice into clean, firm squares. This also enhances the fudgy texture of the brownies.
By following these expert tips, you’ll consistently bake red velvet brownies that are moist, fudgy, and absolutely delightful!
Storage and Freezing Tips
Proper storage is essential to keep your delicious Red Velvet Brownies fresh, moist, and flavorful. Whether you’re planning to enjoy them over a few days or save them for a future treat, these guidelines will help.
Storing Fresh Red Velvet Brownies
Because these fudgy red velvet brownies are topped with a creamy, dairy-based cream cheese frosting, refrigeration is crucial for optimal freshness and food safety.
- Refrigerator: Once cooled and frosted, store the brownies in an airtight container. If you don’t have an airtight container, you can wrap the entire slab or individual brownies tightly in plastic wrap, then place them in a resealable bag. This prevents them from drying out and absorbing other odors from the fridge. Stored correctly, they will remain wonderfully moist and delicious for about 4 days.
- Serving Tip: For the best texture and flavor, allow refrigerated brownies to sit at room temperature for about 15-20 minutes before serving. This softens the frosting and makes the brownies extra tender.
Freezing Red Velvet Brownies
These red velvet cake mix brownies freeze exceptionally well, allowing you to enjoy them long after they’re baked. This is perfect for meal prep, holiday baking in advance, or simply having a decadent treat on hand.
- Freezing with Frosting: If freezing frosted brownies, first place them uncovered on a baking sheet in the freezer for about an hour, or until the frosting is firm. This “flash freezing” prevents the frosting from sticking to wrapping materials. Once firm, wrap individual brownies tightly in plastic wrap, then again in aluminum foil. Place the wrapped brownies in a freezer-safe bag or airtight container.
- Freezing Unfrosted Brownies: For best results when freezing, consider freezing the brownie base unfrosted. Allow the baked brownies to cool completely. Wrap the entire unfrosted slab tightly in plastic wrap, then in a layer of aluminum foil. Place in a freezer-safe bag. This method helps preserve the brownie’s texture and allows you to prepare fresh frosting later.
- Duration: Properly frozen, these red velvet brownies (with or without frosting) will maintain their quality for up to 3 months. Beyond this, they are generally still safe to eat but may start to lose some of their optimal texture and flavor.
- Thawing: To thaw, simply transfer the wrapped brownies from the freezer to the refrigerator overnight. If you’re short on time, you can thaw them at room temperature for a few hours. Once thawed, if they were unfrosted, prepare and add your fresh cream cheese frosting.
With these storage and freezing tips, you can enjoy these delightful red velvet brownies whenever the craving strikes!
Frequently Asked Questions About Red Velvet Brownies
Got questions about baking these easy red velvet brownies? Here are answers to some common inquiries that will help ensure your baking success!
Can I skip the cream cheese frosting?
Absolutely! While the cream cheese frosting adds a significant layer of tangy sweetness and creaminess that is iconic with red velvet, the brownies are undeniably delicious on their own. If you prefer a simpler, less sweet brownie, or if you’re avoiding dairy, feel free to enjoy them plain. They still offer a wonderful fudgy texture and vibrant red velvet flavor. However, for the full, authentic red velvet experience, the frosting is highly recommended!
What if I don’t have a 9×9 inch pan?
No problem! You can definitely use a similar-sized baking dish. Here are a few common alternatives and considerations:
- 8×8 inch pan: This will result in slightly thicker brownies, so you might need to increase the baking time by a few minutes (e.g., 25-30 minutes). Keep an eye on them and use the “jiggle” test for doneness.
- 9×13 inch pan: This larger pan will produce thinner brownies, so your baking time will likely be shorter (e.g., 18-22 minutes). Again, monitor closely for doneness to avoid overbaking.
- Round pan: A 9-inch round cake pan could also work, but note that the edges will be softer due to the rounded corners.
Regardless of the pan size, always line it with parchment paper for easy removal and remember to adjust your baking time accordingly, watching for those set edges and a slightly jiggly center.
Can I make these chewy brownies without an electric mixer?
Yes, absolutely! You can easily mix the red velvet brownie batter by hand. While an electric mixer makes the process quicker and less strenuous, a sturdy whisk or wooden spoon and a bit of “elbow grease” will do the trick perfectly. Just ensure you mix until all ingredients are well combined and no dry pockets of cake mix remain. The frosting, however, will be much smoother and creamier with an electric mixer, but a strong whisk can also achieve a good result if you beat vigorously.
Can I use store-bought cream cheese frosting?
For sure! Using a good quality store-bought cream cheese frosting is an excellent time-saving option and a perfect shortcut, especially if you’re short on time or prefer not to make frosting from scratch. This doesn’t detract from the deliciousness of the brownies at all. Just make sure the frosting is soft enough to spread easily. You might want to gently warm it slightly in the microwave for a few seconds (stirring frequently) if it’s too stiff.
Why are my brownies dry?
The most common reason for dry brownies is overbaking. Brownies continue to cook slightly after they are removed from the oven, so pulling them out when the center still has a slight jiggle is key. Another reason could be incorrect measurements, especially if adding extra flour or reducing liquid. Ensure your oven temperature is accurate (an oven thermometer can help!).
Can I use a different flavor cake mix?
While this recipe specifically highlights red velvet for its distinct flavor and color, you can certainly experiment with other cake mix flavors! A chocolate fudge cake mix would yield intensely rich chocolate brownies, a strawberry cake mix could create a lovely pink brownie, or even a yellow cake mix for a butter-rich classic. Just be aware the flavor profile and color will change accordingly, and you might want to adjust your frosting to match.
Super Easy Red Velvet Brownies with a Cake Mix
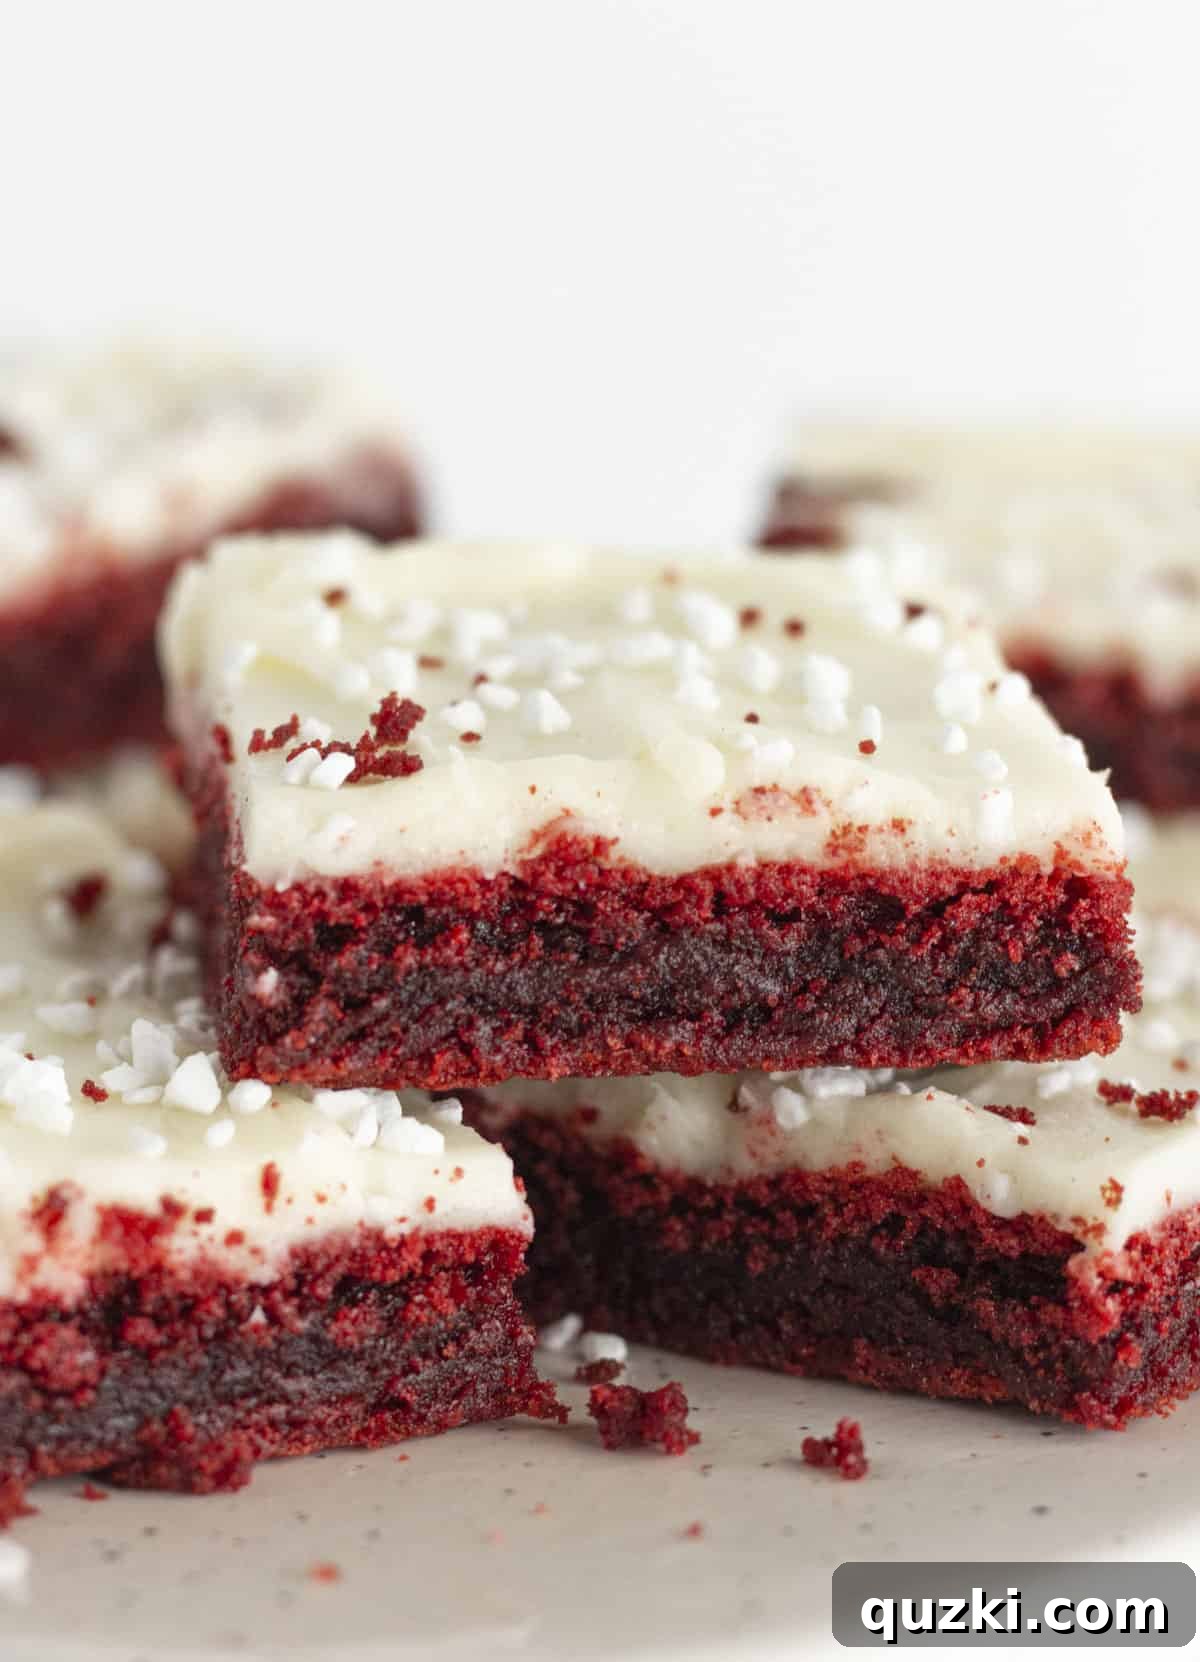
Transform a simple red velvet cake mix into incredibly fudgy brownies, then top them with a perfectly tangy cream cheese frosting for an unforgettable dessert. These easy red velvet brownies are perfect for any occasion!
Super Easy Red Velvet Brownies with a Cake Mix
June Albertson-Dick
Transform a red velvet cake mix into fudgy brownies that are covered in a tangy cream cheese frosting.
15 mins
25 mins
1 hr
1 hr 38 mins
12 brownies
Rate Recipe
Print Recipe
Ingredients
Brownie
- 1 box red velvet cake mix, {13.25 ounces}
- ¾ cup vegetable oil
- 2 large eggs
- 1 Tablespoon vanilla extract
Cream Cheese Frosting
- 2 ounces cream cheese, {softened}
- 2 Tablespoons butter, {softened}
- ¾ cup powdered sugar
- ½ teaspoon vanilla extract
Instructions
Brownie
- Preheat the oven to 350°F (175°C). Line a 9×9 inch baking pan with parchment paper and spray with nonstick cooking spray.
- In a large bowl, combine the red velvet cake mix, oil, eggs, and vanilla extract. This can be done either by hand with a sturdy spoon or spatula, or with an electric mixer on low speed. Mix until just combined and no dry streaks remain.
- Pour the batter into the prepared 9×9 inch pan and spread it out into an even layer. Bake for 20-25 minutes, or until the sides are set and the middle still has a slight jiggle. To get the perfect fudgy texture, be sure not to overbake. Remove from the oven and let them cool completely on a wire rack for at least an hour.
Cream Cheese Frosting
- Once your brownies are completely cooled, combine the softened cream cheese and softened butter in a medium bowl. Mix using an electric mixer until smooth and creamy. Gradually add the powdered sugar and continue to mix until you have a smooth and creamy frosting. (Note: The frosting might look dry at first, but keep mixing, and it will come together.) Finally, add the vanilla extract and mix one more time until completely combined.
- Spread the cream cheese frosting onto the cooled brownies in an even layer. Refrigerate the frosted brownies for an hour or two to allow the frosting to set. Then, lift the brownies out of the pan using the parchment paper handles and cut them into 12 even squares. Serve and enjoy! Store any leftover brownies in an airtight container in the refrigerator for up to 4 days.
Notes
- Line the pan with parchment paper and spray lightly with nonstick cooking spray. This combination makes removing the brownies from the pan super simple and ensures clean cuts.
- For the fudgiest brownies, do not overbake. Remove them from the oven when the edges are set and the center still has a slight jiggle. They will continue to set as they cool.
- Ensure that your cream cheese and butter are at room temperature before making the frosting. This prevents lumps and ensures a smooth, creamy texture.
- For a convenient shortcut, you can use a good quality store-bought cream cheese frosting.
- Allow the brownies to cool completely before applying frosting and cutting into squares. Warm brownies will cause the frosting to melt and make cutting difficult.
- Store frosted red velvet brownies in an airtight container in the refrigerator. They will remain fresh for about 4 days.
- These brownies freeze beautifully! Wrap individual squares tightly in plastic wrap and then foil, and store in a freezer-safe bag for up to 3 months. Thaw in the refrigerator or at room temperature.
Nutrition
Calories: 352kcal,
Carbohydrates: 34g,
Protein: 3g,
Fat: 24g,
Saturated Fat: 6g,
Polyunsaturated Fat: 10g,
Monounsaturated Fat: 7g,
Trans Fat: 0.2g,
Cholesterol: 41mg,
Sodium: 339mg,
Potassium: 139mg,
Fiber: 1g,
Sugar: 21g,
Vitamin A: 168IU,
Calcium: 64mg,
Iron: 2mg
Nutrition information is automatically calculated, so should only be used as an approximation.
More Irresistible Brownie Recipes to Try
If you’ve fallen in love with the ease and deliciousness of these red velvet brownies, you’re in for a treat! There’s a whole world of brownie variations waiting to be discovered. Expand your baking repertoire with these other amazing brownie recipes that are sure to satisfy any chocolate craving and impress your friends and family.
Brownies
Super Easy Fudgy Birthday Brownies
Brownies
Easy Fudgy Condensed Milk Brownies
Desserts
Easy Cookie Dough Brownies
Brownies
Easy Nutter Butter Brownies Recipe
Did you try this recipe?
Leave a ⭐️ review below and tag @practicallyhomemade on Pinterest!