
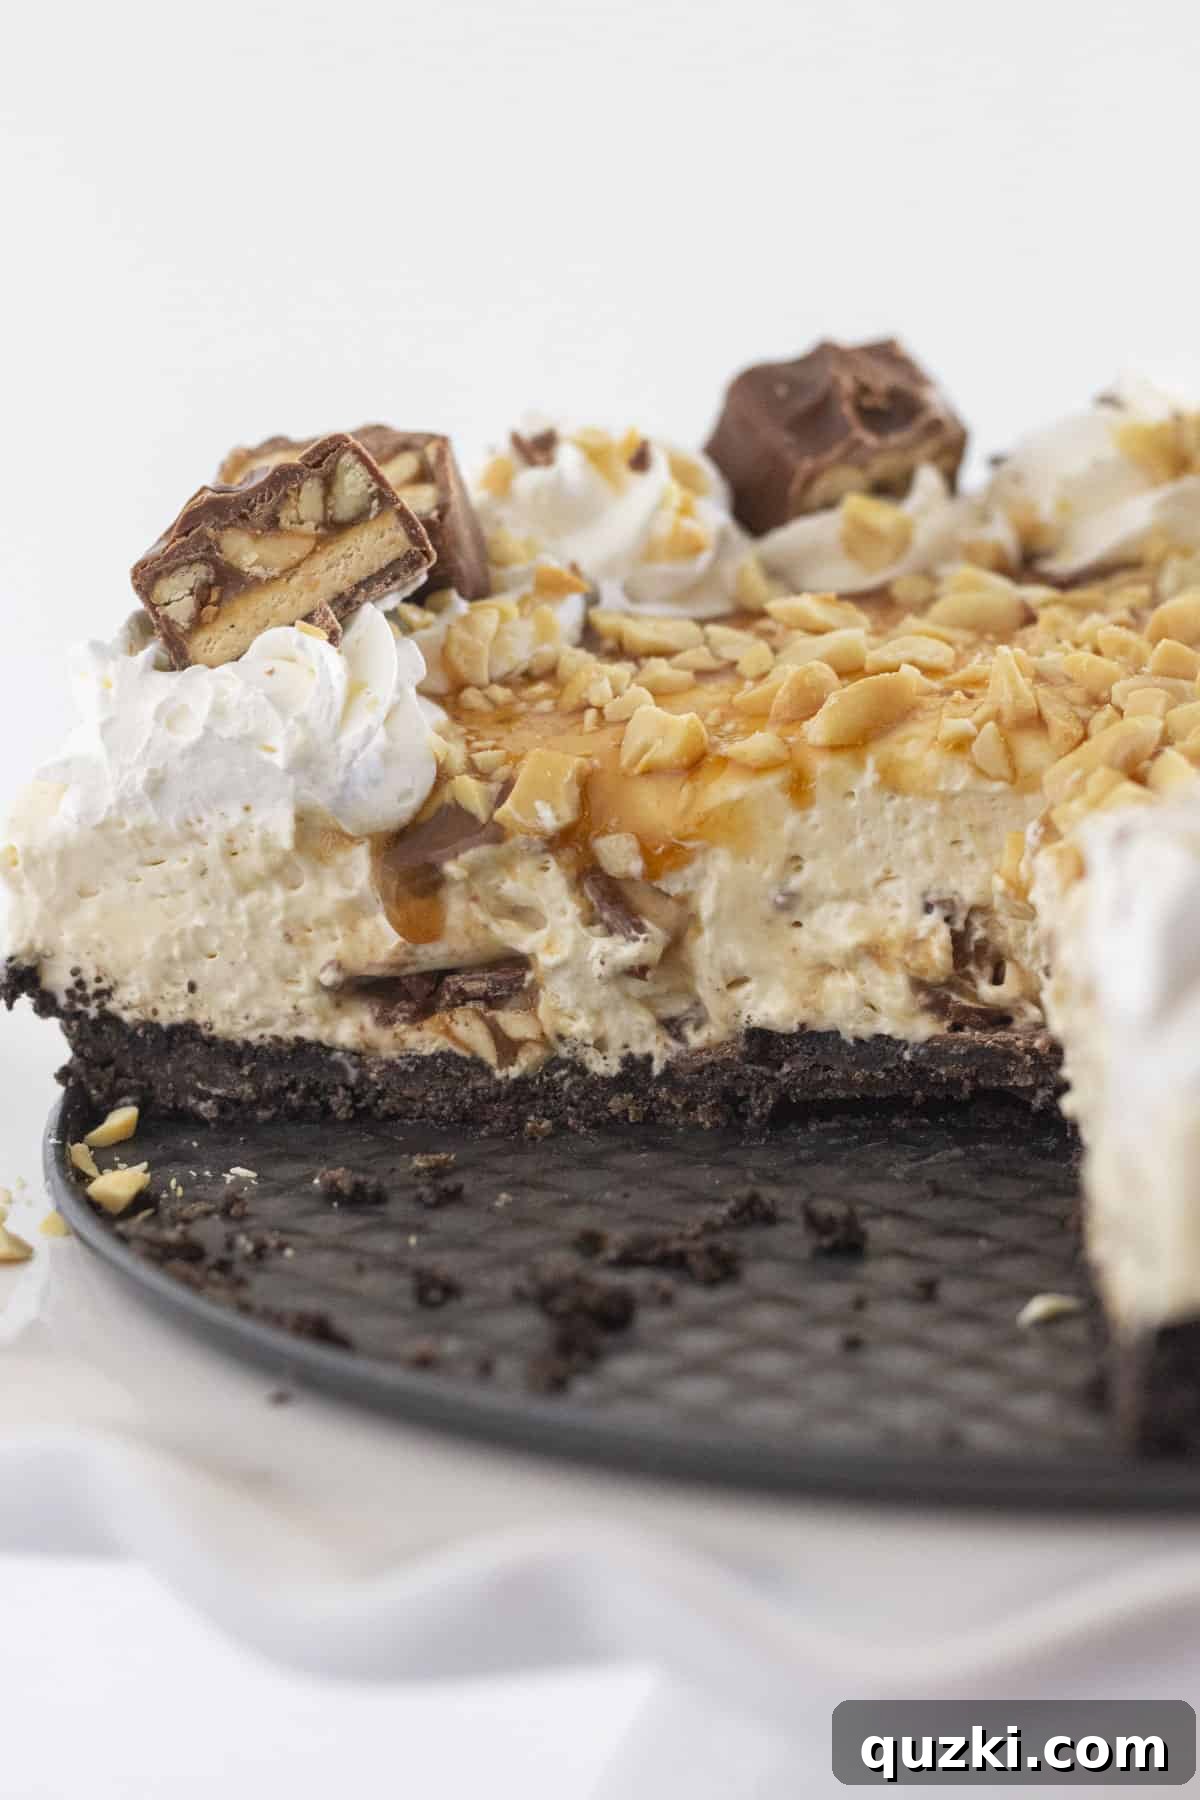
Do you find yourself torn between the delightful chewiness of a classic Snickers bar and the rich, velvety smoothness of a gourmet cheesecake? Imagine a world where you don’t have to choose! This extraordinary Snickers No-Bake Cheesecake seamlessly merges these two beloved dessert titans into one irresistible, harmonious creation. It’s a true celebration of flavor and texture, delivering that iconic combination of chocolate, caramel, nougat, and peanuts, all suspended within a creamy, luscious cheesecake filling atop a crisp, chocolatey Oreo crust.
Beyond its incredible taste, this recipe boasts a magical convenience: it requires absolutely no oven time! This makes it an ideal choice for sweltering summer days when you want to avoid heating your kitchen, or for those busy moments when you need a show-stopping dessert without the fuss and long baking hours. Whether you’re a seasoned baker or a complete novice, this easy-to-follow guide will help you create a dessert that looks impressive, tastes divine, and will undoubtedly become a staple for every sweet craving and special occasion.
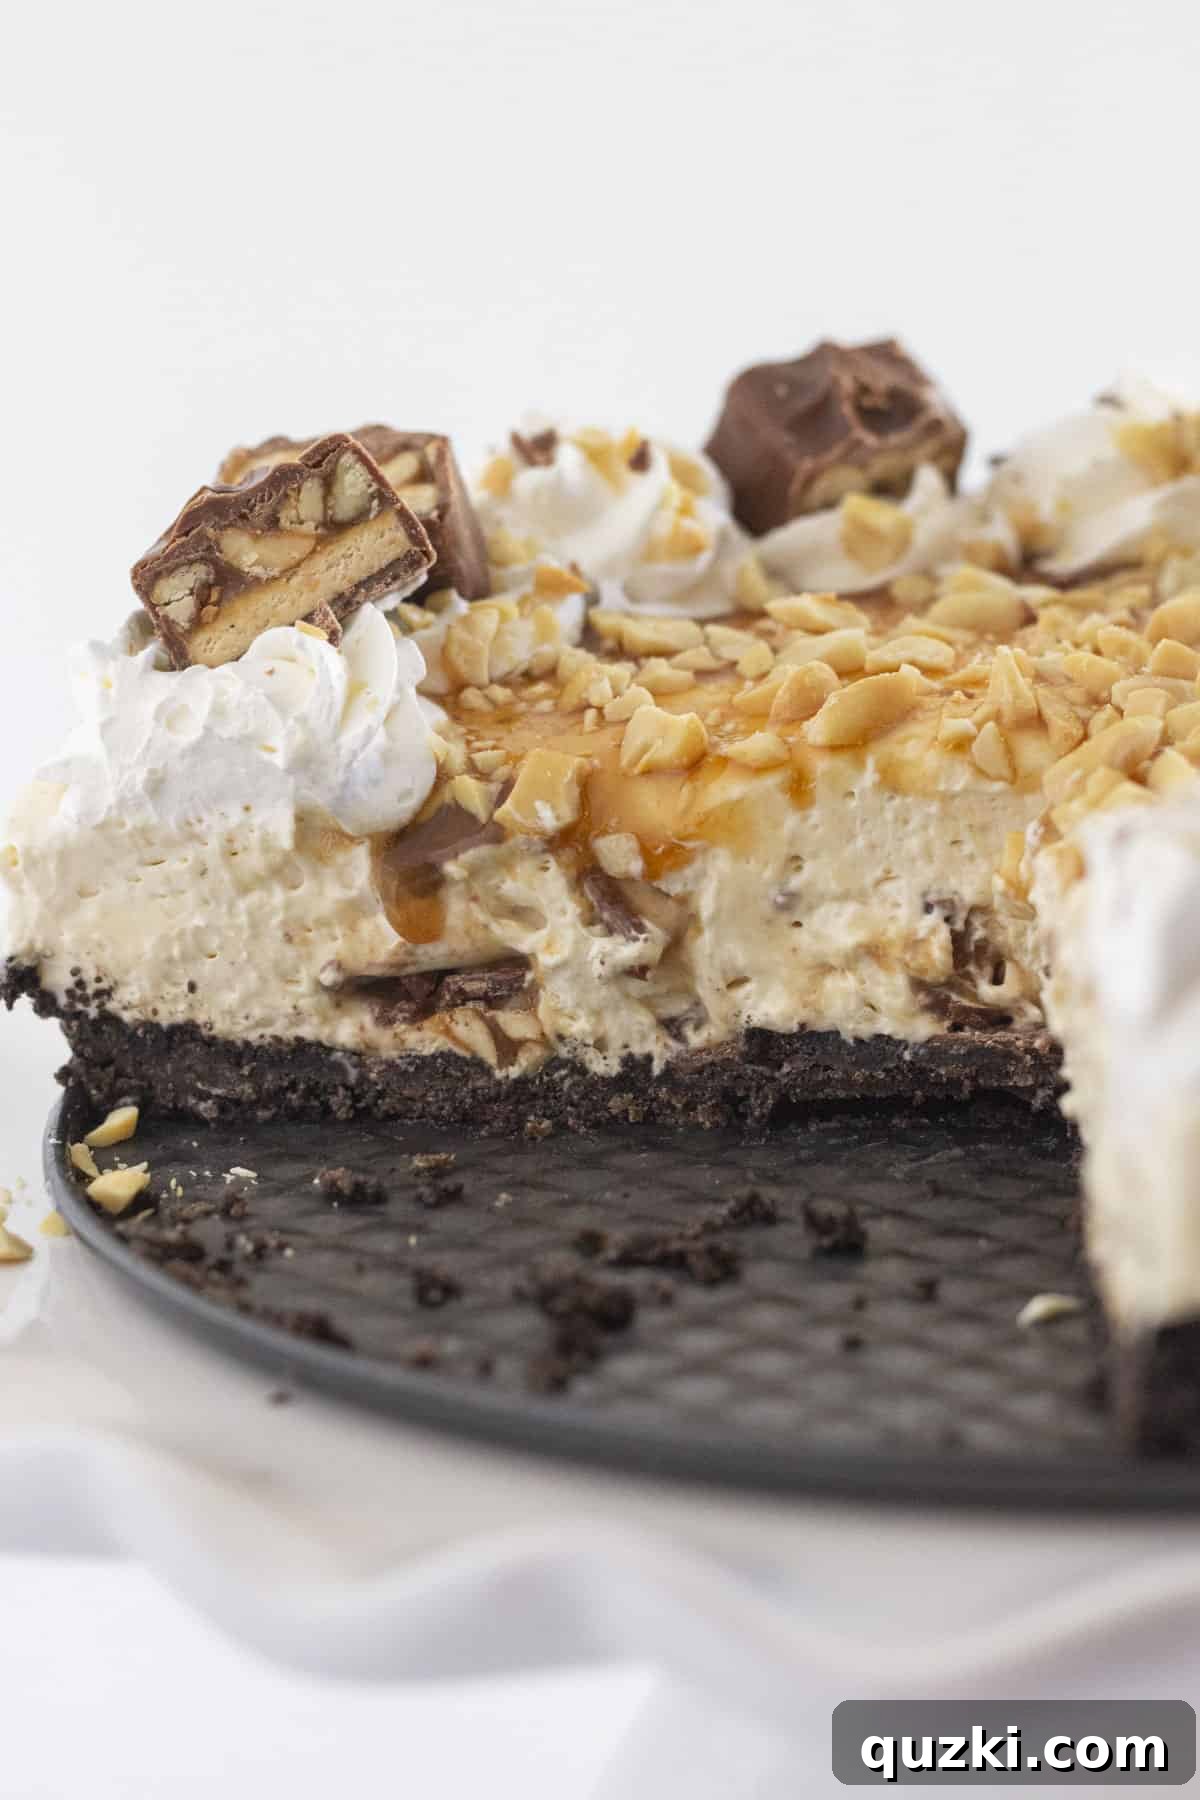
Table of Contents
- Why You Will Adore This Snickers Cheesecake
- Essential Ingredients for Your Snickers Cheesecake
- How to Craft Your No-Bake Snickers Cheesecake
- Expert Tips for No-Bake Cheesecake Perfection
- Storage and Freezing Guidelines
- Recipe FAQs: All Your Questions Answered
- Crave More No-Bake Desserts? Explore These Cheesecake Recipes…
- The Ultimate No-Bake Snickers Cheesecake Recipe
For many years, incorporating Snickers bars into my dessert repertoire has been a cherished tradition, largely influenced by my husband’s unwavering adoration for this iconic candy. What began as a personal indulgence quickly evolved into a highly requested favorite amongst our family and friends, securing its status as a total crowd-pleaser at every gathering. This Snickers No-Bake Cheesecake isn’t just a dessert; it’s a testament to the magic that happens when classic flavors are reimagined. Each bite is a multi-layered sensory experience: a firm, chocolatey Oreo crust gives way to a luxuriously creamy cheesecake filling, generously studded with chunks of Snickers, all intertwined with ribbons of gooey caramel and the delightful crunch of roasted peanuts. It’s an explosion of sweet, salty, and utterly decadent goodness that promises to leave a lasting impression and satisfy even the most discerning sweet tooth.
Why You Will Adore This Snickers Cheesecake
This Snickers No-Bake Cheesecake transcends the ordinary dessert experience, offering a multitude of reasons why it’s destined to become a beloved addition to your culinary repertoire. Here’s why you’ll fall head over heels for this incredible treat:
- Effortlessly Delicious and Simple: Forget the stress of precise oven temperatures and lengthy baking times. This no-bake marvel comes together with remarkable ease, making it a perfect project for bakers of all skill levels. Its simplicity in preparation truly belies its incredibly rich and complex flavor profile, proving that exquisite taste doesn’t always require intricate effort.
- A Symphony of Textures: Prepare your palate for an exciting journey! This cheesecake delivers an incredible array of textures in every spoonful. You’ll savor the satisfying crunch of the rich Oreo cookie crust, followed by the silky, melt-in-your-mouth cream cheese filling. Then comes the delightful chewiness of caramel, the distinct bite of roasted peanuts, and the unique combination of nougat and chocolate from the Snickers pieces. It’s a textural masterpiece!
- Unforgettable Flavor Fusion: The ingenious pairing of the classic Snickers candy bar’s signature blend—chocolate, gooey caramel, crunchy peanuts, and sweet nougat—with the tangy, sweet notes of a traditional cheesecake creates an unparalleled taste sensation. It’s a harmonious marriage of flavors that is both familiar and exciting, hitting all the right sweet and salty notes.
- The Ultimate Crowd-Pleaser: This dessert is guaranteed to be a hit at any event. Whether it’s a casual backyard barbecue, a sophisticated dinner party, a festive holiday celebration, or simply a weekend indulgence, its appealing look and universally loved flavors make it an instant favorite. Be prepared for requests for the recipe!
- Customizable Creativity: While the Snickers bar is undoubtedly the star, the beauty of this recipe lies in its versatility. Feeling adventurous? Experiment with other candy bars like Milky Way or Twix for a unique spin. You can also customize the toppings with extra chocolate drizzle, a sprinkle of sea salt, or even different nuts to perfectly match your preferences.
- A Make-Ahead Masterpiece: One of the best qualities of this no-bake cheesecake is that it actually benefits from being made in advance. Preparing it a day before serving allows the flavors to fully meld and deepen, while the cheesecake itself achieves an optimal firm and creamy texture. This invaluable feature makes entertaining stress-free, as you can have a magnificent dessert ready and waiting.
Essential Ingredients for Your Snickers Cheesecake
To embark on the delightful journey of crafting this phenomenal no-bake Snickers cheesecake, you’ll need a selection of high-quality ingredients, each playing a crucial role in building its signature layers of flavor and texture. Gathering these items before you begin will ensure a smooth and enjoyable baking process:
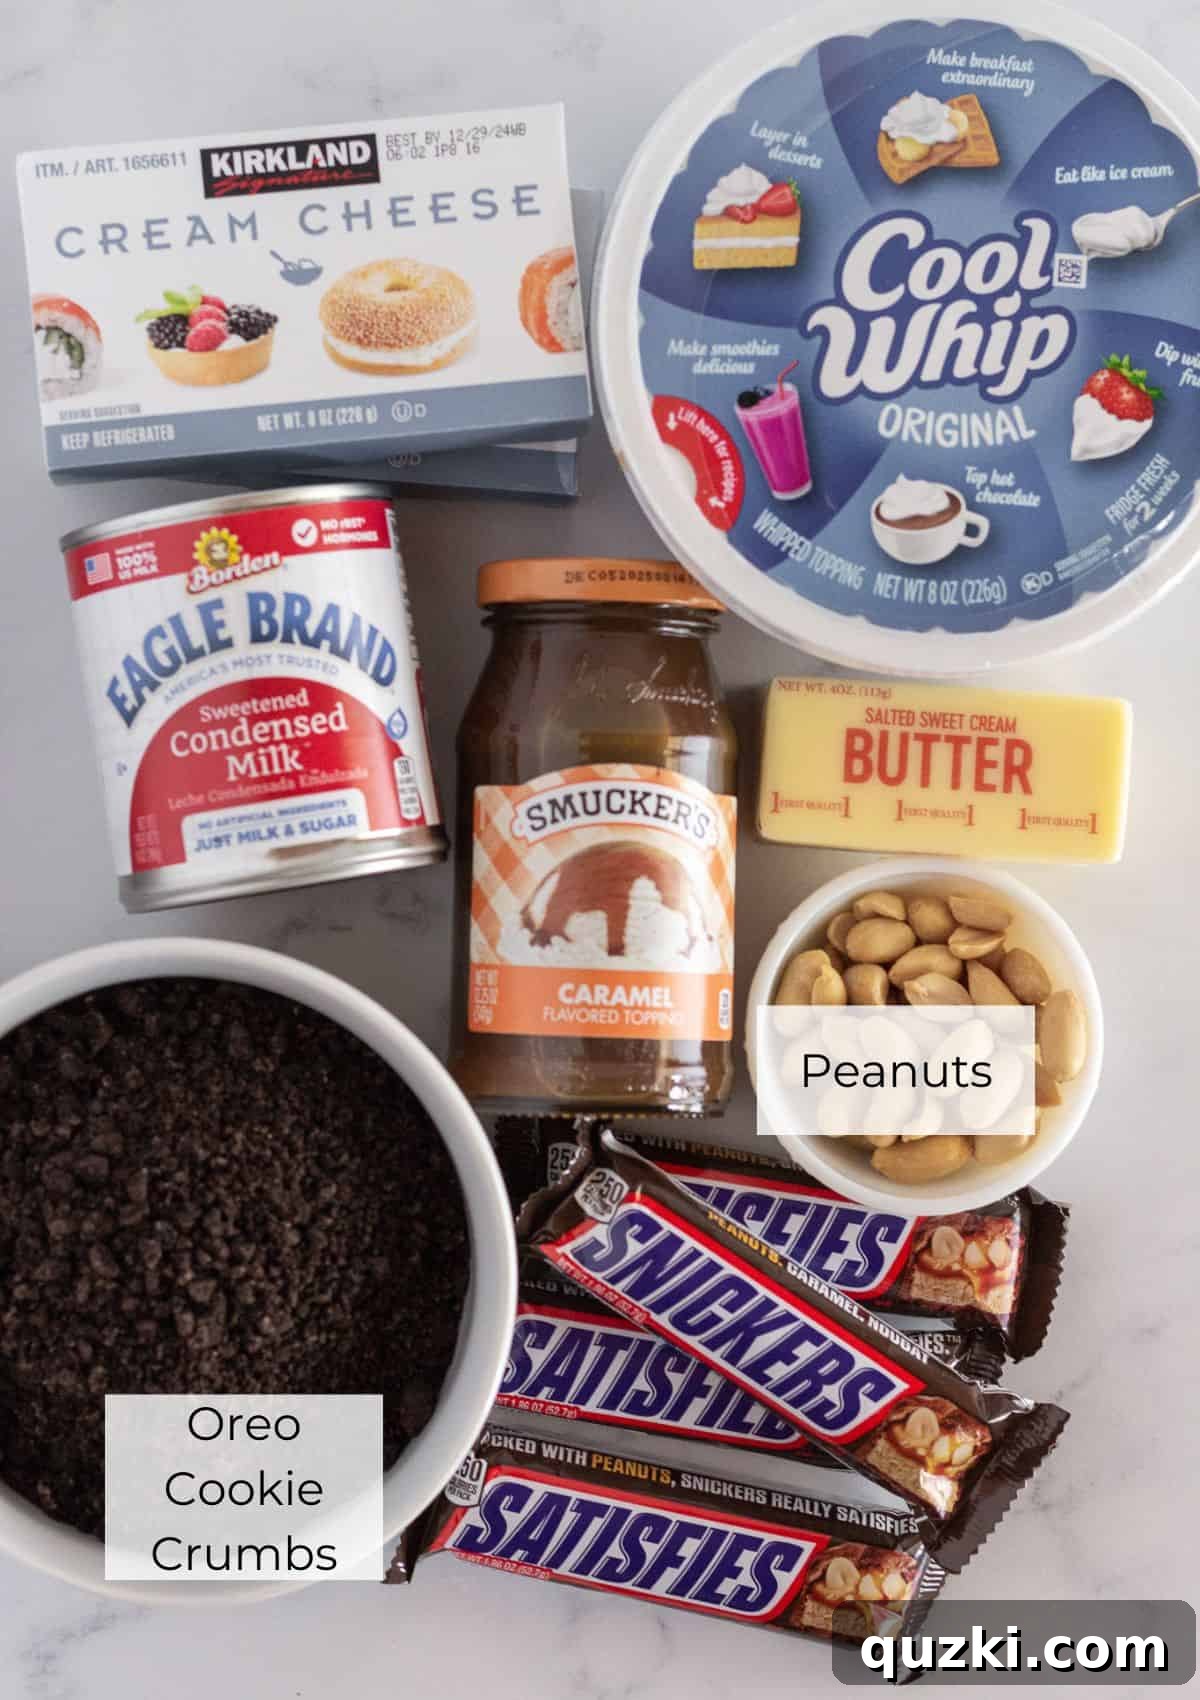
- Oreo Cookies: These iconic chocolate sandwich cookies are the backbone of our cheesecake, forming the rich, dark, and utterly delicious crust. When finely crushed and mixed with butter, they create a perfectly sturdy and flavorful foundation that beautifully complements the creamy filling. You can stick with classic Oreos, or for a subtle twist, consider using Double Stuf or even peanut butter-flavored Oreos to enhance the nutty notes. While an Oreo crust provides a classic chocolatey base, if you desire an alternative, a traditional graham cracker crust, similar to the one featured in a S’mores Cheesecake, would also be a delightful choice.
- Unsalted Butter: Melted butter is the essential binding agent that transforms our Oreo crumbs into a cohesive, sliceable crust. Using unsalted butter allows you precise control over the overall saltiness of your dessert, ensuring that the sweet and salty balance from the Snickers is perfectly maintained.
- Full-Fat Cream Cheese: This is unequivocally the star ingredient for any exceptional cheesecake, and especially crucial for achieving the desired rich, firm, and luxuriously smooth consistency in a no-bake recipe. Always opt for full-fat cream cheese, as lower-fat versions can result in a softer, less stable filling. The most vital tip here is to ensure your cream cheese is completely softened to room temperature before you begin mixing. This step prevents lumps, guarantees a velvety-smooth blend, and contributes significantly to the cheesecake’s ultimate texture.
- Sweetened Condensed Milk: Often hailed as a no-bake dessert’s secret weapon, sweetened condensed milk delivers intense sweetness and unparalleled richness without adding excessive liquid. Its thick, syrupy consistency is key to achieving a firm set without baking and contributes to the wonderfully dense yet creamy texture of the filling. It also eliminates the need for granulated sugar, ensuring a perfectly balanced sweetness throughout the cheesecake.
- Frozen Whipped Topping (like Cool Whip): This light and airy component plays a vital role in creating a cheesecake filling that is both decadent and delightfully fluffy. It acts as a stabilizer, helping the cheesecake set beautifully and hold its shape without needing to be baked. If you prefer to embrace a truly homemade touch, you can prepare homemade whipped cream by whipping 1 cup of cold heavy whipping cream with approximately 1/4 cup of powdered sugar and 1/2 teaspoon of pure vanilla extract until stiff peaks form. However, please note that cheesecakes made with homemade whipped cream may have a slightly softer set and a reduced shelf life compared to those made with stabilized whipped topping.
- Snickers Candy Bars: These are the true essence of this extraordinary dessert, lending their iconic flavor and texture profile! Roughly chopped Snickers bars are generously folded into the creamy cheesecake filling. Each piece introduces bursts of chewy caramel, satisfyingly crunchy roasted peanuts, and soft nougat throughout the entire no-bake Snickers cheesecake. This creates an exciting interplay of textures and an explosion of the distinct Snickers flavor in every single bite, making the cheesecake undeniably unique and irresistibly delicious, much like these delightful Snickers Cookies. Consider reserving a few extra chopped Snickers for a beautiful garnish.
- Caramel Sauce: An integral component that elevates the Snickers experience, caramel sauce serves a dual purpose in this recipe. A portion is swirled into the creamy filling, creating pockets of gooey sweetness, while the remainder is drizzled generously over the top of the finished cheesecake. This adds an additional layer of rich, buttery sweetness and depth, beautifully tying all the flavors together. A high-quality store-bought caramel sauce offers convenience, but if you have the time and inclination, a homemade caramel sauce will add an extra touch of gourmet sophistication.
- Lightly Salted Peanuts (for topping): These are not just for decoration; they provide an essential textural crunch and a perfect hint of savory balance to the overall sweet indulgence. A sprinkle of chopped, lightly salted peanuts on the finished cheesecake not only enhances its visual appeal but also amplifies the authentic Snickers flavor profile.
For precise measurements and quantities of each ingredient, please refer to the detailed recipe card provided further down.
How to Craft Your No-Bake Snickers Cheesecake
Crafting this decadent Snickers No-Bake Cheesecake is a remarkably straightforward and enjoyable process. By following these clear, step-by-step instructions, you’ll be able to create a perfectly textured and incredibly flavorful dessert that will impress everyone who tries it. Let’s get started on your culinary adventure:
- Prepare the Oreo Crust: The foundation of our cheesecake begins with the rich Oreo crust. Start by crushing your Oreo cookies into very fine, uniform crumbs. The most efficient way to achieve this is by using a food processor; simply pulse the whole cookies (including the creamy filling) until they resemble fine sand. If you don’t have a food processor, place the cookies in a sturdy, heavy-duty zipper-lock bag, seal it tightly, and use a rolling pin to crush them thoroughly until no large chunks remain. Transfer the finely crushed Oreo crumbs to a medium-sized mixing bowl. Melt your unsalted butter completely, then pour the melted butter over the Oreo crumbs. Mix everything together thoroughly with a spoon or your hands until all the crumbs are evenly moistened and have the consistency of wet sand. Next, carefully press this mixture firmly and evenly into the bottom of a 9-inch springform pan. For a neat finish, you can also press the crumbs slightly up the sides of the pan. Once the crust is compact and smooth, place the springform pan in the refrigerator to chill while you prepare the cheesecake filling. This crucial step allows the butter to solidify, ensuring a firm and stable crust.
- Begin the Cheesecake Filling: In a large mixing bowl, combine your completely softened full-fat cream cheese with the sweetened condensed milk. Using an electric mixer (either a hand-held mixer or a stand mixer fitted with the paddle attachment), beat the mixture on medium speed. Continue mixing until it becomes perfectly smooth, creamy, and completely free of any lumps. It’s important to scrape down the sides of the bowl periodically with a rubber spatula to ensure all ingredients are thoroughly incorporated and blended to a consistent texture.
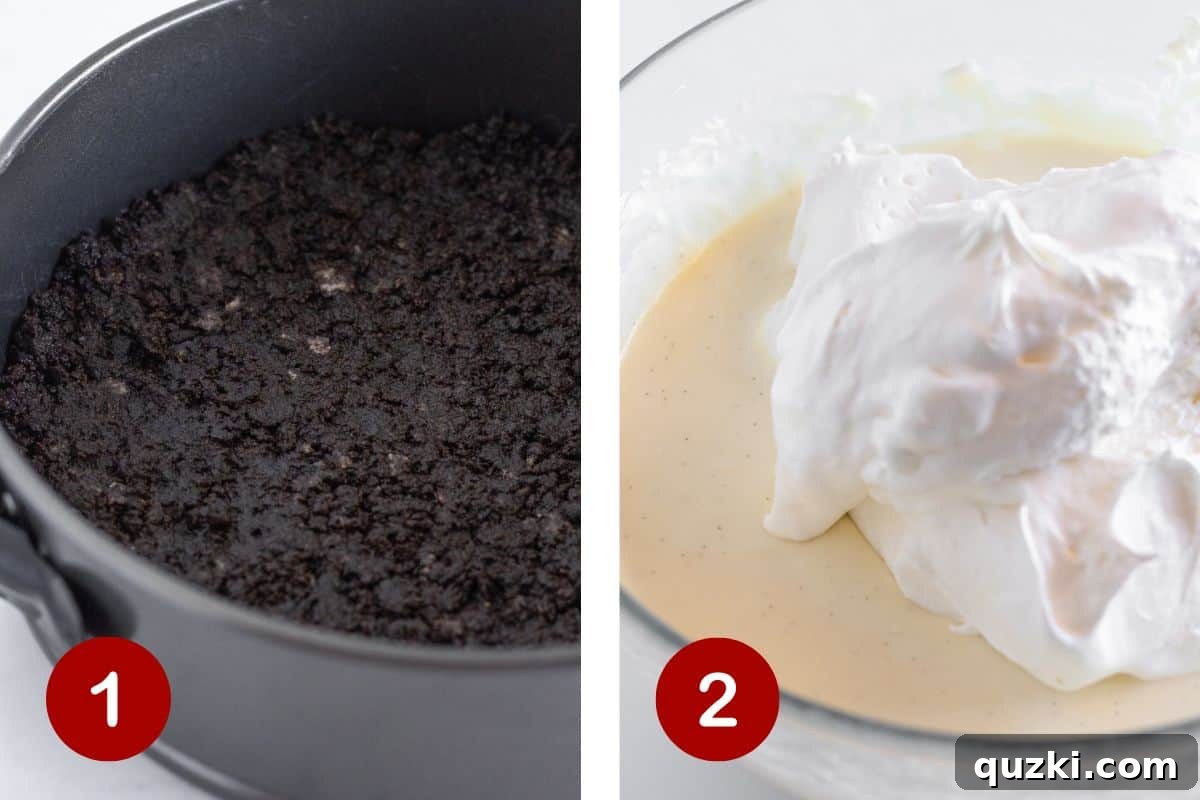
- Fold in the Whipped Topping: Carefully add the frozen whipped topping (or homemade whipped cream, if using) to the cream cheese mixture. Using a rubber spatula, gently fold the whipped topping into the cream cheese base. Employ a light, lifting motion to avoid deflating the airiness of the whipped topping. This delicate folding technique is essential for maintaining the cheesecake’s desired light, fluffy, and airy texture. Continue folding until the whipped topping is just combined and no white streaks are visible. Be very careful not to overmix at this stage, as excessive agitation can lead to a denser, less desirable cheesecake consistency.
- Incorporate Caramel and Snickers: Now for the signature flavors! Pour a generous ¼ cup of caramel sauce into the cheesecake batter. Using your rubber spatula, gently swirl the caramel into the filling. Aim for beautiful, marbled ribbons of caramel rather than fully incorporating it; this will create delightful pockets of gooey caramel goodness throughout the cheesecake when you slice into it. Finally, add the 3 chopped Snickers candy bars to the batter. Gently stir them into the filling until the pieces are evenly distributed. Again, avoid overmixing, as you want to keep the Snickers chunks intact for maximum flavor and textural impact.
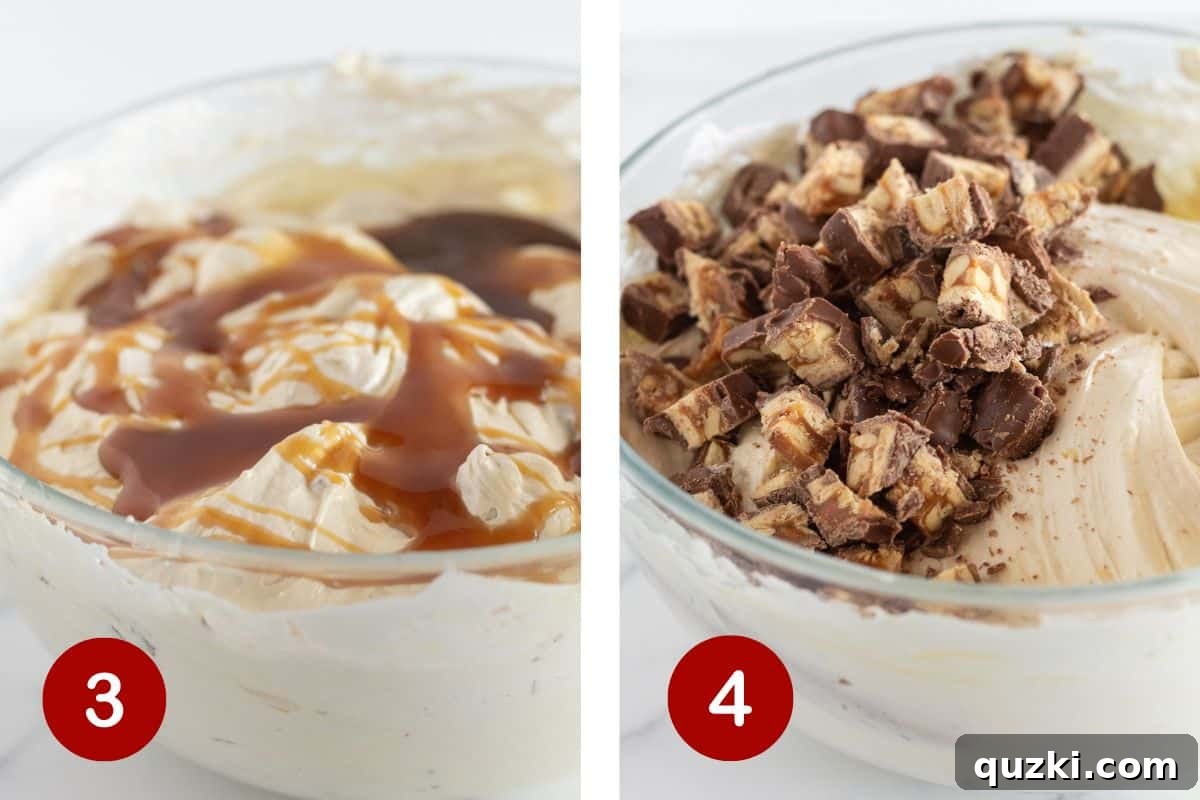
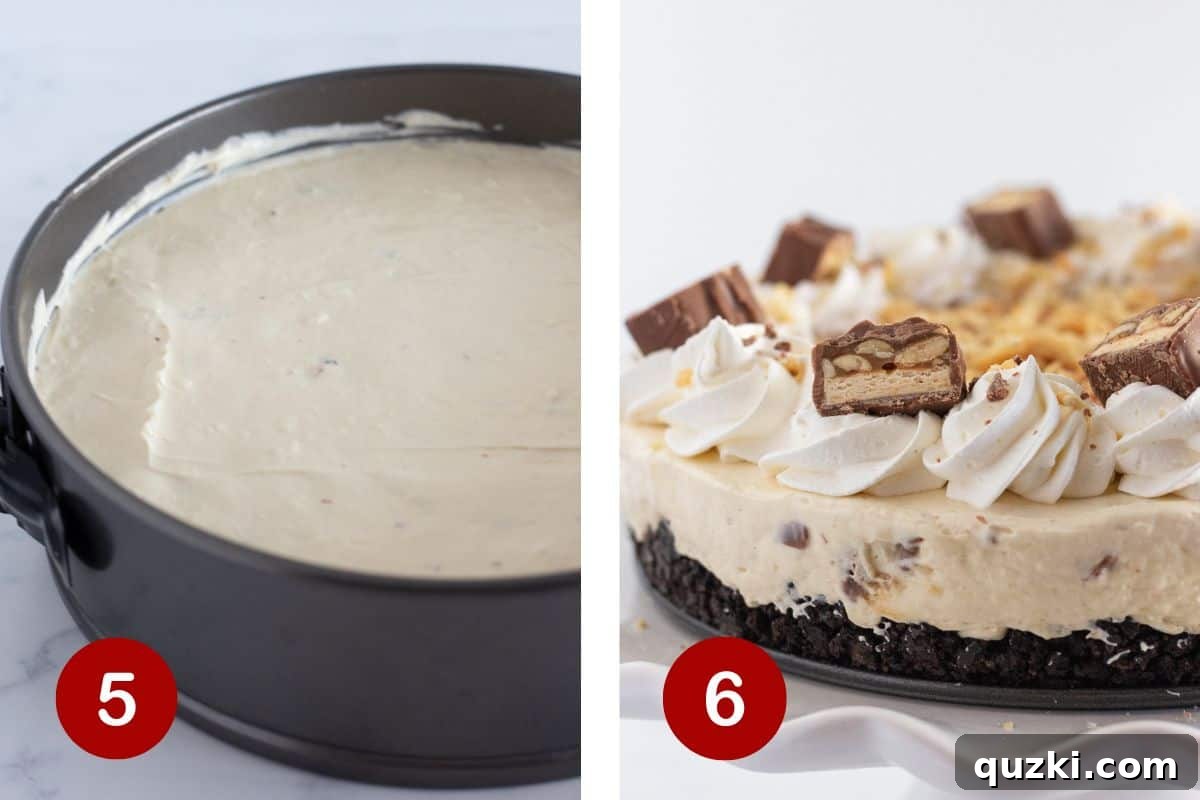
- Assemble and Chill to Perfection: Once your decadent filling is ready, carefully pour the entire mixture over the chilled Oreo crust in the springform pan. Use your rubber spatula to gently spread the filling evenly across the crust, creating a smooth and appealing top surface. After smoothing, cover the springform pan loosely with plastic wrap to prevent any odors from the refrigerator from affecting the cheesecake. Transfer the covered cheesecake to the refrigerator to chill. This is a critical step: allow it to chill for a minimum of 4 hours, but for the absolute best results – a perfectly firm, sliceable texture and fully developed flavors – chilling it overnight (8-12 hours) is highly recommended. Adequate chilling is paramount for the cheesecake to set correctly.
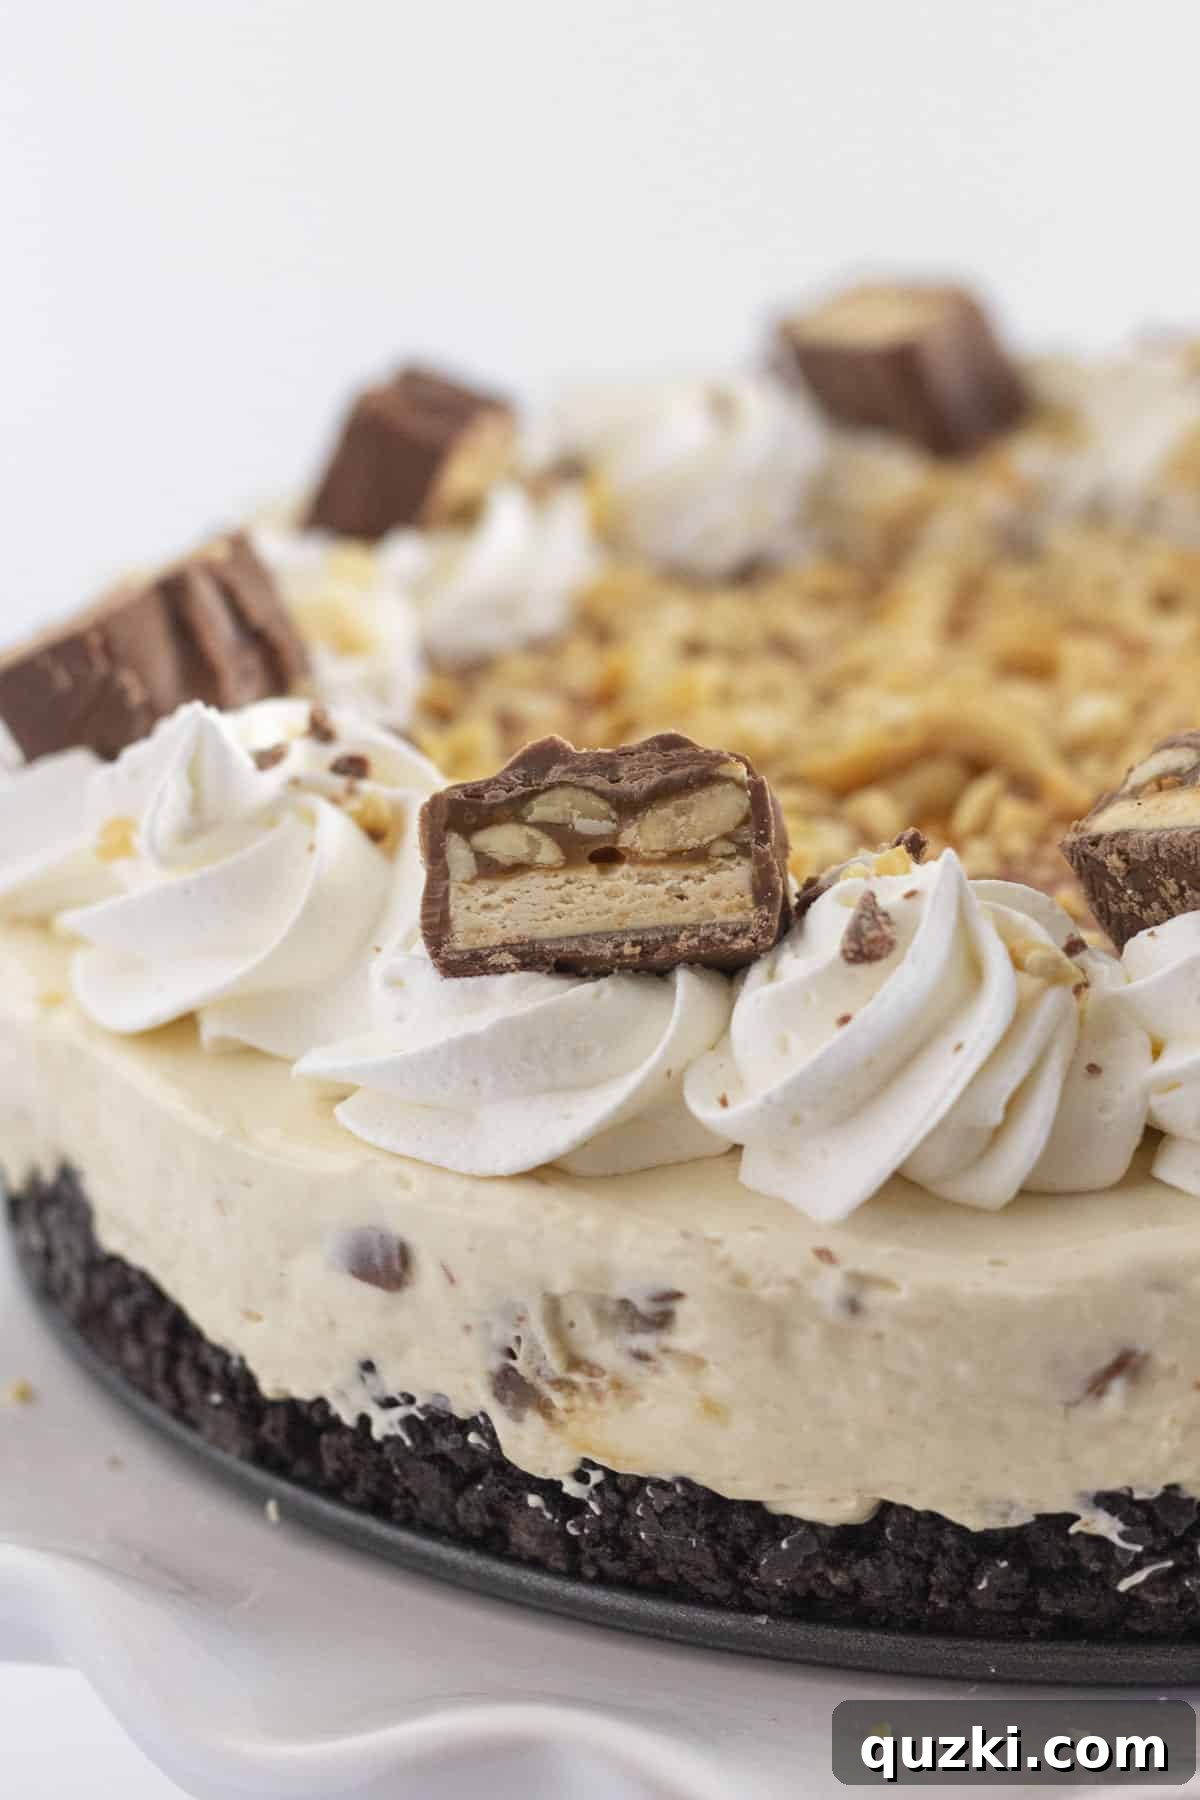
- Garnish and Serve Your Masterpiece: When your Snickers No-Bake Cheesecake has set beautifully and you’re ready to serve, carefully remove it from the refrigerator. To ensure clean edges, gently run a thin, sharp knife around the perimeter of the pan before releasing the springform sides. Transfer the remaining 4 ounces of whipped topping to a piping bag fitted with your favorite decorative tip (or simply use a sturdy zipper bag with a corner snipped off for a simpler look) and pipe an attractive border or dollops around the top edge of the cake. Generously drizzle the top with the remaining ¼ cup of caramel sauce and sprinkle with chopped, lightly salted peanuts and a few extra chopped Snickers chunks for a stunning presentation and intensified flavor. To achieve clean, neat slices, dip a sharp knife in hot water and wipe it clean and dry between each cut (refer to Expert Tips for more detail). Slice the cheesecake and serve immediately. Prepare for rave reviews and pure enjoyment of this homemade Snickers No-Bake Cheesecake!
Expert Tips for No-Bake Cheesecake Perfection
While making a no-bake Snickers cheesecake is relatively simple, a few expert tips can elevate your dessert from good to absolutely outstanding. Pay close attention to these details to ensure your cheesecake is flawlessly creamy, perfectly set, and utterly delicious every single time:
- Cream Cheese Temperature is Key: This is arguably the most critical tip for any no-bake cheesecake. Your full-fat cream cheese MUST be at proper room temperature, completely softened, before you start mixing. This usually means taking it out of the refrigerator at least 1 to 2 hours in advance. If the cream cheese is too cold, it will not blend smoothly with the sweetened condensed milk, resulting in a lumpy, uneven filling. Softened cream cheese ensures a silky-smooth, luscious texture.
- Avoid Overmixing the Whipped Topping: Once you’ve incorporated the whipped topping (like Cool Whip or homemade whipped cream) into your cream cheese mixture, resist the urge to vigorously beat it. Instead, use a gentle folding motion with a rubber spatula. Overmixing can deflate the air that gives the cheesecake its light and fluffy quality, leading to a denser, heavier texture. Fold just until no white streaks remain and everything is incorporated.
- The Springform Pan Advantage: While you can technically make this cheesecake in a regular pie dish, a 9-inch springform pan is highly recommended. Its removable sides allow you to effortlessly release the cheesecake, presenting it beautifully with clean, defined edges without the need for inversion or messy scooping. This is especially helpful if you’re serving it for a special occasion, as seen in this Raspberry Pie.
- Patience with Chilling: The chilling period is non-negotiable for a no-bake cheesecake. While a minimum of 4 hours is suggested, for the best possible results – a perfectly firm, sliceable texture and flavors that have fully developed and melded – refrigerate your cheesecake overnight (8-12 hours). Rushing this step will result in a soft, messy cheesecake that won’t hold its shape.
- Achieve Clean Slices: For picture-perfect, neat slices, especially if you’re serving your cheesecake to guests, here’s a professional trick: dip a sharp, thin-bladed knife into hot water, then wipe it completely dry with a paper towel. Make each slice with this warm, clean knife, and repeat the hot water dip and wipe process between every single cut. This prevents the knife from dragging and sticking, ensuring beautifully defined pieces.
- Experiment with Toppings: While caramel, peanuts, and extra Snickers are the classic choice, don’t hesitate to get creative with your garnishes! Consider adding a drizzle of melted milk chocolate or dark chocolate, a sprinkle of flaky sea salt for an extra flavor pop, or even a dollop of fresh whipped cream on each individual slice just before serving. Mini chocolate chips or a few chocolate-covered pretzels could also add an interesting twist.
- Ensure Crust is Compact: When pressing the Oreo crust into the springform pan, make sure it’s packed down very firmly. This prevents the crust from crumbling when you slice the cheesecake. You can use the bottom of a flat glass or a measuring cup to achieve a tight, even layer.
Storage and Freezing Guidelines
To ensure your delightful Snickers No-Bake Cheesecake remains as fresh and delicious as possible, proper storage is paramount. These guidelines will help you keep your dessert in perfect condition for future enjoyment:
Storage: Once your No-Bake Snickers Cheesecake has fully set, it must always be stored in the refrigerator. The creamy filling, made with dairy products, requires consistent chilling to maintain its texture and freshness. To prevent it from absorbing any unwanted odors from other foods in your fridge and to keep the filling from drying out, cover the cheesecake tightly with plastic wrap. If you’ve already sliced it, transfer individual slices into an airtight container. When stored correctly, your cheesecake will retain its delightful flavors and creamy consistency for up to 5 days. Remember to keep it chilled at all times, as the cream cheese filling can soften quickly if left at room temperature for an extended period.
Freezing: Excellent news for those who love to plan ahead or wish to savor their dessert over a longer period – this Snickers No-Bake Cheesecake freezes exceptionally well! You have the flexibility to freeze either the entire cheesecake or conveniently cut it into individual slices beforehand. To freeze: first, wrap the cheesecake (whether whole or in slices) extremely tightly in several layers of plastic wrap, ensuring that no air pockets remain. Then, add another protective layer of heavy-duty aluminum foil. This double wrapping is crucial for preventing freezer burn and preserving the cheesecake’s quality. Place the securely wrapped cheesecake in the freezer. It will maintain its deliciousness for up to 3 months. When you’re ready to enjoy it, simply transfer the frozen cheesecake to the refrigerator and allow it to thaw slowly overnight. Once fully thawed, it will be ready to serve and taste almost as fresh and indulgent as it did on the day it was made!
Recipe FAQs: All Your Questions Answered
Can I use a different type of candy bar instead of Snickers?
Absolutely! While Snickers provides a truly unique combination of chocolate, chewy caramel, and crunchy peanuts that defines this specific cheesecake, the beauty of this recipe lies in its adaptability. You can certainly experiment with other beloved candy bars. Consider trying Milky Way, Twix, or even a different type of milk chocolate bar with a creamy filling for a delicious alternative. This concept is incredibly versatile, encouraging you to get creative and tailor it to your personal preferences! For more candy bar-inspired dessert ideas, explore this fun candy bar cheesecake recipe, which is perfect for Halloween or whenever you have a surplus of sweet treats.
Do I have to use a springform pan?
A springform pan is highly recommended for preparing this cheesecake. Its innovative design, with removable sides, makes it incredibly easy to unmold and serve the cheesecake with perfectly clean and impressive slices, enhancing its presentation. However, it is not an absolute necessity. You can certainly use a regular 9-inch pie dish or even a square baking pan if that’s what you have available. Just be aware that serving from a conventional pan might be a little trickier, and achieving perfectly defined slices might require a bit more effort. You may find yourself scooping out servings rather than lifting neat slices.
Can I make this cheesecake ahead of time?
Yes, and it is actually highly encouraged! This no-bake Snickers cheesecake is an excellent candidate for making ahead. Preparing it a full day in advance allows ample time for all the delicious flavors to deepen and meld together beautifully, and it gives the cheesecake sufficient time to set up perfectly firm in the refrigerator. This advance preparation makes it an ideal dessert for entertaining, as it frees up your time on the day of your event, allowing you to focus on other preparations or simply enjoy your guests. Just ensure it’s kept covered tightly in the fridge until you’re ready to add the final toppings and serve.
Can I use homemade whipped cream instead of store-bought whipped topping?
You absolutely can opt for homemade whipped cream, crafted from heavy cream, if you prefer a fresh, natural alternative. To make it, simply whip 1 cup of cold heavy cream with approximately 1/4 cup of powdered sugar and 1/2 teaspoon of vanilla extract until stiff peaks gracefully form. However, it’s worth noting that commercially available whipped toppings, such as Cool Whip, often contain stabilizers. These stabilizers play a crucial role in helping the cheesecake filling set more firmly and consistently without the need for baking. While homemade whipped cream will undoubtedly contribute a wonderful flavor, your cheesecake might have a slightly softer texture and may not hold its shape quite as robustly, particularly after prolonged storage.
What’s the best way to crush the Oreos for the crust?
For the finest, most uniform cookie crumbs, which are essential for a perfectly smooth and cohesive crust, a food processor is your best tool. Simply place the whole Oreo cookies (yes, including the cream filling!) into the food processor and pulse until they are transformed into fine crumbs. If you don’t have access to a food processor, a heavy-duty zipper-lock bag and a rolling pin work wonderfully as an alternative. Place the cookies in the bag, seal it securely, and then roll over them repeatedly with the rolling pin until they are finely crushed. Ensure there are no large chunks remaining for a flawless crust.
How can I prevent my no-bake cheesecake from being too soft?
Several key factors contribute to achieving a perfectly firm no-bake cheesecake. Firstly, always use full-fat cream cheese, as its higher fat content provides essential structure. Secondly, ensure your cream cheese is softened, but not warm or melted, as this can adversely affect the setting. Thirdly, and most critically, adhere strictly to the recommended chilling time; allow the cheesecake to refrigerate for a minimum of 4 hours, and ideally, overnight. The longer it chills, the firmer and more stable it will become. Lastly, utilizing a stabilized whipped topping like Cool Whip, which contains ingredients that aid in setting, will generally result in a firmer cheesecake compared to using fresh homemade whipped cream.
Crave More No-Bake Desserts? Explore These Cheesecake Recipes…
If you’ve been captivated by the sheer simplicity and incredible deliciousness of this no-bake Snickers cheesecake, then you’re truly in for a treat! The expansive world of no-bake desserts is a treasure trove of delightful possibilities, especially when it comes to cheesecakes. They offer all the creamy, decadent indulgence you could ever desire, without the need for an oven, making them perfect for any season or occasion. Prepare to expand your repertoire and satisfy every sweet craving with these other fantastic no-bake cheesecake creations:
Desserts
Easy Pecan Pie No Bake Cheesecake
Desserts
Golden Oreo Desserts: Golden Oreo No Bake Cheesecake Recipe
Cheesecakes
Cookie Butter No Bake Cheesecake Recipe
Cheesecakes
Easy S’mores No Bake Cheesecake Recipe
Did you try this irresistible recipe? We’d love to hear about your experience!
Please leave a ⭐️ review below to share your thoughts and don’t forget to tag @practicallyhomemade on Pinterest when you proudly share your delicious creation!
The Ultimate No-Bake Snickers Cheesecake Recipe
June Albertson-Dick
30
0
4
4 30
10 slices
Rate Recipe
Print Recipe
Ingredients
1x
Crust
- 2 ¼ cups Oreo Cookie crumbs
- ⅓ cup unsalted butter , {melted}
Filling
- 16 ounces full-fat cream cheese , {softened}
- 14 ounces sweetened condensed milk
- 8 ounces frozen whipped topping, {thawed, like Cool Whip}
- ¼ cup caramel sauce
- 3 Snickers candy bars , {chopped}
Toppings
- 4 ounces frozen whipped topping, {thawed, for garnish}
- ¼ cup caramel sauce, {for drizzling}
- ¼ cup lightly salted peanuts, {chopped}
- 1 Snickers candy bar , {chopped, for garnish}
Instructions
Crust
-
Combine the finely crushed Oreo cookie crumbs and the melted unsalted butter in a medium bowl. Mix everything together thoroughly with a spoon or spatula until all the crumbs are evenly moistened and resemble wet sand. Pour this mixture into a lightly greased 9-inch springform pan. Using the bottom of a flat glass or measuring cup, press the crumbs firmly and evenly into the bottom of the pan, and slightly up the sides if desired, to form a compact crust. Refrigerate the crust for at least 30 minutes, or until the cheesecake filling is ready, to allow it to firm up.
Filling
-
In a large mixing bowl, beat the softened full-fat cream cheese and sweetened condensed milk together using an electric mixer on medium speed. Continue mixing until the mixture is perfectly smooth, creamy, and completely free of any lumps. Scrape down the sides of the bowl as needed to ensure even blending. Gently fold in the thawed whipped topping using a rubber spatula. Use a light, lifting motion to avoid deflating the topping, folding just until no white streaks remain and everything is combined. Stir in ¼ cup of the caramel sauce, swirling it gently into the filling for a marbled effect. Finally, add the 3 chopped Snickers candy bars to the batter and stir gently until they are evenly distributed throughout the filling.
-
Pour the prepared cheesecake filling over the chilled Oreo crust in the springform pan, using a rubber spatula to gently spread it evenly across the surface. Cover the pan loosely with plastic wrap. Place the cheesecake in the refrigerator to chill for a minimum of 4 hours, or ideally overnight (8-12 hours), to allow it to set completely. Proper chilling is crucial for achieving a firm, sliceable texture.
Toppings
-
When you are ready to serve, remove the cheesecake from the refrigerator. Carefully run a thin, sharp knife around the inner edge of the springform pan before releasing and removing the outer ring. Transfer the additional 4 ounces of thawed whipped topping to a piping bag (or a sturdy zipper bag with a corner snipped off) and pipe a decorative border or dollops around the top edge of the cheesecake. Generously drizzle the top with the remaining ¼ cup of caramel sauce and sprinkle with the chopped, lightly salted peanuts and the reserved chopped Snickers candy bar pieces for garnish. For clean slices, dip a sharp knife in hot water and wipe it dry between each cut. Slice and serve immediately. Store any leftover cheesecake covered in an airtight container in the refrigerator for up to 4 days.
Notes
For optimal results, ensure your cheesecake chills for a minimum of 4 hours, and ideally overnight. This extended chilling time is crucial for the filling to firm up completely, ensuring clean slices and a delightful, stable texture. Patience truly pays off with no-bake cheesecakes!
Don’t be afraid to get creative with your garnishes! Beyond the recommended caramel and peanuts, consider drizzling some melted chocolate, sprinkling a pinch of flaky sea salt, or adding a dollop of extra homemade whipped cream to each individual slice just before serving for an elevated touch.
Always ensure your full-fat cream cheese is at proper room temperature (softened) before you begin mixing. This crucial step prevents lumps and ensures that your cheesecake filling achieves a wonderfully smooth, creamy, and consistent texture.
Nutrition
Calories: 679kcal,
Carbohydrates: 69g,
Protein: 11g,
Fat: 42g,
Saturated Fat: 23g,
Polyunsaturated Fat: 3g,
Monounsaturated Fat: 12g,
Trans Fat: 0.3g,
Cholesterol: 77mg,
Sodium: 447mg,
Potassium: 422mg,
Fiber: 2g,
Sugar: 54g,
Vitamin A: 944IU,
Vitamin C: 1mg,
Calcium: 206mg,
Iron: 6mg
Nutrition information is automatically calculated and should be used as an approximation.
Love this recipe? Leave a comment below!