
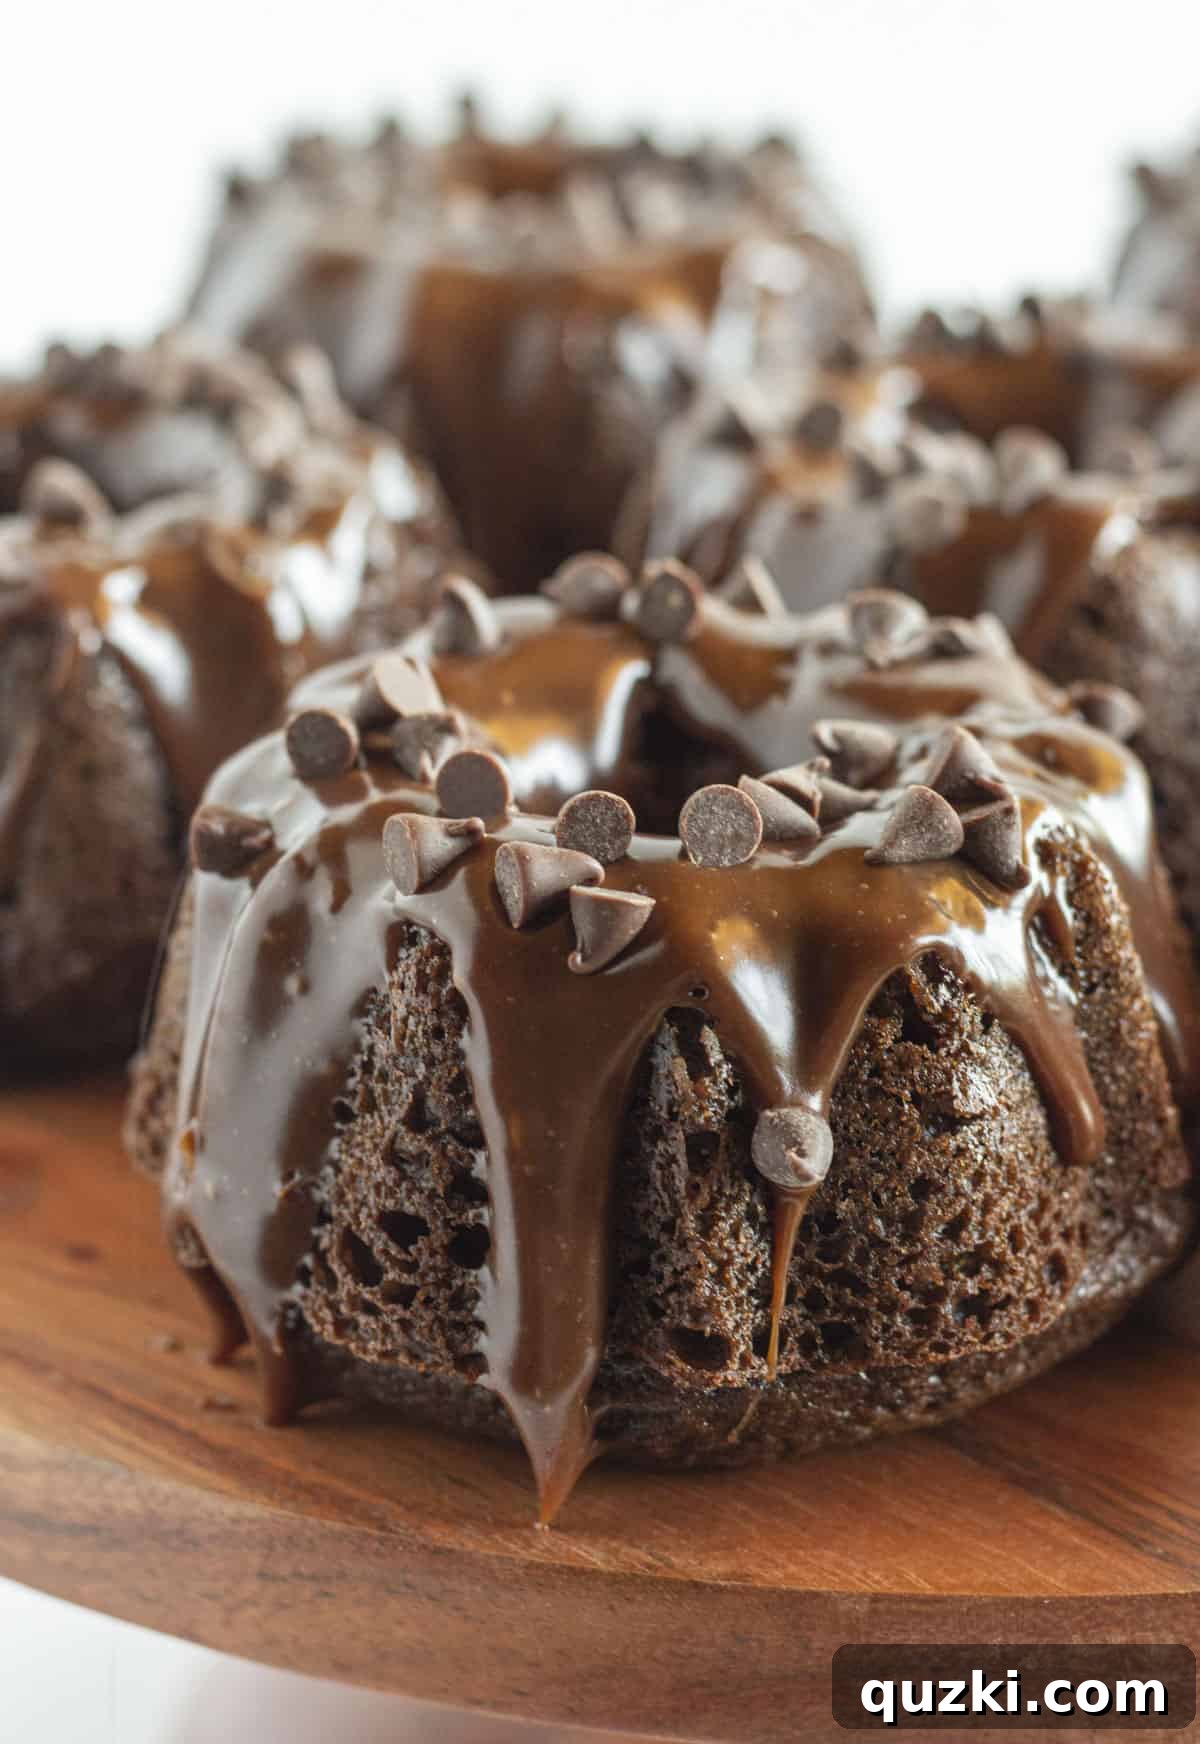
There’s an undeniable charm to individual desserts, and these Mini Chocolate Bundt Cakes perfectly capture that appeal. Forget the fuss of cutting slices from a larger cake; these delightful single-serving treats offer elegance and convenience in every bite. They’re like gourmet cupcakes, but with the distinctive, beautiful shape of a classic bundt cake, miniaturized for maximum impact. This easy mini chocolate cake recipe elevates a simple pleasure into a memorable experience, proving that smaller versions of beloved desserts often lead to the sweetest surprises.
Whether you’re hosting a dinner party, preparing a special treat for loved ones, or simply craving a personal indulgence, these mini bundt cakes are sure to be a crowd-pleaser. Their rich chocolate flavor, moist texture, and stunning appearance make them an ideal choice for any occasion, promising a luxurious taste without complicated baking steps.
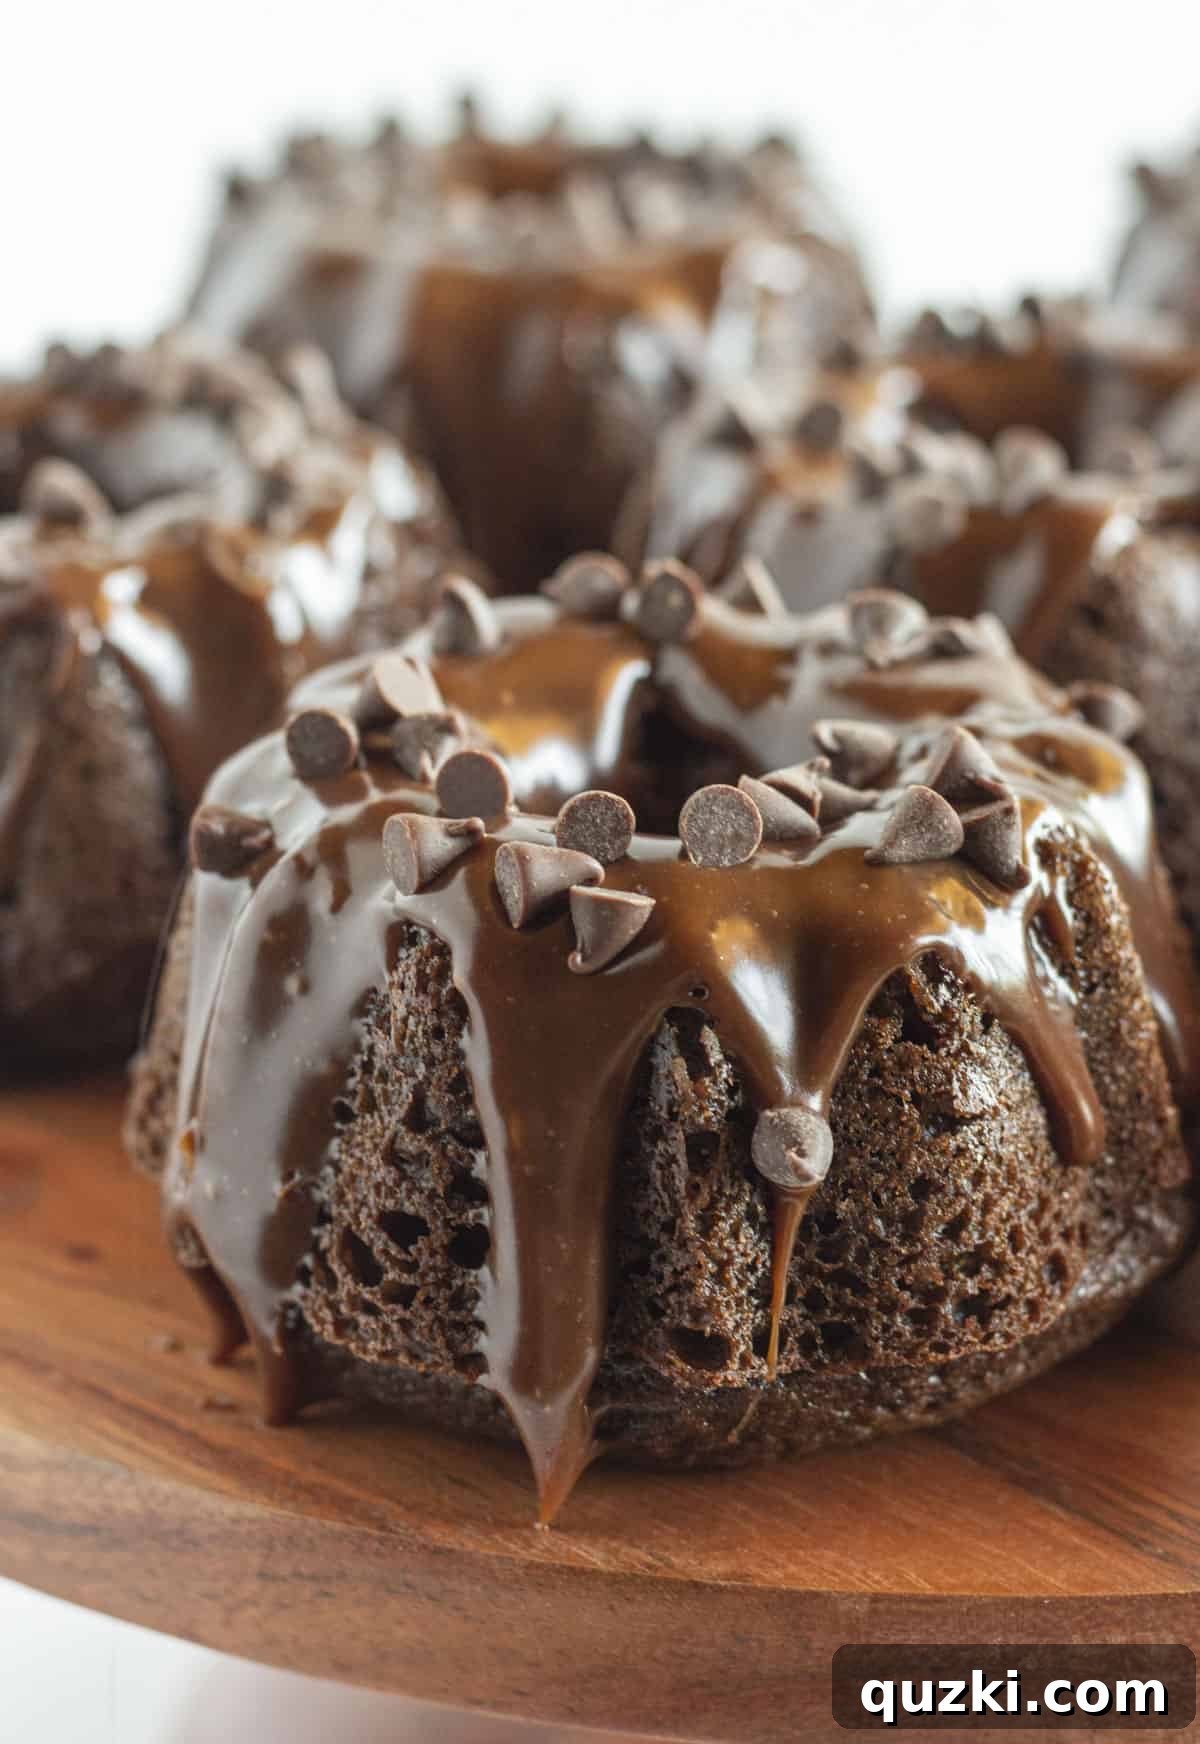
Table of Contents
- Why These are the BEST Mini Chocolate Bundt Cakes!
- Essential Ingredients for this Recipe
- Creative Mini Chocolate Cake Topping Ideas
- How to Make Mini Chocolate Bundt Cakes Using a Cake Mix
- Expert Baking Tips for Perfect Bundt Cakes
- Storing and Freezing Your Mini Bundt Cakes
- Recipe FAQs: Your Questions Answered
- Craving More Chocolate? Discover These Amazing Cake Recipes…
- Easy Mini Chocolate Bundt Cakes with a Cake Mix Recipe Card
Why These are the BEST Mini Chocolate Bundt Cakes!
When it comes to baking, finding a recipe that balances ease with gourmet results is a true gem. These mini chocolate bundt cakes are precisely that. They stand out as the absolute best for several compelling reasons, making them a favorite among both seasoned bakers and eager beginners.
Firstly, the recipe ingeniously starts with a simple chocolate cake mix. This isn’t just about saving time; it’s about creating a foolproof foundation that ensures consistent results every single time. However, what truly transforms these from ordinary to extraordinary are the carefully selected extra ingredients. The addition of strong brewed coffee works wonders, intensifying the chocolate flavor without making the cake taste like coffee. It’s a secret ingredient that deepens the cocoa notes, making each bite incredibly rich and satisfying. Meanwhile, sour cream lends an incredible moistness and a tender crumb, balancing the sweetness with a subtle tang that elevates the cake’s overall complexity.
Beyond their exceptional flavor and texture, these mini bundt cakes offer unparalleled convenience. Each cake is an individual serving, eliminating the need for slicing and making them perfect for parties, potlucks, or thoughtful edible gifts. Their mini size also contributes to a charming presentation, instantly making any dessert spread feel more special and sophisticated. To top it all off, a decadent chocolate ganache is drizzled over each cake, providing a smooth, glossy finish and an extra layer of chocolatey goodness that truly completes the experience. Every bite is a harmonious blend of moist cake, rich chocolate, and elegant sweetness, making these an irresistible treat that will have everyone reaching for more.
Essential Ingredients for this Recipe
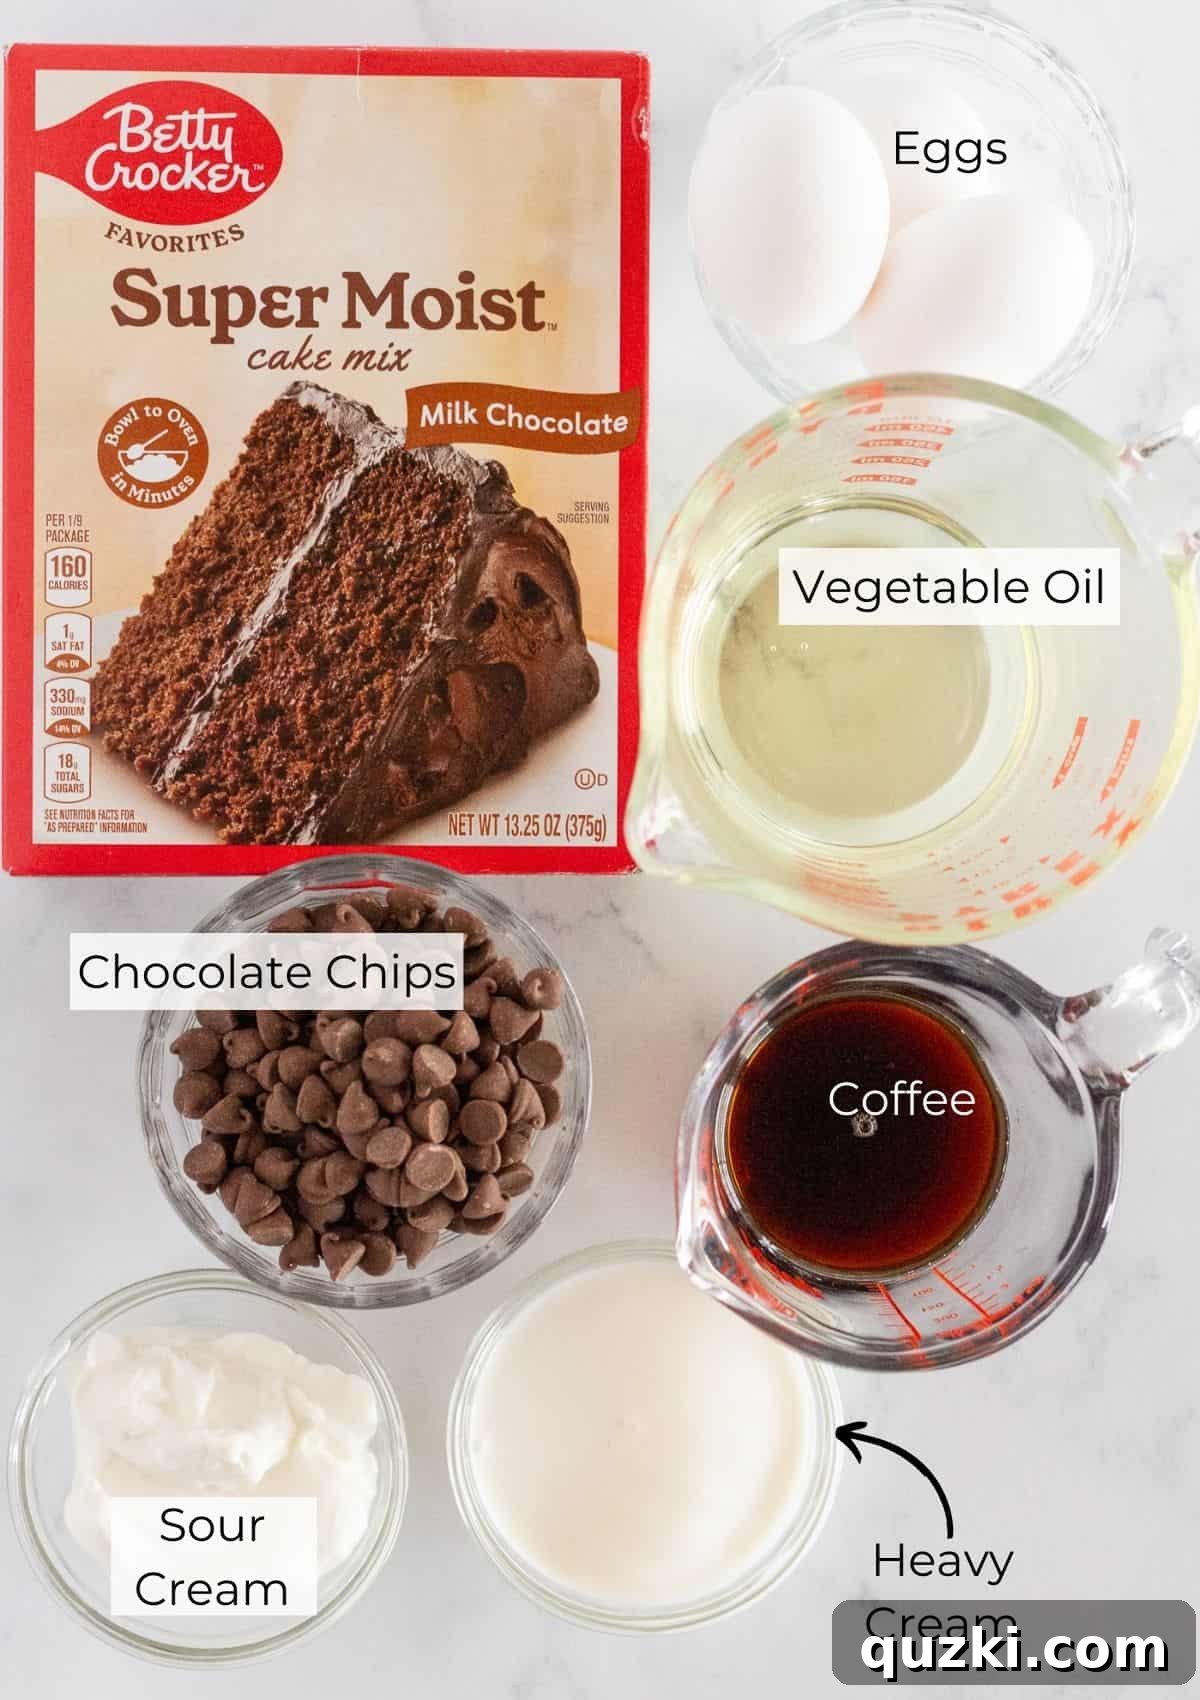
Crafting these delectable mini chocolate bundt cakes relies on a careful selection of ingredients that work in harmony to create a truly unforgettable dessert. While the recipe starts with a convenient cake mix, several key additions transform it into a homemade masterpiece. Here’s a detailed look at what you’ll need:
For the Moist Chocolate Cakes:
- Chocolate Cake Mix: This is your foundational ingredient, providing a quick and reliable base for perfectly textured mini bundt cakes. A standard 13.25-ounce box works perfectly. It’s a fantastic shortcut that doesn’t compromise on flavor when enhanced with other ingredients.
- Large Eggs: Eggs are crucial for structure, helping to bind the cake batter together and contributing to a lighter, more airy texture. They also add richness and moisture.
- Vegetable Oil: Used for its ability to create an incredibly moist and tender crumb. Vegetable oil helps keep the cakes soft and prevents them from drying out. Melted unsalted butter can also be used for a slightly richer flavor, but oil typically provides a more consistently moist result in cake mixes.
- Water: The liquid component that hydrates the dry ingredients in the cake mix. For an even richer flavor, whole milk can be substituted for water, adding a creamier texture to the finished cakes.
- Brewed Coffee: A small amount of strong brewed coffee is the secret ingredient for an intensely chocolatey flavor. Coffee doesn’t add a distinct coffee taste but rather amplifies and deepens the cocoa notes, making the chocolate truly sing. Alternatively, a teaspoon or two of espresso powder can be dissolved in hot water for a similar effect.
- Sour Cream: This ingredient is a game-changer for moisture and tenderness. Sour cream adds a delightful richness, a subtle tang that perfectly balances the sweetness of the chocolate, and ensures a wonderfully moist chocolate cake. Full-fat Greek yogurt is an excellent substitute if you prefer, offering similar benefits in terms of moisture and richness.
For the Luxurious Chocolate Ganache:
- Milk Chocolate Chips: While semi-sweet chocolate chips can certainly be used, milk chocolate chips create a smoother, creamier, and sweeter ganache that complements the rich cake beautifully. The choice depends on your preference for sweetness and chocolate intensity.
- Heavy Cream: This essential ingredient is heated and combined with the chocolate chips to create the smooth, silky, and pourable chocolate ganache. The high-fat content of heavy cream gives the ganache its luxurious texture and rich mouthfeel.
Refer to the complete recipe card below for precise measurements and quantities, ensuring you have everything needed for these spectacular mini desserts.
Creative Mini Chocolate Cake Topping Ideas
While the rich chocolate ganache is a divine topping on its own, these mini chocolate bundt cakes are incredibly versatile, offering endless possibilities for customization. Adding an extra topping can introduce new textures, enhance flavors, and make your cakes perfectly suited for any holiday or celebration. Here are some fantastic ideas to get your creativity flowing:
- Nuts: For a delightful crunch and nutty flavor, finely chop your favorite nuts and sprinkle them over the wet ganache. Pecans, walnuts, hazelnuts, pistachios, or even candied peanuts would all be wonderful additions, adding richness and a satisfying texture. Consider toasting them lightly for an even deeper flavor.
- Sprinkles: Sprinkles are a fun and easy way to add a pop of color and festivity. Choose your favorite colors to match a party theme, opt for seasonal sprinkles for holidays like Christmas, Halloween, or Valentine’s Day, or simply go for classic chocolate sprinkles for extra chocolatey goodness. Nonpareils or jimmies work especially well.
- Candy: Miniature candies can be incredibly adorable and tasty atop these mini cakes. Mini M&M’s are a popular choice, adding color and a delightful candy shell crunch. You can also chop up other beloved candies like Snickers, Reese’s Peanut Butter Cups, or even bits of toffee for a gourmet touch.
- Chopped Pretzels: If you love the sweet and salty flavor combination, chopped pretzels are an absolute must-try. Not only do they provide a fantastic savory contrast to the sweet chocolate, but they also offer a satisfyingly crisp texture that elevates the entire dessert experience.
- Powdered Sugar: For a simple yet elegant finish, a delicate dusting of powdered sugar over the set ganache creates a beautiful snow-kissed effect. This adds a subtle sweetness and a sophisticated visual appeal, perfect for any occasion.
- Fresh Berries: Bright, tart berries like raspberries or strawberries offer a beautiful color contrast and a refreshing burst of flavor that cuts through the richness of the chocolate. Place a few berries on top or around the base of each cake.
- Toasted Coconut Flakes: For a tropical twist, lightly toast some coconut flakes until golden brown and sprinkle them on top. The toasted coconut adds a lovely texture and a distinct, sweet flavor.
- Caramel Drizzle: A light drizzle of homemade or store-bought caramel sauce can add an extra layer of rich, buttery flavor that pairs wonderfully with chocolate.
- Mini Chocolate Chips: Sometimes, more chocolate is just what you need! Mini chocolate chips (milk, semi-sweet, or white) are a classic and always welcome topping, adding a bit more texture and intense chocolate flavor.
Don’t be afraid to mix and match these ideas to create your unique signature mini bundt cakes!
How to Make Mini Chocolate Bundt Cakes Using a Cake Mix
Baking these mini chocolate bundt cakes is a wonderfully straightforward process, made even easier by starting with a cake mix. Follow these simple steps for perfectly moist and delicious individual desserts:
Step 1: Prepare the Cake Batter
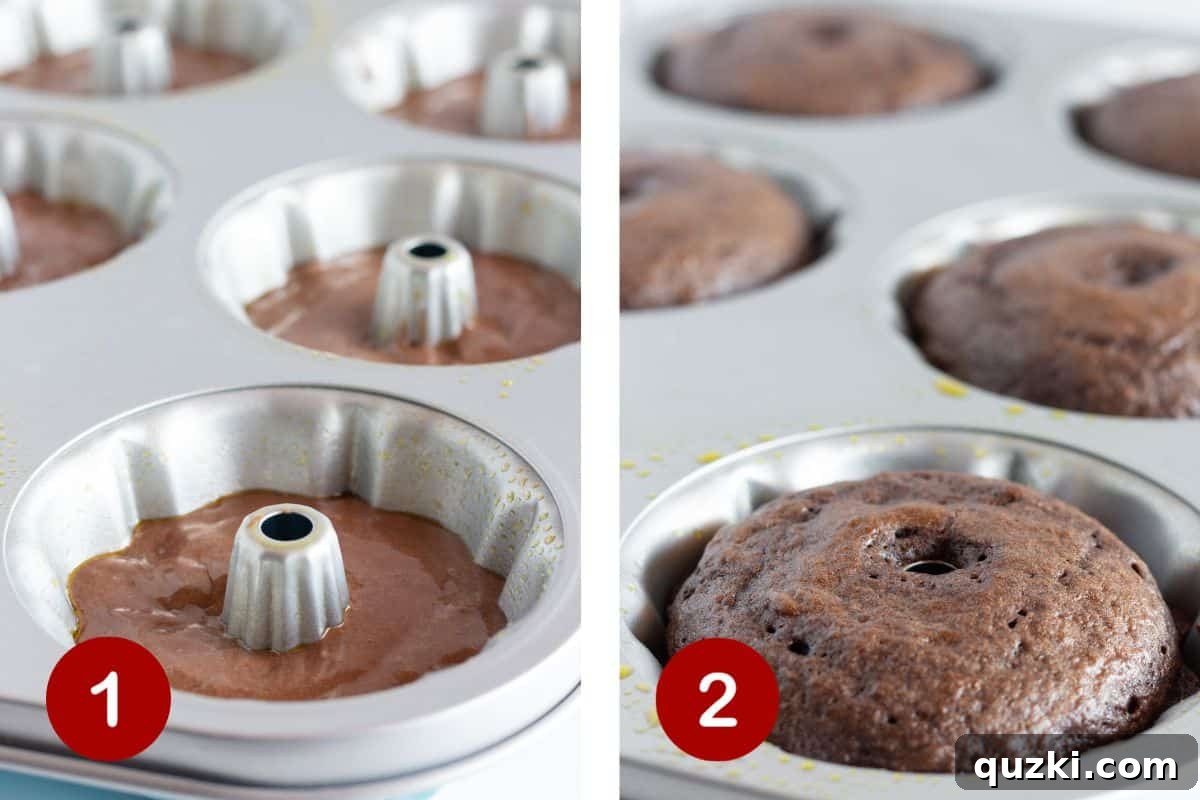
In a large mixing bowl, combine the chocolate cake mix, eggs, vegetable oil, water, brewed coffee, and sour cream. Using an electric mixer (or a whisk if mixing by hand), beat the ingredients together on medium speed until the batter is smooth and well combined. Be careful not to overmix; mix just until no dry streaks remain. Liberally spray the cavities of your mini bundt cake pan with a nonstick baking spray (like Baker’s Joy, which contains flour). Fill each cavity about two-thirds full with the chocolate batter. This prevents overflow and ensures the cakes bake evenly with their signature bundt shape.
Step 2: Bake to Golden Perfection
Preheat your oven to 350°F (175°C). Carefully place the filled mini bundt pan into the preheated oven and bake for 12-15 minutes. Baking times can vary slightly depending on your oven and the specific size of your mini bundt pan. To check for doneness, insert a toothpick into the center of a cake; it should come out with only a few moist crumbs attached, but not wet batter. Once baked, remove the pan from the oven and let the cakes cool in the pan for about 10 minutes. This crucial cooling time allows the cakes to firm up slightly, making them easier to remove without breaking. After 10 minutes, carefully invert the cakes onto a wire rack to cool completely. Ensuring they are fully cooled before adding ganache is key to preventing the ganache from melting.
Step 3: Craft the Velvety Chocolate Ganache
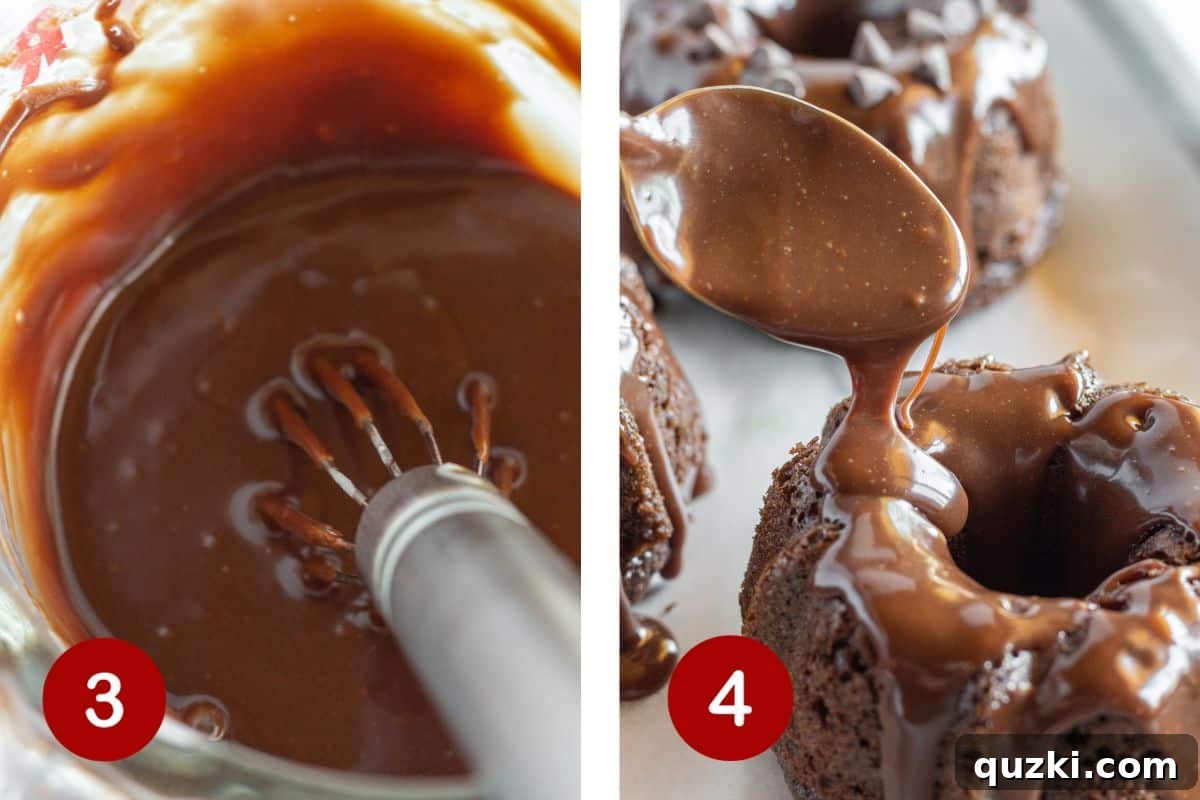
Once your mini bundt cakes are fully cooled, it’s time to prepare the luscious chocolate ganache. In a heat-proof bowl, combine the milk chocolate chips and heavy cream. Microwave the mixture for 30 seconds. After heating, remove the bowl and whisk the ingredients together until they are smooth and glossy. If the mixture still appears chunky or not fully melted, return it to the microwave for additional 15-second increments, whisking after each, until you achieve a perfectly smooth and pourable consistency. The goal is a velvety, rich ganache that spoons easily over the cakes.
Step 4: Drizzle and Decorate
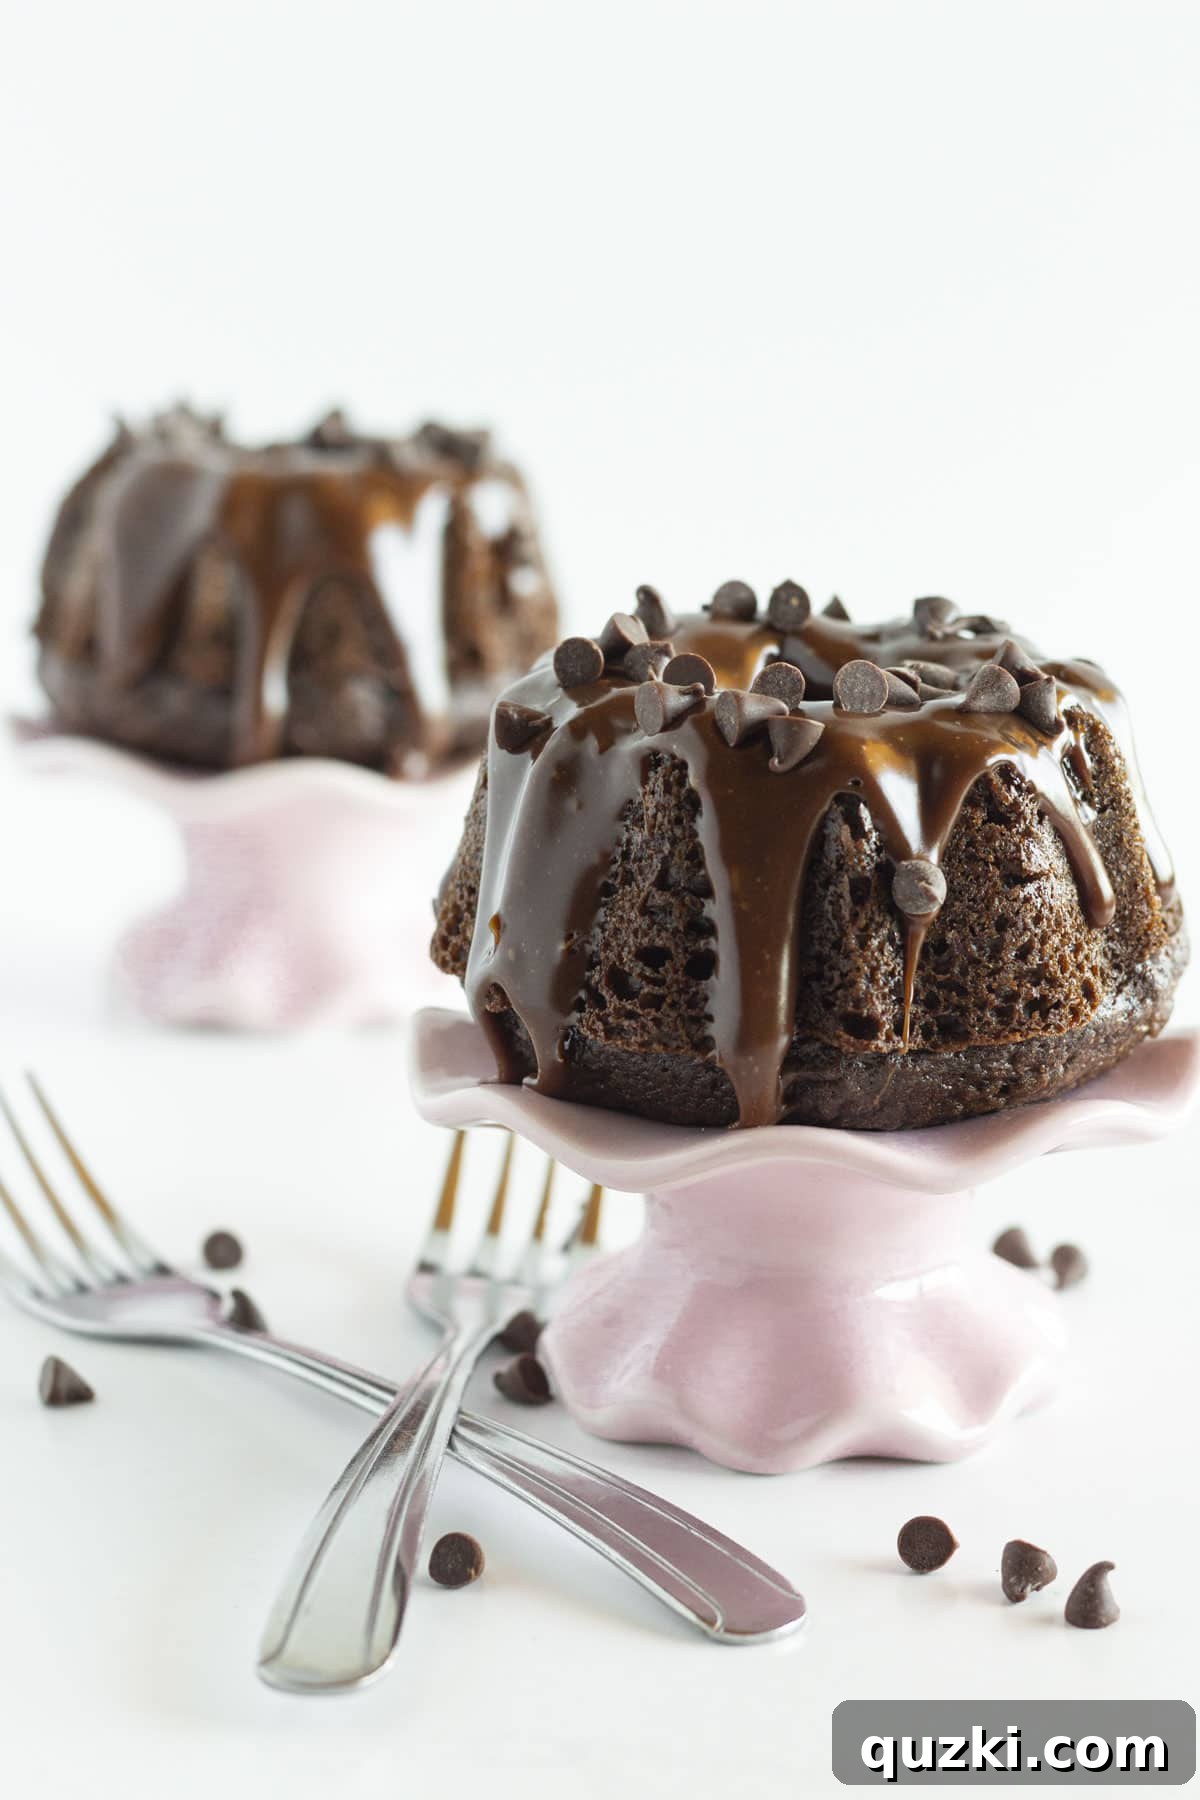
Now for the fun part – assembly and decoration! Spoon about a tablespoon of the silky chocolate ganache over the top of each individual cooled bundt cake, allowing it to artfully drip down the sides. While the ganache is still wet, immediately add your favorite toppings. This is where you can get creative – mini chocolate chips, chopped nuts, festive sprinkles, or any of the other topping ideas mentioned above. Allow the ganache to set completely before serving. This usually takes about 15-30 minutes at room temperature, or you can speed it up by chilling them briefly in the refrigerator. The set ganache will create a beautiful, slightly firm coating that adds a wonderful contrast to the soft cake.
Expert Baking Tips for Perfect Bundt Cakes
Achieving flawless mini bundt cakes, especially those with intricate designs, requires a few insider tricks. Even with a simple cake mix, attention to these details can make all the difference in preventing sticky situations and ensuring beautiful, perfectly shaped treats every time:
- Invest in a Quality Nonstick Pan: The foundation of any successful bundt cake, mini or full-sized, is a good quality nonstick pan. If you find yourself questioning the efficacy of your current pan, it’s probably a sign that an upgrade is due. A reliable nonstick coating is paramount to easy cake release and preserving the delicate bundt design.
- Liberally Spray with Nonstick Baking Spray: Even with the best nonstick pan, an extra layer of nonstick spray is crucial. Don’t be shy with the spray; ensure every nook and cranny of the bundt pan’s intricate design is thoroughly coated. Baker’s Joy is an excellent choice as it combines nonstick spray with a touch of flour, creating a superior release barrier that helps prevent sticking, especially in detailed molds.
- Allow Adequate Cooling Time in the Pan: Patience is a virtue in bundt cake baking. Resist the urge to unmold your cakes immediately after taking them out of the oven. Allowing the cakes to cool in the pan for the specified time (usually around 10 minutes for mini bundts) gives them a chance to firm up and pull away slightly from the pan’s edges. This significantly reduces the risk of them breaking apart when inverted.
- Gentle Cleaning to Preserve Nonstick Coating: To prolong the life and effectiveness of your nonstick bundt pan, avoid using anything abrasive during cleaning. Harsh scrubbers, metal utensils, or aggressive cleaning solutions can damage the nonstick surface. Opt for warm, soapy water and a soft sponge or cloth. A specialized bundt pan brush can be a fantastic tool for gently cleaning those hard-to-reach crevices without causing damage.
- Do Not Overfill the Cavities: Filling each mini bundt cavity approximately two-thirds full is key. Overfilling can lead to the batter spilling over the sides during baking, obscuring the bundt shape, and potentially making the cakes stick to the pan’s rim.
- Ensure Ingredients are at Room Temperature: For a smoother, more uniform batter, ensure your eggs and sour cream are at room temperature. This allows them to emulsify better with the other ingredients, leading to a more consistent and moist cake texture.
- Tap the Pan Before Baking: After filling the pan, gently tap it on your counter a few times. This helps to release any trapped air bubbles in the batter, which can lead to unsightly holes in your finished cakes.
Storing and Freezing Your Mini Bundt Cakes
Proper storage is key to maintaining the freshness and deliciousness of your mini chocolate bundt cakes. Whether you plan to enjoy them within a few days or save them for a future treat, here’s how to keep them at their best:
How to Store: For optimal freshness, the best way to store these small bundt cakes is in an airtight container. Arrange them in a single layer to prevent any damage to the ganache or the delicate cake structure. If stacking is necessary, place a piece of parchment paper between layers. They will last longer if stored in the refrigerator, typically remaining fresh for up to 4-5 days. However, for a softer texture, they can also be stored at room temperature for 2-3 days, especially if your kitchen isn’t overly warm. Always ensure the container is tightly sealed to prevent the cakes from drying out.
How to Freeze: These delightful little bundt cakes are excellent candidates for freezing, allowing you to enjoy them weeks or even months later. They can be frozen for up to 3 months. For the best results when freezing, it is highly recommended to freeze them before adding the chocolate ganache. Once cooled completely, wrap each mini bundt cake individually in plastic wrap, then place them in an airtight freezer-safe container or a heavy-duty freezer bag. This double layer of protection helps prevent freezer burn. When you’re ready to enjoy them, simply thaw the cakes at room temperature for a few hours. Once thawed, you can then prepare and apply the fresh chocolate ganache and your chosen toppings for a perfectly fresh-tasting dessert.
Recipe FAQs: Your Questions Answered
Absolutely! This versatile chocolate cake recipe can easily be adapted for a regular-sized Bundt pan or even a 9×13-inch baking pan. If using a standard Bundt pan, the bake time will increase to approximately 35-40 minutes. For a 9×13-inch pan, expect a baking time of about 25-30 minutes. Always perform the toothpick test to ensure the cake is fully baked through. The key is to keep an eye on it, as oven temperatures can vary.
Yes, you can certainly make chocolate bundt cakes ahead of time, which can be a huge time-saver. These cakes are actually quite perfect on the second day, as the flavors have a chance to meld and deepen. You can bake them a day in advance and store them in an airtight container at room temperature. For longer storage, freezing is your best option. You can freeze the baked, unfrosted cakes for up to 3 months. When ready to serve, simply thaw them and then apply the ganache and any desired toppings. This method ensures optimal freshness and flavor.
The addition of coffee to a chocolate cake recipe is a classic baking secret, and for good reason! While both cocoa and coffee flavors can be distinct and even bitter on their own, a bit of strong coffee or espresso powder works like magic when mixed with chocolate. It doesn’t make the cake taste like coffee; instead, it intensely amplifies and deepens the natural chocolate flavor. The coffee helps to bring out the richer, darker notes of the cocoa, making the chocolate truly shine and resulting in an even more wonderfully decadent and complex flavor profile.
There are a few different types of mini bundt pans available, and the choice can affect your bake time. I typically use a pan that bakes 6 larger individual cakes, sometimes referred to as a “Bundtlette” pan. This size generally requires a baking time of 12-15 minutes. Alternatively, you might find pans that have 12 smaller mini bundt cake cavities. If you opt for these smaller molds, please note that the bake time will be shorter, usually around 9-11 minutes. Always keep a close eye on your cakes and use the toothpick test for accuracy, as oven temperatures can vary.
Absolutely! While this recipe focuses on chocolate, the technique of enhancing a cake mix with sour cream and coffee (or other flavor enhancers) can be applied to other cake mix flavors. For instance, a Devil’s Food cake mix would yield an even richer chocolate flavor, or you could experiment with a German chocolate cake mix for a unique twist. Ensure your added liquids and flavorings complement the chosen cake mix. Just remember to adjust any toppings accordingly!
Mini bundt cakes sticking to the pan is a common issue, often due to insufficient pan preparation. Ensure you generously coat every crevice of your nonstick pan with baking spray that contains flour (like Baker’s Joy). Don’t use regular cooking spray alone, as it doesn’t provide the necessary release. Also, make sure the cakes cool in the pan for the recommended 10 minutes before inverting. This allows them to firm up and naturally pull away from the sides. If they still stick, a thin layer of melted butter and then flouring the pan before filling can also help.
Craving More Chocolate? Discover These Amazing Cake Recipes…
If you’ve fallen in love with these Mini Chocolate Bundt Cakes, you’ll be thrilled to explore other sensational chocolate cake recipes. From rich brownie-inspired bundts to elegant layered creations, these recipes will satisfy any chocolate lover’s desires:
More Irresistible Chocolate Cake Creations
Desserts
Super Easy Chocolate Brownie Bundt Cake
Desserts
Super Easy Ferrero Rocher Cake Recipe
Desserts
Cherry Cheesecake Chocolate Bundt Cake Recipe Made with a Cake Mix
Cakes
Better Than Anything Chocolate Cake
Did you try this recipe? Leave a ⭐ review below and tag @practicallyhomemade on Pinterest! We love seeing your delicious creations!
Easy Mini Chocolate Bundt Cakes with a Cake Mix
June Albertson-Dick
15 minutes
15 minutes
10 minutes
40 minutes
12 mini cakes
Rate Recipe
Print Recipe
Ingredients
Chocolate Cakes
- 1 box chocolate cake mix, {13.25 ounces}
- 3 large eggs
- ½ cup vegetable oil
- 1 cup water
- ¼ cup brewed coffee
- ¼ cup sour cream
Chocolate Ganache
- 1 cup milk chocolate chips
- ¼ cup heavy cream
Prevent your screen from going dark
Instructions
-
Preheat the oven to 350°F (175°C).
Chocolate Cakes
-
Combine chocolate cake mix, eggs, vegetable oil, water, brewed coffee, and sour cream in a large bowl. Use a hand-held mixer (or mix by hand) to blend the ingredients until you have a smooth batter with no dry streaks.
-
Spray each mini bundt pan cavity liberally with nonstick cooking spray that contains flour (like Baker’s Joy). Fill the pans ⅔ full. Bake for 12-15 minutes, or until a toothpick inserted into the center of the cakes comes out with only a few moist crumbs.
-
Allow the cakes to cool in the pans for 10 minutes. If needed, gently run a knife around the edge of each cake to loosen them, then turn them out onto a wire rack to cool completely.
Chocolate Ganache
-
Combine the milk chocolate chips and heavy cream in a small heat-proof bowl. Microwave for 30 seconds. Whisk the ingredients until smooth. If it’s still chunky, microwave in additional 15-second increments and whisk again until smooth and pourable.
Assembly
-
Pour about a tablespoon of chocolate ganache over the top of each cooled cake. Top with your favorite topping immediately, while the ganache is still wet. Allow the ganache to set up (about 15-30 minutes at room temperature) and then serve. Store cakes in an airtight container at room temperature for 2-3 days or in the refrigerator for up to 4 days.
Notes
- If you are using a mini bundt pan with 12 smaller cavities (instead of 6 larger ones), they will only need to bake for 9-11 minutes. Always use the toothpick test for accuracy.
- TOPPING IDEAS: Mini chocolate chips, chopped nuts (pecans, walnuts), sprinkles (colorful, holiday-themed, or chocolate), chopped candy (mini M&M’s, crushed toffee), powdered sugar, fresh berries, or a drizzle of caramel.
- To maintain the nonstick quality of your bundt pan, avoid using anything abrasive on the surface when cleaning. Gentle washing with warm, soapy water and a soft sponge is best.
Nutrition
Nutrition information is automatically calculated, so should only be used as an approximation.
Like this? Leave a comment below!