
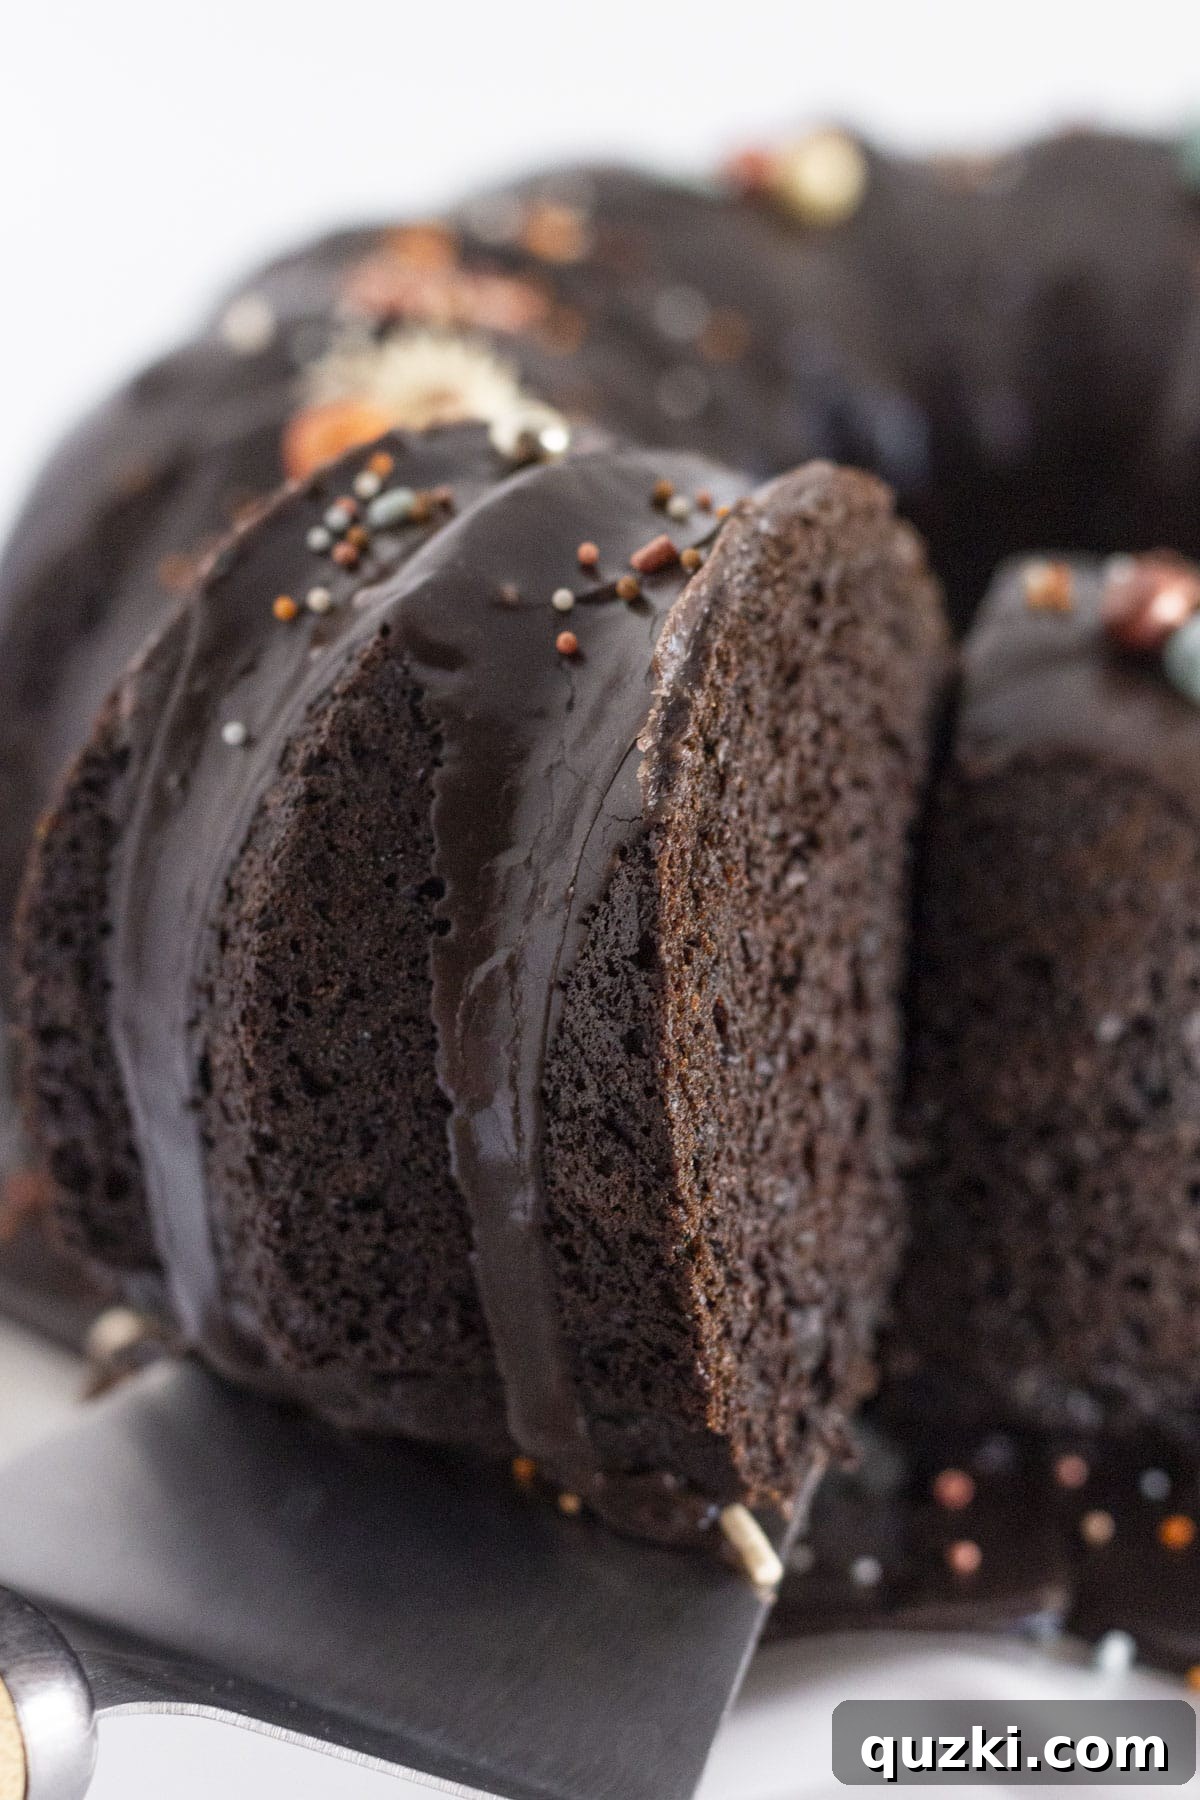
Craving a stunningly dark and deeply delicious chocolate cake without artificial food coloring? Look no further! This Moist Black Velvet Bundt Cake recipe is your ultimate guide to baking a show-stopping dessert that gets its intense, dramatic black hue and rich flavor from the star ingredient: black cocoa powder. Forget messy dyes and embrace the natural, elegant darkness that only black cocoa can provide, resulting in a perfectly tender and flavorful treat that will impress everyone.
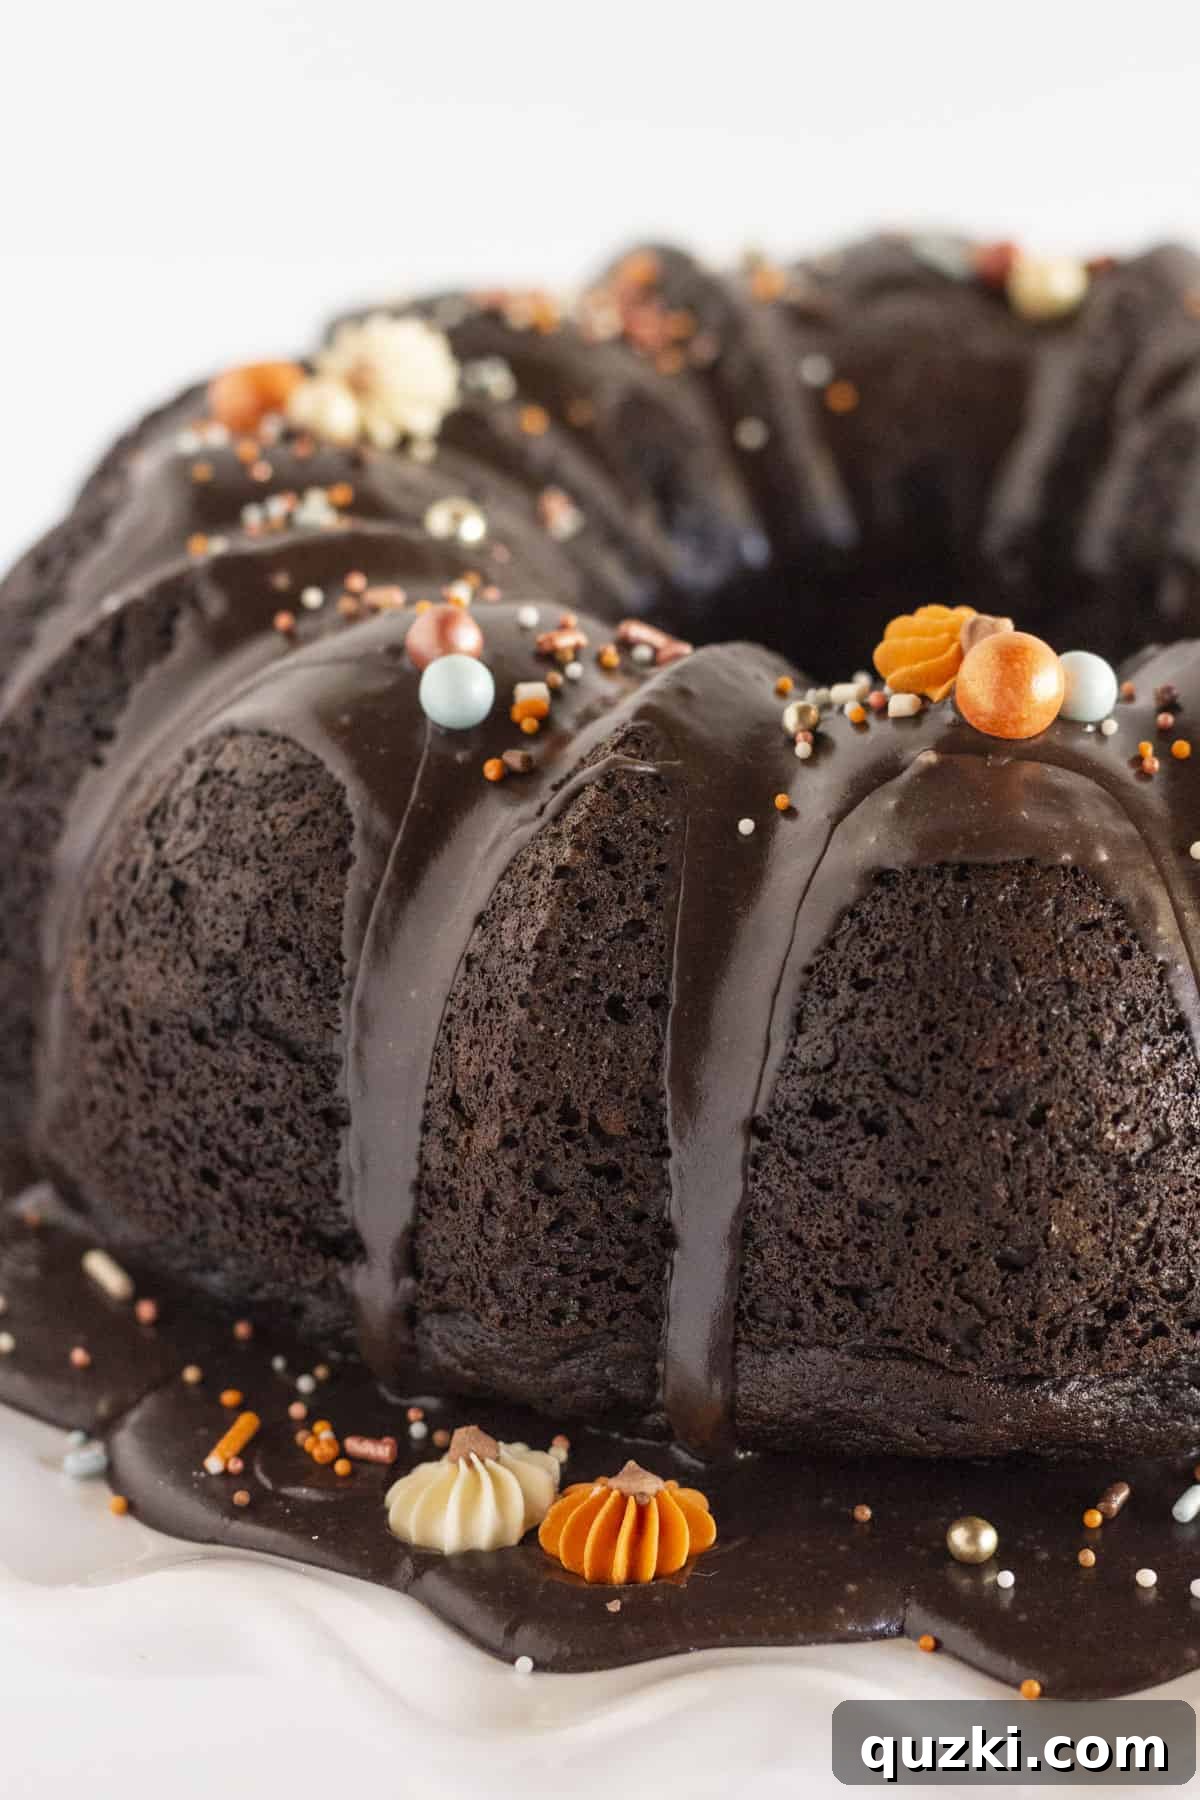
Table of Contents
- What is Black Velvet Cake?
- The Magic Behind the Ingredients
- Step-by-Step Guide to Baking Black Velvet Bundt Cake
- Expert Baking Tips and Tricks
- Proper Storage and Freezing Techniques
- Black Velvet Cake FAQs
- Explore More Chocolate Cake Delights
- Easy Black Velvet Bundt Cake Recipe Card
Whether you’re celebrating Halloween with a spooky-chic treat, hosting an elegant dinner party, or simply indulging in a rich chocolate craving, this black velvet bundt cake stands out. Its deep, mysterious color makes it an ideal centerpiece for seasonal festivities, while its incredibly moist crumb and intense cocoa flavor promise a truly unforgettable dessert experience for any occasion.
What is Black Velvet Cake?
Black velvet cake is a captivating twist on the classic red velvet cake, sharing its signature tender, “velvety” texture but distinguishing itself with an incredibly dark, almost midnight-black hue. Unlike red velvet, which achieves its vibrant color through a combination of regular cocoa powder and a generous amount of red food coloring, black velvet cake gets its dramatic appearance naturally from **black cocoa powder**. This special ingredient is heavily Dutch-processed, meaning it has been treated with an alkali to reduce its acidity. This process not only neutralizes the cocoa’s natural acidity, making it less bitter and mellower in flavor, but it also deepens its color significantly, creating the stunning rich black chocolate cake we adore.
The flavor profile of a black velvet cake is distinctively deep and rich, often compared to the intense, almost savory chocolate notes found in Oreo cookies, which famously utilize black cocoa. It offers a more profound cocoa experience than a traditional chocolate cake, without being overly sweet. The “velvet” in its name refers to the exceptionally smooth and fine crumb, which is achieved through specific ingredients like buttermilk and a balanced acidity. This unique characteristic makes it incredibly versatile for various occasions. It can serve as the perfect dramatic base for a themed celebration like a Halloween Cake, providing an effortlessly eerie elegance. Alternatively, it can be adorned with elegant garnishes for a sophisticated holiday dessert, such as a Christmas Wreath Cake, showcasing its adaptability beyond spooky season and proving that a naturally dark cake can be both fun and refined.
The Magic Behind the Ingredients
Crafting a moist and flavorful Black Velvet Bundt Cake starts with selecting the right ingredients. This recipe cleverly combines convenience with quality to deliver exceptional results. Here’s a closer look at the key components and why they are essential for achieving that perfect texture and rich flavor:
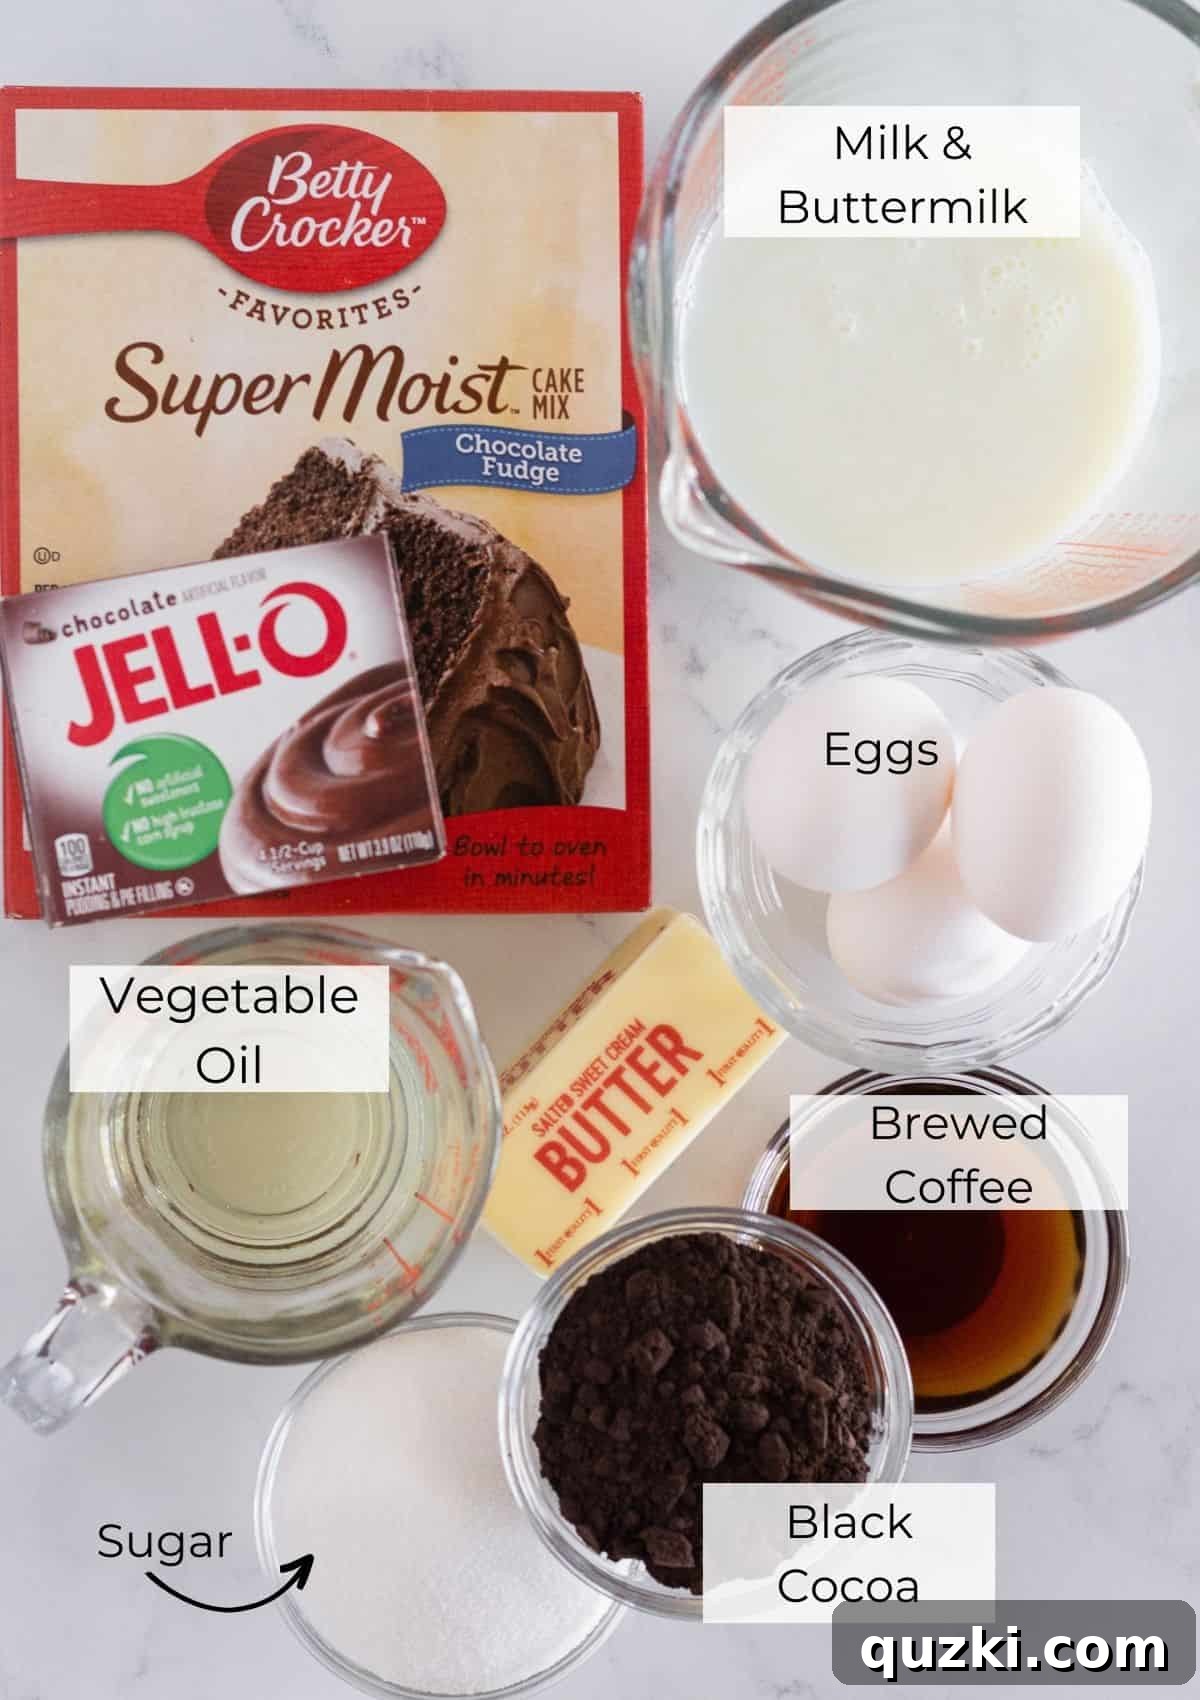
- Chocolate Cake Mix: A high-quality chocolate cake mix serves as an excellent foundation for this recipe. It simplifies the baking process, ensuring a consistent texture and rich chocolate flavor with minimal effort. Using a mix not only saves time but also guarantees a reliably delicious result, making this recipe accessible even for novice bakers. Opt for a brand you trust for the best base flavor.
- Chocolate Pudding Mix: This is a secret weapon for achieving an incredibly moist and tender cake crumb. When added to a cake mix, the pudding mix not only enhances the chocolate flavor, intensifying the overall richness, but it also acts as a powerful moisture retainer. This is particularly beneficial with black cocoa powder, which can sometimes lead to a slightly drier texture due to its processing. The pudding mix contributes to a luxurious, almost velvety mouthfeel that sets this cake apart.
- Black Cocoa Powder: The true star responsible for the cake’s dramatic appearance and distinctive flavor! Black cocoa powder is an ultra-Dutch-processed cocoa. The extensive alkalization process drastically reduces its acidity and creates an intensely dark, almost jet-black powder with a milder, less bitter chocolate taste than natural cocoa. This gives the cake a flavor profile often compared to the rich, deep chocolate in Oreo cookies. If genuine black cocoa is unavailable, a high-quality regular Dutch-processed cocoa powder can be used as a substitute. While it will still contribute a wonderful depth of chocolate flavor and a similar texture, the resulting cake will be a dark brown rather than true black, similar to this Marble Bundt Cake. Avoid natural cocoa, as it won’t yield the desired color or mellow flavor.
- Buttermilk: An iconic ingredient in all velvet cakes, buttermilk plays a crucial role in achieving that characteristic tender, soft crumb. Its inherent acidity reacts with the leavening agents present in the cake mix, helping the cake rise beautifully and contributing to its moistness and exceptionally fine texture. The slight tanginess of buttermilk also subtly balances the sweetness of the cake. If you don’t have buttermilk on hand, you can easily make your own. Simply combine 1/4 cup of regular milk in a bowl and stir in 1/4 cup of white vinegar or lemon juice. Let it sit for about 5 minutes until it slightly curdles – and voilà, you have a perfect homemade buttermilk substitute!
- Brewed Coffee: A touch of strong brewed coffee is a common secret ingredient in many chocolate desserts, and for good reason. It doesn’t make the cake taste like coffee; instead, it remarkably enhances and deepens the natural chocolate flavor, bringing out its complexity and making the cake even more intensely chocolatey and rich. It acts as a flavor booster, ensuring every bite is packed with profound cocoa notes.
For a comprehensive list of ingredients and precise quantities, please refer to the easy-to-follow recipe card below.
Step-by-Step Guide to Baking Black Velvet Bundt Cake
Creating this stunning Black Velvet Bundt Cake is simpler than you might think, especially with the convenience of a cake mix. Follow these detailed steps for a perfectly baked, moist, and dramatically dark chocolate treat that will impress with both its appearance and flavor.
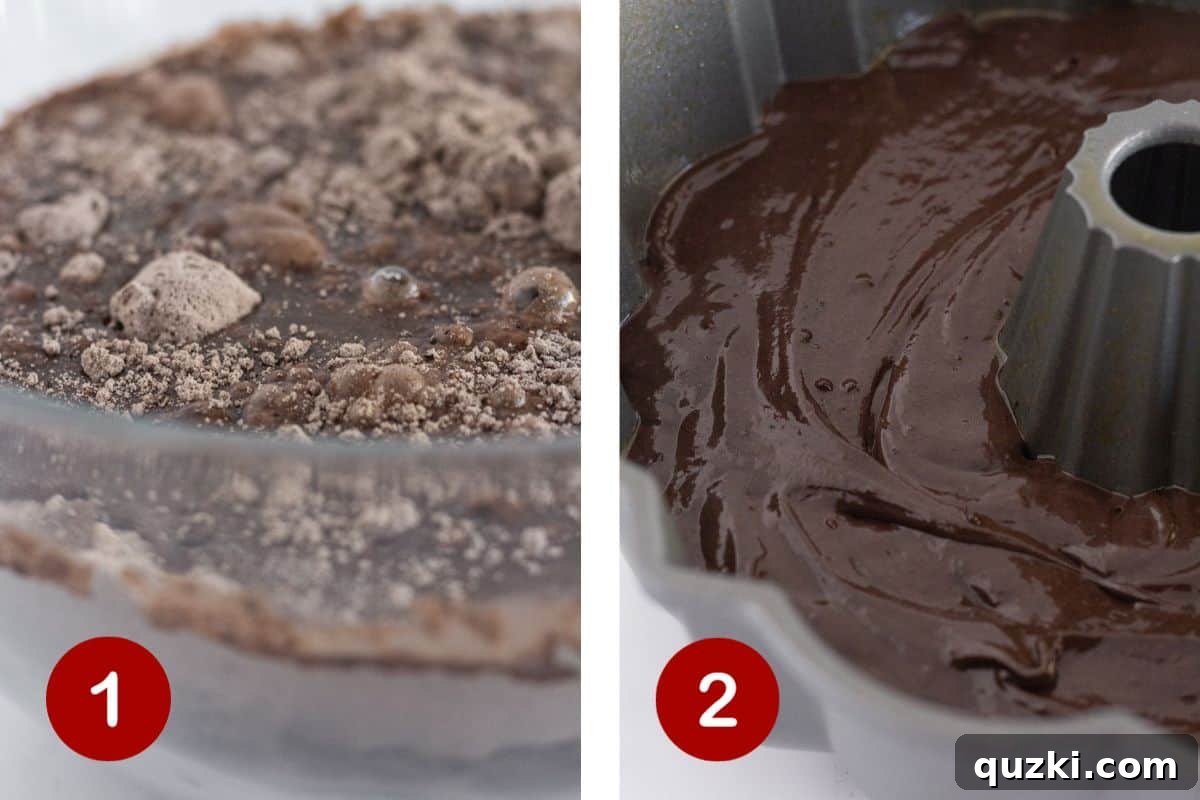
- **Preheat Oven and Prepare Dry Ingredients:** Begin by preheating your oven to 350°F (175°C). While the oven heats, in a large mixing bowl, combine the entire contents of the chocolate cake mix, the chocolate instant pudding mix, and the black cocoa powder. Whisk these dry ingredients together thoroughly for about 1-2 minutes until all components are well-incorporated and there are no visible lumps. This crucial step ensures an even distribution of flavor and color throughout your cake batter, preventing pockets of unmixed ingredients.
- **Combine Wet and Dry Ingredients for Batter:** To the perfectly combined dry mixture, add all the remaining wet cake ingredients: the three large eggs, vegetable oil, milk, buttermilk, and brewed coffee. Using an electric mixer (handheld or stand mixer), begin mixing on low speed until the dry and wet ingredients are just barely combined. Then, increase the speed to medium and continue beating for 2-3 minutes. This process will yield a smooth, uniform, and slightly aerated cake batter. Be careful not to overmix, as excessive mixing can develop too much gluten, resulting in a tougher cake.
- **Prepare the Bundt Pan and Fill:** Liberally spray your bundt cake pan with a high-quality nonstick cooking spray, ideally one that contains flour (such as Baker’s Joy or a similar product), to ensure an easy release. Make sure to coat every crevice and intricate design of the pan thoroughly, as bundt cakes are known for sticking if not properly prepared. Once the pan is ready, carefully pour the prepared cake batter into the bundt pan. Use a spatula to gently spread the batter into an even layer, ensuring it fills the pan uniformly for consistent baking.
- **Bake to Perfection:** Place the prepared bundt pan into your preheated 350°F (175°C) oven. Bake for approximately 35-40 minutes. It’s important to remember that baking times can vary slightly depending on your oven, so it’s always best to check for doneness. Insert a clean wooden toothpick into the deepest part of the cake; it should come out with only a few moist crumbs attached, but no wet batter. If it comes out clean, the cake is likely overbaked, which can lead to dryness.
- **Cool and Invert Correctly:** Once baked, remove the dark chocolate cake from the oven. Allow it to cool in the bundt pan for exactly 15 minutes on a wire rack. This crucial cooling time allows the cake to firm up slightly and pull away from the pan sides, making it much easier to release without breaking. After 15 minutes, carefully invert the cake onto a wire rack or a decorative cake plate to cool completely. Cooling thoroughly is absolutely essential before applying any frosting to prevent it from melting and sliding off. This could take an additional 45 minutes to 1 hour.
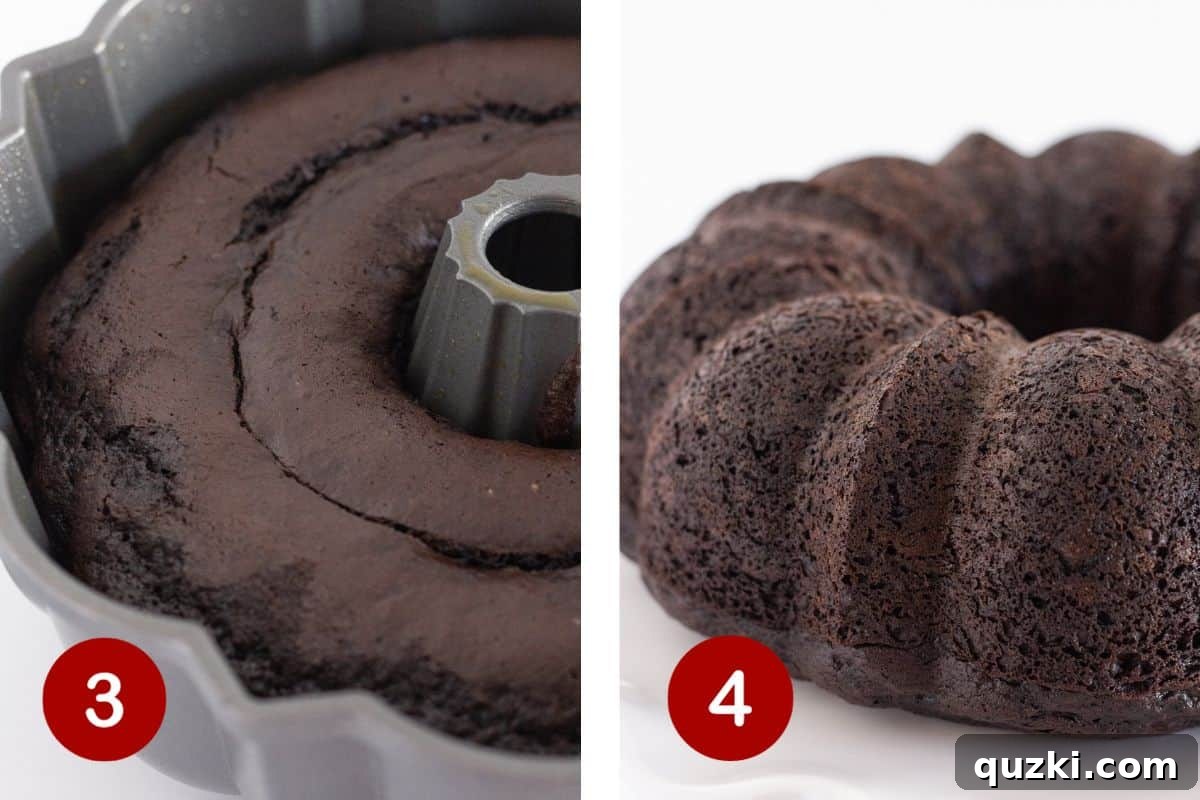
- **Prepare the Black Cocoa Frosting:** While the cake is cooling, begin preparing your rich and glossy black cocoa frosting. In a small saucepan, combine the salted butter, black cocoa powder, and milk. Place the saucepan over medium heat and stir continuously. Heat the mixture until the butter is completely melted, and all ingredients are warm, smooth, and well-blended. Ensure there are no lumps of cocoa powder.
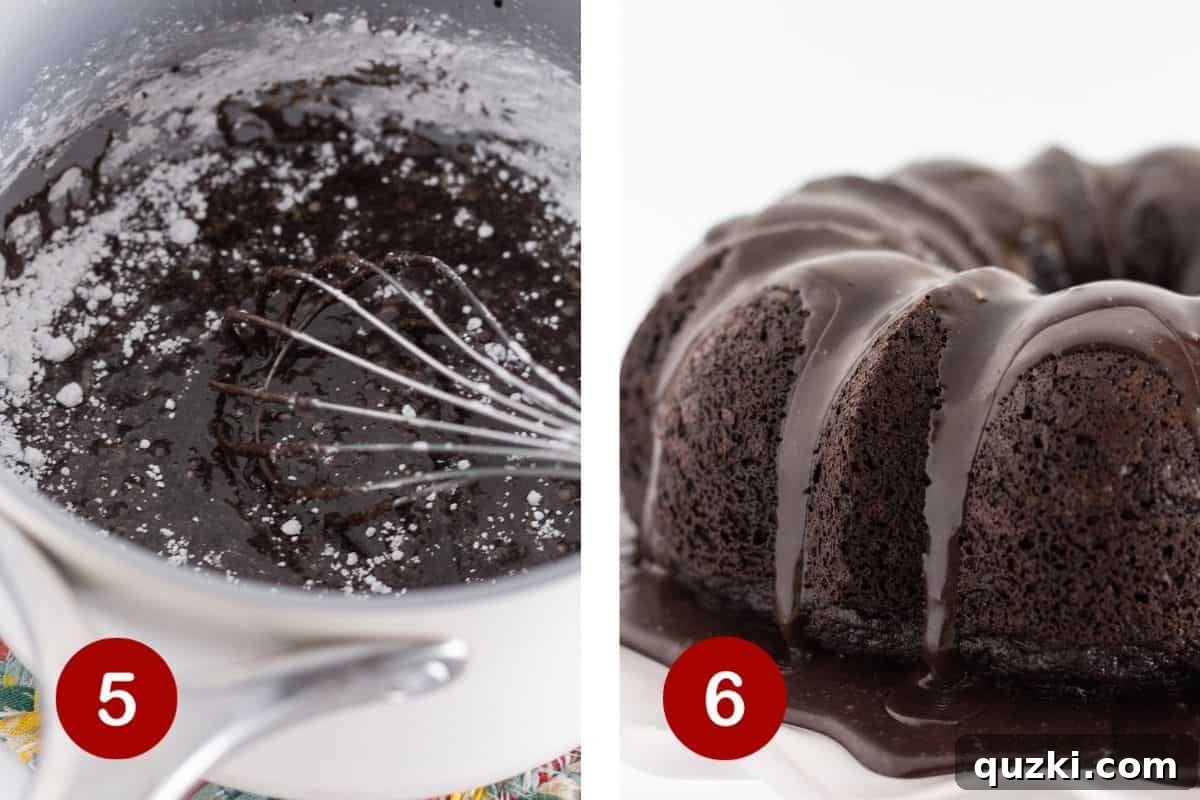
- **Whisk in Powdered Sugar and Thicken:** Remove the saucepan from the heat. Gradually add the powdered sugar to the warm cocoa mixture. Whisk vigorously using a spoon or a small whisk until the frosting is completely smooth and free of any lumps. Allow the frosting to sit for about 2 minutes. During this brief resting period, it should thicken slightly to a perfect pourable consistency, making it ideal for glazing the bundt cake.
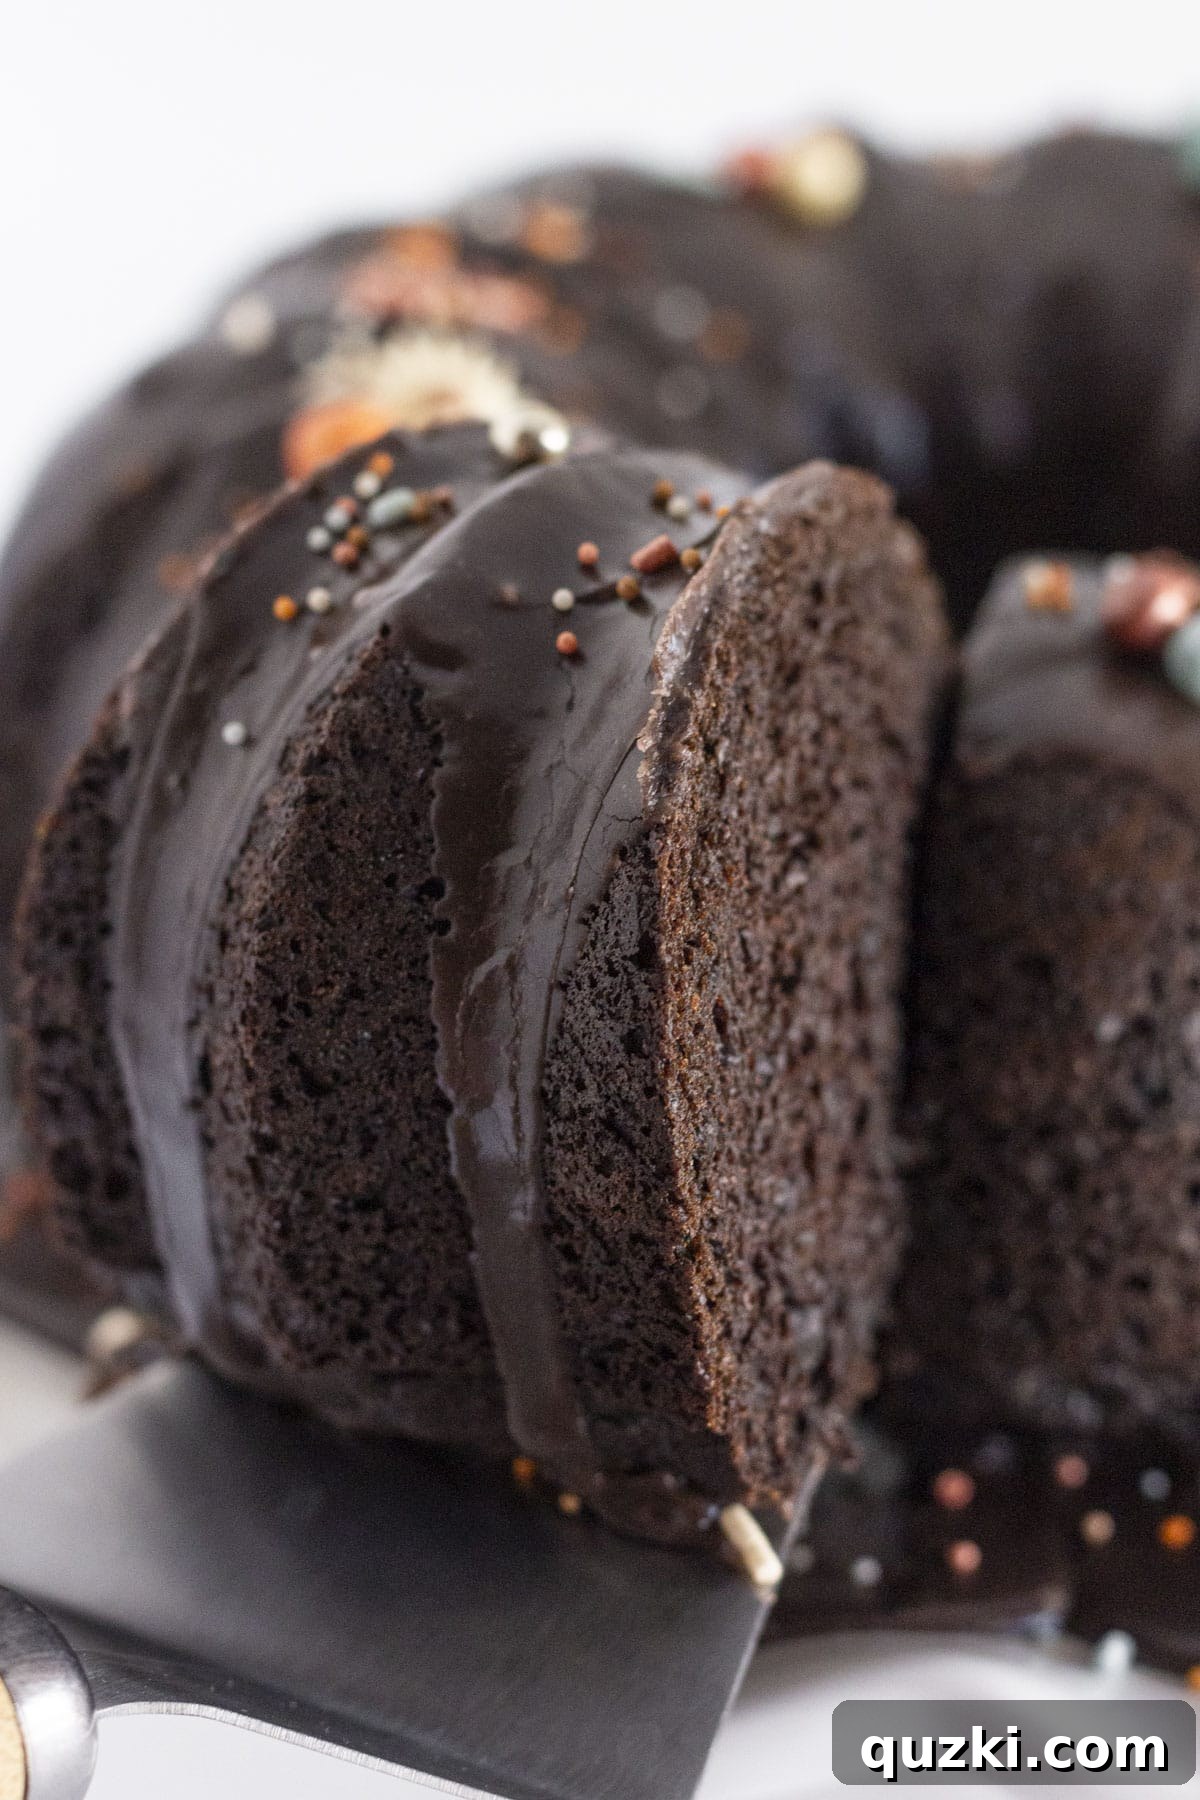
- **Frost the Cooled Cake:** Once the cake is completely cool to the touch, pour the luscious black cocoa frosting evenly over the top. Allow it to cascade down the sides, creating an appealing glazed finish. For an extra touch of flair and festive charm, immediately adorn the freshly frosted cake with your favorite sprinkles before the frosting has a chance to fully set. Slice and serve this magnificent black velvet bundt cake to eager guests!
Expert Baking Tips and Tricks
Achieving a perfectly moist and beautiful Black Velvet Bundt Cake is easier with a few insider tips. These pointers will help you avoid common pitfalls and ensure your cake turns out flawlessly and deliciously every time:
- Timing is Key for Pan Preparation: Always wait until your cake batter is fully mixed and ready to go before liberally spraying your bundt pan with nonstick cooking spray. If you spray the pan too early, the oil can pool at the bottom, leading to an uneven coating and potentially causing the cake to stick when inverted. For extra insurance, especially with intricate bundt designs, after spraying, you can lightly dust the pan with a tablespoon of black cocoa powder (to maintain color) or flour, tapping out any excess. This creates a highly effective non-stick barrier.
- Patience with Cooling is a Virtue: Resist the urge to frost a warm cake! It’s absolutely crucial for the cake to be completely cooled before you even think about adding the frosting. If the cake is even slightly warm, the frosting will melt and slide right off, creating a messy rather than a beautifully glazed finish. Allow at least 45 minutes to an hour for the cake to cool fully on a wire rack after its initial 15 minutes in the pan. Rushing this step is a common mistake that can ruin your presentation.
- Creative Frosting Variations: While the included black cocoa frosting is wonderfully rich and complements the cake perfectly, feel free to get creative and personalize your dessert! A classic cream cheese frosting offers a delightful tangy contrast to the deep chocolate, creating a popular flavor pairing. Alternatively, a silky black cocoa buttercream can provide a more substantial, pipeable frosting, perfect for more elaborate decorations. For ultimate convenience on a busy day, a good quality store-bought can of chocolate frosting can be warmed slightly and poured over the cake for a quick and easy glaze. Don’t be afraid to experiment with different flavors and textures to find your favorite pairing. Explore options like this Halloween Bundt Cake for more inspiration on decorating with various frostings and themes.
- Troubleshooting Common Bundt Cake Issues:
- **Cake sticking to the pan:** This is almost always due to insufficient greasing or not allowing the cake to cool long enough in the pan. Ensure thorough pan prep, and strictly adhere to the 15-minute in-pan cooling rule before attempting to invert. If it still sticks, run a thin plastic knife along the edges.
- **Dry cake:** The addition of pudding mix and buttermilk are your best defense against dryness, but over-baking is the main culprit. Always use the toothpick test and remove the cake promptly from the oven once it’s done.
- **Uneven baking:** Ensure your oven is fully preheated to the correct temperature. An oven thermometer can help verify this. Also, consider rotating the pan halfway through baking for more consistent heat distribution, especially if you know your oven has hot spots.
- **Hole in the center of bundt:** If your cake tears when coming out, it could be due to sticking or not cooling properly. Ensure correct pan preparation.
- Presentation Power: This black velvet cake is an excellent blank canvas for various decorative themes. For Halloween, think spooky sprinkles, edible googly eyes, or intricate spiderweb designs with white frosting. For a sophisticated look, consider a simple dusting of powdered sugar, fresh bright berries (especially raspberries or strawberries for a striking color contrast), or a scattering of silver or gold edible glitter. The dark canvas makes any decoration pop and elevates the cake’s visual appeal.
Proper Storage and Freezing Techniques
To keep your Black Velvet Bundt Cake tasting fresh and delicious for as long as possible, proper storage is essential. Whether you plan to enjoy it over a few days or save some for later, here’s how to best store and freeze your decadent creation to maintain its perfect moisture and flavor:
- Storing at Room Temperature: For optimal flavor and moisture, this black velvet cake is best stored in an airtight container at room temperature for up to 3 days. Ensure it’s kept in a cool, dry place, away from direct sunlight or any heat sources that could prematurely dry it out. An airtight container is crucial as it prevents the cake from absorbing external odors and helps to lock in its tender texture, keeping it fresh for enjoyment.
- Refrigerating for Extended Freshness: If you need to store the cake for a longer period, it can be refrigerated for up to 4 days. When placing it in the fridge, always use a well-sealed airtight container. This protective barrier is vital to prevent the cake from absorbing any unwanted refrigerator odors and to shield it from the drying effects of cold air. Before serving, allow the cake to come to room temperature for about 30 minutes to an hour. This step is important because chilling can slightly alter the texture and dull the flavors; warming it up allows the flavors to bloom and the crumb to soften again, providing the best tasting experience.
- Freezing for Long-Term Enjoyment: This bundt cake freezes beautifully, making it perfect for preparing desserts in advance, or simply saving leftovers for a future craving. You have the option to freeze the cake with or without the frosting, depending on your preference and future plans.
- For Unfrosted Cake: Once the cake is completely cooled to room temperature, wrap it tightly in several layers of plastic wrap. Then, add an additional protective layer of heavy-duty aluminum foil. This double wrapping is essential to prevent freezer burn and protect its delicate flavor and texture from the harsh freezer environment.
- For Frosted Cake: If your cake is already frosted, place the entire cake in the freezer uncovered for about an hour, or until the frosting is completely firm. This step prevents the frosting from sticking to the wrapping. Once the frosting is frozen solid, wrap the cake securely in plastic wrap, followed by a layer of aluminum foil, just as you would with an unfrosted cake.
Properly frozen, the cake can be stored for up to 2-3 months. To thaw, simply unwrap the cake (if unfrosted) or keep it wrapped (if frosted) and let it sit at room temperature for several hours or overnight in the refrigerator. This gradual thawing helps maintain its moisture and texture.
Black Velvet Cake FAQs
The flavor of a black velvet cake is a rich, deep chocolate, but with a unique profile that sets it apart from traditional chocolate cakes. Thanks to the black cocoa powder, it offers an intense cocoa experience that leans towards dark chocolate notes, often described as less bitter and smoother than cakes made with natural cocoa. If you’re wondering what to expect, think of the distinct chocolate taste of Oreo cookies – they utilize a similar type of black cocoa, giving you a perfect reference point for its unique, delicious flavor. It’s a profound chocolate taste without being overly sweet or cloying.
The primary differences between red and black velvet cake lie in their color source and a subtle variation in chocolate flavor profile. While both are part of the “velvet” cake family, known for their tender crumb, a red velvet cake traditionally incorporates a significant amount of red food coloring to achieve its vibrant crimson hue, combined with regular unsweetened cocoa powder. In contrast, a rich black velvet cake derives its deep, dramatic black color solely from the use of black cocoa powder, which is a heavily Dutch-processed cocoa. This difference in cocoa also gives black velvet a more pronounced, often milder, and deeper chocolate flavor compared to the slightly tangier profile of a red velvet cake, which often has a hint of acidity from ingredients like vinegar and buttermilk reacting with baking soda.
Absolutely! This versatile cake recipe can be easily adapted to various pan sizes, offering flexibility for different serving needs and presentations.
- **Round Cake Pans:** For beautiful layer cakes, you can use two 9-inch round cake pans. Remember to line the bottom of the pans with parchment paper and grease the sides well to prevent sticking. The baking time will be shorter than for a bundt, typically around 28-32 minutes, or until a toothpick inserted into the center comes out clean.
- **9×13 Baking Pan:** If you prefer a simpler sheet cake that can be served directly from the pan, a 9×13 inch baking pan works perfectly. Bake this single-layer cake for approximately 25-32 minutes, always using the toothpick test for doneness. Keep in mind that for different pan shapes, you may need to adjust the quantity of frosting to ensure full coverage.
The intensity of the black color primarily depends on the quality and type of black cocoa powder used. Ensure you are purchasing and using true “black cocoa” which is ultra-Dutch-processed. If you use regular Dutch-processed cocoa or natural cocoa (which is acidic), the cake will likely turn out a very dark brown, not a deep black. Also, ensure you use the recommended amount of black cocoa powder in the recipe. Baking time can also subtly affect color; over-baking can sometimes slightly dull the intensity of the black hue, making it look less vibrant.
While this recipe leverages a cake mix for its incredible convenience and consistent, delicious results, you can certainly adapt a scratch chocolate cake recipe to achieve a similar effect. To do so, you would substitute a significant portion of regular cocoa with black cocoa powder and potentially adjust leavening agents (like baking soda or baking powder) as needed to account for black cocoa’s lower acidity. Many scratch recipes for “blackout cake” or “dark chocolate cake” exist that utilize black cocoa. However, for a reliable, moist, and easy bake with a stunning dark color, this cake mix-based recipe is a fantastic and foolproof choice for home bakers.
Explore More Chocolate Cake Delights
If you’ve fallen in love with the rich flavors and delightful simplicity of this Black Velvet Bundt Cake, you’re in for a treat! We have a collection of irresistible chocolate cake recipes that are just as easy to make and guaranteed to satisfy any chocolate craving. Dive into these delightful creations for more baking inspiration and discover your next favorite dessert:
Cakes
Easy Mini Chocolate Bundt Cakes with a Cake Mix
Desserts
Super Easy Chocolate Brownie Bundt Cake
Desserts
Cherry Cheesecake Chocolate Bundt Cake Recipe Made with a Cake Mix
Desserts
Super Easy Ferrero Rocher Cake Recipe
Did you try this recipe? We’d love to hear your thoughts! Leave a ⭐️ review below and tag @practicallyhomemade on Pinterest or share your creation on social media. Your feedback helps us continue to share delicious recipes!
Easy Black Velvet Bundt Cake
Rate Recipe
Print Recipe
Ingredients
Black Velvet Cake
- 1 box chocolate cake mix, {15.25 ounces}
- 1 box chocolate instant pudding mix, {3.4 ounces}
- ¼ cup black cocoa powder
- 3 large eggs
- ½ cup vegetable oil
- ½ cup milk
- ¼ cup buttermilk
- ¼ cup brewed coffee
Black Cocoa Frosting
- ½ cup salted butter
- 2 Tablespoons black cocoa powder
- 3 Tablespoons milk
- 2 ½ cups powdered sugar
Instructions
Black Velvet Cake
-
Preheat the oven to 350°F (175°C).
-
To prepare cake batter: In a large bowl, whisk together the chocolate cake mix, chocolate pudding mix, and black cocoa powder. Add the eggs, vegetable oil, milk, buttermilk, and brewed coffee. Mix using an electric mixer on low until combined, then increase to medium and beat for 2-3 minutes until smooth.
-
Liberally spray a bundt pan with nonstick cooking spray. Pour the prepared batter into the pan and spread into an even layer.
-
Bake for 35-40 minutes, or until a toothpick inserted in the center comes out with only a few moist crumbs (no raw batter).
-
Cool in the pan for 15 minutes, then invert onto a wire rack or cake plate and cool completely (approximately 45 minutes to 1 hour).
Black Cocoa Frosting
-
Combine the salted butter, black cocoa powder, and milk in a small saucepan over medium heat. Stir until everything is melted and smooth. Remove from heat, add powdered sugar, and whisk until smooth.
Assembly
-
Allow the frosting to sit in the saucepan for 2 minutes (it should thicken slightly but still be pourable). Pour the frosting evenly over the top of the cooled cake. Optionally, top with festive sprinkles.
Notes
- Wait to spray the bundt pan until the batter is ready. If you spray the bundt pan too soon, the oil can pool at the bottom and cause sticking.
- Wait for the cake to be completely cooled before adding the frosting. If you apply frosting while the cake is warm, it will melt and won’t set properly.
- This black velvet bundt cake makes an excellent base for themed decorating. For a fun Halloween treat, consider using spooky sprinkles or edible decorations.
- Don’t hesitate to change up the frosting! A rich cream cheese frosting or a smooth black cocoa buttercream would both be delicious alternatives. For a quick option, you can even warm a can of store-bought chocolate frosting and pour it over the cake for an instant glaze.
Nutrition
Nutrition information is automatically calculated, so should only be used as an approximation.