
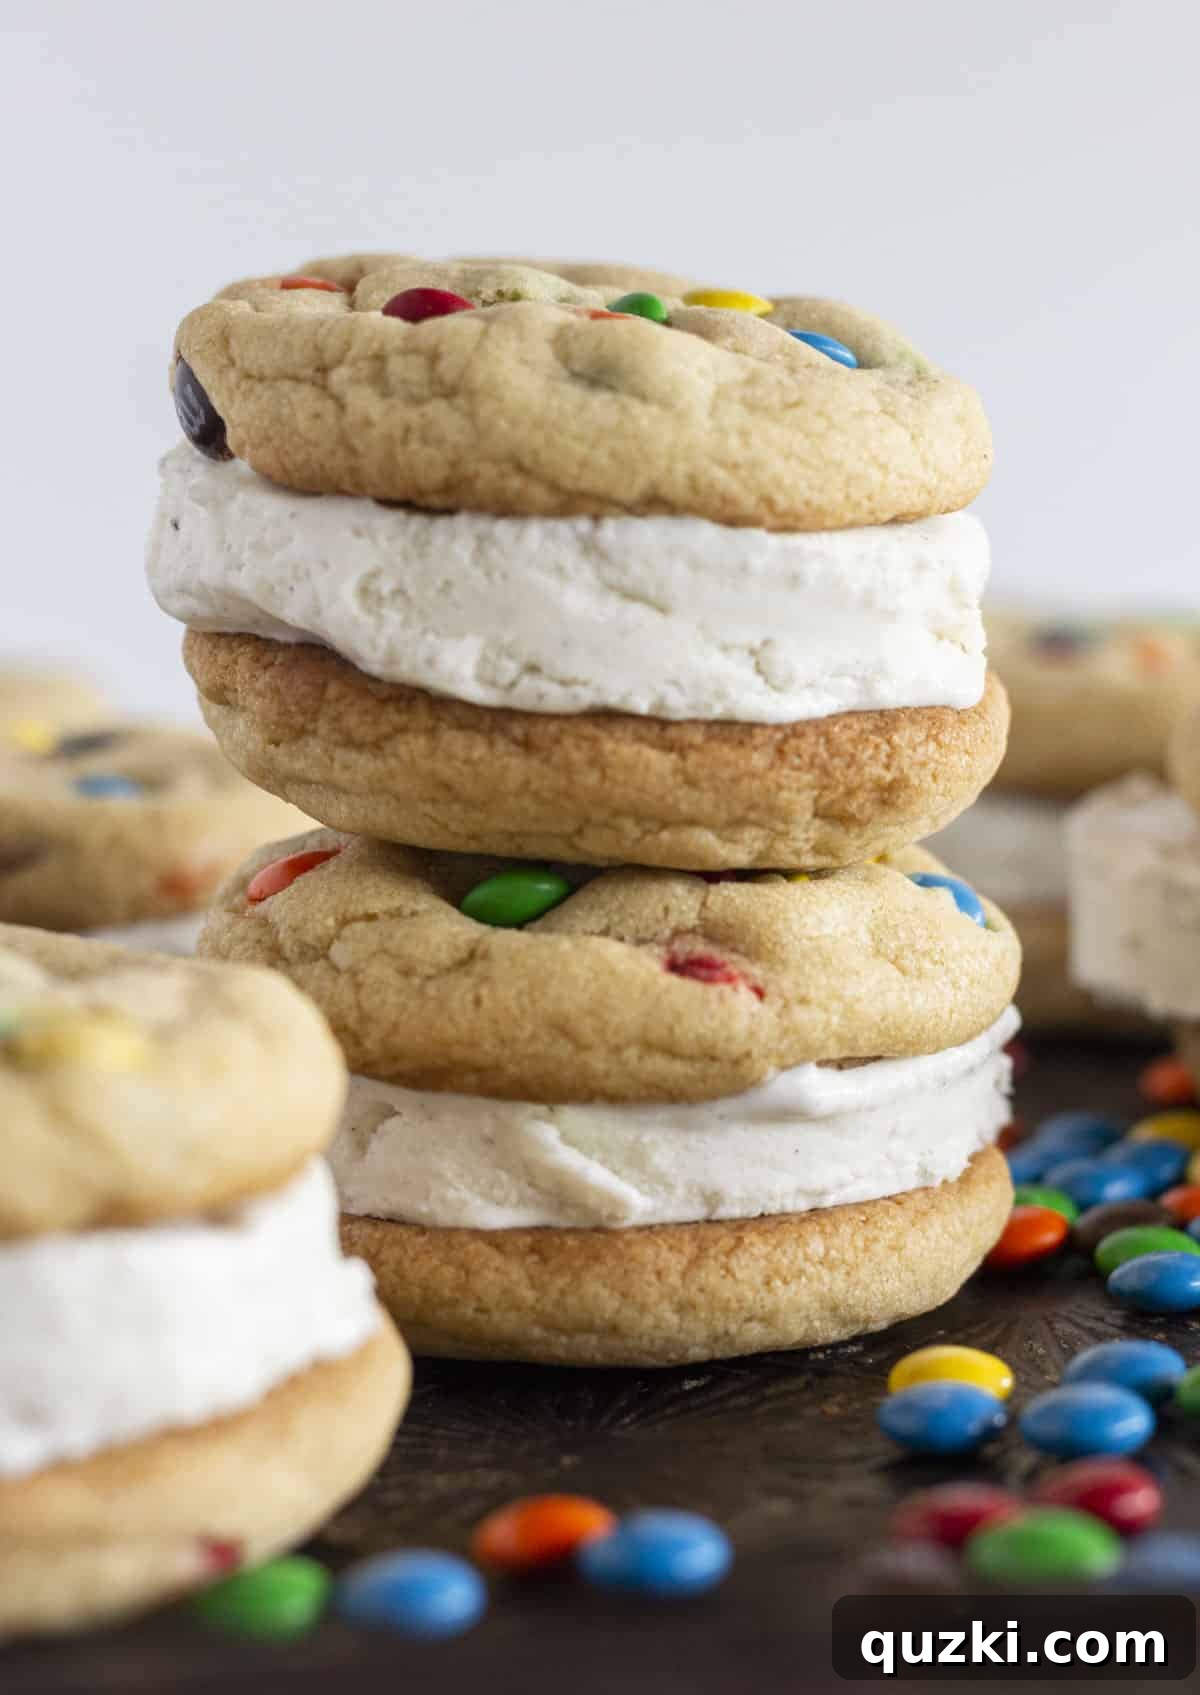
As a passionate cookie enthusiast, I can confidently say that these Homemade M&M Ice Cream Sandwiches are an absolute dream come true. They perfectly marry the comforting familiarity of a classic chocolate chip cookie with the cool, refreshing joy of an ice cream sandwich. Imagine biting into a soft, buttery cookie studded with colorful M&M’s, yielding to a layer of smooth, creamy ice cream. It’s a symphony of textures and flavors that promises to transport you straight back to childhood summer days.
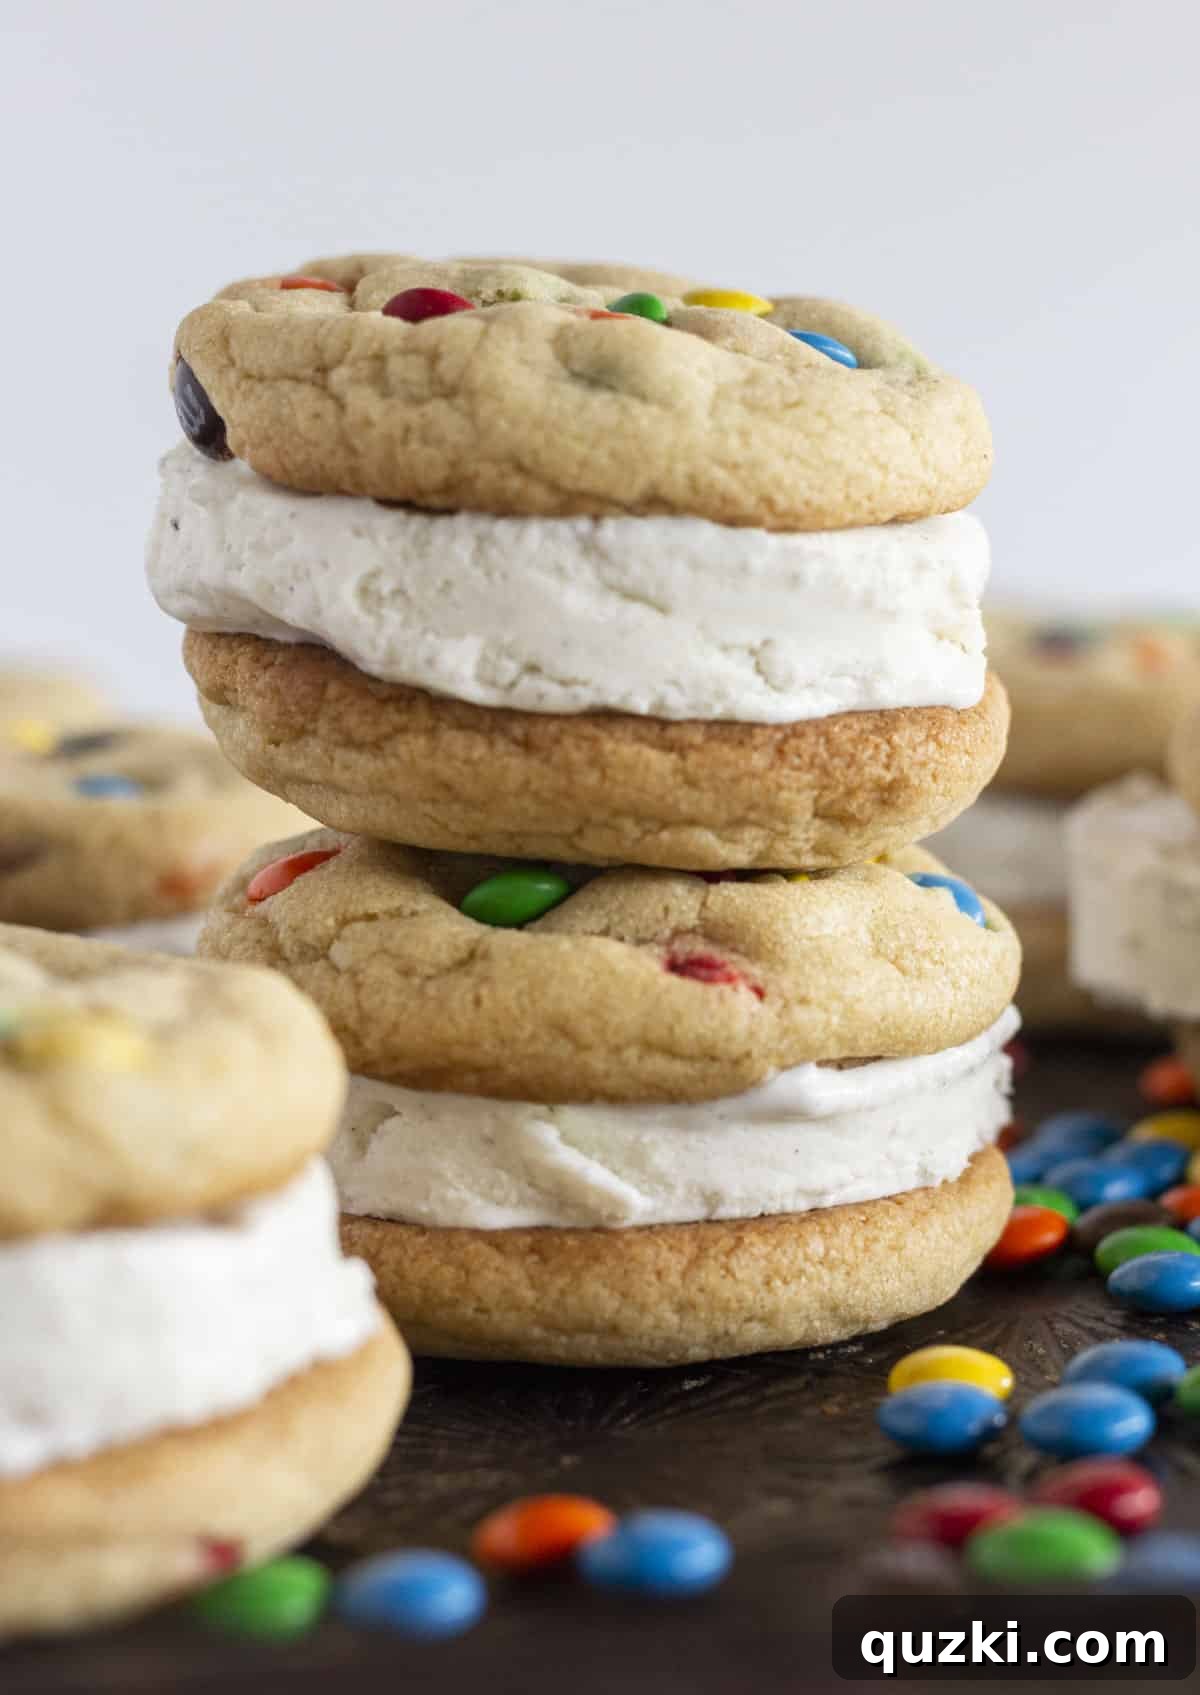
Table of Contents
- Why You’ll Love These Homemade Ice Cream Sandwiches
- Essential Recipe Ingredients
- Step-by-Step Guide: How to Make M&M Ice Cream Sandwiches
- M&M Ice Cream Sandwich Variations
- Expert Tips for Perfect Ice Cream Sandwiches
- Storing Your Frozen Treats
- Recipe FAQs
- More Cool Summer Treats to Try
- M&M Ice Cream Cookies Recipe
Why You’ll Love These Homemade Ice Cream Sandwiches
There’s something uniquely satisfying about a homemade ice cream sandwich, and this M&M version takes that delight to a whole new level. Far superior to any store-bought alternative, these treats are crafted with love and fresh ingredients. The secret to their incredible appeal lies in the cookies: they are made with melted butter, eliminating the need for a stand mixer and making the baking process incredibly simple and accessible for even novice bakers. This means less cleanup and more time enjoying the delicious results!
Whether you’re preparing for a lively summer barbecue, celebrating a birthday, or simply looking to add a sprinkle of joy to an ordinary day, these homemade M&M Ice Cream Sandwiches are guaranteed to be a crowd-pleaser. Their vibrant colors and irresistible taste make them a standout dessert. Plus, the process of making them is just as enjoyable as devouring them, making baking a truly fun and rewarding experience.
Essential Recipe Ingredients
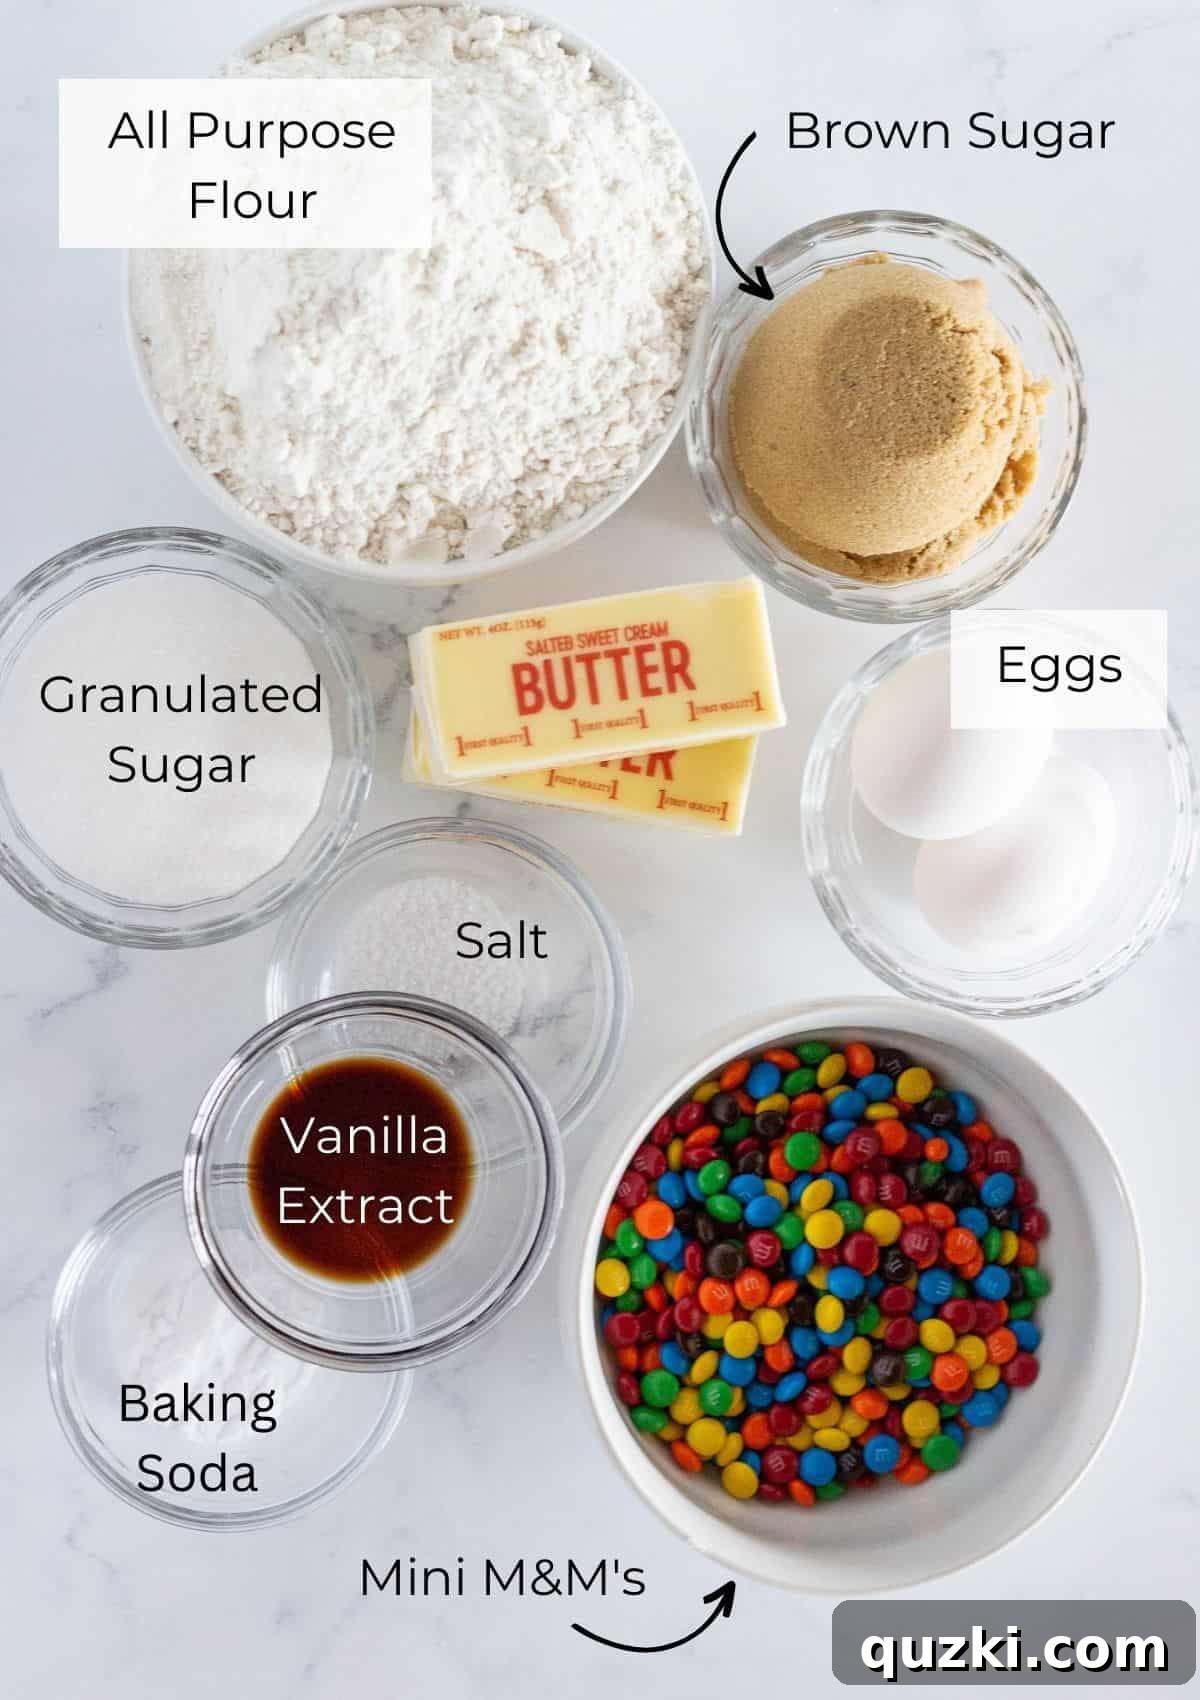
Crafting the perfect M&M ice cream sandwich starts with understanding the role of each key ingredient. Here’s what you’ll need to create the ultimate chewy cookie base and creamy filling:
- Melted Butter: This is a game-changer! Using melted butter ensures a wonderfully chewy cookie texture without needing a mixer. It also contributes to the rich, buttery flavor that makes these cookies so irresistible.
- Brown Sugar (packed): A generous amount of packed brown sugar is crucial for achieving that signature soft and chewy texture. It adds moisture and a deep, molasses-like flavor that perfectly complements the chocolate.
- Granulated Sugar: While brown sugar provides chewiness, a touch of granulated sugar helps with the cookie’s spread and contributes to a slight crispness on the edges, balancing the softness of the brown sugar.
- Eggs: Eggs act as a binder, holding the dough together, and contribute to the rich flavor and structure of the cookies. Make sure they are at room temperature for better incorporation.
- Vanilla Extract: High-quality vanilla extract enhances all the other flavors in the cookie, adding warmth and depth. Don’t skip this!
- All-Purpose Flour: The foundational dry ingredient, providing the structure for your cookies. Measure it correctly to avoid dense or overly crumbly cookies.
- Baking Soda: This leavening agent reacts with the acidic brown sugar to help the cookies rise slightly and achieve their soft, airy texture.
- Salt: A pinch of salt balances the sweetness and brings out the full flavor of the chocolate and butter.
- Mini M&M’s Candy: The star of the show! Mini M&M’s are perfect because their smaller size allows for more even distribution throughout the dough and in every bite. They add a delightful crunch, bursts of chocolate flavor, and a vibrant pop of color that makes these sandwiches visually appealing.
- Store-Bought Vanilla Ice Cream: For ultimate convenience and to let the M&M cookies shine, a rich vanilla ice cream is the ideal choice. Its classic flavor enhances the cookies without overpowering them. However, feel free to experiment with your favorite flavors!
For the complete list of exact quantities and detailed instructions, please refer to the comprehensive recipe card located further down the page.
Step-by-Step Guide: How to Make M&M Ice Cream Sandwiches
Creating these delightful M&M Ice Cream Sandwiches is a straightforward process that’s enjoyable from start to finish. Follow these simple steps for a perfect batch:
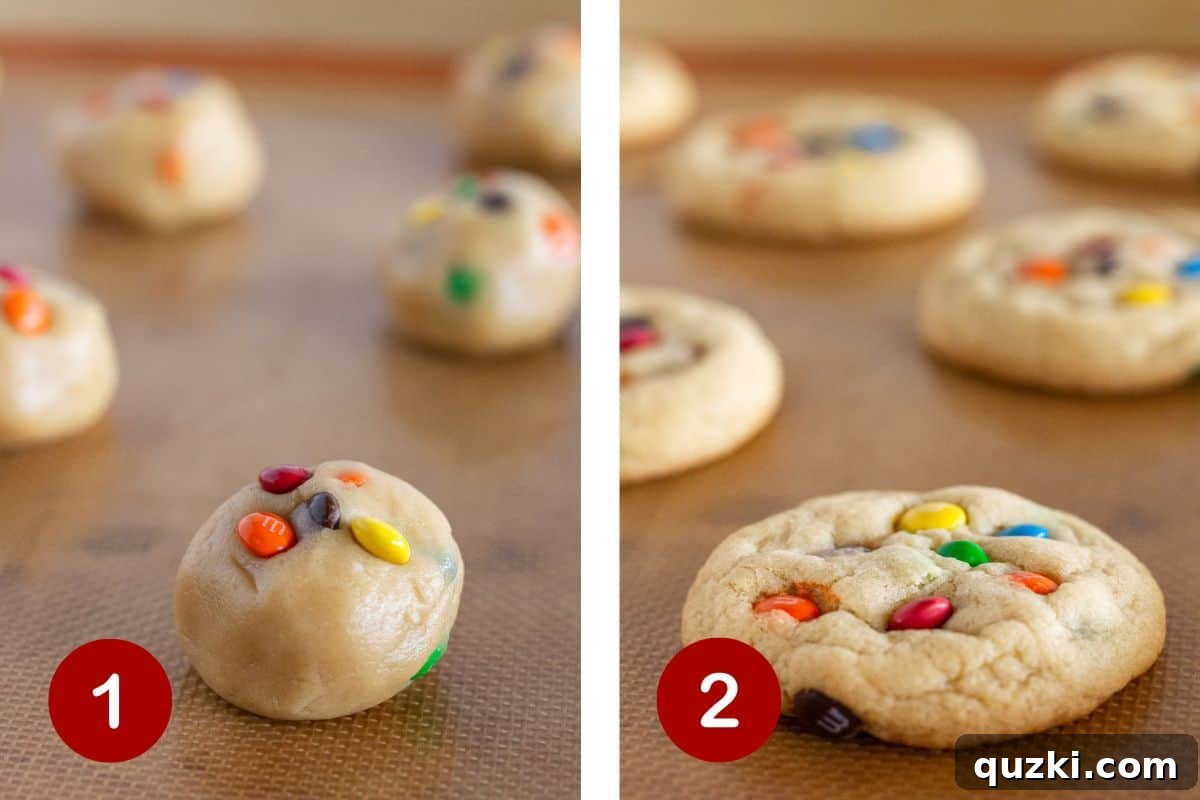
1. Prepare the Chewy M&M Cookie Dough: Begin by making your irresistibly chewy M&M cookie dough. In a bowl, combine the slightly melted butter with both brown and granulated sugars, mixing well until creamy. Stir in the eggs and vanilla extract until just incorporated. Then, gradually add the dry ingredients – flour, baking soda, and salt – mixing until a soft dough forms. Finally, fold in the colorful mini M&M’s. Use a medium cookie scoop to ensure uniform sizes, then place the dough mounds onto a silicone mat (or parchment paper) lined baking sheet. Evenly sized cookies are essential for perfectly assembled sandwiches.
2. Bake to Perfection: Preheat your oven to 350°F (175°C). Bake the cookies for approximately 9-11 minutes, or until the edges are set and just beginning to turn a light golden brown, while the centers still look slightly soft. The key to super soft, chewy cookies is to avoid overbaking. Immediately after removing them from the oven, you can press a few extra mini M&M’s onto the tops for an even more appealing finish. Allow the cookies to cool completely on the baking sheet before handling; this allows them to firm up properly.
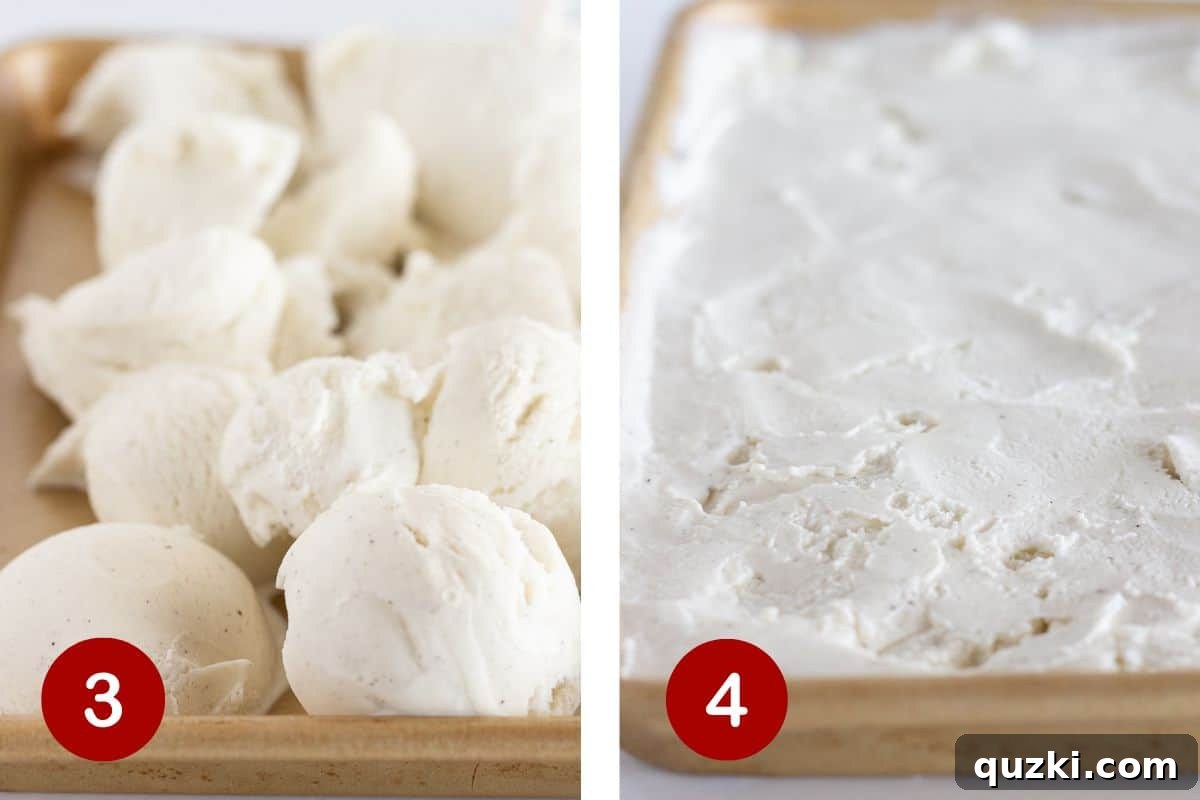
3. Prepare the Ice Cream Layer: While your cookies are baking and cooling, take your favorite vanilla ice cream out of the freezer and let it soften slightly for about 5-10 minutes. Scoop the softened ice cream onto a quarter sheet pan (or a 9×13 inch baking pan) that has been lined with parchment paper for easy removal. This helps create a smooth, even layer.
4. Spread and Freeze: Using an offset spatula or the back of a spoon, spread the softened ice cream evenly across the pan to a consistent thickness, typically about half an inch. Once spread, place the pan back into the freezer for at least 20-30 minutes, or until the ice cream is firm enough to cut cleanly. This crucial step prevents messy assembly.
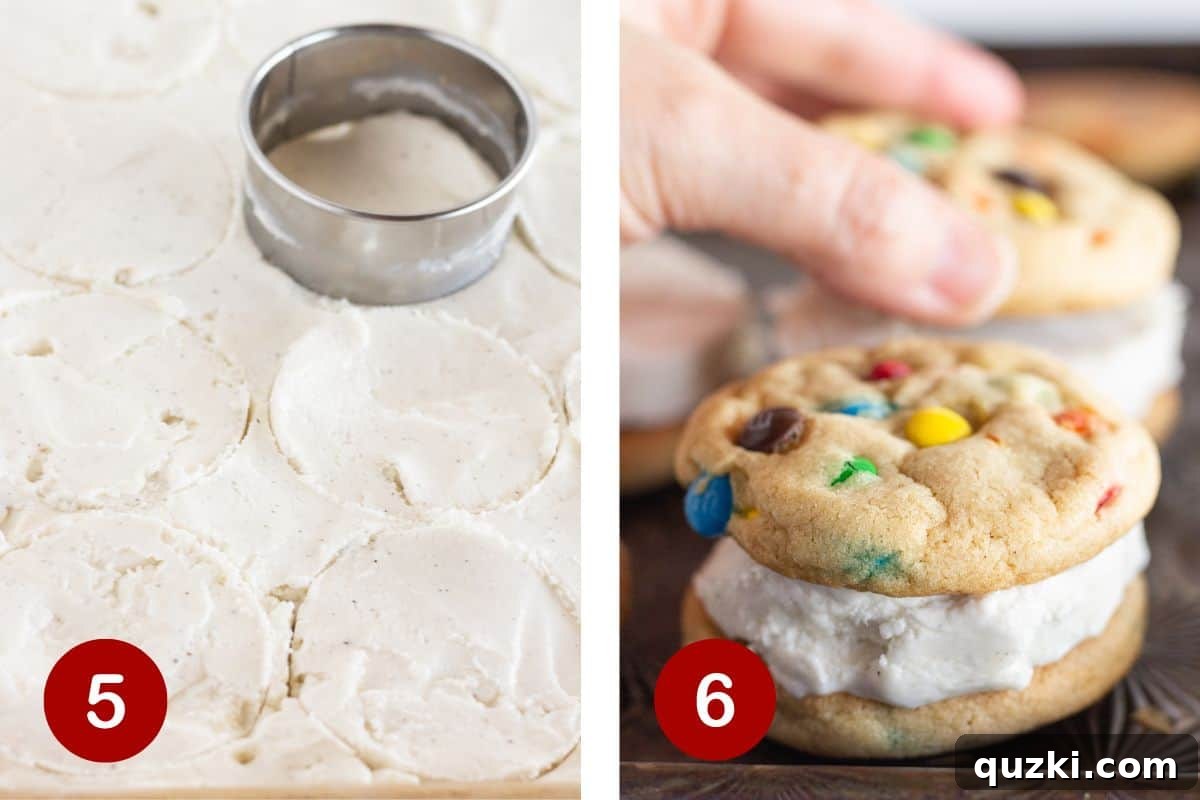
5. Cut Ice Cream Rounds: Once the ice cream is thoroughly refrozen and firm, remove the pan from the freezer. Use a 3-inch cookie cutter (or a size that matches your baked cookies) to cut out perfect ice cream rounds. Work quickly to prevent the ice cream from melting. If it starts to soften, pop it back into the freezer for another 15-20 minutes with the cut rounds on a separate parchment-lined tray to ensure they are solid before assembly.
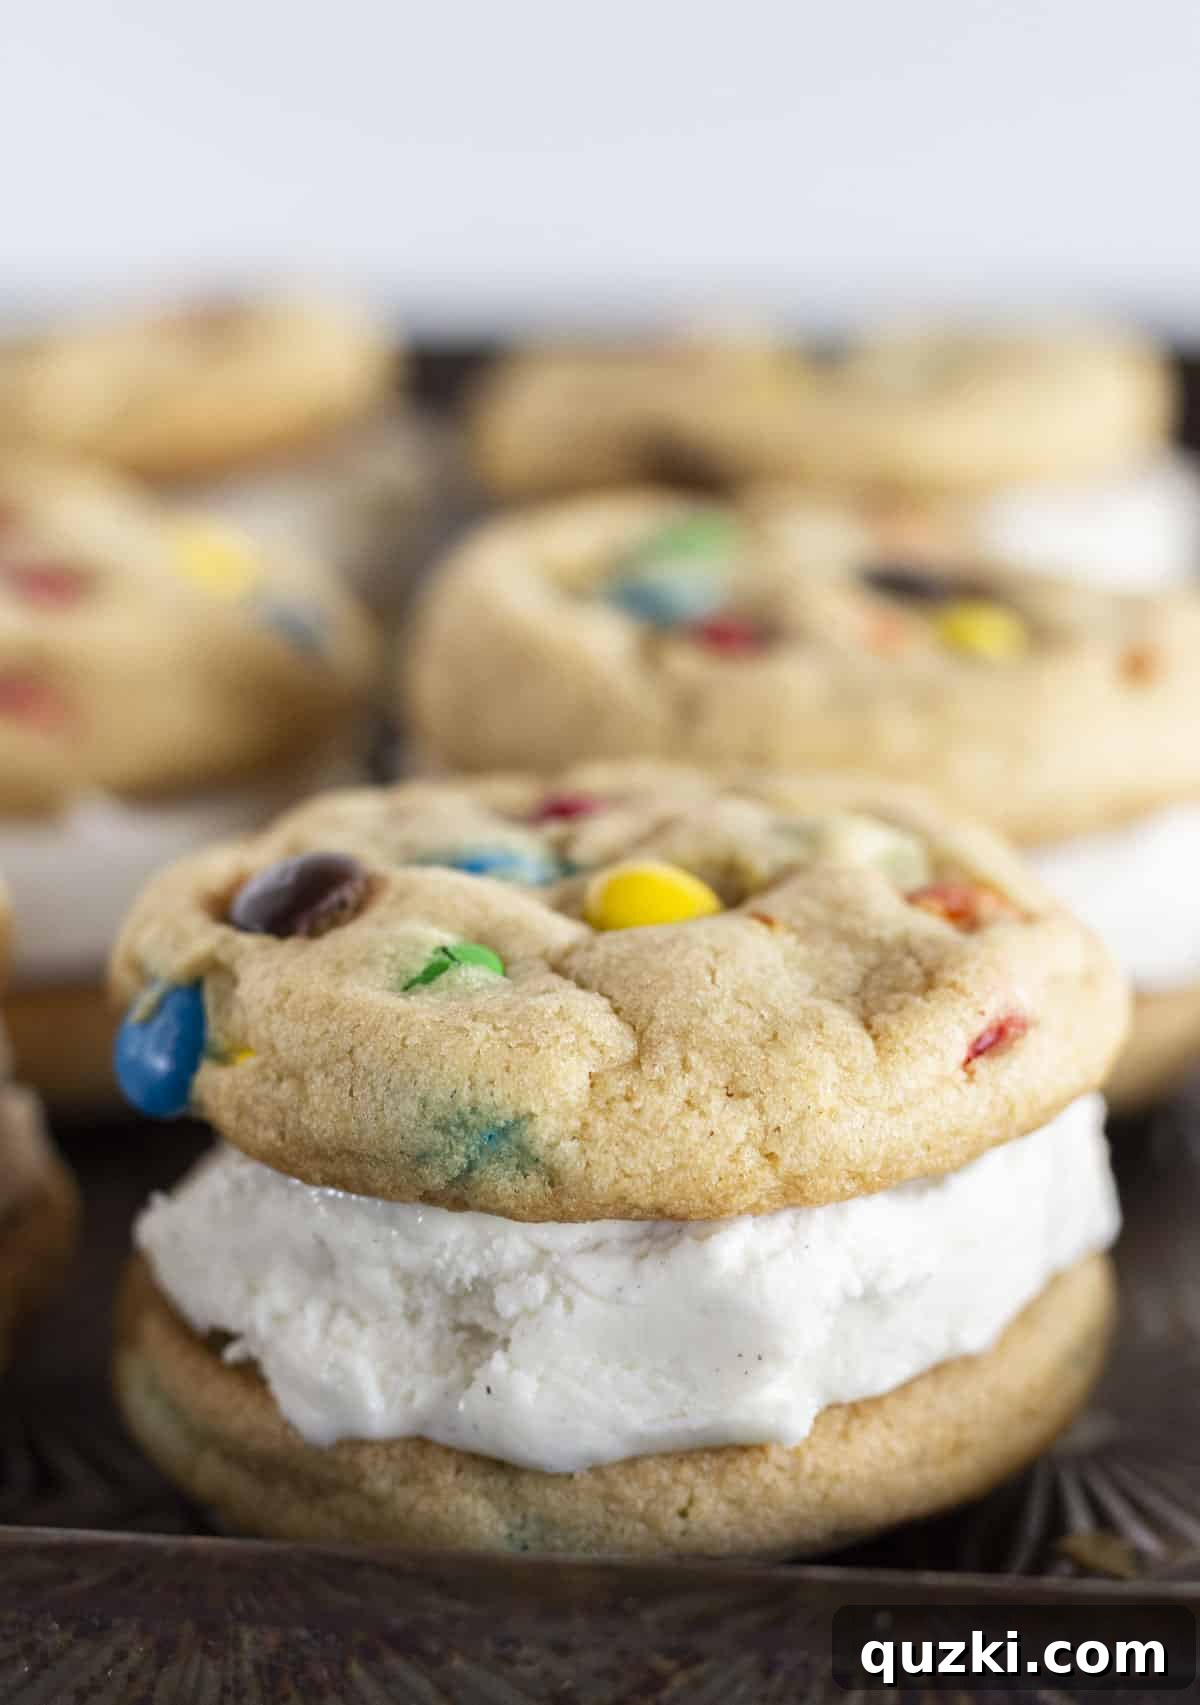
6. Assemble Your Sandwiches: Now for the fun part! Take one cooled M&M cookie and turn it upside down. Place a firm ice cream round neatly on top of it. Then, gently top with another M&M cookie, pressing lightly to secure the ice cream without crushing the cookies. Continue this process until all your cookies have been paired with ice cream. Immediately place the assembled sandwiches back into the freezer for at least an hour to firm up completely before serving or storing. This ensures they hold their shape beautifully.
M&M Ice Cream Sandwich Variations
While the classic M&M and vanilla combination is undeniably delicious, these homemade ice cream sandwiches are incredibly versatile! Don’t hesitate to get creative and customize them to your taste:
- Exciting Cookie Add-ins: If mini M&M’s aren’t your only favorite, feel free to swap them or combine them with other delightful mix-ins. Consider adding mini chocolate chips for extra chocolatey goodness, chopped nuts (like walnuts or pecans) for a textural crunch, bits of your favorite chopped candy bars (think Snickers or Reese’s cups), or colorful sprinkles for a festive touch. Even white chocolate chips can add a different dimension of sweetness.
- Diverse Ice Cream Flavors: Vanilla ice cream is a perfect canvas, but the possibilities are endless!
- Chocolate Lover’s Dream: Opt for rich chocolate ice cream or even chocolate fudge swirl.
- Fruity & Fresh: Strawberry, raspberry, or cherry ice cream can add a bright, summery twist.
- Nutty Indulgence: Peanut butter ice cream (especially with peanut M&M cookies!) or rocky road ice cream offers a satisfying richness.
- Minty Cool: Mint chocolate chip ice cream can be incredibly refreshing, especially on a warm day.
You can even use a low-fat ice cream option if you’re looking to watch the calories without sacrificing the fun. Homemade ice cream (traditional churned varieties work best) can also elevate these sandwiches, just ensure it freezes firm enough.
- Different Cookie Bases: While these M&M cookies are fantastic, almost any chewy cookie will work!
- Try a Snickerdoodle cookie for a cinnamon-sugar twist.
- A Peanut Butter Cookie would be incredible with chocolate or even banana ice cream.
- For classic simplicity, use easy mini chocolate chip cookies.
- Rich chocolate cookies or festive sugar cookies are also excellent choices for a different flavor profile.
- External Coatings: For an extra layer of flavor and visual appeal, roll the edges of your assembled ice cream sandwiches in additional mini M&M’s, mini chocolate chips, chopped nuts, or even shredded coconut. This adds a delightful textural contrast and makes them even more irresistible.
Expert Tips for Perfect Ice Cream Sandwiches
Achieving bakery-quality M&M ice cream sandwiches at home is simple with a few insider tricks. These tips will help ensure your treats are not just delicious, but also perfectly constructed and beautiful:
- Uniform Cookie Size is Key: Invest in a good cookie scoop. Using a scoop ensures that all your cookies are the same size, which is critical for even baking and, more importantly, for creating neatly assembled ice cream sandwiches. If you prefer larger sandwiches, simply use a larger scoop and adjust baking time slightly (typically 11-13 minutes).
- Cool Completely: This might seem obvious, but it’s vital: ensure your cookies are *completely* cooled before attempting to add the ice cream. Even slightly warm cookies will cause the ice cream to melt immediately, leading to a messy and disappointing assembly. Patience here truly pays off.
- Pre-freeze Your Ice Cream: To streamline the assembly process and prevent excessive melting, prepare your ice cream layer well in advance. Spreading and freezing the ice cream on a sheet pan can be done hours or even a day ahead. This allows it ample time to harden thoroughly, making it much easier to cut clean, firm rounds.
- Chill Your Cookie Cutter: For the cleanest cuts, dip your cookie cutter in hot water (then quickly wipe dry) or chill it in the freezer for a few minutes before cutting the ice cream rounds. This prevents the ice cream from sticking.
- Work Quickly: Ice cream melts fast! Once you take the frozen ice cream block out to cut rounds, work efficiently. If the ice cream starts to soften too much, place it back in the freezer for a few minutes before continuing.
- Embrace Edge Coatings: For an extra touch of fun and flavor, roll the edges of your assembled ice cream sandwiches in additional mini M&M’s, chopped nuts, sprinkles, or even mini chocolate chips. This not only adds visual appeal but also creates another delightful layer of texture.
- Proper Ingredient Temperature: For the cookies, ensure your butter is just melted (not hot) and your eggs are at room temperature. This helps everything combine smoothly without overmixing, leading to a tender cookie.
Storing Your Frozen Treats
Proper storage is essential to keep your homemade M&M Ice Cream Sandwiches fresh and delicious for as long as possible. These treats are designed to be enjoyed directly from the freezer:
- Store Individually: Once assembled and completely firmed up in the freezer, individually wrap each M&M ice cream sandwich. Use plastic wrap, wax paper, or even aluminum foil. Individual wrapping prevents them from sticking together, protects them from freezer burn, and makes it easy to grab just one whenever a craving strikes.
- Airtight Container: After wrapping, place the individually wrapped sandwiches in a larger airtight freezer-safe container. This provides an additional layer of protection against odors from other freezer items and helps maintain their quality.
- Freeze Duration: When stored correctly, these delightful ice cream sandwiches can be kept in the freezer for up to 2 months. Beyond this period, they might start to develop ice crystals or lose some of their optimal texture, though they would still be safe to eat.
Recipe FAQs
Got questions about making the ultimate M&M Ice Cream Sandwiches? We’ve got answers!
While you can find pre-made M&M ice cream sandwiches in the freezer section of many grocery stores, there’s nothing quite like the homemade version! Crafting them yourself allows for customization and ensures you get that perfectly soft, chewy cookie made with our Chewy Mini M&M Cookie recipe. The freshness and flavor of homemade simply can’t be beaten.
Absolutely not! While our delicious M&M candy-filled cookies are a fantastic choice, these ice cream sandwiches are incredibly versatile. Almost any cookie with a soft, chewy center would work wonderfully. Feel free to experiment with your favorites! Some great alternatives include:
- Classic mini chocolate chip cookies
- Spiced Snickerdoodle cookies
- Rich Peanut Butter Cookies
- Decadent chocolate fudge cookies
- Simple, scrumptious sugar cookies (especially for a fun twist with colored sprinkles!)
The key is a cookie that holds its shape but is soft enough to bite through when frozen.
Yes, absolutely! Using homemade ice cream can elevate these sandwiches even further, offering unique flavor combinations. However, it’s important to consider the type of homemade ice cream. Traditional churned homemade ice cream, which freezes to a firm consistency, should work perfectly for cutting into rounds. No-churn ice cream, while delicious, often has a softer texture and may not freeze hard enough to cut cleanly or hold its shape as well in a sandwich. If using no-churn, you might need to spoon it between the cookies rather than cutting rounds, and freeze for a longer period to ensure firmness.
Yes, you can! Cookie dough can typically be stored in an airtight container in the refrigerator for up to 3-5 days. You can also scoop the dough into balls and freeze them for up to 2-3 months. When ready to bake, you might need to add a couple of extra minutes to the baking time if baking from frozen, or let them thaw slightly if you want the exact original texture.
Several factors can influence cookie spread. Ensure your butter is just melted and not hot. Chilling the cookie dough for at least 30 minutes before baking can also significantly reduce spread. Additionally, make sure your oven temperature is accurate – a too-low oven can cause excessive spreading. Using a silicone baking mat or parchment paper helps, and avoid greasing your baking sheets excessively.
More Cool Summer Treats to Try
If you’re a fan of delightful, refreshing desserts, especially during the warmer months, you’ll love these other cool summer treats. They’re perfect for picnics, parties, or simply a sweet escape!
Discover More Irresistible Desserts
Pies
Easy Drumstick Pie Recipe
Desserts
Dairy Queen’s Buster Bar Dessert Recipe
Desserts
No Churn Oreo Ice Cream Recipe
Desserts
Summer Ice Cream Ideas: No Churn S’mores Ice Cream Recipe
Did you try this recipe?
Leave a ⭐️ review below and tag @practicallyhomemade on Pinterest!

M&M Ice Cream Cookies
June Albertson-Dick
10 minutes
40 minutes
1 hour
1 hour
44 minutes
12
sandwich cookies
Rate Recipe
Print Recipe
Ingredients
-
▢
1
cup
butter,
{melted} -
▢
1
cup
brown sugar,
{packed} -
▢
½
cup
granulated sugar -
▢
2
eggs -
▢
1 ½
teaspoons
vanilla extract -
▢
3
cups
all purpose flour -
▢
1
teaspoon
baking soda -
▢
½
teaspoon
salt -
▢
1 ¼
cups
mini M&M’s -
▢
5
cups
vanilla ice cream
Instructions
-
Preheat your oven to 350°F (175°C) and prepare your baking sheets by lining them with silicone mats or parchment paper.
-
In a microwave-safe bowl, gently melt the butter for about 40 seconds until it’s just barely melted. Swirl any remaining solid pieces until they fully dissolve into the warm butter. Be careful not to let the butter get hot, as this can curdle the eggs later.
-
Add both the brown sugar and granulated sugar to the melted butter. Mix by hand until the mixture is smooth and creamy. Next, incorporate the vanilla extract and then one egg at a time, mixing until each egg is just combined. Avoid overmixing at this stage to prevent the dough from becoming stiff.
-
In a separate bowl, whisk together the all-purpose flour, baking soda, and salt. Gradually add these dry ingredients to the wet mixture, stirring until everything is just incorporated and no dry streaks of flour remain. Finally, fold in the mini M&M’s until they are evenly distributed throughout the dough.
-
Using a medium cookie scoop (approximately 2 tablespoons), portion the cookie dough onto your prepared baking sheets. For extra visual appeal, you can gently press a few additional mini M&M’s onto the top of each dough ball before baking.
-
Bake for 9-11 minutes. You want to remove the cookies from the oven when they appear puffy and the edges are just beginning to turn a slight golden color, but the centers still look soft. This ensures a super soft and chewy cookie. Once out of the oven, immediately press a few more mini M&M’s onto each cookie (if desired) and let them cool completely on the baking sheet to set up perfectly. This step is critical before adding ice cream.
-
While the cookies are cooling, scoop the vanilla ice cream onto a quarter sheet pan (or a 9×13 inch pan) lined with parchment paper. Spread the ice cream evenly into a layer about ½ to ¾ inch thick. Freeze for at least 30 minutes, or until very firm. Once refrozen, remove from the freezer and use a 3-inch cookie cutter to cut out 12 perfect ice cream circles. Place these circles back on a parchment-lined tray and freeze again for 15-20 minutes until solid.
-
Once the cookies are completely cool and the ice cream circles are firm, begin assembling. Turn half of the cookies upside down. Place one ice cream circle on top of each inverted cookie, then top with the remaining cookies. Gently press to secure. Freeze the assembled M&M ice cream sandwiches until ready to eat, at least 1 hour. Store them individually wrapped in plastic wrap in the freezer for up to 2 months.
Notes
- Using a cookie scoop ensures all your cookies are the same size, which helps them bake evenly and makes assembling the sandwiches much easier and neater.
- It is crucial that the cookies are completely cooled before you add the ice cream. If they are even slightly warm, the ice cream will melt instantly.
- Prepare the ice cream layer ahead of time by spreading and freezing it on a sheet pan. This allows it to harden sufficiently, making cutting and assembly much smoother.
- For an extra delightful touch, roll the edges of your assembled ice cream sandwiches in additional mini M&M’s, chopped nuts, or mini chocolate chips. This adds texture and visual appeal.
Add-in Ideas: Feel free to experiment with other additions to your cookies or for rolling the edges! Mini chocolate chips, chopped nuts, crushed candy bars, or colorful sprinkles all work wonderfully.
Nutrition
Serving:
1
sandwich cookie
,
Calories:
586
kcal
,
Carbohydrates:
78
g
,
Protein:
7
g
,
Fat:
27
g
,
Saturated Fat:
17
g
,
Polyunsaturated Fat:
1
g
,
Monounsaturated Fat:
6
g
,
Trans Fat:
1
g
,
Cholesterol:
95
mg
,
Sodium:
385
mg
,
Potassium:
183
mg
,
Fiber:
2
g
,
Sugar:
51
g
,
Vitamin A:
792
IU
,
Vitamin C:
0.5
mg
,
Calcium:
124
mg
,
Iron:
2
mg
Nutrition information is automatically calculated, so should only be used as an approximation.
Like this? Leave a comment below!