
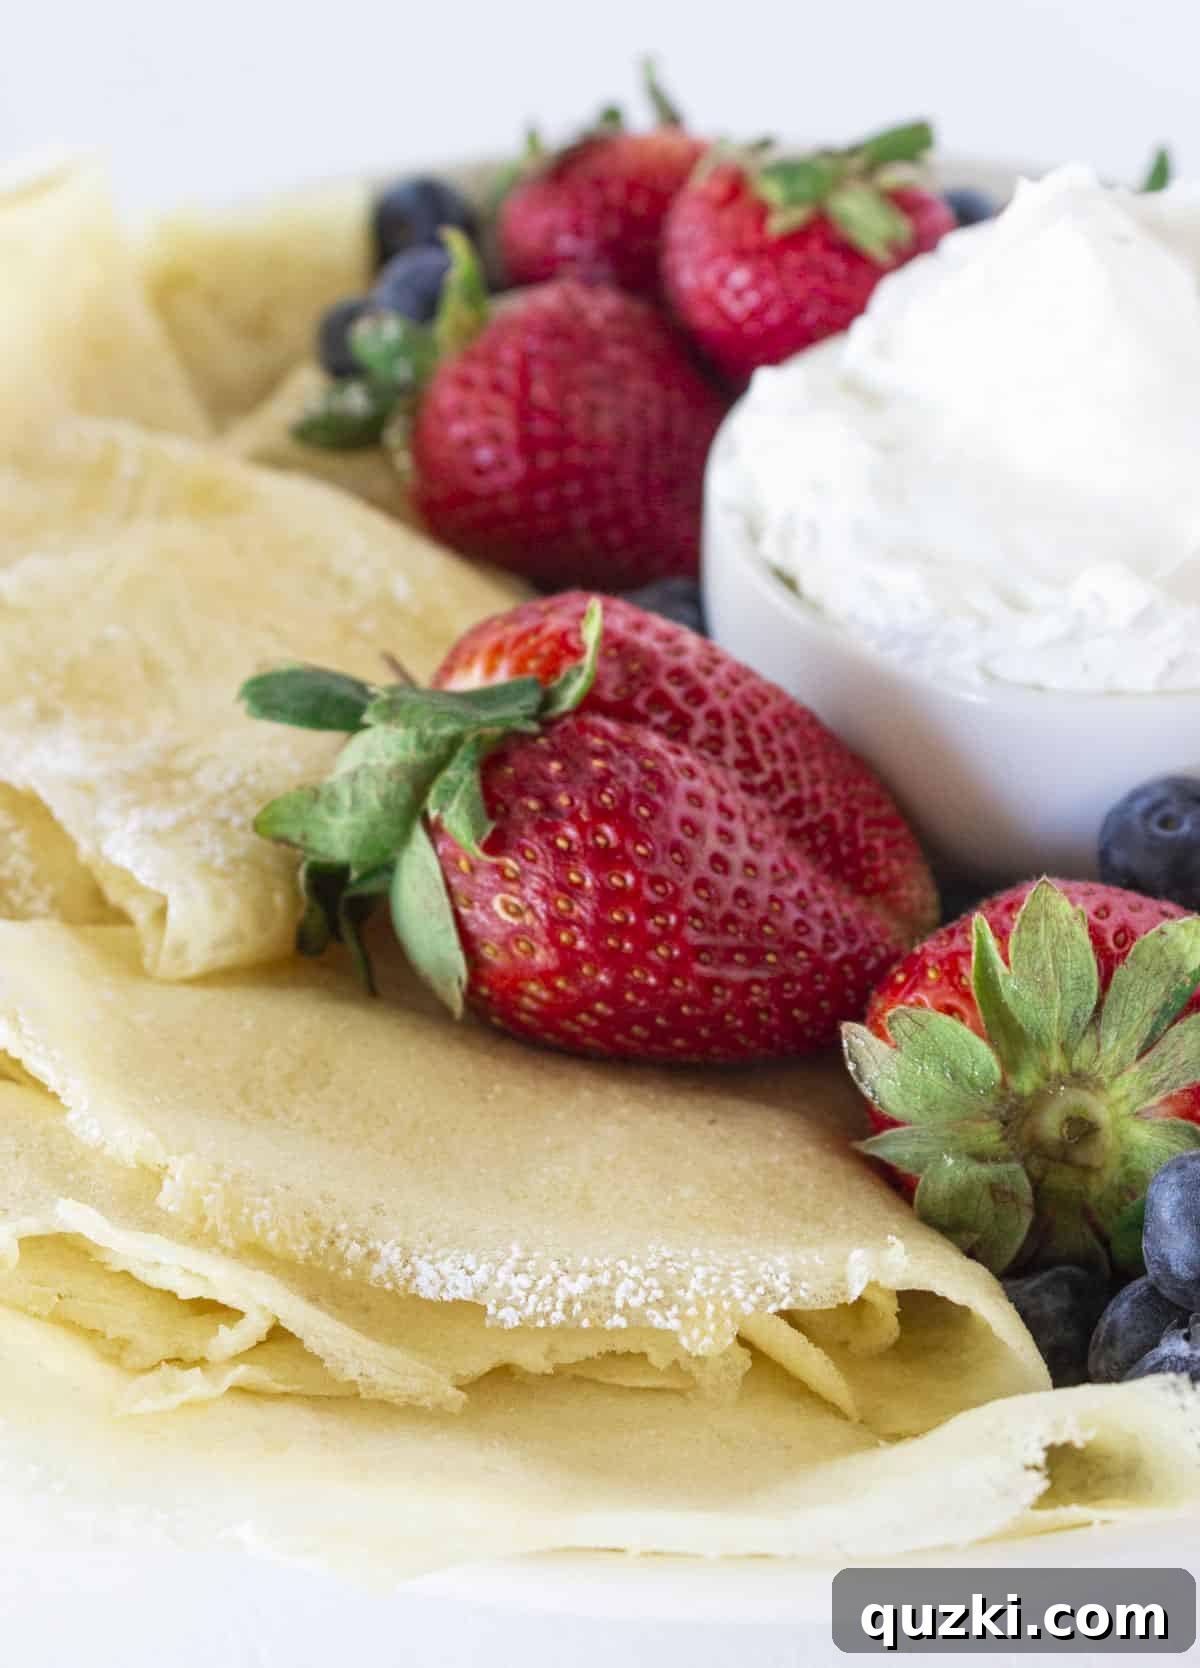
As an avid home cook and a connoisseur of breakfast delights, I’ve spent countless hours perfecting various pancake mix recipes. It is with absolute certainty that I declare these Pancake Mix Crepes a revolutionary addition to any breakfast or dessert menu. This ingenious recipe gracefully eliminates the complexities often associated with traditional crêpe making, relying instead on readily available pantry staples, with the humble pancake mix taking center stage. Imagine light, delicate crepes that are incredibly simple to prepare, yet yield impressive, restaurant-quality results every single time.
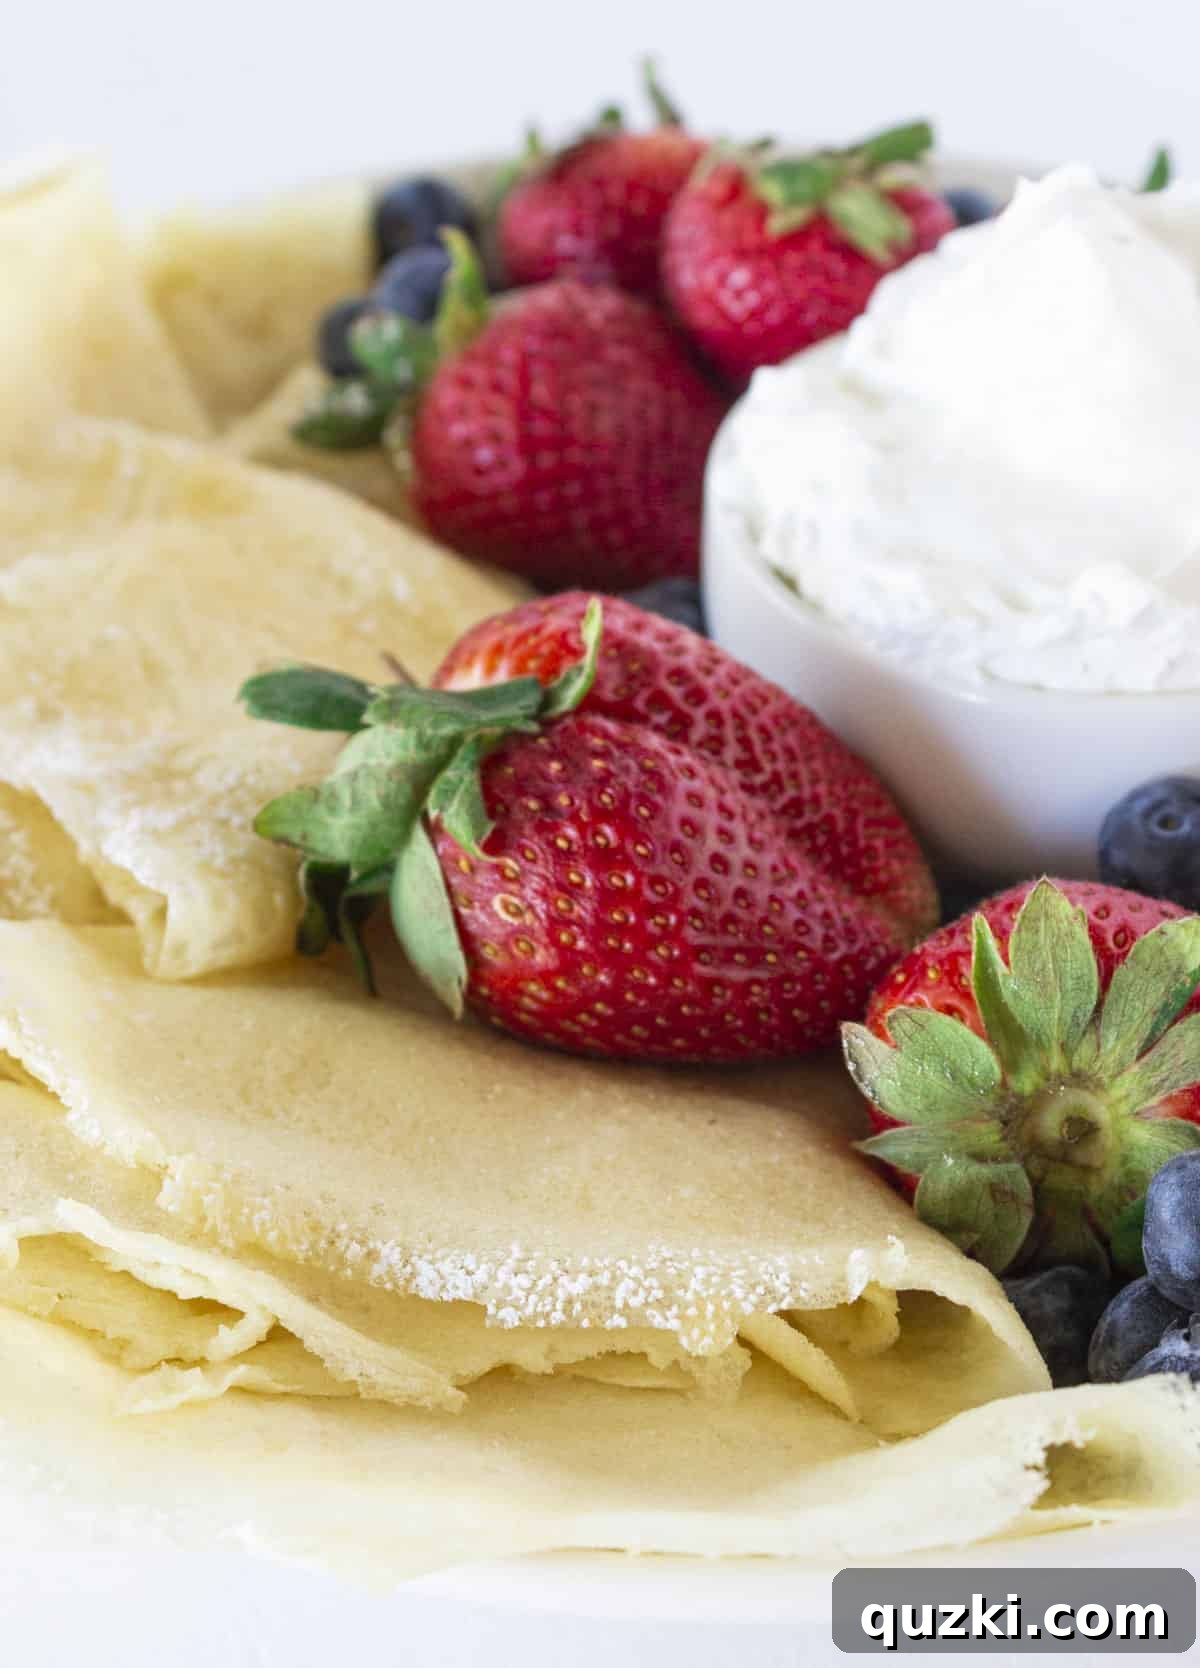
Table of Contents
- Essential Ingredients for Perfect Crepes
- Step-by-Step Guide: Crafting Crepes from Pancake Mix
- Expert Tips for Flawless Crepes
- Delightful Crepe Filling Ideas
- Storage Solutions for Crepes and Batter
- Common Crepe Questions Answered
- More Irresistible Breakfast Recipes
- Pancake Mix Crepes Recipe Card
Forget the intimidating techniques and specialized ingredients often demanded by classic crêpe recipes. This method delivers a remarkably foolproof batter that transforms into exquisitely thin, golden-brown crepes in mere minutes. Whether you are a seasoned culinary expert or a novice venturing into the world of crêpe making for the very first time, this simplified approach guarantees consistent, perfect results. Each crepe emerges from the pan tender, pliable, and ready to be filled with your favorite sweet or savory delights. It’s truly a testament to how everyday ingredients can be elevated into something extraordinary with a clever twist.
Beyond their effortless preparation, one of the most compelling attributes of these crepes is their boundless versatility. They serve as the quintessential blank canvas, eagerly awaiting your creative touch, whether you envision a decadent sweet treat or a satisfying savory meal. From a quick weekday breakfast to an elegant weekend brunch or a delightful dessert, these crepes adapt beautifully to any occasion, making them a staple in your recipe repertoire.
Essential Ingredients for Perfect Crepes
Creating these delightful pancake mix crepes requires just a few basic ingredients that you likely already have on hand. The magic lies in how these simple components come together to form a light, pourable batter that cooks up into delicate, thin crepes.
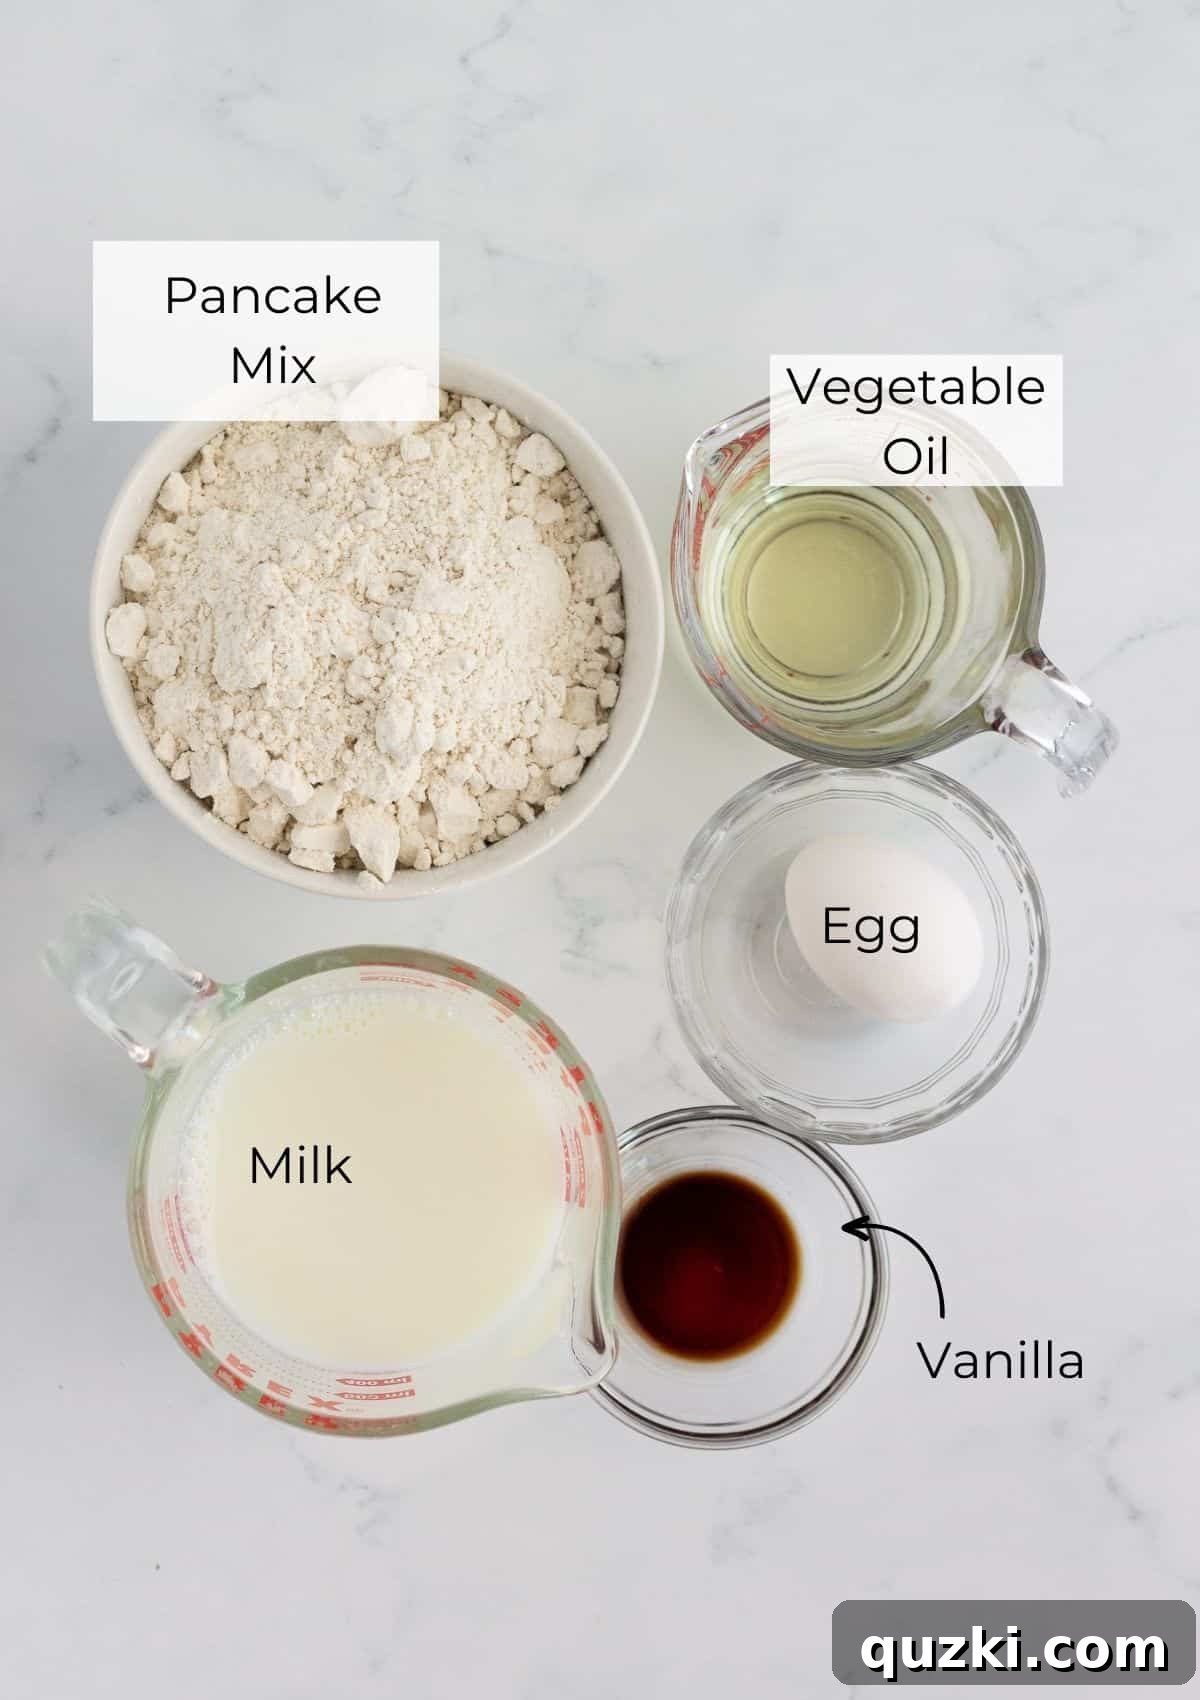
- Pancake Mix: This is the hero ingredient, streamlining the entire process. A quality pancake mix acts as an excellent base for crepes because it already contains flour, a leavening agent (though less crucial for crepes, it contributes to a slight tenderness), and often some sugar and salt. This eliminates the need to measure multiple dry ingredients individually, making prep incredibly quick and easy. Brands like Bisquick or Aunt Jemima work wonderfully, providing a consistent foundation for your batter.
- Milk: The liquid component, milk, is vital for achieving the desired thin consistency that differentiates crepes from their thicker pancake cousins. It thins out the pancake mix, ensuring the batter spreads easily across the pan to create that characteristic delicate texture. While 1% milk was used in the original recipe, you can experiment with whole milk for a richer flavor or even a non-dairy alternative like almond or oat milk for dietary considerations.
- Egg: A single large egg plays a crucial role in binding the ingredients together, providing structure, and contributing to the crepes’ wonderful softness and subtle richness. The egg also aids in achieving that beautiful golden-brown color as the crepes cook, giving them an appealing finish.
- Vanilla Extract: A dash of vanilla extract elevates the flavor profile of the crepe batter, adding a warm, aromatic sweetness that perfectly complements both sweet and many savory fillings. Don’t skip this ingredient, as it adds depth and sophistication to what is otherwise a very simple base.
- Vegetable Oil: Incorporating vegetable oil directly into the crepe batter is a clever trick to ensure tender crepes and significantly reduce sticking. The oil contributes to a smoother cooking process, allowing the crepes to release effortlessly from the pan. It also adds a subtle richness without making the crepes greasy. You can use other neutral-flavored oils like canola or grapeseed oil if preferred.
For precise measurements and detailed instructions on how to combine these ingredients, please refer to the comprehensive recipe card at the end of this article.
Step-by-Step Guide: Crafting Crepes from Pancake Mix
Making crepes with pancake mix is surprisingly straightforward and incredibly rewarding. Follow these simple steps for perfectly thin and delicious crepes every time.
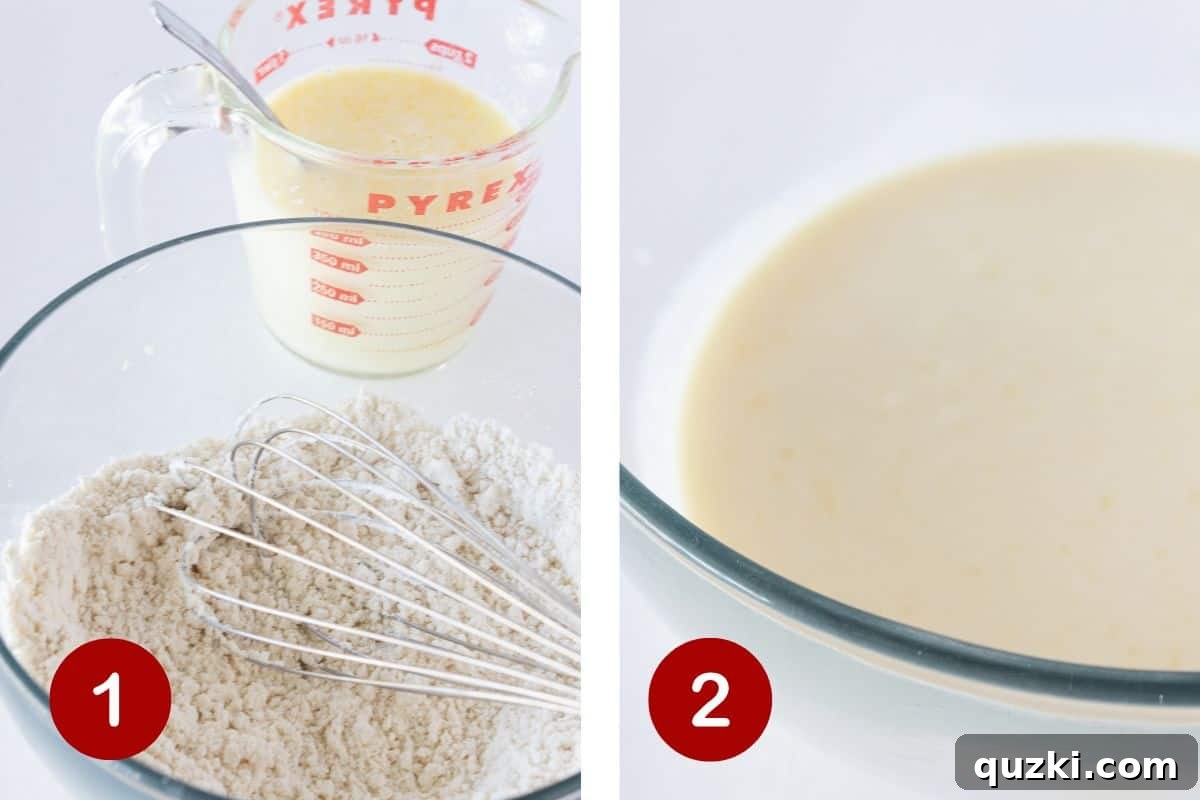
1. Begin by measuring your chosen pancake mix into a spacious large bowl. Using a whisk, gently whisk the dry mix to break up any potential lumps. This crucial first step ensures a consistently smooth batter, preventing uneven textures in your finished crepes. In a separate liquid measuring cup, combine the milk, large egg, vanilla extract, and vegetable oil. Whisk these wet ingredients together thoroughly until they are well combined and smooth. This pre-mixing helps to evenly distribute the liquids throughout the batter.
2. Gradually pour the combined liquid ingredients into the bowl with the pancake mix. Using your whisk, mix until all ingredients are fully incorporated. The resulting batter will be notably thinner than traditional pancake batter, resembling a light cream or thin soup. This fluid consistency is exactly what you’re aiming for, as it allows the batter to spread thinly and evenly across the pan, creating delicate crepes rather than thick pancakes. Avoid overmixing, as this can develop the gluten in the flour, leading to tougher crepes; just mix until smooth.
3. To cook your crepes, place a non-stick pan or a dedicated crepe pan over medium heat. Allow the pan to warm up thoroughly; a properly heated pan is key to preventing sticking and ensuring even cooking. For optimal results, lightly spray the warm pan with non-stick cooking spray before each crepe, even if your pan is well-seasoned. Next, pour approximately 1/4 cup of the thin batter directly into the center of the pan. Immediately after pouring, lift the pan and gently swirl it in a circular motion. This technique helps the batter quickly and evenly spread to cover the entire bottom surface of the pan, forming a perfectly round and thin crepe.
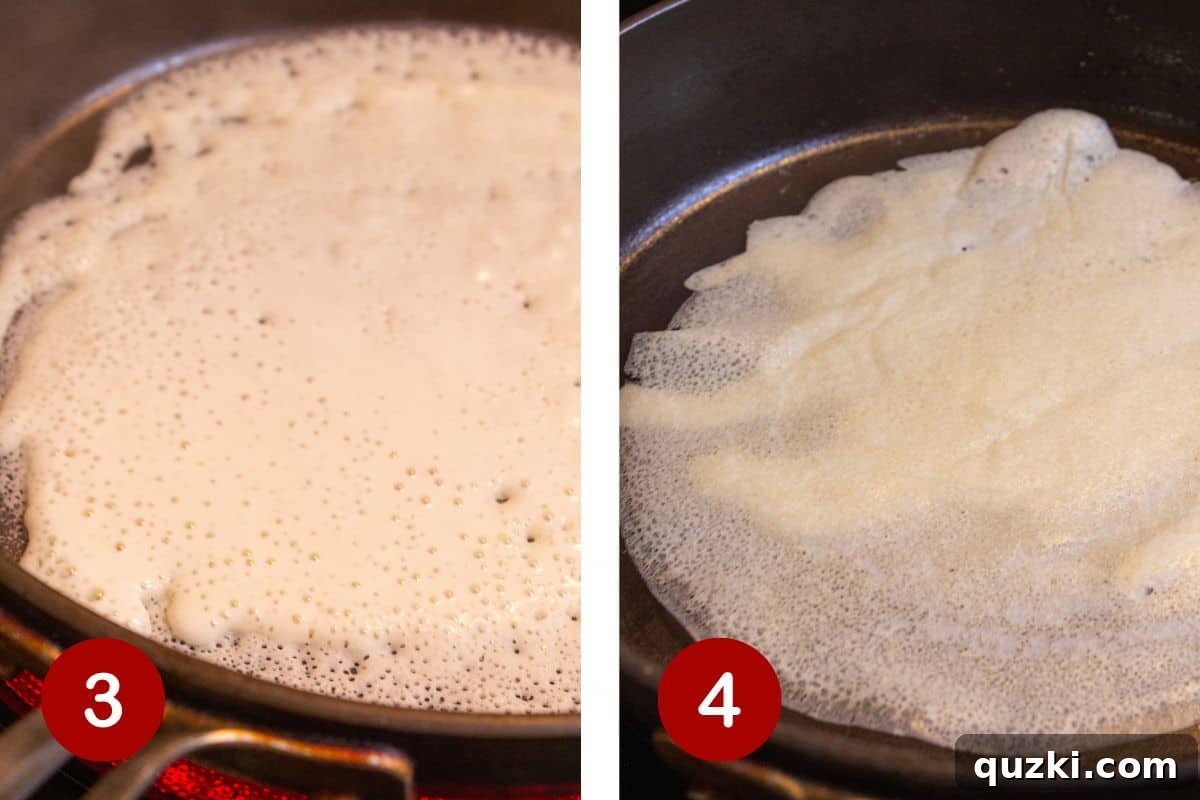
4. Allow the crepe to cook undisturbed on the first side. This usually takes about 1-2 minutes. You’ll know it’s ready to flip when the edges begin to slightly curl away from the pan, the surface of the crepe appears mostly dry, and any visible bubbles have popped. Use a thin, flexible spatula to carefully loosen the edges and then slide it underneath the crepe before gently flipping it over to cook the second side. The second side cooks much faster, typically requiring only about 20-30 additional seconds, just enough time for it to lightly brown. Once cooked through, carefully remove the delicate crepe from the skillet and transfer it to a serving plate. Continue this process with the remaining batter, stacking the cooked crepes to keep them warm. Don’t be discouraged if the first crepe isn’t perfect; it often acts as a “tester” to adjust your pan temperature and technique, and the subsequent crepes will surely improve!
How to Tell When Your Crepe is Ready to Turn
Mastering the flip is an essential part of crepe making, and knowing the right moment to turn your crepe prevents tearing and ensures a beautifully cooked result. The most reliable indicator that your crepe is ready to be flipped is when the top surface of the crepe starts to lose its wet, raw appearance and begins to look dry and matte. You’ll also notice the very edges of the crepe subtly pulling away or peeling from the sides of the pan. Furthermore, any small bubbles that formed on the surface during the initial cooking phase will have popped and set.
Attempting to turn the crepe too early, when the batter is still wet or sticky, significantly increases the likelihood of it tearing or crumbling. Patience is key here. Once these visual cues are present, carefully slide a thin, flexible spatula underneath the crepe, ensuring you get it fully beneath the cooked surface, and confidently flip it over. The second side will cook very quickly, usually within 20 to 30 seconds, achieving a light golden hue. After a few tries, you’ll develop an intuitive sense for this timing.
NOTE: It’s a widely acknowledged truth in the world of crepes that the very first crepe rarely turns out perfectly. This is often because the pan is still adjusting to the optimal temperature, or you’re fine-tuning your batter-to-pan swirling technique. Don’t let this minor setback discourage you! Consider the first crepe your ‘practice run’ or ‘chef’s treat.’ The subsequent crepes will undoubtedly improve as your pan reaches consistent heat and your technique becomes more fluid. So, embrace the learning curve and keep going; perfection is just a crepe or two away.
Expert Tips for Flawless Crepes
Achieving perfect crepes consistently is easier than you think, especially with a few helpful tips in your arsenal. These techniques will ensure your pancake mix crepes are delicate, evenly cooked, and truly delightful every time.
- Thoroughly Whisk the Pancake Mix First: Before you even think about adding any liquid ingredients, take a moment to vigorously whisk the dry pancake mix in your bowl. This simple action serves a vital purpose: it breaks up any potential clumps or lumps in the mix. Starting with a smooth, lump-free dry base is fundamental to achieving a silky-smooth batter, which in turn leads to uniformly thin and tender crepes without any unappetizing pockets of dry mix.
- Combine Wet Ingredients Separately and Thoroughly: For the best results, always mix all your wet ingredients—milk, egg, vanilla, and oil—together in a separate bowl or liquid measuring cup until they are fully homogenous. Doing so ensures that these components are evenly distributed throughout the batter when combined with the dry mix. This step is crucial for developing a consistently thin and smooth batter that pours and spreads beautifully, preventing streaks or uneven pockets of ingredients that could impact the crepe’s texture and cooking.
- Ensure Your Pan is Properly Heated: The temperature of your cooking surface is paramount for crepe success. Always preheat your non-stick skillet over medium heat until it is sufficiently hot but not smoking. A hot pan is essential for the batter to set quickly, cook evenly, and prevent sticking. If the pan isn’t hot enough, the crepe will stick and cook slowly, becoming tough. If it’s too hot, it will burn before it can set properly. A good test is to flick a drop of water onto the pan; if it sizzles and evaporates immediately, your pan is ready.
- Utilize a High-Quality Non-Stick Skillet and Cooking Spray: Crepes, by their delicate nature, can be a little temperamental when it comes to sticking. To mitigate this, invest in a good quality non-stick skillet, ideally one specifically designed for crepes or an even-bottomed pan. Additionally, lightly spraying the pan with non-stick cooking spray before pouring each crepe, even on a non-stick surface, provides an extra layer of insurance. This dual approach ensures your crepes release effortlessly, allowing for easy flipping and beautiful presentation.
- Exercise Patience Before Flipping: Resisting the urge to flip too soon is perhaps the most important tip. Trying to turn a crepe before it’s ready is the most common cause of tearing and frustration. Wait patiently until you observe clear signs that the first side is adequately cooked: the edges will start to gently pull away from the pan, the entire surface of the crepe will appear dry and matte (no visible wet batter), and any small bubbles that formed will have popped. These indicators confirm that the crepe has developed enough structural integrity to be flipped cleanly and smoothly without incident.
Delightful Crepe Filling Ideas
The beauty of these pancake mix crepes lies in their incredible versatility; they are a blank canvas, eagerly awaiting your culinary creativity. While a simple dollop of butter and a drizzle of warm maple syrup always remains a fabulous classic, the possibilities for toppings and fillings are genuinely endless. Here are some inspiring ideas to transform your crepes into an unforgettable meal or dessert:
Sweet Crepe Fillings:
- Fresh Fruit: Any ripe fruit is a perfect companion for sweet crepes. Consider luscious, fresh macerated strawberries that have released their sweet juices, thinly sliced bananas for a creamy texture, or a vibrant mix of berries like blueberries, raspberries, and blackberries. Sautéed apples with cinnamon or peaches in a light syrup also make delightful seasonal options.
- Decadent Spreads: A rich and flavorful spread can elevate your crepes instantly. Indulge in creamy Nutella for a chocolate-hazelnut dream, or creamy peanut butter for a protein-packed treat. Try Biscoff cookie butter for a unique, spiced sweetness, or tangy lemon curd for a zesty kick. Don’t forget classic fruit jams or preserves, which offer a delightful burst of fruit flavor and color. A simple cream cheese spread (perhaps sweetened with a touch of sugar and vanilla) is also a fantastic base.
- Sweet Toppings & Garnishes: Once filled, add the perfect finishing touches. A sprinkle of mini chocolate chips (dark, milk, or white!), finely chopped nuts like pecans or walnuts for crunch, or a generous drizzle of chocolate sauce, caramel sauce, or fruit syrup. A cloud of freshly whipped cream adds luxurious lightness, while a delicate dusting of powdered sugar makes for an elegant presentation and a touch of extra sweetness.
Savory Crepe Fillings:
Crepes aren’t just for breakfast or dessert; they make fantastic savory meals too! Think of them as delicate wrappers for a variety of hearty and flavorful combinations.
- Cheesy Delights: Melted shredded cheese, such as cheddar, Swiss, or Gruyère, forms a warm, gooey base.
- Protein Power: Add scrambled eggs for a breakfast-for-dinner option, thinly sliced ham or turkey, cooked chicken (shredded or diced), or even smoked salmon with cream cheese and dill.
- Vegetable Medley: Sautéed mushrooms, spinach, bell peppers, onions, asparagus, or roasted vegetables like zucchini and eggplant can add flavor and texture. A sprinkle of fresh herbs like chives, parsley, or basil will brighten any savory crepe.
- Hearty Combinations: For a more substantial meal, consider a filling of ground beef or turkey seasoned with taco spices, a chicken and mushroom cream sauce, or even ratatouille-style vegetables.
Feel free to mix and match these ideas to create your own signature crepe combinations. The beauty is in the experimentation!
Storage Solutions for Crepes and Batter
While freshly made crepes are undoubtedly at their absolute best—warm, delicate, and inviting—you might find yourself with leftovers or wish to prepare ahead for convenience. Understanding how to properly store both cooked crepes and uncooked batter is key to enjoying these delights even beyond the immediate cooking session.
Storing Cooked Crepes:
Once crepes are made, they tend to lose some of their initial delicate texture upon refrigeration. They can become a bit firmer and less pliable. For this reason, I generally recommend enjoying them fresh. However, if you do have leftovers that you absolutely want to save, here’s the best approach: Allow the crepes to cool completely to room temperature. Stack them with a piece of parchment paper or wax paper between each crepe to prevent them from sticking together. Then, place the stacked crepes into an airtight container or a heavy-duty Ziploc bag. Refrigerate for up to 2 days. When reheating, gently warm them in a lightly greased non-stick pan over low heat, or briefly in the microwave, being careful not to overcook them, which can make them rubbery.
Alternatively, cooked crepes can be frozen for longer storage. Once cooled, stack them with parchment paper in between, wrap the stack tightly in plastic wrap, and then place it in a freezer-safe bag or container. They can be frozen for up to 1 month. Thaw in the refrigerator overnight and reheat as directed above.
Storing Crepe Batter:
The superior method for enjoying fresh crepes with minimal effort is to prepare the crepe batter ahead of time. This approach allows the ingredients to meld and hydrate fully, often resulting in an even more flavorful and perfectly smooth batter. Simply prepare the batter as instructed, cover the bowl tightly with plastic wrap or transfer it to an airtight container, and refrigerate it. Crepe batter can be stored in the refrigerator for up to 24-48 hours. Before cooking, give the batter a good whisk, as it may have thickened slightly or separated. This make-ahead strategy means you can quickly fry up fresh, warm crepes whenever the craving strikes, making them perfect for busy mornings or impromptu brunch gatherings.
Common Crepe Questions Answered
While both crepe and pancake batters share a foundational set of ingredients—typically flour, milk, and eggs—there are critical distinctions that result in their unique textures and forms. The primary difference lies in the leavening agent and the consistency of the batter. Pancake batter is intentionally thicker and contains leavening agents like baking powder or baking soda, which create the characteristic fluffy, airy texture when cooked. This allows pancakes to rise and be thick.
Crepe batter, on the other hand, is specifically designed to be thin and pourable, which is why it traditionally contains no leavening agents (or a minimal amount, which pancake mix provides). This absence of leavening ensures that crepes cook into thin, delicate, and pliable sheets, rather than rising. The higher proportion of wet ingredients in crepe batter contributes to its significantly thinner, almost liquid, consistency, enabling it to spread widely and thinly across a hot pan.
If you prefer to make your crepes from scratch without using a pancake mix, it’s absolutely possible and still quite simple. You’ll just need to substitute the pancake mix with its individual components. For every 1 cup of pancake mix specified in this recipe, you will need to use 1 cup of all-purpose flour, 2 tablespoons of granulated sugar, and 1/4 teaspoon of salt. All the other wet ingredients—milk, egg, vanilla extract, and vegetable oil—remain the same as listed in the recipe. This substitution allows you to have full control over the flavor profile and ensures a homemade taste while still achieving the desired thin, delicate crepe consistency.
For the best results when making crepes from pancake mix, you’ll want to opt for a classic, all-purpose pancake mix. Brands such as Bisquick or Aunt Jemima are excellent choices because they are formulated with a blend of flour, sugar, and a leavening agent. This combination provides a stable and flavorful base for the crepe batter, ensuring it has just enough structure and sweetness. Avoid specialty pancake mixes with added flavors, grains, or extremely high leavening, as these might alter the delicate texture you’re aiming for in a crepe. Basic is best for conversion!
Crepes sticking to the pan can be a frustrating issue, but it usually comes down to a few common culprits. Firstly, the most frequent reason is that the heat of your pan is probably not warm enough. A sufficiently hot pan allows the batter to set instantly upon contact, forming a non-stick barrier. Secondly, there might not be enough non-stick cooking spray or a thin film of melted butter on the bottom of the pan before you add the batter. Even with a non-stick pan, a little extra lubrication is crucial for crepes. Lastly, the problem could be with your pan itself. If your non-stick skillet has seen better days, has scratches, or a worn-out finish, its non-stick properties may be compromised. In such cases, replacing your pan with a new, high-quality non-stick option or a dedicated crepe pan can make a significant difference.
Yes, you absolutely can freeze cooked crepes for future enjoyment! This is a fantastic way to meal prep or save extra crepes. To freeze them effectively, first, allow the crepes to cool completely to room temperature. Then, stack them with a piece of parchment paper or wax paper placed between each crepe. This prevents them from sticking together and makes it easy to separate individual crepes later. Once stacked, wrap the entire stack tightly in plastic wrap, ensuring no air can get in. For added protection against freezer burn, place the wrapped stack into a freezer-safe Ziploc bag or an airtight container. Frozen crepes can be stored for up to 1 month. When you’re ready to enjoy them, thaw them in the refrigerator overnight, then gently reheat in a lightly greased non-stick pan over low heat, or briefly in the microwave.
More Irresistible Breakfast Recipes
If you’re a true breakfast enthusiast, always on the lookout for new and exciting ways to start your day, then you’re in for a treat! Beyond these delightful Pancake Mix Crepes, there’s a whole world of morning meal possibilities waiting to be explored. From savory casseroles that feed a crowd to sweet, comforting baked goods, these recipes are perfect for weekend brunches, holiday gatherings, or simply making an ordinary morning extraordinary. Dive into these tempting breakfast and brunch ideas that are sure to become new family favorites:
Brunch
Easy Cheesy Ham and Egg Breakfast Casserole
Brunch
French Toast Monkey Bread Recipe
Brunch
Pigs in a Blanket Breakfast Casserole Recipe
Brunch
Easy Chocolate Crumb Cake Recipe made with a Cake Mix
Did you try this recipe?
Leave a ⭐️ review below and tag @practicallyhomemade on Pinterest!

Easy Pancake Mix Crepes
Rate Recipe
Print Recipe
Ingredients
- 1 cup pancake mix
- 1 ¼ cups milk , {I used 1%}
- 1 large egg
- 1 teaspoon vanilla extract
- 2 Tablespoon vegetable oil
Instructions
-
Measure the pancake mix into a large bowl and whisk thoroughly to remove any lumps, ensuring a smooth dry base.
-
In a liquid measuring cup or small bowl, combine the milk, egg, vanilla extract, and oil. Whisk these wet ingredients well. Add this liquid mixture to the pancake mix and whisk gently until just combined. The batter should be notably thin and pourable.
-
Heat a medium non-stick skillet over medium heat until warm. Lightly spray with non-stick cooking spray. Pour about 1/4 cup of batter into the center of the hot pan, then immediately swirl the pan in a circular motion to evenly coat the bottom surface.
-
Cook the crepe until the edges begin to pull away from the pan, the top appears dry, and any bubbles have popped (approx. 1-2 minutes). Use a thin spatula to carefully flip the crepe and cook for another 20-30 seconds until lightly golden. Carefully remove and repeat with the remaining batter.
-
Serve your fresh crepes with your favorite sweet or savory toppings. Store any cooled leftovers in an airtight container in the refrigerator for up to 2 days, separated by parchment paper.
Video
Video for “Super Easy Pancake Mix Crepes” (Original video ID: MmI0hDbV)

Notes
- Be sure that you whisk the pancake mix before adding the wet ingredients. This will eliminate any lumps and ensure a smooth batter.
- Mix the wet ingredients together thoroughly before adding them to the pancake mix. Doing this step will ensure you have a nice and smooth, consistently thin batter.
- Heat the pan so that it is hot before adding the batter. You need a hot pan to quickly cook the crepes and prevent sticking, so having the pan hot to start is key.
- Use a nonstick skillet and also spray with nonstick spray. Crepes can be a little temperamental, so taking every precaution to prevent them from sticking will help immensely.
- Don’t try to turn the crepe too soon. Be patient and wait until the edges are starting to pull from the pan, the top looks a little more dry, and any visible bubbles have popped.
Filling Ideas:
Sweet Crepes- Fresh fruit (like strawberries, bananas, or berries), cream cheese, Nutella, cookie butter, peanut butter, lemon curd or jam, chocolate chips, chopped nuts, chocolate sauce, whipped cream, and a sprinkle of powdered sugar.
Savory Crepes- Try adding shredded cheese, scrambled eggs, ham or turkey, and sautèed vegetables (such as mushrooms, spinach, or bell peppers).
Enjoy your homemade crepes!
Nutrition
Nutrition information is automatically calculated, so should only be used as an approximation.