
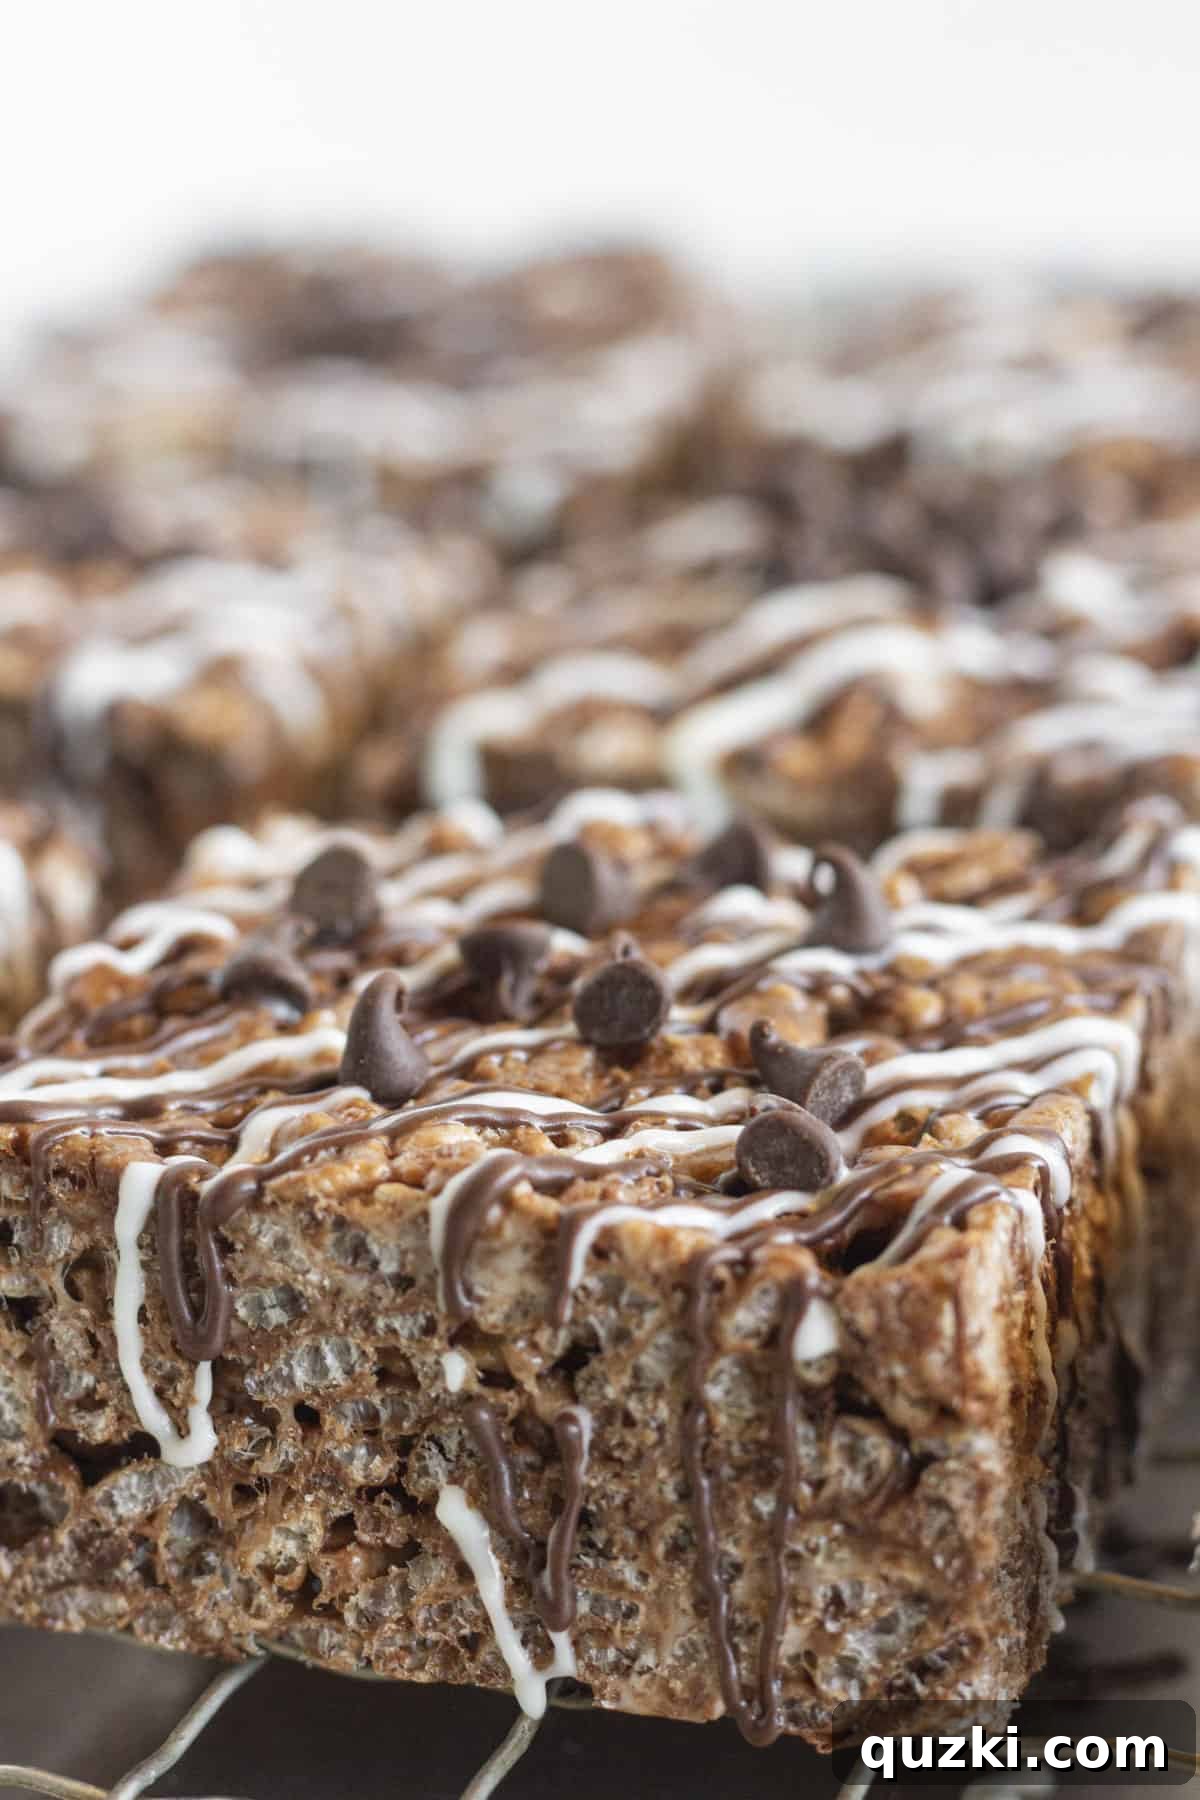
Indulge your sweet tooth with these unbelievably simple and utterly delightful Chocolate Rice Krispies Treats. A twist on the classic, these no-bake bars are a dream come true for chocolate enthusiasts, combining the familiar satisfying crunch with a rich, decadent cocoa flavor. With just a handful of ingredients and minimal effort, you can whip up a batch of these mouthwatering treats in a flash. They are the epitome of nostalgic comfort food, guaranteed to earn a permanent spot on your dessert rotation and at any gathering.
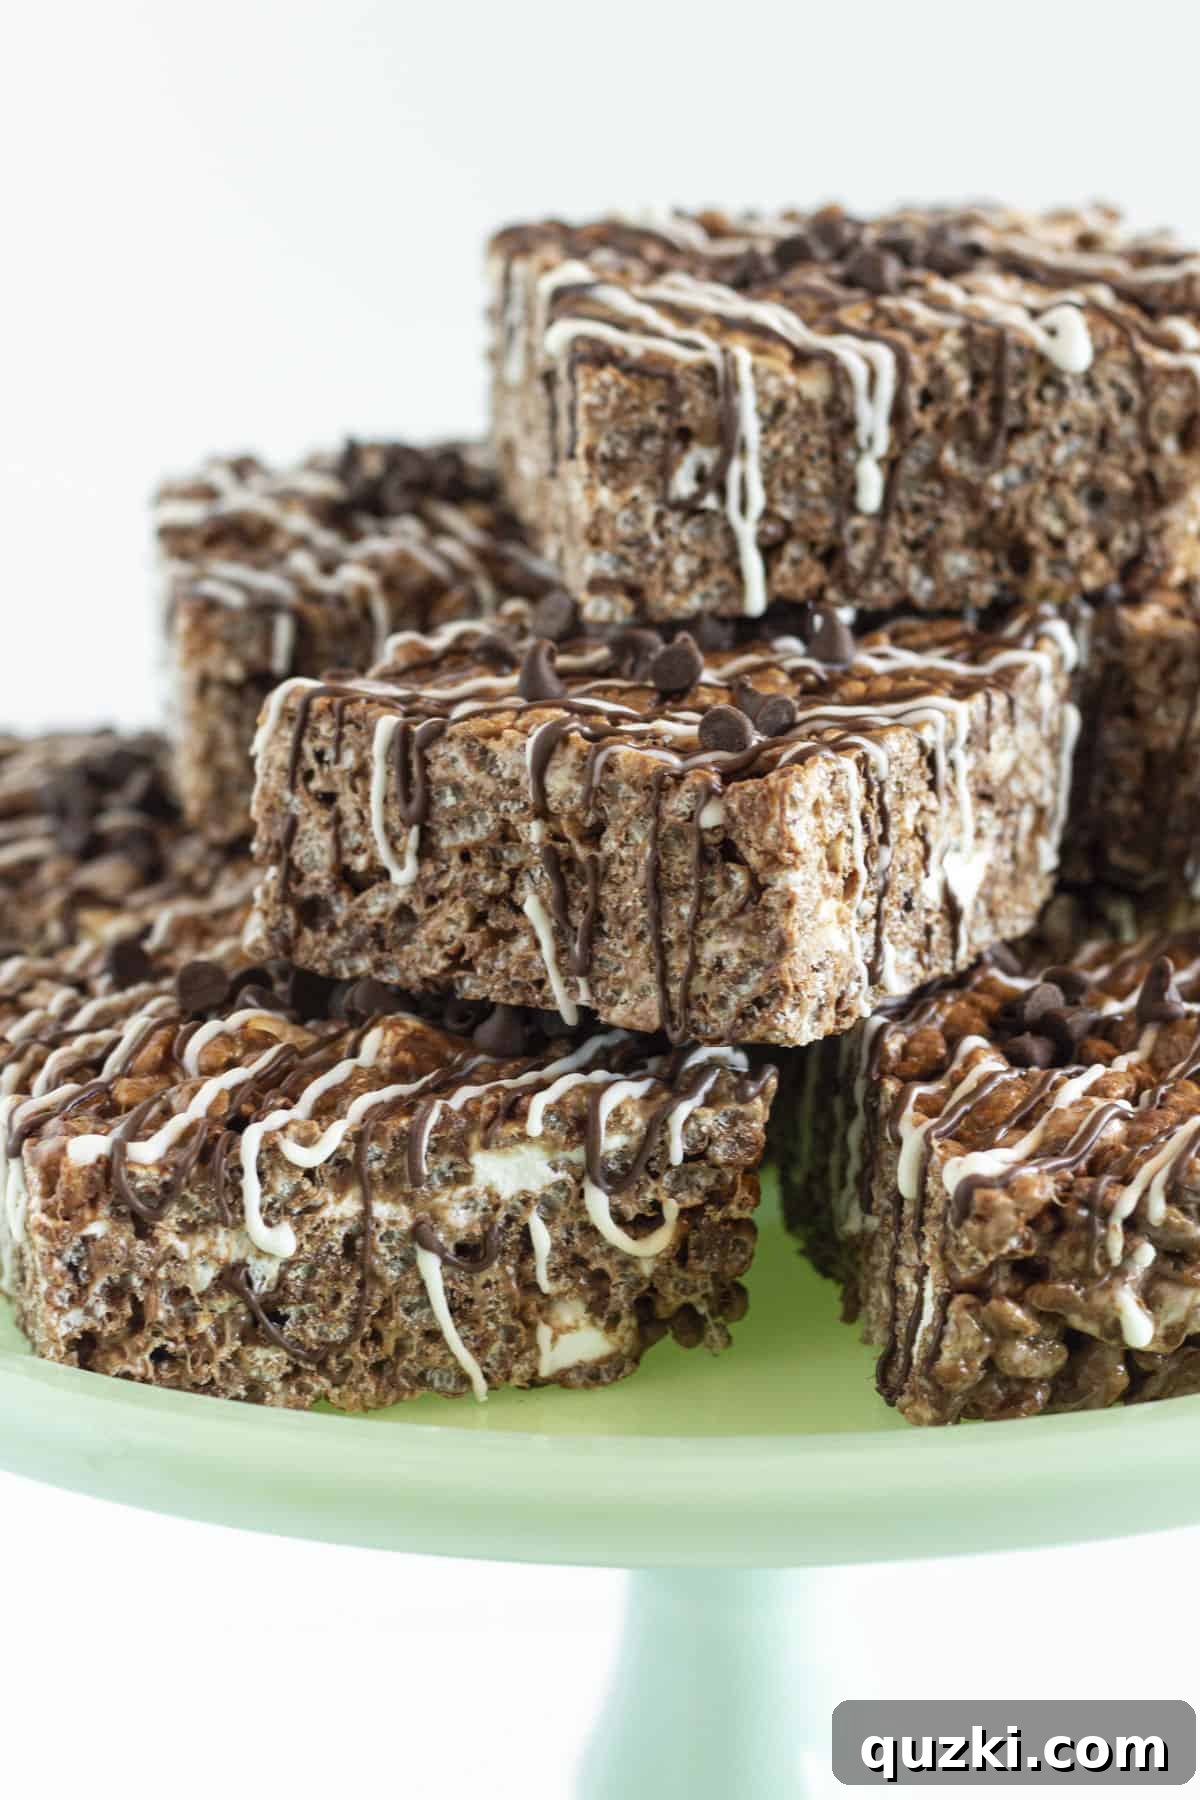
What Are Chocolate Rice Krispies Treats?
For those who adore the timeless appeal of original Rice Krispies Treats but crave an extra layer of chocolatey goodness, these Chocolate Rice Krispies Treats are your perfect match. They take the beloved foundation of crispy cereal and gooey marshmallows and elevate it with a double dose of chocolate. Instead of traditional rice cereal, we use chocolate-flavored crispy rice cereal, and we generously fold in semi-sweet chocolate chips, creating pockets of melted delight in every bite.
The result is a treat that maintains the irresistible soft, chewy texture and the signature amazing crunch from the rice cereal, but with an intensified chocolate flavor that truly stands out. It’s a next-level confection that’s both familiar and exciting, offering a delightful experience for kids and adults alike. If you’re looking for other fantastic no-bake delights, you might also love these Cinnamon Toast Crunch Bars.
Why You’ll Love This Easy Recipe
There are countless reasons why these Chocolate Rice Krispies Treats will become a staple in your kitchen. First and foremost, they are incredibly **easy to make**. You won’t need any special baking skills or fancy equipment. The no-bake aspect means no oven required, making them ideal for hot summer days or when you need a quick dessert fix.
Secondly, they are wonderfully **kid-friendly**, both to eat and to help prepare. Little hands can assist with mixing the ingredients (under supervision, of course!), making it a fun activity for the whole family. The simple, classic flavors appeal to even the pickiest eaters, guaranteeing smiles all around.
Moreover, these treats are surprisingly **versatile**. While the base recipe is fantastic on its own, it serves as a blank canvas for countless variations and additions, allowing you to customize them to suit any preference or occasion. Whether you’re preparing them for a school bake sale, a birthday party, or just a cozy night in, these chocolate crispy treats are always a crowd-pleaser that deliver on taste and convenience.
Essential Ingredients for Perfect Chocolate Rice Krispies Treats
Crafting these delectable no-bake bars requires just a few basic ingredients, each playing a crucial role in achieving the perfect balance of flavor and texture. Here’s what you’ll need:
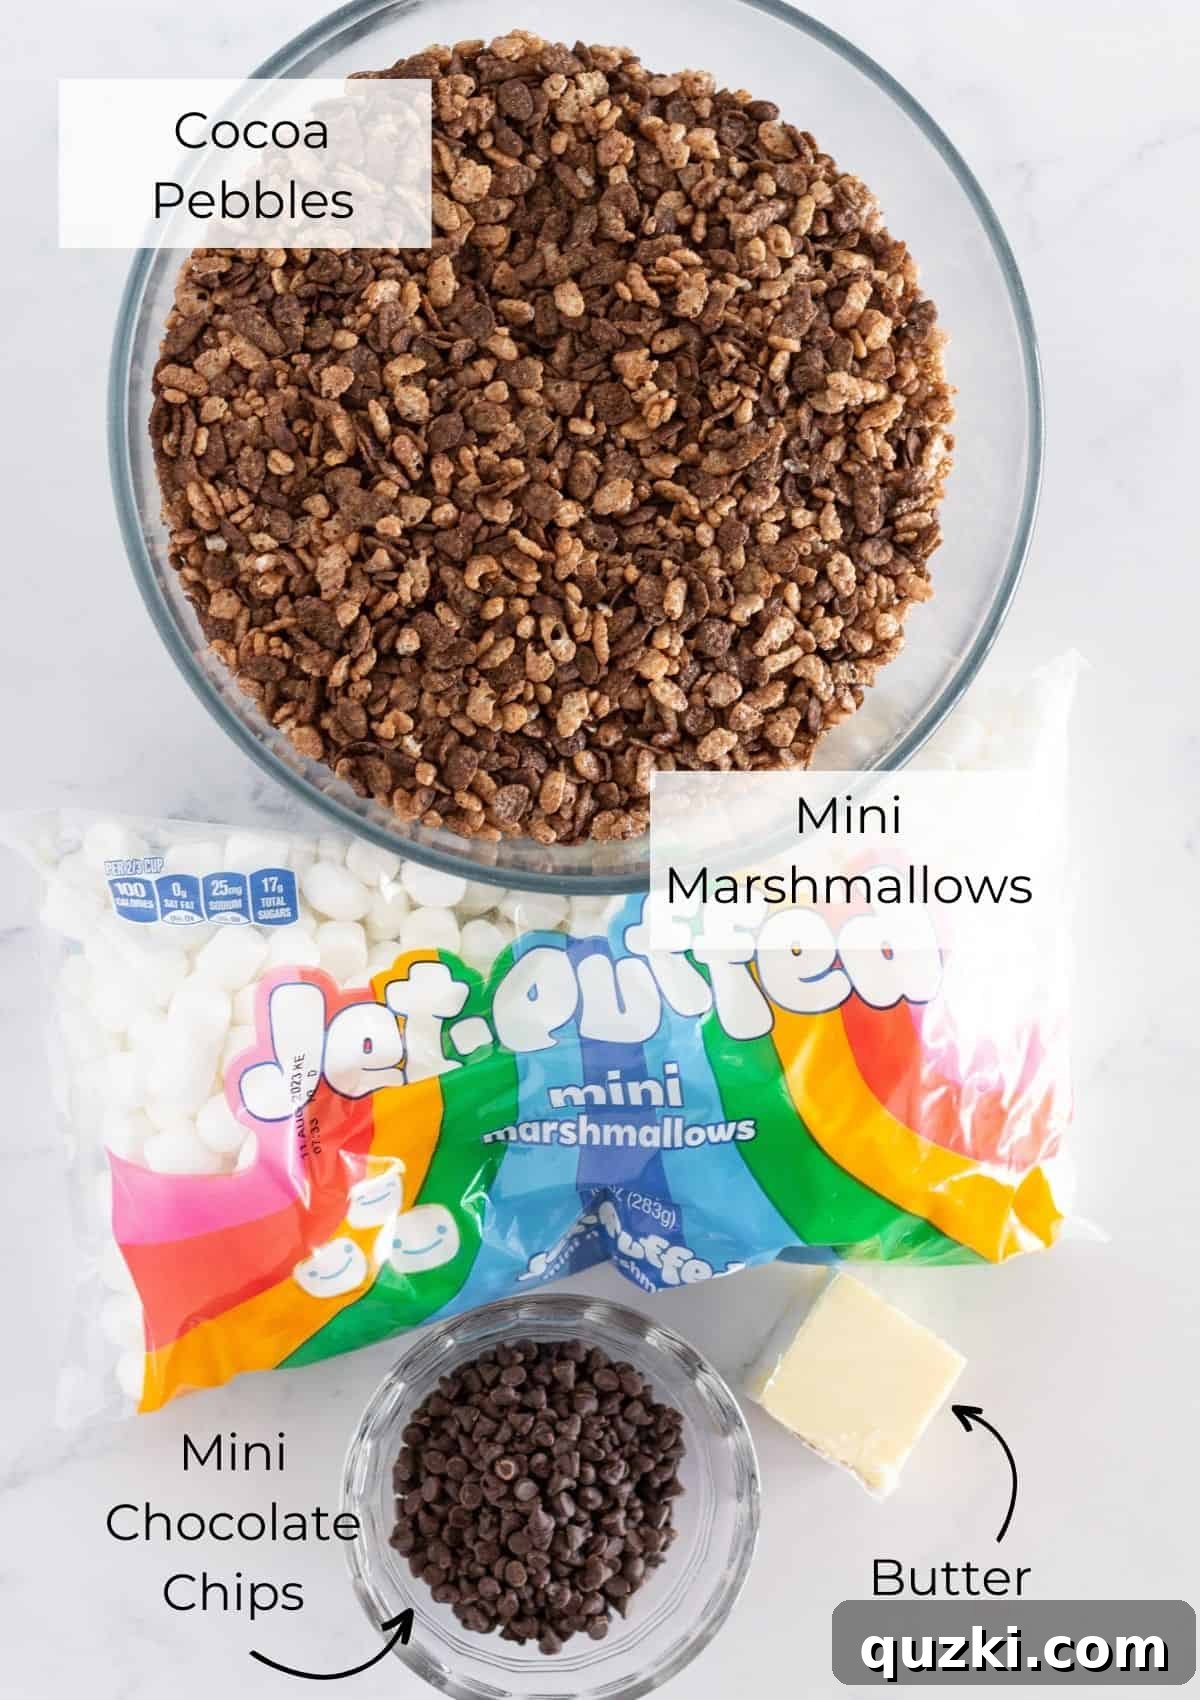
- Butter: Essential for both flavor and texture. When melted with the marshmallows, butter helps to create a smoother, more pliable marshmallow mixture, making it easier to coat the cereal. It also contributes a rich, buttery depth that enhances the overall taste. Unsalted butter is usually preferred, but salted can be used if you like a hint of saltiness to balance the sweetness.
- Marshmallows: The magical binding agent that holds everything together. We use marshmallows in two ways: some are melted into a gooey syrup with the butter, while others are added whole to provide delightful pockets of soft, chewy sweetness throughout the bars. Both miniature and large marshmallows work well; miniature ones melt faster and distribute more evenly when added whole.
- Semi-Sweet Chocolate Chips: These are incorporated directly into the mixture, melting slightly from the warmth of the marshmallow goo to create luscious chocolate pockets. Mini chocolate chips are my preference as they distribute better and ensure chocolate in every bite, but standard-sized or even chopped chocolate bars can also be used. Adjust the type of chocolate (milk, dark, white) to your preference.
- Cocoa Krispies Cereal: The star of the show for that undeniable chocolate flavor and signature crisp. This chocolate version of traditional Rice Krispies cereal is what gives these treats their distinctive dark hue and cocoa notes. If Cocoa Krispies aren’t available, other chocolate-flavored crispy cereals like Cocoa Pebbles or even crushed chocolate O’s can work beautifully as substitutes, maintaining that delightful crunch.
For precise measurements and detailed quantities, please refer to the comprehensive recipe card below.
Exciting Variations & Customization Ideas
One of the best aspects of no-bake treats is their adaptability. These Chocolate Rice Krispies Treats are incredibly flexible, allowing for endless creative variations to suit any taste or occasion. Don’t be afraid to experiment!
- Marshmallow Magic: While classic mini marshmallows are excellent, consider exploring different flavored marshmallows for a unique twist. You might find strawberry, vanilla bean, or even caramel-flavored marshmallows in specialty stores or online, which could add an unexpected layer of flavor to your bars.
- Chocolate Chips Galore: Beyond semi-sweet, the world of chocolate chips is vast! Mix and match different chip flavors for a dynamic profile. White chocolate chips add a lovely contrast, milk chocolate chips offer a creamier sweetness, and dark chocolate chips provide a more intense cocoa hit. For a truly adventurous flavor, try adding cinnamon chips, peanut butter chips, or even butterscotch chips.
- Cereal Creativity: Don’t limit yourself to just Cocoa Krispies. While they are perfect for this recipe, you can experiment with other cereals. Fruity cereals can add a playful color and tang, while classic Rice Krispies can be used for a less intense chocolate flavor. You could even combine different cereals for a custom blend. For another great way to use crispy rice cereal, check out these Rice Krispies Cookies.
- Delectable Mix-ins: Boost the flavor and texture with a variety of mix-ins. A half cup of creamy peanut butter, almond butter, or even Nutella stirred into the melted marshmallow mixture can transform the bars into a rich, nutty delight. For an added crunch and salty-sweet balance, try adding crushed pretzels, chopped nuts (like pecans or walnuts), or even miniature M&M’s. Cookie butter is another fantastic addition for a unique twist.
- Gourmet Toppings: Elevate your treats with decadent toppings. Drizzle with melted white chocolate, dark chocolate, or caramel sauce. Sprinkle with flaky sea salt, colorful sprinkles, or crushed candy pieces (like peppermint in winter, or Heath bar bits). A dusting of cocoa powder or powdered sugar can also add a sophisticated touch.
How to Make Easy Chocolate Rice Krispies Treats: Step-by-Step Guide
Making these chocolatey delights is incredibly straightforward. Follow these simple steps for perfectly gooey and crispy treats every time.
- Prepare Your Pan: First, ensure your 9×9 inch baking pan is thoroughly prepared. Liberally spray it with non-stick cooking spray or line it with parchment paper, leaving an overhang on the sides for easy removal. Set this aside.
- Combine Dry Ingredients: In a large mixing bowl, pour the chocolate Rice Krispies cereal. Add 1 cup of mini marshmallows and ½ cup of mini chocolate chips. Give them a gentle stir to combine, then set this bowl aside.
- Melt Marshmallows and Butter: In a medium saucepan, add the butter and melt it over medium-low heat. Once the butter is melted, pour in the remaining marshmallows. Continue to cook, stirring frequently, over medium-low heat until the marshmallows are completely melted and form a smooth, gooey mixture. Be careful not to overheat.
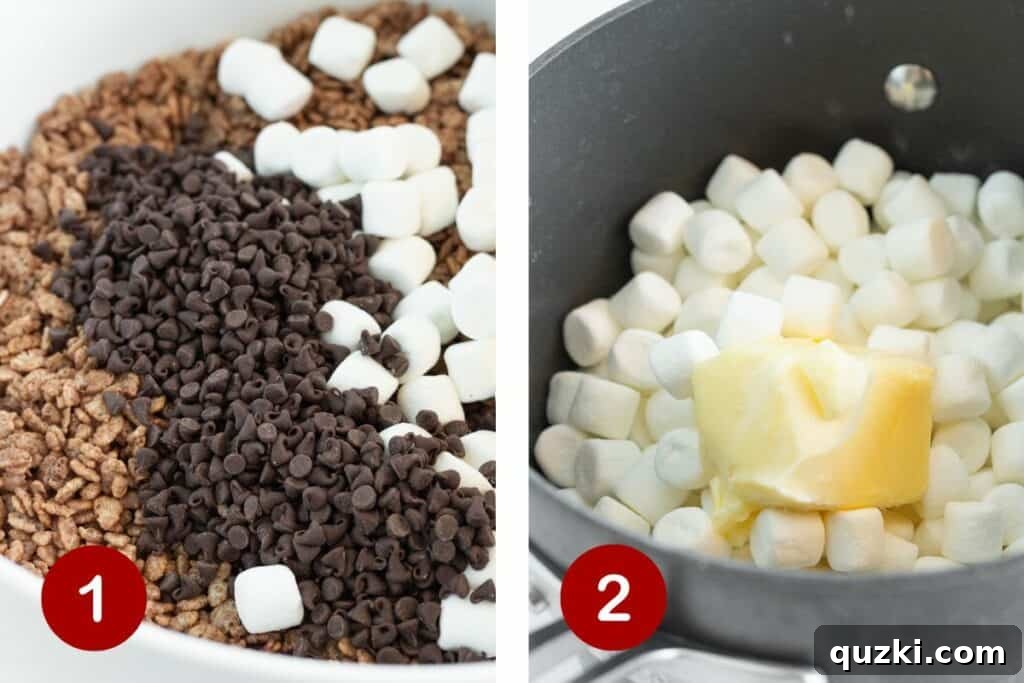
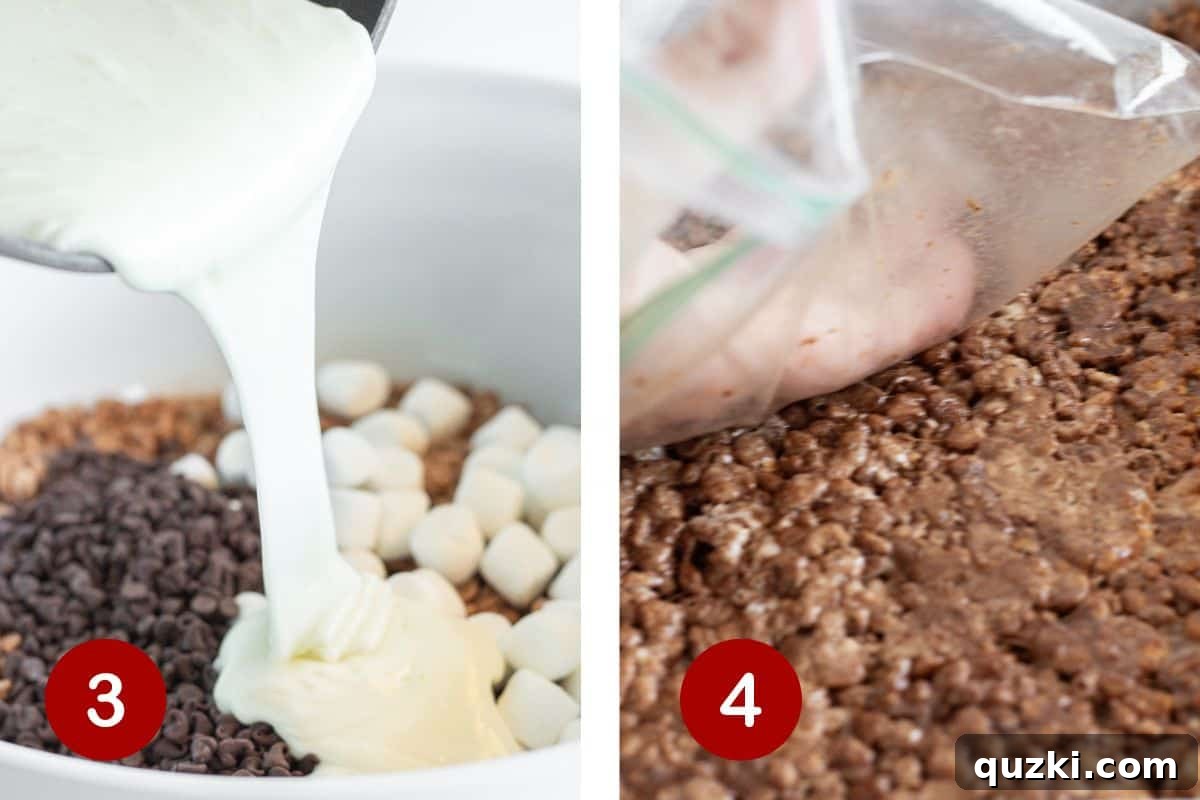
- Combine Wet and Dry: Pour the warm, melted marshmallow and butter mixture over the chocolate cereal, mini marshmallows, and chocolate chips in the large bowl. Stir everything together gently but thoroughly until all the cereal is evenly coated. This ensures every bite is equally delicious and held together properly.
- Press into Pan: Transfer the mixture immediately into your prepared 9×9 inch baking pan. Using a piece of parchment paper, wax paper, or a zipper bag sprayed with non-stick cooking spray over your hand, press the mixture down firmly and evenly into the pan. This technique prevents sticking and helps create dense, well-formed bars.
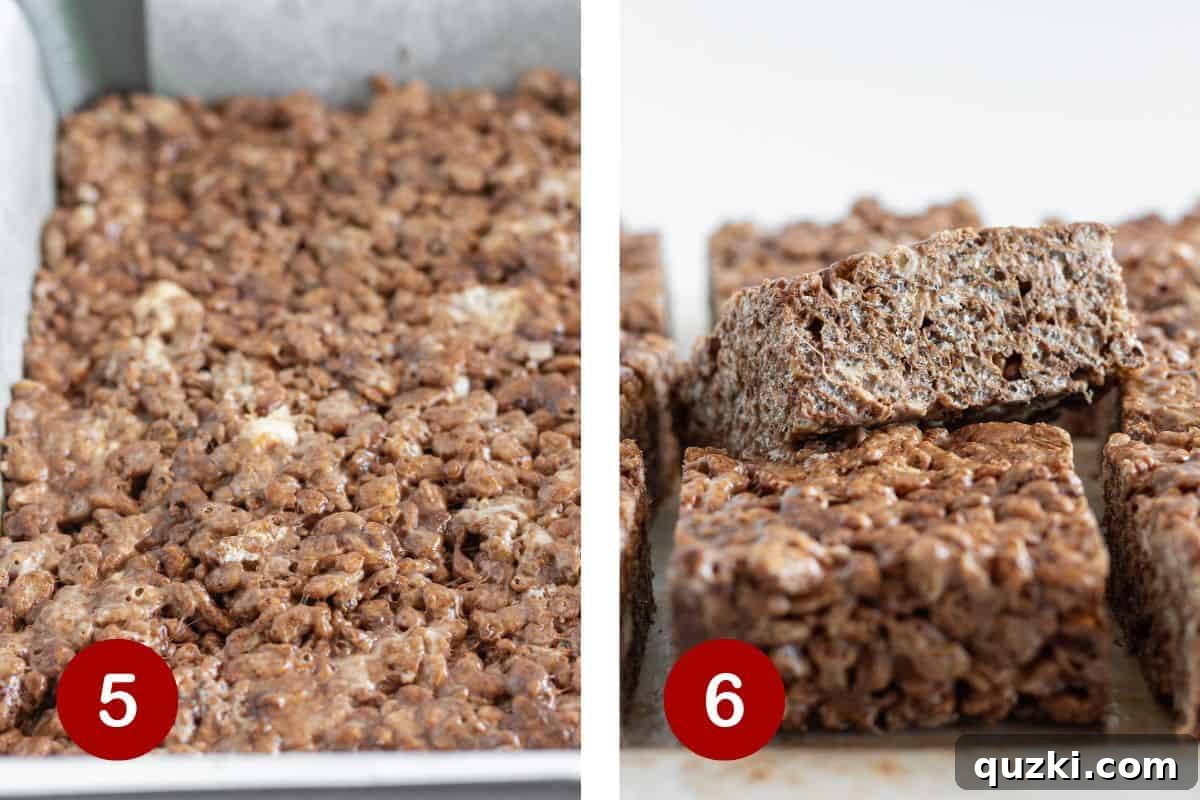
- Set and Serve: Cover the pan loosely with plastic wrap and allow the no-bake bars to set up at room temperature for at least 2 hours, or ideally overnight. If you’re in a hurry, you can refrigerate them for about 1 hour to speed up the setting process. Once firm, lift the treats out of the pan using the parchment paper overhang (if used) or carefully cut them directly in the pan.
- Cut and Garnish: Cut the large slab into individual squares on a cutting board. For an extra touch of elegance and flavor, melt a small amount of chocolate (white or semi-sweet) and drizzle it over the top of each bar. This adds a beautiful finish and an extra layer of chocolate.
Expert Tips for the Perfect No-Bake Cereal Bars
Achieving perfectly chewy, crispy, and delicious Chocolate Rice Krispies Treats is easy with a few simple tricks. Keep these tips in mind to ensure your treats are a resounding success every time.
- Pre-prepare Your Pan: This is crucial! Always spray your baking pan liberally with non-stick cooking spray or line it with parchment paper before you start melting anything. Once the sticky marshmallow mixture is ready, you’ll want to transfer it quickly without fumbling with pan preparation. A well-prepared pan makes removal and cutting effortless.
- Add Wet to Dry: For optimal coating and to prevent the cereal from breaking down too much, always pour the melted butter and marshmallow mixture over your dry cereal and other additions. Stirring the dry ingredients into a sticky pot of melted marshmallows can be messier and result in uneven distribution and crushed cereal pieces.
- Gentle Mixing is Key: While you want to mix thoroughly to ensure all cereal is coated, do so gently. Over-mixing can crush the delicate cereal, leading to a less crispy texture. Use a sturdy spatula and fold the mixture until just combined.
- Prevent Sticky Hands: The marshmallow mixture is notoriously sticky. To avoid a mess when pressing the mixture into the pan, place a piece of buttered parchment paper, wax paper, or a non-stick sprayed zipper bag over your hand. This creates a barrier, allowing you to press firmly without getting gooey fingers, and cleanup is a breeze!
- Allow Ample Cooling Time: Patience is a virtue, especially with no-bake treats. Allow your Chocolate Rice Krispies Treats to cool completely at room temperature for at least 2 hours, or even overnight, before cutting. For cleaner, sharper cuts, you can refrigerate them for about an hour after they’ve mostly set at room temperature. Cutting them too soon can result in a sticky, misshapen mess.
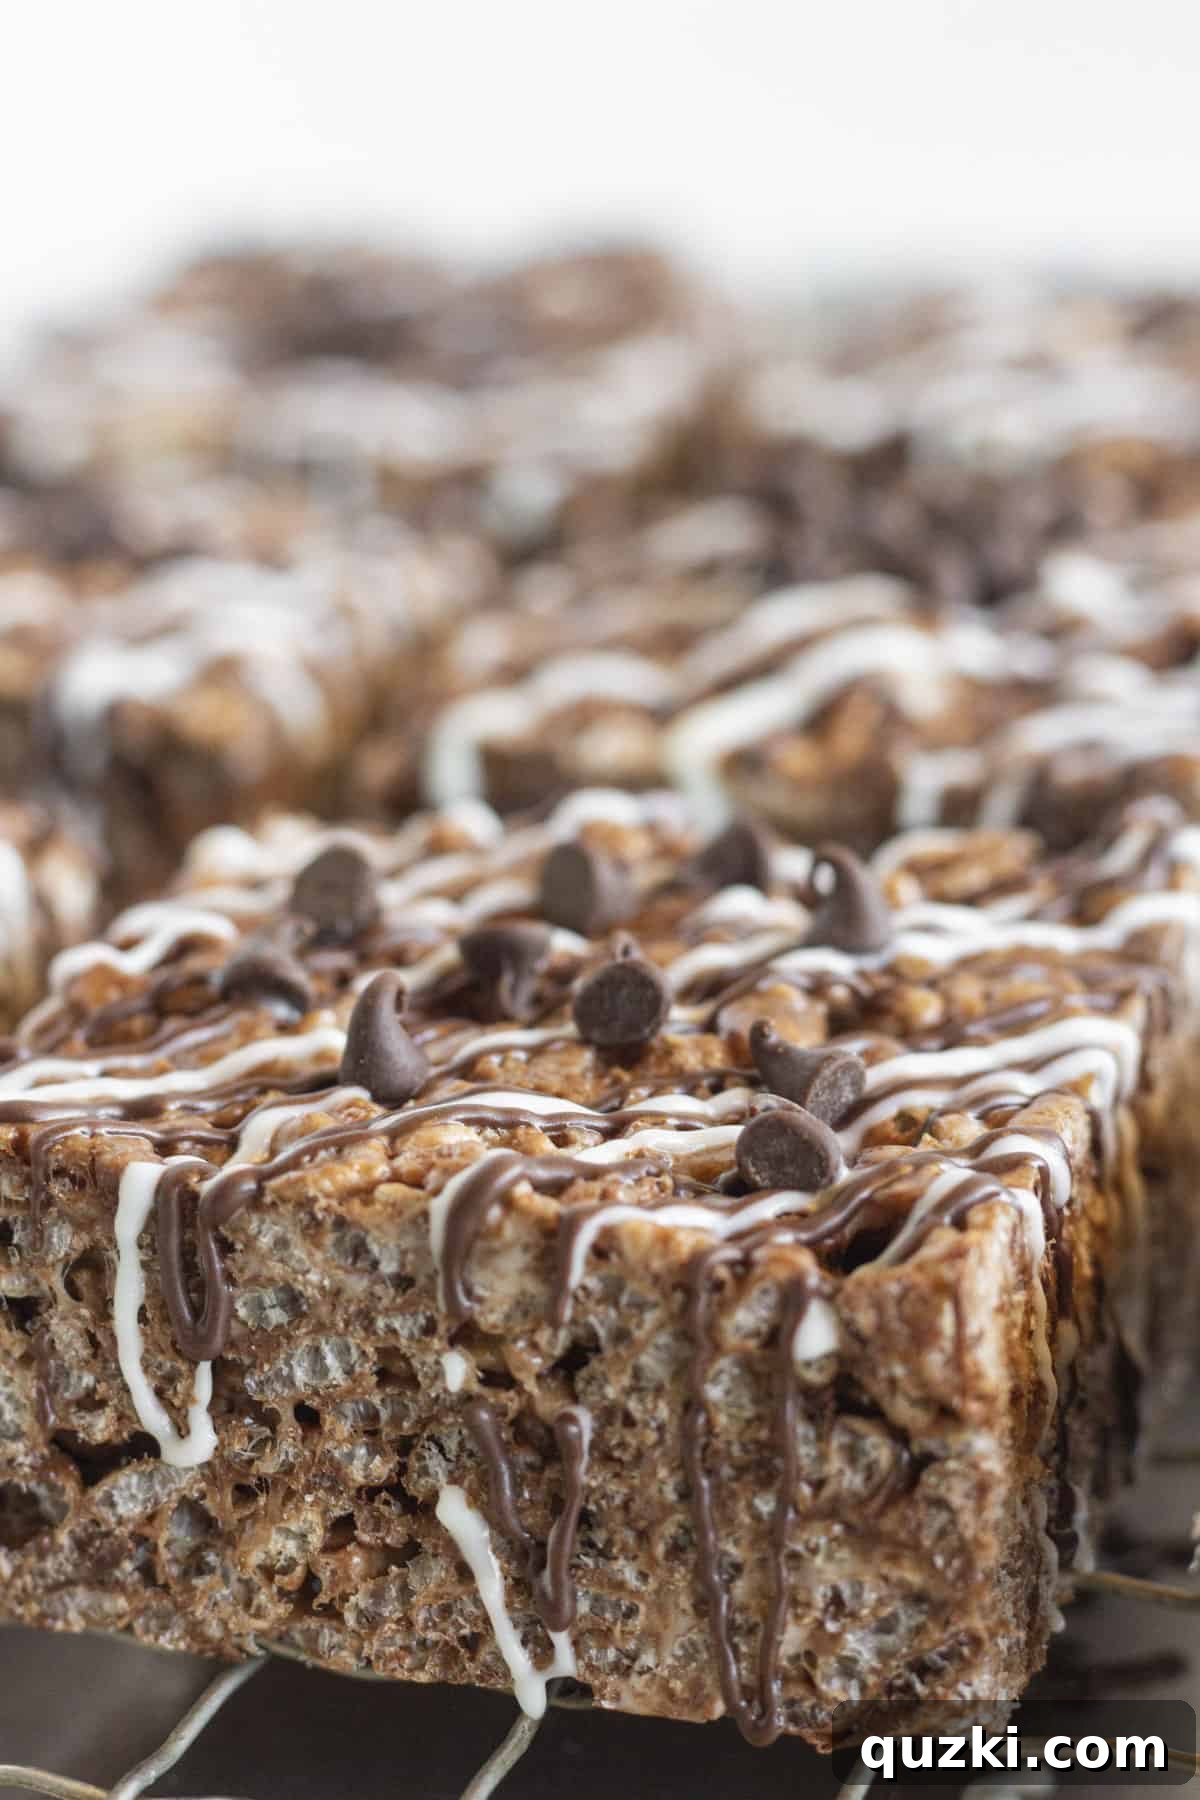
- Go the Extra Mile with a Drizzle: A simple chocolate drizzle on top can transform these humble treats into something truly special. Melt a quarter cup of chocolate melting wafers (dark, milk, or white) and use a spoon or a piping bag with a small tip to create an appealing pattern over the cooled bars. This adds a professional finish and an extra layer of chocolatey delight with minimal effort.
- Don’t Pack Too Tightly: While you want to press the mixture firmly into the pan, avoid compacting it excessively. Over-compressing can result in very dense, hard bars that lose some of their signature chewiness and crispy lightness. A firm, even press is sufficient.
Storing and Freezing Chocolate Rice Krispies Treats
Proper storage is key to keeping your Chocolate Rice Krispies Treats fresh and delicious for as long as possible.
Storing: The best way to store these treats is in an airtight container at room temperature. They tend to firm up in the refrigerator, losing some of their ideal soft and chewy texture. When stored correctly at room temperature, they will stay fresh and enjoyable for 2-3 days. If you need to stack layers of treats within the container, be sure to place a piece of parchment paper or wax paper between each layer to prevent them from sticking together.
Freezing: While you technically can freeze rice crispy treats, it’s generally not recommended for the best quality. Upon thawing, they often lose some of their signature crispy texture and can become somewhat stale or soggy. The truth is, this dessert is so incredibly simple and quick to make that it’s always best enjoyed fresh. If you do choose to freeze them, wrap individual bars tightly in plastic wrap, then place them in an airtight freezer-safe bag for up to 6 weeks. Thaw at room temperature before serving.
Frequently Asked Questions About Chocolate Rice Krispies Treats
Absolutely! This Chocolate Rice Krispies Treat recipe can easily be doubled to feed a larger crowd. Simply use a 9×13 inch baking pan for a larger batch, and ensure you have enough space to mix all the ingredients thoroughly in a very large bowl. Enjoy more of these delicious treats!
If your rice crispy treats are crumbling or falling apart, there could be a couple of common issues. First, the ratio of ingredients might be off; sometimes too many marshmallows or too much butter can make them too soft or greasy to hold together properly. Secondly, it’s crucial to press the mixture firmly and evenly into the pan. Not pressing them down enough, or not allowing them to cool and set completely before cutting, can also lead to them falling apart. Ensure they are fully set before attempting to slice them.
Yes, you absolutely can! Making these treats in the microwave is a fantastic time-saver. To do so, combine the butter and marshmallows in a large microwave-safe bowl. Microwave for 1 to 1½ minutes on high. Stir the mixture, then continue to microwave in 30-second intervals, stirring after each, until you achieve a nice smooth, melted mixture. Once melted, pour it over your dry ingredients, stir well, and press into your prepared pan. It’s a quick and efficient method!
Generally, traditional Rice Krispies cereal and many brands of marshmallows are gluten-free, but always check the labels of all your ingredients, especially the cereal and any added chocolate chips, to ensure they are certified gluten-free if catering to strict dietary needs. Butter is naturally gluten-free.
Hard treats usually result from overheating the marshmallow mixture or compacting the mixture too much in the pan. When marshmallows are heated for too long or at too high a temperature, they can become tough. Ensure you melt them over medium-low heat and remove them from the heat as soon as they are smooth. Also, avoid pressing the mixture too firmly into the pan, as this can make the bars dense and hard.
Do You Love No-Bake Desserts? Try These Amazing Recipes!
If the simplicity and deliciousness of these Chocolate Rice Krispies Treats have captured your heart, you’re in for a treat! No-bake desserts are a fantastic way to enjoy homemade sweets without the hassle of an oven. They’re perfect for any season and often require minimal ingredients and effort. Explore some of our other favorite no-bake creations that are just as easy and delightful.
More Irresistible No-Bake Delights
Desserts
No Bake Cinnamon Toast Crunch Bars Recipe
Desserts
Easy No Bake Mini Cheesecakes
Cookies
Easy Classic No Bake Cookies Recipe
Cheesecakes
Easy No Bake Lemon Cheesecake {5 Ingredients ONLY!}
Did you try this recipe? We’d love to hear from you!
Leave a ⭐ review below and tag @practicallyhomemade on Pinterest!
⭐⭐⭐⭐⭐
Chocolate Rice Krispies Treats
June Albertson-Dick
10 minutes
0 minutes
2 hours
2 hours 10 minutes
9 bars
Rate Recipe
Print Recipe
Ingredients
- ▢ 5 Tablespoons unsalted butter
- ▢ 13 ounces mini marshmallows
- ▢ ½ cup mini semi-sweet chocolate chips
- ▢ 4 ½ cups chocolate rice crispy cereal, {like Cocoa Krispies}
Optional Toppings
- ▢ ¼ cup chocolate melting wafers
- ▢ ¼ cup white chocolate melting wafers
Instructions
-
Spray a 9×9 inch baking pan liberally with non-stick cooking spray or line with parchment paper, and set aside.
-
In a large bowl, combine the chocolate Rice Krispies cereal, 1 cup of mini marshmallows, and ½ cup of mini chocolate chips. Stir gently and set aside.
-
In a medium saucepan, melt the butter over medium-low heat. Once melted, add the remaining marshmallows and continue to cook, stirring constantly, until the marshmallows are completely melted and smooth.
-
Pour the melted butter and marshmallow mixture over the cereal mixture in the large bowl. Stir until all ingredients are thoroughly combined and the cereal is evenly coated.
-
Transfer the mixture into the prepared 9×9 inch baking pan. Using a piece of parchment paper or a non-stick sprayed zipper bag over your hand, press the mixture down firmly and evenly into the pan.
-
Cover the pan and allow the bars to set at room temperature for at least 2 hours, or ideally overnight. Alternatively, refrigerate for 1 hour for faster setting. Once firm, cut into squares. If desired, melt chocolate and drizzle over the top of each bar for a finishing touch. Store leftovers in an airtight container for up to 3 days, using parchment or wax paper between layers if stacking.
Video
Watch our video tutorial for a visual guide on making these delicious Chocolate Rice Krispies Treats!
Notes
- Always prepare your pan (spray liberally with nonstick cooking spray or line with parchment paper) ahead of time. This saves time and stress when the sticky mixture is ready.
- For even coating and to prevent cereal from breaking, add your melted butter and marshmallow mixture to the dry ingredients, rather than the other way around.
- Use a buttered sandwich bag or parchment paper over your hand when pressing the mixture down. This prevents sticking and makes cleanup a breeze.
- Allow the treats to cool completely before cutting for the cleanest, most perfectly shaped squares. Refrigerating for an hour can speed up this process and yield even neater cuts.
- For an elevated presentation and extra flavor, drizzle melted chocolate over the top of the cooled and cut treats. This simple step adds a gourmet touch.
- Avoid over-mixing and over-compacting the mixture to maintain a perfectly chewy and crispy texture. Gentle handling is key for light, airy treats.
Nutrition
Nutrition information is automatically calculated and should only be used as an approximation.
Like this? Leave a comment below!