
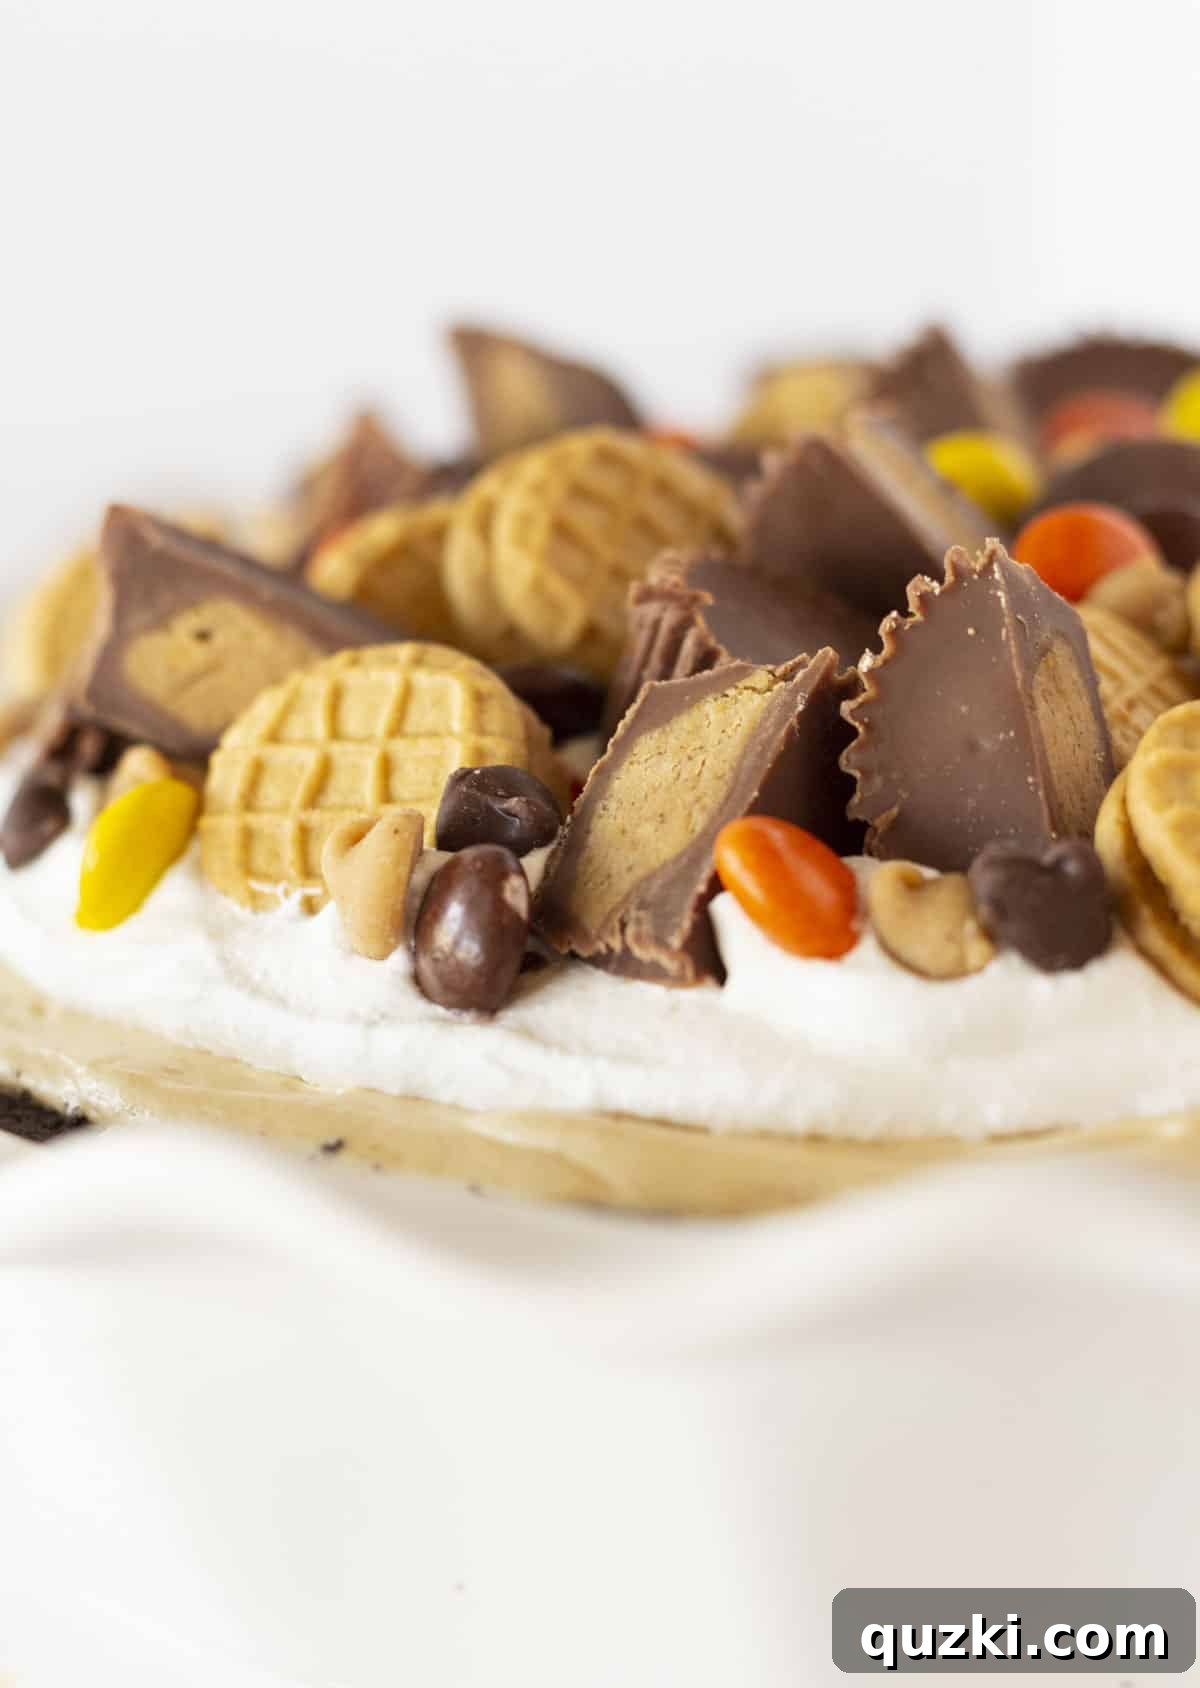
If you’re a devoted peanut butter enthusiast, prepare to be amazed by this **Easy No-Bake Peanut Butter Pie**! This isn’t just a dessert; it’s a culinary masterpiece that seamlessly blends the rich flavors of chocolate and peanut butter into a single, irresistible treat. From its sturdy chocolate cookie crust to the lusciously creamy peanut butter filling, crowned with a light whipped topping and a generous scattering of your favorite sweets, this pie is destined to become a staple in your recipe collection. It’s not only incredibly delicious but also remarkably simple to make, requiring no oven at all. Get ready to impress your family and friends with a pie that truly stands out!
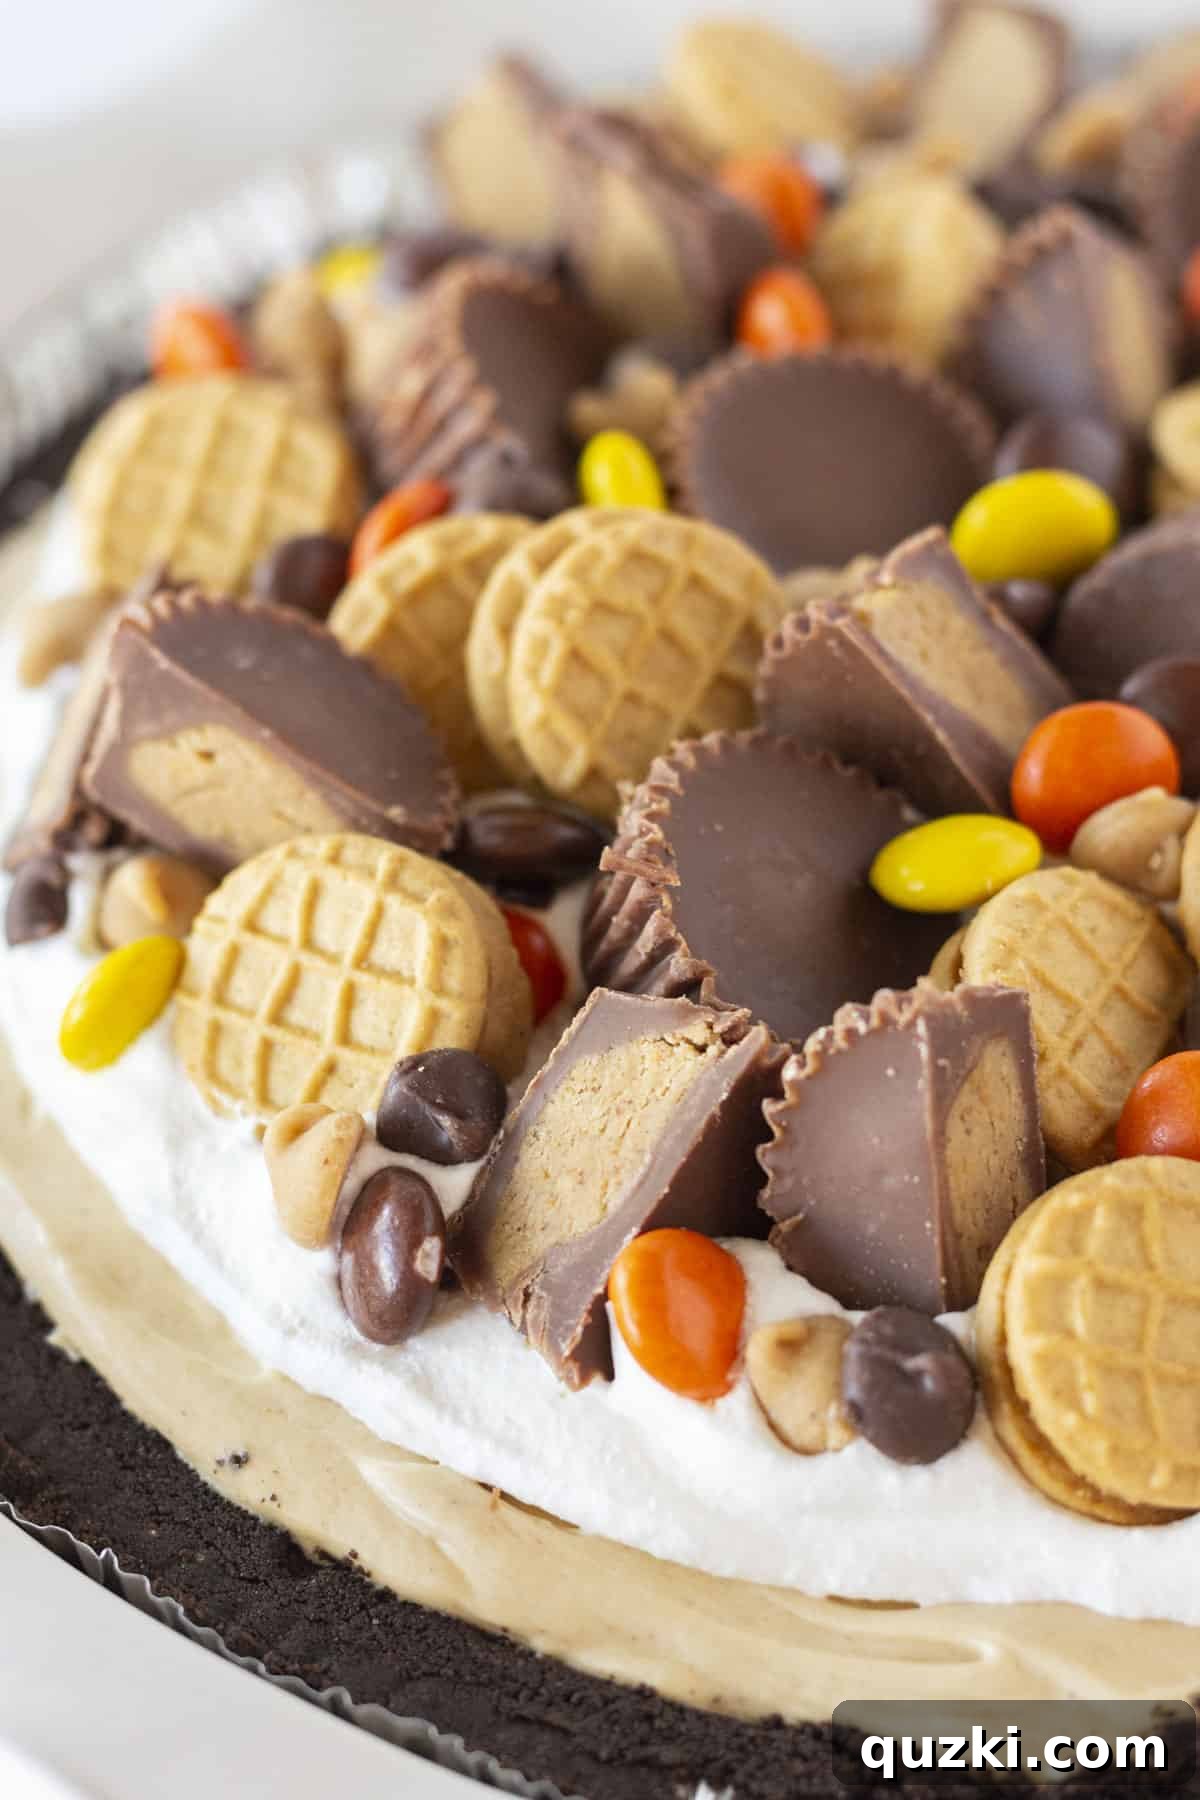
Table of Contents
- The Irresistible Magic of Chocolate and Peanut Butter
- Essential Ingredients for Your Perfect Pie
- Unleash Your Creativity with Topping Ideas
- Step-by-Step Guide: How to Make No-Bake Peanut Butter Pie
- Expert Tips for a Flawless No-Bake Pie
- Storing and Freezing Your Peanut Butter Pie
- Frequently Asked Questions About No-Bake Peanut Butter Pie
- Explore More Delightful No-Bake Desserts
- The Best Easy No-Bake Peanut Butter Pie Recipe Card
The Irresistible Magic of Chocolate and Peanut Butter
Is there any combination more iconic, more universally loved, than chocolate and peanut butter? We think not! This dynamic duo creates a symphony of flavors and textures that tantalizes taste buds and evokes pure joy. The rich, slightly bitter notes of chocolate perfectly complement the creamy, salty-sweet goodness of peanut butter. This **chocolate peanut butter pie** is the ultimate testament to this classic pairing, delivering a dessert experience that is both comforting and extraordinarily decadent. If you appreciate this flavor harmony, you’ll definitely want to try these Chocolate and Peanut Butter Texas Sheet Cake Cookies too!
Beyond its incredible taste, one of the biggest appeals of this particular pie is its sheer simplicity. The “no-bake” aspect makes it a go-to dessert for busy weeknights, summer gatherings when you want to avoid heating up the kitchen, or any occasion where you need a show-stopping treat without the fuss of baking. It’s a dessert that truly delivers on both flavor and convenience, making it a household favorite for all ages. Prepare to indulge in a dessert that requires minimal effort but yields maximum satisfaction, proving that some of the best treats don’t require an oven.
Essential Ingredients for Your Perfect Pie
Crafting this heavenly no-bake peanut butter pie requires just a handful of simple ingredients, each playing a crucial role in achieving that perfect creamy texture and balanced flavor. Here’s a closer look at what goes into this fantastic recipe, along with tips for choosing the best quality components:
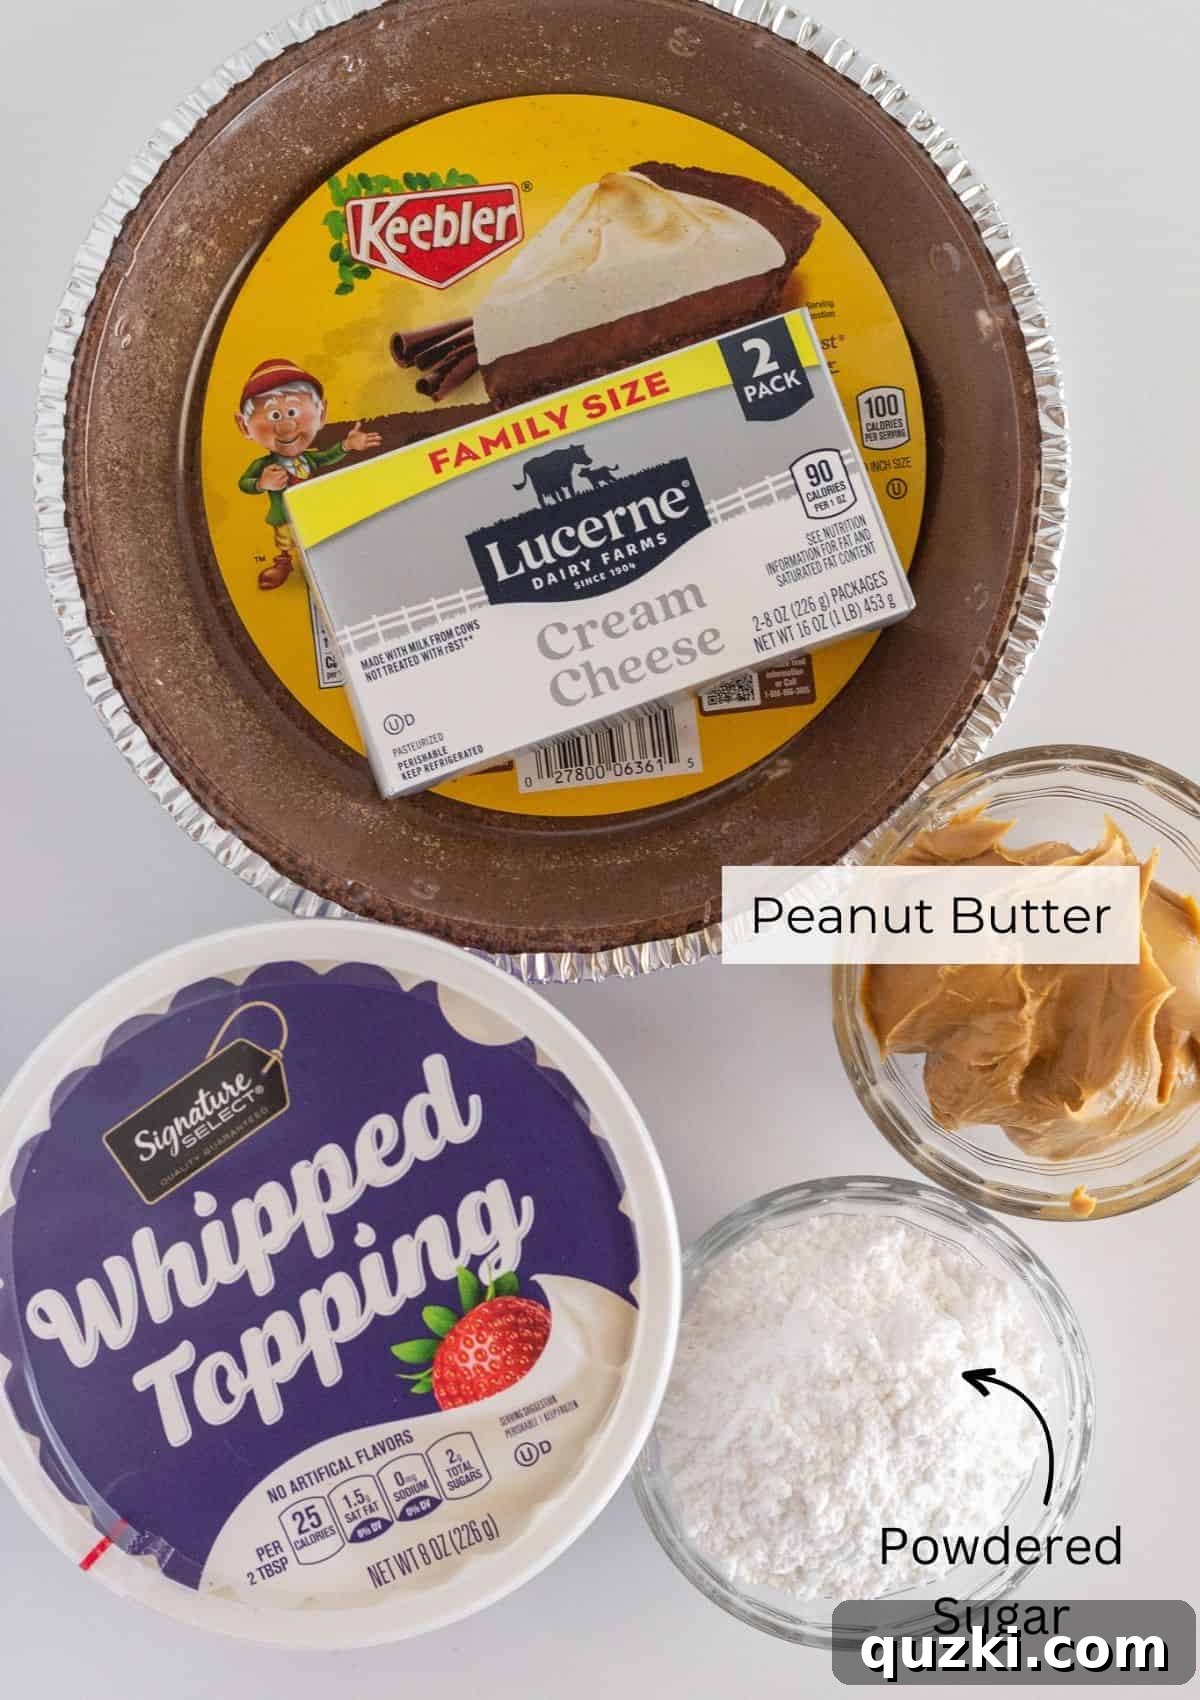
- Chocolate Pie Crust: This forms the essential foundation of our pie. While you can certainly make your own chocolate cookie crust using crushed Oreo cookies and melted butter for a homemade touch, a store-bought chocolate graham cracker or cookie crust is a fantastic time-saver. It provides that delightful crisp texture and rich chocolate flavor that perfectly balances the sweet peanut butter filling, creating an ideal contrast in every bite. This pre-made base significantly cuts down on preparation time without sacrificing taste.
- Cream Cheese: The secret to the pie’s incredibly smooth, creamy, and slightly tangy filling. It’s imperative that the cream cheese is softened to room temperature before mixing. This crucial step ensures a lump-free mixture that will be wonderfully smooth and easy to spread. The cream cheese adds richness and a subtle tang that balances the sweetness of the other ingredients, preventing the pie from being overly rich and giving it a delightful cheesecake-like quality.
- Peanut Butter: The undeniable star of the show! For the best results and a consistently smooth filling, opt for a good quality creamy peanut butter. Brands like Jif or Skippy are highly recommended for their classic flavor profile and stable consistency. Avoid “natural” peanut butter varieties that separate easily into oil and solids, as their varying oil content can unpredictably affect the texture and setting of your pie filling. A smooth, well-blended creamy peanut butter is key for that perfect melt-in-your-mouth experience.
- Powdered Sugar (Confectioners’ Sugar): This finely milled sugar dissolves effortlessly into the filling, ensuring a silky-smooth texture without any graininess. It adds just the right amount of sweetness to the peanut butter and cream cheese mixture, making the pie perfectly balanced and deliciously sweet without being cloyingly so. Powdered sugar is essential for achieving the light and airy consistency of the filling.
- Whipped Topping (like Cool Whip): This ingredient serves a dual purpose in our recipe. Firstly, a portion is gently folded into the peanut butter filling to give it structure, lightness, and a delicate sweetness, allowing it to set up beautifully in the refrigerator. Secondly, additional whipped topping is used generously as a decadent, airy layer on top of the pie. This creates a soft, cloud-like counterpoint to the dense filling and provides a perfect, pristine canvas for your chosen decorative toppings.
For precise measurements and detailed instructions, refer to the full recipe card below. Ensuring your ingredients are at room temperature, especially the cream cheese, is a simple step that guarantees the smoothest possible filling and a truly sensational **easy peanut butter pie**.
Unleash Your Creativity with Topping Ideas
One of the most exciting aspects of making this **easy peanut butter pie** is customizing it with a dazzling array of toppings. Not only do toppings add extra flavor and texture, but they also transform your pie into a visually stunning dessert, making it look incredibly appealing and professional. Here are some fantastic ideas to inspire your dessert artistry and elevate your pie to new heights:
- Peanut Butter Chips: For an extra boost of concentrated peanut butter goodness, generously sprinkle these delightful chips over the top. They melt slightly into the whipped topping, creating little pockets of intense, nutty flavor that peanut butter lovers will adore.
- Reese’s Pieces: These iconic, colorful candies bring a fun, satisfying crunch and an undeniable burst of classic peanut butter and chocolate flavor. Their vibrant orange, yellow, and brown hues are perfect for adding visual appeal and a playful, festive touch to your pie.
- Mini Nutter Butter Cookies: Whether you choose to crush them for a textural sprinkle or arrange them whole around the edge for a charming border, mini Nutter Butter cookies are a fantastic way to reinforce the peanut butter theme. Their distinct peanut butter sandwich cookie shape and flavor are instantly recognizable and loved by many, adding both taste and whimsy.
- Reese’s Cups (Mini or Chopped): Whether you use whole mini Reese’s Peanut Butter Cups or chop up larger ones into bite-sized pieces, these are a quintessential topping for any chocolate and peanut butter dessert. Their iconic combination of creamy peanut butter encased in rich milk chocolate is a guaranteed crowd-pleaser and adds a luxurious touch.
- Chocolate Chips: You can never go wrong with a classic! Chocolate chips are a versatile topping; mini chocolate chips are particularly excellent as they distribute more evenly across the pie and provide a subtle, delightful crunch in every bite. For a more intense flavor, consider using dark chocolate chips to add a lovely bitter contrast to the sweet filling.
- Chocolate Curls or Chocolate Shavings: For an elegant and sophisticated finish, create delicate chocolate curls by running a vegetable peeler along the edge of a block of chocolate. Alternatively, simply sprinkle coarse chocolate shavings. This adds a refined aesthetic and a hint of extra chocolatey flavor that looks incredibly impressive.
- Chocolate Sauce or Chocolate Ganache Drizzle: A generous drizzle of warm, rich chocolate sauce or a silky smooth chocolate ganache can elevate your pie to gourmet status. It adds moisture, a beautiful sheen, and an intensified chocolate experience, creating enticing patterns over the whipped topping.
- Chopped Nuts: For those who crave extra crunch and a deeper nutty flavor, finely chopped roasted peanuts or even almonds can be a wonderful textural addition. They provide a satisfying contrast to the creamy layers and enhance the overall experience.
- Caramel Drizzle: A swirl of golden caramel sauce can introduce another layer of sweetness and a slightly different flavor profile. Caramel’s rich, buttery notes pair beautifully with both peanut butter and chocolate, adding complexity to your dessert.
Don’t be afraid to mix and match your favorites! A combination of chocolate chips, Reese’s Pieces, and chopped peanut butter cups offers a delightful textural and flavor journey in every single slice. Experiment and discover your perfect **peanut butter pie** topping combination!
Step-by-Step Guide: How to Make No-Bake Peanut Butter Pie
Creating this easy no-bake peanut butter pie is incredibly straightforward, making it an accessible and rewarding recipe even for novice bakers. Follow these simple steps for a dessert that looks and tastes like it came from a professional pastry kitchen, all without ever turning on your oven!
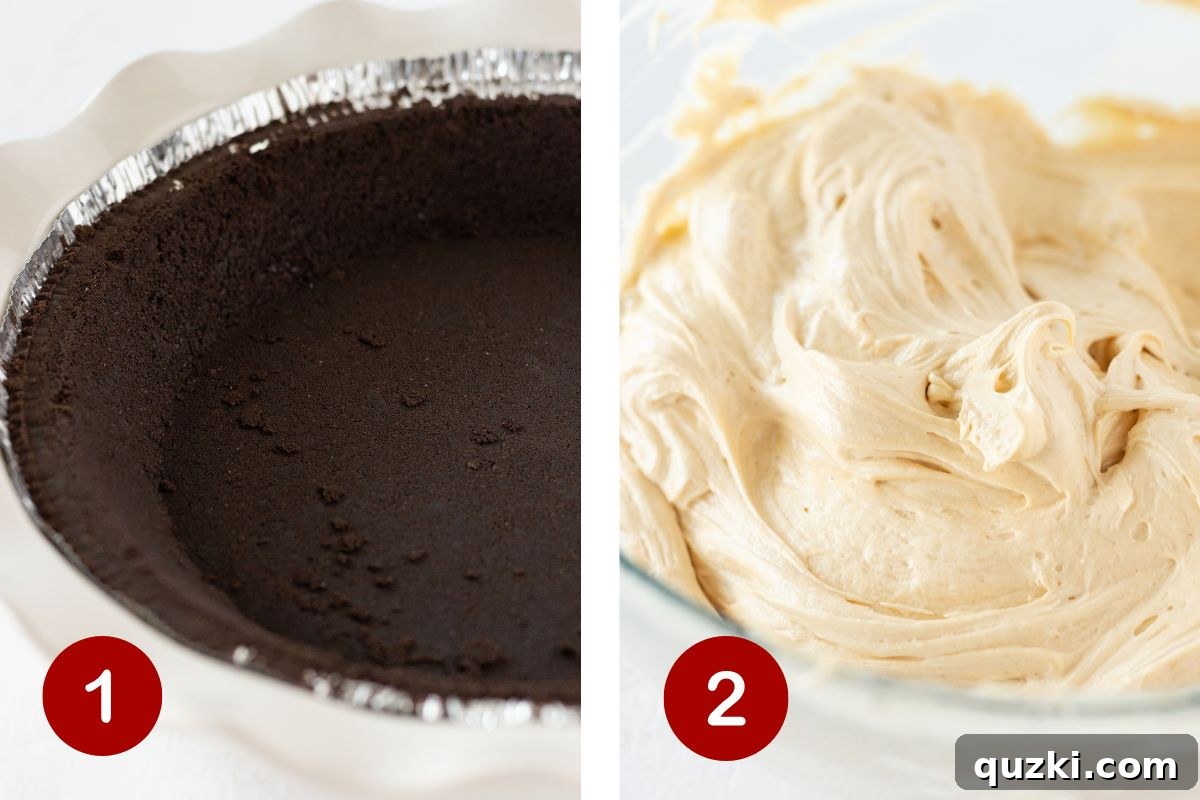
- Prepare Your Crust: Begin by unboxing a pre-made chocolate cookie crust from your local grocery store. This is your ultimate time-saver! If you’re feeling ambitious and prefer a homemade touch, you can easily prepare a simple Oreo cookie crust. This involves crushing about 20-24 Oreo cookies (filling included), mixing them with 4-6 tablespoons of melted butter, and pressing the mixture firmly into a 9-inch pie pan. Whichever crust you choose, ensure it’s firm and ready to hold your delicious filling.
- Whip Up the Creamy Filling Base: In a large mixing bowl, combine the softened cream cheese with the creamy peanut butter. The key here is to ensure your cream cheese is at true room temperature; this prevents lumps and guarantees a super smooth, uniform mixture. Use an electric mixer (a hand-held mixer works perfectly) to beat these two ingredients together until they are light, fluffy, and completely smooth, with no visible cream cheese chunks. Scrape down the sides of the bowl as needed to ensure everything is thoroughly combined.
- Sweeten and Lighten the Filling: Gradually add the powdered sugar to the cream cheese and peanut butter mixture. Continue to mix on low speed until the sugar is fully incorporated and the filling is evenly sweetened. Next, very gently fold in 8 ounces of thawed whipped topping. This addition is crucial; it makes the filling wonderfully airy, gives it structure, and allows it to set up beautifully without needing to be baked. Mix just until everything is combined and the filling is velvety smooth – be careful not to overmix, which can deflate the whipped topping.
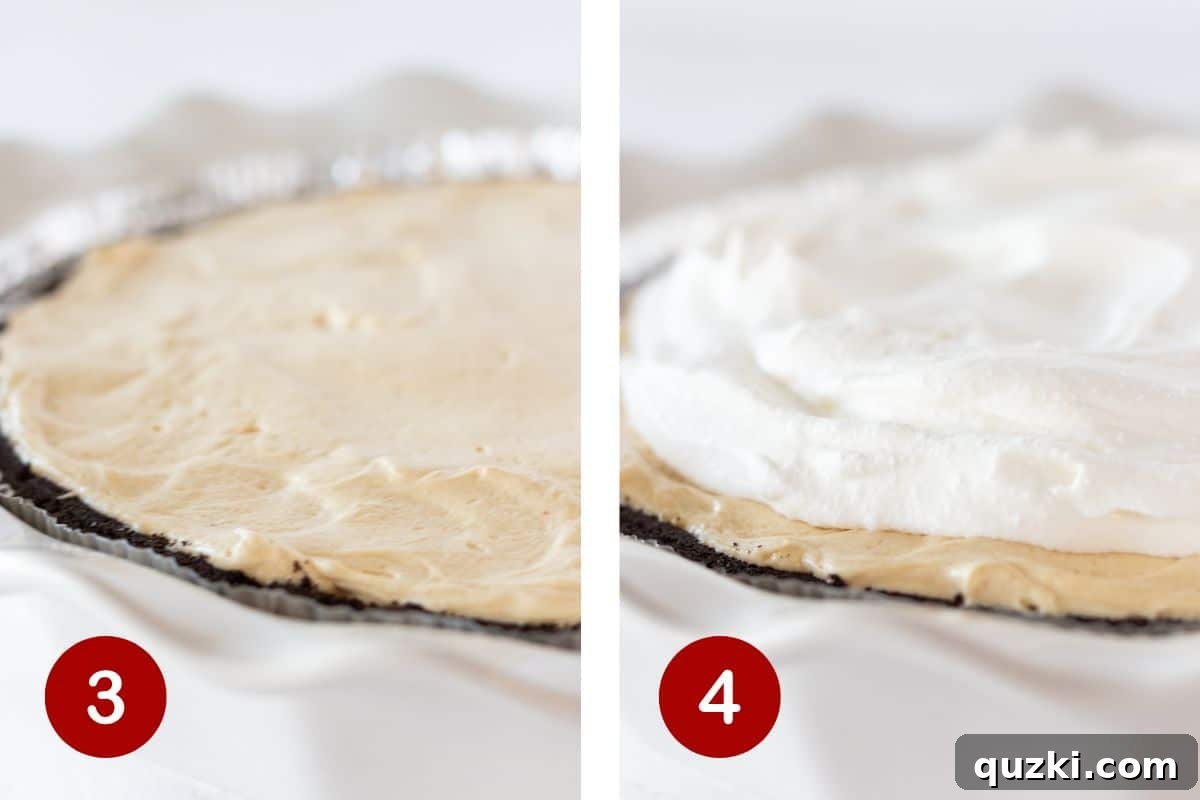
- Fill the Pie Crust: Carefully spoon the luscious peanut butter filling into your prepared chocolate pie crust. Take your time to use a spatula or the back of a spoon to gently spread the filling out into an even, smooth layer. Ensure it reaches all edges of the crust for a consistent bite and a beautiful, clean finish.
- Add the Top Whipped Layer: Now, dollop the remaining 4 ounces of whipped topping over the peanut butter filling. Gently spread this into an even layer, being mindful to leave a slight border of the peanut butter filling showing around the edge. This creates a visually appealing, beautiful layered look and adds a soft, cloud-like contrast to the rich filling below.
- Gather Your Toppings: This is where your creativity truly shines! Select your desired combination of topping ingredients. As suggested earlier, a medley of peanut butter cups, Reese’s pieces, mini Nutter Butter cookies, peanut butter chips, and chocolate chips creates an incredible symphony of flavors and textures that will delight every guest.
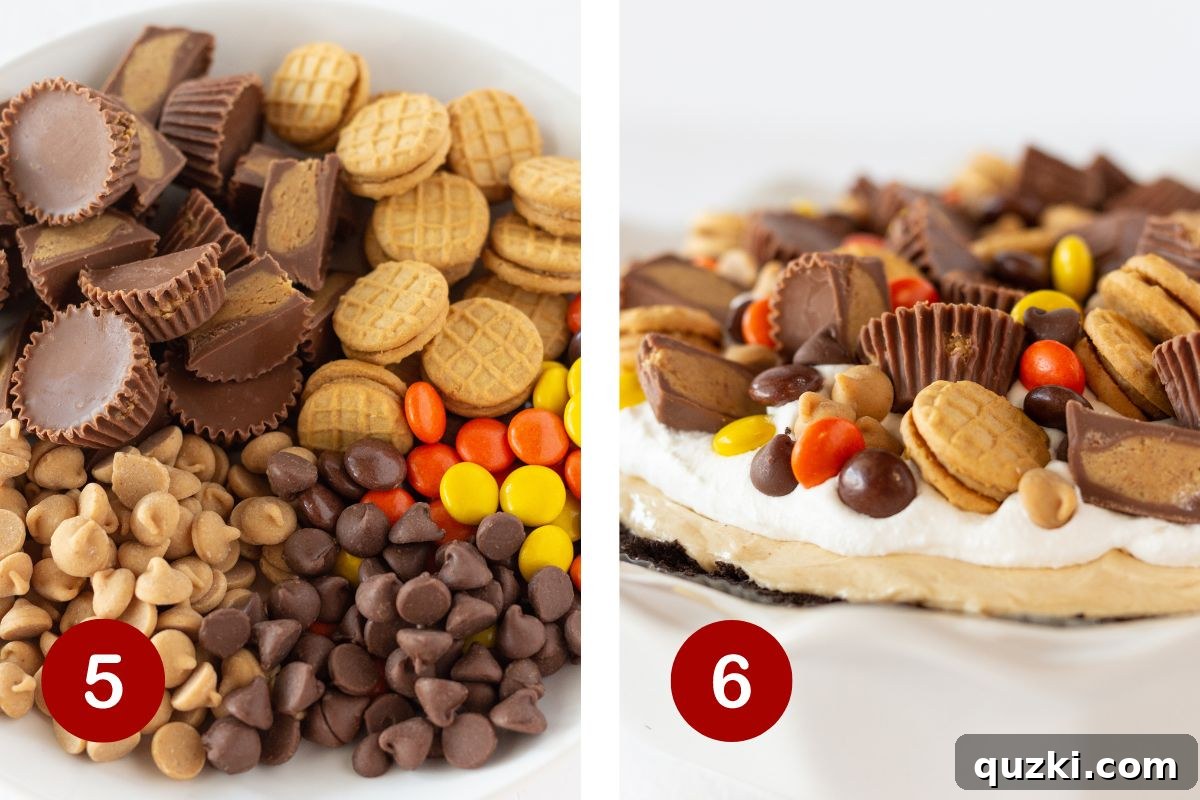
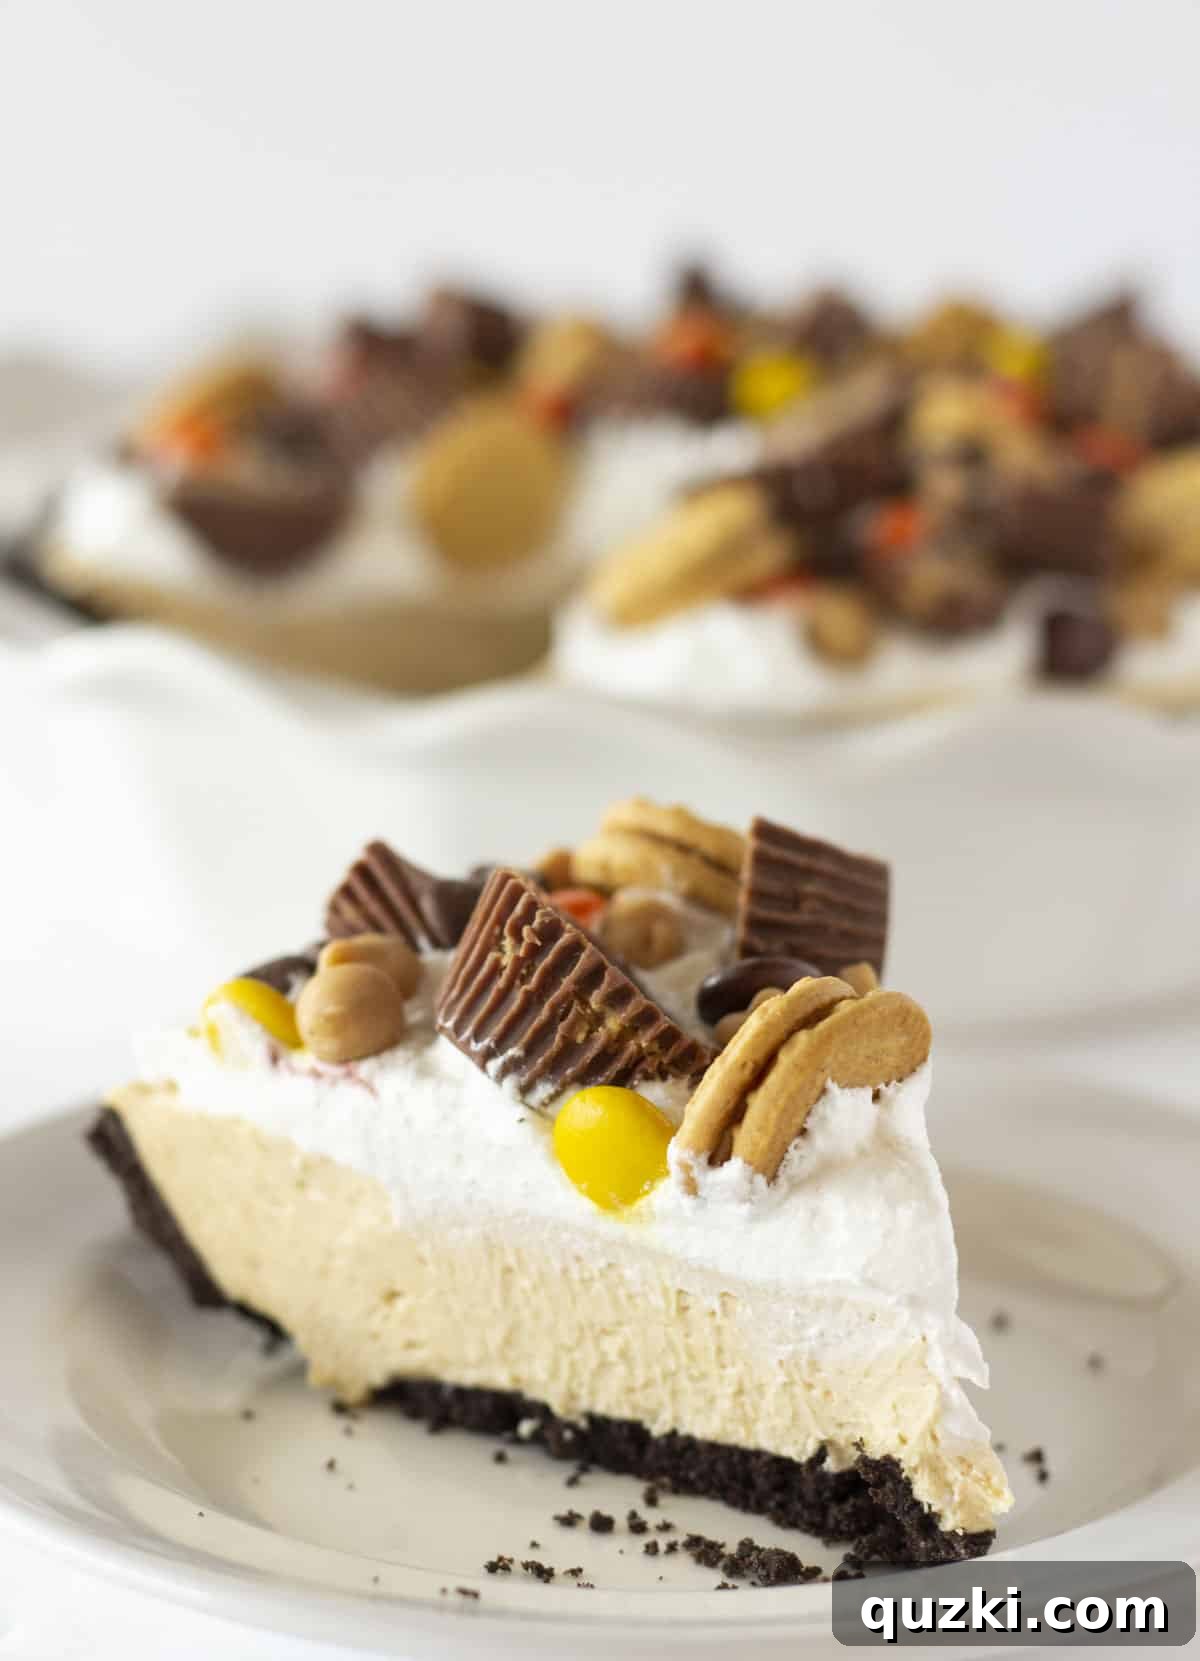
- Decorate and Chill for Perfection: Generously arrange your chosen toppings over the whipped topping layer. Be creative and cover the entire top for a truly spectacular and inviting finish. Once decorated, the most important step for a perfectly set pie is chilling. Refrigerate your pie for at least 2 hours to allow the filling to firm up nicely. For an even firmer, almost frozen consistency, which is delightful on a hot day, you can freeze it for 4 hours. A well-chilled pie will slice cleanly, hold its shape beautifully, and offer the best possible texture.
Once properly chilled, your incredible **No-Bake Peanut Butter Pie** is ready to be sliced, served, and enjoyed! This recipe is a testament to how simple ingredients and minimal effort can result in an outstanding, crowd-pleasing dessert.
Expert Tips for a Flawless No-Bake Pie
Achieving a perfect no-bake peanut butter pie is incredibly easy, but a few expert tips can elevate your dessert from good to absolutely phenomenal. Pay attention to these details for a smooth, well-set, and delicious pie every time, ensuring your pie is consistently a triumph:
- Ensure Room Temperature Ingredients: This is perhaps the most crucial tip! Make sure your cream cheese and peanut butter are softened to room temperature before you begin mixing. Cold cream cheese will inevitably result in a lumpy filling, no matter how long or vigorously you mix it. Softened ingredients, however, combine effortlessly, yielding a wonderfully smooth, homogenous, and velvety texture that is key to this pie’s appeal. Plan ahead by taking them out of the refrigerator at least an hour before you start.
- Choose Your Crust Wisely: A store-bought chocolate cookie crust is a fantastic shortcut that doesn’t compromise on flavor or quality. It saves significant time and ensures a consistent, crisp base. However, if you prefer a different flavor profile, a pre-made graham cracker crust also works wonderfully, offering a milder background that truly lets the rich peanut butter filling shine. For an extra rich, homemade feel, consider crushing your favorite chocolate sandwich cookies (like Oreos) and mixing them with melted butter to form your own unique crust. Our No Bake Lemon Cheesecake also benefits from a versatile crust!
- Smooth and Even Filling Application: When transferring the luscious peanut butter filling to the crust, take a moment to meticulously spread it out into an even layer using a spatula or the back of a spoon. This small step not only ensures uniform slices, where every bite is equally enjoyable, but also significantly contributes to a professional and appealing presentation. A consistent, smooth layer helps the pie set evenly and creates a cleaner aesthetic.
- Pile on the Whipped Cream and Toppings: Do not be shy with the final decorative touches! A generous, fluffy layer of whipped topping creates a beautiful visual contrast and adds a delightful lightness that perfectly complements the rich peanut butter filling. Then, get truly creative with your toppings. A vibrant medley of peanut butter chips, various chocolate chips, crushed cookies, and chopped candy bars not only adds incredible flavor and diverse textures but also transforms your pie into a true showstopper. The more variety, the better the visual appeal and taste experience!
- Chill for Success: Patience is an absolute virtue when it comes to any no-bake dessert. It is absolutely essential to chill your pie for a minimum of 2 hours. This critical step allows the cream cheese and whipped topping to firm up properly, ensuring that your slices are neat, hold their shape beautifully, and don’t collapse when served. For an even firmer pie, or if you prefer a slightly frozen treat that’s perfect on a warm day, extend the chilling time to 4 hours or even better, overnight. A well-chilled pie is always a happy pie, delivering on texture and stability.
- Quality Peanut Butter Matters: While most creamy peanut butter brands will work for this recipe, opting for a high-quality, classic creamy peanut butter (such as Jif or Skippy) will consistently give you the best flavor and texture for your filling. Natural peanut butter can sometimes separate or be too oily, which might subtly alter the desired smooth consistency of the pie and prevent it from setting as firmly.
Storing and Freezing Your Peanut Butter Pie
To keep your delicious Easy No-Bake Peanut Butter Pie fresh and delightful for as long as possible, proper storage is absolutely key. Whether you’re planning to enjoy it over a few days or save some for a future craving, here’s how to store and even freeze your pie effectively:
Storing in the Refrigerator: This creamy peanut butter pie, with its dairy components, absolutely needs to be refrigerated. Keeping it chilled not only ensures it sets up perfectly and maintains its delightful texture but also prevents any ingredients from spoiling. If you used a store-bought pie crust that came with a clear plastic dome or liner, it makes an excellent, convenient covering for refrigeration. Otherwise, to ensure maximum freshness and prevent it from absorbing any unwanted odors from other foods in your fridge, transfer any leftover slices or the entire pie to a good, airtight container. When properly stored this way, your pie will remain fresh and delicious for up to 4 days in the refrigerator. Always make sure it’s well-sealed.
Freezing for Longer Enjoyment: This pie freezes remarkably well, making it a fantastic make-ahead dessert that you can prepare for future gatherings or simply to have on hand for an unexpected craving! To freeze your **peanut butter pie**, first ensure it’s fully chilled and completely set in the refrigerator. This step is important for maintaining its structure. Then, wrap the entire pie (or individual slices, if you prefer portion control) tightly with at least two layers of plastic wrap. Follow this with an additional layer of heavy-duty aluminum foil. This double wrapping helps to prevent freezer burn, protects the pie from moisture, and keeps it fresh. When meticulously wrapped, the pie can be stored in the freezer for up to 2 months without significant loss of quality. When you’re ready to enjoy it, you have options: you can either serve it directly from the freezer for a wonderfully firm, almost ice-cream-like frozen peanut butter pie experience, or you can thaw it gently in the refrigerator for several hours (typically 4-6 hours for a whole pie) until it reaches your desired creamy consistency. Freezing is an excellent way to extend the life of this indulgent treat!
Frequently Asked Questions About No-Bake Peanut Butter Pie
Got questions about making this fantastic no-bake peanut butter pie? We’ve got comprehensive answers to ensure your pie-making experience is a complete success and your dessert turns out perfectly every time!
For the best results and a consistently smooth filling with that classic, rich peanut butter flavor, we highly recommend using a high-quality creamy peanut butter. Brands like Jif and Skippy are excellent choices as they provide a stable consistency and blend seamlessly. While natural peanut butter can be used, be aware that its tendency to separate oils might slightly alter the texture of your filling, making it less predictable. If you do opt for natural, ensure it’s thoroughly stirred until completely emulsified before incorporating it into the recipe to avoid an oily or grainy texture.
Absolutely! While a store-bought crust is a fantastic time-saver and works perfectly, making your own crust adds an extra layer of homemade goodness and allows for customization. A popular choice is an Oreo cookie crust – simply crush about 20-24 Oreo cookies (including the cream filling) very finely, mix with 4-6 tablespoons of melted butter, and press the mixture firmly into a 9-inch pie plate. You can also make a classic graham cracker crust using crushed graham crackers, sugar, and melted butter for a milder base. This pie can be prepared in a standard pie plate or a springform pan for incredibly easy serving and a beautiful, clean presentation.
For ultimate convenience, stability, and consistent results, we prefer using store-bought frozen whipped topping (like Cool Whip). Simply thaw it thoroughly in the refrigerator before you’re ready to use it, ensuring it’s cold but soft. If you wish to use homemade whipped cream, it’s a wonderful, fresher alternative! To make it, combine 1 cup of very cold heavy cream with 3 tablespoons of powdered sugar in a medium bowl. Use an electric mixer to beat the ingredients on high speed until stiff peaks form. For an extra touch of flavor, you can stir in 1 teaspoon of vanilla extract at the end. Keep in mind that homemade whipped cream tends to be lighter and slightly less stable than store-bought whipped topping, so be sure to chill the pie thoroughly for a good set.
No problem at all! If you or someone you’re serving has a peanut allergy, or if you simply prefer an alternative, you can easily substitute the peanut butter with another nut or seed butter. Almond butter or sunflower seed butter (often sold as SunButter) are excellent alternatives. The pie will still be wonderfully creamy and delicious, offering a delightful nutty flavor. Just remember to adjust your toppings accordingly – for instance, use almond slices, sunflower seeds, or your favorite almond-based candies instead of peanut-based ones to maintain a safe and enjoyable dessert.
Absolutely! This **No-Bake Peanut Butter Pie** is an ideal make-ahead dessert, perfect for parties, holidays, or any gathering. You can prepare the entire pie, including the filling and whipped topping, up to 24-48 hours in advance. Just be sure to keep it covered tightly with plastic wrap or a pie dome in the refrigerator. If your toppings include crunchy items like cookies or candies, consider adding them closer to serving time to ensure they remain crisp and fresh-looking. The longer it chills, the firmer and more stable the pie will become, making for perfectly clean and beautiful slices.
A standard 9-inch no-bake peanut butter pie typically yields 8 to 10 generous slices. However, because the pie is quite rich and satisfying, you can easily cut it into 12 smaller slices if you’re serving a larger crowd or prefer more modest portions. The creamy, decadent nature of the pie means a little goes a long way in terms of satisfying your sweet tooth!
Explore More Delightful No-Bake Desserts
If you’ve fallen in love with the simplicity, convenience, and sheer deliciousness of this **No-Bake Peanut Butter Pie**, you’re in for a treat! No-bake desserts are a fantastic category for quick, easy, and incredibly satisfying sweets, especially when you want to avoid heating up your kitchen during warmer months or simply need a fast dessert solution. They prove that you don’t need an oven to create something truly spectacular. Here are some other fantastic no-bake recipes from Practically Homemade that you might enjoy adding to your dessert repertoire:
More No-Bake Wonders to Try
Cheesecakes
The Best No-Bake Cherry Cheesecake
Desserts
Easy No-Bake Texas Sheet Cake Bites
Cheesecakes
Easy Vanilla No-Bake Cheesecake
Desserts
No-Bake Cheesecake Waffle Cones Recipe
Did you try this recipe? We’d love to hear your thoughts! Leave a review below and tag @practicallyhomemade on Pinterest to share your delicious creations!

The Best Easy No-Bake Peanut Butter Pie
June Albertson-Dick
The perfect combination of smooth peanut butter filling with a rich chocolate crust, this Easy No-Bake Peanut Butter Pie is truly the BEST!
10 mins
0 mins
2 hrs
2 hrs 10 mins
10 slices
Print Recipe
Ingredients
- 1 chocolate pie crust (9-inch)
- 8 ounces cream cheese, softened
- ¾ cup creamy peanut butter
- ¾ cup powdered sugar
- 8 ounces whipped topping (like Cool Whip), thawed
Toppings (Optional)
- 4 ounces additional whipped topping
- 3 Tablespoons Reese’s pieces candies
- 3 Tablespoons peanut butter chips
- 3 Tablespoons chocolate chips
- 20 mini Reese’s Peanut Butter Cups (some cut in half for variety)
- 20-24 mini Nutter Butter Cookies
Instructions
-
In a large mixing bowl, combine the softened cream cheese and creamy peanut butter using an electric mixer until the mixture is thick, smooth, and lump-free.
-
Gradually add the powdered sugar to the cream cheese and peanut butter mixture, mixing until fully incorporated and smooth.
-
Gently fold in the 8 ounces of thawed whipped topping until everything is just combined and the filling is velvety smooth. Be careful not to overmix.
-
Remove the plastic liner from your chocolate pie crust and pour the prepared peanut butter filling into the crust. Spread it out evenly with a spatula.
-
Top the peanut butter filling with the remaining 4 ounces of whipped topping, spreading it into an even layer and leaving a slight edge of the peanut butter filling showing.
-
Generously arrange your chosen assorted toppings (Reese’s pieces, peanut butter chips, chocolate chips, mini Reese’s cups, mini Nutter Butter cookies) over the whipped topping for a decorative finish.
-
Refrigerate your No-Bake Peanut Butter Pie for at least 2 hours to allow it to set up firmly. For an extra firm, almost frozen pie, chill for 4 hours or freeze for 2 months. Refrigerate any leftovers for up to 4 days.
Notes
- For the smoothest filling, always ensure your cream cheese and peanut butter are at room temperature.
- Chilling the pie for at least 2 hours is crucial for it to set properly and slice cleanly. Overnight chilling is even better.
- To freeze this pie, wrap it tightly with plastic wrap and then aluminum foil. It keeps well for up to 2 months. Thaw in the refrigerator or serve frozen.
- If you don’t prefer a chocolate crust, a store-bought graham cracker crust works wonderfully as an alternative.
- Get creative with your toppings! The options are endless and allow for personalized touches that truly make the pie your own.
Nutrition
Calories: 371kcal,
Carbohydrates: 31g,
Protein: 7g,
Fat: 25g,
Saturated Fat: 12g,
Polyunsaturated Fat: 3g,
Monounsaturated Fat: 8g,
Trans Fat: 0.02g,
Cholesterol: 24mg,
Sodium: 197mg,
Potassium: 193mg,
Fiber: 1g,
Sugar: 27g,
Vitamin A: 341IU,
Vitamin C: 0.03mg,
Calcium: 66mg,
Iron: 0.5mg
Nutrition information is automatically calculated, so should only be used as an approximation.
Like this? Leave a comment below!
Share your thoughts and ratings on this delightful pie!