
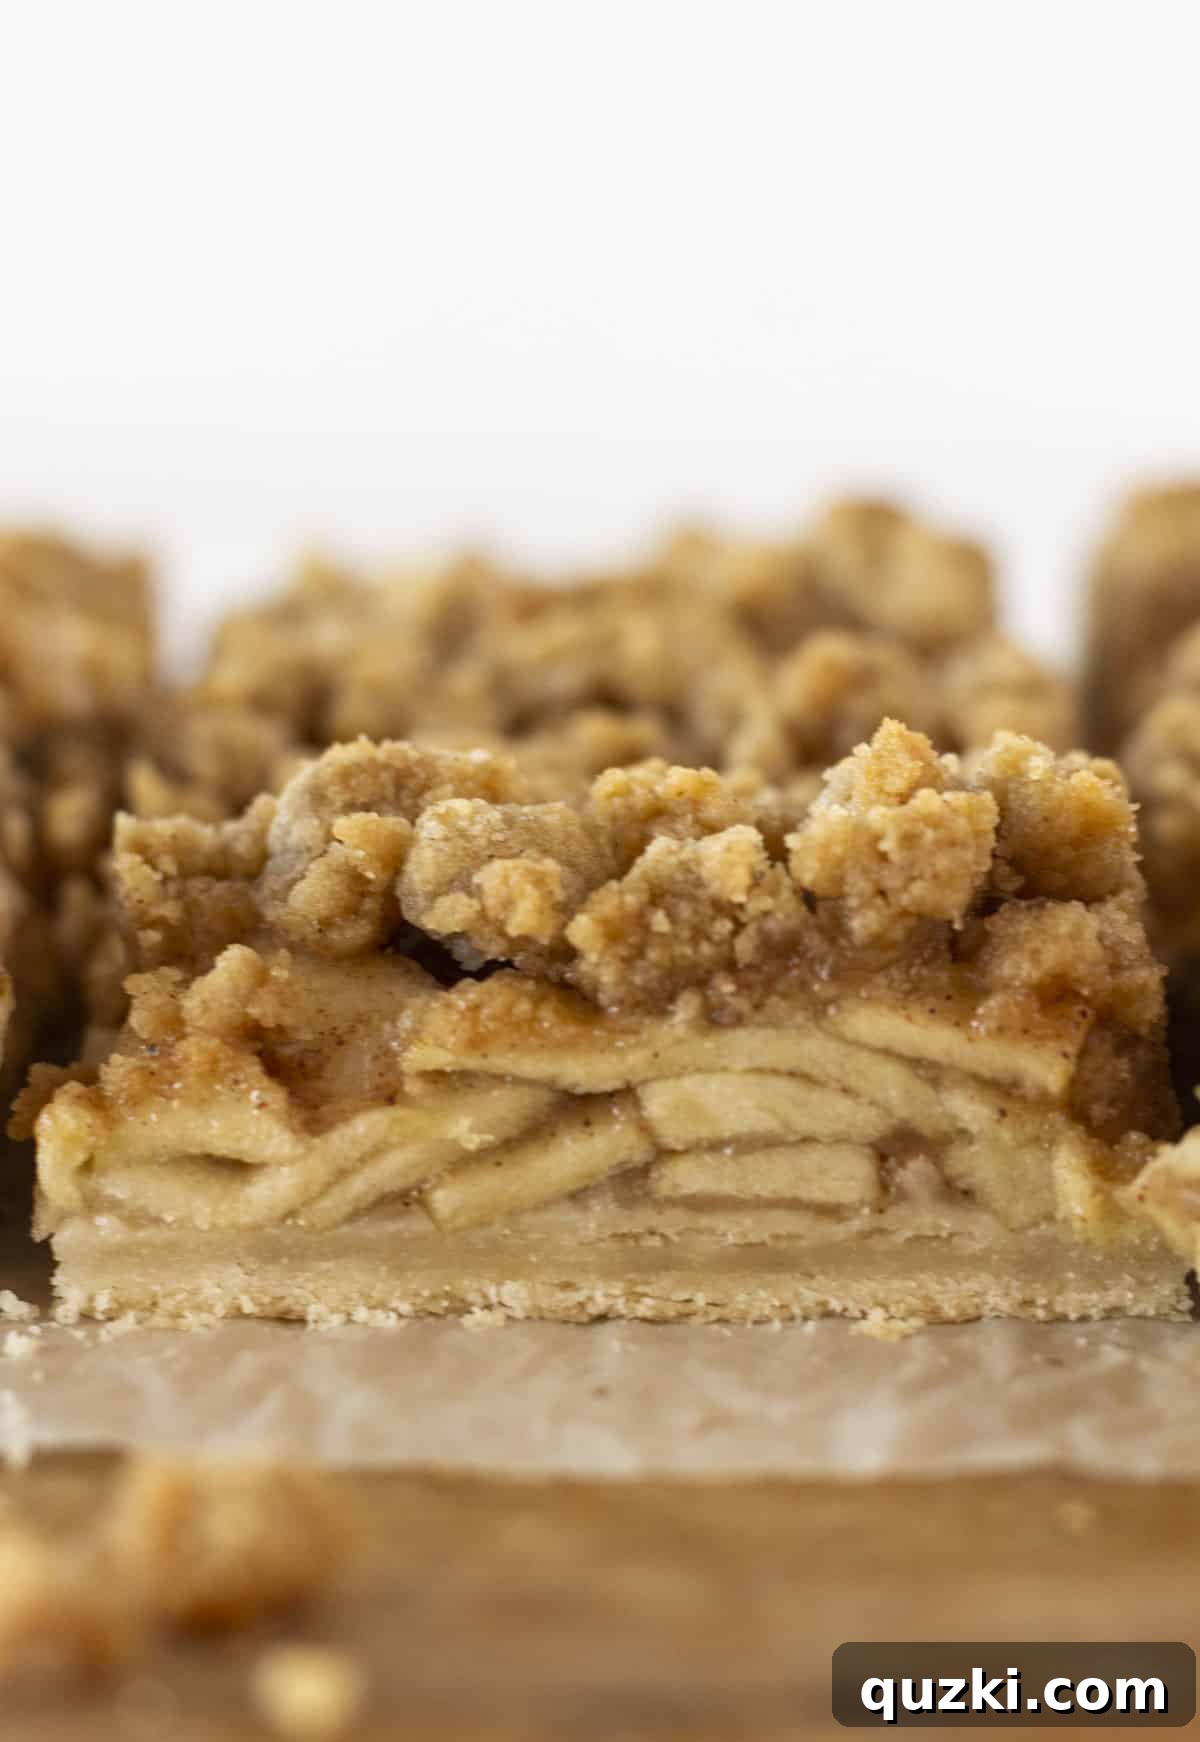
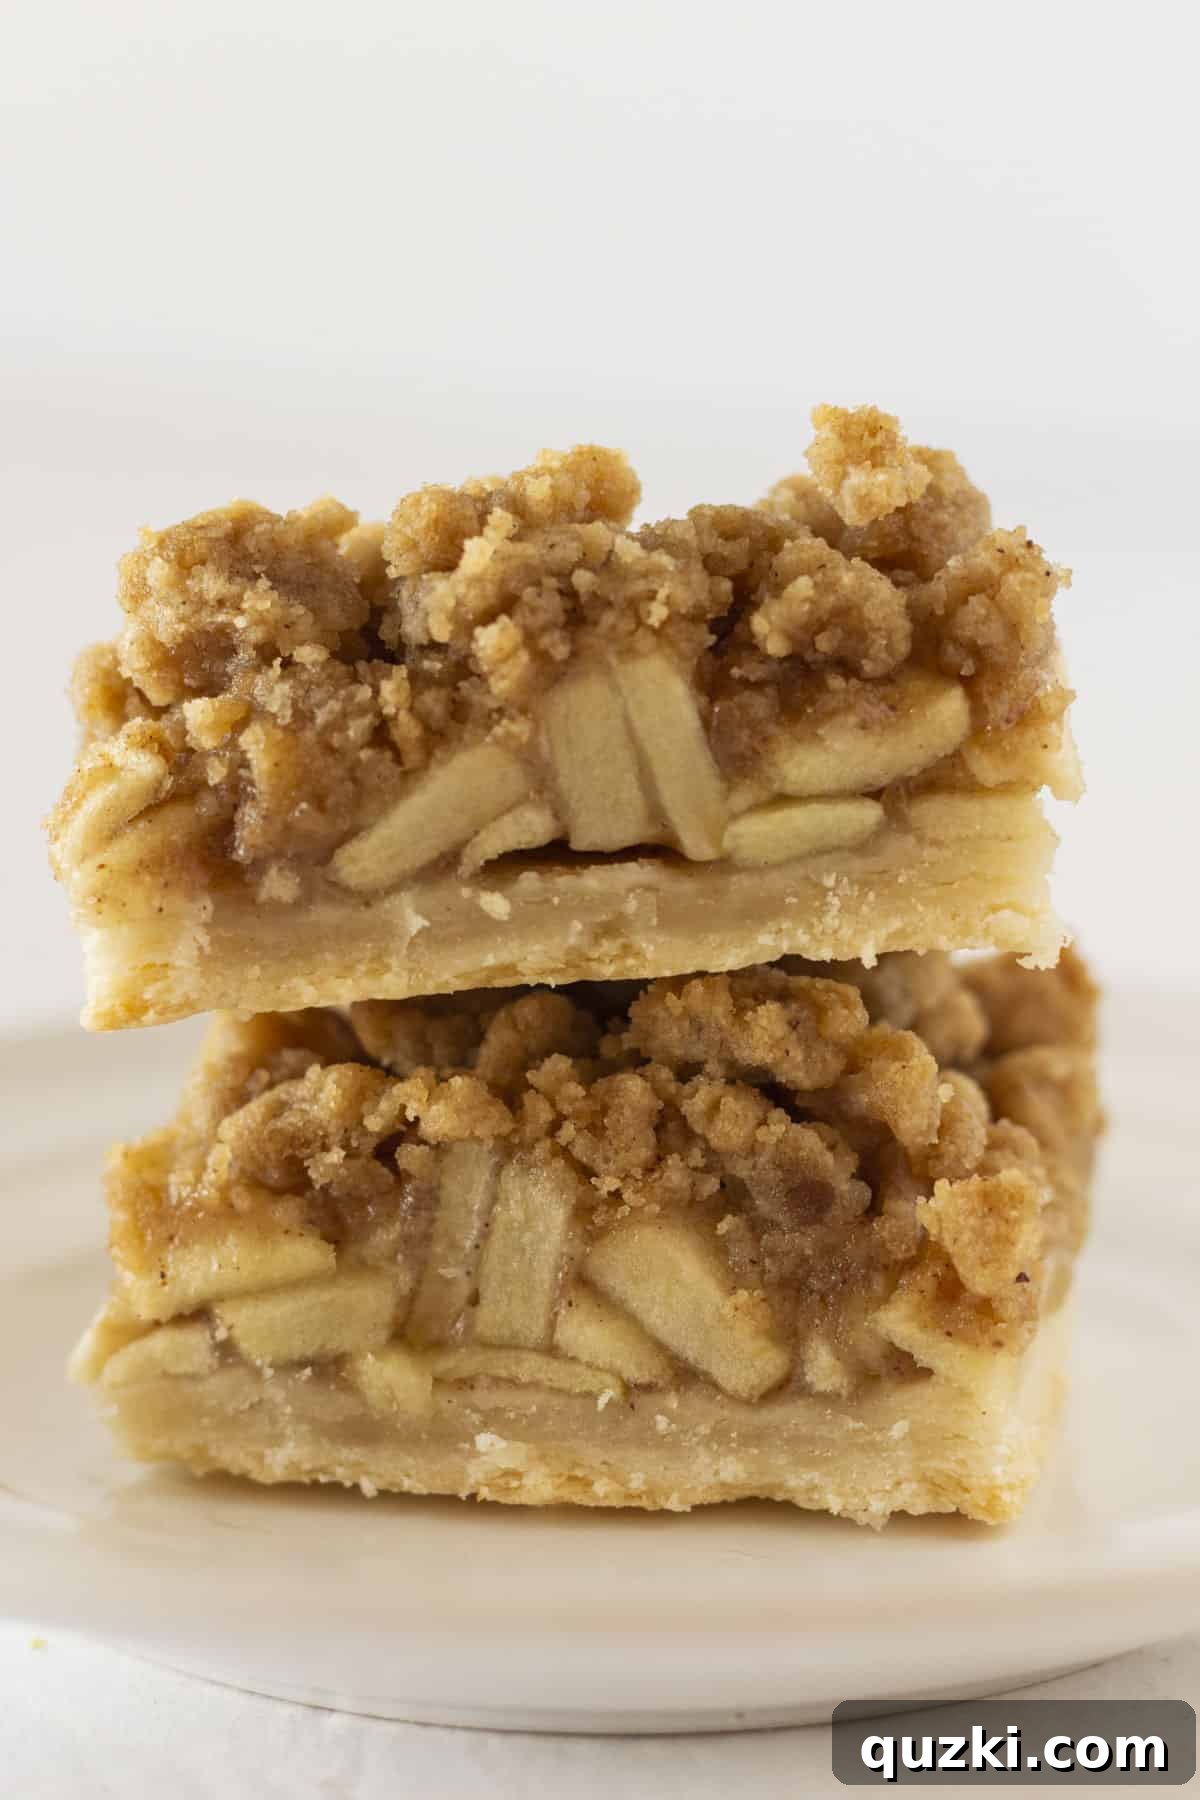
Do you adore the comforting taste of traditional apple pie but often find yourself skipping making it due to the extensive time commitment? Then this Easy Dutch Apple Pie Bar recipe is your ultimate solution! Combining the delightful essence of classic apple pie with the convenience of a bar, this simple yet incredibly flavorful dessert comes together in approximately one hour. Featuring three irresistible layers – a perfectly flaky crust, tender spiced apples, and a rich, buttery crumble topping – these bars offer all the goodness of a homemade pie without the fuss. They are an ideal treat for festive fall gatherings, cozy weeknight desserts, or simply satisfying that apple pie craving with minimal effort and maximum deliciousness.
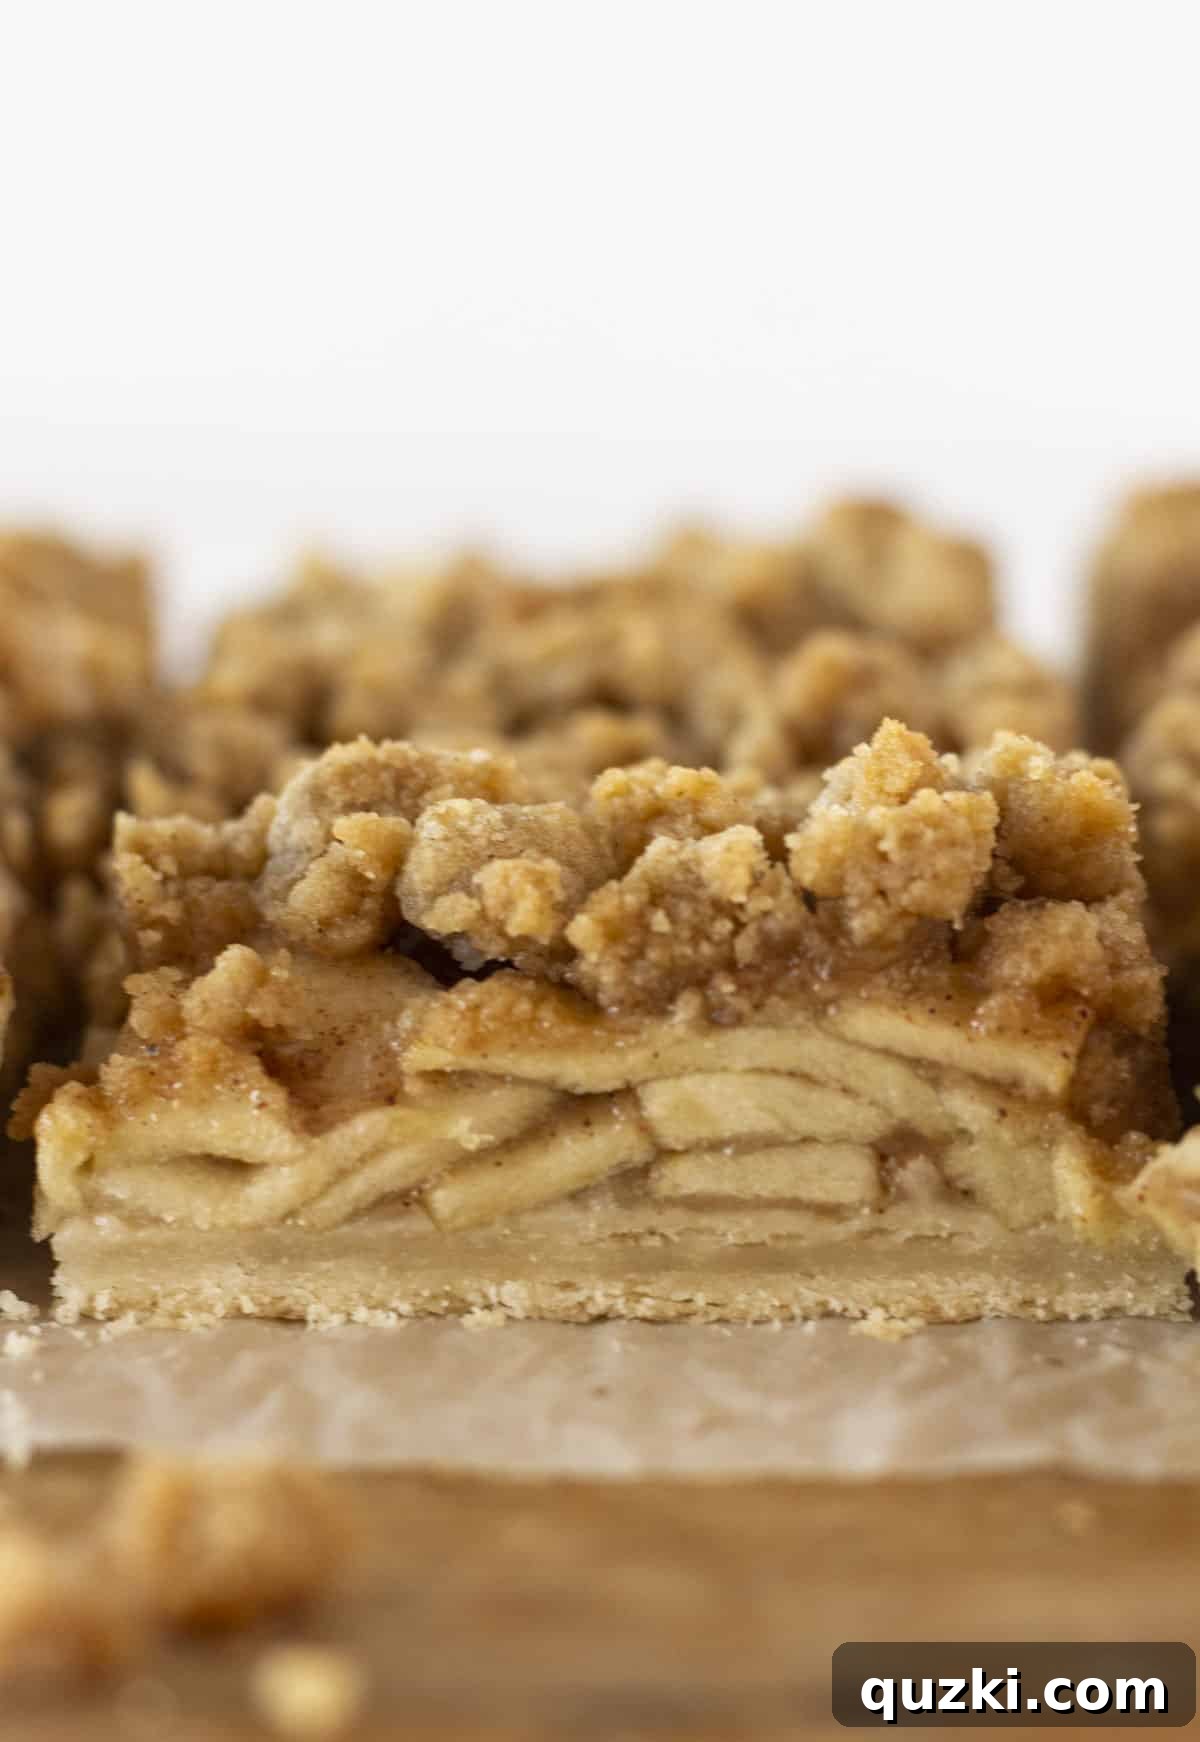
Table of Contents
- What is the Difference Between Regular Apple Pie and Dutch Apple Pie?
- Essential Ingredients for These Delicious Dutch Apple Pie Bars
- How to Make Easy Dutch Apple Pie Bars: A Step-by-Step Guide
- Expert Tips for Crafting Perfect Apple Pie Bars
- Storing and Freezing Your Easy Dutch Apple Pie Bars
- Dutch Apple Pie Bars: Frequently Asked Questions
- More Amazing Apple Desserts You’ll Love
- Easy Dutch Apple Pie Bars Recipe Card
What is the Difference Between Regular Apple Pie and Dutch Apple Pie?
While both traditional apple pie and Dutch apple pie lovingly celebrate a sweet and spiced apple filling, their primary distinction lies in their topping. A classic American apple pie typically features a double crust, meaning the delectable apple mixture is entirely enveloped between a bottom pastry crust and a top crust, which can be solid, latticed, or even decorated with cut-outs. This top crust bakes to a beautiful golden crisp, offering a distinct textural contrast to the soft fruit filling beneath.
Dutch apple pie, also widely known as apple crumble pie or apple streusel pie, takes a different, equally beloved approach. Instead of an upper pastry crust, it is generously crowned with a sweet, crumbly streusel topping. This irresistible crumble is traditionally a rich mixture of flour, sugar (often brown sugar for added depth and moisture), cold butter, and frequently includes warm, aromatic spices like cinnamon and nutmeg. For an extra layer of texture and nutty flavor, some variations incorporate rolled oats or finely chopped nuts such as pecans or walnuts into the streusel. This topping bakes into a delightfully crisp, golden, and buttery layer that perfectly complements the tender, perfectly spiced apple filling, creating a symphony of textures and flavors in every bite.
Beyond the characteristic topping, both pie styles share a common foundation: a flaky bottom pastry crust and a succulent apple filling seasoned with classic pie spices. However, the streusel topping of a Dutch apple pie often lends itself to a slightly more rustic, homey, and inviting presentation, making it an especially popular and comforting choice, particularly throughout the cooler autumn and winter months, and a staple for holiday dessert tables.
Essential Ingredients for These Delicious Dutch Apple Pie Bars
Crafting these delectable Dutch Apple Pie Bars requires a handful of simple, readily available ingredients, ensuring ease and accessibility for any home baker. Each component plays a crucial role in building the irresistible flavor and texture profile that makes this dessert so uniquely special and satisfying. Here’s a closer look at what you’ll need and why each element is important:
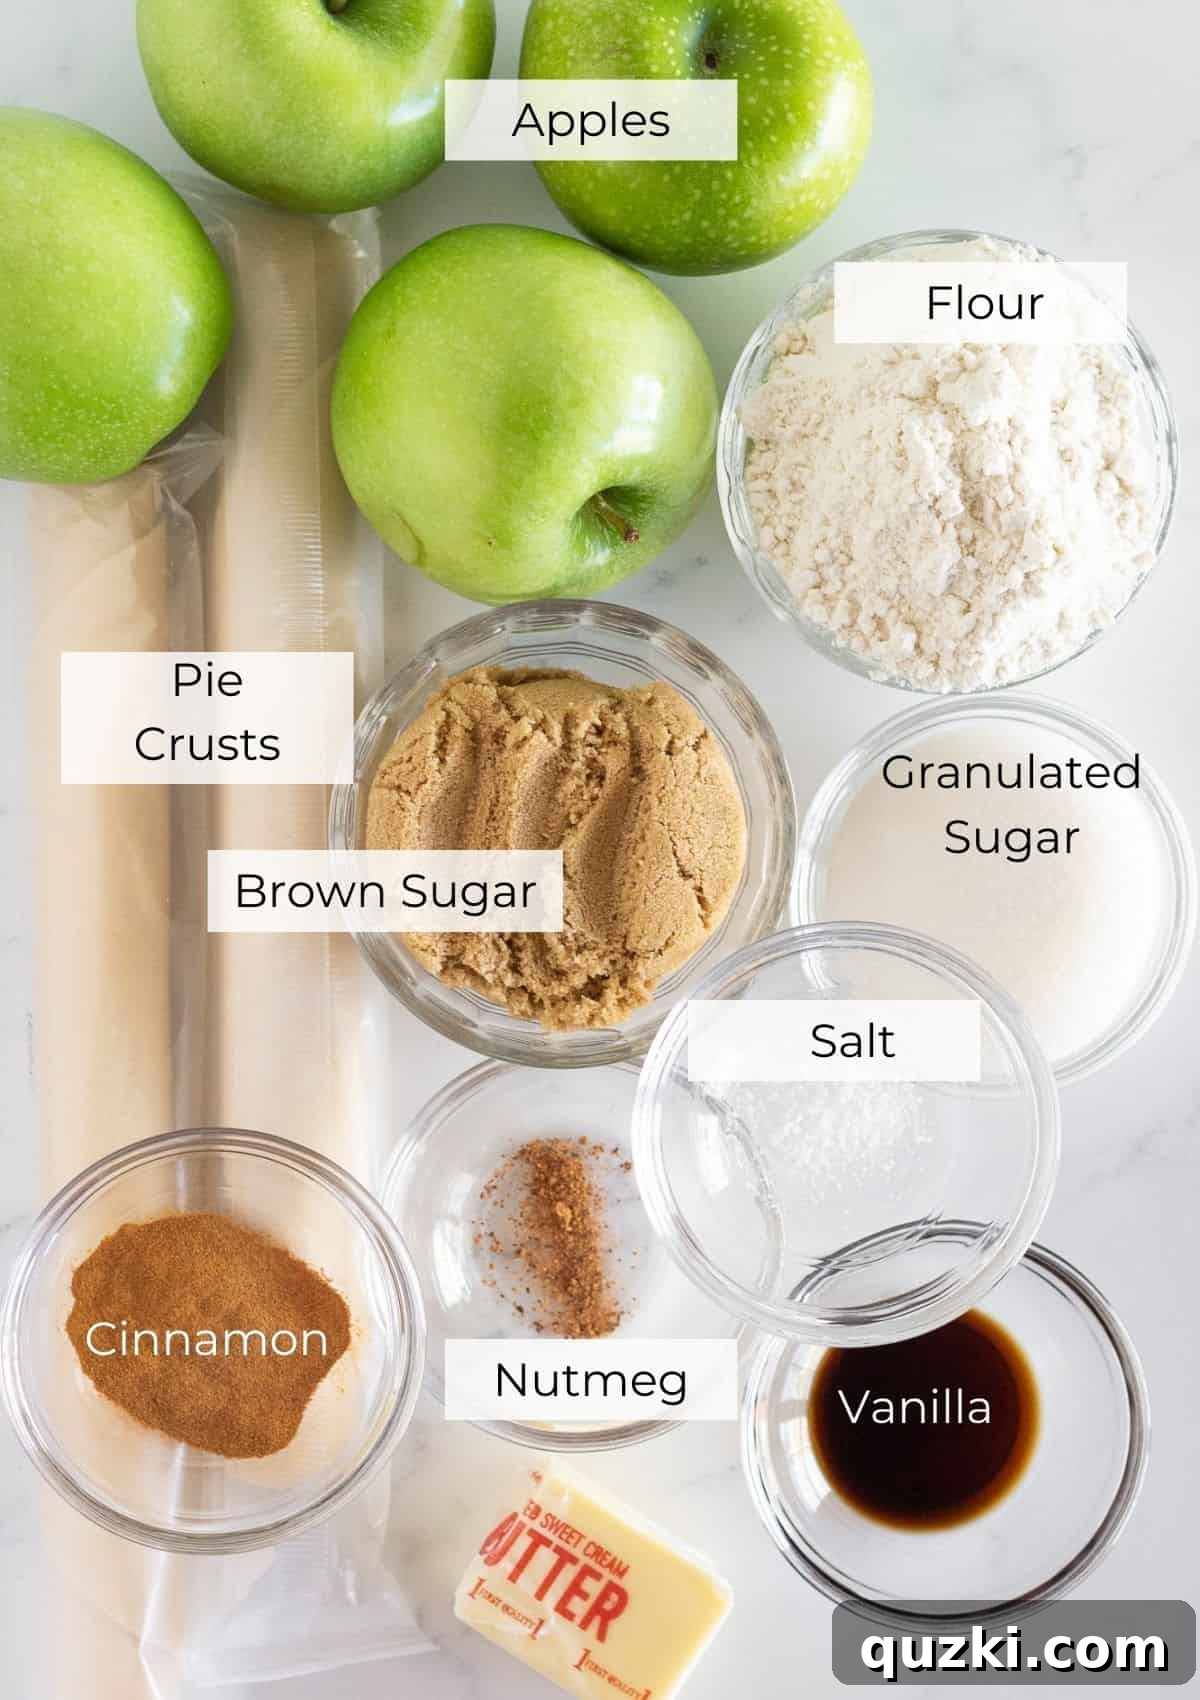
- Refrigerated Pie Crusts: This is your ultimate secret weapon for saving time without compromising on quality! Using pre-made refrigerated pie crusts dramatically cuts down on your preparation time, bypassing the need for extensive dough-making while still delivering that beloved flaky, buttery texture that forms a sturdy and delicious base for your bars. While incredibly convenient, if you prefer, you could certainly opt for a homemade pie crust or even explore alternatives like a buttery graham cracker or shortbread crust for a distinct flavor and texture profile.
- Granny Smith Apples: These wonderfully tart apples are unequivocally the star of the show for any apple pie or crumble. Their firm, crisp texture is paramount, as it holds up beautifully during the baking process, preventing the apple filling from becoming overly mushy or watery. Furthermore, their inherent tartness provides a perfect, bright counterpoint to the sweetness contributed by the sugars in both the crumble and the filling, resulting in a beautifully balanced and vibrant flavor profile. Other excellent baking apple varieties that maintain their shape and flavor include Honeycrisp, Braeburn, Fuji, or even a thoughtful mix of both sweet and tart apples for a more complex and nuanced taste.
- All-Purpose Flour: A fundamental and versatile ingredient, all-purpose flour serves a critical dual purpose in this recipe, contributing to both texture and consistency. In the rich crumble topping, it provides essential structure and body, helping to create that signature crumbly, streusel-like texture. Within the vibrant apple filling, a small but significant amount of flour acts as a natural thickener, ensuring that the delicious juices released from the baking apples coalesce into a luscious syrup rather than making the bars watery or creating a soggy base.
- Sugar (Brown & Granulated): The thoughtful combination of both brown and granulated sugar is key to achieving the ideal level of sweetness and a nuanced flavor complexity in these bars. Granulated sugar offers a clean, straightforward sweetness that brightens the apple flavor, while brown sugar contributes a deeper, more caramel-like molasses flavor and helps create a more moist, tender, and cohesive crumble topping. This blend ensures a rich, well-rounded sweetness throughout the dessert.
- Cinnamon & Nutmeg: These are the quintessential warm spices that are absolutely indispensable for truly bringing out the best in fresh apples. Cinnamon offers its distinct sweet, woody warmth and comforting aroma, while nutmeg provides a subtly pungent, sweet, and delicately spicy undertone that pairs exquisitely with apples. Together, they create that classic, inviting aroma and deeply comforting flavor profile that is synonymous with beloved apple desserts, particularly during the crisp autumn season. For those looking to further enhance the spice blend, consider adding a tiny pinch of allspice or ground cloves for an extra layer of warmth.
For a comprehensive list of all required quantities and precise measurements, please refer to the detailed recipe card provided further down this page.
How to Make Easy Dutch Apple Pie Bars: A Step-by-Step Guide
Crafting these irresistibly delicious Dutch Apple Pie Bars is a surprisingly straightforward process, thoughtfully broken down into three main, manageable stages: preparing the delightful crumble topping, perfectly pre-baking the pie crust, and assembling the vibrant apple filling. Follow these simple, clear steps carefully for consistently perfect results that will impress every time:
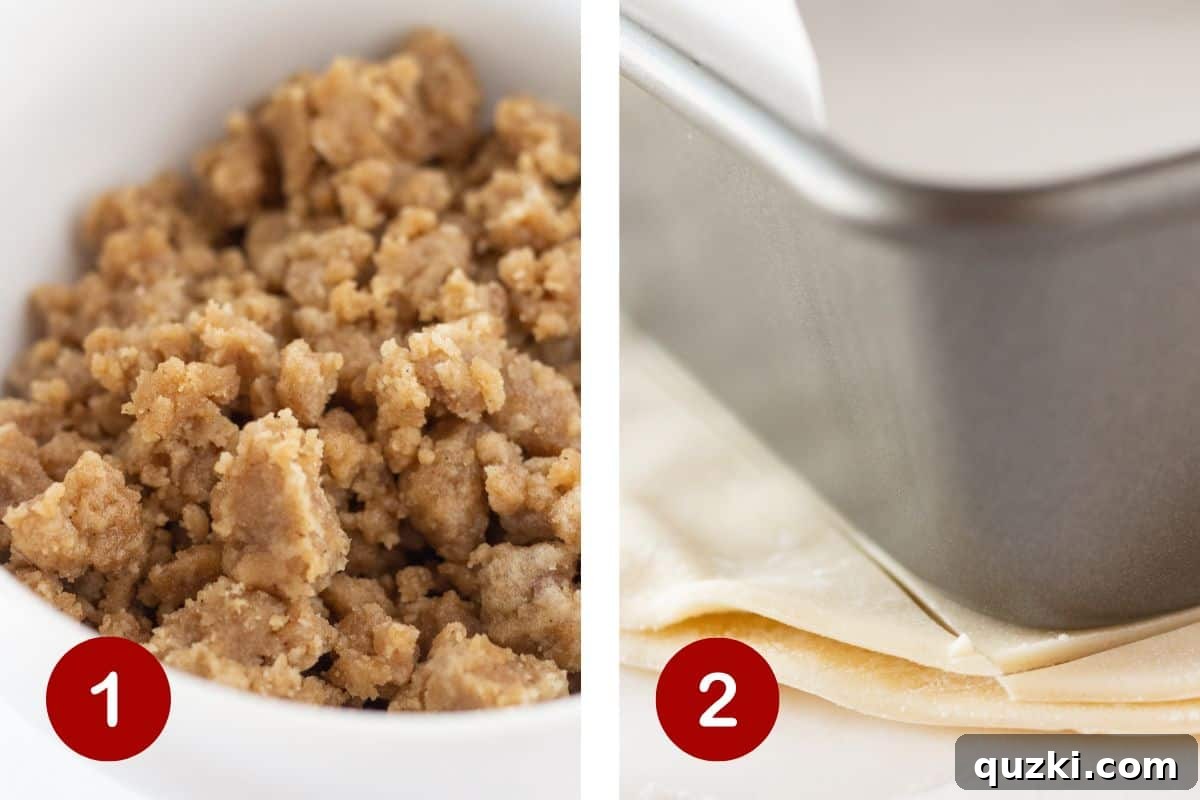
- Prepare the Crumble Topping: In a spacious mixing bowl, meticulously combine all the dry ingredients designated for the crumble topping: brown sugar, all-purpose flour, ground cinnamon, and a pinch of salt. Whisk these together thoroughly until they are uniformly blended. Subsequently, pour in the melted butter and the vanilla extract. Using a pastry cutter, a sturdy fork, or even your clean fingertips, gently mix the ingredients until a delightfully crumbly texture begins to form. You are aiming for a pleasing mix of both small, pea-sized crumbs and slightly larger, irregular clusters. Once achieved, cover the bowl securely and transfer the crumble topping to the refrigerator. Chilling the topping is an absolutely crucial step as it allows the butter to re-solidify, which in turn prevents the crumble from melting too rapidly in the oven and ensures a crispier, more distinct streusel layer that holds its shape beautifully.
- Prepare the Pie Crust: Begin by preheating your oven to a precise 400°F (200°C). Carefully unroll two refrigerated pie crusts and gently lay one directly on top of the other on a clean, floured surface. This layering technique creates a thicker, more robust, and sturdier base for your bars, capable of supporting the apple filling. Next, place your 9×9-inch baking dish directly on top of the stacked pie dough and use the bottom edges of the pan as a precise template to cut a perfect square from the crusts. This method guarantees that your crust will fit flawlessly into the pan, minimizing waste and ensuring neat edges.
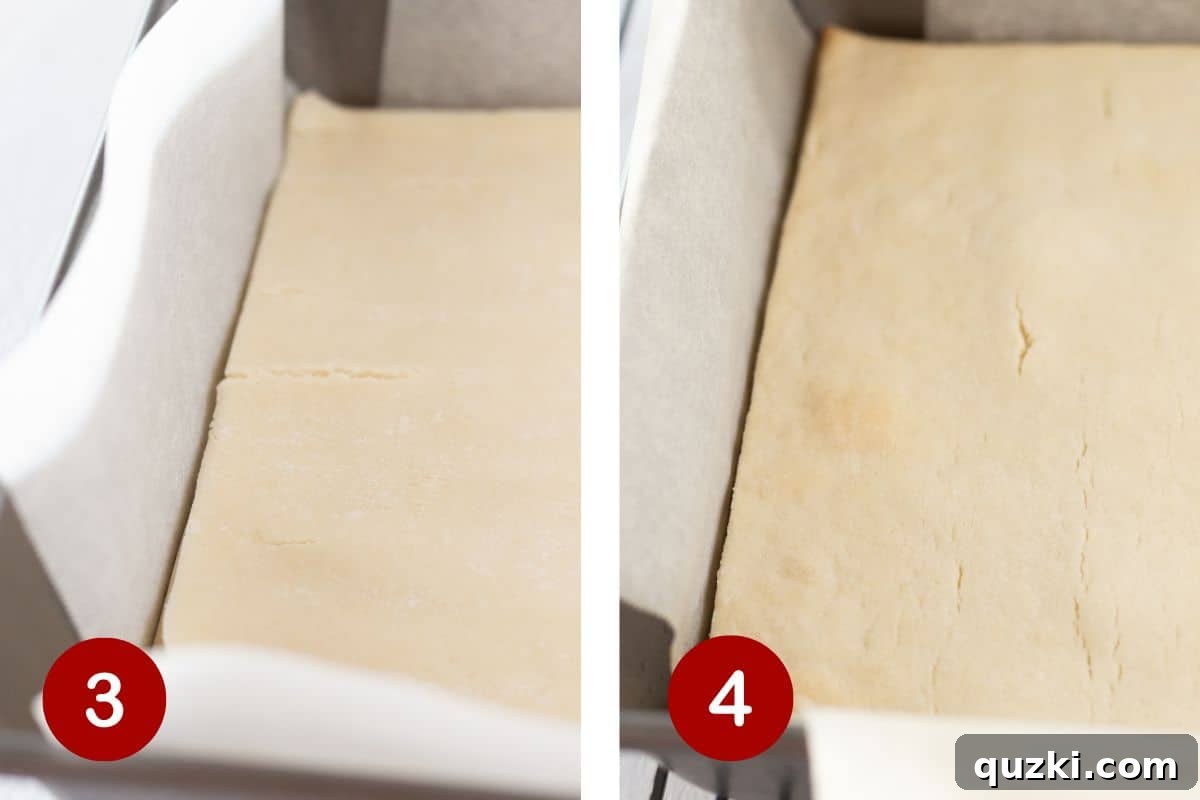
- Initial Crust Bake: Meticulously line your 9×9-inch baking pan with a sheet of parchment paper, ensuring that you leave a generous overhang on all sides. These “handles” will prove invaluable for effortless removal of the baked bars later. Gently place the freshly cut, double-layered pie crust square into the bottom of your prepared pan. Bake this crust in the preheated 400°F (200°C) oven for precisely 15 minutes. This vital pre-baking step, also known as blind baking, is paramount for preventing a soggy bottom crust, thereby guaranteeing that your bars possess a perfectly crisp, golden, and structurally stable foundation. Immediately after the 15 minutes have elapsed, carefully remove the pan from the oven and promptly reduce the oven temperature to 350°F (175°C) in preparation for the next baking phase.
- Prepare the Apple Filling: While the crust is undergoing its crucial pre-baking, dedicate your attention to preparing the vibrant apple filling. Begin by thinly slicing your peeled Granny Smith apples. In a separate large mixing bowl, meticulously combine these thinly sliced apple pieces with the granulated sugar, brown sugar, a quarter cup of all-purpose flour, cinnamon, and nutmeg. Gently stir the mixture, ensuring that all the apple slices are thoroughly and evenly coated with the sugar and spice blend. This meticulous coating ensures that every single bite is bursting with flavor and plays a key role in helping the filling to thicken beautifully and evenly during the baking process, preventing a watery result.
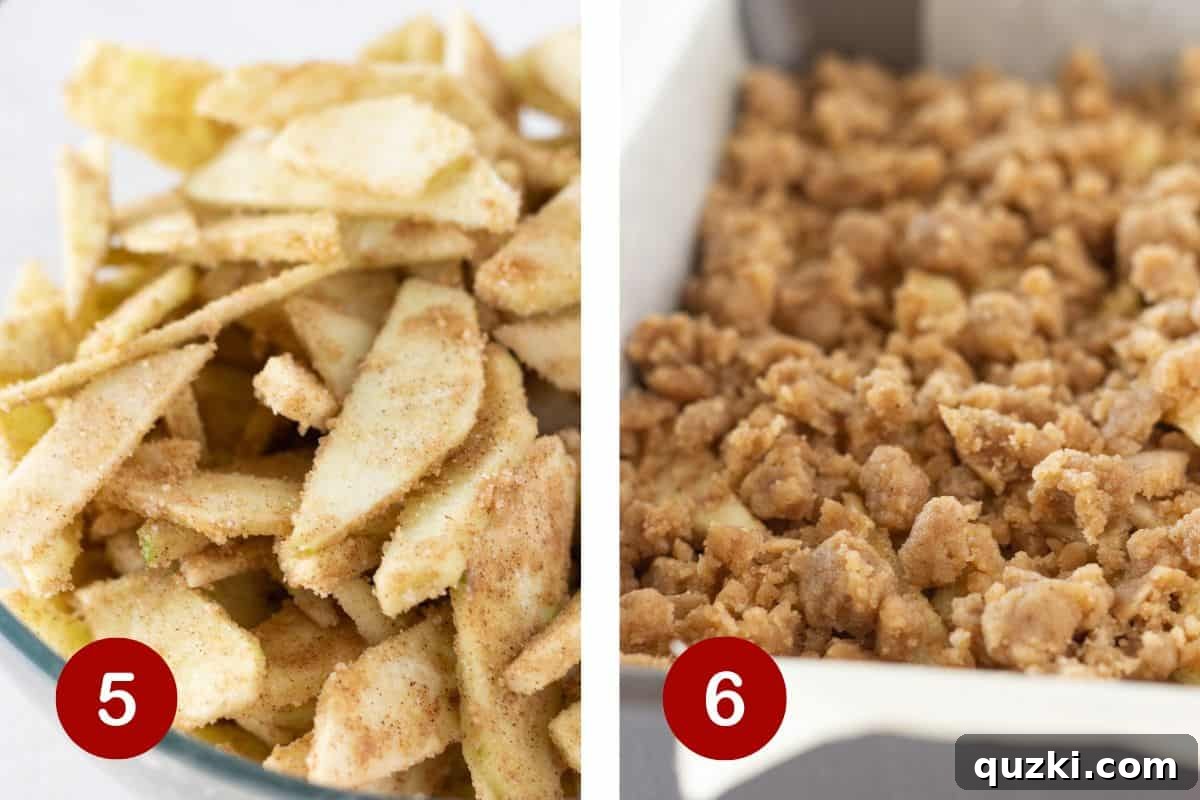
- Assemble the Bars: Once the pre-baked crust is ready and the oven temperature has been correctly reduced to 350°F (175°C), carefully pour the perfectly spiced apple mixture evenly over the partially baked crust in the pan. Gently spread it out into a single, uniform layer, ensuring consistency. Next, retrieve your perfectly chilled crumble topping from the refrigerator. Evenly sprinkle this delightful crumble mixture over the entire apple layer, making sure to cover the apples as completely as possible. The intentional varying sizes of the crumbs will create a wonderful, dynamic texture on top of your bars.
- Final Bake and Cooling: Place the fully assembled bars back into the oven, now set at the reduced temperature of 350°F (175°C), and bake for an estimated 30-35 minutes. You will know they are perfectly ready when the apples are tender (which you can test by carefully inserting a thin knife or fork into a representative apple piece) and the crumble topping has achieved a beautiful, rich golden brown hue and feels crisp to the touch. The irresistible, comforting aroma filling your kitchen will also serve as an unmistakable sign of their doneness!
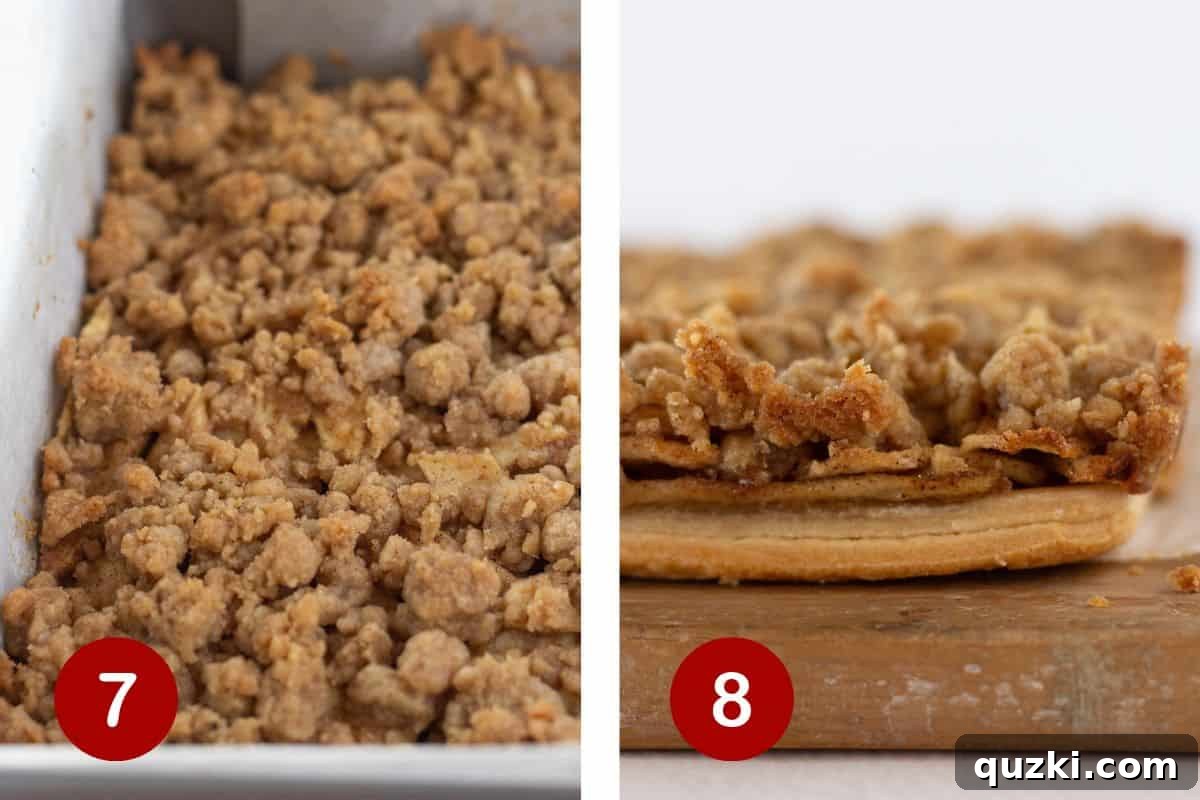
- Cool and Serve: Once baked to perfection, carefully remove the Dutch Apple Pie Bars from the oven and place the entire pan on a wire rack to cool completely. This cooling process is not merely a suggestion; it is absolutely crucial! Attempting to cut the bars while they are still warm will invariably result in a messy, crumbling dessert, as the warm fruit filling requires ample time to properly set and firm up. Once thoroughly cooled—ideally for several hours, or even conveniently overnight—utilize the parchment paper overhang to gently lift the entire slab of bars out of the pan in one cohesive piece. Transfer them to a clean cutting board and precisely slice them into 12 even squares. Serve and savor every delightful bite!
Expert Tips for Crafting Perfect Dutch Apple Pie Bars
Achieving bakery-quality Dutch Apple Pie Bars is easier than you might imagine with these tried-and-true expert tips and culinary tricks. Pay close attention to these details, and you’ll be rewarded with a truly exceptional dessert:
- Always Line Your Pan with Parchment Paper: This seemingly simple step is an absolute game-changer for both effortless cleanup and seamless removal of your perfectly baked bars. Ensure the parchment paper extends generously over all four edges of the pan, creating convenient “handles.” These handles will allow you to easily lift the entire slab of cooled bars out of the pan in one piece, making the cutting and serving process incredibly convenient and mess-free.
- Do Not Skip Pre-Baking the Pie Crust: This step is arguably the most critical for preventing a common issue: a soggy bottom crust. If you were to add the heavy, moist apple filling directly to a raw, unbaked crust, it would take significantly longer for the crust to bake through, and it would likely remain undercooked, gooey, or unpleasantly soft in various spots. Pre-baking ensures a beautifully crisp, golden, and structurally sound foundation that can confidently stand up to the juicy apple filling, providing a delightful textural contrast.
- Peel Apples for the Best Texture: While some bakers prefer to leave apple skins on for added fiber and rustic appeal, peeling your apples before slicing them is highly recommended for these bars. Removing the apple peel eliminates any potential chewy or fibrous texture that the skins might add, resulting in a consistently smooth, tender, and truly melt-in-your-mouth apple filling that significantly enhances the overall enjoyment and refined texture of the bar.
- Refrigerate the Crumble Topping: Chilling your streusel topping while you meticulously prepare the apple filling is a small, easy step with a surprisingly big impact on the final texture. The cold butter within the crumble mixture will melt much more slowly in the hot oven, which leads to the formation of larger, distinctly crispier crumbs. This technique also prevents the topping from spreading out too much and becoming flat or oily. This ensures you achieve that wonderful, chunky, and irresistible streusel texture that is the hallmark of a great Dutch apple pie.
- Allow Dutch Apple Pie Bars to Cool Completely Before Cutting: Patience truly is a virtue, especially when it comes to cleanly cutting baked goods, particularly bars that feature a soft fruit filling. The apple filling, along with its thickening agents, needs ample time to fully set and firm up as it cools. If you attempt to cut the bars while they are still warm, the filling will be loose and runny, and the bars will inevitably fall apart, resulting in uneven, messy, and crumbly slices. For perfectly clean, neat, and appealing squares, allow them to cool thoroughly, ideally for several hours, or conveniently overnight at room temperature.
- Enhance Flavor with a Simple Vanilla Glaze: To truly elevate these already delicious crumble bars and add an extra touch of gourmet decadence, consider drizzling them with a simple, yet elegant, vanilla glaze once they have completely cooled. A straightforward glaze can be effortlessly made by whisking together approximately 1 cup of powdered sugar with 2-3 tablespoons of milk (or cream for a richer texture) and 1 teaspoon of pure vanilla extract until the mixture is perfectly smooth and has a pourable, yet not too thin, consistency. Adjust the thickness with more milk or powdered sugar as needed. This adds an additional layer of sweetness, a creamy texture, and a beautiful, glossy finish.
- Slice Apples Thinly and Uniformly: For an even bake and to ensure tender, consistently cooked apples throughout your bars, it is crucial to aim for thin and uniform slices. This precision ensures that all apple pieces cook at roughly the same rate, preventing the frustrating scenario where some pieces remain crunchy and undercooked while others become overly soft or mushy. Consistent slicing leads to a superior texture in every bite.
Storing and Freezing Your Easy Dutch Apple Pie Bars
These delightful Dutch Apple Pie Bars are wonderfully versatile, perfect for preparing in advance for special occasions or simply enjoying over several days. Proper storage is key to ensuring they maintain their exquisite freshness, delightful texture, and delicious taste for as long as possible.
Storing Leftovers: To keep your apple pie bars at their peak freshness, it is best to store them in an airtight container. They will maintain their quality beautifully in the refrigerator for 3-4 days. While they can be left at room temperature for up to a day, refrigerating them is highly recommended for extending their shelf life, especially if your kitchen tends to be on the warmer side. For the most enjoyable experience, you might wish to warm individual servings slightly in the microwave just before serving. This gentle reheating helps to soften the apples once more and can gently re-crisp the crumble topping if done briefly in a toaster oven or conventional oven.
Freezing for Later Enjoyment: Dutch Apple Pie Bars freeze exceptionally well, making them an ideal candidate for meal prepping desserts or saving for a spontaneous future indulgence. When properly frozen, they can be stored for up to 3 months without any significant compromise to their delicious quality. Here are the best methods for freezing:
- Individual Wrapping for Convenience: Once the bars are completely cooled and meticulously cut into individual squares, wrap each bar tightly in plastic wrap. For an extra layer of protection against freezer burn and to preserve freshness, wrap them again in aluminum foil. Place these double-wrapped bars into a large freezer-safe bag or a sturdy freezer-proof container. This method is exceptionally convenient for grabbing just a single serving whenever a craving strikes, or for packing into lunchboxes.
- Layered Freezing for Batches: If you are planning to freeze a larger batch of bars, arrange the completely cooled and cut bars in a single layer within a freezer-proof container. To prevent them from sticking together or fusing into a solid block, place a sheet of parchment paper or wax paper between each subsequent layer of bars. Ensure the container is then sealed very tightly to prevent any air from entering, which can lead to freezer burn.
When you’re ready to savor a frozen bar, simply remove it from the freezer and allow it to thaw at room temperature for approximately one to two hours. Alternatively, for a warm and comforting treat, gently reheat it in the microwave or in a low oven (around 300°F / 150°C) until it is heated through. This gentle reheating process helps to restore some of their delightful freshly baked texture and warmth.
Dutch Apple Pie Bars: Frequently Asked Questions
What are the best apples to use for Apple Pie Bars?
With over 7,500 distinct varieties of apples available worldwide, choosing the ideal one for baking can indeed feel like a delightful challenge! For apple pie bars, the general consensus is to select an apple that staunchly holds its shape and firm texture during the baking process, and importantly, offers a harmonious balance of flavor. My personal preference leans towards tart apples such as Granny Smith or Braeburn, as their bright, crisp acidity beautifully cuts through and balances the inherent sweetness of both the buttery crumble and the luscious filling. However, incorporating a thoughtful combination of apples can often create a more complex and engaging flavor profile. Consider mixing a vibrant tart apple with a sweeter, equally firm variety like Honeycrisp, Jazz, Pink Lady, or Gala. Each of these options contributes unique textural nuances and flavor notes that can significantly elevate your finished apple pie bars.
How should I serve this recipe?
These remarkably easy apple pie bars are utterly delicious and satisfying when served simply, straight from the pan, whether they are still warm or have cooled to room temperature. But why stop at delicious when you can effortlessly elevate them into an extra-special, memorable dessert? For a truly indulgent and comforting experience, consider serving a warm apple pie bar with a generous scoop of creamy vanilla bean ice cream. The ice cream will gently melt into the spiced apple filling, creating a divine contrast. A luxurious drizzle of rich caramel sauce or a sprinkle of toasted, chopped pecans can undeniably take this classic combination over the top. Alternatively, for a lighter yet equally delightful presentation, a simple dollop of freshly whipped cream or a delicate dusting of powdered sugar offers an elegant finish. They are also fantastic companions to a warm cup of coffee or a cold glass of milk for a comforting afternoon snack.
Can I make Dutch Apple Pie Bars ahead of time?
Absolutely! These apple pie bars are an exceptional make-ahead dessert, making them an ideal choice for entertaining guests, holiday gatherings, or simply for busy weeknights when you desire a homemade treat without the last-minute fuss. You can bake them completely, allow them to cool thoroughly, and then store them in an airtight container in the refrigerator for up to 3-4 days. In fact, the flavors often have a chance to meld and deepen overnight, frequently making them even more delicious the day after they are baked. If you prefer to enjoy them warm, simply reheat individual servings gently in the microwave for a short burst, or in a low oven until they are just heated through.
How do I know when the apples are perfectly cooked?
The most reliable method to ascertain the doneness of the apples within your bars is to carefully insert a thin, sharp knife or a fork into the center of one of the apple pieces (ensuring you are away from the crust). If the knife slides in with minimal to no resistance, then the apples are tender, cooked through, and perfectly soft. Simultaneously, the crumble topping should have achieved a beautiful, rich golden brown color across its surface and should feel distinctively crisp to the touch. It’s always a good practice to keep a watchful eye on the edges of your bars; if they begin to brown too quickly, you can loosely tent the pan with a piece of aluminum foil for the remainder of the baking time to prevent over-browning.
Can I use a different size baking pan for this recipe?
While a 9×9-inch baking pan is specifically recommended for this recipe to achieve the ideal thickness and apple-to-crumble-to-crust ratio, you can certainly adapt the recipe for other pan sizes with a few considerations. If you opt for an 8×8-inch pan, your bars will be slightly thicker, which means you will likely need to increase the baking time by an additional 5-10 minutes to ensure the apples are fully cooked and tender. Conversely, if you choose a larger 9×13-inch pan, the bars will naturally be thinner, and consequently, the baking time will decrease. For a larger pan, you might also consider increasing the recipe by 1.5 to 2 times the original ingredient quantities to ensure you achieve an adequate thickness, which is crucial for satisfying bars. Regardless of the pan size alteration, always adjust baking times accordingly and maintain a close watch on the doneness of both the apples and the crumble to achieve the best results.
More Amazing Apple Desserts You’ll Love
If you’ve thoroughly fallen in love with the comforting flavors and ease of these Dutch Apple Pie Bars, you’ll be thrilled to discover an entire world of other delightful, apple-infused treats. Apples are an incredibly versatile fruit, making them a beloved staple in countless comforting and irresistibly delicious desserts that suit every season and occasion. Explore these other fantastic recipes that brilliantly celebrate the crisp, sweet, and tangy essence of apples in unique and scrumptious ways:
Discover Your Next Favorite Apple Treat!
Breads & Cakes
Apple Crumb Cake
Desserts
Apple Crisp Skillet
Desserts
Apple and Blackberry Crumble
Cakes
Super Easy Apple Upside Down Cake
We genuinely hope you enjoy the process of making and the pleasure of sharing these delightful Easy Dutch Apple Pie Bars with your loved ones! If you had the chance to try this wonderful recipe, we would be absolutely thrilled to hear from you. Please take a moment to leave a ⭐️ star review below and don’t forget to tag @practicallyhomemade on Pinterest to share your beautiful culinary creations!
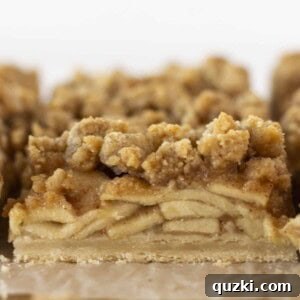
Easy Dutch Apple Pie Bars
June Albertson-Dick
Enjoy all the comforting flavors of traditional apple pie in a fraction of the time with these incredible Easy Dutch Apple Pie Bars. Featuring simple, distinct layers that come together quickly, this dessert is the quintessential fall treat for any occasion.
10 mins
50 mins
1 hr
12 bars
Rate Recipe
Print Recipe
Ingredients
For the Crumble Topping
- ½ cup packed brown sugar
- ¾ cup all-purpose flour
- ¼ teaspoon ground cinnamon
- ⅛ teaspoon salt
- 6 Tablespoons (¾ stick) unsalted butter, melted
- 1 teaspoon vanilla extract
For the Apple Bars
- 2 refrigerated pie crusts, softened to room temperature
- 4 medium Granny Smith apples, peeled, cored, and thinly sliced
- ¼ cup all-purpose flour
- ¼ cup granulated sugar
- 2 Tablespoons packed brown sugar
- 1 teaspoon ground cinnamon
- ¼ teaspoon ground nutmeg
Instructions
-
Preheat your oven to 400°F (200°C). Line a 9×9-inch baking pan with parchment paper, ensuring there’s an overhang on all sides to assist with lifting the bars later.
1. Prepare the Crumble Topping
-
In a medium mixing bowl, combine ½ cup brown sugar, ¾ cup all-purpose flour, ¼ teaspoon cinnamon, and ⅛ teaspoon salt. Whisk these dry ingredients together thoroughly. In a separate small bowl, combine the 6 tablespoons of melted butter and 1 teaspoon of vanilla extract. Pour the wet ingredients into the dry mixture and mix with a pastry cutter or fork until moist, coarse crumbs form (you want a mix of small and larger clusters). Cover the bowl and refrigerate the crumble topping while you prepare the rest of the recipe.
2. Prepare and Pre-Bake the Crust
-
Once your refrigerated pie crusts have come to room temperature, unroll them and lay one directly on top of the other on a clean surface to create a thicker base. Place the bottom of your 9×9-inch baking pan on top of the stacked crusts and use it as a template to cut a perfect square from the dough. Carefully transfer this double-layered crust square into the bottom of your parchment-lined 9×9-inch baking pan. Bake in the preheated 400°F (200°C) oven for 15 minutes. Remove the pan from the oven and immediately reduce the oven temperature to 350°F (175°C).
3. Prepare the Apple Filling
-
While the crust is pre-baking, prepare the apple filling. In a large mixing bowl, combine the thinly sliced Granny Smith apples, ¼ cup all-purpose flour, ¼ cup granulated sugar, 2 tablespoons packed brown sugar, 1 teaspoon cinnamon, and ¼ teaspoon nutmeg. Stir gently until all the apple slices are thoroughly and evenly coated with the sugar and spice mixture.
4. Assembly & Final Baking
-
Pour the prepared apple mixture evenly over the partially baked crust in the pan and spread it into a single, uniform layer. Retrieve the chilled crumble mixture from the refrigerator and evenly sprinkle it over the top of the apple layer, ensuring the apples are well covered. Bake for 30-35 minutes in the 350°F (175°C) oven, or until the apples are tender (test with a thin knife) and the crumble topping is beautifully golden brown. Remove the pan from the oven and allow the bars to cool completely on a wire rack. Once fully cooled, use the parchment paper overhang to lift the entire slab of bars out of the pan, transfer to a cutting board, and slice into 12 even squares. Store any leftovers in an airtight container at room temperature or in the refrigerator for up to 4 days. Warm gently in the microwave if desired. These bars can also be frozen for up to 3 months.
Recipe Video
A video tutorial demonstrating the creation of these Easy Dutch Apple Pie Bars will be available here soon!
Notes
- Pre-Baking is Key: Never skip pre-baking the pie crust! This vital step prevents a soggy bottom, ensuring your bars have a crisp, golden foundation.
- Chill Your Crumble: Refrigerating the crumb topping ensures that the butter remains firm, leading to larger, crispier crumbs that hold their shape better during baking.
- Cool Completely for Clean Cuts: Patience is paramount! The apple filling needs time to set as it cools. Cutting warm bars will result in messy, crumbly slices.
- Optional Vanilla Glaze: For an extra touch of sweetness and elegance, whisk together 1 cup powdered sugar, 2-3 tablespoons milk, and 1 teaspoon vanilla extract. Drizzle over the cooled bars.
- Uniform Apple Slices: Ensure your apple slices are consistently thin for an even cook and tender texture throughout the bars.
Nutrition Information
Per Serving (1 bar):
- Calories: 181 kcal
- Carbohydrates: 32g
- Protein: 1g
- Fat: 6g
- Saturated Fat: 4g
- Polyunsaturated Fat: 0.3g
- Monounsaturated Fat: 2g
- Trans Fat: 0.2g
- Cholesterol: 15mg
- Sodium: 74mg
- Potassium: 94mg
- Fiber: 2g
- Sugar: 21g
- Vitamin A: 208 IU
- Vitamin C: 3mg
- Calcium: 18mg
- Iron: 1mg
Nutrition information is automatically calculated and should be used as an approximation.
Tried this recipe? Leave a comment below!
We absolutely love hearing your feedback and seeing your delightful culinary creations!