
Mastering Homemade Chocolate Covered Pretzel Rods: Your Ultimate Guide
Dive into the delightful world of homemade chocolate covered pretzel rods! This comprehensive guide will equip you with all the essential tips, tricks, and creative topping ideas to effortlessly craft these irresistible sweet and salty treats right in your own kitchen. Whether you’re preparing for a holiday gathering, a special event, or simply craving a delicious snack, these gourmet pretzels are a crowd-pleaser that are surprisingly simple to make.
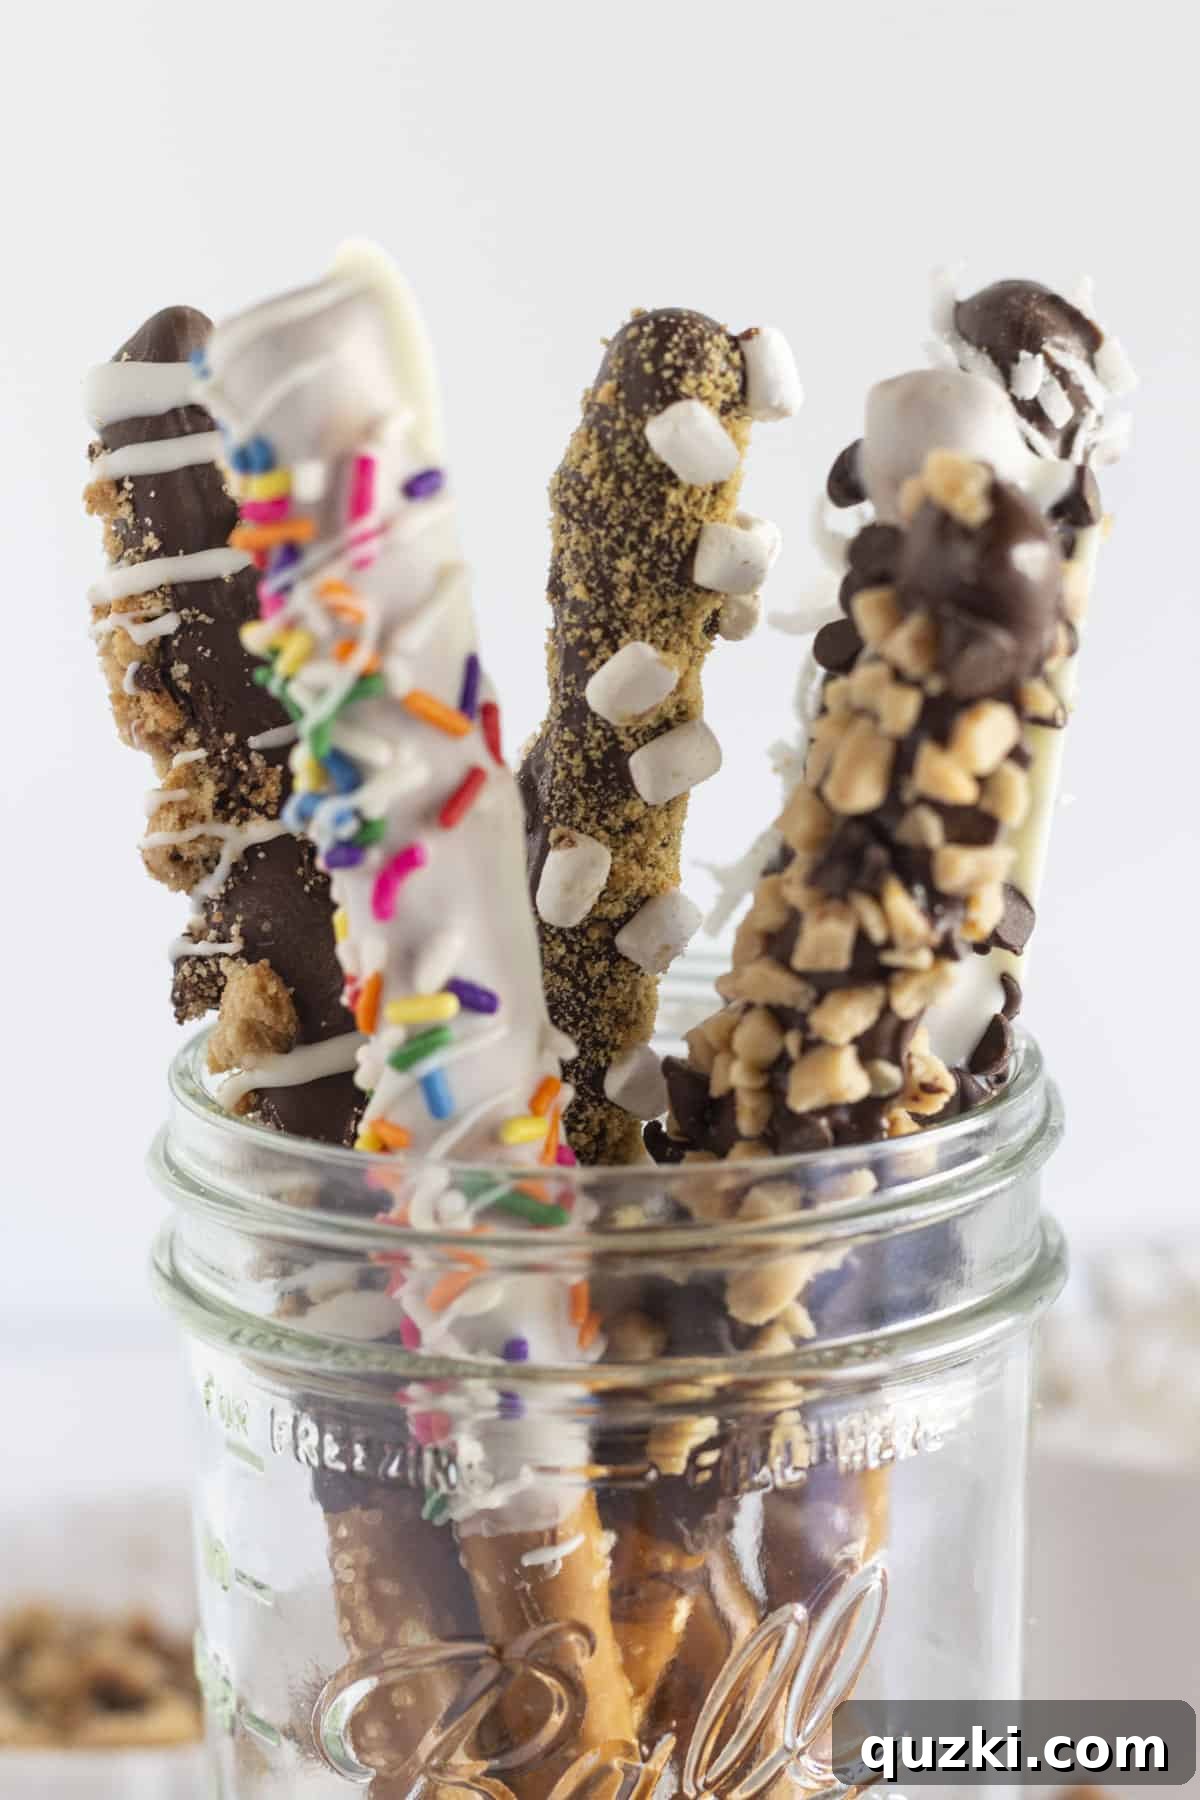
Table of Contents
- Why Make Your Own Chocolate Covered Pretzels?
- The Easiest Ways to Melt Chocolate for Dipping
- Essential Ingredients for Perfect Pretzels
- Inspiring Topping Ideas for Every Occasion
- Step-by-Step: How to Make Chocolate Dipped Pretzels
- Expert Tips for Flawless Pretzel Rods
- Troubleshooting Common Pretzel Dipping Issues
- Storage and Freezing Guidelines
- Recipe FAQs
- More Homemade Candy Recipes You’ll Love
- Easy Chocolate Covered Pretzel Rods Recipe
Why Make Your Own Chocolate Covered Pretzel Rods?
There’s something uniquely satisfying about homemade treats, and chocolate covered pretzel rods are no exception. They strike the perfect balance between salty and sweet, offering a delightful crunch with every bite. Beyond their incredible taste, these treats are:
- Incredibly Easy: With just a few ingredients and simple steps, even beginner bakers can achieve professional-looking results.
- Highly Customizable: The possibilities for toppings are endless, allowing you to tailor them for any season, holiday, or personal preference.
- Perfect for Gifting: Beautifully packaged, they make thoughtful and delicious gifts for friends, family, teachers, or hosts.
- Budget-Friendly: Making them at home is often more economical than buying gourmet versions from a store.
- A Fun Activity: It’s a fantastic project for kids and adults alike, perfect for a rainy afternoon or a party activity.
Get ready to impress everyone with these simple yet elegant confections!
The Easiest Ways to Melt Chocolate for Dipping
Melting chocolate correctly is the foundation of perfect chocolate covered pretzel rods. A smooth, glossy, and well-tempered chocolate coating is key. Here are the most reliable methods to achieve that ideal consistency:
Microwave Method: The Quickest Option
The microwave is undoubtedly my go-to for speed and convenience when melting chocolate. It’s fast and requires minimal cleanup. To melt chocolate successfully in the microwave:
- Place your chosen chocolate (wafers, chips, or chopped bars) in a clean, microwave-safe container. Ensure the container is completely dry, as even a tiny drop of water can cause chocolate to seize.
- Microwave on medium power (50-60%) for 30-second intervals.
- After each interval, remove the container and stir thoroughly, even if the chocolate doesn’t appear melted. This distributes the heat evenly and prevents scorching.
- Continue microwaving and stirring until the chocolate is mostly melted but still has a few small lumps. Remove it from the microwave and stir continuously until all the lumps dissolve and you achieve a perfectly smooth, creamy, and fluid consistency. Overheating can burn the chocolate, making it thick and unusable.
Crock Pot (Slow Cooker) Method: Ideal for Keeping Chocolate Melted
The slow cooker is an excellent choice for larger batches or when you need to keep your chocolate melted and warm for an extended period, which is particularly useful for events or when decorating many pretzel rods. This method essentially creates a makeshift double boiler:
- Place your chocolate melting wafers or chopped chocolate into glass jars (like mason jars) or a heat-safe bowl that fits inside your slow cooker.
- Carefully add hot water to the slow cooker, ensuring it reaches about halfway up the sides of the jars. Be extremely cautious not to get any water into the chocolate, as this will cause it to seize and become grainy.
- Turn the slow cooker to a high setting and allow the chocolate to melt gently for approximately 30-45 minutes, stirring occasionally.
- Once the chocolate is fully melted and smooth, reduce the slow cooker’s heat to a low or warm setting. This will maintain the chocolate’s liquid consistency, making it easy to dip your pretzel rods throughout your decorating session.
Double Boiler Method: The Classic Gentle Melt
For the most controlled and gentle melting, a double boiler is a professional’s choice, preventing any direct heat from burning the chocolate.
- Fill a saucepan with about 1-2 inches of water and bring it to a gentle simmer over medium heat.
- Place a heat-safe bowl (preferably glass or metal) on top of the saucepan, ensuring the bottom of the bowl does not touch the simmering water.
- Add your chocolate to the top bowl. The steam from the simmering water will gently and gradually melt the chocolate.
- Stir the chocolate frequently with a dry spatula until it’s completely smooth and free of lumps. This method takes a bit longer but gives you excellent control and a perfectly smooth melt every time.
Essential Ingredients for Perfect Pretzels
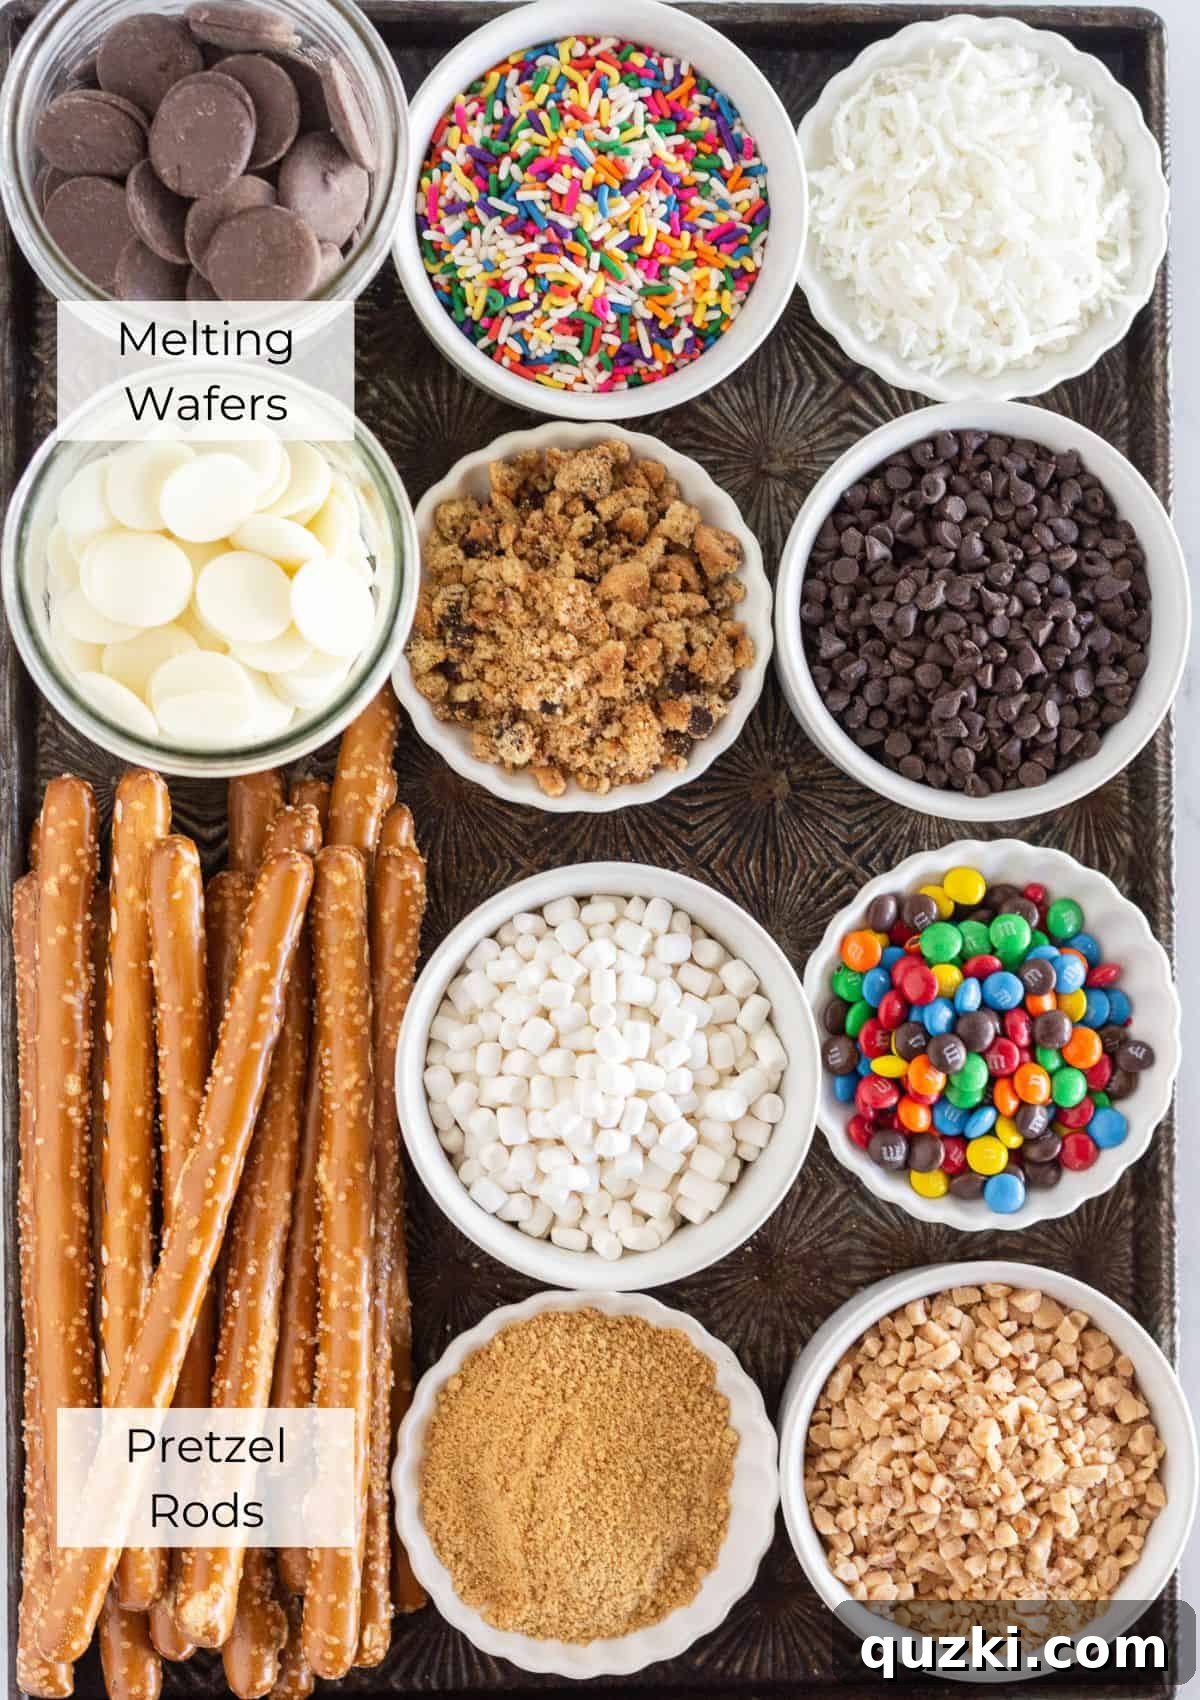
The beauty of chocolate covered pretzel rods lies in their simplicity. You only need two main ingredients, plus your favorite toppings, to create an impressive treat:
- Pretzel Rods: The foundation of your sweet and salty masterpiece!
- Selection: Opt for thick, sturdy pretzel rods that can withstand dipping without easily breaking. The longer length of rods makes them ideal for dipping and decorating, offering a larger canvas for your creative toppings.
- Alternatives: If pretzel rods are unavailable, standard pretzel twists or even small mini pretzels can work, though they might be a bit trickier to dip uniformly. Ensure they are fresh and crunchy for the best texture contrast with the chocolate.
- Melting Wafers (Candy Melts) or High-Quality Chocolate: The star of the show, providing that luxurious coating.
- Melting Wafers: These are specifically designed to melt smoothly, providing an excellent, consistent coating that hardens quickly with a beautiful sheen. They come in various flavors and colors, including milk chocolate, dark chocolate, white chocolate, and even vibrant hues for festive occasions. They are generally easier to work with than regular chocolate chips.
- Chocolate Chips/Bars: While you can use good quality chocolate chips or finely chopped baking chocolate bars, they may require a bit more finesse to melt smoothly. For a better consistency and easier dipping, consider adding a teaspoon of vegetable shortening, coconut oil, or cocoa butter per cup of chocolate chips. This helps to thin out the chocolate and ensures a silky finish. Choose a brand with good flavor, as it will significantly impact the final taste.
For specific quantities and detailed measurements, please refer to the complete recipe card below.
Inspiring Topping Ideas for Every Occasion
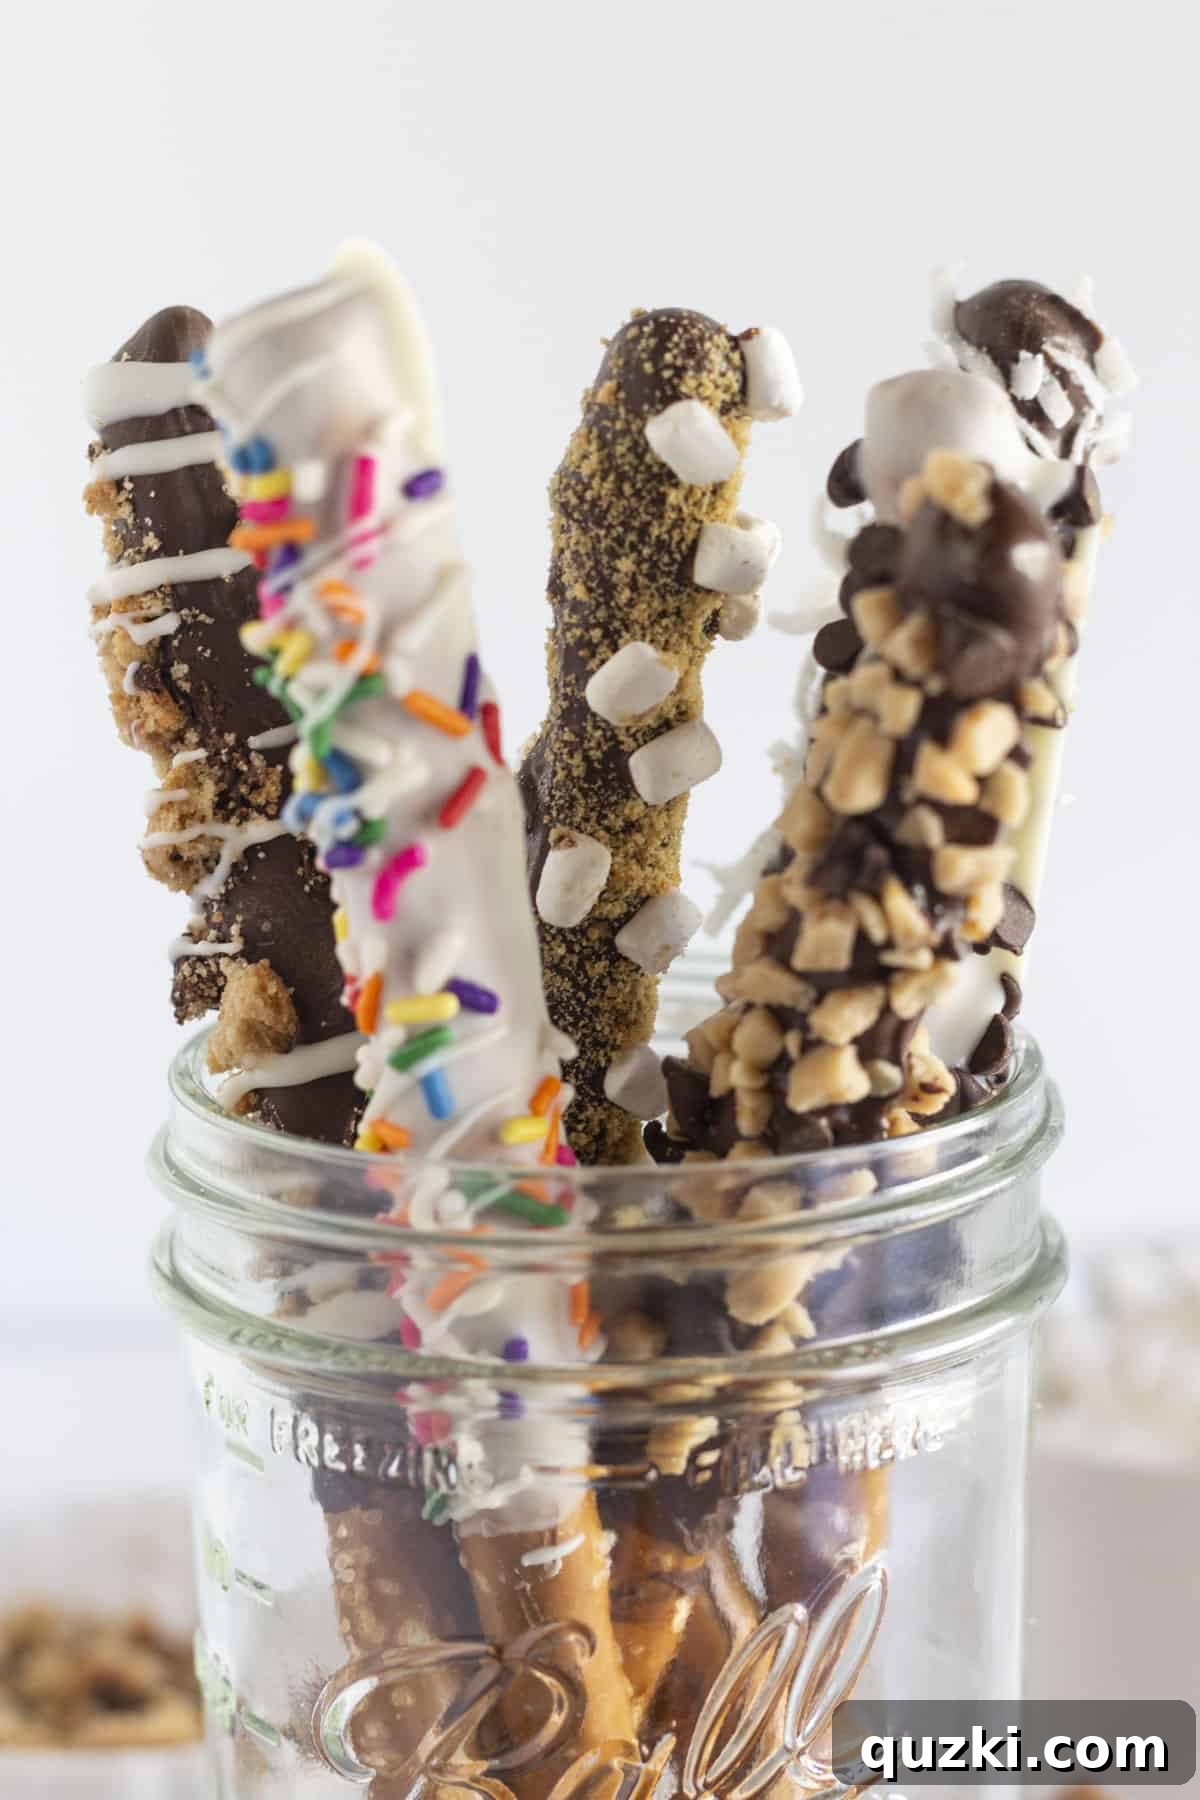
This is where the fun truly begins! Customizing your chocolate covered pretzel rods with various toppings allows you to transform them for different seasons, holidays, or events. The possibilities are truly endless, limited only by your imagination. Here are some fantastic topping ideas to get you started:
- Holiday Magic:
- Valentine’s Day: Adorn with cheerful red and pink sprinkles, crushed freeze-dried raspberries, or tiny edible heart candies. Pair them with these lovely Heart Sugar Cookies for a complete romantic treat.
- Christmas: Evoke the festive spirit with crushed candy canes, festive red and green sprinkles, mini chocolate chips, or mini M&M’s in holiday colors. A drizzle of contrasting white chocolate can also add a beautiful touch.
- Halloween: Create spooky treats using orange and black sprinkles, candy corn pieces, crushed Oreos for a “dirt” effect, or green and purple sanding sugar. These would look absolutely amazing alongside Spooky Halloween Chocolate Covered Oreos.
- Easter/Spring: Pastel sprinkles, shredded coconut (tinted green for grass), or tiny candy eggs can bring a fresh, seasonal feel.
- Classic & Crowd-Pleasing Flavors:
- Peanut Butter Twist: After dipping in chocolate, drizzle generously with melted peanut butter chips or a thin stream of smooth peanut butter for that ultimate sweet and savory combination.
- Nutty Perfection: Enhance the crunch and flavor with finely chopped pecans, almonds, pistachios, or walnuts. The earthy notes of nuts perfectly complement the sweet chocolate and salty pretzel.
- Cookie & Crumb Extravaganza: Roll in crushed OREO cookies (chocolate or golden), graham cracker crumbs, or even crushed shortbread cookies for added texture and flavor.
- Decadent & Fun Additions:
- S’mores Style: Transform your pretzel rods into mini campfire treats by dipping in chocolate and then rolling them in a mix of mini marshmallows and graham cracker crumbs. A quick toast with a kitchen torch can lightly caramelize the marshmallows for an authentic touch. You definitely need to try these incredible S’mores Cookie Bars too!
- Toffee & Caramel: Sprinkle with crunchy toffee bits or a delicate drizzle of caramel sauce over the set chocolate for a truly indulgent experience.
- Coconut Craze: Toasted or plain shredded coconut adds a tropical flair and lovely chewiness.
- Zesty Brightness: For a refreshing twist, sprinkle with finely grated orange or lemon zest over white chocolate dipped pretzels.
- Edible Glitter/Dust: For an extra touch of glamour, lightly dust with edible glitter or shimmer dust once the chocolate has set.
Remember to add your desired toppings while the chocolate is still wet to ensure they adhere properly!
Step-by-Step: How to Make Chocolate Dipped Pretzels
Creating these delightful sweet and salty treats is a straightforward process. Follow these detailed steps to ensure perfectly coated and decorated pretzel rods every time:
- Prepare Your Workspace: Begin by lining a large baking sheet with parchment paper or wax paper. This non-stick surface is crucial for easily removing the finished pretzel rods once the chocolate has set. Set aside all your desired toppings in small, easily accessible bowls before you start dipping, as you’ll need to work quickly.
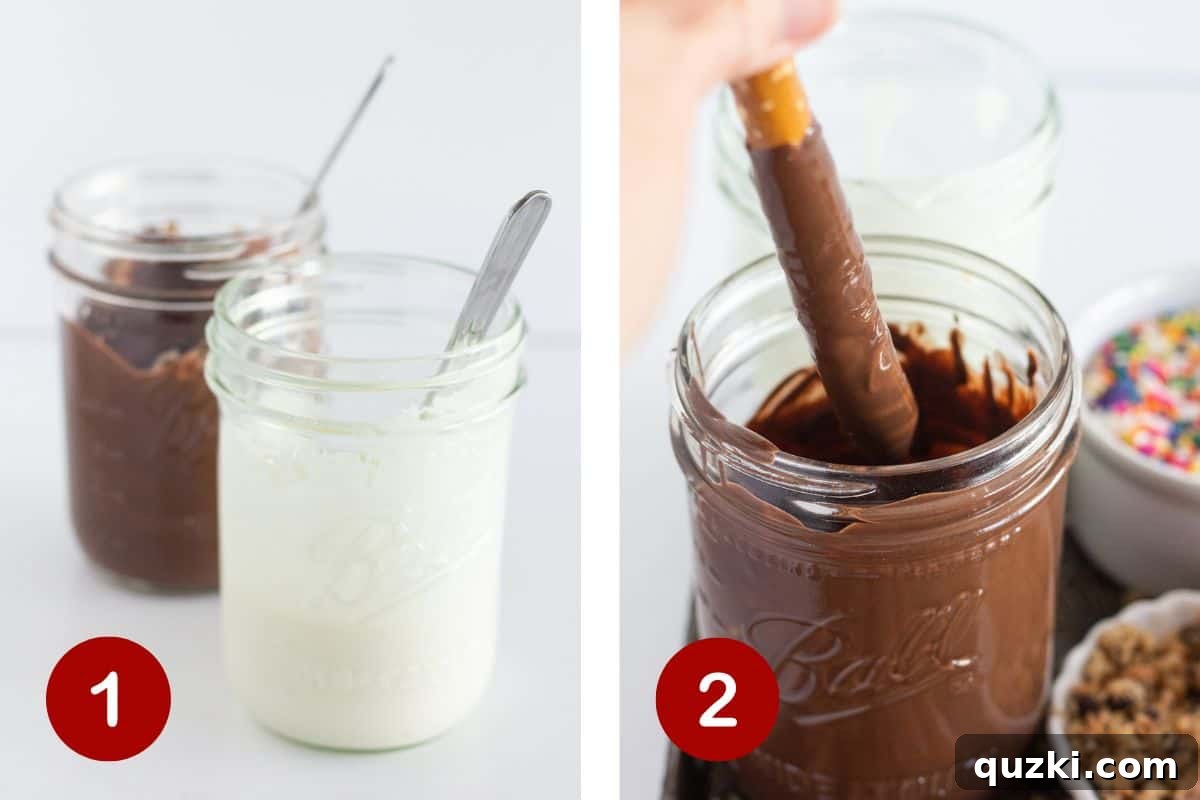
- Melt the Chocolate: Place your chocolate melting wafers (or prepared chocolate chips) into a tall, narrow microwave-safe jar or bowl. This shape is ideal for dipping as it allows you to submerge more of the pretzel rod without needing an excessive amount of chocolate. Microwave in 30-second intervals, stirring thoroughly after each interval, until the chocolate is completely smooth, creamy, and free of any lumps. If using the crock pot or double boiler method, ensure your chocolate is at the optimal dipping consistency.
- Dip the Pretzel Rods: Hold one pretzel rod by one end, typically leaving about an inch or two uncovered for a convenient “handle.” Carefully dip the pretzel rod into the melted chocolate, submerging it as deeply as you wish. Gently rotate and lift the pretzel, allowing excess chocolate to drip back into the container. A gentle tap against the side of the cup can help remove any extra drips, ensuring a neat, even coating.
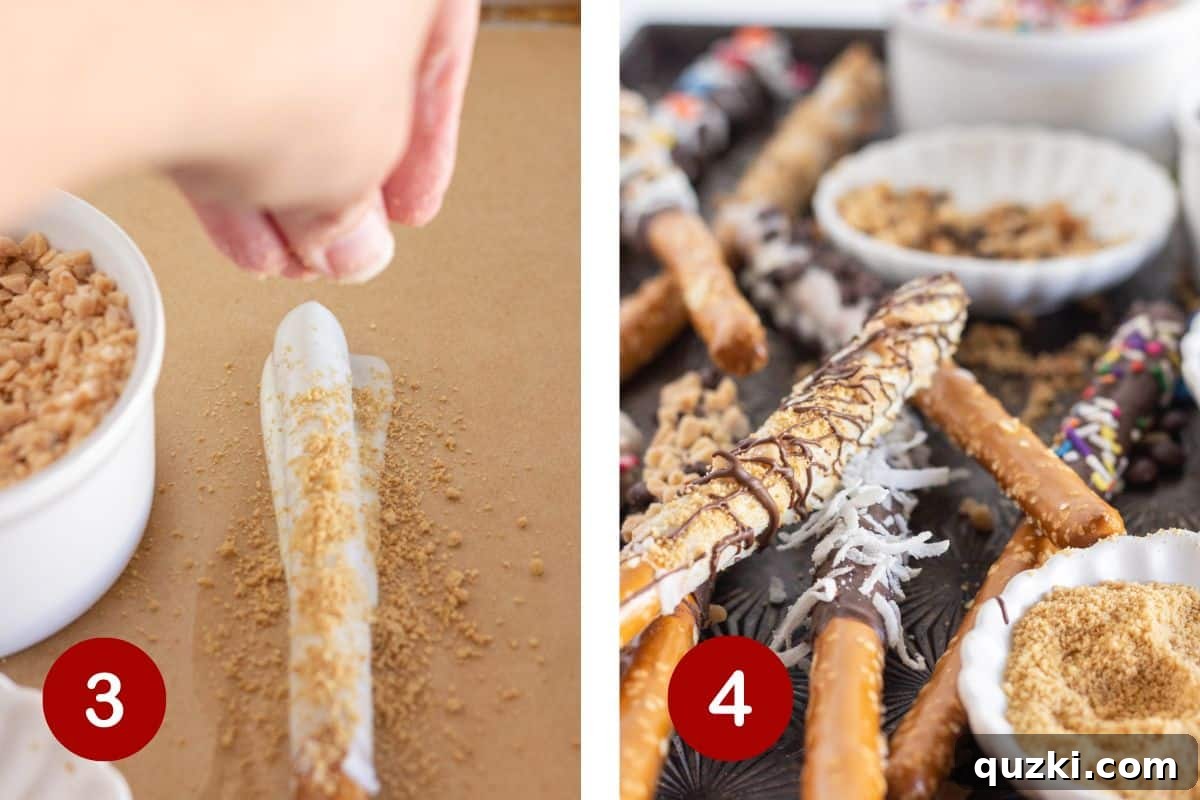
- Add Toppings Immediately: Once dipped, immediately transfer the chocolate-covered pretzel rod to your prepared baking sheet. While the chocolate is still wet and pliable, quickly sprinkle your chosen toppings over the coated section. For full coverage, you can gently roll the dipped portion in a shallow dish of sprinkles or nuts.
- Repeat and Set: Continue steps 3 and 4 with the remaining pretzel rods. Once all your pretzel rods are coated and adorned with toppings, allow them to set. You can let them harden at room temperature for about 30-60 minutes, or for a quicker process, refrigerate them for 15-20 minutes until the chocolate is completely firm.
- Final Touches (Optional): For extra flair, once the first layer of chocolate and toppings has set, you can drizzle additional melted chocolate (perhaps a contrasting color) over the set pretzels using a spoon or a piping bag with a fine tip. Allow this second layer to set completely before handling or storing.
Expert Tips for Flawless Pretzel Rods
Achieving perfectly coated and decorated chocolate pretzel rods is easy with these insider tips:
- Choose the Right Dipping Container: Always use a tall, narrow container (like a measuring cup, mug, or mason jar) for your melted chocolate. This design allows you to fully submerge the pretzel rod with less chocolate, reducing waste and making dipping much easier and more efficient. A long-handled spoon or skewer can also aid in stirring and retrieving the chocolate.
- Work in Small Batches: Chocolate can begin to set relatively quickly, especially if your kitchen is cool. To ensure your toppings adhere beautifully, dip and decorate a few pretzel rods at a time. This gives you ample opportunity to sprinkle toppings before the chocolate hardens.
- Gentle Tapping is Key: After dipping, gently tap the pretzel rod against the side of your dipping container. This helps to remove any excess chocolate, preventing thick, uneven coatings and ensuring a smoother, more elegant finish. Avoid vigorous shaking, which can introduce air bubbles.
- Timing is Everything for Toppings: Immediately after dipping a pretzel rod, while the chocolate is still completely wet, add your desired toppings. This is crucial for proper adhesion. If the chocolate starts to set, your sprinkles or nuts won’t stick well. Have all your toppings ready and within arm’s reach.
- Proper Setting is Essential: While room temperature setting works, refrigerating for 15-20 minutes is a faster and more reliable method, especially in warmer environments. Ensure the chocolate is completely firm before moving or packaging to prevent smudges and damage.
- Prevent Chocolate from Seizing: Chocolate is very sensitive to water. Ensure all your equipment (bowls, spatulas, spoons) is thoroughly dry before it comes into contact with melted chocolate. Even a tiny drop of water can cause the chocolate to thicken and become unusable.
- The Art of Drizzling: For an extra decorative touch, drizzle a contrasting color of melted chocolate (or even melted white chocolate over dark chocolate) over your set, topped pretzel rods. Use a fork or a piping bag with a very small opening for fine lines.
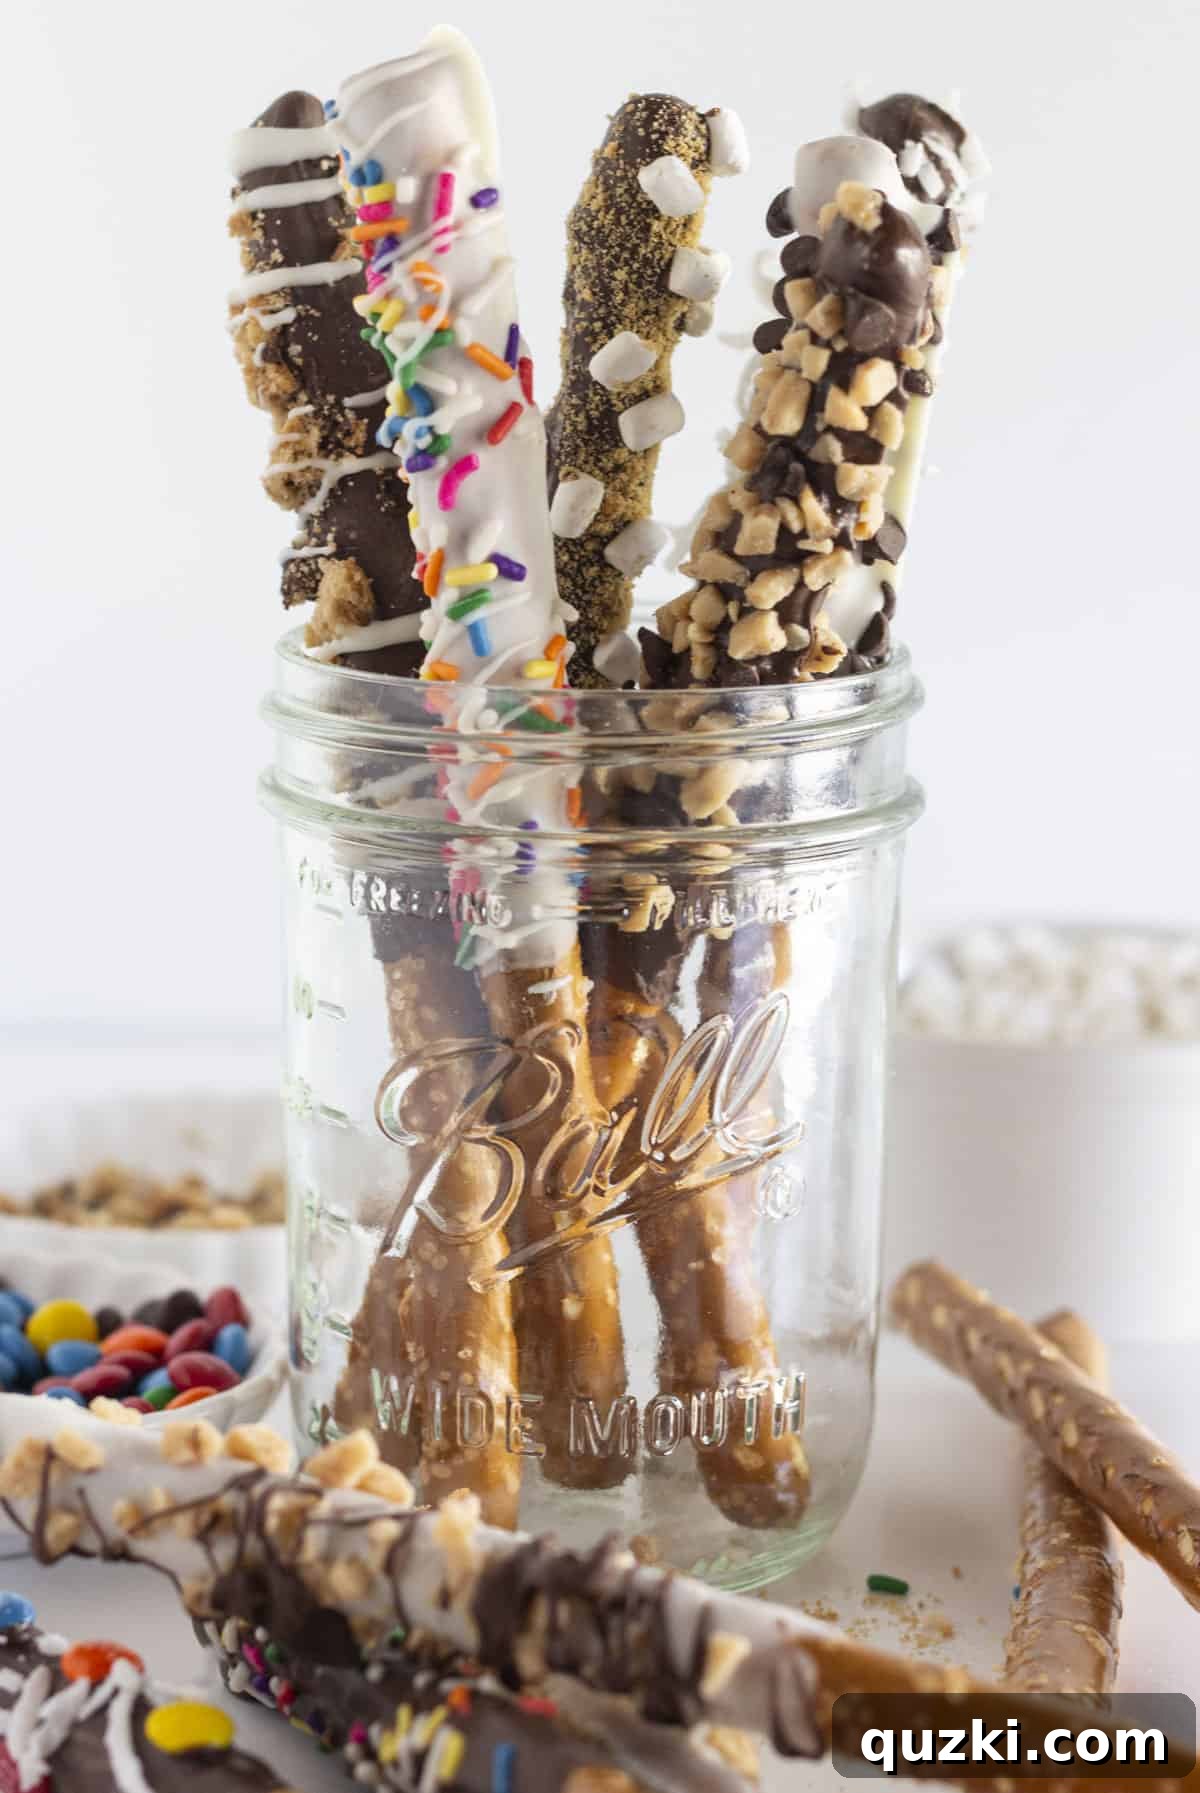
- Perfect for Gifting: Chocolate covered pretzel rods make wonderful edible gifts. Once fully set, arrange them in cellophane bags tied with a festive ribbon, or stand them upright in a decorative mason jar. They’re perfect for holidays, birthdays, or thank-you gifts.
Troubleshooting Common Pretzel Dipping Issues
Even with the best intentions, sometimes things don’t go perfectly in the kitchen. Here are solutions to common problems you might encounter when making chocolate covered pretzel rods:
- Chocolate Seized or Thickened: This is usually caused by water contact or overheating. If your chocolate becomes thick, grainy, and unworkable:
- Too Much Heat: Try adding a tiny amount (1/2 teaspoon) of vegetable shortening or coconut oil and stir vigorously. If it’s already burnt, it’s best to discard and start fresh.
- Water Contact: Unfortunately, seized chocolate due to water is very difficult to salvage. It’s often best to discard it and begin with new, dry chocolate and equipment.
- Chocolate Too Thin or Transparent: If your chocolate coating is too thin, it might be overheated or thinned too much with oil.
- Solution: Let the chocolate cool slightly and stir frequently. If it’s still too thin, you can add a few more melting wafers or chopped chocolate and gently melt them in to thicken the mixture.
- Chocolate Too Thick: If the chocolate is too viscous, it will be hard to get a smooth, even coating.
- Solution: This usually means it’s not quite warm enough or needs a bit of thinning. Return it to the microwave for 10-15 second intervals, stirring well after each. Alternatively, add a tiny amount of vegetable shortening or coconut oil (1/4 to 1/2 teaspoon at a time) and stir until desired consistency.
- Toppings Not Sticking: This happens when the chocolate has started to set before you add the toppings.
- Solution: Work faster! Dip one pretzel, top it immediately, and then move to the next. If you’re working with many pretzels, consider having a helper or melting smaller batches of chocolate.
- Pretzel Rods Breaking During Dipping:
- Solution: Ensure you are using fresh, sturdy pretzel rods. Be gentle when dipping and tapping. If the chocolate is too thick, it might create too much resistance and cause breakage; refer to the “chocolate too thick” solution.
Storage and Freezing Guidelines
Proper storage is key to keeping your homemade chocolate covered pretzel rods fresh and delicious for as long as possible.
Storage:
Once the chocolate has fully set and hardened, store these delightful pretzel rods in an airtight container at room temperature. Place layers of parchment paper between the pretzel rods to prevent them from sticking together. Stored correctly, they will maintain their freshness and crispness for up to 2 weeks. If your home tends to be warm, or during hot weather, storing them in the refrigerator can help prevent the chocolate from melting, becoming too soft, or developing a “bloom” (a whitish film caused by temperature fluctuations), although refrigeration might slightly alter the pretzel’s crispness.
Freezing:
Yes, you can absolutely freeze chocolate-covered pretzel rods! This is a fantastic option for making them far in advance or for saving leftovers. They can be frozen for up to 3 months without compromising much on quality. To freeze them:
- Ensure the chocolate coating is completely firm and set.
- Arrange the pretzel rods in a single layer on a cookie sheet lined with parchment paper.
- Freeze until they are solid, typically about 1-2 hours.
- Once frozen solid, transfer the pretzel rods to a freezer bag or an airtight freezer-safe container. To prevent them from sticking together, separate layers with additional sheets of parchment paper.
- When you’re ready to enjoy them, simply thaw the frozen pretzel rods at room temperature for approximately 15-20 minutes. There’s no need to reheat them; they’re best enjoyed once thawed but still cool.
Recipe FAQs
While you can use regular chocolate chips for this easy recipe, be aware that melting wafers (also known as candy melts or compound chocolate) are specifically formulated to melt smoothly and set well for coating, providing a glossy finish without requiring tempering. If you opt for chocolate chips, you might find the consistency a bit thick. To help them melt more evenly and achieve a smoother, thinner coating, I recommend adding a small amount (about 1 teaspoon per cup) of vegetable shortening, cocoa butter, or coconut oil to the chocolate chips before melting. Stir it in thoroughly.
Absolutely! Chocolate covered pretzel rods are a fantastic make-ahead treat, making them perfect for parties, holiday gifts, or any special occasion. When stored properly in an airtight container at room temperature (or refrigerated if your home is warm), they will stay fresh and delicious for 1-2 weeks. This allows you to prepare them well in advance, reducing stress on the day of your event. For more make-ahead sweet treats, you might also love this Double Layer Fudge recipe!
Yes! To make these treats gluten-free, simply use certified gluten-free pretzel rods, which are widely available in most grocery stores. For a dairy-free version, choose dairy-free chocolate melting wafers or high-quality dark chocolate chips that are dairy-free (check the ingredient labels carefully). Ensure any toppings you choose are also suitable for your dietary needs.
This phenomenon is called “chocolate bloom,” and it’s harmless, though it doesn’t look as appealing. It usually occurs when chocolate is exposed to significant temperature fluctuations (e.g., moving from a warm room to a cold refrigerator quickly), causing the cocoa butter or sugar to separate and rise to the surface. To avoid this, try to let your pretzel rods set at a consistent room temperature, or if refrigerating, place them in the coldest part of the fridge for a shorter period.
Using high-quality melting wafers often naturally yields a shiny finish. If you’re using chocolate chips or bars, achieving a professional shine usually requires tempering the chocolate. Tempering involves carefully melting and cooling the chocolate to specific temperatures to stabilize its crystal structure. While a bit more advanced, it ensures a glossy, snap-worthy finish. For a simpler approach, ensuring your chocolate isn’t overheated during melting and sets smoothly (without being disturbed) can help maintain some shine.
More Homemade Candy Recipes You’ll Love
Desserts
Chocolate Dipped Marshmallows {2 Ingredients}
Valentine’s Day
Easy Valentine’s Chocolate Dipped Strawberries
Desserts
3-Ingredient Golden Oreo Truffles (No Bake)
Desserts
Easy Chocolate Covered Pretzel Rods Recipe
Did you try this recipe?
Leave a ⭐ review below and tag @practicallyhomemade on Pinterest!
Easy Chocolate Covered Pretzel Rods Recipe
Rate Recipe
Print Recipe
Ingredients
- 24 pretzel rods
- 16-20 ounces chocolate melting wafers
Toppings (Optional)
- ¾ cup toffee bits, mini M&Ms, mini chocolate chips, sprinkles, crushed nuts, or mini marshmallows
Instructions
-
Line a baking sheet with parchment paper or wax paper. Begin by adding the chocolate melting wafers to a tall, narrow microwave-safe bowl or jar. Microwave in 30-second intervals, stirring vigorously between each interval, until the chocolate is completely melted and smooth. The tall container will make dipping easier.
-
Hold a pretzel rod by one end and dip it into the melted chocolate, leaving an inch or two uncovered for a handle. Gently tap the rod against the side of the container to shake off any excess chocolate, ensuring a smooth coating. Immediately transfer the dipped pretzel rod to the prepared baking sheet.
-
While the chocolate is still wet, quickly sprinkle your desired toppings over the coated section of the pretzel rod. Repeat the dipping and topping process with the remaining pretzel rods.
-
Once all pretzels are coated and topped, allow the chocolate to fully harden. This can be done at room temperature (about 30-60 minutes) or by refrigerating for 15-20 minutes for a faster set. Once hardened, store in an airtight container.
Notes
You can also freeze these treats for up to 3 months. Ensure they are completely solid before transferring to a freezer-safe bag or container, separating layers with parchment paper. Thaw at room temperature for 15-20 minutes before serving.
Nutrition
Calories: 160kcal,
Carbohydrates: 20g,
Protein: 0.2g,
Fat: 9g,
Saturated Fat: 6g,
Polyunsaturated Fat: 0.1g,
Monounsaturated Fat: 1g,
Trans Fat: 0.1g,
Cholesterol: 9mg,
Sodium: 26mg,
Potassium: 69mg,
Fiber: 0.04g,
Sugar: 18g,
Vitamin A: 97IU,
Vitamin C: 0.04mg,
Calcium: 19mg,
Iron: 0.1mg
Nutrition information is automatically calculated, so should only be used as an approximation.
Like this? Leave a comment below!