
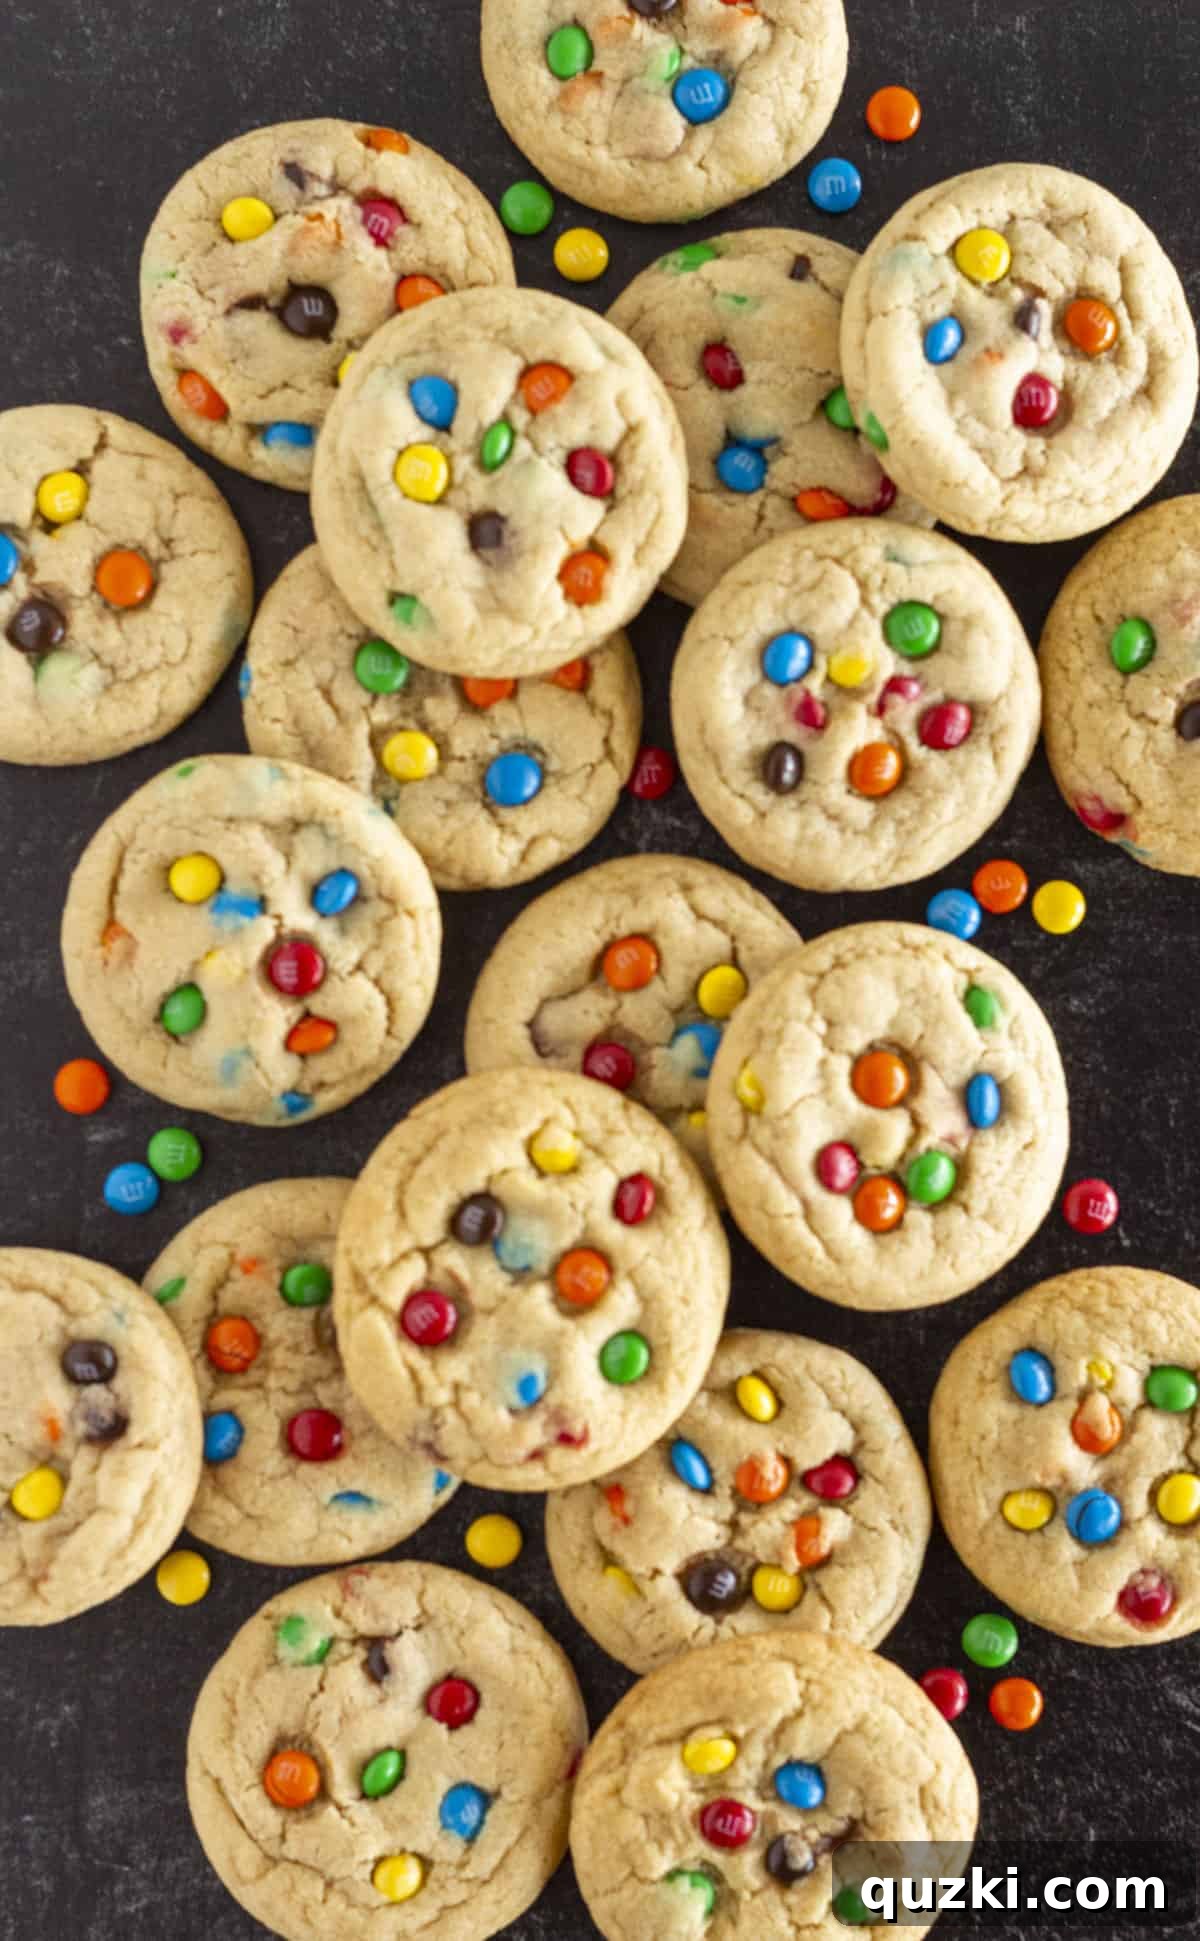
There’s a special magic in the comforting aroma of freshly baked cookies filling your home. It’s more than just a scent; it’s an invitation to warmth, joy, and shared moments. These incredible M&M cookies, bursting with vibrant colors and rich chocolatey goodness, are the quintessential treat to bring smiles to your family’s faces. With their irresistibly soft, chewy centers, delicately crispy edges, and delightful bursts of M&M chocolate in every bite, they embody homemade love and comfort.
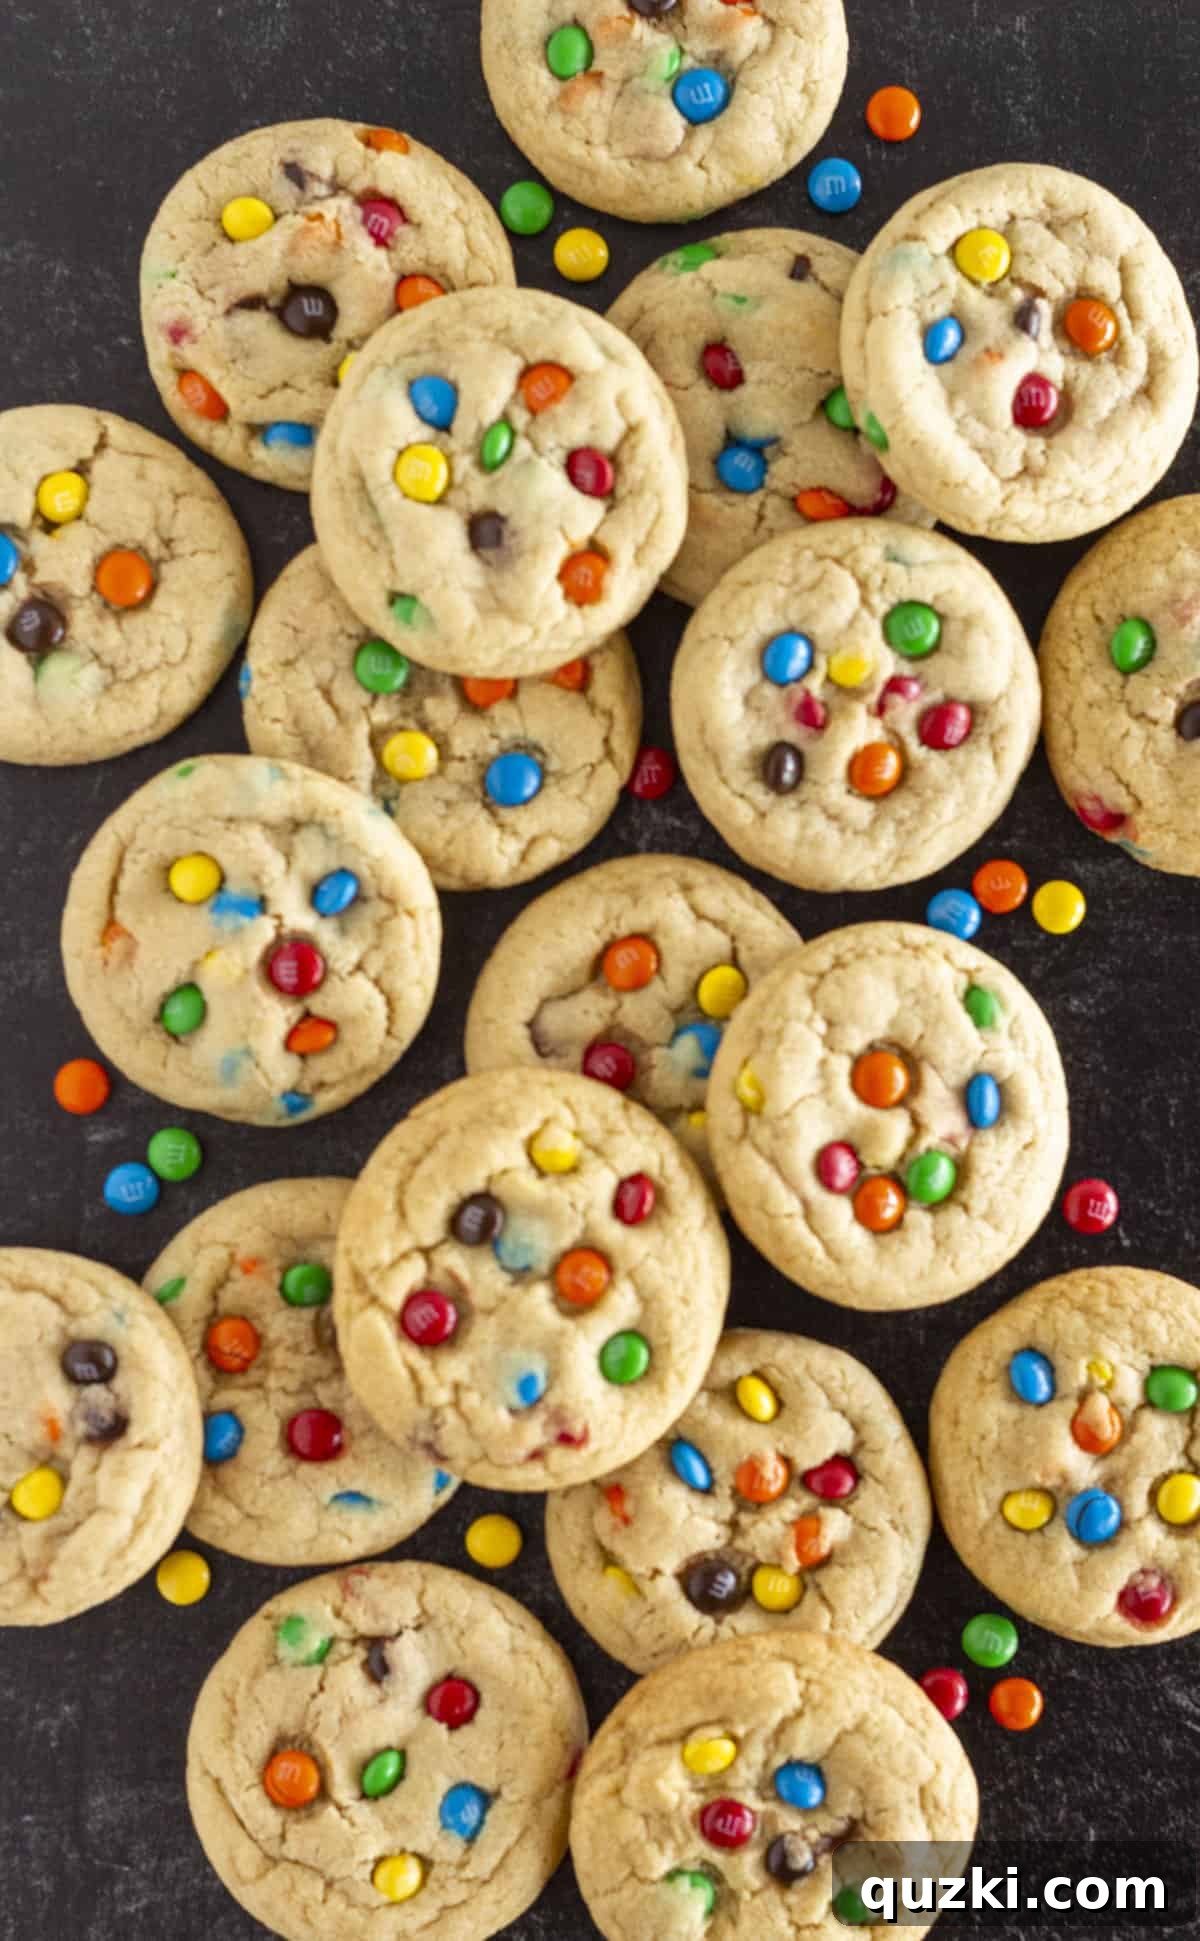
Table of Contents
- The Secret to Chewy Cookies: Melted Butter
- Essential Ingredients for Your M&M Cookies
- Creative Variations on this M&M Cookie Recipe
- Step-by-Step Guide: How to Make M&M Cookies
- Expert Baking Tips for Perfect M&M Cookies
- Storage and Freezing for Freshness
- M&M Cookie Recipe FAQs
- More Mini Cookie Delights
- Best M&M Cookies (Mini and Chewy) Recipe
This recipe distinguishes itself by harnessing the power of melted butter. Far from being a mere shortcut, using melted butter fundamentally transforms the cookie dough, making it incredibly easy to bring together – no electric mixer required! This method also imparts a profoundly rich, buttery depth of flavor and, crucially, contributes to that coveted, perfectly chewy texture. The addition of vibrant M&M’s not only adds a burst of milk chocolate but also infuses each cookie with a festive, playful spirit, much like the beloved Chocolate M&M Sheet Cake Cookies. Whether you’re baking for a special occasion or simply to brighten an ordinary day, these homemade M&M cookies are sure to be a hit.
There’s immense satisfaction in pulling a tray of these colorful treats from the oven and watching the excitement build as friends and family gather. They’re straightforward enough for a casual weeknight dessert, yet special enough to elevate any celebration. Bake a batch today and savor the delight as loved ones reach for not just a second, but perhaps even a third! These M&M cookies aren’t just a dessert; they’re a symbol of connection, a simple pleasure that brings everyone together.
The Secret to Chewy Cookies: Melted Butter
Many cookie recipes call for softened butter, which requires foresight and patience. Our recipe cleverly uses melted butter, making these delicious M&M cookies accessible whenever the craving strikes. Melted butter creates a denser dough because it incorporates less air compared to creamed butter. This leads to a cookie that spreads slightly more, resulting in those desirable slightly crispy edges and an ultimately chewier, more dense interior. It also simplifies the process, eliminating the need for special equipment and making it perfect for novice bakers or those in a hurry. The rich, nutty flavor that develops from slightly melted butter also enhances the overall taste, setting these cookies apart from others.
Essential Ingredients for Your M&M Cookies
Crafting the perfect mini M&M cookies relies on a few key ingredients, each playing a vital role in achieving that incredible taste and texture. Understanding what each component contributes will help you appreciate the magic behind every bite.
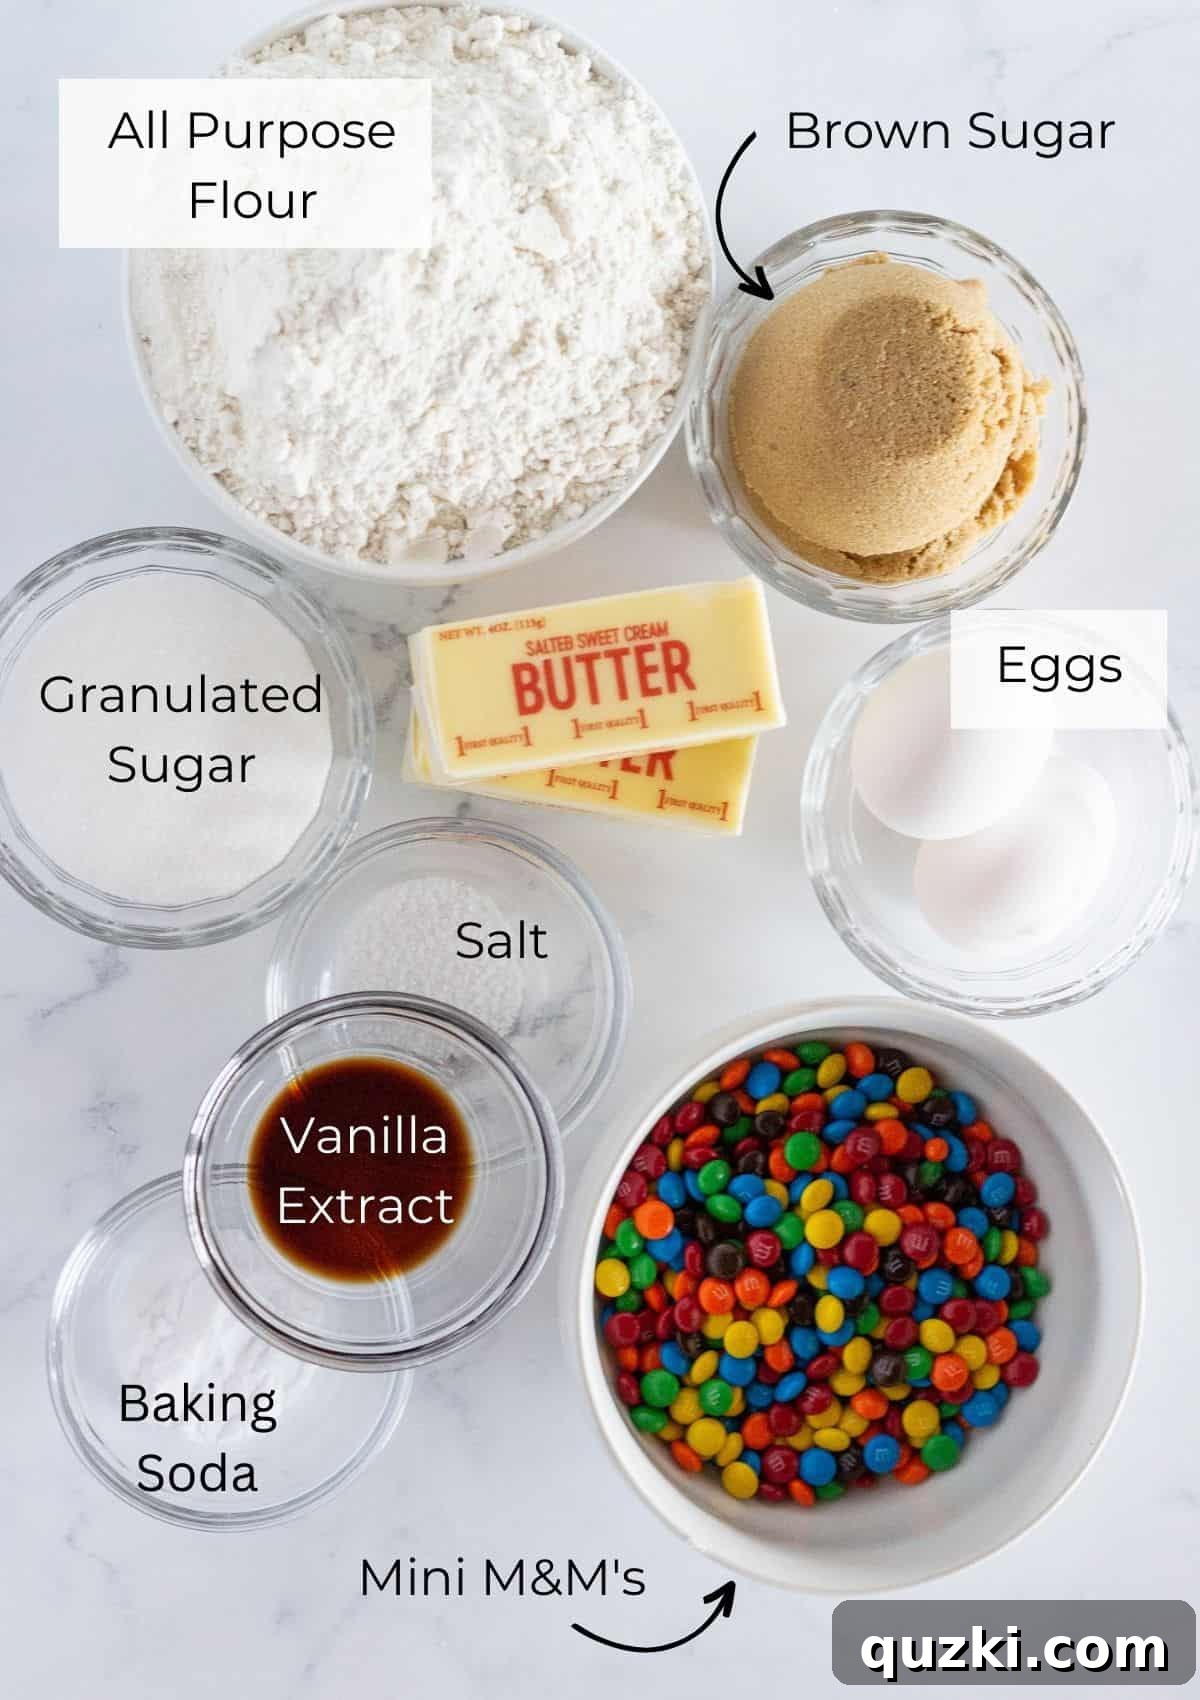
- Butter: As highlighted, using melted butter is the cornerstone of this recipe. It streamlines the mixing process, allowing you to whip up cookies without waiting for butter to soften. More importantly, it yields an undeniably rich, buttery flavor and contributes significantly to the chewy texture we’re aiming for. This same game-changing technique is often utilized in the best chocolate chip cookie recipes for superior results.
- Brown Sugar: The higher ratio of brown sugar to white sugar in this cookie dough is no accident. Brown sugar contains molasses, which adds moisture and a subtle caramel note, essential for soft and exceptionally chewy cookies. It keeps the cookies from drying out and helps create that wonderful, melt-in-your-mouth texture.
- Granulated Sugar: While brown sugar ensures chewiness, granulated sugar plays a role in the cookie’s spread and contributes to those slightly crispy edges that perfectly complement the soft interior. The combination of both sugars creates a balanced sweetness and ideal texture.
- Eggs: Eggs are crucial binders, helping to hold the dough together. They also add richness and moisture, contributing to the overall structure and tenderness of the final cookie. Using room temperature eggs can sometimes lead to better emulsification with the melted butter and sugars.
- Vanilla Extract: A simple yet powerful flavor enhancer. High-quality vanilla extract elevates all the other ingredients, adding a warm, aromatic depth that makes these M&M cookies truly irresistible. Don’t skimp on the vanilla!
- All-Purpose Flour: The structural backbone of our cookies. Properly measured flour (spooned and leveled, not scooped directly from the bag) is key to preventing dry, crumbly cookies.
- Baking Soda: This leavening agent reacts with the acidic brown sugar to help the cookies rise slightly and achieve a tender crumb, while also promoting that desirable browning on the edges.
- Salt: A pinch of salt is vital for balancing the sweetness and bringing out the complex flavors of the chocolate and butter. It’s an unsung hero in baking.
- Mini M&M’s: The star of the show! Mini M&M’s distribute more evenly throughout the dough, ensuring a burst of colorful chocolate in nearly every bite. Their smaller size also contributes to the delicate texture of these cookies without overwhelming them.
For precise measurements and quantities, please refer to the detailed recipe card below.
Creative Variations on this M&M Cookie Recipe
While these mini M&M cookies are perfect as they are, the beauty of this recipe lies in its versatility. Feel free to unleash your inner baker and experiment with various add-ins to create your unique cookie masterpiece. Here are some delightful ideas to get you started:
- Chocolate Chips: Don’t limit yourself to just M&M’s! This recipe is incredibly adaptable to various types of chocolate chips. My personal favorites are mini chocolate chips for an even distribution and classic milk chocolate chips for a melty, creamy sweetness. You could also try semi-sweet, dark chocolate, white chocolate, or even a mix for a more complex flavor profile.
- Nuts: For those who love a bit of crunch, adding chopped pecans or walnuts introduces a delightful textural contrast and a rich, nutty flavor. Toasting the nuts lightly before adding them can enhance their aroma and taste even further.
- Regular Sized M&M’s: If you prefer bigger, bolder chunks of chocolate and a more pronounced chew from the candy coating, swap the mini M&M’s for regular-sized M&M’s. This is a fantastic option if you want to highlight the M&M’s even more.
- Seasonal M&M’s: Make these cookies festive for any holiday! Use red and green M&M’s for Christmas, pastel M&M’s for Easter, or orange and black M&M’s for Halloween. This small change instantly transforms them into a themed treat.
- Other Candy Additions: Get adventurous! Crushed peppermint candies add a refreshing minty kick, especially during the winter holidays. Chopped candy bars (think Snickers, Butterfingers, or even Twix) can turn these into a decadent, gourmet experience. Sprinkles, particularly jimmie-style, can add an extra layer of color and fun without significantly altering the flavor.
- Extracts: Beyond vanilla, consider adding a touch of almond extract for a subtle, sophisticated twist, or a hint of peppermint extract for a festive winter treat. A dash of coffee extract can also deepen the chocolate flavor.
- Pretzel Pieces: For a delightful sweet and salty combination, fold in some crushed pretzel pieces. The salty crunch perfectly balances the sweetness of the cookie and chocolate.
Step-by-Step Guide: How to Make M&M Cookies
Creating these perfect chewy M&M cookies is a straightforward and enjoyable process. Follow these detailed steps to ensure a batch of homemade goodness every time.
Preparation: Before you begin, preheat your oven to 350°F (175°C). Line a baking sheet with parchment paper or a silicone mat. This prevents sticking and makes cleanup a breeze.
1. Combine Wet Ingredients: In a medium-sized bowl, melt the butter gently. You want it just melted, not hot or boiling, as excessively hot butter can cook the eggs prematurely. Once melted, add the brown sugar and granulated sugar. Mix with a sturdy wooden spoon or spatula until the sugars are thoroughly combined with the butter, forming a creamy mixture. There’s absolutely no need for an electric mixer here, which simplifies the process and reduces cleanup. This initial mixing by hand helps incorporate the ingredients without over-aerating the butter, a key to a chewy texture.
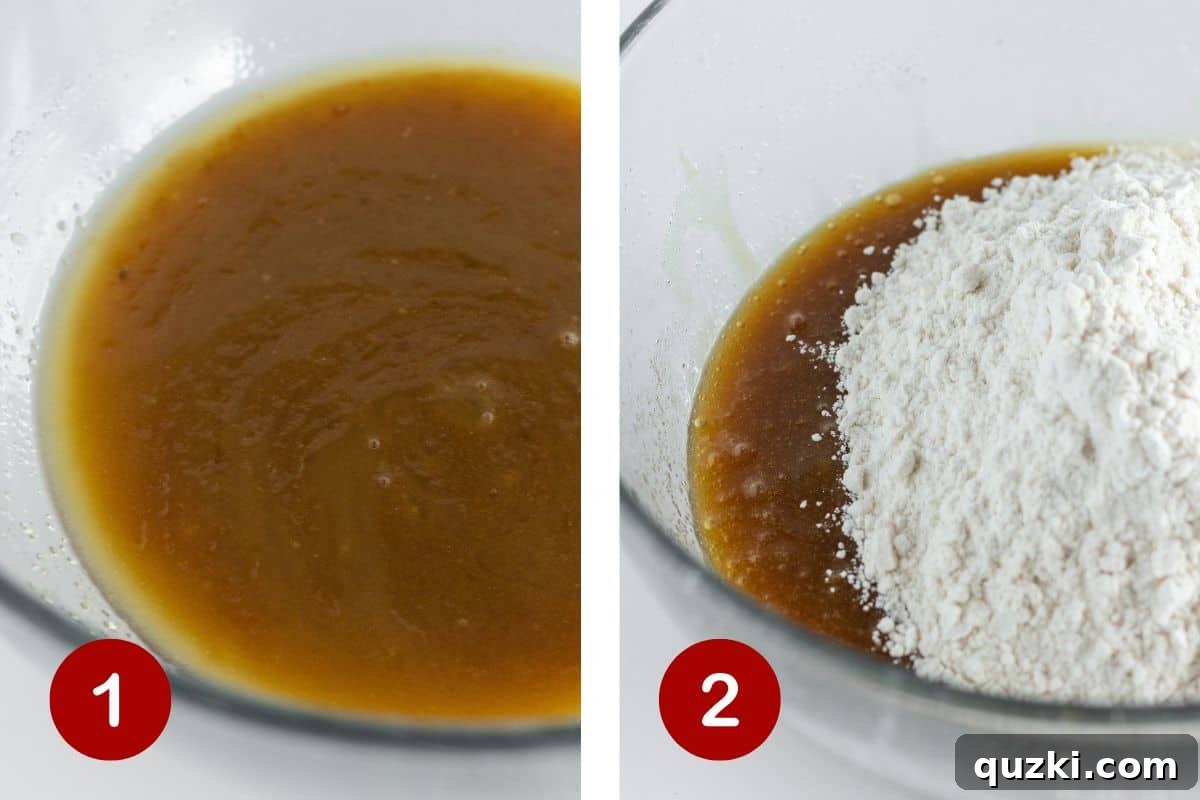
2. Add Eggs and Vanilla: Beat in the eggs one at a time, ensuring each is fully incorporated before adding the next. Stir in the vanilla extract until just combined. Be careful not to overmix at this stage; overmixing can introduce too much air, leading to a cakier cookie rather than a chewy one. A few gentle stirs are all that’s needed to integrate these liquid components.
3. Combine Dry Ingredients: In a separate bowl, whisk together the all-purpose flour, baking soda, and salt. Whisking ensures these dry ingredients are evenly distributed, which is crucial for uniform leavening and flavor in your cookies.
4. Integrate Dry into Wet: Add the entire mixture of dry ingredients to your wet ingredients all at once. Stir with your wooden spoon or spatula until everything is just incorporated. It’s important to mix until no streaks of flour remain, but stop as soon as it comes together. Overmixing flour develops gluten, which can make your cookies tough instead of tender and chewy.
5. Fold in M&M’s: Now it’s time for the star attraction! Add the mini M&M candies to the cookie dough. Gently fold them into the dough until they are evenly distributed throughout. You want a burst of M&M color and chocolate in every single cookie.
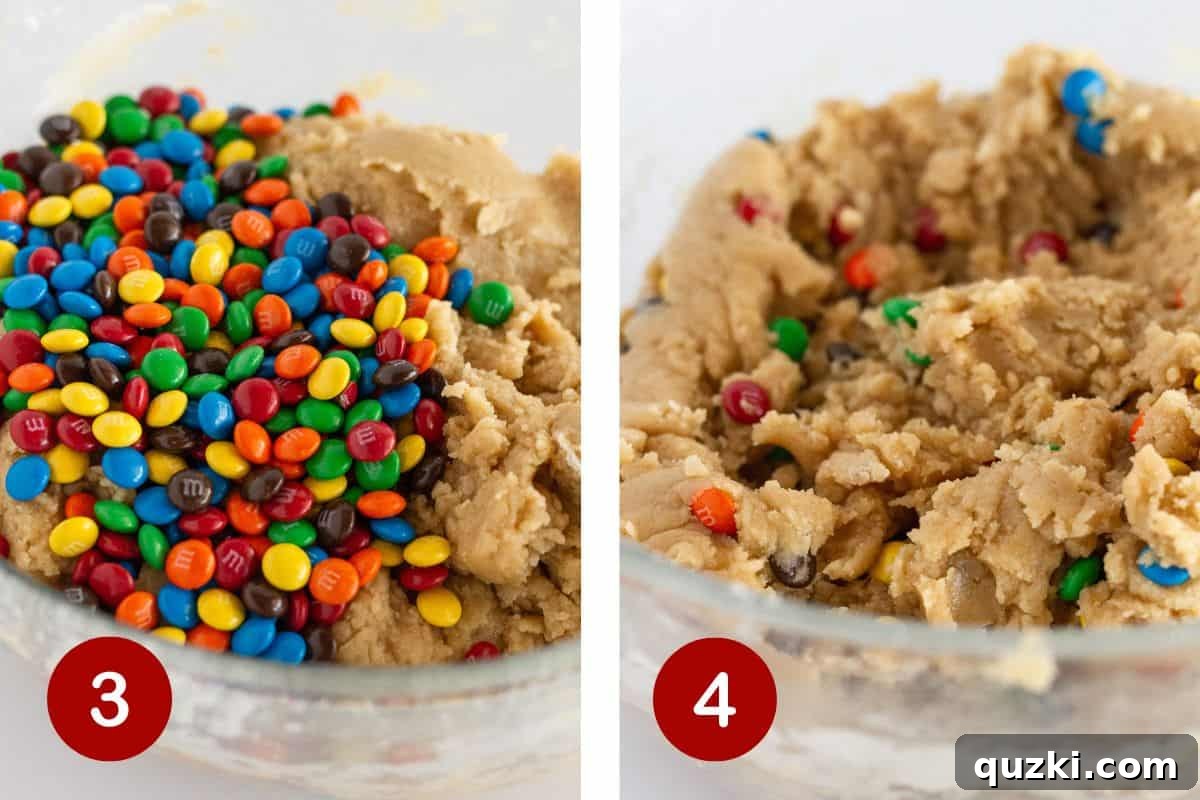
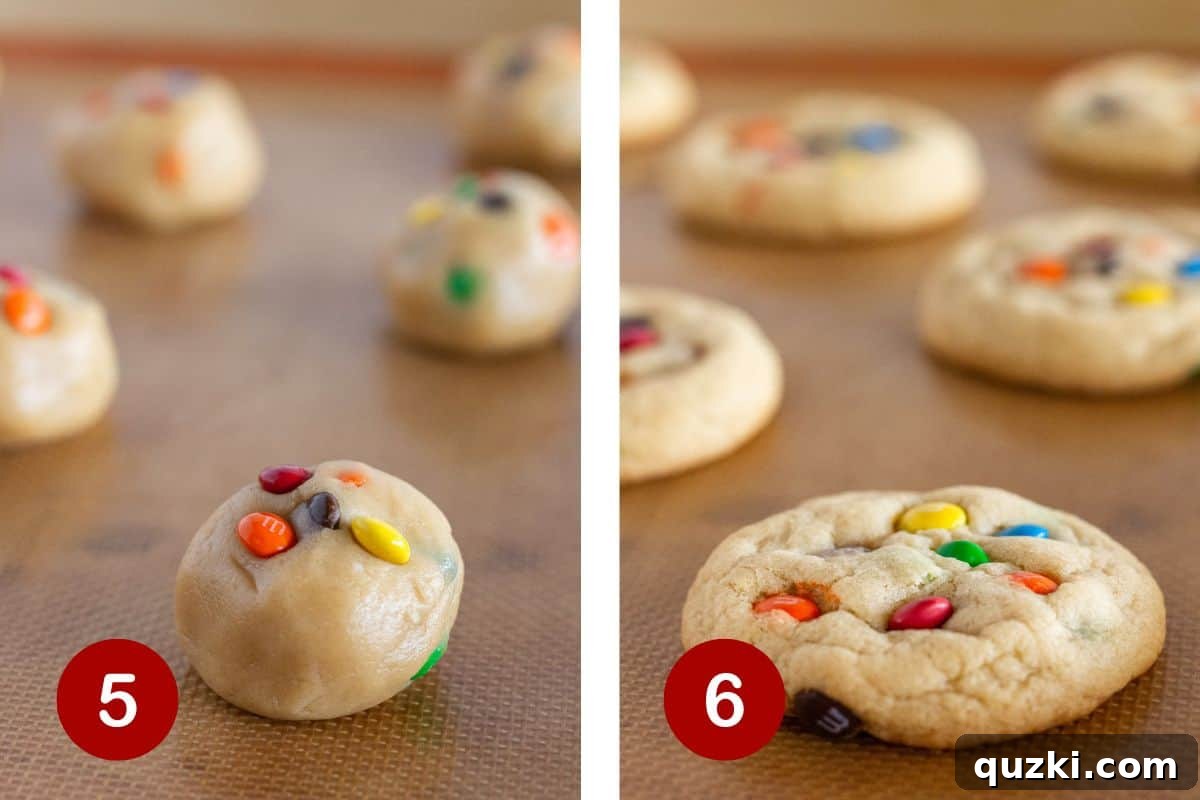
6. Scoop and Shape: Use a medium cookie scoop (approximately 2 tablespoons of dough) to form uniform cookie dough balls. Rolling the dough gently between your palms can help create smooth, round cookies. For a polished, bakery-style finish, press a few additional mini M&M’s onto the top of each cookie dough ball before baking. This ensures plenty of colorful candies are visible after baking.
7. Bake to Perfection: Place the scooped cookie dough balls onto your prepared baking sheet, leaving adequate space between them for spreading. Bake in the preheated 350°F (175°C) oven for 9-11 minutes. You’re looking for cookies that are just starting to turn golden brown around the edges but still appear slightly puffy and soft in the center. The key to a soft and chewy cookie is to avoid overbaking. They will continue to set as they cool.
8. Cooling: Once baked, remove the baking sheet from the oven and place it on a wire rack. Allow the cookies to cool on the hot pan for at least 5-10 minutes. This crucial step allows them to firm up without breaking and ensures they retain their soft centers. After this initial cooling period, transfer them directly to the wire rack to cool completely. This prevents the bottoms from becoming soggy.
Expert Baking Tips for Perfect M&M Cookies
Achieving bakery-quality cookies at home is easier than you think with a few simple tricks. These tips will help ensure your M&M cookies turn out perfectly soft, chewy, and visually appealing every single time.
- Use a Cookie Scoop for Uniformity: Investing in a good quality cookie scoop is a game-changer. It helps to keep all of your cookies the same size and shape, which is essential for even baking. When cookies are uniform, they bake consistently, resulting in a perfect texture from edge to edge and ensuring no cookie is under or overcooked. It also helps them stay beautifully round.
- Prepare Your Baking Sheet: Always use a silicone mat or parchment paper to line your cookie sheets. This simple step prevents the cookies from sticking, promotes even browning on the bottom, and makes for incredibly easy cleanup. It also helps in maintaining the cookie’s shape during baking and cooling.
- Reserve M&M’s for Garnish: For that “magazine-cover” look, set aside a small handful of mini M&M candies. Immediately after pulling the cookies from the oven, gently press a few of these reserved candies onto the tops of the warm cookies. The warmth of the cookie will slightly melt the chocolate, adhering them perfectly and creating a vibrant, polished finish that makes them even more enticing.
- Do Not Overbake: This is arguably the most critical tip for achieving a soft and chewy cookie. Cookies continue to bake slightly even after they’re removed from the oven due to residual heat. You want to take them out when the edges are just set and lightly golden, but the centers still look slightly soft or underbaked. They will firm up as they cool, leaving you with that desirable chewy texture rather than a hard, brittle cookie.
- Cool on the Baking Sheet: Allow the baked cookies to cool on the prepared baking sheet for 5-10 minutes before transferring them to a wire rack. This initial cooling period allows the cookies to set and firm up enough to be moved without falling apart. It also helps lock in moisture, contributing to their chewiness. Transferring them too soon can cause them to break or lose their shape.
- Room Temperature Ingredients (Except Butter): While our recipe calls for melted butter, ensuring your eggs are at room temperature can lead to a smoother, more emulsified dough. Room temperature eggs mix more easily with the other ingredients, creating a more uniform batter and a better cookie texture.
Storage and Freezing for Freshness
Once you’ve baked your delicious batch of mini M&M cookies, you’ll want to ensure they stay fresh and delightful for as long as possible. Here’s how to properly store and freeze them:
Store Baked Cookies:
To maintain their optimal soft and chewy texture, store baked cookies in an airtight container at room temperature. They will remain fresh and delicious for up to 4 days. For an extra touch of freshness, you can place a slice of bread in the container with the cookies; the cookies will absorb moisture from the bread, keeping them softer for longer. Ensure the container is sealed tightly to prevent air from drying them out.
Freeze Baked Cookies:
These M&M cookies freeze exceptionally well! Once completely cooled, place the cookies in a single layer on a baking sheet and freeze for about 30 minutes until solid. Then, transfer the frozen cookies to a freezer-safe airtight container or a heavy-duty freezer bag. Layer them with parchment paper in between to prevent sticking. Baked cookies can be frozen for 2-3 months. When ready to enjoy, simply thaw them at room temperature or warm them slightly in the microwave for that fresh-out-of-the-oven experience.
Freeze Cookie Dough:
Preparing cookie dough in advance is a fantastic time-saver. To freeze the dough, scoop the cookie dough balls as directed in the recipe. Place them on a parchment-lined baking sheet and freeze until firm, about 1-2 hours. Once solid, transfer the frozen cookie dough balls to a freezer-safe bag or airtight container. They can be frozen for up to a month. When you’re ready to bake, you can bake them directly from frozen, adding an extra 2-4 minutes to the baking time. This way, you can have warm, fresh M&M cookies whenever a craving strikes without the full prep work!
M&M Cookie Recipe FAQs
Here are answers to some common questions you might have about making these delightful M&M cookies, helping you bake with confidence.
Absolutely! That’s one of the wonderful things about this cookie dough—it’s incredibly versatile with add-ins. Using regular-sized M&M’s will give you bigger bursts of chocolate and a more prominent chew from the candy coating. The baking time and method will remain the same, but the overall appearance and texture will be slightly different, in a delicious way!
No, you absolutely do not need an electric mixer for this recipe. In fact, we recommend against it! This recipe is specifically designed for ease, utilizing melted butter and simple hand-mixing. Overmixing the dough, especially after adding flour, can develop too much gluten, which can result in tough, flat cookies instead of the soft, chewy ones we’re aiming for. A wooden spoon or sturdy spatula works perfectly.
While I haven’t specifically tested this particular M&M cookie recipe with pudding mix, adding dry instant pudding mix is a popular way to enhance moisture and flavor in many cookie recipes. If you’re interested in a pudding-enhanced cookie, I highly recommend trying this super soft chocolate chip cookie recipe, which already incorporates a pudding mix for an extra tender crumb.
Flat cookies can often be attributed to a few factors: butter that was too warm (almost boiling) when mixed with the sugars, overmixing the dough (especially after adding flour), or using too much melted butter. Ensure your butter is just melted and cool to the touch. Also, make sure your baking soda is fresh and active. Chilling the dough for at least 30 minutes can also help prevent spreading.
While this specific recipe uses all-purpose flour, you can often substitute it with a 1:1 gluten-free all-purpose flour blend (one that contains xanthan gum). Results may vary slightly in texture, but many bakers have success with this substitution. Ensure all other ingredients, including M&M’s, are certified gluten-free if that is a strict dietary requirement.

More Mini Cookie Delights
If you adore the charm and delightful chewiness of mini cookies, you’re in for a treat! These smaller versions are perfect for snacking, sharing, or adding to a dessert platter. Explore more of our favorite mini cookie recipes below:
Discover More Irresistible Mini Treats
Desserts
Banana Pudding Cookie Cups Recipe
Desserts
Mini Chocolate Chip Cookies
Cookies
Snickers Cookie Cups Recipe
Cookies
Lemon Bar Cookie Cups Recipe
Did you try this recipe?
Leave a ⭐ review below and tag @practicallyhomemade on Pinterest!

Best M&M Cookies (Mini and Chewy)
June Albertson-Dick
10
9-11
~20
24 cookies
Print Recipe
Ingredients
- 1 cup unsalted butter, {melted and slightly cooled}
- 1 cup packed light brown sugar
- ½ cup granulated sugar
- 2 large eggs, {room temperature}
- 1 ½ teaspoons pure vanilla extract
- 3 cups all-purpose flour
- 1 teaspoon baking soda
- ½ teaspoon salt
- 1 ¼ cup mini M&M’s, {plus extra for topping}
Instructions
-
Preheat your oven to 350°F (175°C). Line a large baking sheet with parchment paper or a silicone baking mat.
-
Melt the butter in a microwave-safe bowl for about 30-40 seconds, or until just melted. Swirl to ensure any small pieces melt completely. Allow it to cool slightly; you don’t want it hot as it can curdle the eggs.
-
In a large bowl, combine the slightly cooled melted butter with both brown sugar and granulated sugar. Mix vigorously with a wooden spoon or spatula until creamy and well combined, about 1-2 minutes. Add the eggs one at a time, mixing until just incorporated after each addition. Stir in the vanilla extract. Be careful not to overmix the wet ingredients to avoid a tough cookie.
-
In a separate medium bowl, whisk together the all-purpose flour, baking soda, and salt. Add the dry ingredients to the wet ingredients all at once. Mix gently with the wooden spoon until everything is just incorporated and no dry streaks of flour remain. Fold in 1 ¼ cup of the mini M&M candies until they are evenly distributed throughout the dough.
-
Scoop the dough using a medium cookie scoop (about 2 tablespoons per cookie). Roll each scoop into a smooth ball in your hands. Place the dough balls onto your prepared baking sheet, ensuring there is enough space between each cookie for spreading. For a bakery-style finish, gently press a few extra mini M&M’s onto the top of each cookie dough ball before baking.
-
Bake for 9-11 minutes. You want to remove them from the oven when the edges are set and just starting to turn golden brown, but the centers still look slightly soft and puffy. The key to achieving a super soft and chewy cookie is to avoid overbaking. Immediately upon removing them from the oven, if desired, press a few more mini M&M’s onto the top of each cookie for a vibrant look. Allow the baked cookies to cool completely on the baking sheet for at least 10-15 minutes. This crucial step allows them to set up perfectly and retains their chewiness.
-
Store cooled cookies in an airtight container at room temperature for up to 4 days, or in the refrigerator for extended freshness. For longer storage, freeze baked cookies for up to 3 months.
Video
Notes
- For consistent size and even baking, always use a cookie scoop. This also helps in keeping your cookies perfectly round.
- To achieve a beautiful, professional look, reserve a handful of M&M candies. Press these onto the top of the cookies immediately after they come out of the oven. The residual heat will slightly melt them, ensuring they stick.
- Feel free to get creative with your add-ins! The base cookie dough is wonderfully versatile:
- Chocolate Chips: Swap or add any kind of chocolate chips – mini, milk, semi-sweet, or white chocolate chips all work wonderfully.
- Nuts: For extra crunch and flavor, consider adding chopped pecans or walnuts to the dough.
- Regular Sized M&M’s: If you prefer larger chocolate pieces, regular-sized M&M’s are a great alternative.
- Other Ideas: Elevate your cookies with crushed peppermint candies for a festive touch, chopped candy bars for decadence, or sprinkles for added fun and color.
Nutrition
Calories: 236kcal,
Carbohydrates: 33g,
Protein: 3g,
Fat: 11g,
Saturated Fat: 7g,
Polyunsaturated Fat: 0.4g,
Monounsaturated Fat: 2g,
Trans Fat: 0.3g,
Cholesterol: 36mg,
Sodium: 170mg,
Potassium: 37mg,
Fiber: 1g,
Sugar: 20g,
Vitamin A: 280IU,
Vitamin C: 0.1mg,
Calcium: 27mg,
Iron: 1mg
Nutrition information is automatically calculated and should be used as an approximation. It can vary based on specific ingredients and brands used.
Enjoyed this recipe? Share your thoughts below!Your feedback helps us and other home bakers.