
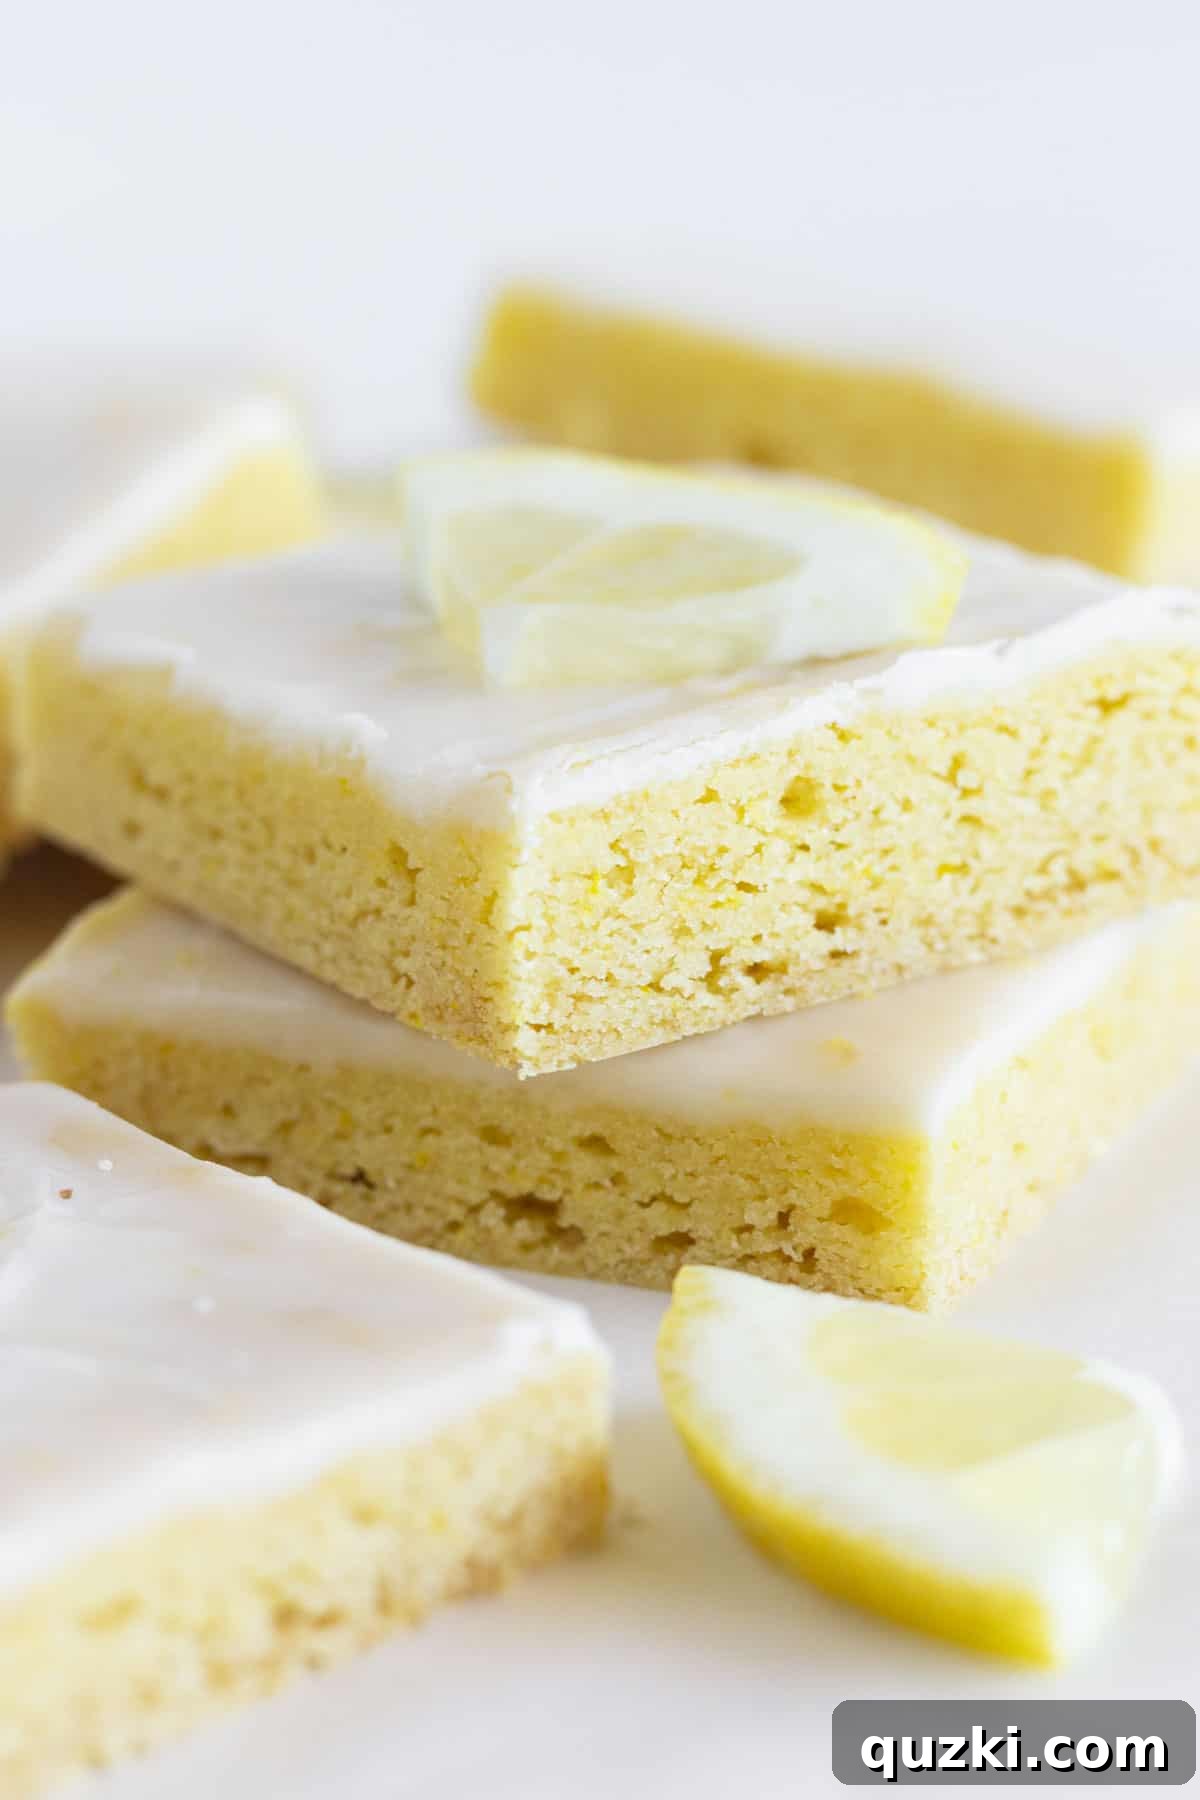
There’s something inherently delightful about a classic cookie, but what if we told you there’s a way to elevate that experience into an even more irresistible treat? Enter the **Easy Lemon Cookie Bars**, a sunshine-filled dessert that combines the convenience of a cake mix with the vibrant, zesty flavor of fresh lemons. These bars are incredibly simple to make, requiring just a handful of common ingredients, and are topped with a luscious lemon glaze that perfectly balances their sweet and tangy profile. Get ready to bake a batch of these incredibly soft, wonderfully chewy, and refreshingly delicious lemon bars that are sure to become a new favorite in your recipe collection!
Table of Contents
- Introduction to Lemon Cookie Bars
- Why These Are the BEST Lemon Cookie Bars?
- Essential Recipe Ingredients
- How to Make Lemon Cake Bars: A Step-by-Step Guide
- Creative Variations for Your Lemon Bars
- Expert Tips for Perfect Lemon Cookie Bars
- How to Store Your Delicious Lemon Treats
- Recipe FAQs
- More Irresistible Lemon Desserts to Try
- Easy Lemon Cookie Bars Recipe
Introduction to Easy Lemon Cookie Bars
Lemon desserts hold a special place in the hearts of many, known for their bright, uplifting flavor that can instantly transport you to a sunny day. These Easy Lemon Cookie Bars are no exception, offering a convenient yet gourmet-tasting experience. By leveraging the simplicity of a boxed cake mix, we transform a humble ingredient into a soft, chewy, and utterly delightful bar cookie. Perfect for potlucks, parties, or simply a sweet afternoon pick-me-up, these bars boast a tender crumb, a rich lemony base, and a sweet-tart glaze that makes every bite an absolute pleasure. Forget complicated recipes; this is your go-to for a quick, impressive, and crowd-pleasing lemon treat.
Why These Are the BEST Lemon Cookie Bars?
You might be wondering what makes this particular lemon bar recipe stand out from the rest. The answer lies in a combination of simplicity, flavor, and texture that is hard to beat. Here are the compelling reasons you’ll find yourself returning to this recipe time and time again:
- Effortless with a Cake Mix Base: The secret to their incredible ease starts with a simple boxed lemon cake mix. This ingenious shortcut not only streamlines the baking process but also infuses the cookie bars with a wonderfully consistent and deep lemon flavor right from the start. Like many of our favorite cake mix dessert recipes, it means less measuring and mixing, making this the perfect quick dessert for any occasion, even when time is short.
- Irresistibly Soft and Delicious Texture: The end result is a truly remarkable lemon bar that is both super soft and amazingly delicious. The unique blend of ingredients creates a tender, chewy cookie base that’s moist and never dry. This delightful texture, combined with the bright lemon flavor, makes for an unforgettable treat that practically melts in your mouth.
- Perfectly Balanced Lemon Flavor: One might assume that using a lemon cake mix would result in an overpowering lemon flavor, but that’s simply not the case here. This recipe achieves a harmonious balance, delivering a robust lemon essence that is neither too subtle nor too intense. The thin, delicate lemon glaze perfectly complements the base, adding another layer of tangy sweetness without making the bars excessively tart. It’s truly a symphony of lemon.
- A Treat for Every Season: While lemon desserts are often associated with spring and summer, these easy lemon cookie bars defy seasonal limitations. Their refreshing flavor profile is just as welcome on a chilly autumn evening as it is on a hot summer afternoon. This means you can enjoy the bright, sunny taste of lemon all year long, whenever the craving strikes.
- Versatility for Any Occasion: Whether you’re hosting a casual gathering, preparing a special holiday dessert, or simply seeking a delightful snack, these lemon bars fit the bill. Their appealing appearance and crowd-pleasing flavor make them suitable for everything from picnics and brunches to elegant tea parties. They’re also an excellent candidate for gifting to friends and neighbors.
Essential Recipe Ingredients
Crafting these delectable lemon cookie bars requires only a few key ingredients, each playing a vital role in creating their signature taste and texture. Opting for quality ingredients, especially fresh lemons, will truly elevate your baking experience.
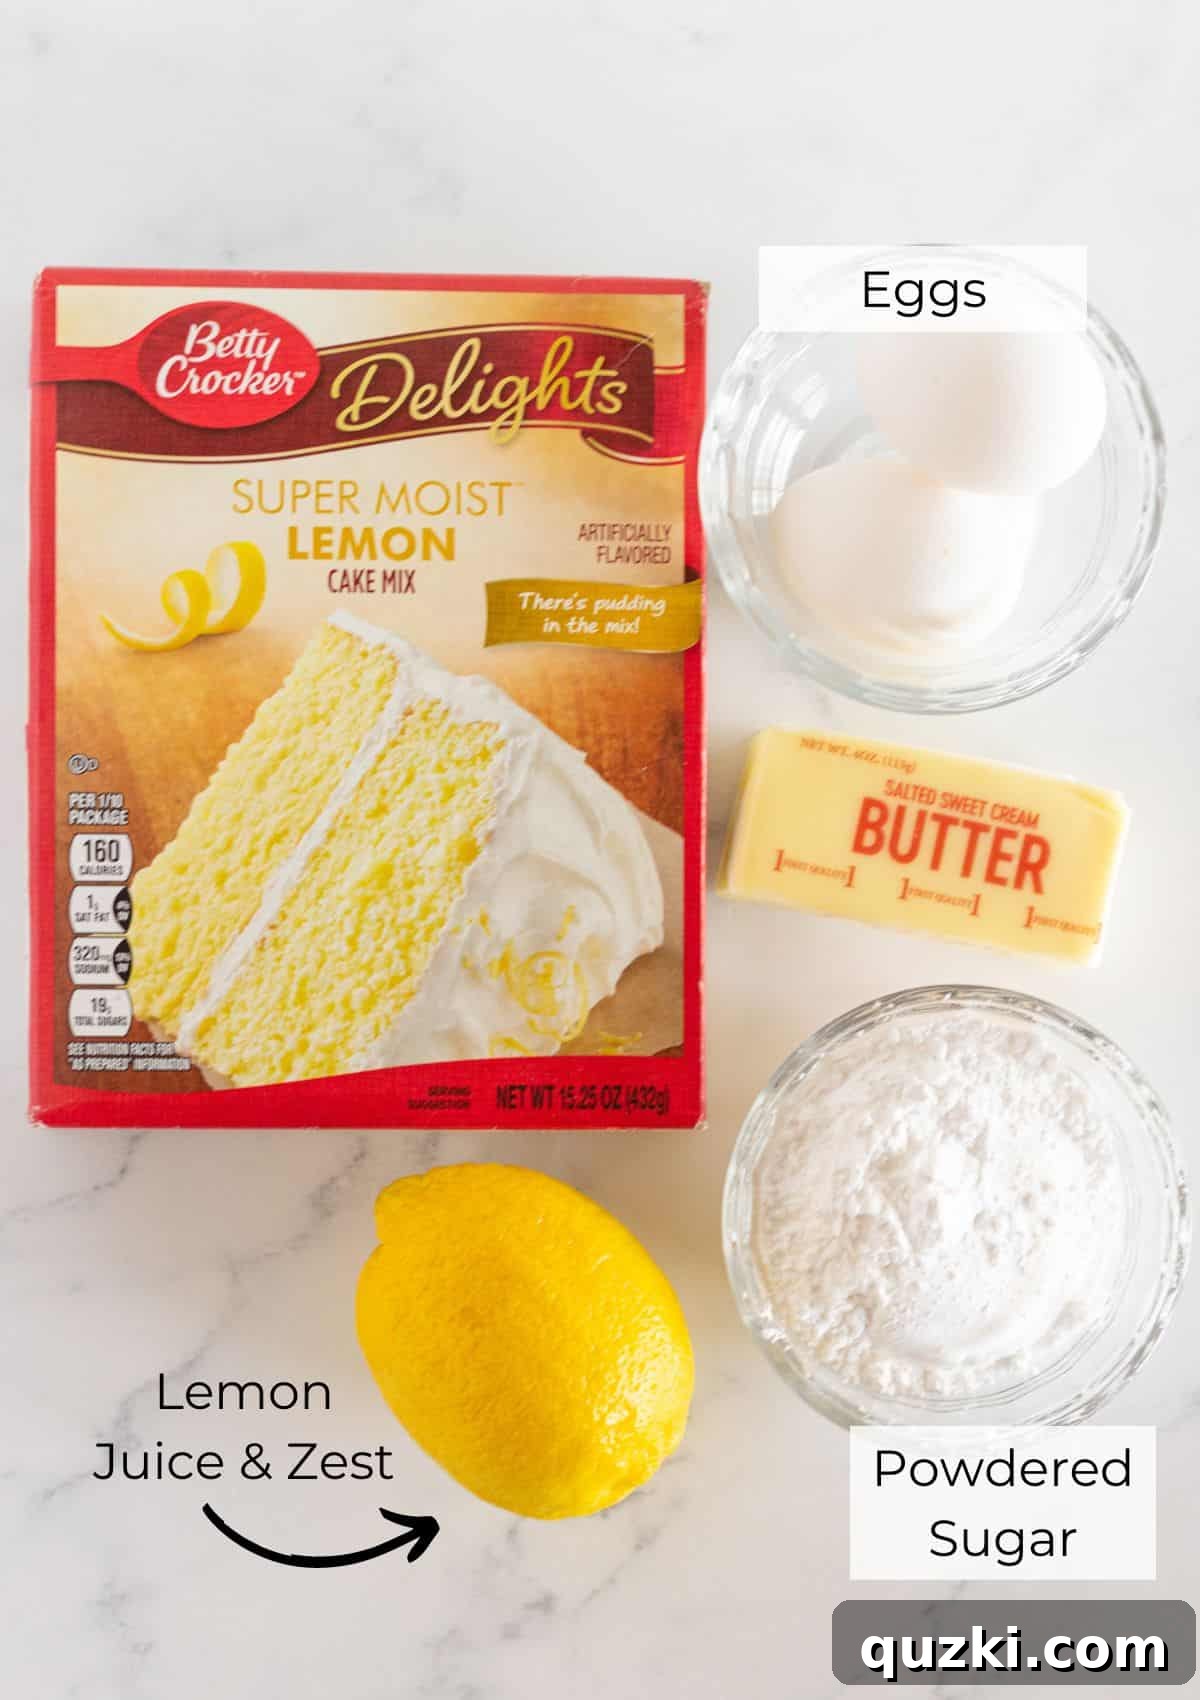
- Lemon Cake Mix: This is the hero ingredient, providing an incredibly convenient and flavorful base for your soft lemon cookie bars. A standard 13.25-ounce box is ideal. The mix not only simplifies the dry ingredient blend but also ensures a consistent lemon flavor throughout the base. It’s also a fantastic shortcut for other treats like these Mini Lemon Bundt Cakes, proving its versatility in creating simple yet impressive desserts.
- Eggs: Essential for binding all the ingredients together, the eggs contribute significantly to the soft, chewy texture of the cookie bars. They add structure and moisture, ensuring your bars are tender and hold their shape beautifully. Using room temperature eggs can also help them incorporate more smoothly into the dough.
- Butter: Everything is truly better with butter! Softened unsalted butter lends a rich, decadent flavor and an exceptionally moist crumb to the cookie base. While vegetable oil can be used as a substitute, butter offers a superior taste and contributes to a more tender texture. Ensure your butter is properly softened (but not melted) for optimal mixing.
- Fresh Lemon Juice & Zest: This dynamic duo is what truly makes these bars sing with authentic lemon flavor. Using fresh lemon juice, especially when starting with one tablespoon for the glaze and adding more as needed, delivers a bright, natural tartness. The lemon zest, packed with aromatic oils, infuses both the cookie base and the glaze with an intense, fragrant citrus essence that screams homemade. Always opt for fresh lemons for the best results.
- Powdered Sugar: Also known as confectioners’ sugar, its fine, powdery consistency is absolutely crucial for achieving a smooth, lump-free, and pourable glaze. It dissolves easily with the lemon juice, creating that perfectly sweet and tangy topping that sets these cake mix lemon bars apart.
For detailed measurements and full instructions, please refer to the complete recipe card below.
How to Make Lemon Cake Bars: A Step-by-Step Guide
Creating these delightful lemon cookie bars is a straightforward process, even for beginner bakers. Follow these detailed steps to ensure perfectly baked, wonderfully flavored treats every time.
- Prepare Your Baking Dish and Preheat Oven: Begin by preheating your oven to 350°F (175°C). This ensures the oven is at the correct temperature when your bars are ready to bake. Next, prepare a 9×13-inch baking dish. Line the dish with parchment paper, leaving an overhang on the sides. This parchment “sling” will make it incredibly easy to lift the entire baked slab of cookie bars out of the pan later for clean cutting. Lightly spray the parchment paper with nonstick cooking spray to prevent any sticking, even if the paper is naturally non-stick. Set the prepared pan aside.
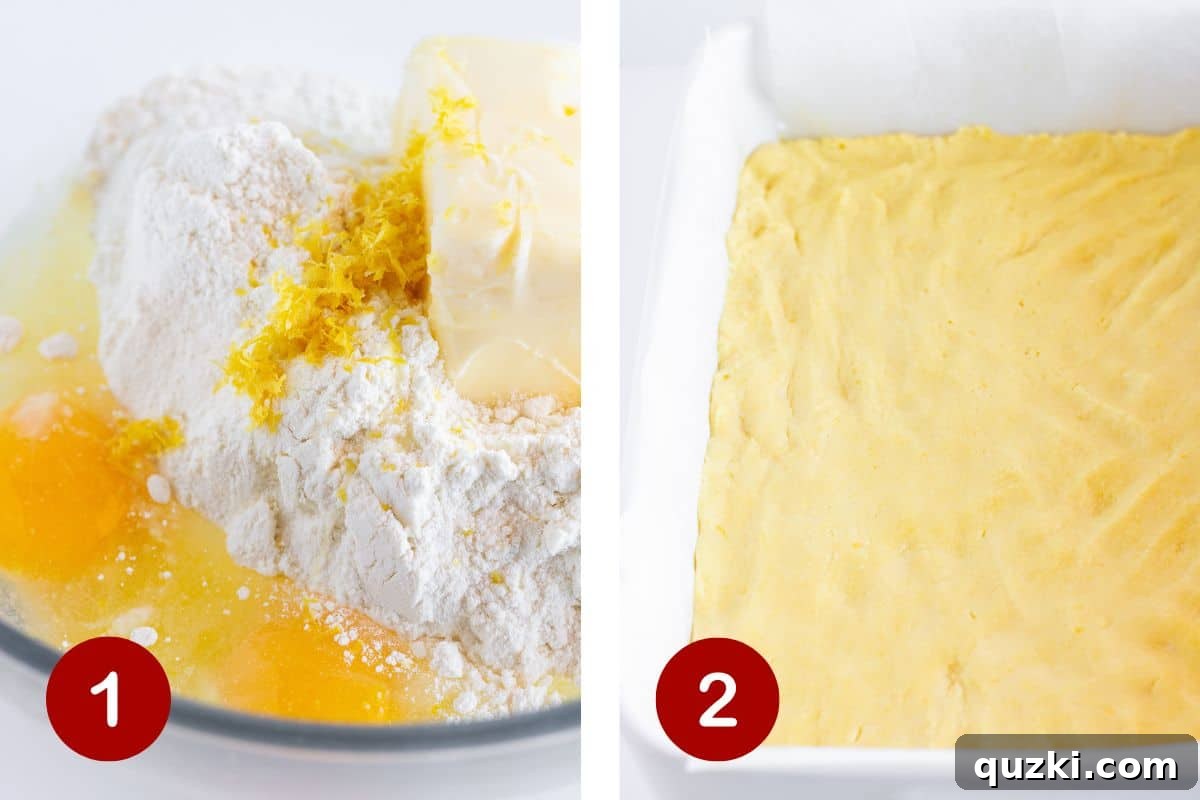
- Mix the Lemon Cookie Dough: In a large mixing bowl, combine the lemon cake mix, two eggs, softened butter, and the zest from half a lemon. Using either a hand-held electric mixer or a stand mixer fitted with a paddle attachment, mix on medium speed until all the ingredients are thoroughly combined. The mixture will come together to form a thick, somewhat sticky dough. Don’t worry if it seems too sticky; that’s exactly the right consistency for a moist bar. Continue mixing until no streaks of dry cake mix remain and the dough is uniform.
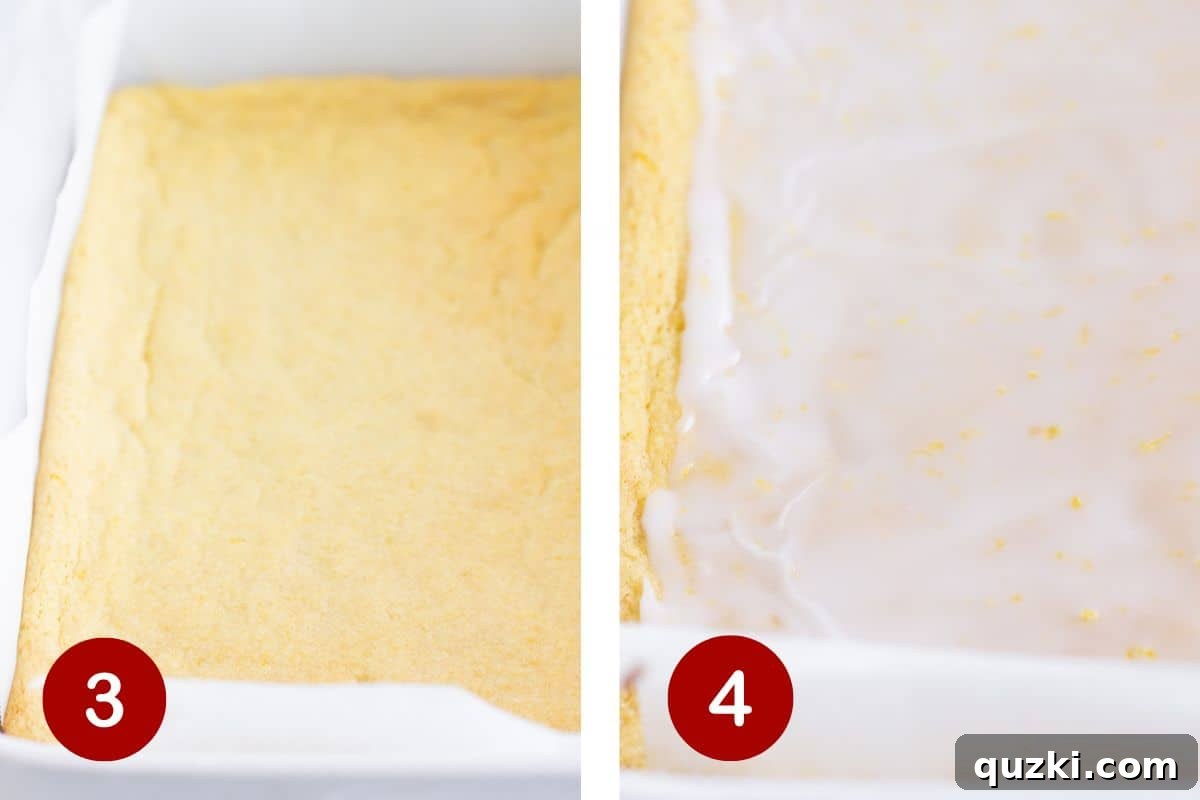
- Press the Dough into the Pan: Once your dough is mixed, transfer it into the bottom of the prepared 9×13-inch baking dish. This dough is designed to be pressed, not poured. To prevent the sticky dough from adhering to your hands, you may find it helpful to lightly flour your hands or spray them with a little nonstick cooking spray. Gently and evenly press the dough into a single layer across the entire bottom of the pan. Ensure the thickness is consistent for even baking.
- Bake the Lemon Bars: Place the baking dish into your preheated oven and bake for 18-22 minutes. The key is to bake them just until the center of the bars appears set but still remains wonderfully soft to the touch. The edges might be lightly golden, but avoid over-baking, as this can lead to a dry, hard texture. Once baked, remove the pan from the oven and immediately transfer it to a wire cooling rack. Allow the bars to cool completely in the pan before proceeding. Cooling completely is vital for the bars to firm up properly before glazing.
- Prepare the Tangy Lemon Glaze: While the bars are cooling, prepare the bright lemon glaze. In a small bowl, combine the powdered sugar, one tablespoon of fresh lemon juice, and the zest from the other half of the lemon. Whisk these ingredients together until you achieve a smooth, thick, and pourable consistency. If the glaze is too thick, add a tiny bit more lemon juice (a quarter teaspoon at a time) until it reaches your desired consistency. The goal is a glaze that coats the back of a spoon but can still be easily spread.
- Glaze and Set the Bars: Once the lemon cookie bars have cooled completely (this is crucial for the glaze to set properly), evenly pour the prepared lemon glaze over the top. Use an offset spatula or the back of a spoon to gently spread the glaze all the way to the edges of the bars. For the best results and to allow the glaze to firm up, let the glazed bars sit at room temperature for at least 30 minutes, or longer if needed, until the glaze is set.
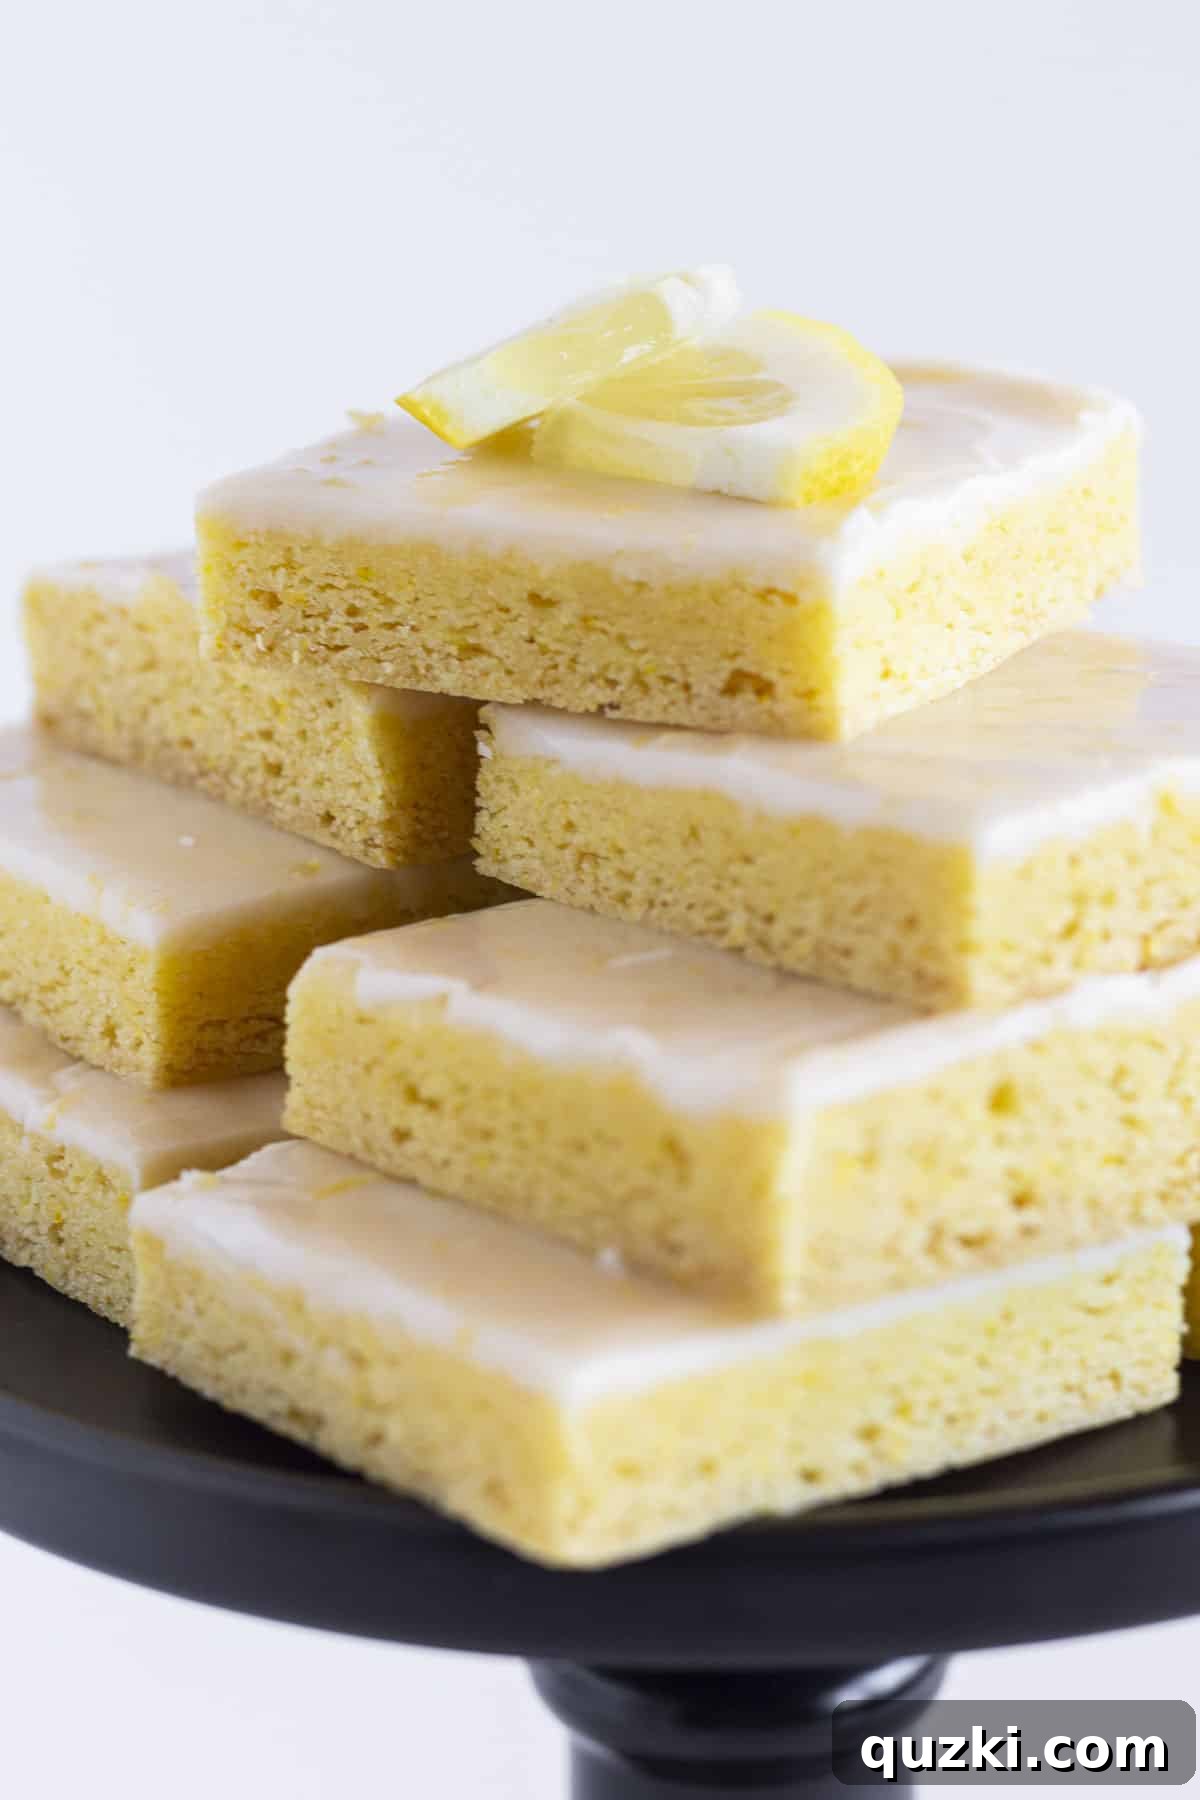
- Slice and Serve: After the glaze has fully set, carefully use the parchment paper overhang to lift the entire slab of lemon bars out of the baking dish and onto a cutting board. Using a sharp knife, cut the large slab into 16 even squares. For exceptionally clean cuts, you can chill the bars in the refrigerator for about 30 minutes before cutting. Serve these delightful Easy Lemon Cookie Bars and enjoy their refreshing, sweet-tart flavor. Store any leftovers as directed in the storage section.
Creative Variations for Your Lemon Bars
While these Easy Lemon Cookie Bars are absolutely perfect as they are, there’s always room for a little creativity in the kitchen! If you’re looking to put a unique spin on this classic recipe or cater to different preferences, here are several delightful variations:
- Simple Powdered Sugar Finish: For a more traditional take reminiscent of classic lemon bars, you can opt to leave off the lemon glaze entirely. Instead, once the bars are completely cooled, dust them generously with a fine layer of powdered sugar. This creates a beautifully delicate finish that is both elegant and delicious, allowing the pure lemon flavor of the bar itself to shine through.
- White Chocolate Indulgence: If you’re feeling a little adventurous and craving an extra layer of sweetness and richness, try folding some white chocolate chips into your lemon bar batter before pressing it into the pan. The creamy sweetness of white chocolate pairs exceptionally well with the bright tang of lemon, creating a truly decadent treat that’s sure to impress.
- Berry Burst Lemon Bars: Introduce a fruity twist by adding fresh berries to the mix. Gently fold 1/2 to 1 cup of fresh blueberries, raspberries, or chopped strawberries into the cookie dough just before pressing it into the pan. The berries will burst with juicy flavor as they bake, adding a lovely tartness and beautiful color that complements the lemon perfectly.
- Coconut Lemon Dream: For those who love tropical flavors, a sprinkling of shredded coconut can transform these bars. You can mix about half a cup of unsweetened shredded coconut into the dough, or even toast some coconut flakes and sprinkle them on top of the glaze once it’s set for added texture and flavor. The nutty sweetness of coconut harmonizes wonderfully with the zesty lemon.
- Almond Lemon Delight: Enhance the sophisticated flavor of these bars by adding a touch of almond. Stir in 1/2 teaspoon of almond extract along with the eggs and butter in the dough for a subtle nutty undertone. You could also sprinkle slivered almonds over the top of the glaze (before it sets) for a lovely crunch and presentation.
- Lemon Pie Filling Topping: To double down on the lemon factor and create an even gooier texture, consider topping the baked (and cooled) cookie base with a layer of homemade or store-bought lemon pie filling before applying the powdered sugar or a very light glaze. The vibrant lemon filling from recipes like these Lemon Bar Cookie Cups would be absolutely phenomenal.
Expert Tips for Perfect Lemon Cookie Bars
Achieving bakery-quality lemon cookie bars at home is easier than you think, especially with a few insider tips. These simple tricks will help you ensure your bars are perfectly moist, beautifully presented, and utterly delicious every single time.
- The Parchment Paper Advantage: This simple step is a game-changer for several reasons. First and foremost, lining your baking pan with parchment paper, allowing some to overhang, acts as a natural non-stick barrier, ensuring your bars release easily without tearing or sticking. Secondly, once baked and cooled, you can use these overhangs to lift the entire slab of cookie bars out of the pan in one piece. This makes the crucial step of cutting them into neat, uniform squares significantly easier and less messy.
- Avoid Over-Baking for Softness: This is perhaps the most critical tip for achieving that desirable soft and chewy texture. Bake the cookie bars just long enough for the center to appear set and no longer jiggly, but not until they are firm or golden brown all over. Over-baking will lead to a dry, crumbly, and hard texture, diminishing the delightful moistness that makes these bars so good. A slightly underbaked center that finishes setting as it cools is ideal.
- The Chilling Secret to Clean Cuts: After your cake mix lemon squares have completely cooled and the glaze has set, resist the urge to cut them immediately. Instead, place the entire pan (or the lifted slab on a cutting board) into the refrigerator for at least 30 minutes, or even an hour. This chilling period allows the gooey bars to firm up, resulting in beautifully clean, sharp edges when you slice them, making for a much more professional presentation.
- Room Temperature Ingredients are Key: For the best results, ensure your eggs and butter are at room temperature before mixing. Room temperature butter creams more easily with the cake mix, creating a smoother, more uniform dough. Room temperature eggs also incorporate better into the batter, leading to a lighter, more cohesive texture in your baked goods.
- Sifting Powdered Sugar for a Smooth Glaze: To guarantee a perfectly smooth, lump-free lemon glaze, consider sifting your powdered sugar before mixing it with the lemon juice and zest. Powdered sugar can often clump, and sifting ensures a silky consistency, which is essential for that beautiful, even finish on your lemon bars.
- Don’t Skip the Fresh Zest! While lemon juice provides tartness, lemon zest is where much of the intense, aromatic lemon flavor resides. Zest contains essential oils that impart a brighter, more fragrant essence than juice alone. Using fresh zest in both the cookie base and the glaze will significantly amplify the overall lemon experience, making your bars taste truly vibrant and homemade.
How to Store Your Delicious Lemon Treats
Proper storage is essential to maintain the freshness, texture, and vibrant flavor of your Easy Lemon Cookie Bars. Here’s how to keep them delicious for as long as possible:
Room Temperature Storage: The best way to store these easy lemon cake mix cookies for short-term enjoyment is in an airtight container at room temperature. Place a layer of parchment paper between stacked cookie bars to prevent them from sticking together, especially if the glaze is still slightly soft. Stored this way, they will remain fresh and delightful for 2-3 days.
Refrigerated Storage: If you want to extend their freshness, particularly in warmer climates or if your home is warm, storing them in the refrigerator is an excellent option. Place the bars in an airtight container, again separating layers with parchment paper. Refrigerated lemon bars can last for up to 5-7 days. The chilled temperature can also enhance their firm texture, which some prefer.
Freezing for Later Enjoyment: To enjoy these tangy lemon bars even longer, they freeze beautifully! Once the bars are completely cooled and the glaze is set, cut them into individual squares. Place them in a single layer on a baking sheet and freeze for about an hour until firm. Then, transfer the frozen bars to an airtight freezer-safe container or a heavy-duty freezer zipper bag. Make sure to put a layer of parchment paper between stacked cookie bars to keep them from sticking together. They can be frozen for up to 3 months. When ready to enjoy, simply thaw them at room temperature for an hour or two, or overnight in the refrigerator.
Recipe FAQs
Have questions about making the perfect Easy Lemon Cookie Bars? We’ve got answers to some of the most common queries to help you master this delicious recipe.
Achieving perfectly clean, sharp edges on your lemon bars is simpler than you think! The absolute best method is to refrigerate the bars once they have been baked, completely cooled, and glazed. Place them in the refrigerator for at least 30 minutes, or even up to an hour, before you attempt to cut them. The cold temperature will help the cookie base firm up and solidify the glaze, allowing your knife to slice through cleanly without dragging or creating crumbs. For an even cleaner cut, use a sharp, non-serrated knife and wipe it clean between each slice.
Absolutely! While the simple lemon glaze is divine, these versatile lemon bars can be paired with various delicious toppings. For a burst of complementary flavor, consider a light and fluffy strawberry buttercream, which would add a lovely pink hue and a sweet berry note. A dreamy marshmallow buttercream could provide a uniquely sweet and gooey counterpoint. If you’re looking for something with a little tang and richness, a luscious raspberry cream cheese frosting would be a fantastic choice, offering a beautiful color and a depth of flavor that complements the lemon wonderfully.
Unlike some classic lemon bar recipes which often feature a custard-like filling that benefits from refrigeration, these particular lemon cake mix bars do not strictly *have* to be refrigerated for food safety. They can be stored in an airtight container at room temperature for 2-3 days. However, storing them in the refrigerator will certainly help them last longer (up to 5-7 days) and often improves their texture, making them a bit firmer and more refreshing, especially if you enjoy a chilled dessert. For cleaner cuts, refrigeration is also highly recommended.
Yes, you can! Many brands now offer excellent gluten-free lemon cake mixes that perform very similarly to their conventional counterparts. Simply substitute a gluten-free lemon cake mix of the same weight (typically 13.25 ounces) into the recipe. All other ingredients are naturally gluten-free. Always double-check the ingredient list of your specific cake mix to ensure it meets your dietary needs, as formulations can vary between brands.
To ensure your beautiful lemon bars arrive at their destination intact and looking their best, first make sure they are completely cooled and the glaze is fully set. If possible, transport them in the same pan you baked them in, especially if you used the parchment paper sling. If you’ve already cut them, arrange the bars snugly in a single layer in an airtight container. For multiple layers, place parchment paper between each layer to prevent sticking. If it’s a hot day, consider placing the container in an insulated bag with a small ice pack to keep them cool and prevent the glaze from becoming too soft.
More Irresistible Lemon Desserts to Try
If you’ve fallen in love with the vibrant and zesty flavor of these Easy Lemon Cookie Bars, you’re in for a treat! Lemon is a truly versatile ingredient that shines in countless dessert applications. Explore these other fantastic lemon-infused recipes that are guaranteed to brighten your day and satisfy your sweet tooth:
Cakes
Super Easy Strawberry Lemonade Bundt Cake
Cheesecakes
Easy No Bake Lemon Cheesecake {5 Ingredients ONLY!}
Cookies
Lemon Bar Cookie Cups Recipe
Desserts
Raspberry Lemonade Bars Recipe
Did you try this recipe and love it as much as we do?
Leave a ⭐️ review below and tag @practicallyhomemade on Pinterest! We love seeing your delicious creations!
Easy Lemon Cookie Bars
Rate Recipe
Print Recipe
Ingredients
Lemon Bar Base
- 1 box lemon cake mix, {13.25 ounces}
- 2 large eggs
- ½ cup unsalted butter, {softened}
- zest ½ fresh lemon
Tangy Lemon Glaze
- ½ cup powdered sugar
- 1-2 Tablespoons fresh lemon juice
- zest other ½ fresh lemon
Instructions
Making the Lemon Bars
-
Preheat Oven & Prep Pan: Preheat your oven to 350°F (175°C). Line a 9×13-inch baking dish with parchment paper, leaving an overhang on the longer sides to create a “sling.” Lightly spray the parchment with nonstick cooking spray and set aside.
-
Mix Dough: In a medium mixing bowl, combine the lemon cake mix, eggs, softened butter, and the zest from half a lemon. Using a hand-held or stand mixer, mix until all ingredients are thoroughly combined and a sticky dough forms. Be sure to scrape down the sides of the bowl to ensure everything is incorporated.
-
Press into Pan: Transfer the sticky dough to the prepared 9×13-inch baking dish. Lightly flour your hands or spray them with nonstick spray to prevent sticking, then gently and evenly press the dough into the bottom of the pan to form a uniform layer.
-
Bake Bars: Bake for 18-22 minutes, or until the center of the bars is set but still soft and slightly moist. The edges may be lightly golden. Do not over-bake, as this will result in dry bars. Remove from the oven and place the pan on a wire cooling rack to cool completely.
Adding the Glaze
-
Prepare Glaze: In a small bowl, combine the powdered sugar, one tablespoon of fresh lemon juice, and the zest from the other half of the lemon. Whisk vigorously until you achieve a smooth, thick, and pourable glaze. If the glaze is too thick, add a quarter teaspoon more lemon juice at a time until the desired consistency is reached.
-
Glaze the Bars: Once the bars have cooled completely, pour the lemon glaze evenly over the top. Use an offset spatula or the back of a spoon to spread the glaze to all edges. Allow the glaze to set up at room temperature for at least 30 minutes, or until firm.
-
Cut & Serve: Using the parchment paper overhang, carefully lift the entire slab of glazed bars out of the pan and place it on a cutting board. For perfect, clean cuts, refrigerate the bars for 30 minutes before slicing. Cut into 16 even squares. Serve and enjoy! Store any leftovers in an airtight container at room temperature or in the refrigerator for 2-3 days.
Notes
-
- Parchment Paper is Key: Lining the pan with parchment paper is a simple step that significantly helps with easy removal and clean cutting of the bars. Ensure there’s an overhang for easy lifting.
- Don’t Over-Bake: For the softest, most delicious bars, bake just until the center is set. Over-baking can lead to a dry texture.
-
- Chill for Perfect Cuts: After the bars have cooled and the glaze is set, refrigerate them for at least 30 minutes before cutting. This firming-up period ensures beautifully clean, sharp edges on each square.
- Storage Tips: Store leftovers in an airtight container. For room temperature, they’ll last 2-3 days. For extended freshness, refrigerate for up to a week, placing parchment paper between layers to prevent sticking.
Nutrition
Nutrition information is automatically calculated, so should only be used as an approximation.