
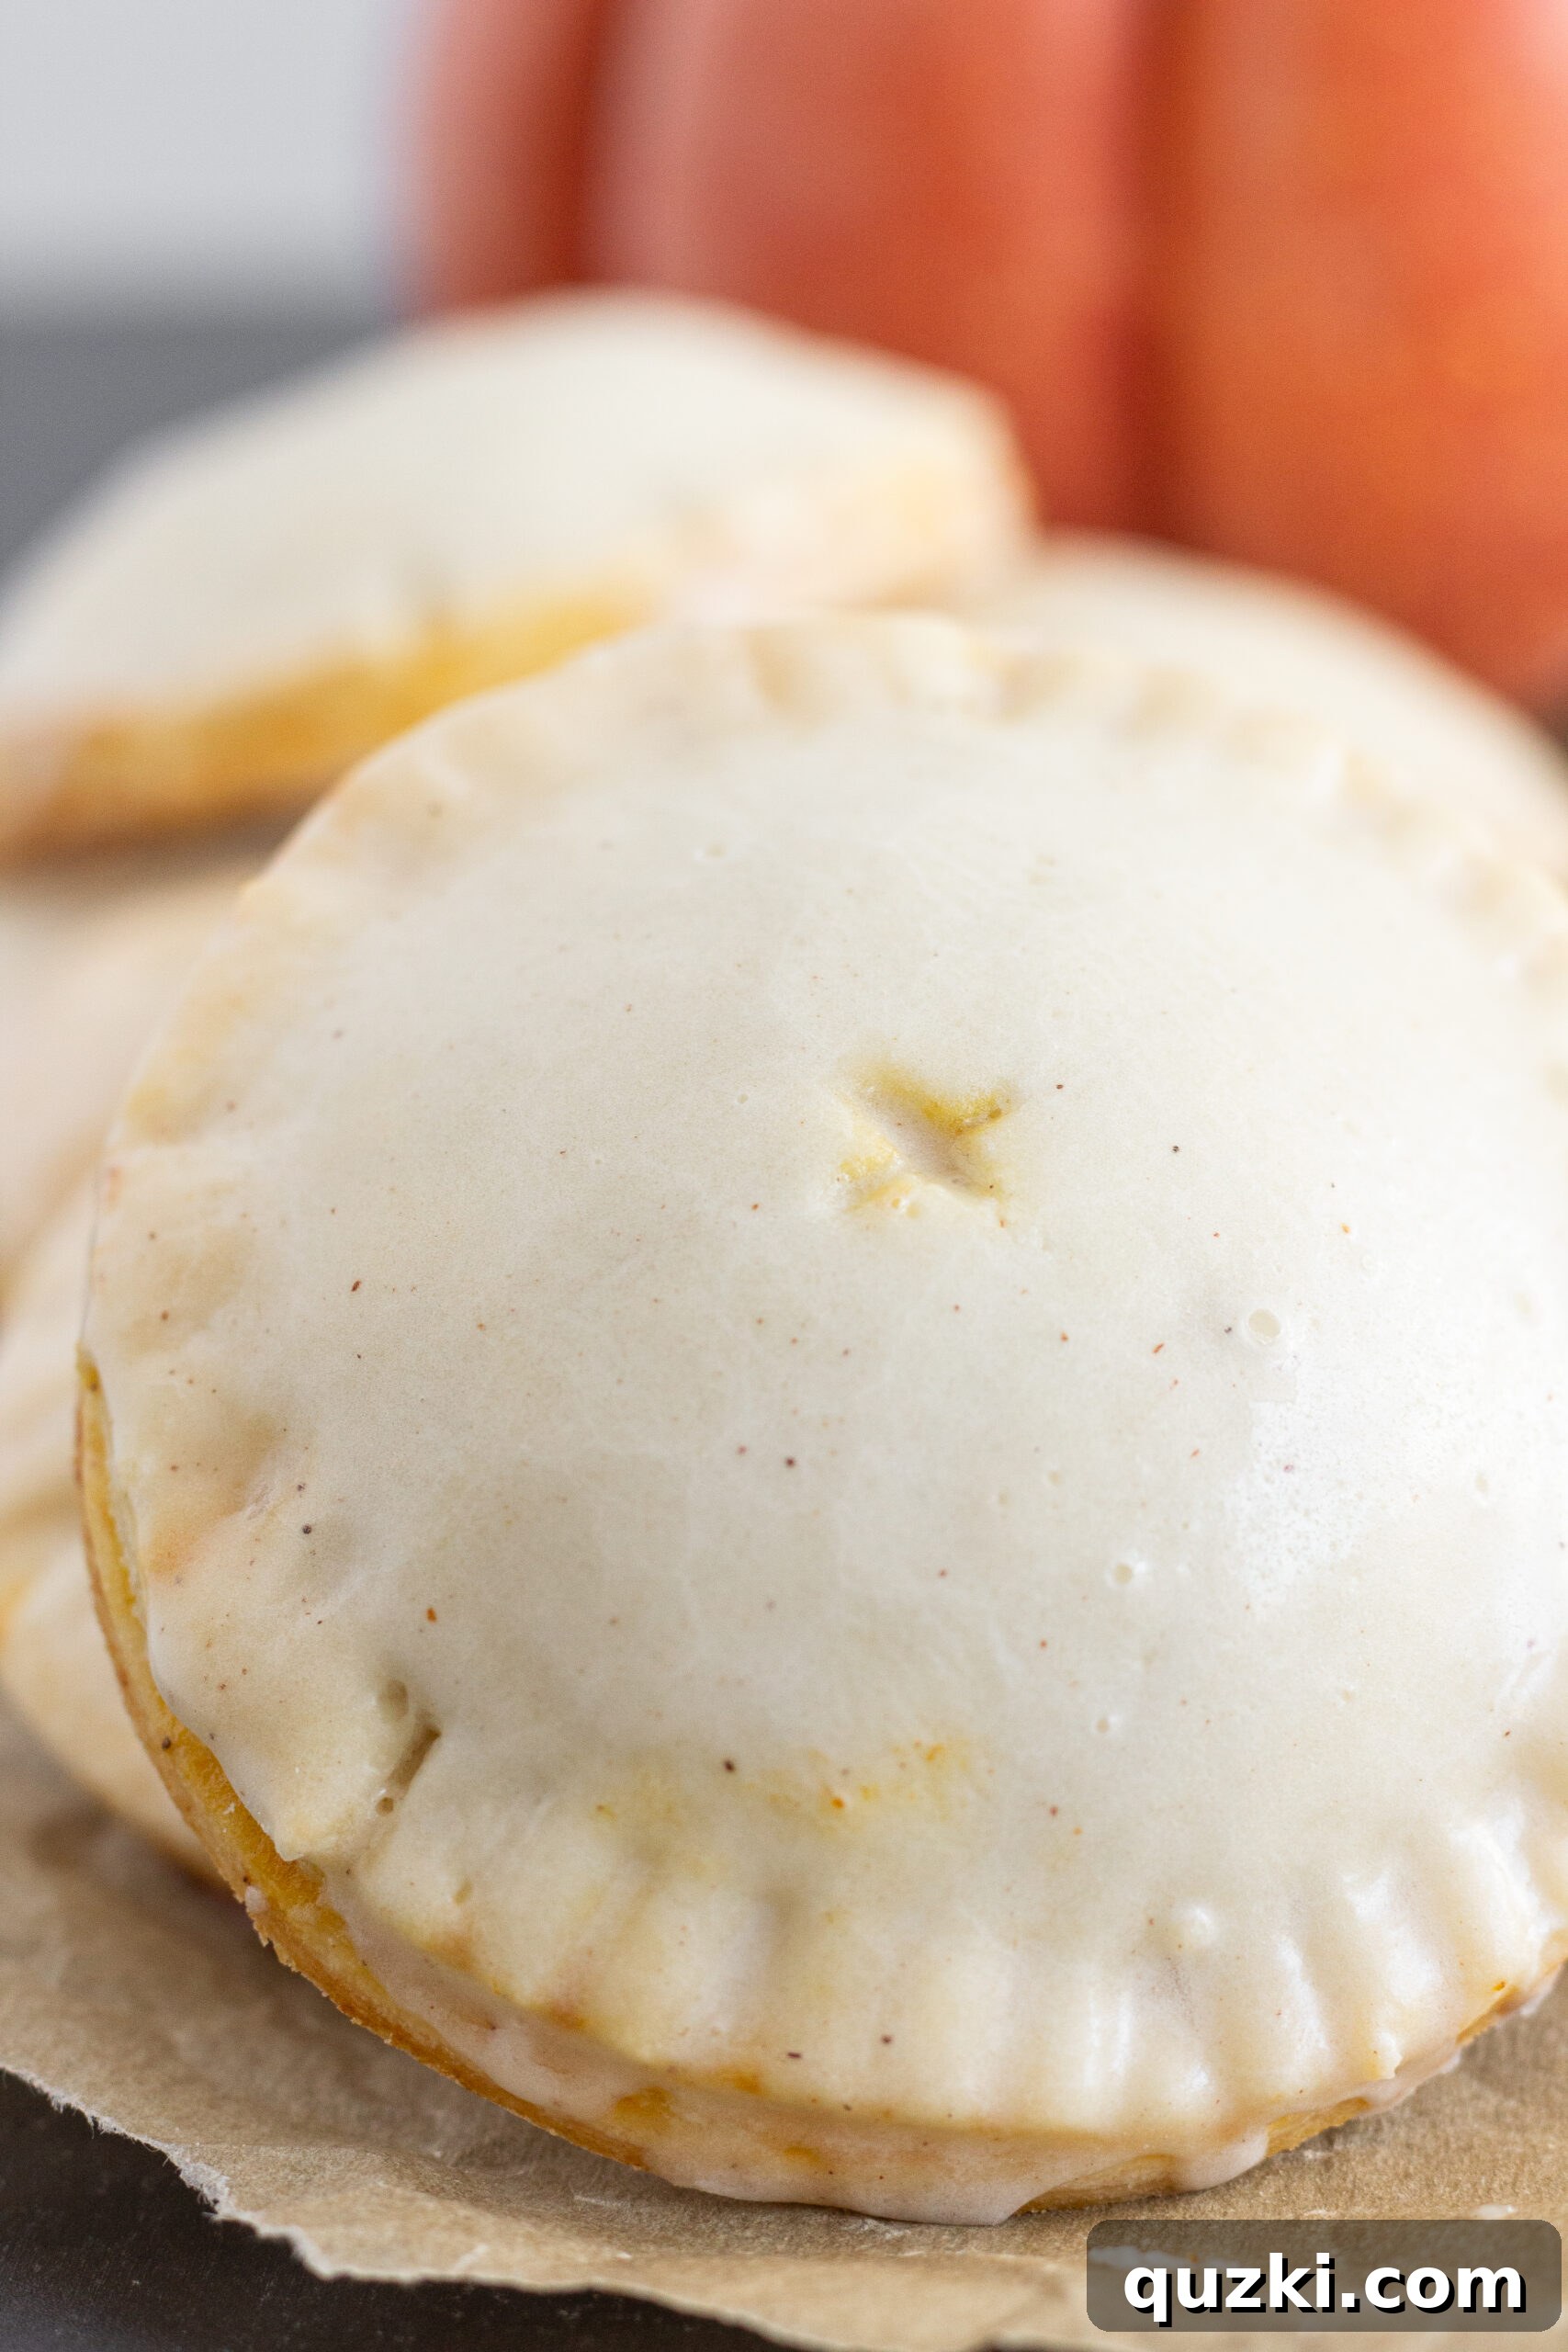
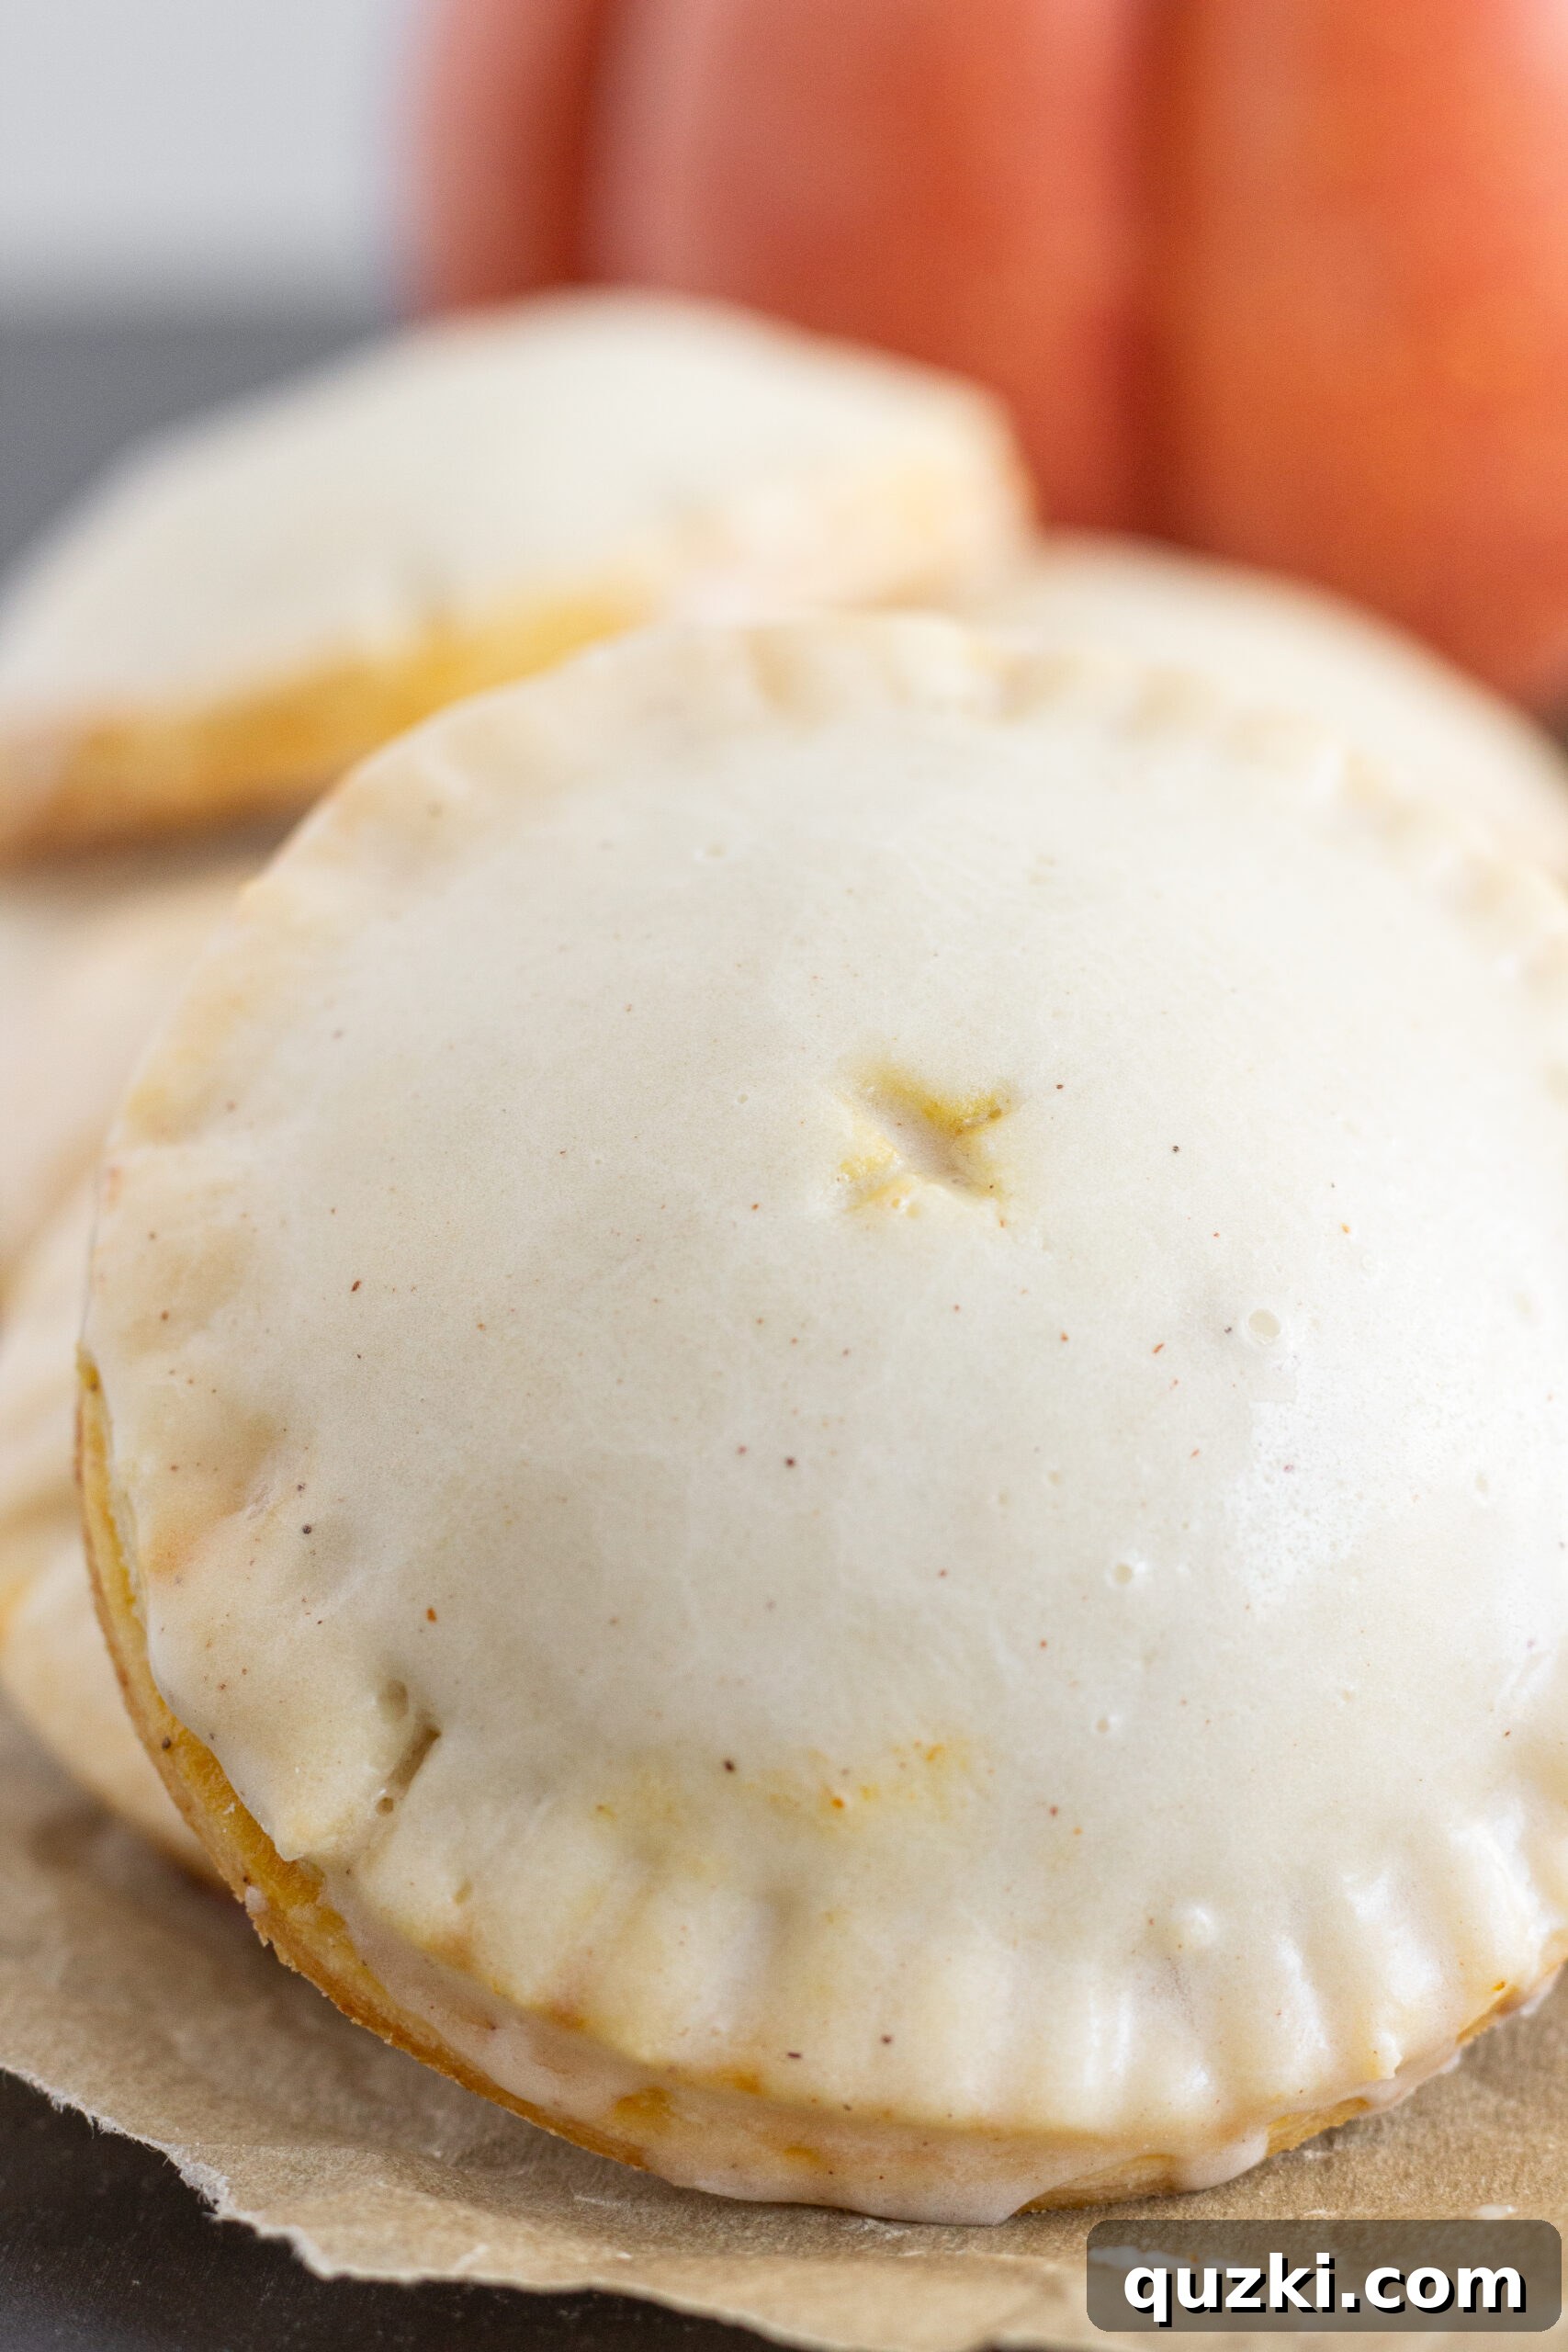
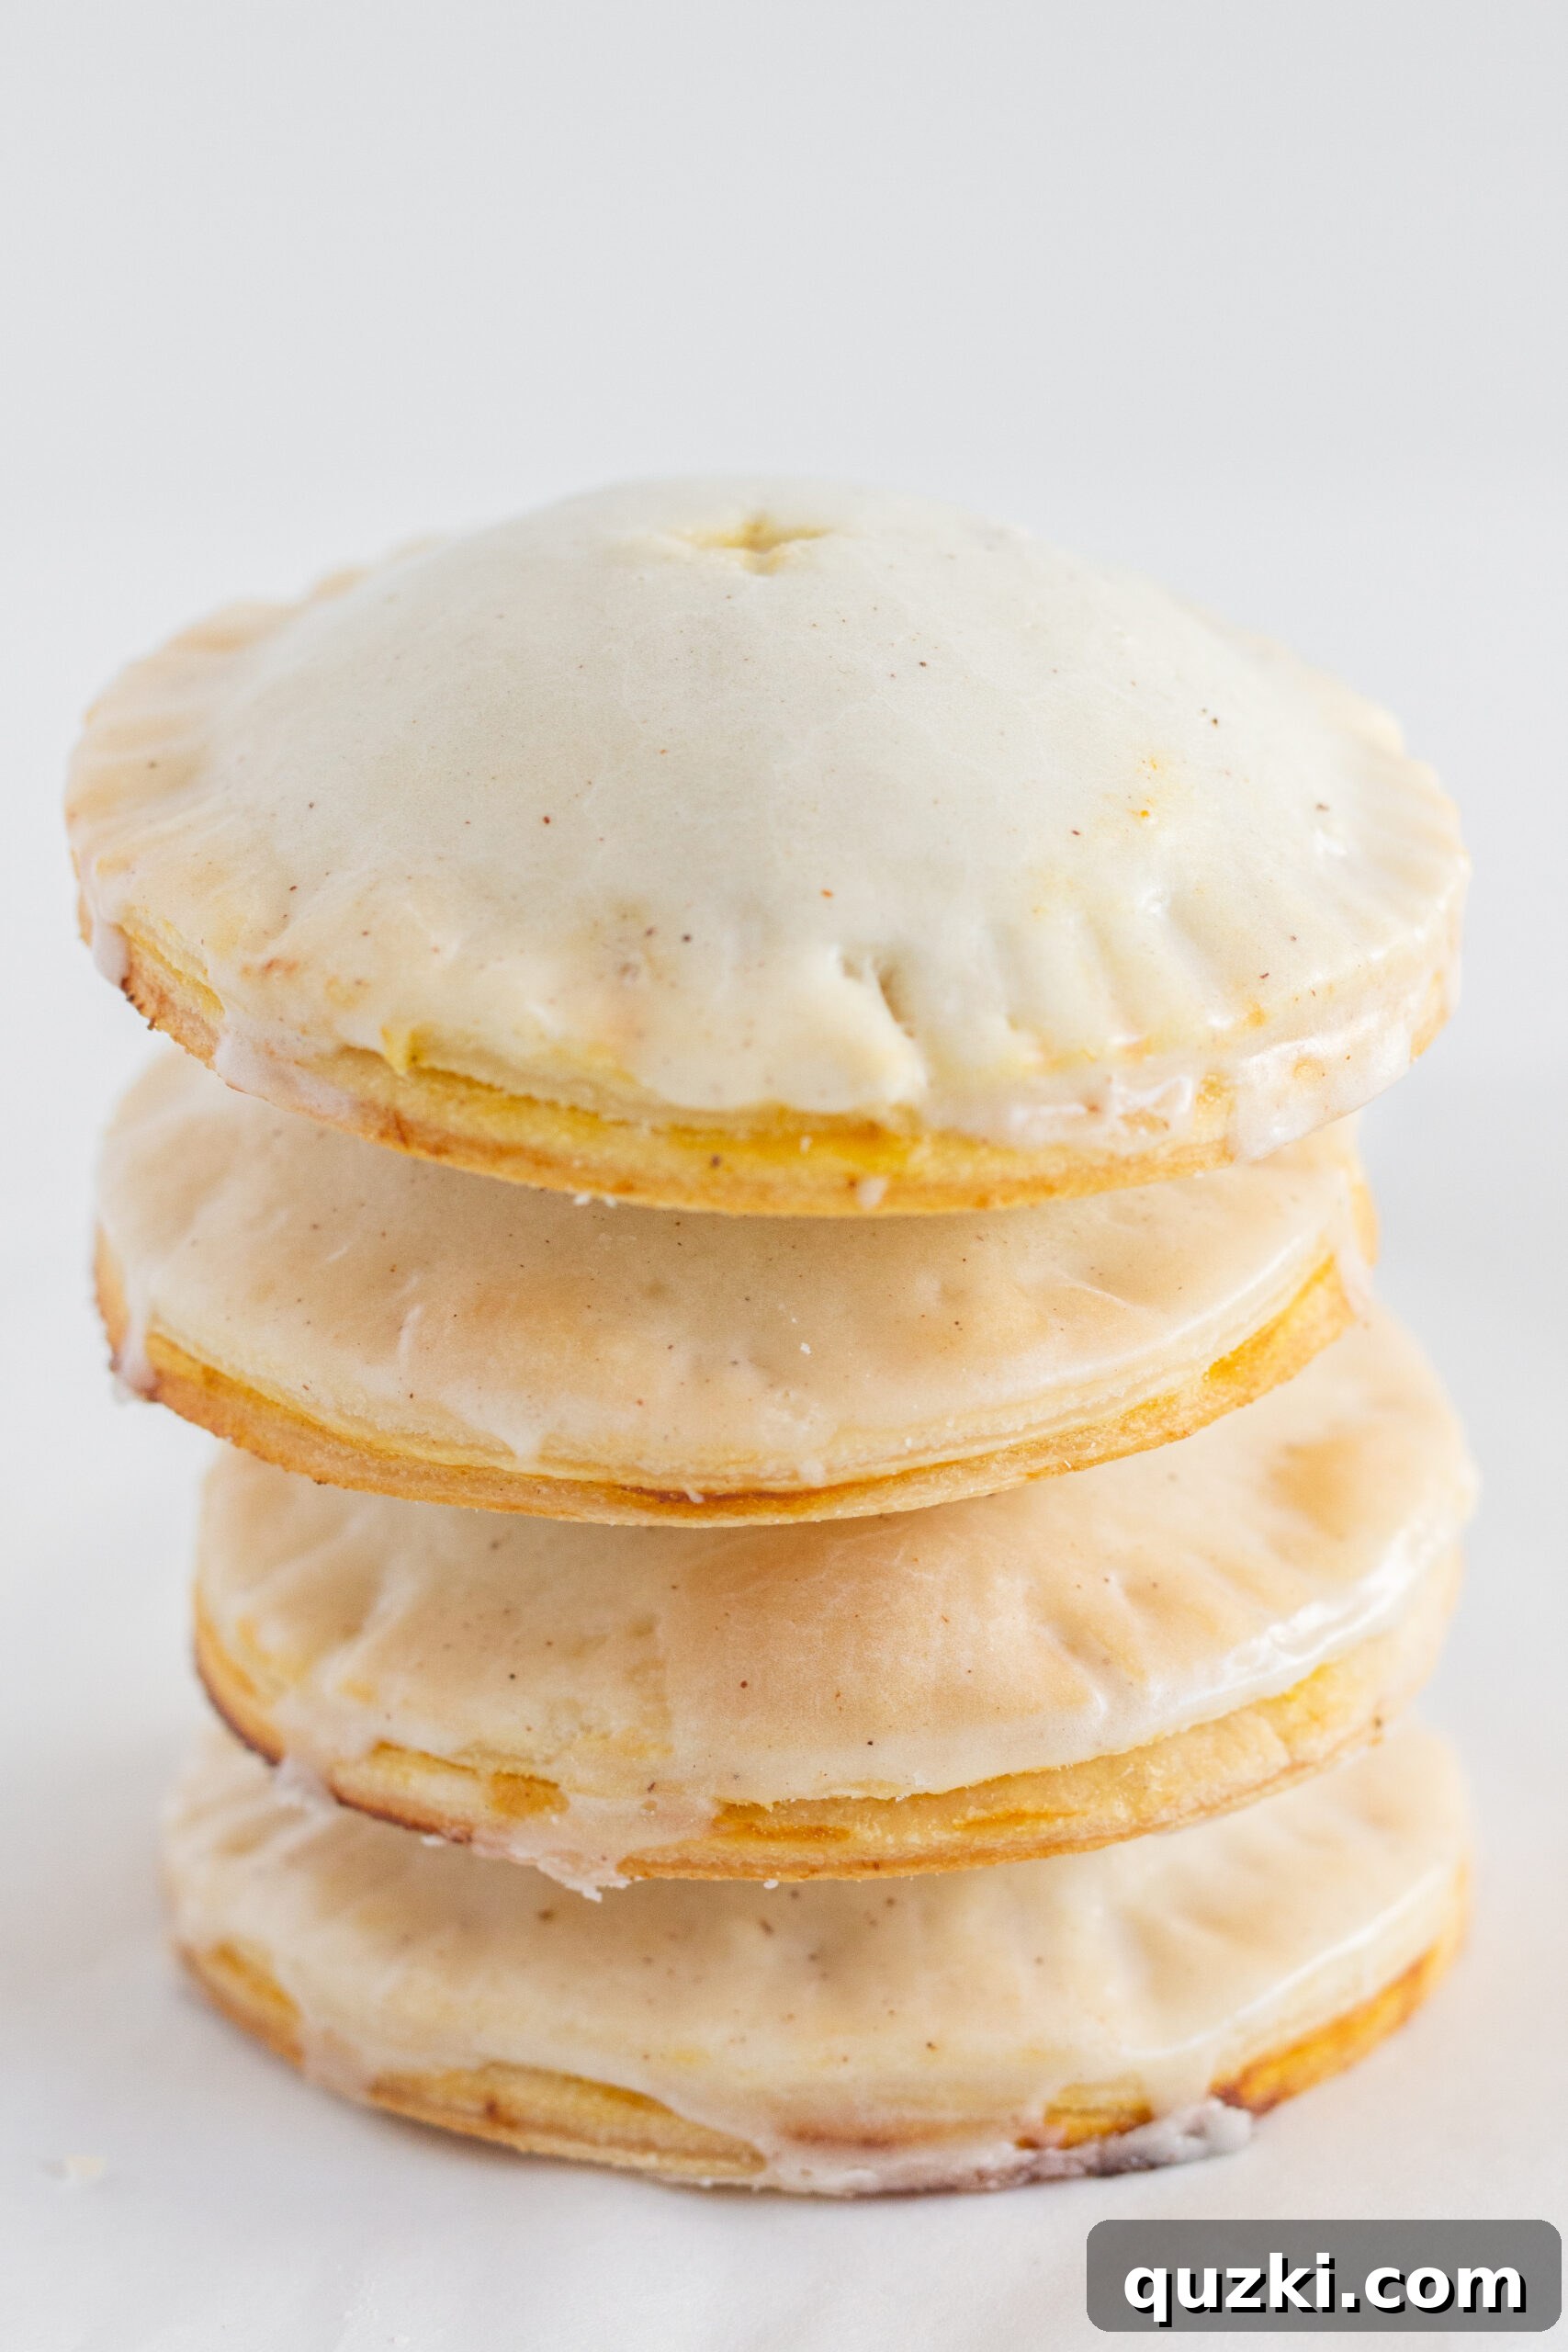
If you adore the comforting taste of traditional pumpkin pie, then these Easy Pumpkin Hand Pies are destined to become a beloved staple in your recipe collection. They perfectly encapsulate every rich, aromatic flavor you’d expect from a classic pumpkin pie, but with a delightful twist. Crafted into charming, individual-sized rounds, these hand pies offer unparalleled convenience, allowing you to simply grab and savor them wherever your day takes you. This makes them not only incredibly practical but also utterly irresistible! Furthermore, people are naturally drawn to fun, smaller-portioned desserts, and these Pumpkin Hand Pies are guaranteed to be a sensational hit at any gathering, from casual family dinners to festive holiday celebrations.
Craving more delightful pumpkin desserts this season? You absolutely must try our Pumpkin Snickerdoodle Snack Cake for a moist, spiced treat, or indulge in the creamy goodness of our Pumpkin Mousse Pie!
Why You Will Absolutely LOVE This Mini Pumpkin Pie Recipe!
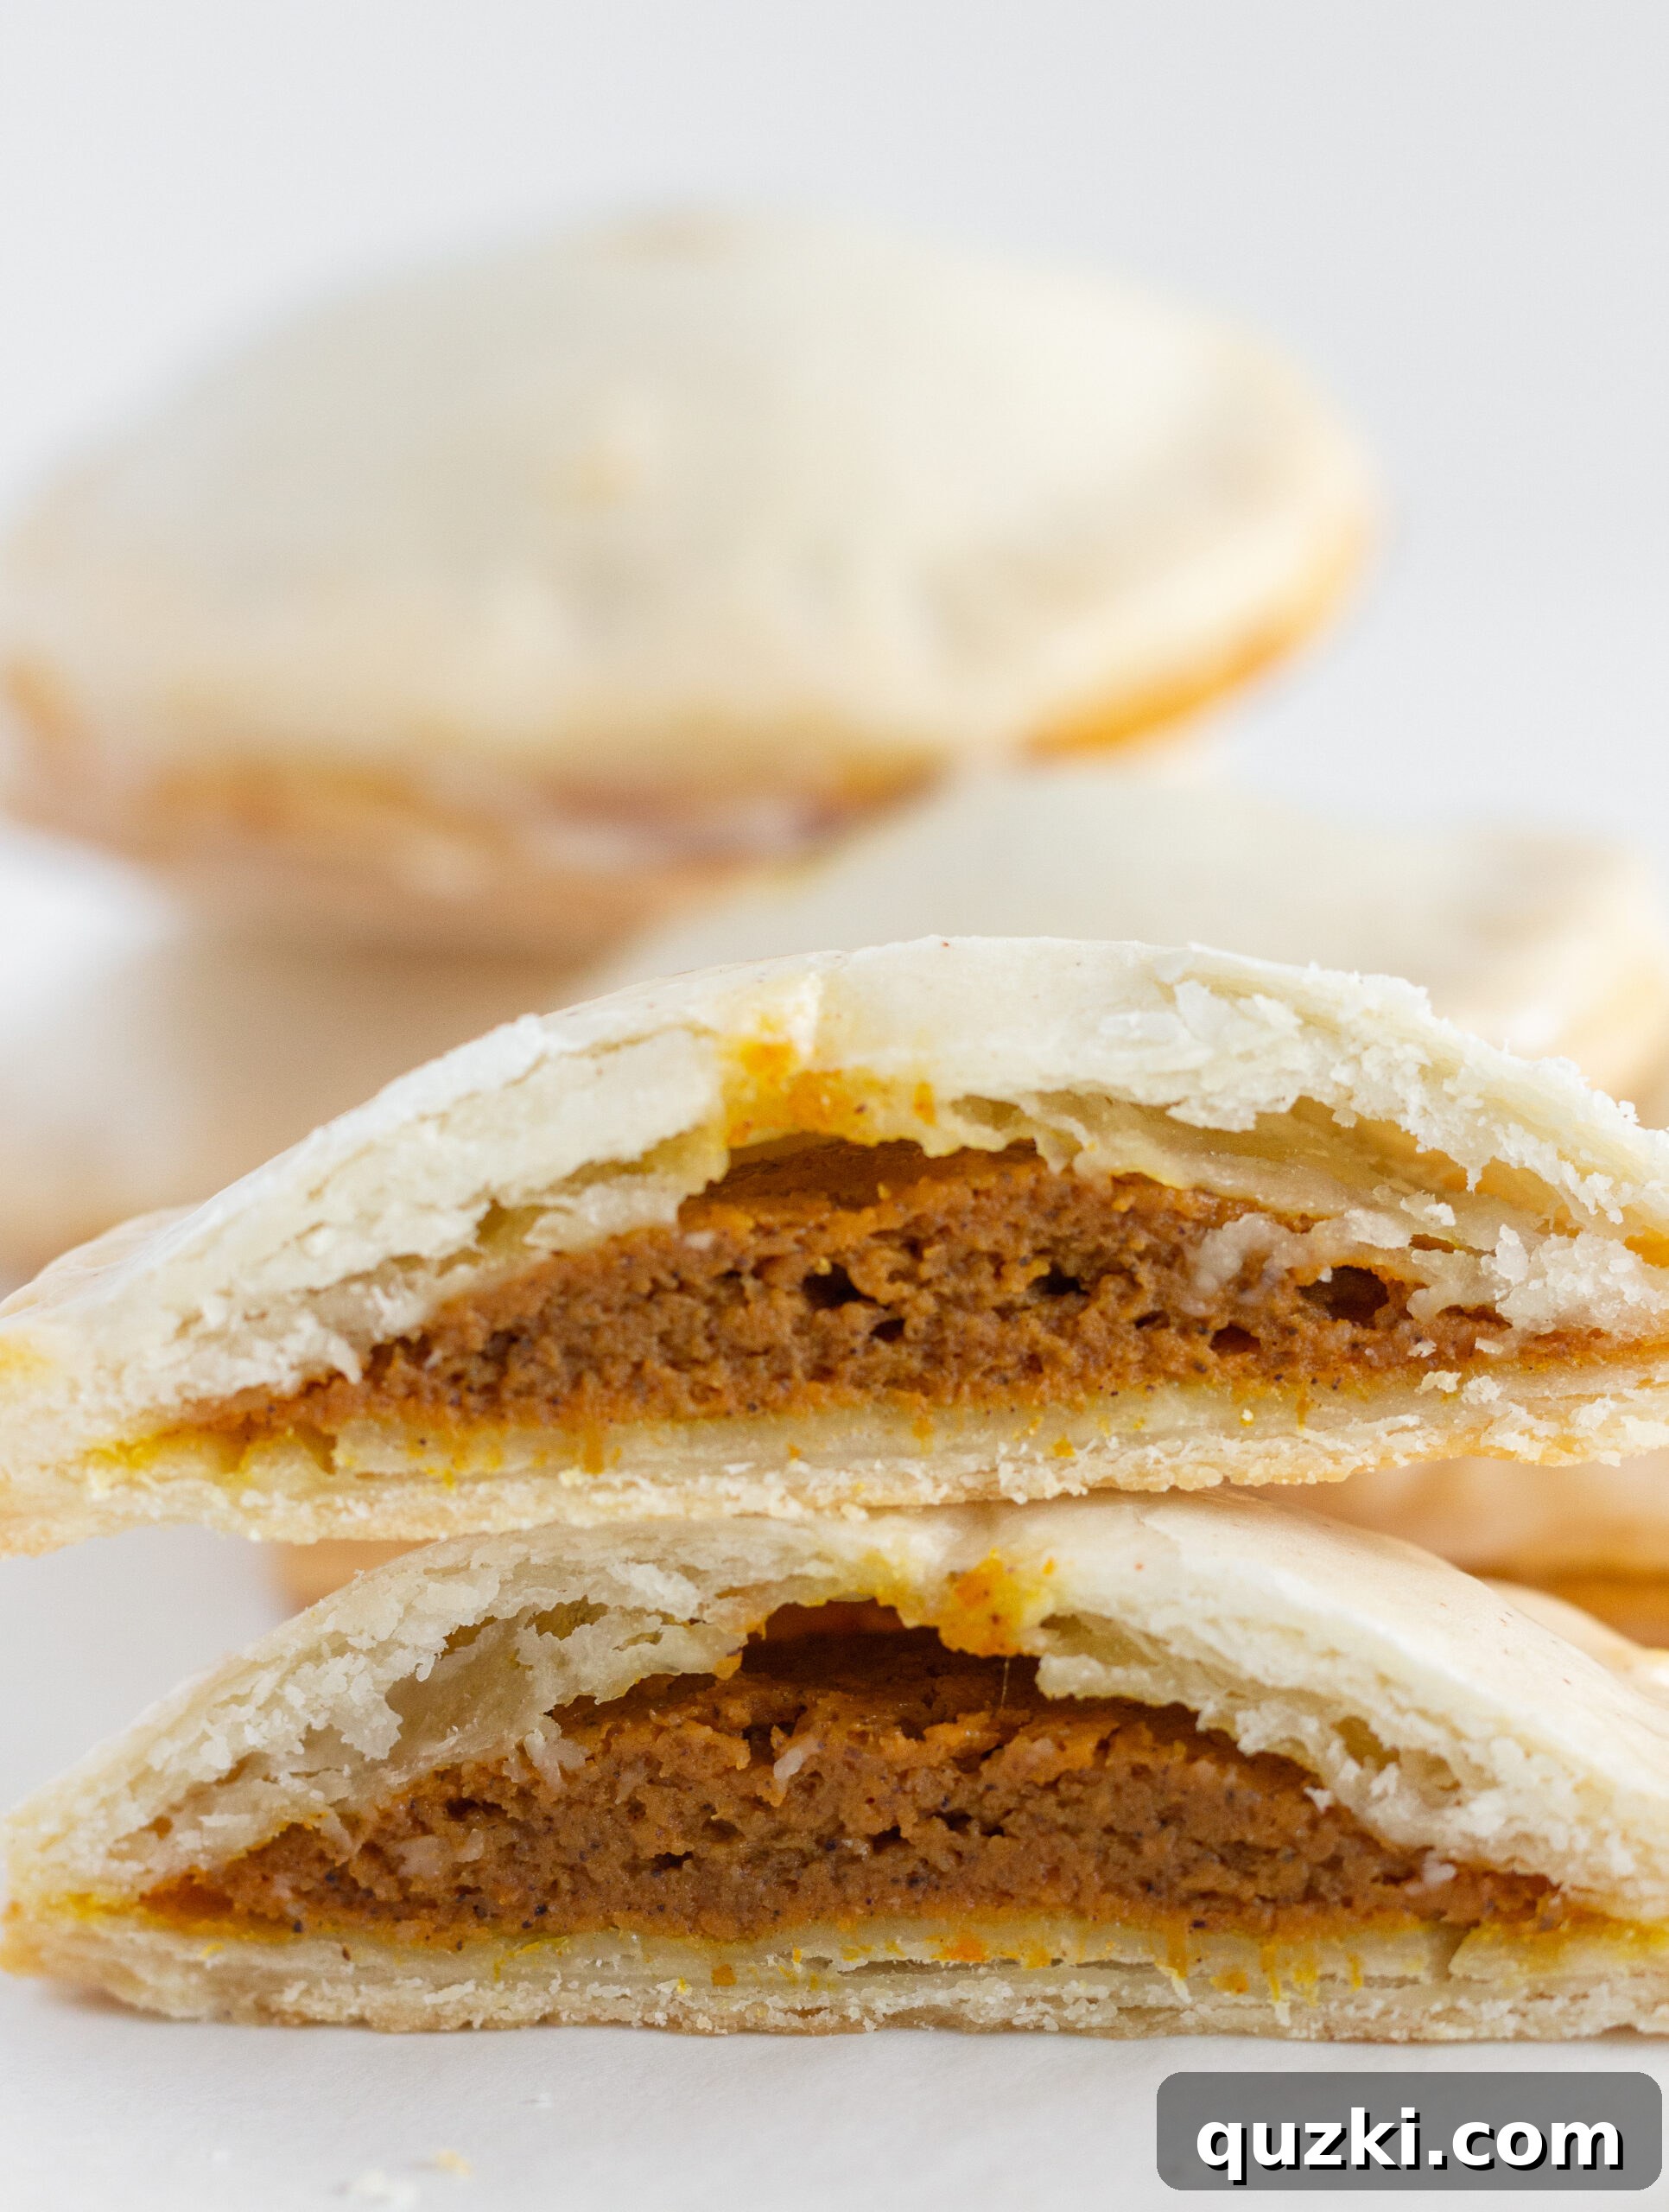
The real question isn’t what you’ll love about these mini pumpkin pies, but rather, what *won’t* you love? From the very moment you begin preparing them to that first delightful bite, these little treasures are brimming with reasons to make them a regular feature in your autumn baking repertoire. They epitomize the cozy flavors of fall in a wonderfully approachable format.
It all starts with the incredible convenience of using refrigerated pie crust. This smart shortcut significantly reduces your prep time and eliminates the common stress and mess associated with making homemade pastry from scratch. You get all the flaky goodness without the extra effort, making this recipe accessible even for novice bakers or those short on time.
Beyond the effortless crust, these hand pies boast a deeply flavorful, perfectly spiced pumpkin pie filling that’s baked to a creamy perfection. But what truly elevates these portable pastries and makes them undeniably shine is the exquisite cinnamon glaze. This sweet, spiced topping isn’t just an afterthought; it’s the crucial finishing touch that bestows these delightful gems with an extra layer of special flavor and a beautiful sheen that makes them utterly irresistible. Each component works in harmony to create a dessert that’s both simple to make and extraordinary to taste.
Essential Ingredients for Your Pumpkin Hand Pies
Crafting these delectable pumpkin hand pies requires a handful of common pantry staples. Each ingredient plays a vital role in achieving that perfect balance of flavor and texture, ensuring every bite is a taste of autumn bliss. Here’s what you’ll need:
- Refrigerated Pie Crusts: The secret to keeping this recipe effortlessly simple yet incredibly impressive. Pre-made pie crusts save valuable time and effort, allowing you to focus on the delicious filling and glaze while still achieving a perfectly flaky, golden crust.
- Pumpkin Puree: The heart of our filling, providing that unmistakable, earthy pumpkin flavor. It’s crucial to use pure pumpkin puree, not pumpkin pie filling (we’ll explain why below!). This allows you to control the spice and sweetness levels precisely. It’s also fantastic in recipes like our No Bake Pumpkin Cheesecake Bars.
- Egg: A single egg is essential for binding the pumpkin filling ingredients together, ensuring a smooth, cohesive texture. It also contributes to a slightly lighter, almost custard-like consistency once baked, preventing the filling from being too dense.
- Brown Sugar: While white sugar can be used, brown sugar is highly recommended. Its molasses content lends a deeper, richer sweetness and a subtle caramel note that beautifully complements the pumpkin and spices, adding complexity to the overall flavor profile.
- Pumpkin Pie Spice: This aromatic blend is what truly makes the filling taste like fall. You can easily purchase it from any grocery store, or for an extra layer of freshness and customizable flavor, whip up your very own Homemade Pumpkin Pie Spice using cinnamon, nutmeg, ginger, and cloves.
- Powdered Sugar: The foundation for our smooth, decadent glaze. Its fine texture dissolves easily, creating a silky-smooth icing without any graininess, providing a perfect sweet contrast to the spiced filling.
- Milk: Used to thin the powdered sugar into a pourable or brushable glaze consistency. You can use any milk you have on hand, or for an even richer glaze, opt for heavy cream. Adjust the amount slowly to reach your desired thickness.
- Cinnamon: A touch of ground cinnamon added to the glaze amplifies the warm spice notes already present in the pies and imparts a lovely, inviting color to the finished topping, making them even more appealing.
Step-by-Step: Crafting Your Own Delicious Pumpkin Hand Pies
Making these delightful hand pies is a straightforward process, even for beginner bakers. Follow these detailed steps to create perfectly portioned, flavorful pumpkin treats:
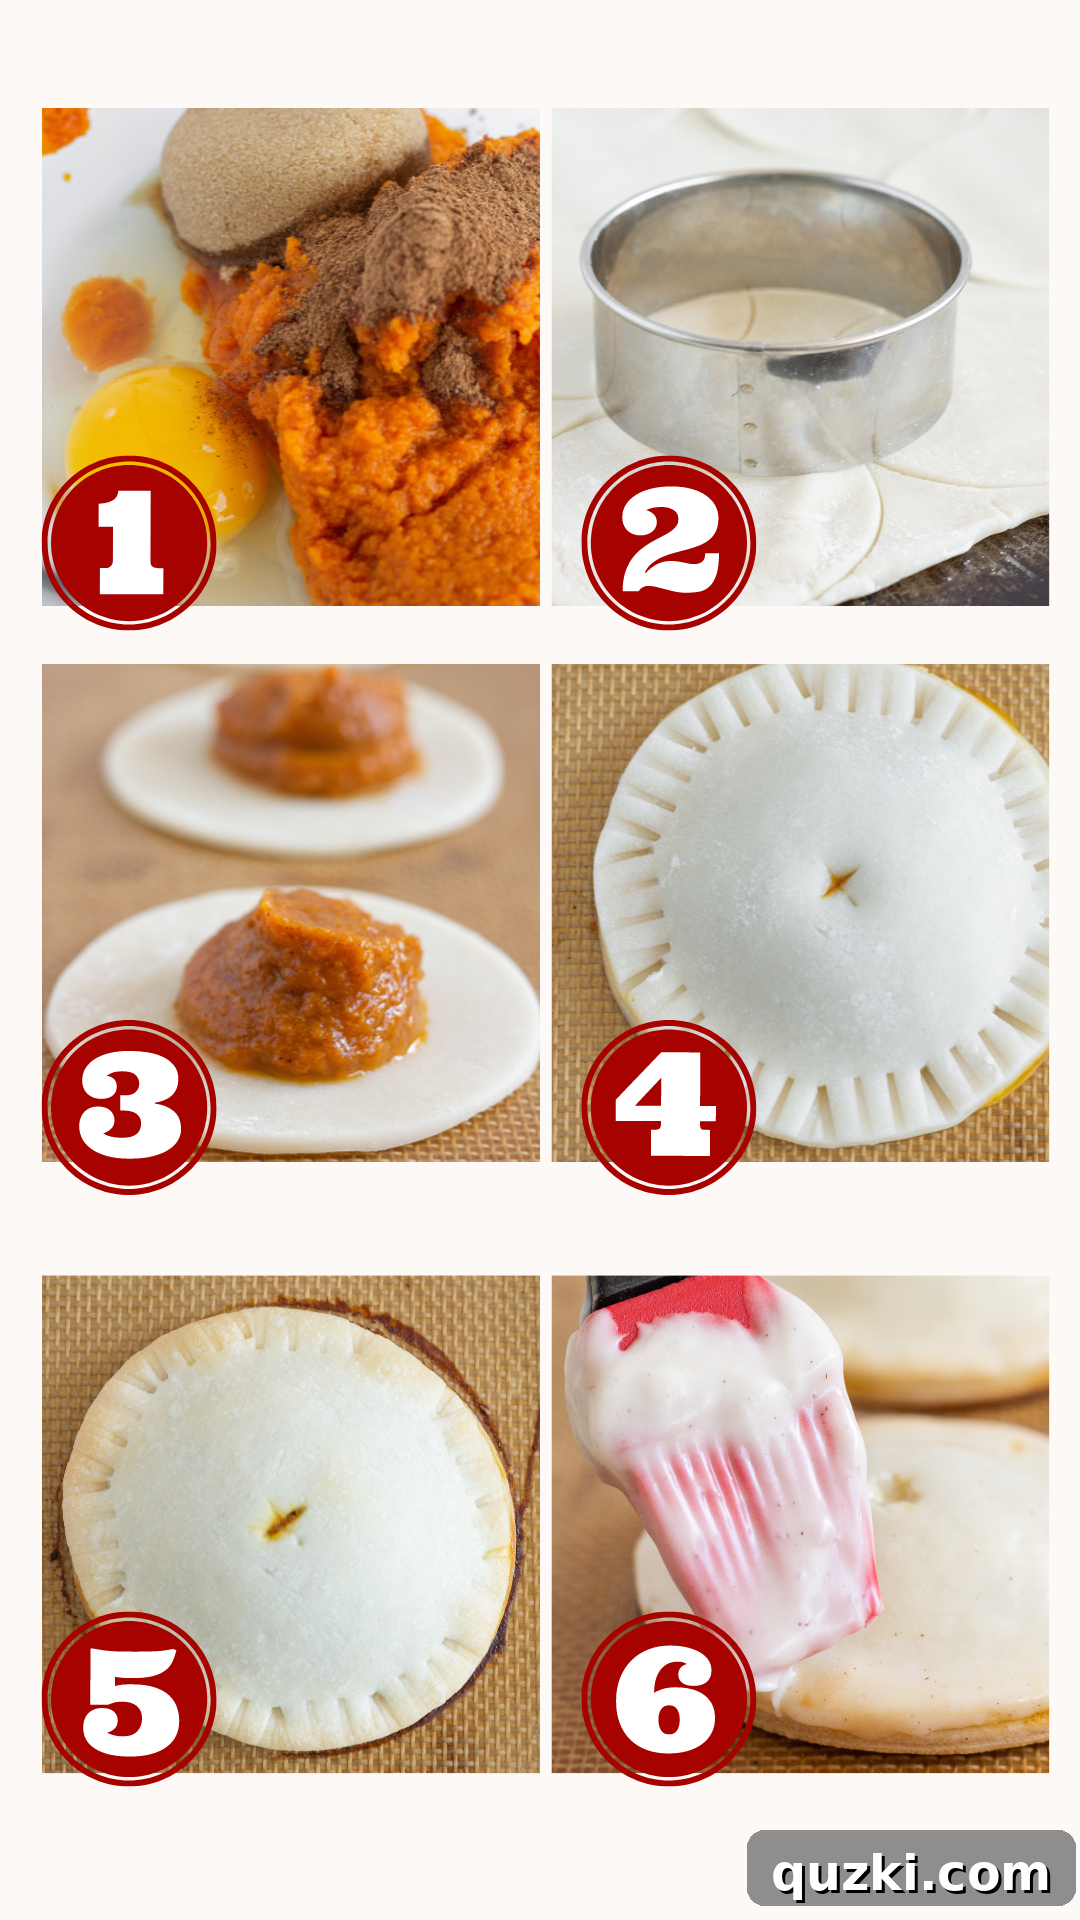
- Prepare the Filling and Crusts: Begin by preheating your oven to 375 degrees Fahrenheit (190°C). As the oven heats, remove your refrigerated pie crusts from the fridge and allow them to come to room temperature. This is crucial for preventing cracks when unrolling and cutting. While the crusts are softening, combine all the pumpkin pie filling ingredients – pumpkin puree, egg, brown sugar, and pumpkin pie spice – in a medium bowl. Whisk everything thoroughly until the mixture is completely smooth and well-combined, ensuring no lumps remain.
- Cut and Fill the Crusts: Gently unroll the room-temperature pie crusts onto a lightly floured surface. Using a round cookie cutter (approximately 3-4 inches in diameter) or the rim of a drinking glass, cut out as many circles as possible from each crust. You should get about 8 rounds per crust, totaling 24 circles from three crusts. Take half of these circles (12 in total) and arrange them on a baking sheet lined with a silicone mat or parchment paper. Using a medium cookie scoop (or roughly 1.5 tablespoons), spoon the pumpkin filling into the center of each of these 12 circles, leaving a small border around the edge.
- Assemble and Seal the Hand Pies: For the remaining 12 pie crust circles, use your fingers to gently stretch and enlarge them slightly. This ensures they will comfortably fit over the filled bases. Carefully place one enlarged crust circle over each pumpkin-topped base. To seal the pies, use the tines of a fork to firmly press down and crimp the edges of the top and bottom crusts together all around the perimeter. This creates a decorative edge and prevents the filling from leaking. Finally, with a sharp paring knife, cut a small ‘X’ or a few slits into the top center of each hand pie. These vents are essential for allowing steam to escape during baking, preventing the pies from puffing up excessively or bursting.
- Bake to Golden Perfection: Place your assembled hand pies on a silicone mat (or parchment) lined baking sheet. Bake them in your preheated 375°F (190°C) oven for 15-18 minutes, or until the pie crusts are beautifully golden brown and appear cooked through. The internal filling will also set during this time. Once baked, carefully remove the pies from the oven and transfer them to a wire rack to cool for about 5 minutes.
- Prepare and Apply the Cinnamon Glaze: While the hand pies are cooling, prepare your cinnamon glaze. In a small bowl, combine the powdered sugar, milk, and a pinch of cinnamon. Whisk vigorously until the mixture is completely smooth and free of lumps. Adjust the consistency by adding a tiny bit more milk if it’s too thick, or a small amount of powdered sugar if it’s too thin – you want a consistency that’s spreadable but not watery. After the pies have cooled for 5 minutes, use a pastry brush to generously apply the cinnamon glaze over the top of each warm hand pie. Allow the glaze to set for a few minutes before serving. Store any leftover hand pies in an airtight container in the refrigerator for up to 4 days.
Expert Tips for Perfect Pumpkin Hand Pies Every Time
Achieving bakery-quality pumpkin hand pies is easier than you think with these helpful tips and tricks. These suggestions will ensure your pies are flaky, flavorful, and perfectly presented:
- Room Temperature Pie Crusts Are Key: Always take your refrigerated pie crusts out of the refrigerator at least 15-20 minutes before you plan to use them. Attempting to unroll or cut cold dough will almost certainly result in cracks and tears, making them difficult to work with and affecting the final appearance of your hand pies. Room temperature dough is pliable and much easier to handle.
- Alternative Round Cutters: If you don’t own a round cookie cutter, don’t fret! A clean, sturdy drinking glass, a small bowl, or even the lid of a container can serve as an excellent substitute. Just ensure the edges are sharp enough to create clean cuts in the dough.
- Uniform Filling for Even Baking: Using a medium cookie scoop to portion your pumpkin filling is a game-changer. This ensures that each hand pie receives the same amount of filling. Not only will this make your pies look consistently beautiful, but it also guarantees they will bake evenly, with no undercooked or overcooked sections.
- Don’t Skip the Vents: Cutting a small ‘X’ or a few slits into the top of each pie before baking is a crucial step. These small openings act as vents, allowing steam generated by the cooking filling to escape. Without them, the steam can build up, causing the pies to puff excessively, potentially crack, or even burst open, ruining their neat appearance.
- Mastering Glaze Consistency: The perfect glaze should be thick enough to cling to the pie but thin enough to spread smoothly. If your glaze seems too thick, add milk in very small increments (half a teaspoon at a time) and whisk until you reach the desired spreadable consistency. Conversely, if you accidentally add too much liquid and it becomes too thin, simply whisk in a bit more powdered sugar until it thickens up.
- Preventing a Soggy Bottom: To ensure a crisp, flaky bottom crust, make sure your oven is fully preheated, and consider using a heavy-duty baking sheet. Baking on parchment paper or a silicone mat also helps. Avoid overfilling the pies, as excess moisture can lead to a soggy crust.
- Egg Wash for Extra Shine: For an extra golden and slightly crispier crust, consider brushing the tops of your hand pies with a simple egg wash (one egg beaten with a tablespoon of water) before baking. This will give them a beautiful, professional sheen.
- Serving Suggestions: These hand pies are fantastic on their own, but for an extra special treat, serve them warm with a dollop of whipped cream, a scoop of vanilla bean ice cream, or a drizzle of caramel sauce. They also pair wonderfully with a hot cup of coffee or cider.
Pumpkin Puree vs. Pumpkin Pie Filling: What’s the Difference?
It’s a common misconception that pumpkin puree and pumpkin pie filling are interchangeable, but they are distinctly different products. Understanding this difference is vital for successful baking, especially when a recipe calls for one specifically.
Pumpkin Puree is simply cooked, mashed pumpkin that has been pureed into a smooth consistency and then canned. It contains no added sugar, spices, or flavorings. Its flavor is natural, mildly sweet, and earthy, making it a versatile ingredient for both sweet and savory dishes, allowing the cook complete control over the additional seasonings.
Pumpkin Pie Filling, on the other hand, is a ready-to-use product. It is essentially pumpkin puree that has already been blended with a pre-measured mix of traditional pumpkin pie spices (such as cinnamon, cloves, nutmeg, and ginger) and sugar. This makes it convenient for quickly assembling a traditional pumpkin pie, but it limits your ability to adjust the flavor profile.
In this Easy Pumpkin Hand Pies recipe, for example, we specifically call for pumpkin puree. This is because we want to precisely control the amount and type of spices and sweetness in our filling and glaze. Using pumpkin puree allows us to build a custom flavor that perfectly complements the hand pie format, rather than relying on the pre-set flavor of pie filling, which could result in an overly sweet or heavily spiced product. Always check your can labels carefully to ensure you’re using the correct ingredient for your recipe!
Frequently Asked Questions: All About Pumpkin Hand Pies
To maintain their freshness and flavor, the best way to store your baked Pumpkin Hand Pies is in an airtight container. If you need to stack them, place a piece of parchment paper or wax paper between layers to prevent them from sticking together and to preserve their delicate glaze. These delicious hand pies will keep well when refrigerated for up to 4 days. You can enjoy them chilled directly from the fridge, or for a warm, comforting treat, simply pop them into the microwave for 20-25 seconds before serving.
Absolutely! These Pumpkin Hand Pies are excellent for freezing, allowing you to enjoy a taste of fall anytime. After baking, allow them to cool completely. Then, place the hand pies in a single layer on a baking sheet and freeze for a couple of hours until solid. Once frozen, transfer them to airtight containers or heavy-duty freezer bags. They will keep well in the freezer for up to 3 months. Freezing them individually first prevents them from sticking together, making it easy to grab just a few at a time to thaw and enjoy.
Yes, if you have a favorite homemade pie crust recipe, feel free to use it! The key to success with hand pies and homemade crust is to ensure you roll the dough thinly, similar to the thickness of a refrigerated pie crust. This will ensure they bake evenly and create that delightful flaky texture synonymous with hand pies. Just remember that homemade crust might require a bit more chilling time to handle easily.
Yes, you can certainly prepare these mini pumpkin pies ahead of time and bake them later, as long as it’s not too far in advance. Assembling them a few hours before baking or even the night before works perfectly. Simply cover the unbaked pies lightly with plastic wrap and refrigerate. When ready to bake, remove them from the fridge about 15-20 minutes beforehand to take the chill off, then bake as directed. This makes them a fantastic option for entertaining or busy holidays!
Pumpkin Hand Pies are incredibly versatile! Their individual size makes them perfect for fall potlucks, Thanksgiving dessert tables, school bake sales, picnics, or as a delightful grab-and-go breakfast treat. They’re also ideal for cozy autumn evenings at home, offering a comforting, single-serving dessert without the fuss of slicing a whole pie.
Certainly! While the cinnamon glaze adds an extra layer of sweetness and spice, these pumpkin hand pies are absolutely delicious even without it. If you prefer a less sweet dessert or want to dust them with powdered sugar instead, they will still be fantastic. Alternatively, you could brush them with an egg wash before baking for a glossy finish without the added sugar from the glaze.
Do You Love Pumpkin? Explore These Amazing Recipes…
If your heart beats for all things pumpkin, you’re in for a treat! We’ve curated a collection of our favorite pumpkin-inspired recipes that are just as easy and delicious as these hand pies. Dive into more autumnal goodness:
- No Bake Pumpkin Cheesecake Bars
- Easy Pumpkin Cheesecake Cookies with a Cake Mix
- Easy Pumpkin Bread with a Cake Mix
- Pumpkin Chocolate Chip Cookies Recipe with a Cake Mix
- Pumpkin Sheet Pan Pancakes from Mix
Easy Pumpkin Hand Pies
June Albertson-Dick
20 mins
18 mins
38 mins
12 hand pies
Rate Recipe
Print Recipe
Ingredients
- 3 refrigerated pie crusts
Pumpkin Pie Filling
- 1 cup pumpkin puree
- 1 egg
- ¼ cup brown sugar, {packed}
- 1 ¼ teaspoons pumpkin pie spice
Cinnamon Glaze
- ¼ cup powdered sugar
- 1 Tablespoon milk, {or heavy cream}
- ⅛ teaspoon cinnamon
Instructions
-
Preheat oven to 375 degrees F (190°C). Remove refrigerated pie crusts from refrigerator and allow to come to room temperature while you are preparing the filling.
Pumpkin Pie Filling
-
Combine the pumpkin puree, egg, brown sugar and pumpkin pie spice in a medium bowl and whisk until smooth.
Assembling Hand Pies
-
Unroll the refrigerated crusts and use a glass or round cookie cutter to cut 24 circles from the dough. Add about 1 ½ tablespoons (or use a medium cookie scoop) of pumpkin pie filling to the middle of 12 (or half) of the pie crust circles.
-
Take the remaining pie crust circles and use your hands to slightly enlarge them, so that they will fit over the top of the pie filling. Place a pie crust circle over each of pumpkin pie topped crusts. Use the tines of a fork to press down and crimp the edge of the pies together. Then use a sharp paring knife to cut a small X into the top of each hand pie (this allows steam to release as they bake). Place them onto a silicone mat (or parchment) lined baking sheet.
-
Bake for 15-18 minutes or until the tops are slightly golden and baked through. Remove from the oven and allow the pies to cool for 5 minutes.
Cinnamon Glaze
-
While the pies are cooling, combine the glaze ingredients and whisk until smooth. Add additional milk if needed to get a good consistency. After 5 minutes, use a pastry brush to brush the top of each pie liberally with the cinnamon glaze. Allow the glaze to set and serve. Store remaining pies in an airtight container in the refrigerator for up to 4 days.
Nutrition
Calories: 269kcal,
Carbohydrates: 33g,
Protein: 4g,
Fat: 14g,
Saturated Fat: 4g,
Polyunsaturated Fat: 2g,
Monounsaturated Fat: 6g,
Trans Fat: 0.002g,
Cholesterol: 14mg,
Sodium: 213mg,
Potassium: 105mg,
Fiber: 2g,
Sugar: 8g,
Vitamin A: 3200IU,
Vitamin C: 1mg,
Calcium: 24mg,
Iron: 2mg
Nutrition information is automatically calculated, so should only be used as an approximation.
Like this? Leave a comment below!