
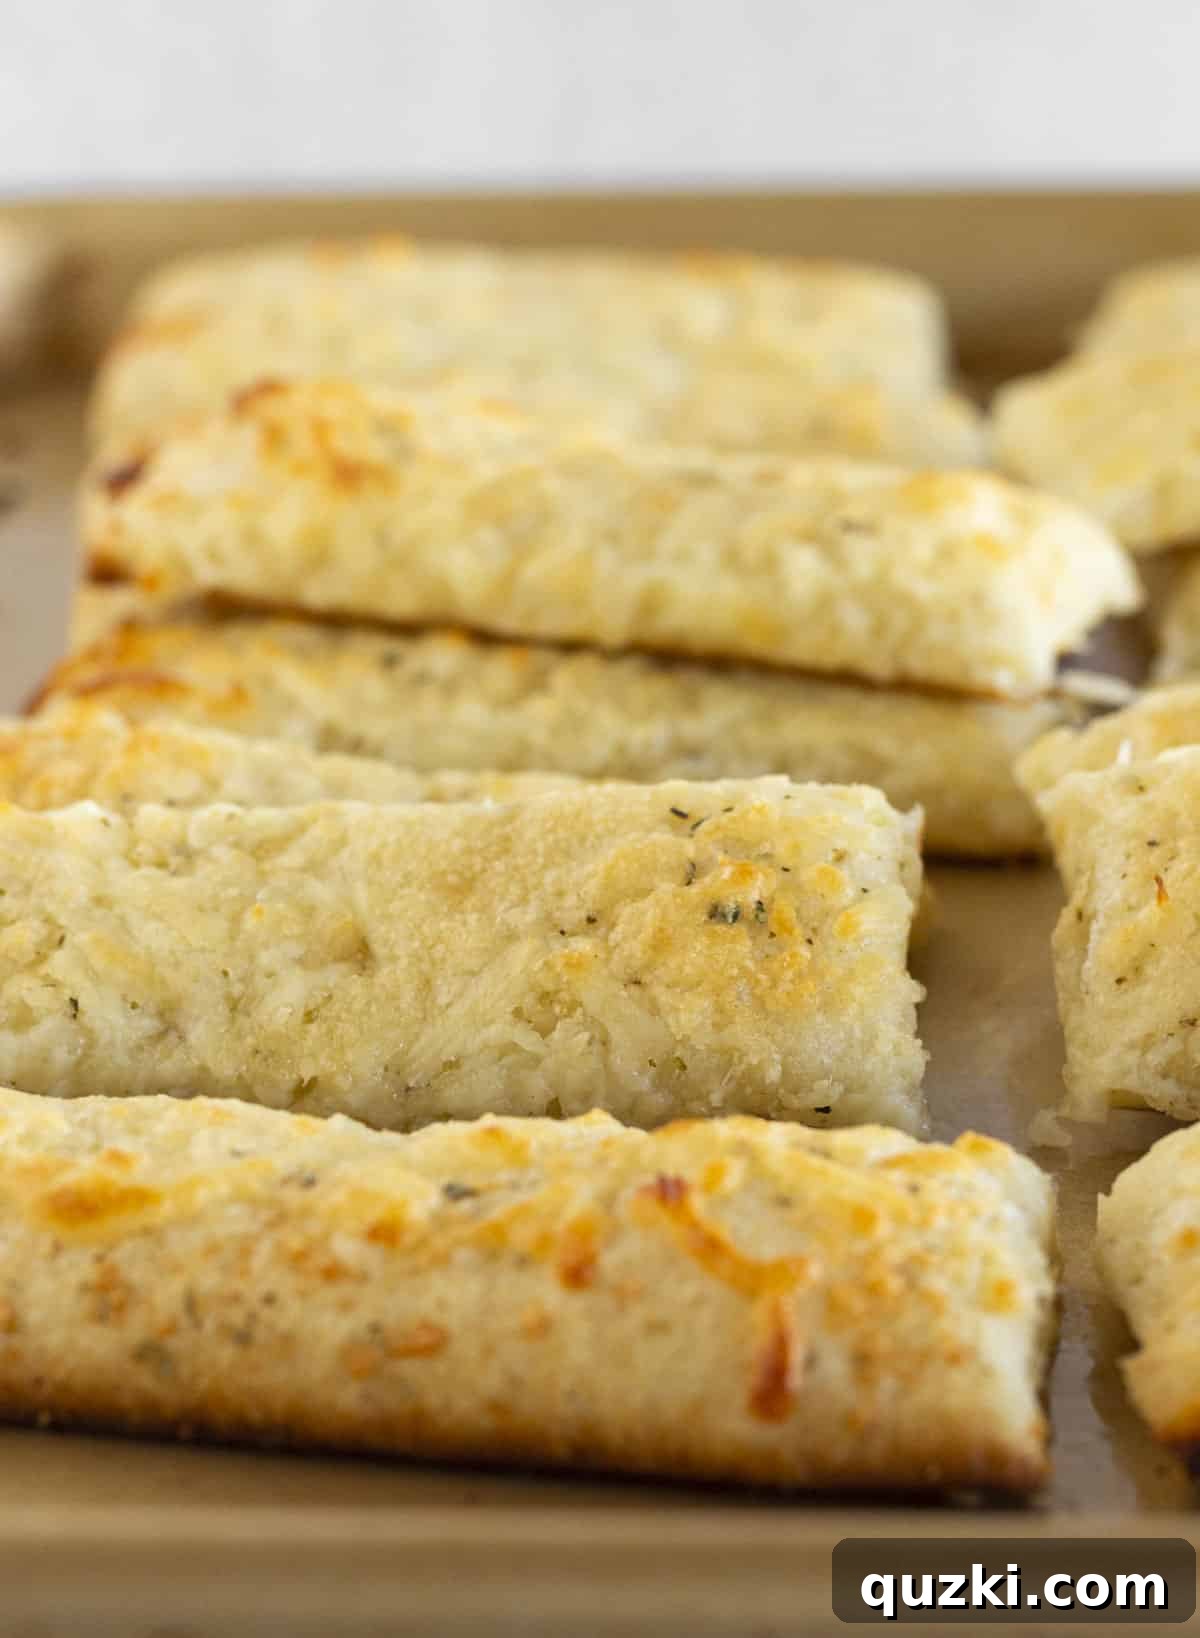
Are you craving that irresistible aroma of freshly baked breadsticks, loaded with savory garlic butter and gooey, melted cheese? Imagine enjoying restaurant-quality cheesy breadsticks in a fraction of the time it takes to order takeout. These quick and easy Cheesy Garlic Breadsticks are your perfect solution! Crafted with readily available store-bought pizza dough and a handful of simple ingredients, they come together in an astonishing 20 minutes, offering a delicious appetizer or side dish that tastes just like it came from your favorite pizzeria, but with the pride of homemade goodness.
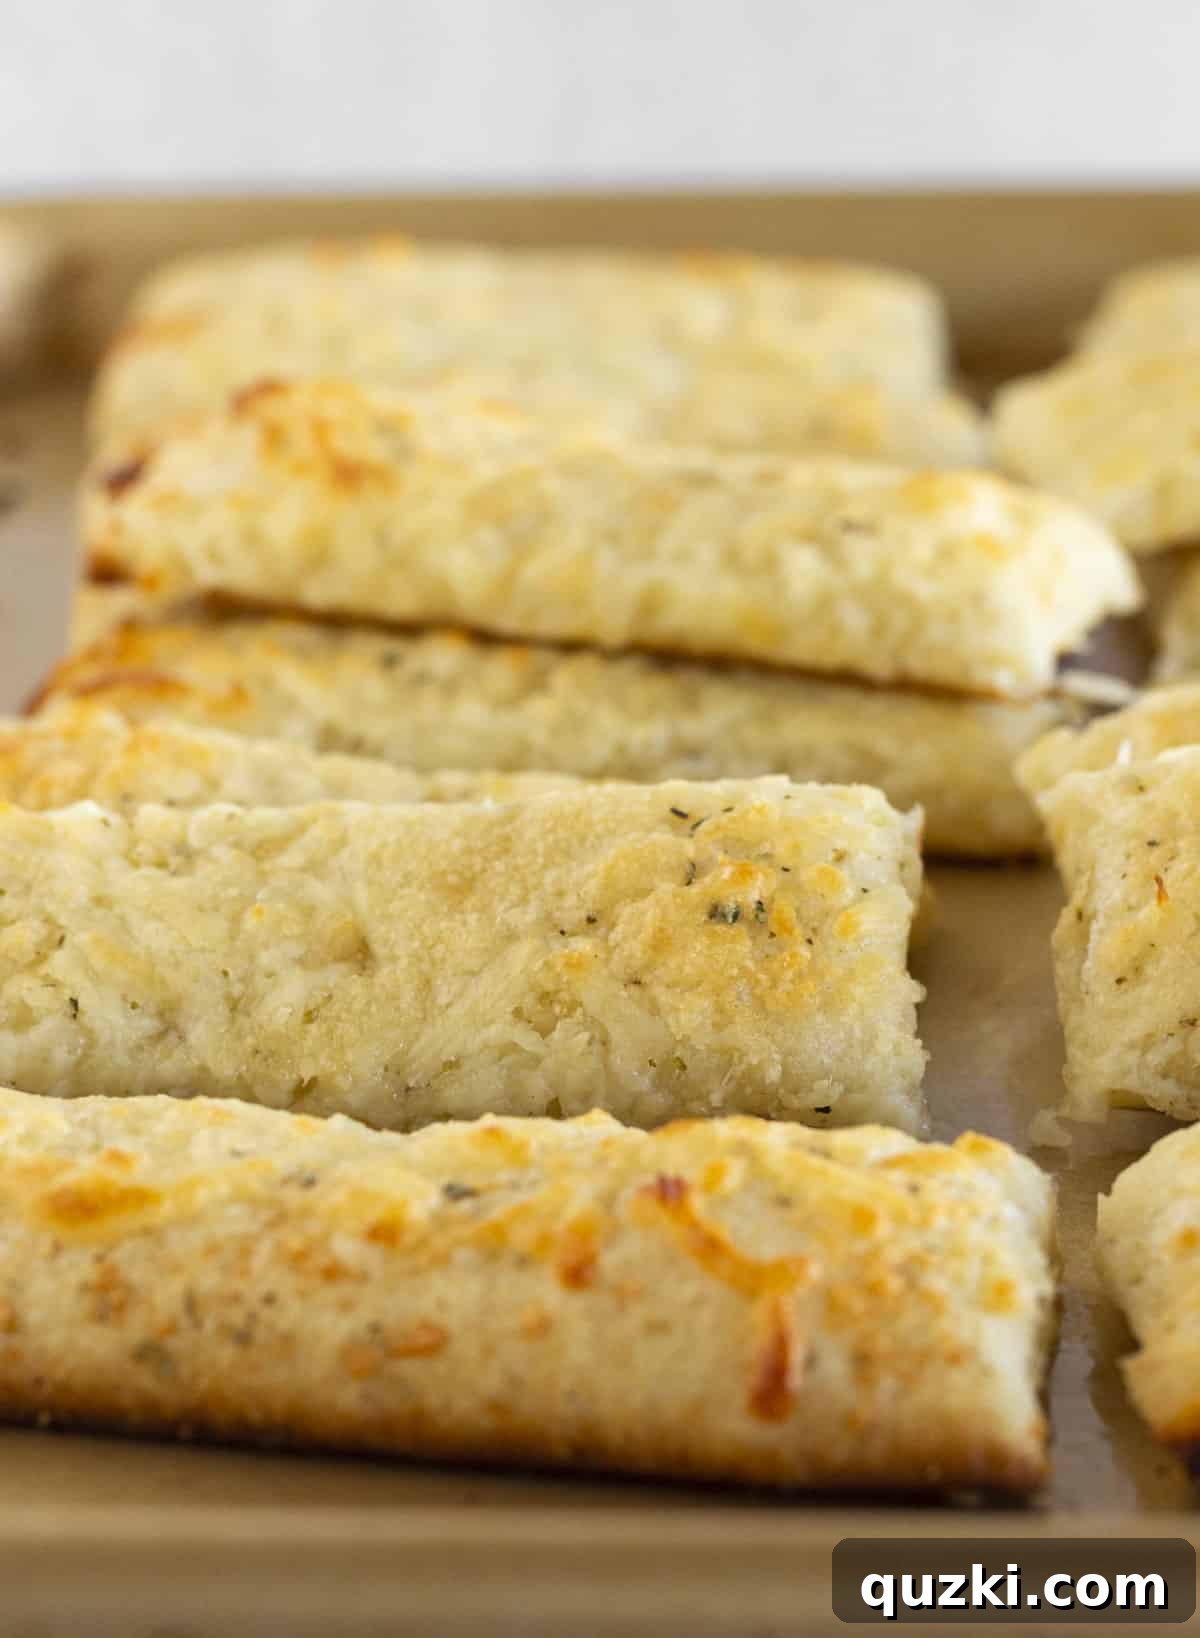
Table of Contents
- Why You’ll Love These Cheesy Breadsticks
- Ingredients for the Perfect Cheesy Breadsticks
- Creative Variations to Customize Your Breadsticks
- Step-by-Step: How to Make Cheesy Breadsticks
- Expert Tips for Flawless Cheesy Breadsticks
- How to Serve Your Homemade Breadsticks
- Storing and Reheating Leftover Breadsticks
- Cheesy Breadsticks Recipe FAQs
- Cheesy Breadsticks Recipe
- More Delicious Side Dish Ideas
Why You’ll Love These Cheesy Breadsticks
The magic behind these utterly irresistible cheesy breadsticks lies in their sensational garlic butter topping! A generous amount of melted butter is lovingly infused with aromatic garlic powder and a fragrant Italian seasoning blend. This flavorful concoction is then brushed generously over the pizza dough before being crowned with a luscious mix of shredded mozzarella and grated Parmesan cheese. As these golden delights bake, the cheesy goodness transforms into a bubbly, molten layer, while the edges of the dough crisp up to a perfect golden brown, delivering a satisfying crunch with every bite. The combination of the rich butter, pungent garlic, fragrant herbs, and two distinct cheeses creates a symphony of flavors that will have everyone reaching for more.
What truly sets this cheesy breadstick recipe apart is its incredible versatility and, of course, its lightning-fast preparation! In today’s busy world, having a go-to recipe that delivers maximum flavor with minimal effort is a game-changer. You have full creative freedom to customize the seasonings or cheese blend to perfectly match your personal taste. Feeling adventurous? Elevate your breadsticks with exciting additions like thinly sliced pepperoni, briny olives, spicy jalapeños, or even a sprinkle of crumbled bacon for a fun and flavorful twist. Imagine serving these at your next family game night or an impromptu gathering – they are guaranteed to be the star of the show.
These buttery garlic breadsticks are simply divine on their own, but they truly shine when paired with your favorite dipping sauces. Imagine dunking them into a rich marinara sauce, a creamy ranch dressing, a zesty pesto, or even a homemade garlic aioli. Their adaptability makes them suitable for any occasion. Planning a pizza night or hosting a large get-together? This fantastic recipe can be effortlessly doubled or even tripled to feed a hungry crowd – just be prepared, because they have a mysterious way of disappearing astonishingly fast! Their crowd-pleasing appeal makes them ideal for parties, potlucks, or simply a cozy night in.
Whether you’re searching for the ultimate quick snack to curb those afternoon cravings, a show-stopping party appetizer that requires minimal fuss, or a dependable side dish to complement your favorite weeknight meals – perhaps alongside a hearty Cajun Pasta Bake or a comforting Crock Pot Tortellini Soup – these easy cheesy breadsticks are your answer. Requiring only a handful of common ingredients and taking just 20 minutes from start to finish, they are a guaranteed hit that promises maximum flavor and minimum stress.
Ingredients for the Perfect Cheesy Breadsticks
Crafting these irresistible cheesy breadsticks requires only a few key ingredients, each playing a vital role in creating their signature flavor and texture. Here’s what you’ll need:
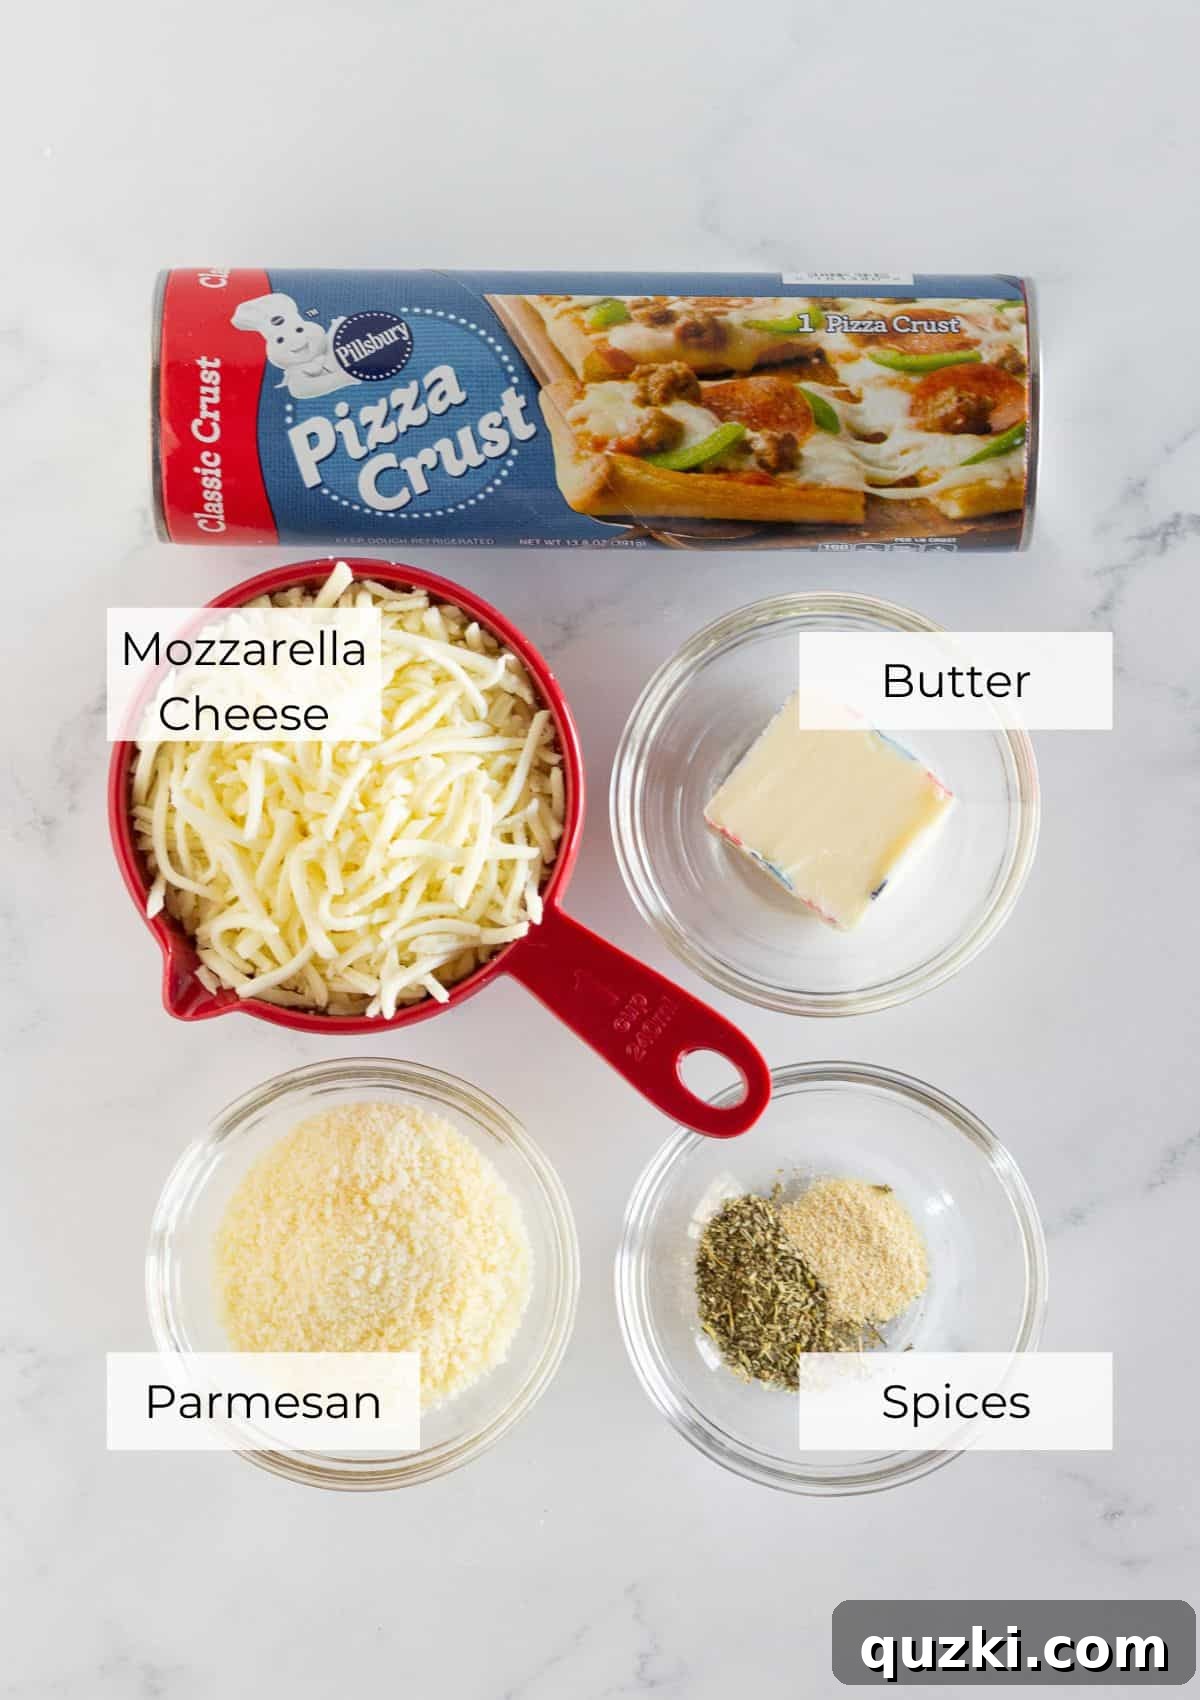
- Refrigerated Pizza Dough: This is the secret weapon for speed and convenience! Using pre-made, refrigerated pizza crust drastically cuts down on preparation time, making this recipe truly express. A standard 13.8-ounce package is perfect. If you prefer, feel free to use your favorite homemade dough for an even more authentic touch. It’s also a fantastic base for other quick bites, like this festive Pigs in a Blanket Wreath.
- Butter (Melted): Unsalted butter is preferred, allowing you to control the saltiness. Melted butter forms the rich base for our flavorful garlic and herb topping, contributing to the golden crust and overall decadence. It’s what makes these breadsticks truly “buttery.”
- Garlic Powder: A staple in every pantry, garlic powder delivers a concentrated, savory punch of garlic flavor without the sharpness of fresh garlic. It blends seamlessly into the butter, ensuring every inch of dough is seasoned to perfection.
- Italian Seasoning: This aromatic blend of dried herbs, typically including oregano, basil, rosemary, thyme, and marjoram, complements the cheesy topping beautifully. It adds depth and a classic Italian-American pizzeria flavor profile to the breadsticks.
- Mozzarella Cheese (Shredded): The star of the show for that iconic stretchy, melty, gooey texture. Low-moisture, part-skim mozzarella is ideal as it melts wonderfully without releasing too much water, preventing a soggy crust. Freshly shredded cheese often melts better than pre-shredded.
- Parmesan Cheese (Grated): A sprinkle of Parmesan cheese adds a sharp, salty, umami bite that perfectly balances the mildness of the mozzarella. It contributes to the golden-brown crust and a slightly nutty flavor, enhancing the overall cheesy experience.
- Optional: Non-stick Cooking Spray: For preparing your baking sheet to ensure easy removal and crispy bottoms.
For precise quantities and a comprehensive breakdown, please refer to the detailed recipe card below.
Creative Variations to Customize Your Breadsticks
One of the best aspects of these cheesy breadsticks is their incredible adaptability. Feel free to unleash your culinary creativity and customize them to suit any palate or occasion:
- Spice it Up: For those who love a bit of heat, simply add a generous pinch of red pepper flakes to the melted butter mixture. You can also sprinkle them directly over the cheese before baking for a spicier kick.
- Herbaceous Twist: After baking, brush the warm breadsticks with a little extra virgin olive oil and sprinkle with fresh herbs like finely chopped basil, parsley, or oregano. A touch of fresh minced garlic can also be added for a more intense garlic flavor, giving them a vibrant finish.
- Cheese Enthusiast’s Dream: Don’t limit yourself to just mozzarella and Parmesan! Experiment with a blend of your favorite cheeses. Consider adding sharp cheddar for a more robust flavor, creamy provolone for extra meltiness, or nutty Asiago for sophisticated depth. A touch of crumbled feta or goat cheese could also offer a unique tang.
- Ranch Lover’s Delight: Swap out the Italian seasoning for a packet of ranch seasoning mix. This will infuse your breadsticks with a zesty, creamy, and undeniably addictive flavor profile that’s perfect for dipping in ranch dressing.
- Make it a Meal: Transform these breadsticks into a heartier snack by adding toppings before baking. Think mini pepperoni slices, finely chopped cooked bacon, sautéed mushrooms, diced bell peppers, or sliced black olives. Ensure any wet toppings are drained well to prevent a soggy crust.
- Cheesy Garlic Knots: For a fun, visually appealing twist, turn your breadsticks into cheesy garlic knots. Simply cut the dough into 1-inch wide strips, tie each strip into a loose knot, then brush with the seasoned butter and top with cheese before baking. They’re just as delicious and even more charming!
- Sweet & Savory: For an unexpected yet delightful pairing, consider a very light drizzle of balsamic glaze over the finished breadsticks. The tanginess perfectly cuts through the richness of the cheese and butter.
Step-by-Step: How to Make Cheesy Breadsticks
Creating these delightful cheesy breadsticks is incredibly straightforward. Follow these simple steps for a perfect batch every time:
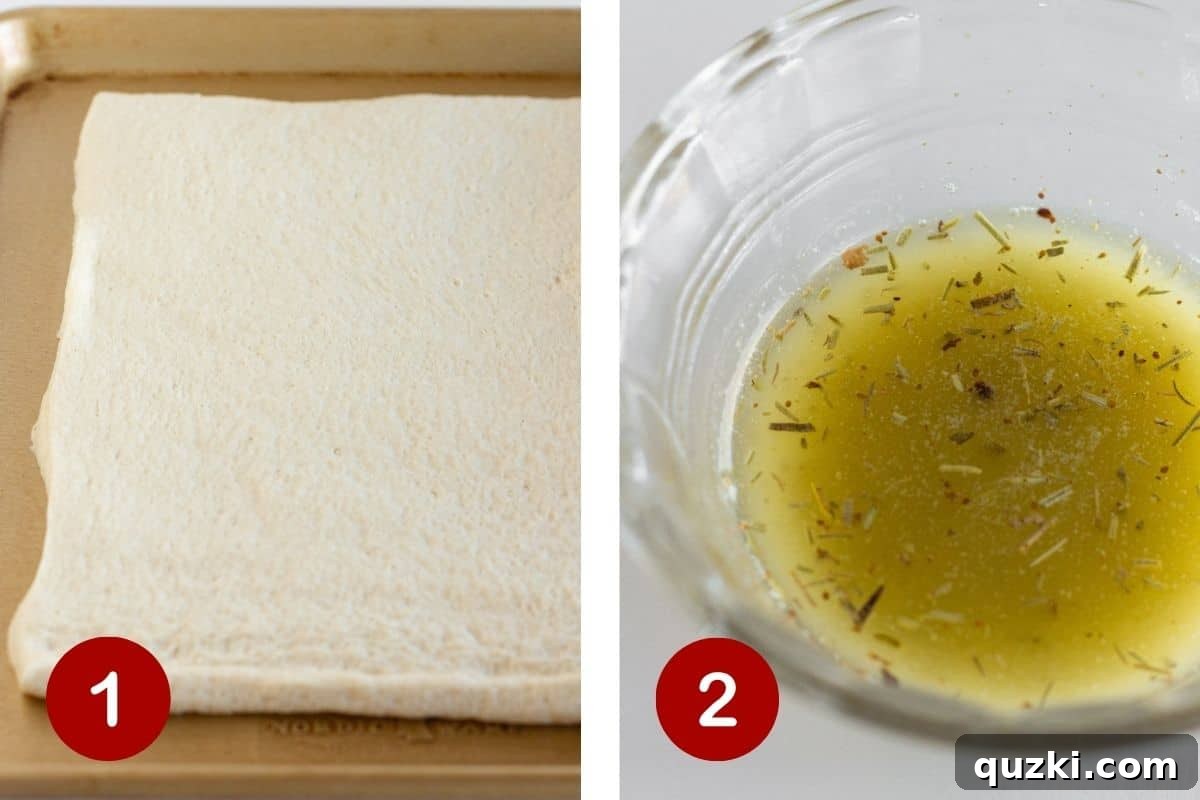
- Prepare Your Workspace and Preheat Oven: Begin by preheating your oven to a scorching 400°F (200°C). This ensures the breadsticks cook quickly and evenly, achieving that desirable golden crust. While the oven preheats, unroll your refrigerated pizza dough directly onto a large baking sheet. For easiest cleanup and to prevent sticking, it’s highly recommended to line the baking sheet with parchment paper or spray it thoroughly with non-stick cooking spray. Gently stretch the dough to fit the sheet if needed.
- Craft the Flavorful Garlic Butter: In a small, microwave-safe bowl, melt 2-3 tablespoons of butter. Once melted, stir in ¼ teaspoon of garlic powder and ½ tablespoon of Italian seasoning until well combined. This aromatic mixture is the cornerstone of our breadsticks’ irresistible flavor.
- Apply Butter and Layer Cheese: Evenly spread the seasoned butter mixture over the entire surface of the pizza dough. A silicone basting brush works wonders for achieving even coverage, ensuring every bite is packed with garlicky goodness. If you don’t have a brush, the back of a spoon can be used to gently spread the butter. Next, generously sprinkle 1 cup of shredded mozzarella cheese evenly over the buttered dough, making sure to cover almost to the edges. Follow this with 3 tablespoons of grated Parmesan cheese, distributing it uniformly for a balanced flavor.
- Slice and Bake: Using a pizza cutter or a sharp knife, carefully slice the prepared pizza dough into approximately 12 uniform breadsticks. You can make them as wide or thin as you prefer, but aim for consistency for even baking. Transfer the baking sheet to your preheated 400°F (200°C) oven.
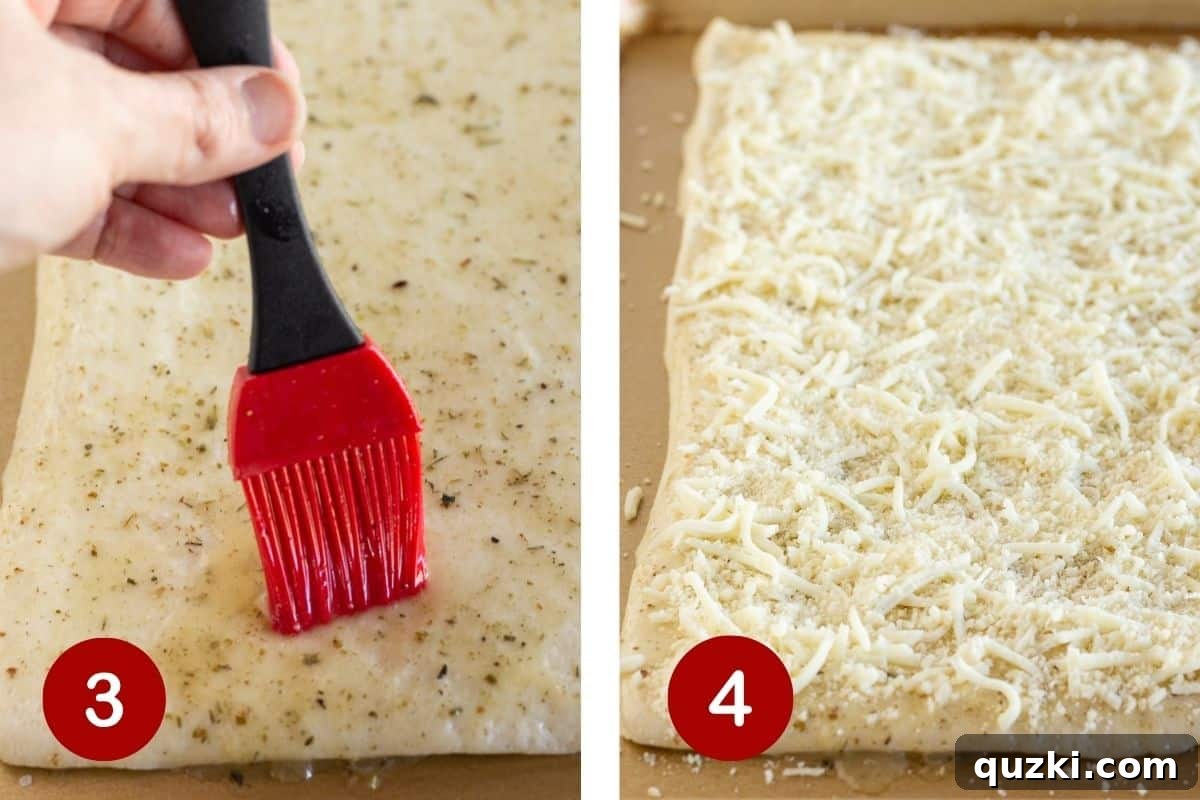
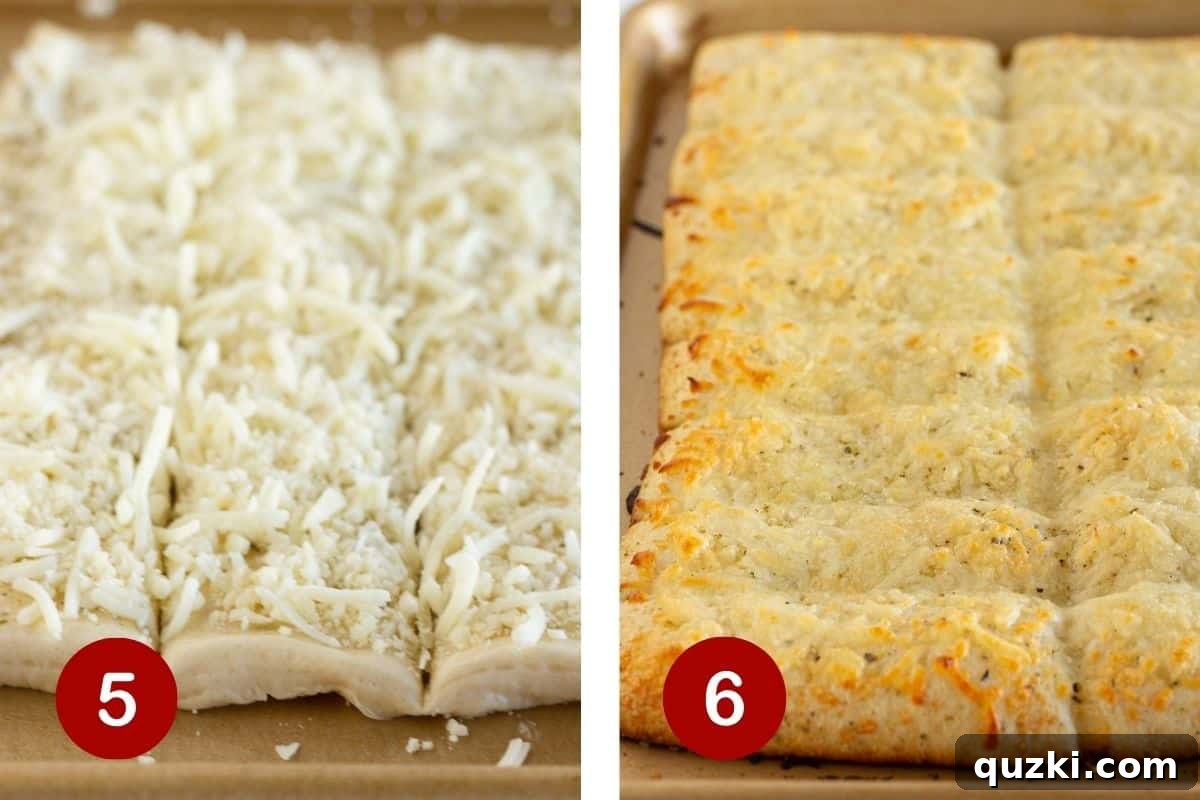
- Bake to Golden Perfection: Bake the breadsticks for 15-17 minutes, or until the edges are beautifully golden brown, the cheese is completely melted and bubbly, and the kitchen is filled with an irresistible aroma. The exact baking time may vary slightly depending on your oven, so keep a watchful eye.
- Serve Warm and Enjoy: Once baked, remove the breadsticks from the oven. You may find that the melted cheese has slightly fused the cut lines together. Don’t worry, simply use your pizza cutter or a knife to re-score the original cuts, allowing the breadsticks to pull apart cleanly and easily. Serve these warm, cheesy masterpieces immediately with your favorite dipping sauces and prepare for them to disappear quickly!
Expert Tips for Flawless Cheesy Breadsticks
Achieving perfectly baked, incredibly flavorful cheesy breadsticks every time is easy with a few insider tricks:
- The Right Tool for the Job: A pizza cutter is your best friend when it comes to slicing the dough. It glides effortlessly through the raw dough, creating clean, even cuts with minimal effort. This will help ensure all your breadsticks bake uniformly.
- Parchment Paper is a Game-Changer: While non-stick spray is good, lining your baking pan with parchment paper is even better. It guarantees that your breadsticks won’t stick, promotes a crispier bottom crust, and makes cleanup an absolute breeze. This is particularly useful for cheesy recipes where melted cheese might try to adhere to the pan.
- Pre-Bake Cutting is Key: It is crucial to cut the breadsticks *before* you bake them. Trying to cut through melted, hot cheese and baked dough can be messy and challenging. Cutting them first ensures you get nicely separated, equally sized breadsticks. Don’t worry if the cuts seem to seal up a little during baking; you can easily re-score them after baking.
- Achieve Uniformity: To get roughly 12 breadsticks, a good strategy is to cut the dough in half lengthwise, then cut each half into 6 strips across the width. If you prefer larger, more substantial sticks, you might opt for fewer cuts, creating broader pieces. Consistency in size helps ensure even cooking for all breadsticks.
- The Post-Bake Re-Score: After your cheesy breadsticks emerge from the oven, golden and bubbling, the melted cheese might have slightly re-sealed the cuts. A quick pass with your pizza cutter or a sharp knife along the original cut lines will help them pull apart beautifully and cleanly without tearing, preserving their perfect shape.
- Don’t Overcrowd the Pan: While it might be tempting to squeeze as many breadsticks as possible onto one sheet, giving them a little space allows for better air circulation. This promotes even baking and crispier edges, preventing them from steaming rather than baking.
- Watch for Doneness: Ovens can vary, so the baking time is a guideline. Keep an eye on your breadsticks, especially towards the end of the cooking time. You’re looking for that perfect golden-brown crust and fully melted, slightly bubbly cheese. If the edges are browning too quickly, you can loosely tent the pan with foil.
How to Serve Your Homemade Breadsticks
These versatile cheesy breadsticks are fantastic on their own, but they truly shine when paired with complementary dishes and dipping sauces. Here are some delicious ideas:
- Classic Dipping Partners: The most popular way to enjoy these is with a side of warm marinara sauce or classic pizza sauce. Other fantastic dipping options include creamy ranch dressing, zesty pesto, a rich alfredo sauce, or even a simple bowl of melted garlic butter for an extra layer of indulgence.
- Soup & Salad Companion: Elevate your meal by serving these alongside a comforting bowl of Tortellini Soup, a hearty minestrone, or a creamy tomato soup. They also make a wonderful accompaniment to a crisp Winter Salad or any fresh green salad, adding a satisfying crunch and savory element.
- Pasta Night Essential: Complete your Italian-inspired dinner! These breadsticks are the perfect partner for pasta dishes like a rich lasagna, a creamy fettuccine alfredo, a robust spaghetti and meatballs, or a cheesy Cajun Chicken Casserole. They’re excellent for soaking up every last bit of delicious sauce.
- Appetizer Star: Arrange a platter of warm cheesy breadsticks for your next party or gathering. Their universal appeal makes them an instant hit, and their easy preparation means you can spend more time enjoying your guests.
- Main Dish Sidekick: Serve them alongside other family favorites such as a Pepperoni Pizza Chicken Skillet, grilled chicken, or even a simple roasted vegetable dish for a well-rounded meal.
- Breakfast/Brunch Twist: Don’t knock it ’til you try it! Serve a spicy variation with scrambled eggs and a Bloody Mary for a unique brunch experience.
However you choose to serve them, ensure they are enjoyed warm for the best taste and texture experience.
Storing and Reheating Leftover Breadsticks
While these cheesy breadsticks are best enjoyed fresh from the oven, it’s entirely possible to store and reheat leftovers, ensuring you can savor their deliciousness later. The key is to maintain their texture as much as possible.
- Storing at Room Temperature: To keep leftover cheese breadsticks fresh for a short period, allow them to cool completely to room temperature. This is crucial to prevent condensation, which can make them soggy. Once cool, place them in an airtight container or a resealable plastic bag. They will keep well at room temperature for up to 2 days. For optimal freshness and to prevent them from drying out, try to consume them within this timeframe.
- Reheating Leftover Breadsticks: The best way to revive leftover cheesy breadsticks and bring back their crispy texture is by reheating them in the oven. Preheat your oven to 350°F (175°C). Arrange the breadsticks in a single layer on a baking sheet. Reheat for 5-10 minutes, or until they are warmed through and the cheese is re-melted and bubbly, with the crust returning to a desirable crispness. Avoid microwaving, as this tends to make them soft and chewy rather than crispy.
- Freezing for Longer Storage: If you’ve made a large batch or want to prepare them for future enjoyment, these breadsticks freeze beautifully. First, bake them according to the recipe instructions and allow them to cool completely. Once cooled, arrange them in a single layer on a baking sheet and flash freeze for about 1-2 hours until solid. This prevents them from sticking together. Then, transfer the frozen breadsticks to a freezer-safe bag or an airtight container, ensuring as much air is removed as possible. They can be frozen for up to 1 month.
- Reheating from Frozen: To reheat frozen breadsticks, you don’t necessarily need to thaw them first. Place the frozen breadsticks directly on a baking sheet in a preheated 350°F (175°C) oven. Increase the reheating time to about 10-15 minutes, or until they are fully warmed through and crispy. Keep an eye on them to prevent over-browning.
With these storage and reheating tips, you can enjoy these delectable cheesy garlic breadsticks whenever the craving strikes!
Cheesy Breadsticks Recipe FAQs
Absolutely! Homemade pizza dough will work wonderfully in this recipe and can add an extra layer of flavor and texture. You’ll generally need about 1 pound (approximately 450-500 grams) of homemade dough to match the size of a standard store-bought refrigerated pizza crust. Ensure your homemade dough is at room temperature before unrolling and preparing for best results.
Yes, you can certainly prepare these cheesy breadsticks ahead of time to save on last-minute cooking. You can assemble the breadsticks up to the point of baking (after adding butter and cheese, and slicing) approximately 4-8 hours in advance. Simply cover the baking sheet tightly with plastic wrap and refrigerate until you’re ready to bake. When baking from chilled, you might need to add an extra 3-5 minutes to the baking time to ensure they are fully cooked and golden.
These versatile breadsticks are delicious served on their own as a snack or appetizer, but they truly shine when paired with dipping sauces or alongside your favorite meals. Popular dipping options include warm marinara sauce, classic pizza sauce, creamy Alfredo sauce, tangy ranch dressing, or even a rich garlic butter for an extra indulgent experience. They make a perfect side for pasta dishes, soups (like Potato Soup), or hearty main courses such as a Pepperoni Pizza Chicken Skillet.
For an extra crispy crust, there are a couple of tricks. First, make sure your oven is fully preheated to 400°F (200°C) before putting the breadsticks in. Second, use a dark-colored baking sheet or a pizza stone if you have one, as they retain and conduct heat more efficiently, leading to a crispier bottom. You can also lightly brush the bottom of the dough with a little olive oil before placing it on the parchment paper. Finally, ensure they are baked until deeply golden brown around the edges, as this indicates maximum crispiness.
Absolutely! This recipe is incredibly adaptable to your cheese preferences. While mozzarella and Parmesan provide the classic flavor and melt, feel free to experiment with other melty cheeses. Good options include provolone, cheddar, Monterey Jack, or even a blend of Italian cheeses like Asiago and Fontina. You can also add a sprinkle of a stronger, crumblier cheese like crumbled feta or goat cheese for a unique twist, but use these sparingly so they don’t overpower the main cheesy flavor.
More Delicious Side Dish Ideas
Looking for more amazing side dishes to complete your meal? Explore these fantastic recipes:
Side Dishes
Caprese Toast Recipe
Salads
Burrata Caprese
Side Dishes
BBQ Green Bean Casserole Recipe
Side Dishes
The Best Baked Beans with Ground Beef
Did you try this incredible recipe? We’d love to hear from you!
Leave a ⭐️ review below and don’t forget to tag @practicallyhomemade on Pinterest when you share your delicious creations!
Cheesy Breadsticks Recipe
June Albertson-Dick
5 mins
15 mins
20 mins
6 servings
Rate Recipe
Print Recipe
Ingredients
- 13.8 ounces refrigerated pizza dough
- 2-3 Tablespoons butter, {melted}
- ¼ teaspoon garlic powder
- ½ Tablespoon Italian seasoning
- 1 cup shredded mozzarella cheese
- 3 Tablespoons Parmesan cheese
Instructions
-
Preheat the oven to 400 degrees Fahrenheit (200°C).
-
Unroll the refrigerated pizza dough onto a greased baking sheet (or one lined with parchment paper). In a small bowl, combine the melted butter, garlic powder, and Italian seasoning.
-
Generously brush the butter mixture over the entire surface of the dough. A basting brush works best for even coverage, but you can use the back of a spoon if a brush isn’t available. Evenly top the buttered dough with the shredded mozzarella cheese, followed by the Parmesan cheese. Before baking, use a pizza cutter or sharp knife to slice the dough into approximately 12 breadsticks.
-
Bake for 15-17 minutes, or until the edges are golden brown and the cheese is completely melted and bubbly. Once removed from the oven, you may need to re-score the cut lines with your pizza cutter to ensure the breadsticks pull apart nicely. Serve warm and enjoy! Store any leftovers at room temperature in an airtight container for up to 2 days.
Notes
- Customize the cheese with whatever melty varieties you have on hand. For a hint of spice, add a pinch of red pepper flakes to the butter mixture or sprinkle over the cheese before baking.
- After baking, the melted cheese might seal the breadstick cuts. A quick pass with a pizza cutter along the original lines will help them separate cleanly.
- To reheat leftover cheesy breadsticks, place them on a baking sheet and warm in a 350°F (175°C) oven for 5-10 minutes, until heated through and crispy.
Nutrition
Calories: 261kcal,
Carbohydrates: 32g,
Protein: 10g,
Fat: 11g,
Saturated Fat: 6g,
Polyunsaturated Fat: 1g,
Monounsaturated Fat: 2g,
Trans Fat: 0.2g,
Cholesterol: 26mg,
Sodium: 659mg,
Potassium: 24mg,
Fiber: 1g,
Sugar: 4g,
Vitamin A: 269IU,
Vitamin C: 0.01mg,
Calcium: 132mg,
Iron: 2mg
Nutrition information is automatically calculated, so should only be used as an approximation.
Like this? Leave a comment below!