
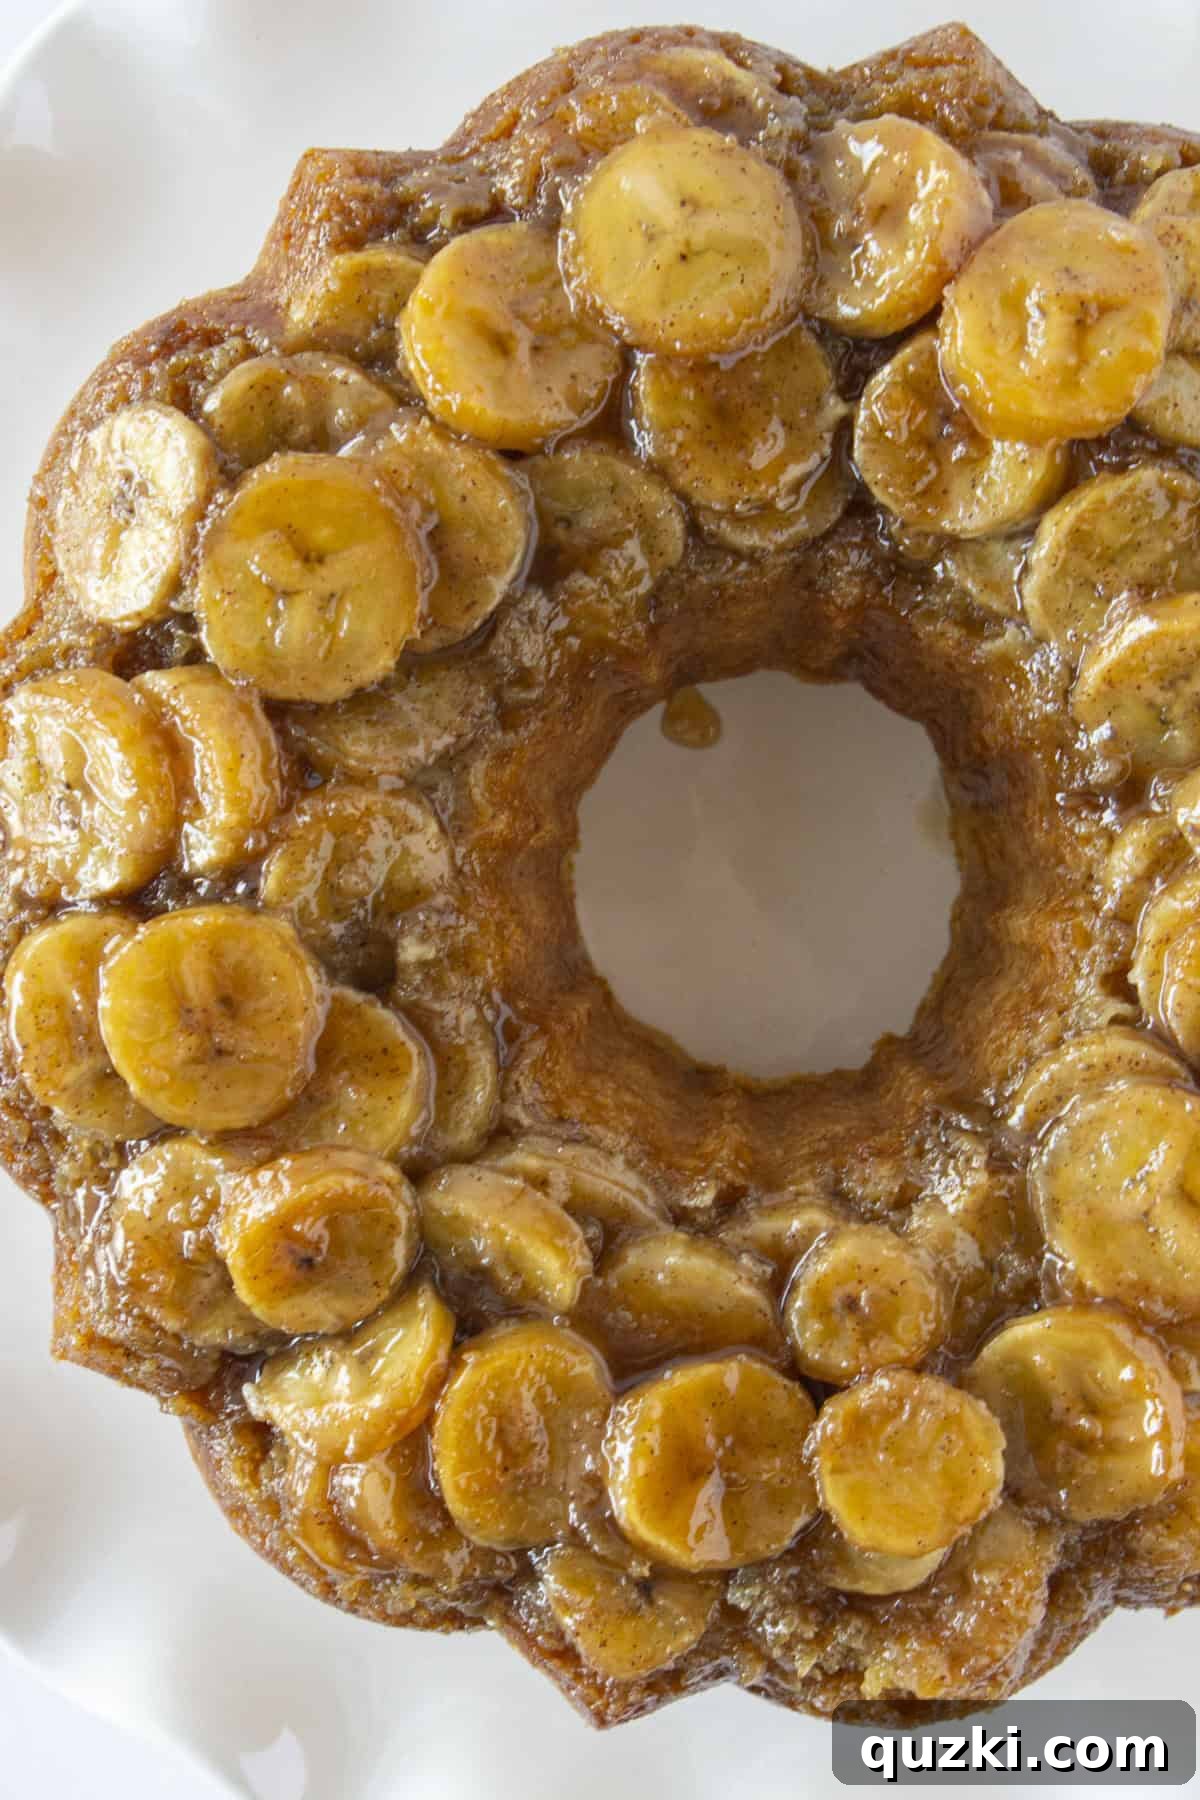
Decadent Banana Upside Down Cake: Your New Go-To Dessert!
If you adore the comforting taste of banana bread but crave a dessert that’s truly show-stopping and effortlessly elegant, this Banana Upside Down Cake is an absolute must-try. The beauty of the upside-down method lies in its simplicity – no intricate frosting required. Just a confident flip, a gentle slice, and you’re ready to serve a masterpiece that looks as impressive as it tastes.
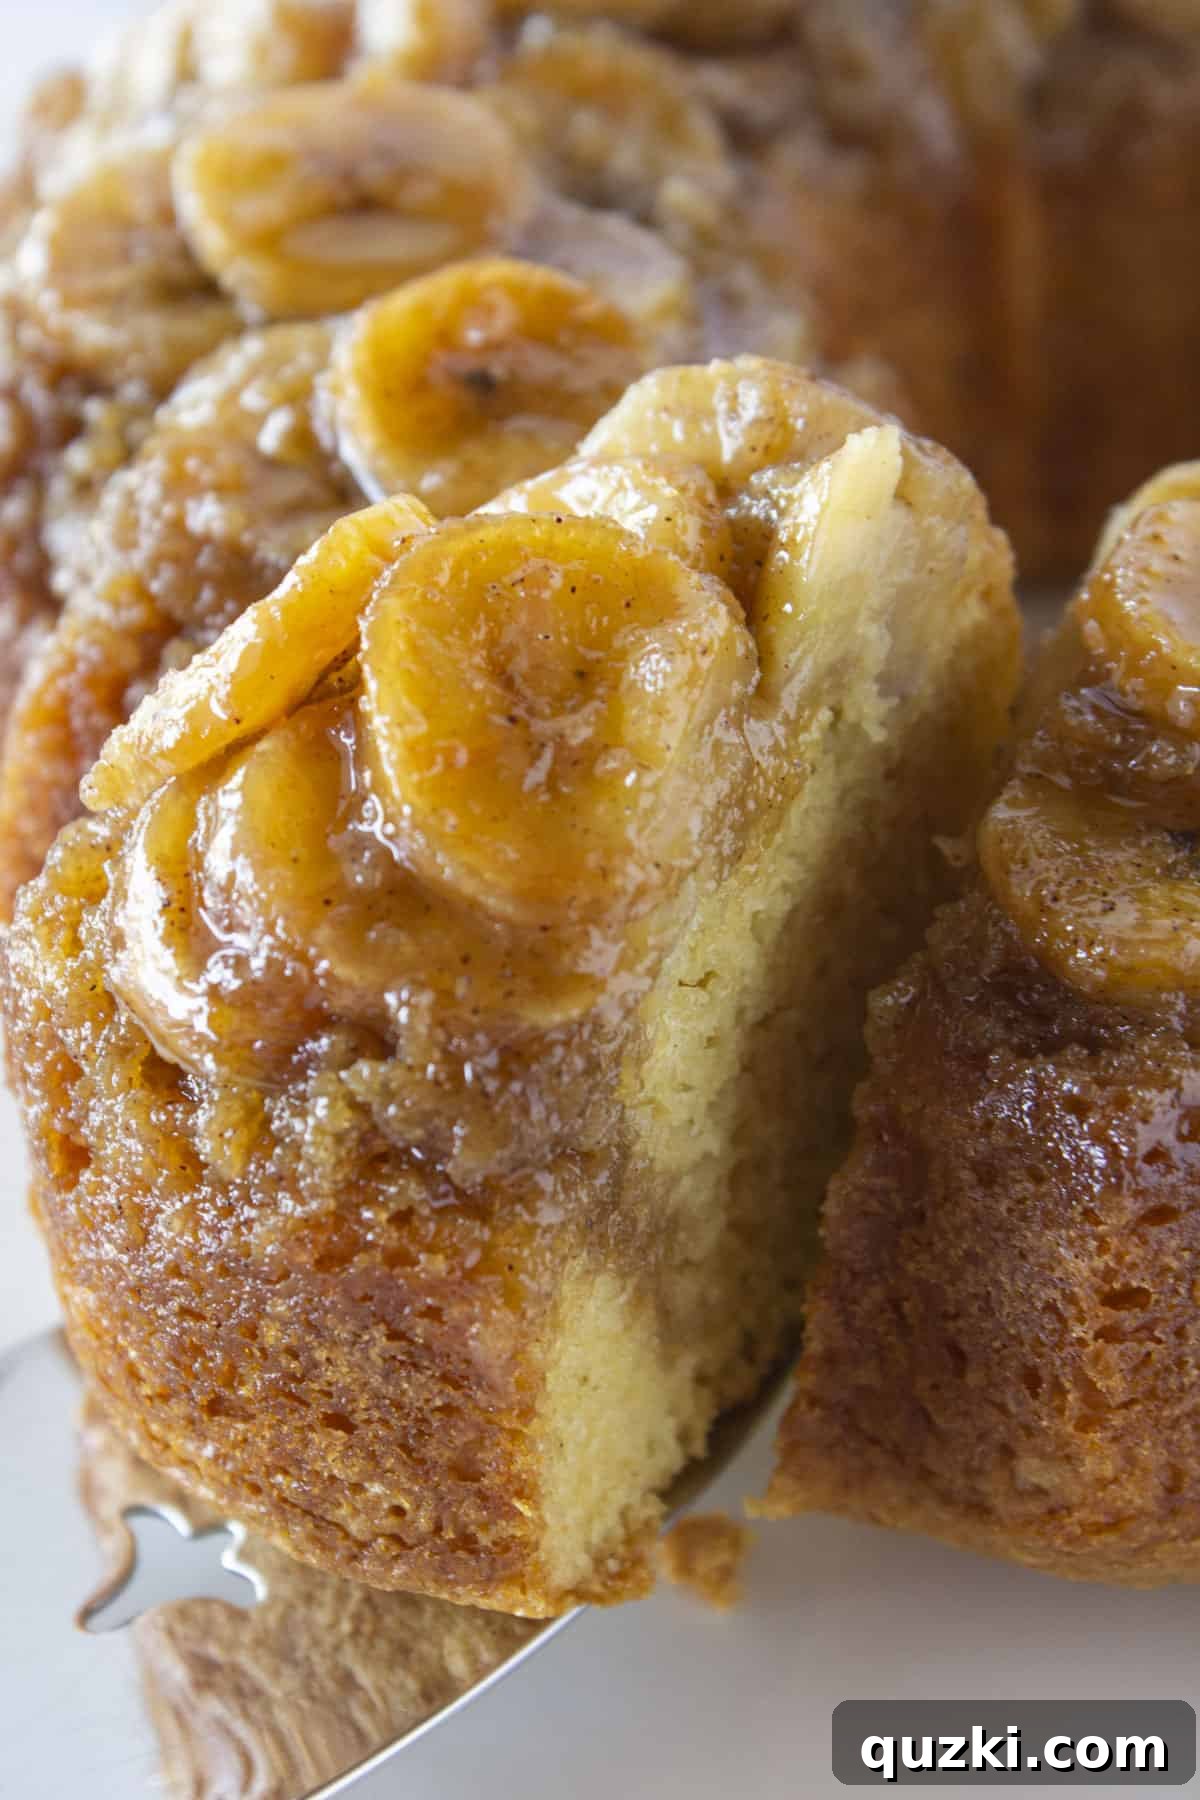
Table of Contents
- The Magic of This Banana Upside Down Cake
- Key Ingredients for Your Banana Upside Down Cake
- Step-by-Step Guide: How to Make the Perfect Banana Upside Down Cake
- Creative Variations to Customize Your Cake
- Expert Tips for a Flawless Banana Upside Down Cake
- Storing and Freezing Your Banana Upside Down Masterpiece
- Frequently Asked Questions About Banana Upside Down Cake
- Banana Upside Down Cake Recipe Card
The Magic of This Banana Upside Down Cake
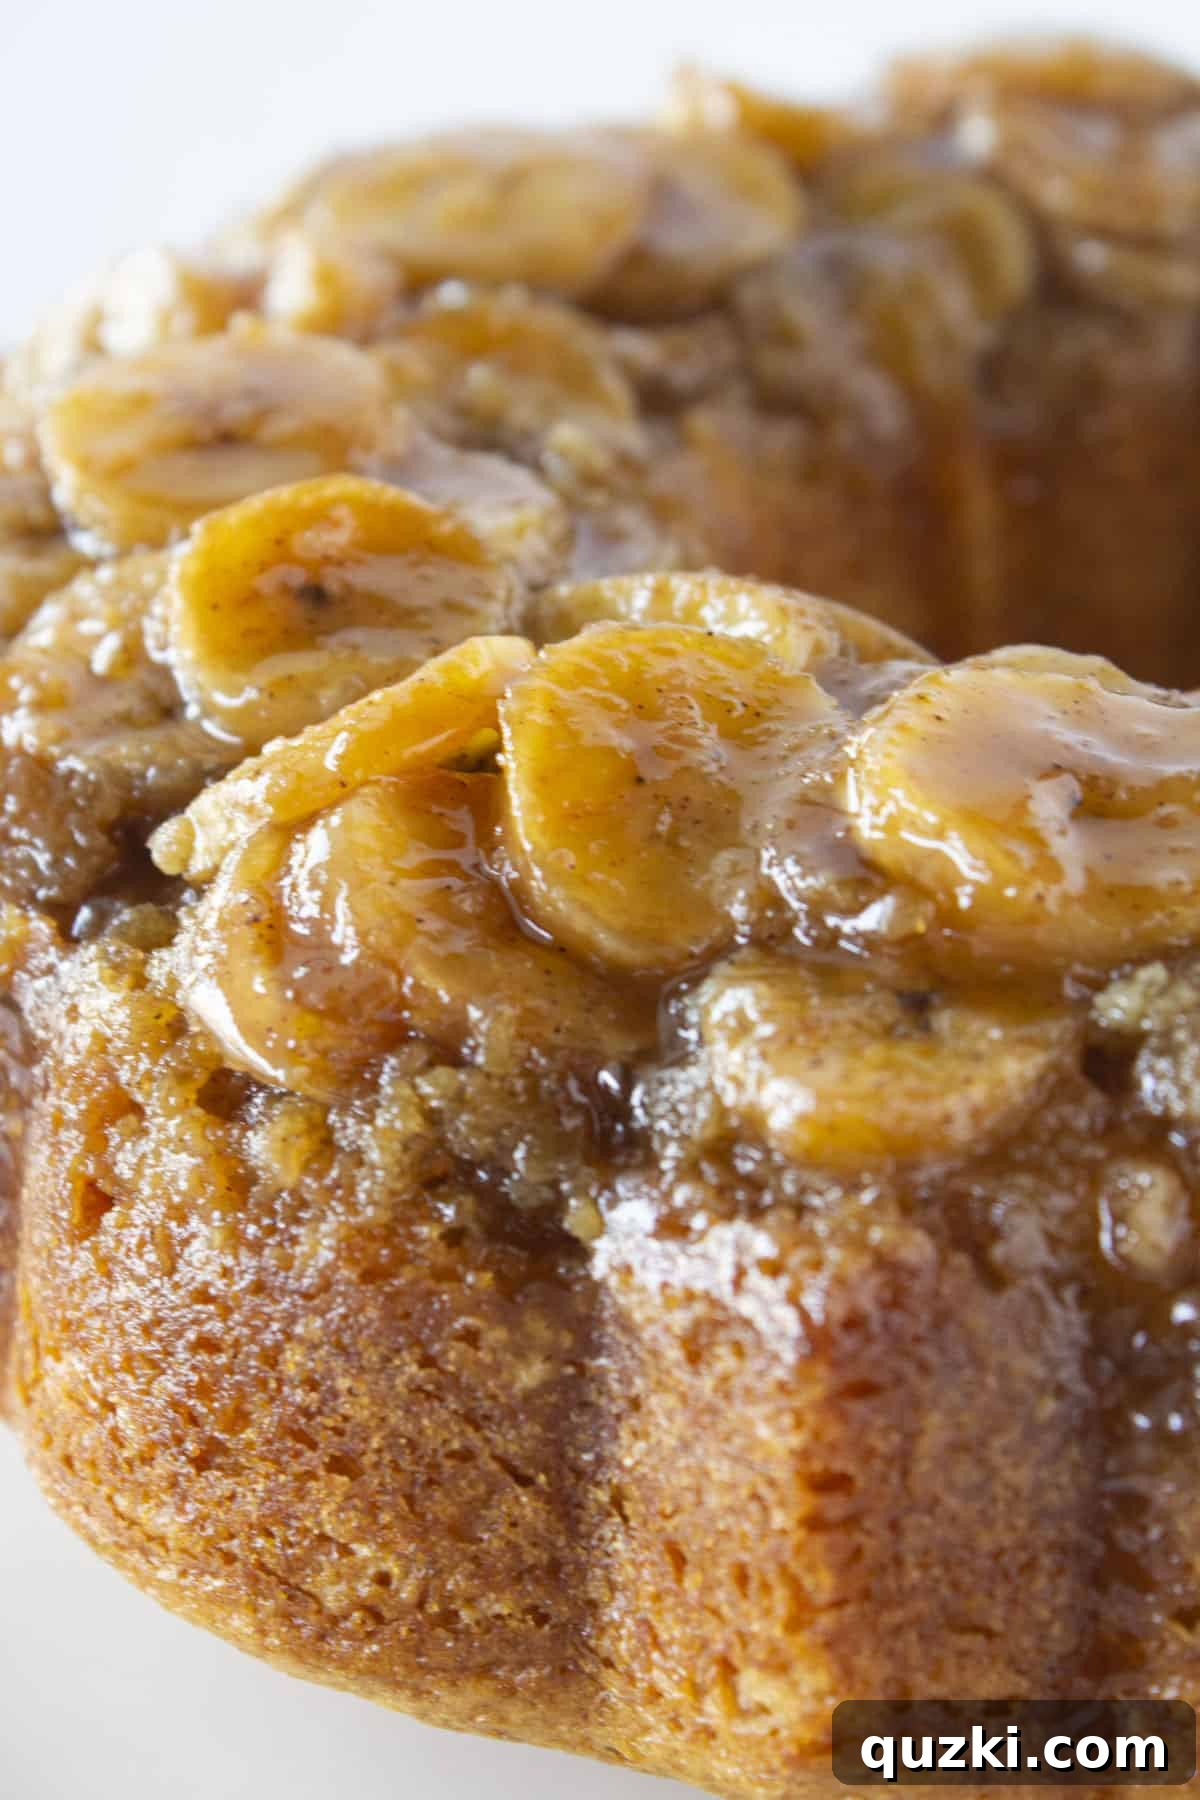
This delightful dessert begins with a luscious foundation: a rich, buttery layer of perfectly sliced fresh bananas. As the cake bakes, these banana slices slowly caramelize, transforming into a deep golden, sticky-sweet topping that is utterly irresistible. Each bite offers a delightful contrast of tender banana and rich, molten caramel – a flavor combination that’s simply divine.
But the magic doesn’t end there! The cake itself is incredibly moist and bursting with authentic banana flavor, thanks to a clever secret ingredient: a box of banana pudding mix. This ingenious addition not only ensures a super tender crumb but also infuses every mouthful with an intense banana taste that tastes genuinely homemade. You’ll be amazed at how simple it is to achieve such a profound flavor profile.
While this banana upside down cake is undeniably exquisite straight from the pan, serving it warm with a generous drizzle of homemade caramel sauce or a dollop of freshly whipped cream elevates it to an entirely new level of indulgence. It’s a versatile dessert that shines whether served for a casual family gathering or a more formal occasion. If you’re a fan of unique banana treats, be sure to also explore our No Bake Banana Cheesecake and the seasonal delight of our Apple Upside Down Cake for more inspiration!
Key Ingredients for Your Banana Upside Down Cake
Crafting this incredible banana upside down cake requires just a few simple, accessible ingredients, many of which you likely already have in your pantry. Here’s a closer look at the stars of our recipe and why they’re essential for achieving the perfect balance of flavor and texture:
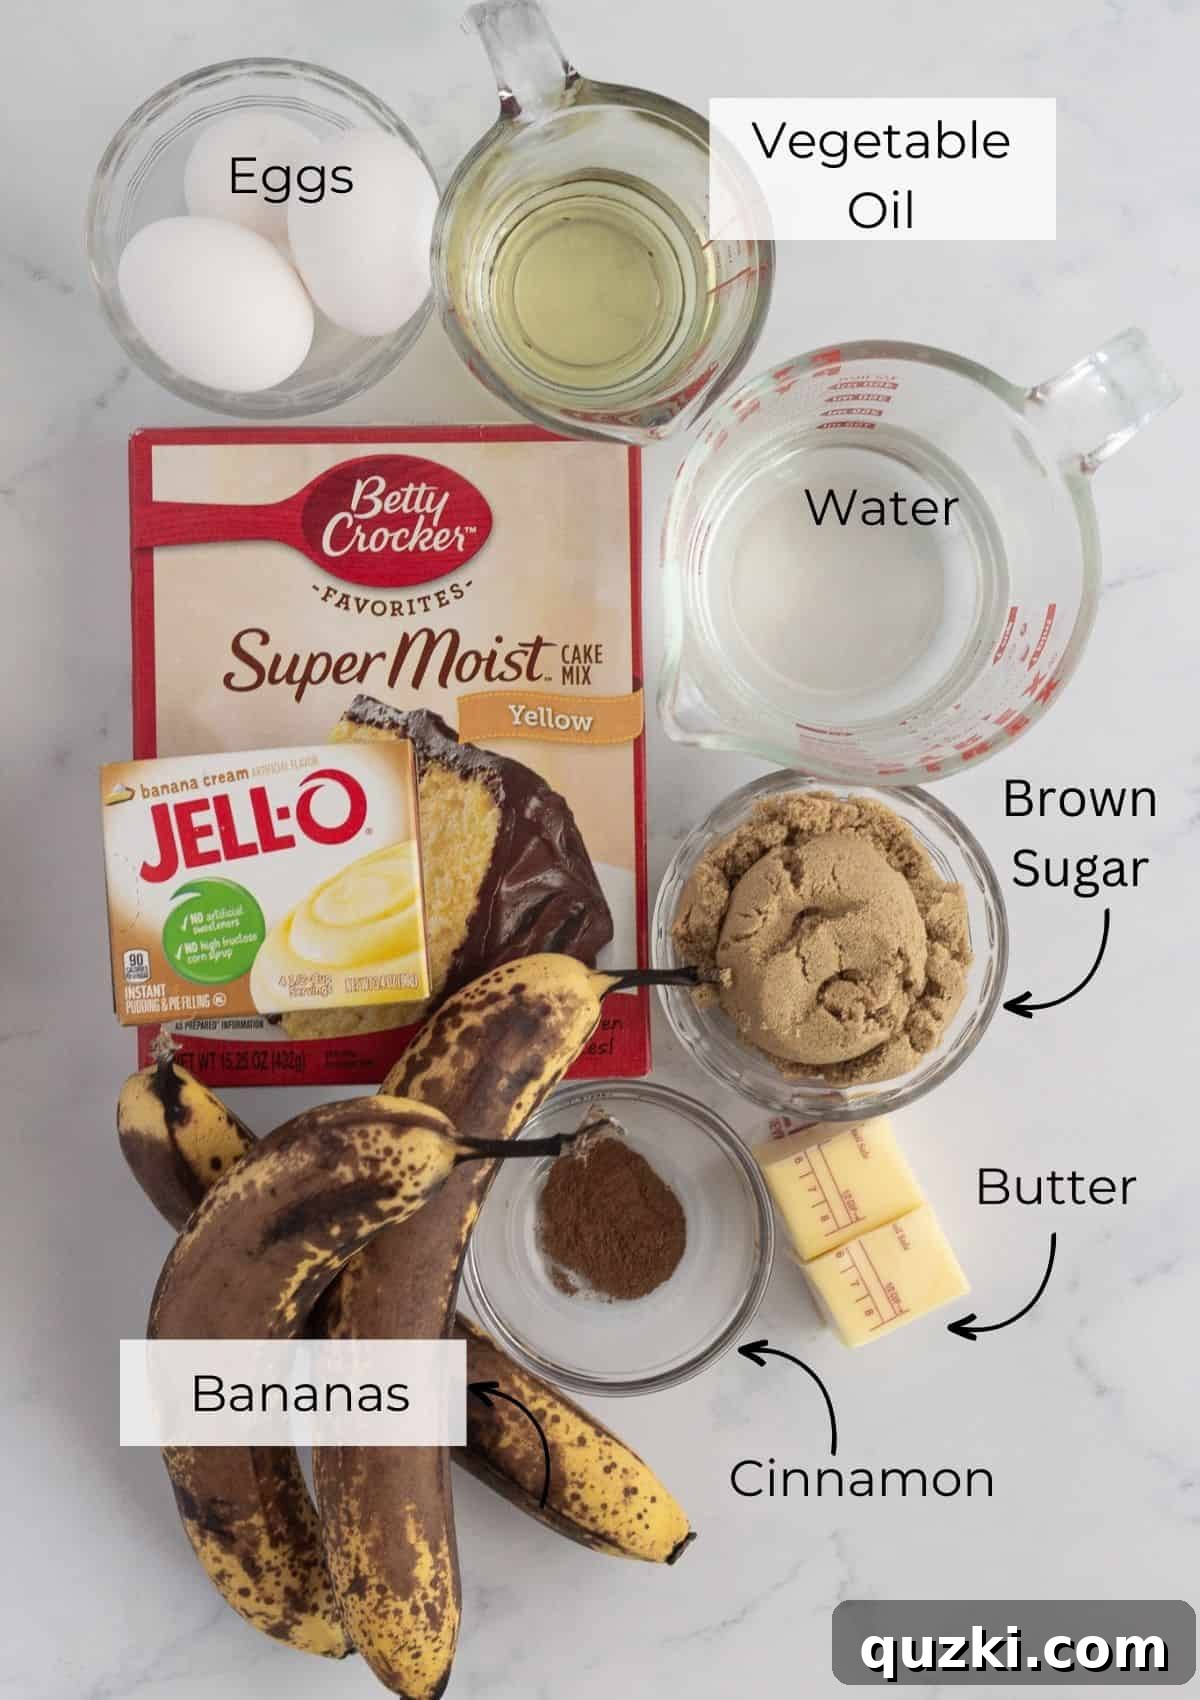
- Yellow Butter Cake Mix: This is our convenient foundation! I personally find that yellow butter cake mix provides an exceptionally moist and rich crumb, complementing the banana topping beautifully. However, if you have a preference, a white or vanilla cake mix can be substituted, offering a slightly different flavor profile while still delivering a wonderful texture.
- Banana Pudding Mix: This is truly the “secret ingredient” that takes our banana cake from good to extraordinary. Adding a box of instant banana pudding mix to the batter dramatically enhances the banana flavor and, crucially, locks in an incredible amount of moisture, ensuring your cake is super tender and never dry.
- Brown Sugar: Essential for the luscious caramelized topping, brown sugar brings a deep, molasses-rich sweetness and a wonderfully sticky texture. It creates that signature warm, golden-brown glaze that makes an upside-down cake so irresistible.
- Ground Cinnamon: A touch of ground cinnamon in the topping adds a gentle warmth and aromatic spice that beautifully complements the sweet bananas and caramel. It’s a subtle addition that truly makes this upside-down banana cake stand out with a cozy, inviting flavor.
- Ripe Bananas: The star of the show! This recipe is an excellent way to use up those ripe bananas sitting on your counter. For the best flavor and texture in the topping, aim for bananas that are yellow with a few brown spots – they’ll be naturally sweet and soft enough to caramelize perfectly. You’ll need about three to four medium-sized bananas, sliced evenly for an attractive and consistent topping.
- Additional Cake Mix Ingredients: Don’t forget the standard additions required by your cake mix box, typically including eggs, vegetable oil, and water. These are crucial for the cake’s structure and moisture.
For precise measurements and quantities, please refer to the detailed recipe card provided below. Each ingredient plays a vital role in creating this delightful dessert!
Step-by-Step Guide: How to Make the Perfect Banana Upside Down Cake
Creating this irresistible banana upside down cake is surprisingly straightforward, especially with the convenience of a cake mix. Follow these simple steps to bake a dessert that will impress everyone!
Preparation is Key
1. Preheat Your Oven and Prepare Your Pan: Begin by preheating your oven to 350°F (175°C). Next, prepare your bundt pan or chosen baking dish. Liberally spray the interior of the pan with a good quality non-stick cooking spray, ensuring every crevice is covered. This is a crucial step for a clean release later! You can use a classic bundt pan for that iconic shape, or explore other options like a 9-inch springform pan or a sturdy cast-iron skillet, as detailed in our variations section.
Crafting the Caramelized Banana Topping
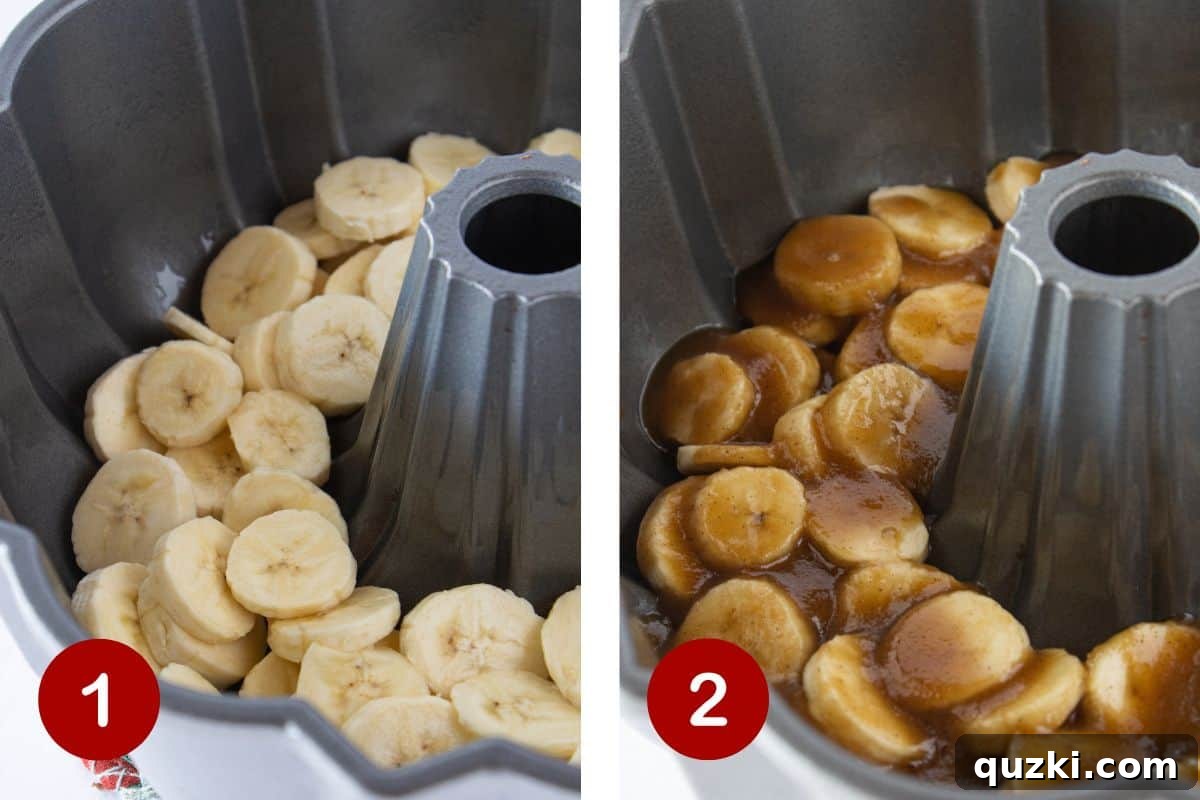
2. Slice the Bananas: Carefully slice three to four ripe bananas into even rounds, approximately 1/4-inch thick. Uniform slices ensure even cooking and caramelization, creating a beautiful presentation. If you don’t have perfectly ripe bananas, slightly green ones will also work as they soften and sweeten beautifully during baking. Arrange these banana slices in a single, even layer at the bottom of your liberally greased bundt pan.
3. Prepare the “Goo” (Caramel Mixture): In a medium bowl, combine the melted butter, rich brown sugar, and a dash of ground cinnamon. Whisk these ingredients together until the brown sugar is mostly dissolved and you have a smooth, fragrant caramel sauce. This is what my family affectionately calls “the goo” – it’s the secret to that amazing sticky topping! Carefully pour this caramel mixture evenly over the banana slices in the pan. This combination will transform into an incredible caramel during baking, giving the bananas a fantastic, tender texture and rich flavor.
Mixing and Baking the Cake
4. Prepare the Cake Batter: In a large mixing bowl, combine the yellow butter cake mix, eggs, vegetable oil, water, and the star ingredient – the banana pudding mix. Using an electric mixer, beat these ingredients according to the package directions for your specific cake mix, usually for about 2 minutes on medium speed until smooth and well combined. The banana pudding mix is key to boosting that delicious banana flavor and ensuring an incredibly moist cake!
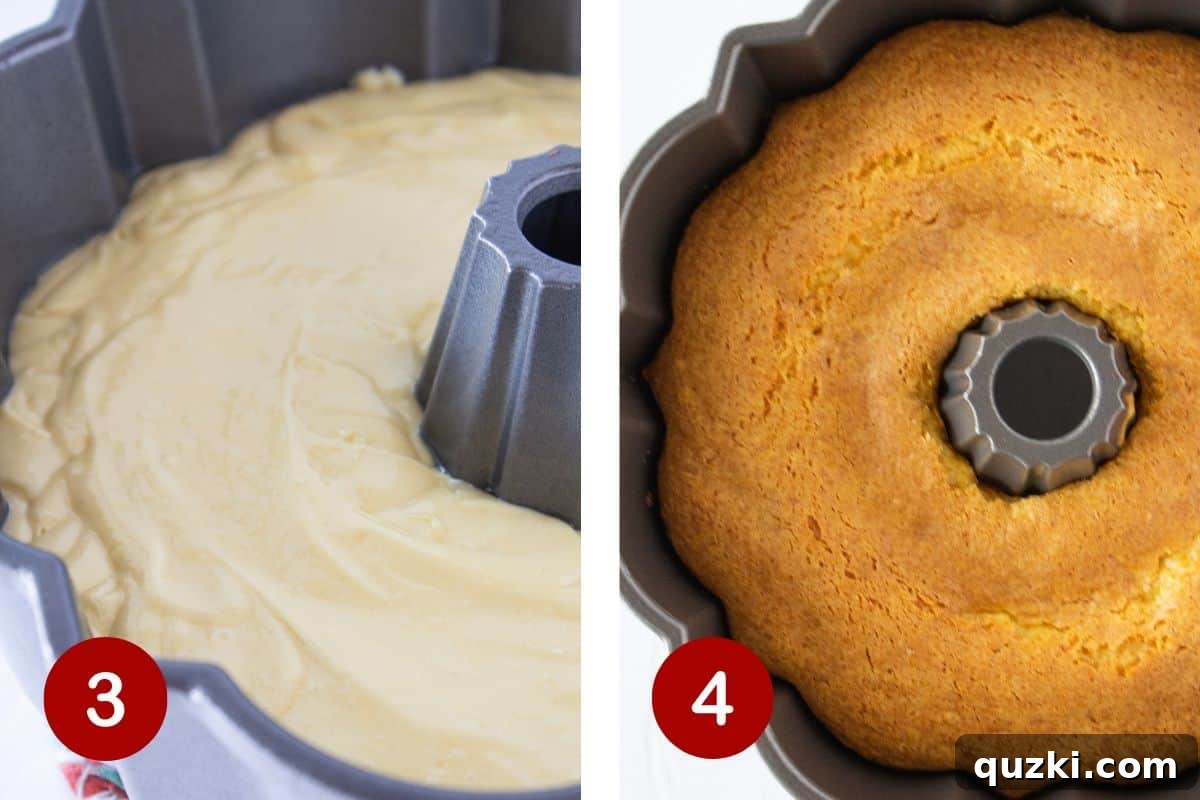
5. Pour and Bake: Gently pour the prepared cake batter into the bundt pan, spreading it carefully and evenly over the top of the caramelized banana and butter mixture. Ensure the batter forms a smooth, consistent layer across the pan. Place the pan in your preheated 350°F (175°C) oven and bake for 35-40 minutes, or until a wooden toothpick inserted into the center of the cake comes out clean or with only a few moist crumbs attached. Avoid over-baking to maintain maximum moisture!
The Grand Finale: Inverting and Serving
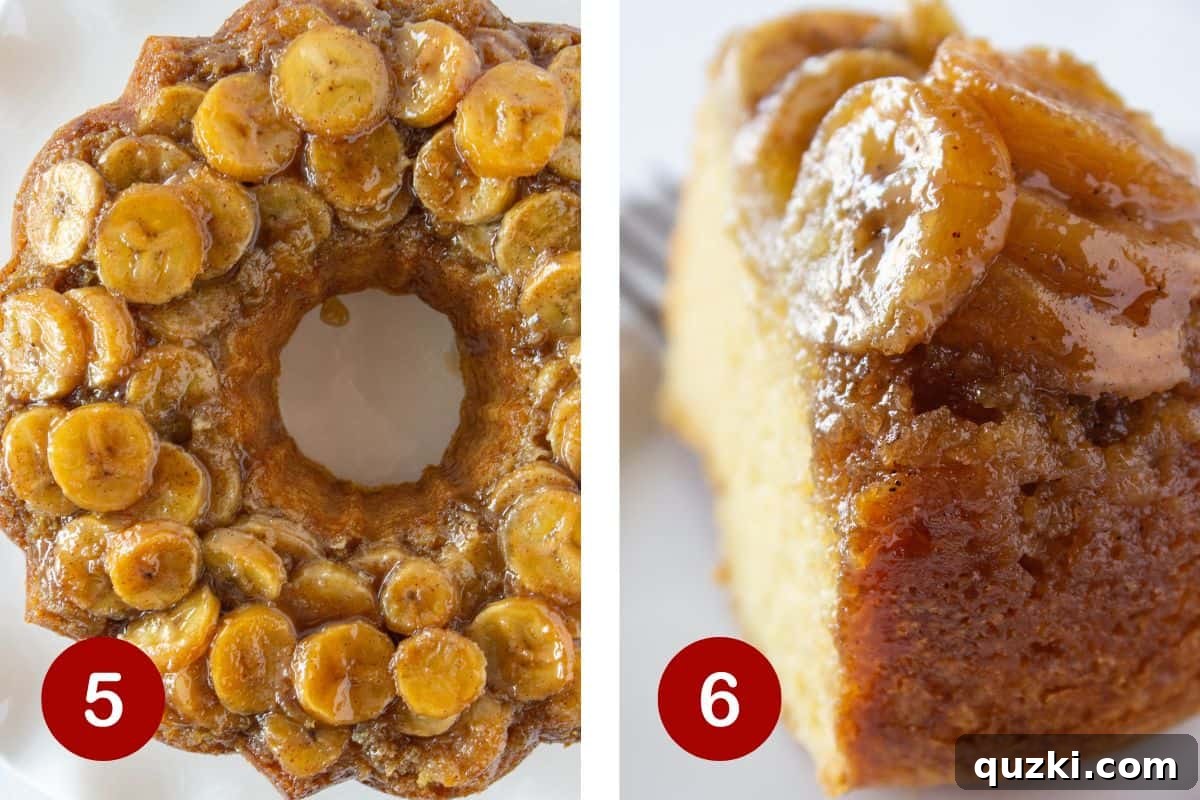
6. Cool and Invert: Once baked, remove the cake from the oven and let it cool in the pan on a wire cooling rack for precisely 7-8 minutes. This brief cooling period is crucial; it allows the caramelized topping to set slightly without sticking firmly to the pan. To invert the cake cleanly, place your serving plate or platter upside down over the bundt pan. Then, carefully but confidently, turn the pan and plate over together in one swift motion. Lift the bundt pan slowly to reveal your stunning banana upside down cake. Don’t worry if a few banana pieces stick to the pan – simply remove them gently with your fingers or a spatula and place them back onto the cake.
7. Serve and Enjoy: For the most delightful experience, slice and serve your warm banana upside down cake with a scoop of vanilla bean ice cream, a dollop of whipped cream, or an extra drizzle of caramel sauce. The warmth of the cake combined with a cool accompaniment is absolutely heavenly. Prepare for rave reviews!
Creative Variations to Customize Your Cake
While this classic Banana Upside Down Cake is truly perfect as is, it also offers a fantastic canvas for your culinary creativity. Feel free to experiment with these variations to suit your taste or occasion:
- Fruit Swaps: Not a banana enthusiast, or just looking to try something new? This recipe adapts beautifully to other fruits. Consider making a traditional pineapple upside-down cake, or try our equally delightful Apple Upside Down Cake or a festive Cranberry Upside Down Cake. Sliced peaches, pears, or even mixed berries can create unique and delicious variations.
- Tropical Twist: For an exotic flair, sprinkle about 1/2 cup of toasted coconut flakes over the banana layer before adding the cake batter. The gentle crunch and nutty flavor of coconut pair wonderfully with bananas and caramel.
- Nutty & Chocolatey Additions: Elevate the texture and flavor by mixing in 1/2 cup of mini chocolate chips or chopped walnuts (or pecans!) into the cake batter. These additions bring a pleasant crunch and an extra layer of richness to this easy caramelized banana upside down cake.
- Spice it Up: In addition to cinnamon, a pinch of nutmeg or a touch of ground ginger can add another layer of warm spice to either the topping or the cake batter.
- Pan Alternatives: No bundt pan? No problem at all! This versatile recipe can be baked in various other pans:
- 9-inch Springform Pan: For a clean, straight-sided cake, bake in a 9-inch springform pan for approximately 45-50 minutes. Ensure the bottom is well-greased and floured (or lined with parchment) for easy release.
- Large Cast Iron Skillet: A seasoned cast-iron skillet (around 10-12 inches) works beautifully and creates a rustic, charming presentation. Baking time will be similar, 45-50 minutes.
- Deep Round Cake Pan: A 9 or 10-inch round cake pan with deep sides can also be used. Adjust baking time as needed, typically 45-55 minutes. Always test with a toothpick for doneness.
Don’t hesitate to get creative and make this recipe truly your own!
Expert Tips for a Flawless Banana Upside Down Cake
Achieving a perfect banana upside down cake, especially when using a bundt pan, comes down to a few key techniques. These expert tips will help ensure your cake is beautifully caramelized, moist, and releases effortlessly every time:
- Spray Your Pan Liberally and Just Before Use: This is arguably the most critical step for a clean inversion. Spray your bundt pan *very* generously with a high-quality non-stick cooking spray, ensuring it covers every nook and cranny. Do this right before adding the bananas and caramel. If you spray it too early, the spray can pool at the bottom or run down the sides, reducing its effectiveness and potentially causing parts of the cake to stick.
- Uniform Banana Slices are Essential: Take a moment to slice your bananas into even thicknesses, ideally about 1/4 inch. This precision ensures that all banana pieces cook evenly, caramelize perfectly, and contribute to a consistent texture and presentation across the entire cake. Uneven slices can lead to some bananas being mushy and others still firm.
- Avoid Over-Baking: Keep a close eye on your cake as it bakes. Over-baking is the quickest way to a dry cake. Start checking for doneness around the 30-minute mark. The cake is ready when a toothpick inserted into the center comes out with a few moist crumbs attached, but no wet batter. If the toothpick is completely clean, it might be slightly overbaked.
- Cooling Time is Crucial for Inversion: Resist the urge to invert the cake immediately after removing it from the oven. Allow the cake to cool in the pan on a wire rack for precisely 7-8 minutes. This short cooling period allows the caramelized topping to firm up slightly and separate from the pan without cooling down too much and becoming overly sticky. If you wait too long (e.g., 20+ minutes), the sticky topping is far more likely to adhere stubbornly to the pan, making inversion difficult.
- Don’t Stress Over Stuck Pieces: It happens to the best of us! If, after inverting, a few small pieces of banana or caramel remain stuck to the bottom of the pan, don’t panic. Gently scrape them out with a small spatula or your fingers and carefully press them back into place on the cake. A little imperfection only adds to its homemade charm!
- Use Ripe, But Not Overly Mushy Bananas: While ripe bananas (yellow with a few brown spots) are ideal for flavor and sweetness, avoid bananas that are excessively bruised or mushy. These can break down too much during baking and make the topping watery.
- Room Temperature Ingredients for Cake Batter: For the cake batter itself, ensure your eggs are at room temperature. This allows them to incorporate more easily and create a smoother, more uniform batter, leading to a better cake texture.
Storing and Freezing Your Banana Upside Down Masterpiece
Once you’ve baked this delightful Banana Upside Down Cake, you’ll want to ensure any leftovers remain as fresh and delicious as the first slice. Here’s how to properly store and even freeze your cake:
Storing Leftovers
If you find yourself with any of this classic banana upside down cake remaining (a rare occurrence!), proper storage is key to maintaining its moisture and flavor.
- Room Temperature (Short-term): For up to 1-2 days, if your kitchen is cool, you can store the cake at room temperature, loosely covered to prevent it from drying out.
- Refrigeration (Best Option): For longer storage, or if your kitchen is warm, transfer the cake to an airtight container and store it in the refrigerator. A specialized Bundt Cake Keeper is an excellent option for preserving its freshness and shape. The cake will stay fresh for up to 3-4 days when refrigerated.
Serving Chilled Slices: This cake is truly best served warm, as it enhances the caramel and banana flavors and keeps the cake incredibly moist. If serving chilled slices, simply microwave them for 15-30 seconds, or until just warm, before enjoying.
Freezing Your Cake
This banana upside down cake freezes beautifully, making it perfect for preparing in advance or saving for a future treat:
- Preparation for Freezing: Ensure the cake has completely cooled to room temperature before freezing. This prevents ice crystals from forming and making the cake soggy.
- Wrapping: For best results, wrap the entire cake or individual slices tightly in several layers of plastic wrap, followed by a layer of aluminum foil. This double-layer protection helps prevent freezer burn and keeps the cake fresh.
- Freezing Time: The cake can be frozen for up to 3 months.
- Thawing: When you’re ready to enjoy, transfer the frozen cake (still wrapped) to the refrigerator and allow it to thaw overnight. For a quicker thaw, you can leave it at room temperature for a few hours. Once thawed, warm individual slices in the microwave if desired.
With these storage tips, you can savor your delicious banana upside down cake for days, or even months!
Frequently Asked Questions About Banana Upside Down Cake
Got questions? We’ve got answers! Here are some common inquiries about making this delicious banana upside down cake:
While fresh bananas are highly recommended for the best texture and flavor, you can technically use canned bananas if that’s all you have on hand. However, please be aware that the texture will be noticeably softer and might not caramelize as effectively as fresh bananas. This could result in a slightly different overall eating experience, and the topping might not be as firm or visually appealing.
It’s incredibly easy to adapt this banana upside-down cake recipe to be gluten-free! All you need to do is substitute a high-quality gluten-free yellow cake mix for the regular yellow cake mix. Ensure the banana pudding mix you use is also certified gluten-free, as some brands may contain hidden gluten ingredients. Follow the package directions for the gluten-free cake mix, along with our recipe steps, for a delicious gluten-free treat.
Absolutely! While I prefer light brown sugar for its balanced flavor and perfect caramelization, you have options. Dark brown sugar will lend a deeper, more robust molasses flavor to the caramel topping. You could also experiment with coconut sugar for a slightly less refined sweetness and a subtle caramel note. Each sugar type will impart a slightly different nuance to the final flavor of your caramelized topping.
Yes, this cake is excellent for making ahead of time! It keeps wonderfully in the refrigerator, allowing you to bake it a day or two in advance of when you plan to serve it. To ensure the best experience, remove the cake from the refrigerator at least an hour before serving to allow it to come to room temperature. You can also gently warm individual slices in the microwave for that fresh-baked feel.
Craving More Banana Desserts? Explore These Irresistible Recipes!
More Delicious Banana Treats
Cheesecakes
Easy No Bake Banana Pudding Cheesecake Recipe
Desserts
Banana Pudding Cookie Cups Recipe
Desserts
Banana Blondies Recipe with Cream Cheese Frosting
Breads
Banana Crumb Cake Recipe
Did you try this irresistible recipe? We’d love to hear from you!
Leave a ⭐️ review below and tag @practicallyhomemade on Pinterest!
Banana Upside Down Cake Recipe
June Albertson-Dick
15 mins
40 mins
1 hr
1 hr 55 mins
10 slices
Rate Recipe
Print Recipe
Ingredients
Banana Topping
- 3/4 cup brown sugar
- 5 tbsp butter , melted
- 1/2 tsp cinnamon
- 3-4 bananas , sliced
Cake
- 1-15.25 oz. box yellow butter cake mix
- 3 eggs
- 1/3 cup vegetable oil
- 1 cup water
- 1-3.4 oz. box banana pudding mix
Instructions
-
Preheat oven to 350°F (175°C). Liberally spray your bundt pan with nonstick cooking spray, ensuring every crevice is covered. Set aside.
Banana Topping
-
Arrange the evenly sliced bananas in a single layer at the bottom of the prepared bundt pan.
-
In a medium bowl, combine the melted butter, brown sugar, and cinnamon. Whisk until the brown sugar is slightly dissolved and smooth. Pour this caramel mixture evenly over the sliced bananas in the pan.
Cake Batter
-
In a large bowl, combine the yellow butter cake mix, eggs, vegetable oil, water, and banana pudding mix. Mix with an electric mixer according to your cake mix package directions (typically 2 minutes on medium speed) until the batter is smooth.
-
Carefully pour the cake batter over the banana topping in the prepared pan, spreading it into an even layer.
-
Bake in the preheated 350°F (175°C) oven for 35-40 minutes, or until a toothpick inserted into the center of the cake comes out clean or with a few moist crumbs.
-
Remove from the oven and place onto a cooling rack. Let the cake cool in the pan for 7-8 minutes. After 7-8 minutes, run a knife around the edges of the cake to loosen it. Then, carefully invert your Banana Upside Down Bundt Cake onto a serving plate. If any banana pieces stick to the pan, gently remove them and place them back onto the cake.
-
Allow the cake to cool completely before slicing for best results, though it’s also delicious served warm. Store your Banana Upside Down Bundt Cake covered at room temperature for up to 2 days, or in the refrigerator for up to 3-4 days.
Notes
- For best results, use ripe bananas with a few brown spots for maximum sweetness and flavor.
- Do not overbake, as this can lead to a dry cake. A few moist crumbs on the toothpick are ideal.
- Cooling the cake in the pan for the specified 7-8 minutes is crucial for the topping to set and prevent sticking.
- Feel free to add 1/2 cup of toasted coconut flakes or chopped nuts (like walnuts or pecans) to the cake batter for added texture and flavor.
- No bundt pan? This recipe works well in a 9-inch springform pan, a 10-inch cast iron skillet, or a deep 9-inch round cake pan. Baking times may vary slightly (usually 45-55 minutes).
Nutrition
Nutrition information is automatically calculated, so should only be used as an approximation.
Enjoyed this recipe? Leave a comment below!