
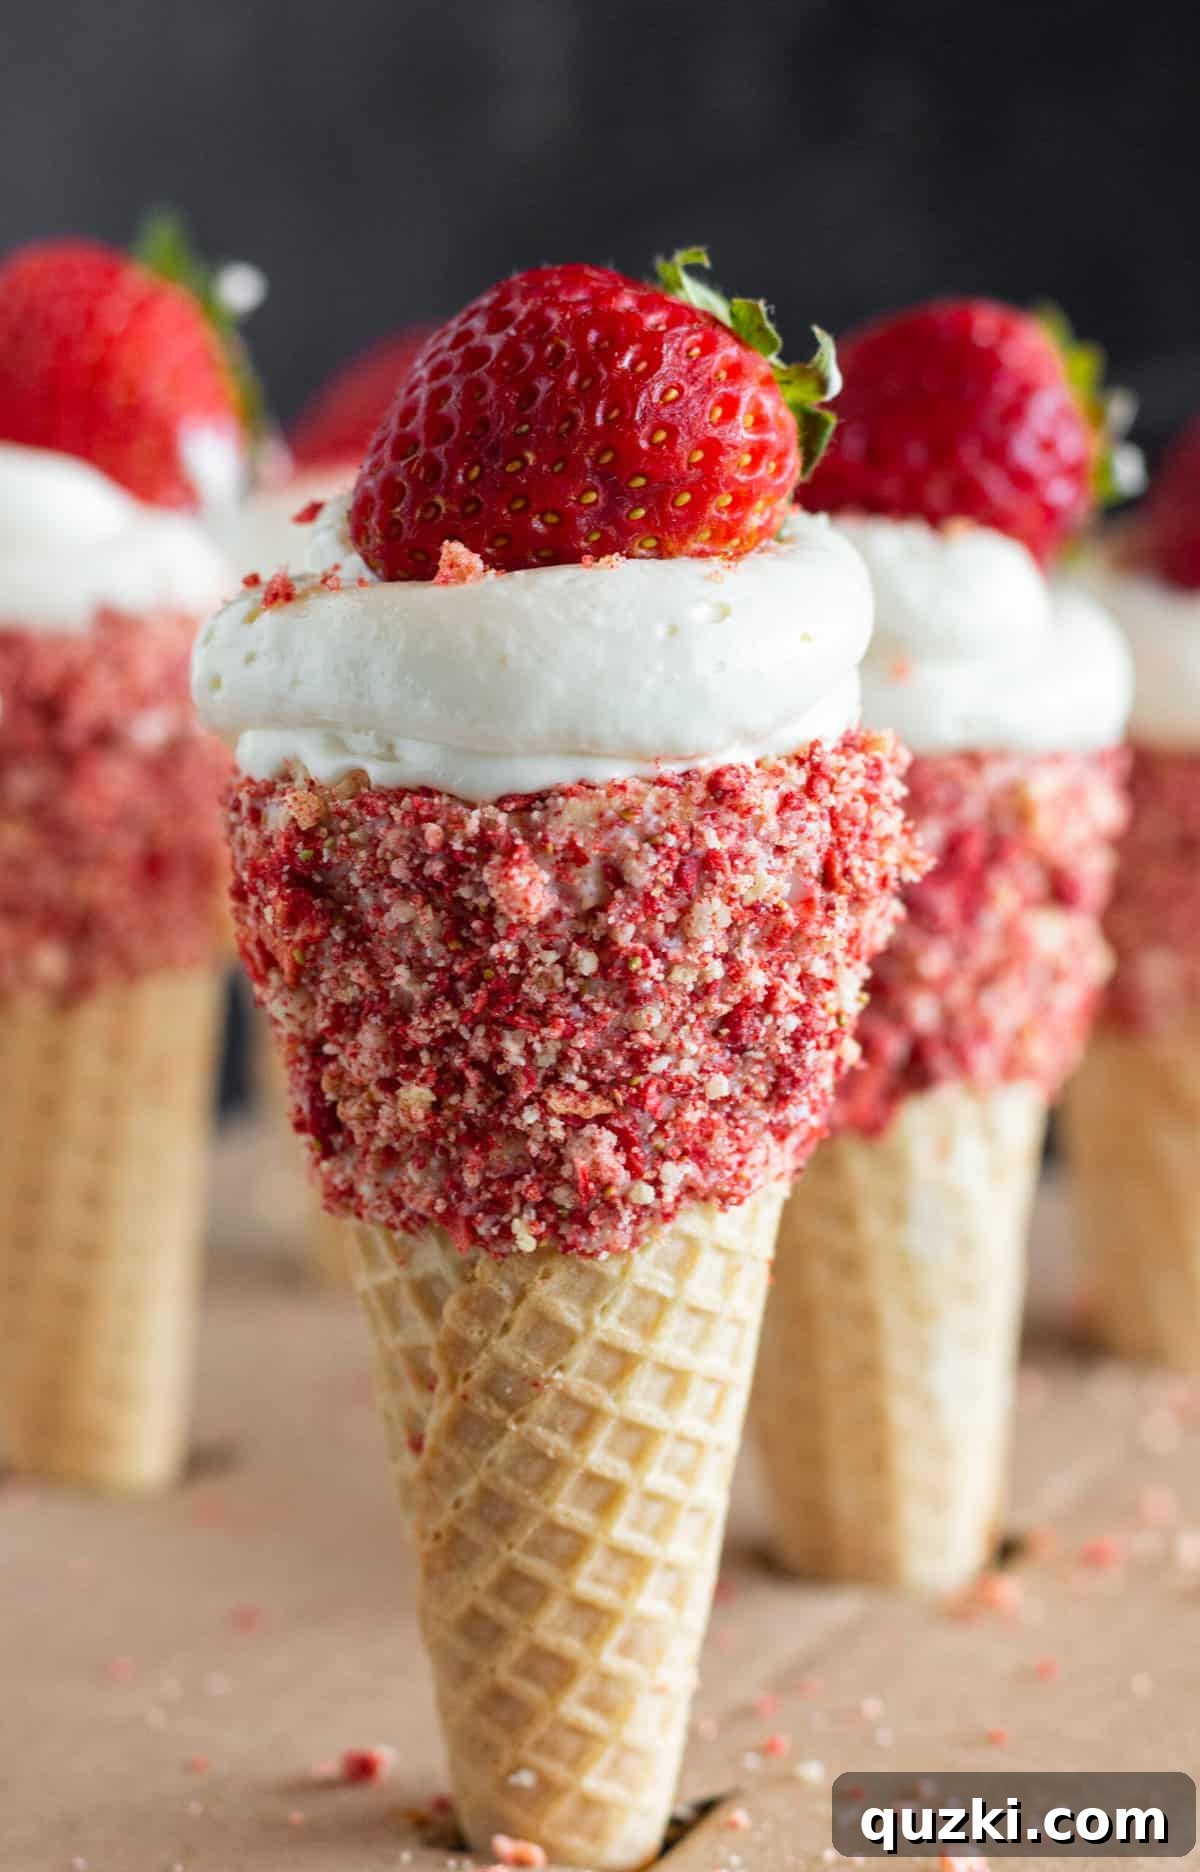
Prepare for an explosion of flavor and texture with every bite of the Best Strawberry Crunch Cheesecake Cones. These delightful handheld treats combine the creamy indulgence of no-bake cheesecake with a irresistible, homemade strawberry crunch topping, all nestled within a crispy waffle cone. It’s a truly unique and portable dessert that promises to excite your taste buds and become a firm favorite for any occasion, especially during the warmer months.
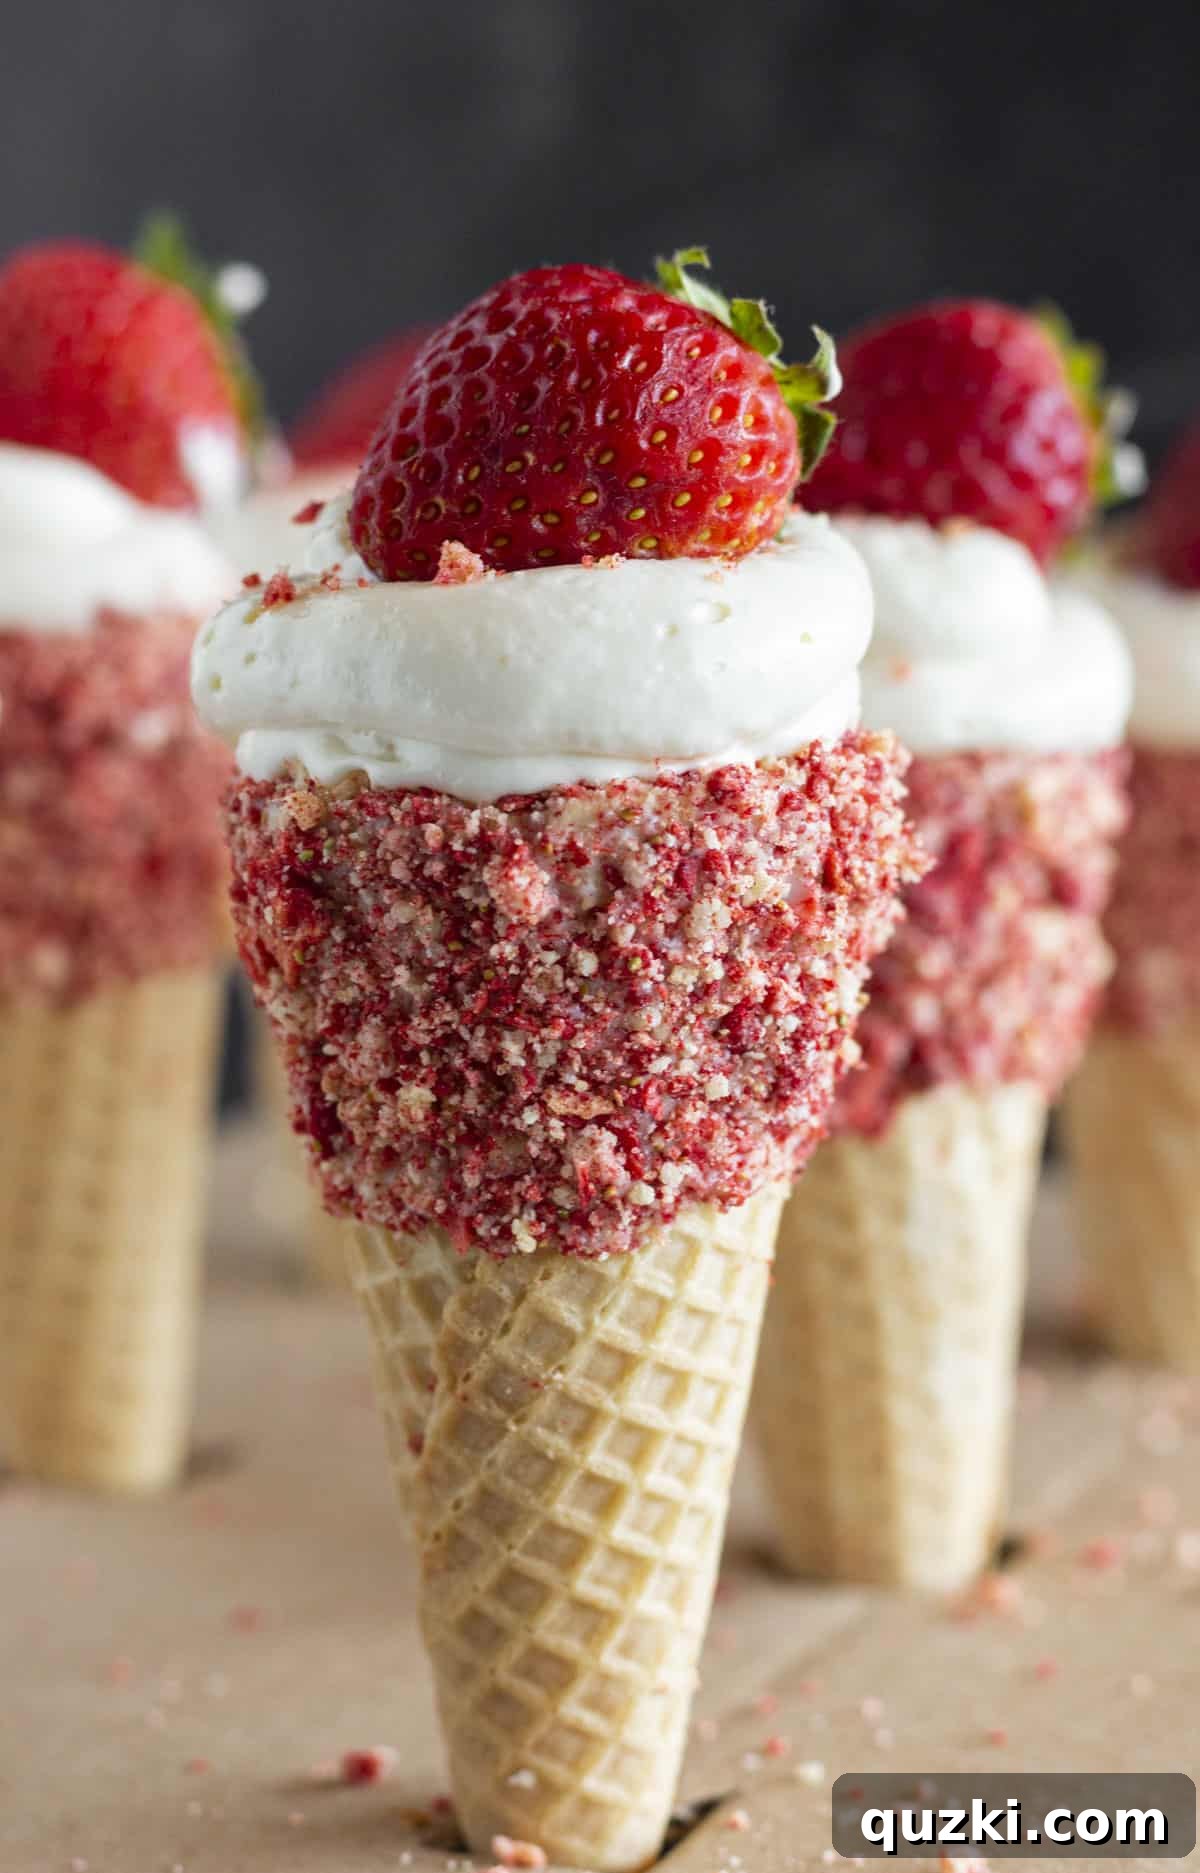
The star of this show is undoubtedly the homemade strawberry crunch topping. Its vibrant color and delightful texture elevate this dessert from good to absolutely phenomenal. Beyond these amazing cones, this versatile topping can be sprinkled over a variety of desserts, including classic Strawberry Crunch Cheesecakes, decadent Strawberry Shortcake Crunch Cakes, and even delightful Strawberry Crunch Cookies. Get ready to impress with this innovative and utterly delicious creation!
Table of Contents
- What is Strawberry Crunch Topping Made Of?
- The Essential Ingredients for this Recipe
- How to Make Strawberry Crunch Cheesecake Cones: Step-by-Step
- Expert Tips for Perfect Cheesecake Cones
- Storage and Freezing Guidelines
- Recipe FAQs: All Your Questions Answered
- Crave More Strawberry Desserts? Try These Awesome Recipes…
- Strawberry Crunch No Bake Cheesecake Cones Recipe Card
What is Strawberry Crunch Topping Made Of?
The secret to these sensational cheesecake cones lies in the incredible strawberry crunch topping, often referred to as strawberry shortcake crunch topping. This crunchy masterpiece begins with a simple yet brilliant base of Golden Oreo crumbs, which provide a delicate sweetness and a satisfying texture. The true strawberry flavor, however, comes from the freeze-dried strawberry powder, which offers an intense, authentic berry taste without any artificiality.
Unlike some recipes that rely on strawberry jello mix for color and flavor, our preferred method utilizes freeze-dried fruit for a more natural and pronounced strawberry essence. Softened butter is then carefully incorporated into the mixture, binding the crumbs and powder together to create that signature irresistible crunch. This method ensures a superior flavor profile and a texture that truly stands out, making it the ideal complement to our creamy no-bake cheesecake filling.
The Essential Ingredients for this Recipe
Crafting these delectable Strawberry Crunch Cheesecake Cones requires a handful of accessible ingredients that come together to create a harmonious blend of flavors and textures. Each component plays a vital role in achieving the perfect balance of creamy, crunchy, and sweet. Here’s a closer look at what you’ll need:
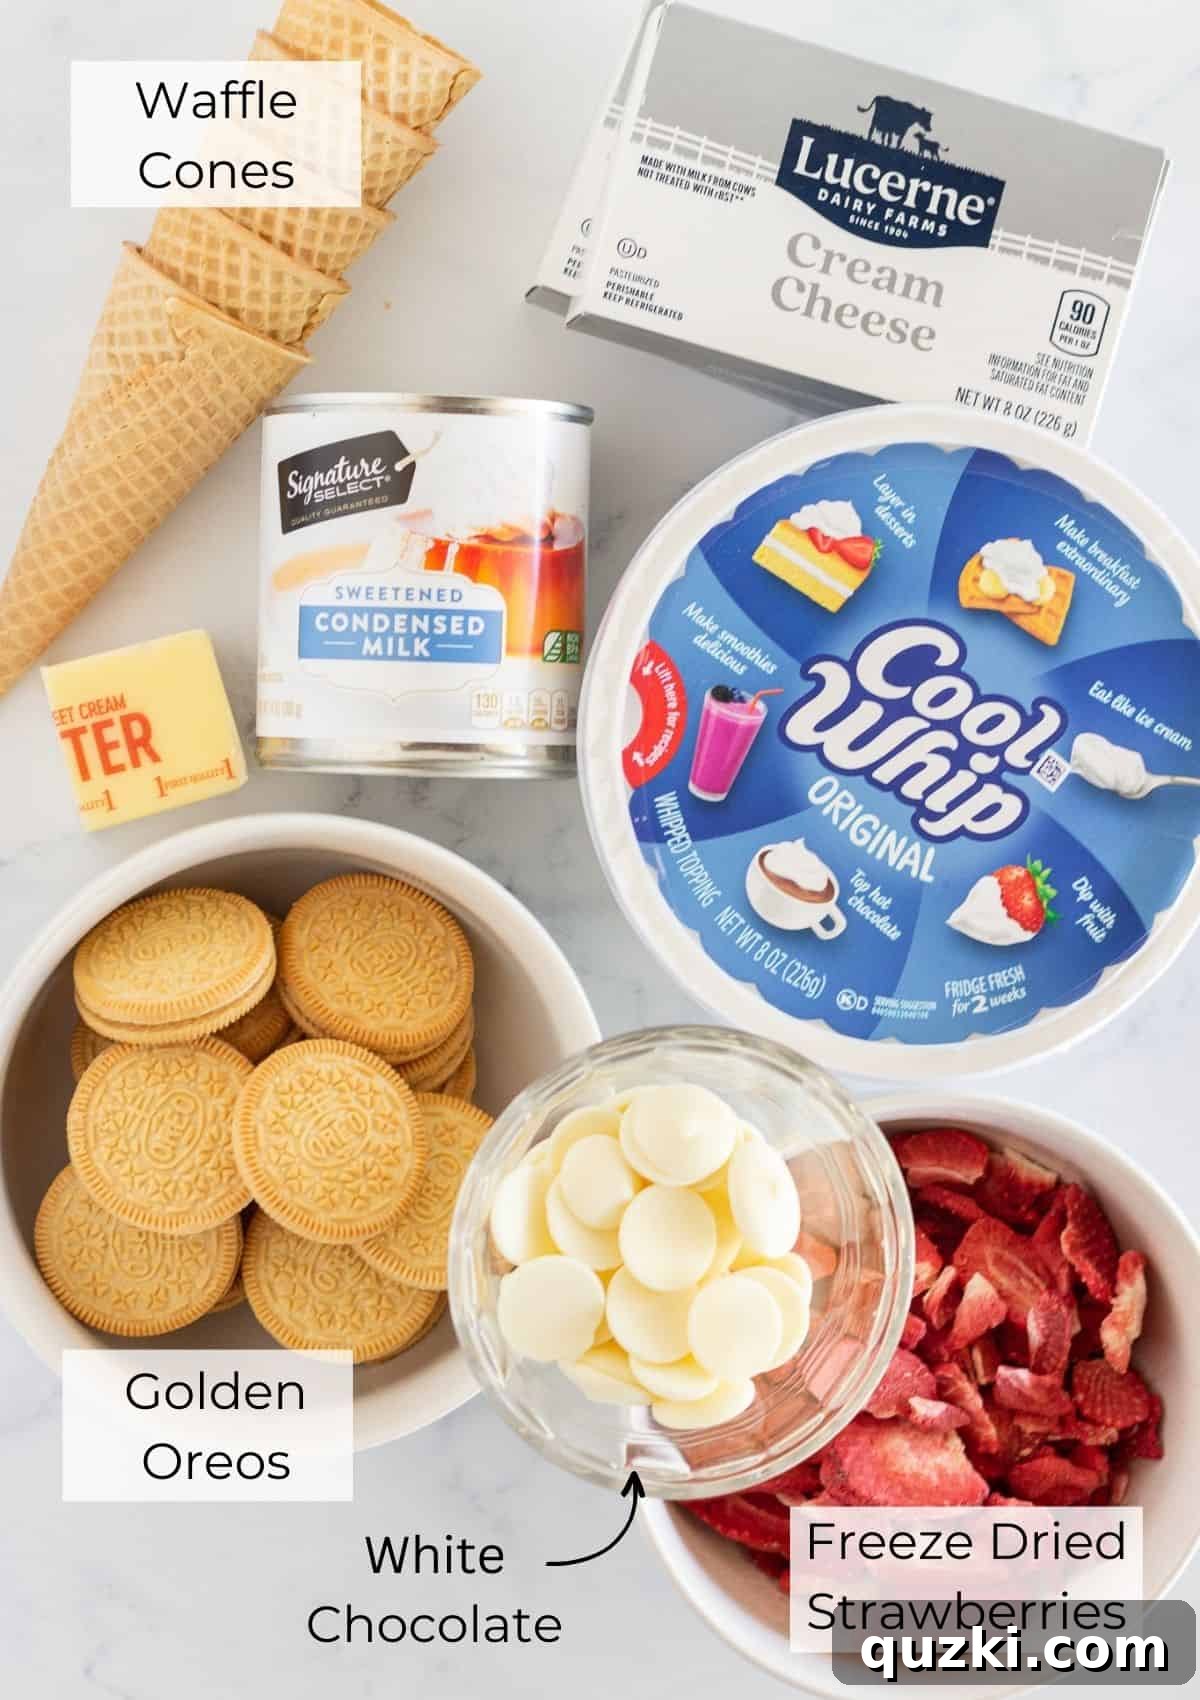
- Waffle Cones: Not just a vessel, the waffle cone adds a crucial layer of texture and a subtle sweetness that perfectly contrasts the rich cheesecake filling and the vibrant Strawberry Crunch Topping. Their sturdy structure makes this dessert delightfully portable and easy to enjoy.
- Cream Cheese: For the ultimate creamy and rich no-bake cheesecake filling, opt for full-fat cream cheese. It provides the essential body and tanginess that defines a classic cheesecake, ensuring a luscious texture that sets beautifully.
- Sweetened Condensed Milk: This ingredient is a powerhouse in no-bake desserts. It not only provides the perfect level of sweetness but also contributes significantly to the ultra-smooth and incredibly creamy texture of the filling, helping it to set without baking.
- Whipped Topping: To achieve a light, airy, and fluffy consistency in our cheesecake filling, whipped topping is key. It adds a gentle sweetness and ensures the filling isn’t too dense, perfectly balancing the richness of the cream cheese.
- White Chocolate Melting Wafers: These are essential for creating the crunchy coated rim of the cone. When melted, they provide the perfect adhesive for the strawberry crunch topping, adding an extra layer of sweetness and a beautiful visual appeal.
- Strawberry Crunch Topping: The star ingredient, made from Golden Oreo crumbs, finely pulsed freeze-dried strawberries, and softened butter. This topping delivers an unparalleled combination of sweet, fruity, and crunchy elements that make these cones truly special.
How to Make Strawberry Crunch Cheesecake Cones: Step-by-Step
Creating these delightful Strawberry Crunch Cheesecake Cones is a fun and straightforward process. Follow these easy steps to bring this irresistible dessert to life:
Part 1: Prepare the Strawberry Crunch Topping
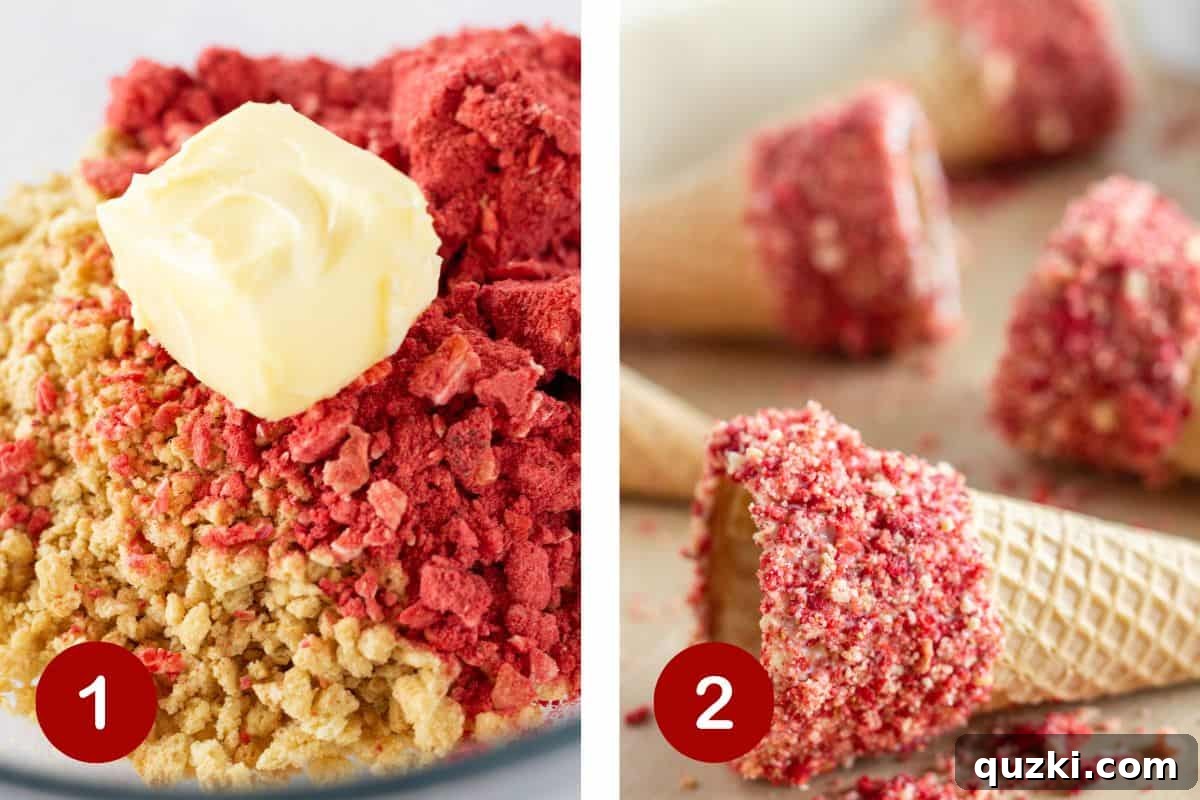
- Begin by making the homemade Strawberry Crunch Topping. Place Golden Oreos into a food processor and pulse until fine crumbs are formed. Transfer 1 cup of these crumbs into a medium-sized bowl.
- Next, add the freeze-dried strawberries to the food processor and pulse until they become a fine powder. A few small chunks are acceptable for added texture. Measure out 1 ¼ cups of this freeze-dried strawberry powder and add it to the bowl with the Golden Oreo crumbs.
- Add the softened butter to the crumb and powder mixture. Using your hands or a spoon, thoroughly work the butter into the ingredients until everything is evenly coated, creating a moist, crumbly topping. Set aside for later use.
Part 2: Decorate the Waffle Cones
- Gently melt the white chocolate melting wafers in a microwave-safe bowl in 30-second intervals, stirring until smooth.
- Dip or use a silicone brush to spread the melted white chocolate around the upper quarter section of each waffle cone.
- While the chocolate is still wet, immediately roll the chocolate-coated section of each cone in your prepared Strawberry Crunch Topping, ensuring it’s generously coated.
- Place the decorated cones upright on a parchment-lined baking sheet or in an ice cream cone holder. Allow them to set for at least 15 minutes, or until the chocolate is firm. This can be done in the refrigerator for faster setting.
Part 3: Prepare the No-Bake Cheesecake Filling
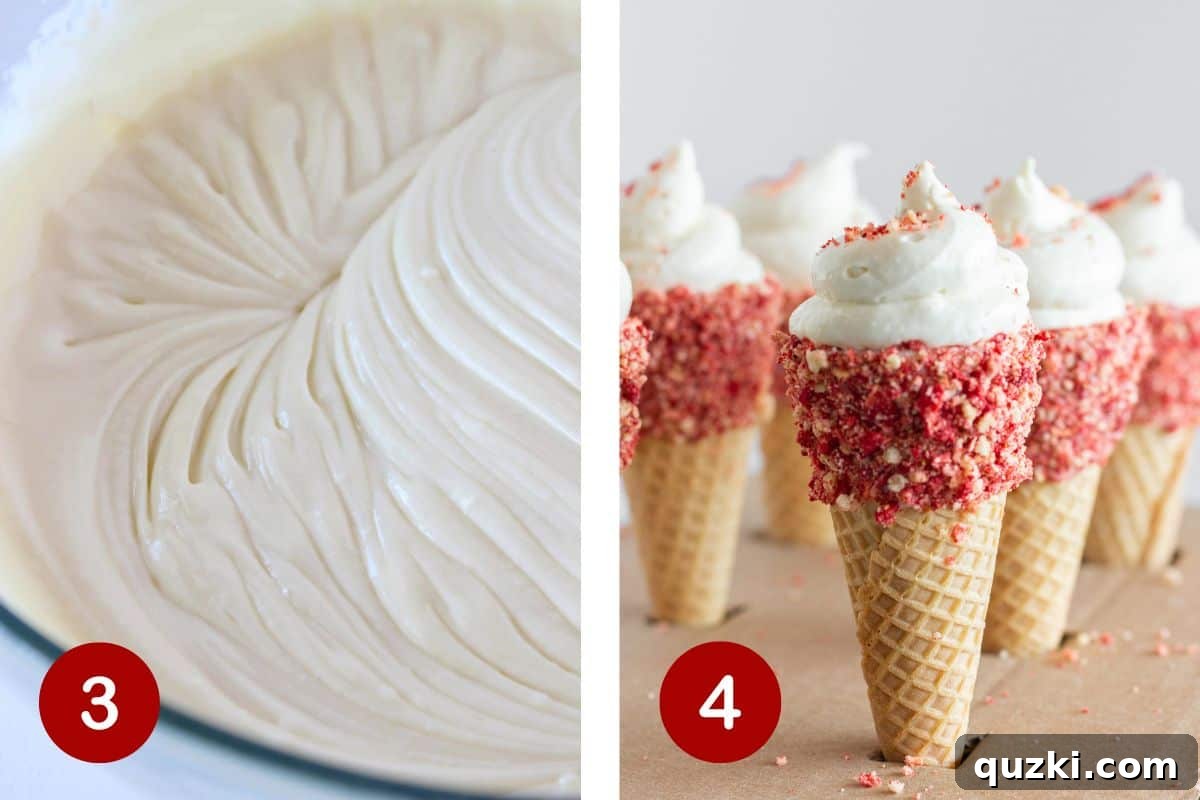
- In a large mixing bowl, beat the softened cream cheese with a hand-held mixer or a stand mixer until it is completely creamy and smooth, with no lumps. This is a crucial step for a silky-smooth filling.
- Gradually add the sweetened condensed milk to the cream cheese mixture, continuing to mix until fully incorporated and the mixture is even creamier.
- Finally, gently fold in the whipped topping until it is thoroughly combined with the cream cheese mixture. Be careful not to overmix, as this can deflate the whipped topping.
- Cover the cheesecake filling and refrigerate for at least 2 hours, or until it is well set and firm enough to scoop or pipe. For best results, chill overnight.
Part 4: Assemble the Cheesecake Cones
- Once the cheesecake filling is firm and the cones are set, it’s time for assembly. You can either use a spoon to carefully fill each cone with the no-bake cheesecake mixture or, for a neater presentation, transfer the chilled filling into a piping bag (or a large zipper bag with the corner snipped off) and pipe it into each cone.
- Generously top each filled cone with additional Strawberry Crunch Topping.
- Serve immediately and enjoy these delightful, portable treats! Any leftover filled cones should be refrigerated.
Expert Tips for Perfect Cheesecake Cones
Achieving perfectly delicious Strawberry Crunch Cheesecake Cones is easy with these expert tips:
- No Food Processor? No Problem! If you don’t have a food processor, you can still make the crunch topping. Simply place the Golden Oreos and freeze-dried strawberries into separate zipper bags. Use a rolling pin to crush them into fine crumbs and powder. This method works just as effectively and ensures a consistent texture.
- Precision with White Chocolate: For neat and even coverage of white chocolate on your cones, use a silicone pastry brush. This allows you to “paint” the chocolate onto the upper rim, giving you precise control over the amount and placement, resulting in a beautifully uniform coating for the topping to adhere to.
- Timing is Key for Topping Adhesion: Immediately after applying the white chocolate, roll the cones in the Strawberry Crunch Topping. The chocolate needs to be wet for the topping to stick properly. Working quickly ensures a generous and even coating that will stay put once set.
- Ensure Softened Cream Cheese: For a lump-free and silky-smooth cheesecake filling, it is absolutely crucial that your cream cheese is at room temperature and fully softened before you start mixing. Cold cream cheese will result in a lumpy texture that is difficult to incorporate smoothly.
- Chill the Filling Adequately: Patience is a virtue when it comes to no-bake cheesecake. Allow the filling to chill in the refrigerator for at least 2 hours before adding it to the cones. This chilling time is essential for the filling to set up properly, ensuring it holds its shape within the cone. For the best, firmest results, an overnight chill is recommended.
- Use a Piping Bag for Easy Filling: For effortless and mess-free cone filling, transfer the chilled cheesecake mixture into a piping bag fitted with a large round tip (or simply snip off a corner of a sturdy zipper bag). Piping the filling allows you to fill the cones evenly from bottom to top, creating a professional and appealing finish.
Storage and Freezing Guidelines
To ensure your Strawberry Crunch Cheesecake Cones remain as fresh and delicious as possible, proper storage is essential. Here are the best practices for both short-term storage and freezing:
Storage: For optimal freshness and to prevent the cones from becoming soggy, it’s generally best to store the components separately and assemble the cones just before serving. Keep the prepared Strawberry Crunch Topping in an airtight container at room temperature. The no-bake cheesecake filling should be stored in an airtight container in the refrigerator. When ready to serve, simply fill the cones and top with the crunch.
If you have leftover assembled cones, refrigerate them in an airtight container for up to 24 hours. While they will still be delicious, the cones may soften slightly over time.
Freezing: Both the no-bake cheesecake filling and the decorated waffle cones can be frozen separately for longer storage. Freezing the assembled cones is not recommended due to their awkward shape, which makes them difficult to store without damage, and the potential for the cone to become excessively soft or brittle once thawed.
- For the Cheesecake Filling: Place the filling in an airtight, freezer-safe container. It can be frozen for up to 1 month.
- For the Decorated Cones: Once the chocolate and topping are fully set, arrange the cones in a single layer on a baking sheet and freeze until solid. Then, transfer them to an airtight freezer bag or container, separating layers with parchment paper. They can be frozen for up to 2 weeks.
To Defrost: To enjoy frozen components, transfer them from the freezer to the refrigerator and allow them to defrost overnight. Once thawed, assemble as per the recipe instructions, ensuring the filling is thoroughly chilled before use.
Recipe FAQs: All Your Questions Answered
Can I make No Bake Cheesecake Cones ahead of time?
Yes, you can prepare all the individual components (the strawberry crunch topping, the coated cones, and the cheesecake filling) ahead of time. Store the topping at room temperature in an airtight container and the cheesecake filling in the refrigerator. The decorated cones can also be stored in an airtight container at room temperature or refrigerated. For the freshest taste and texture, assemble the cones just before you plan to serve them. This prevents the cones from becoming soft due to the moisture from the filling. An ice cream cone holder can be a great tool for both setting and serving.
Could I use a different kind of cone for the base?
Absolutely! While waffle cones offer a fantastic crunchy texture and aesthetic, sugar cones would also work wonderfully for these Strawberry Crunch Cheesecake Cones, providing a slightly sweeter, denser crunch. You could even get creative and fill waffle cone cups for a different presentation, or experiment with various flavored waffle cones to add an extra layer of taste to your dessert. Just ensure the cone is sturdy enough to hold the filling.
What else can I use Strawberry Crunch Topping on?
The versatility of this Strawberry Crunch Topping is truly amazing! It’s a fantastic addition to many desserts. Beyond these cones, it shines in recipes like our Easy Strawberry Crunch Cookies, which are simple to make starting with a cake mix and incredibly delicious. It’s also an incredible complement to Easy Strawberry Shortcake Crunch Cake and our decadent Easy Strawberry Crunch Cheesecake with a Golden Oreo Crust. Don’t limit yourself – try sprinkling it over ice cream, yogurt, or even pancakes for a delightful burst of flavor and crunch!
How long does no-bake cheesecake take to set?
No-bake cheesecake typically requires a minimum of 2-4 hours to set in the refrigerator. However, for the best and firmest consistency, especially with a softer filling like this one, chilling it overnight is highly recommended. The longer chilling time allows the ingredients to fully bind and firm up, preventing a runny or overly soft texture.
Can I put no-bake cheesecake in the freezer to set faster?
Yes, you can certainly place no-bake cheesecake in the freezer to speed up the setting process. It will firm up much faster, often within 1-2 hours. Be aware that freezing the filling will give it a slightly different texture, often resembling a soft ice cream or frozen mousse, which can be a delightful variation, especially in warm weather. Just ensure it doesn’t freeze solid if you prefer a softer consistency.
Can I use fresh strawberries instead of freeze-dried ones for the topping?
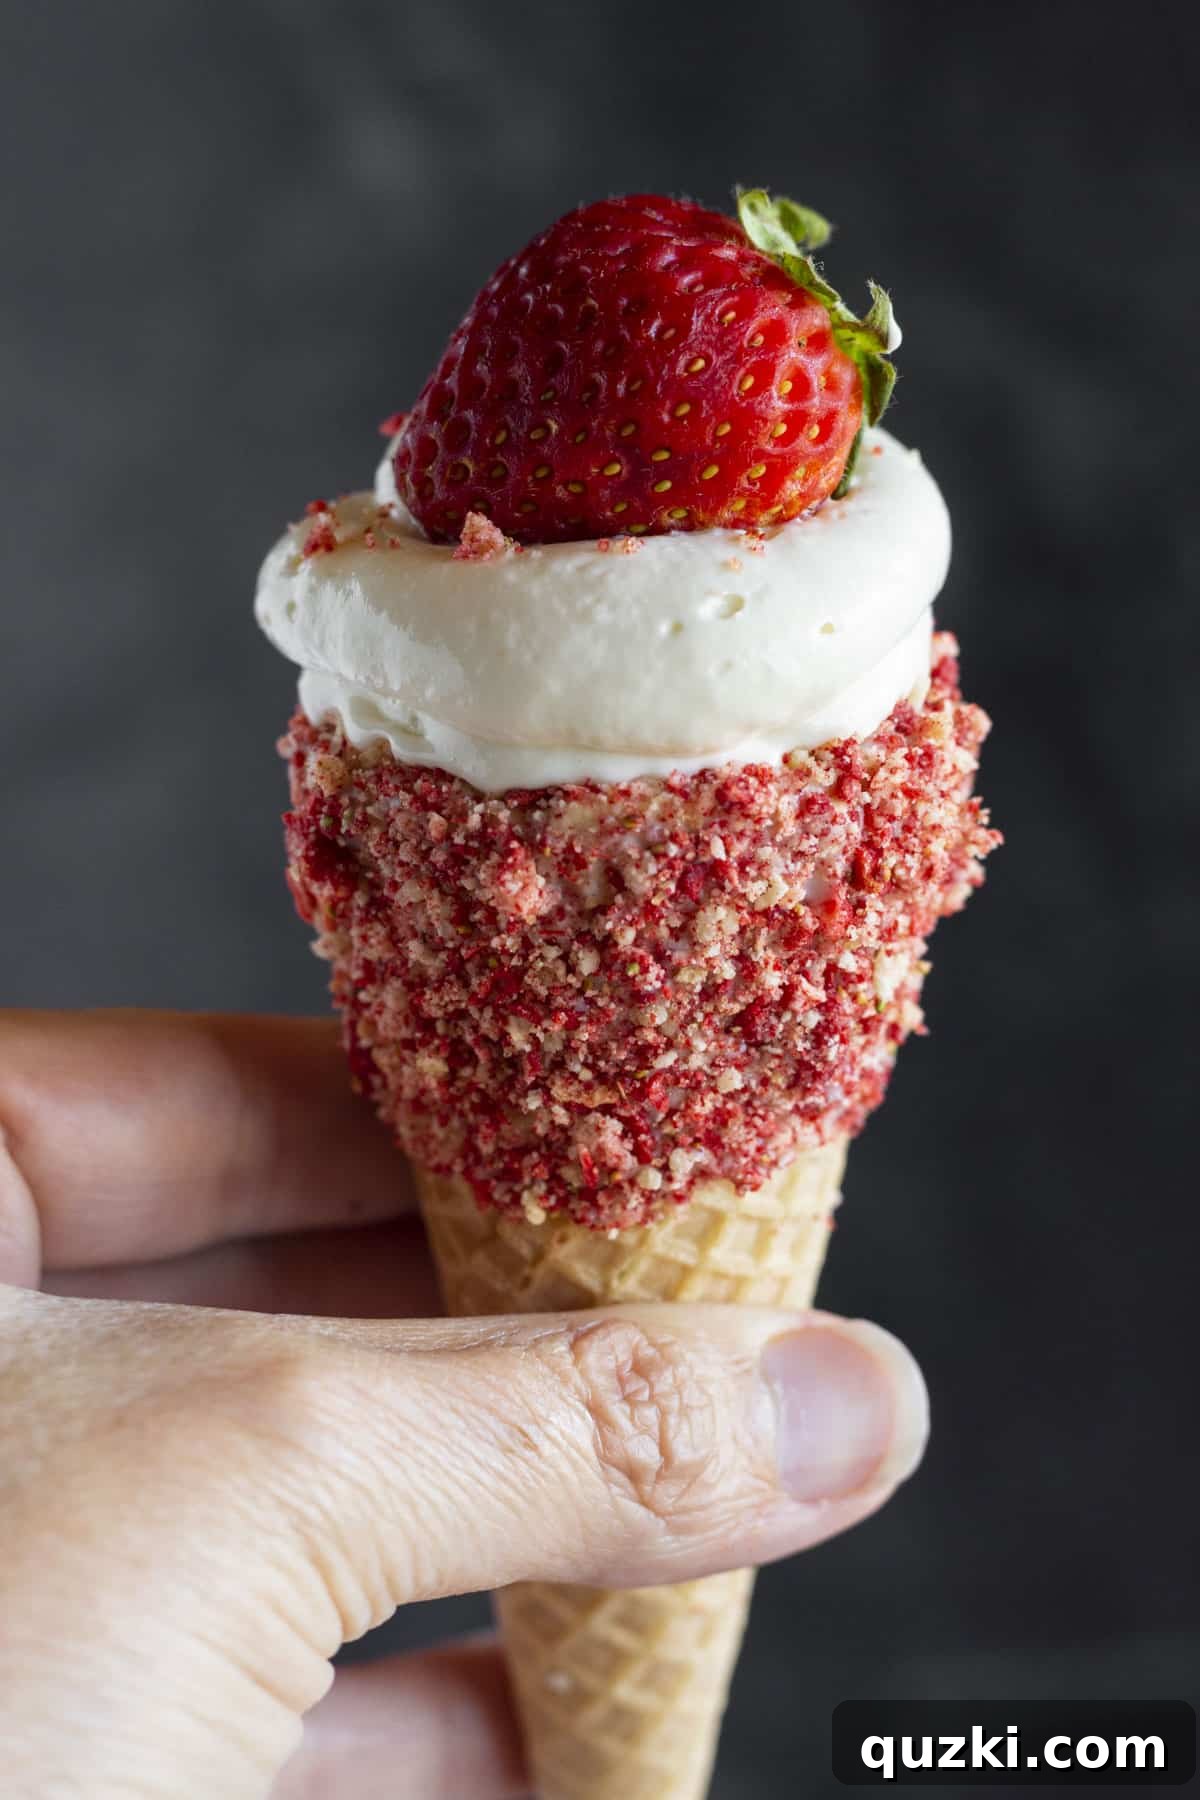
While fresh strawberries are delicious, they contain too much moisture to create the dry, crunchy topping needed for this recipe. Freeze-dried strawberries are crucial because they offer concentrated strawberry flavor without adding liquid, ensuring the topping remains crisp and adheres well to the cones. Fresh strawberries are best used as an optional garnish.
Can I make this recipe gluten-free?
To make this recipe gluten-free, you would need to substitute the Golden Oreos in the crunch topping with a gluten-free vanilla sandwich cookie. Ensure all other ingredients, like waffle cones and whipped topping, are certified gluten-free. Always check ingredient labels to confirm their gluten-free status.
Crave More Strawberry Desserts? Try These Awesome Recipes…
If you’ve fallen in love with the sweet and fruity charm of strawberries, you’re in luck! There’s a whole world of strawberry-infused delights waiting to be explored. From comforting classics to innovative treats, these recipes are perfect for satisfying any strawberry craving:
Desserts
Easy Strawberry Jam Thumbprint Cookies
Simple to make and bursting with fruity flavor, these classic thumbprint cookies are filled with sweet strawberry jam.
Desserts
Easy Strawberry Turnovers with Puff Pastry
Enjoy the crispiness of puff pastry combined with a warm, sweet strawberry filling in these effortlessly delicious turnovers.
Cakes
Super Easy Strawberry Lemonade Bundt Cake
Combine two refreshing flavors in one moist and flavorful Bundt cake, perfect for any gathering.
Desserts
Strawberry Cream Cheese Pastries
Delicate and delightful pastry bites filled with a creamy strawberry and cream cheese mixture, ideal for breakfast or dessert.

Strawberry Crunch No Bake Cheesecake Cones
By: June Albertson-Dick
No Bake Cheesecake Cones are elevated to an extraordinary level when a homemade strawberry crunch topping is generously added to both the cone’s rim and over the creamy cheesecake filling. An irresistible portable treat!
Chill Time: 2 hrs
Total Time: 2 hrs 10 mins
Servings: 12 cones
Print Recipe
Ingredients
- 12 waffle cones
- 16 ounces full-fat cream cheese, softened
- 14 ounces sweetened condensed milk
- 8 ounces whipped topping (e.g., Cool Whip), thawed
- 1/2 cup white chocolate melting wafers
Strawberry Crunch Topping
- 1 ¼ cup freeze-dried strawberries, pulsed to a fine powder
- 1 cup Golden Oreo crumbs (approximately 15 cookies)
- 3 Tablespoons unsalted butter, softened
Instructions
- Prepare Cheesecake Filling: In a large bowl, beat the softened cream cheese with a hand mixer or stand mixer until creamy and smooth. Add the sweetened condensed milk and continue mixing until well combined. Gently fold in the whipped topping until no streaks remain. Refrigerate for at least 2 hours, or until the filling is set (preferably overnight).
- Make Strawberry Crunch Topping: In a food processor, pulse Golden Oreos until fine crumbs form. Transfer 1 cup of crumbs to a bowl. Add freeze-dried strawberries to the food processor and pulse until a fine powder forms (small chunks are fine). Add 1 ¼ cups of strawberry powder to the Oreo crumbs. Add the softened butter and use your hands or a spoon to work it into the mixture until everything is evenly coated and crumbly. Set aside.
- Decorate Cones: Melt white chocolate melting wafers in a microwave-safe bowl. Dip or spread the melted white chocolate around the upper quarter section of each waffle cone. While the chocolate is still wet, roll the coated section of the cones in the Strawberry Crunch Topping to adhere it. Place cones upright on a parchment-lined baking sheet and refrigerate for at least 15 minutes to allow the chocolate to set.
- Assemble Cones: Once the cheesecake filling is set and the cones are firm, fill each cone with the cheesecake mixture using a spoon or a piping bag. Generously top each cone with additional Strawberry Crunch Topping. Serve immediately.
- Storage: Refrigerate any leftover filled cones in an airtight container for up to 24 hours. Store any extra cheesecake filling in an airtight container in the refrigerator for up to 3 days.
Notes
- If you don’t have a food processor, use a zipper bag and rolling pin to crush Golden Oreos and freeze-dried strawberries separately.
- A silicone brush can help apply white chocolate precisely to the cones.
- Ensure cream cheese is softened for a lump-free cheesecake filling.
- Chill the no-bake filling for at least 2 hours to ensure it sets properly; overnight is best.
- Use a piping bag for easier and cleaner filling of the cones.
- For freezing, store filling and decorated cones separately. Assemble after thawing in the refrigerator overnight.
Nutrition
Nutrition information is automatically calculated and should only be used as an approximation.
- Serving: 1 cone
- Calories: 547kcal
- Carbohydrates: 69g
- Protein: 7g
- Fat: 27g
- Saturated Fat: 15g
- Polyunsaturated Fat: 2g
- Monounsaturated Fat: 7g
- Trans Fat: 0.1g
- Cholesterol: 59mg
- Sodium: 285mg
- Potassium: 569mg
- Fiber: 3g
- Sugar: 53g
- Vitamin A: 700IU
- Vitamin C: 302mg
- Calcium: 173mg
- Iron: 6mg
Like this? Leave a comment below!
We’d love to hear your thoughts on these delightful Strawberry Crunch Cheesecake Cones. Share your experience and rating below!