
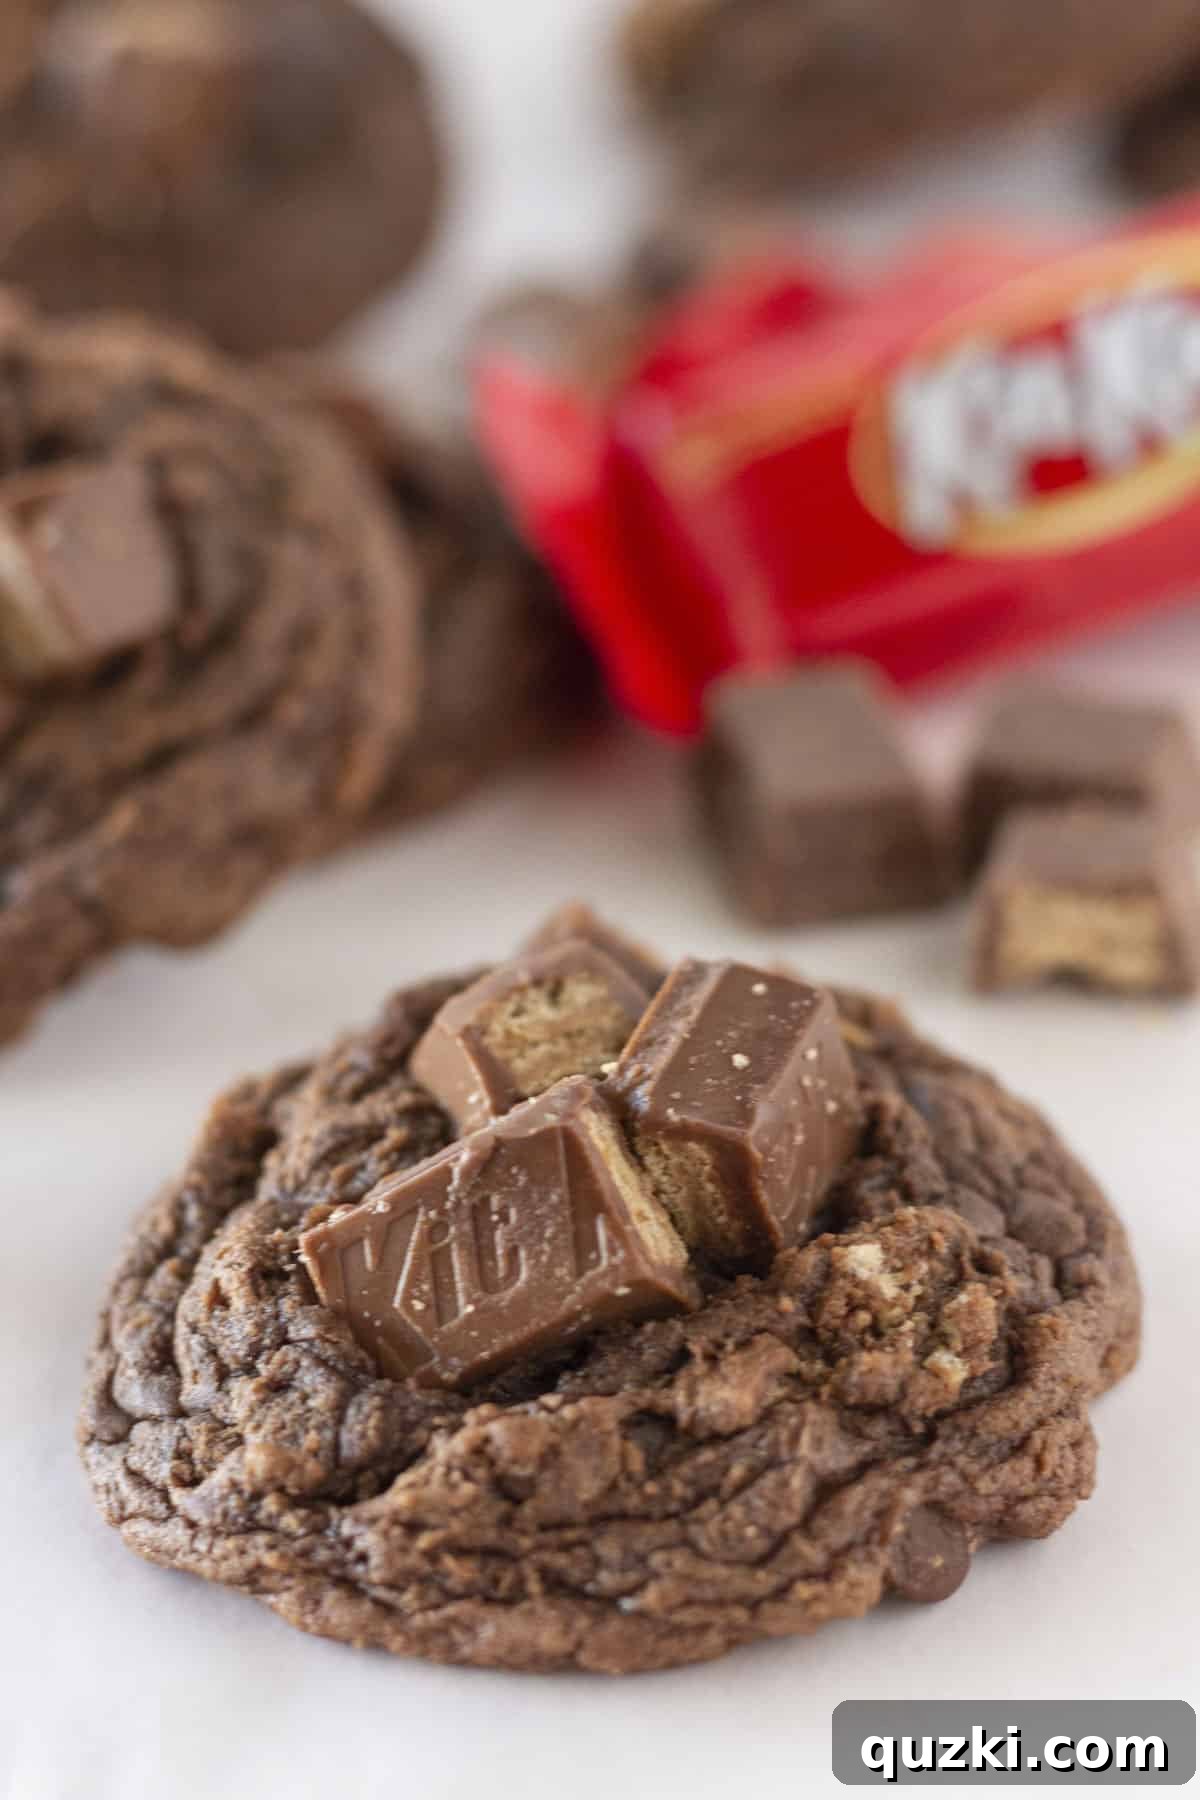
Unleash your inner baker with the simplest and most delicious cookie creation: Kit Kat Brownie Cookies. Combining the beloved crunch of Kit Kat candy bars with the rich, fudgy base of a brownie mix, these cookies are an absolute revelation. They’re not just an ingenious way to transform leftover Halloween candy; they’re a delightful, easy-to-make treat perfect for any season or occasion, sure to satisfy even the most intense sweet tooth.
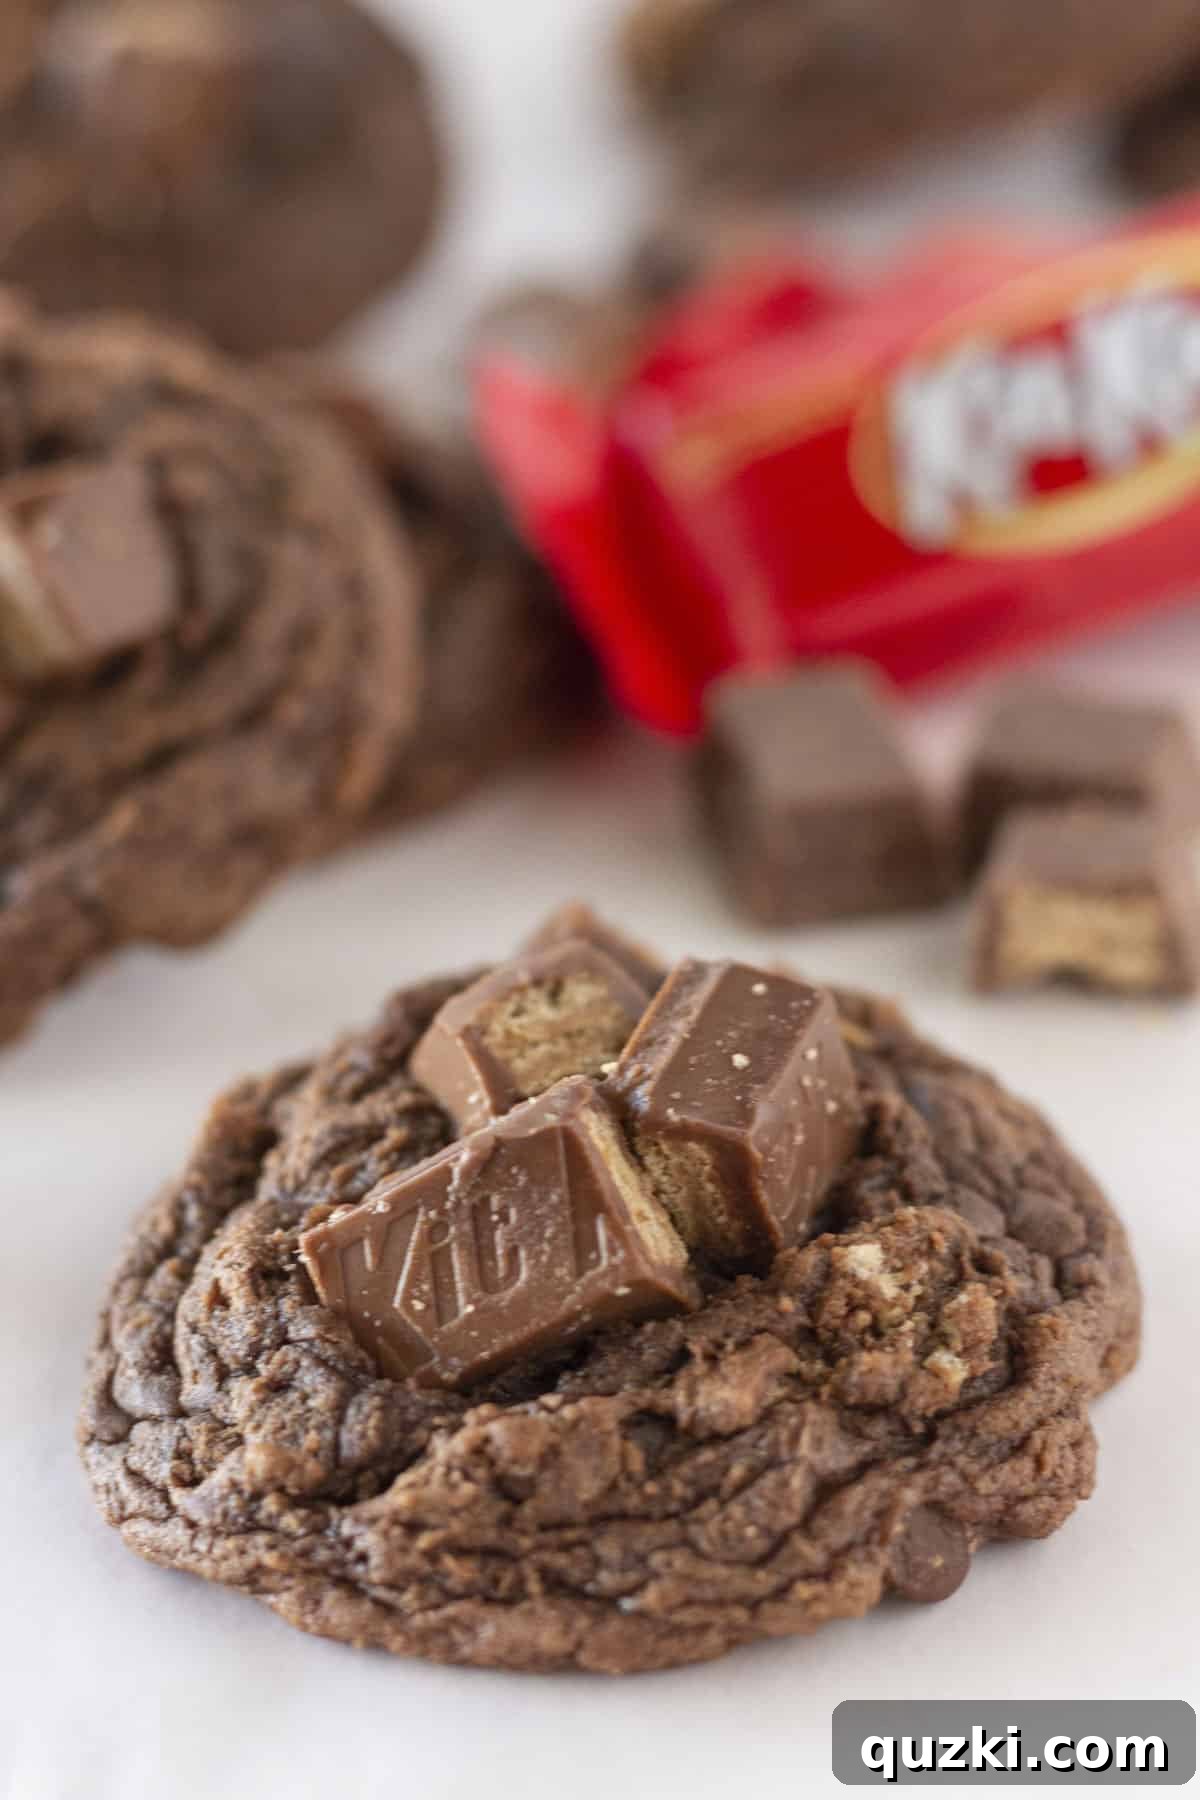
Table of Contents
- Introduction to Kit Kat Brownie Cookies
- Why You Will Love These Kit Kat Cookies
- Essential Ingredients for Kit Kat Brownie Cookies
- Step-by-Step Guide: How to Make Kit Kat Cookies
- Expert Tips for Perfect Kit Kat Brownie Cookies
- Variations and Customizations
- Storage and Freezing Your Kit Kat Cookies
- Recipe FAQs: Your Kit Kat Cookie Questions Answered
- More Irresistible Cookie Recipes You’ll Love
- Easy Kit Kat Brownie Cookies Recipe Card
Introduction to Kit Kat Brownie Cookies
Who can resist the classic snap of a Kit Kat candy bar? That perfect combination of crisp wafer and smooth milk chocolate is undeniably addictive. It’s a timeless treat that brings a smile to anyone’s face, and for good reason! So, naturally, the idea of incorporating these delightful bars into a cookie seemed like an absolute stroke of genius. These Kit Kat Brownie Cookies take that beloved flavor and texture to an entirely new level, creating a dessert experience that is both familiar and exciting.
What makes this recipe truly special, beyond the star ingredient, is its incredible simplicity. By utilizing a readily available brownie mix as the foundation for our cookie dough, we achieve a deeply rich chocolate flavor and an unbelievably fudgy, chewy texture with minimal effort. This ingenious shortcut ensures that even novice bakers can whip up a batch of these extraordinary cookies without any fuss. The brownie mix not only simplifies the ingredient list but also guarantees a consistent, delicious base every single time. If you’re a fan of intense chocolate, you might also adore our Double Dark Chocolate Chip Cookie recipe, but for a truly unique crunch, these Kit Kat cookies reign supreme.
Imagine biting into a soft, chewy cookie, intensely chocolatey, followed by the satisfying crunch of real Kit Kat pieces scattered throughout and artfully pressed on top. It’s a multi-textured dream that will make anyone weak in the knees. These cookies are ideal for using up those leftover Halloween treats, serving at a casual get-together, or simply indulging in a moment of pure bliss with a cold glass of milk. They’re guaranteed to be a hit with kids and adults alike, proving that sometimes, the simplest ideas lead to the most delicious results.
Why You Will Love These Kit Kat Cookies
There are countless reasons to fall in love with these Kit Kat Brownie Cookies, making them a staple in your baking repertoire. Here’s why they’re a must-try:
- Effortless Baking: Thanks to the brownie mix base, this recipe cuts down on prep time and complexity. You’ll spend less time measuring and mixing, and more time enjoying!
- Irresistible Flavor Combination: The rich, deep chocolate of the brownie cookie perfectly complements the classic milk chocolate and crispy wafer of Kit Kats. It’s a match made in dessert heaven.
- Textural Masterpiece: Expect a soft, chewy interior with perfectly crisp edges, punctuated by the delightful snap and crunch of chopped Kit Kat pieces in every bite.
- Versatile Treat: Whether you’re using up holiday candy, need a quick party dessert, a school snack, or simply craving something sweet, these cookies fit every occasion.
- Kid-Friendly & Crowd-Pleasing: Kit Kats are universally loved, making these cookies a guaranteed hit with family, friends, and especially the younger crowd.
- Customizable Fun: While Kit Kats are the star, the brownie base is incredibly adaptable, allowing for easy experimentation with other candies or mix-ins.
Essential Ingredients for Kit Kat Brownie Cookies
Crafting these delectable Kit Kat Brownie Cookies requires just a handful of straightforward ingredients. Each component plays a vital role in achieving the perfect balance of flavor and texture, making the most of that convenient brownie mix!
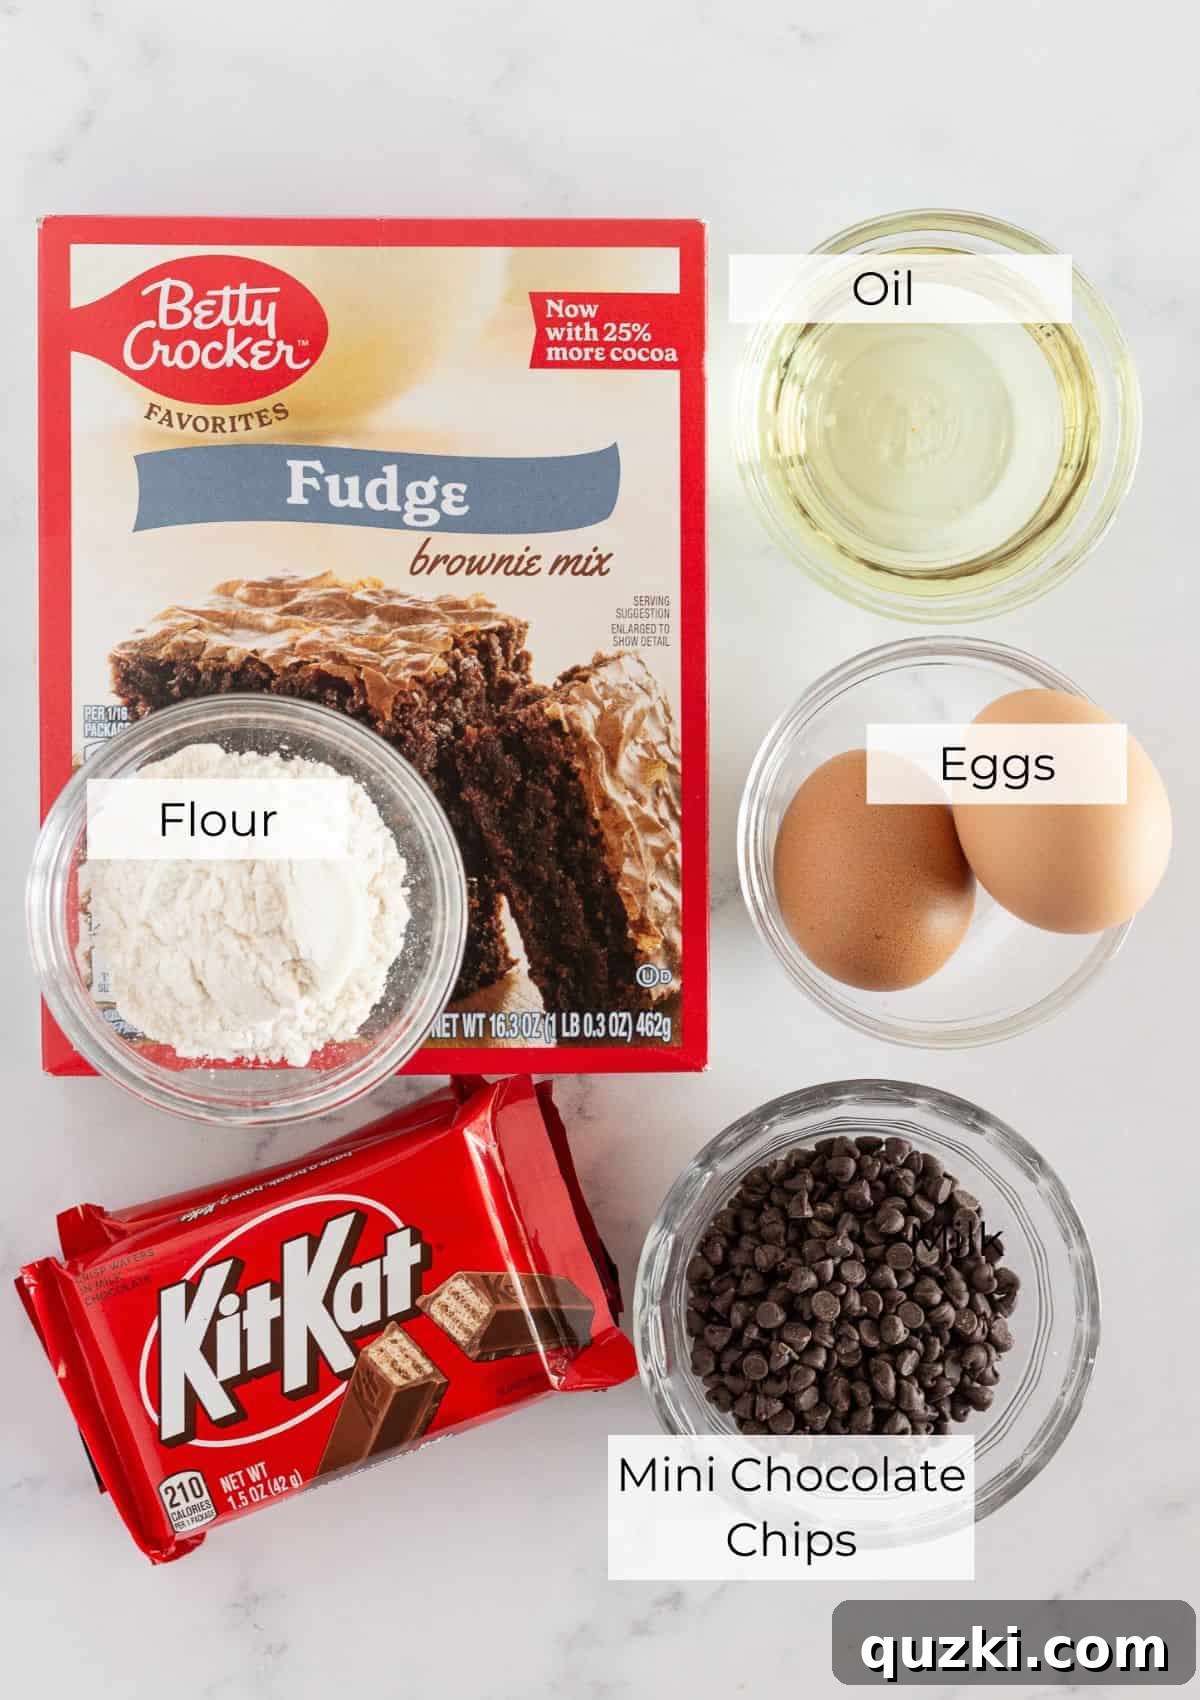
- Fudge Brownie Mix (1 box): This is the hero of our shortcut recipe! Opt for a high-quality fudge brownie mix for the richest, most decadent chocolate flavor and a truly fudgy cookie texture. While any brownie mix will work, fudge varieties tend to yield a chewier, more intense result. It simplifies the baking process significantly, eliminating the need for multiple dry ingredients.
- Large Eggs (2): Eggs are crucial binders that provide structure to the cookie dough, helping all the ingredients meld together. They also contribute to the richness and moisture, ensuring your cookies are tender and soft rather than dry and crumbly. Ensure they are at room temperature for better incorporation into the dough.
- Vegetable Oil (¼ cup): Adding vegetable oil to the mix is key for achieving that incredibly soft and moist cookie texture. It helps keep the cookies tender long after they’ve cooled. You can substitute with canola oil or even melted unsalted butter for a slightly different flavor profile, but vegetable oil is a reliable choice for consistent moisture.
- All-Purpose Flour (3 Tablespoons): While a brownie mix already contains flour, a small addition of all-purpose flour here provides extra body and structure to the cookie dough. This prevents the cookies from spreading too much during baking, ensuring they hold their shape beautifully and maintain a delightful chewiness without becoming overly flat.
- Mini Chocolate Chips (¼ cup): Mini chocolate chips are fantastic for even distribution throughout the cookie dough, ensuring a burst of chocolate in every bite. Semi-sweet chocolate chips are a classic choice, but feel free to experiment with dark chocolate chips for extra intensity or milk chocolate chips for a sweeter profile. They enhance the overall chocolate experience without overpowering the Kit Kat flavor.
- Kit Kat Candy Bars (21 snack-size, or equivalent full-size, chopped): The star ingredient! These provide the iconic chocolate-covered wafer crunch that makes these cookies so unique. Chopping them into smaller pieces allows them to be incorporated into the dough and pressed onto the top of the cookies for maximum visual appeal and textural contrast. You can use full-size bars and chop them, or easily use snack-size bars. Remember to reserve about a third of the chopped pieces for pressing onto the warm cookies after baking – this makes them look extra appealing and ensures the Kit Kat crunch is prominent.
Refer to the complete recipe card below for precise measurements and additional notes on quantities.
Step-by-Step Guide: How to Make Kit Kat Brownie Cookies
Creating these delightful Kit Kat Brownie Cookies is a straightforward process. Follow these simple steps to bake a batch of irresistibly chewy and crunchy chocolate treats.
- Prepare Your Workspace and Kit Kats: Begin by preheating your oven to 350°F (175°C). Line two baking sheets with parchment paper or silicone baking mats. Unwrap all your Kit Kat bars. Carefully chop each Kit Kat bar into small, bite-sized pieces. Aim for about 4-5 pieces per stick. This ensures a good distribution of Kit Kat crunch throughout the cookies. Set aside approximately ⅓ of the chopped Kit Kats to press onto the tops of the warm, baked cookies later.
- Combine Wet and Dry Ingredients: In a medium mixing bowl, combine the fudge brownie mix, large eggs, vegetable oil, and all-purpose flour. Using an electric mixer (handheld or stand mixer), mix these ingredients on medium speed until a thick, uniform dough forms. Scrape down the sides of the bowl as needed to ensure everything is well incorporated. Be careful not to overmix, as this can lead to tougher cookies.
- Fold in the Chocolate Chips and Kit Kat Pieces: Once your brownie cookie dough is ready, reduce the mixer speed to low or remove the bowl from the mixer. Add the mini chocolate chips and ⅔ of the chopped Kit Kat bar pieces to the dough. Using a sturdy spatula or a wooden spoon, gently fold these additions into the dough by hand. This ensures that the chocolate chips and Kit Kat pieces remain largely intact and are evenly distributed without breaking down too much, preserving their distinct texture.
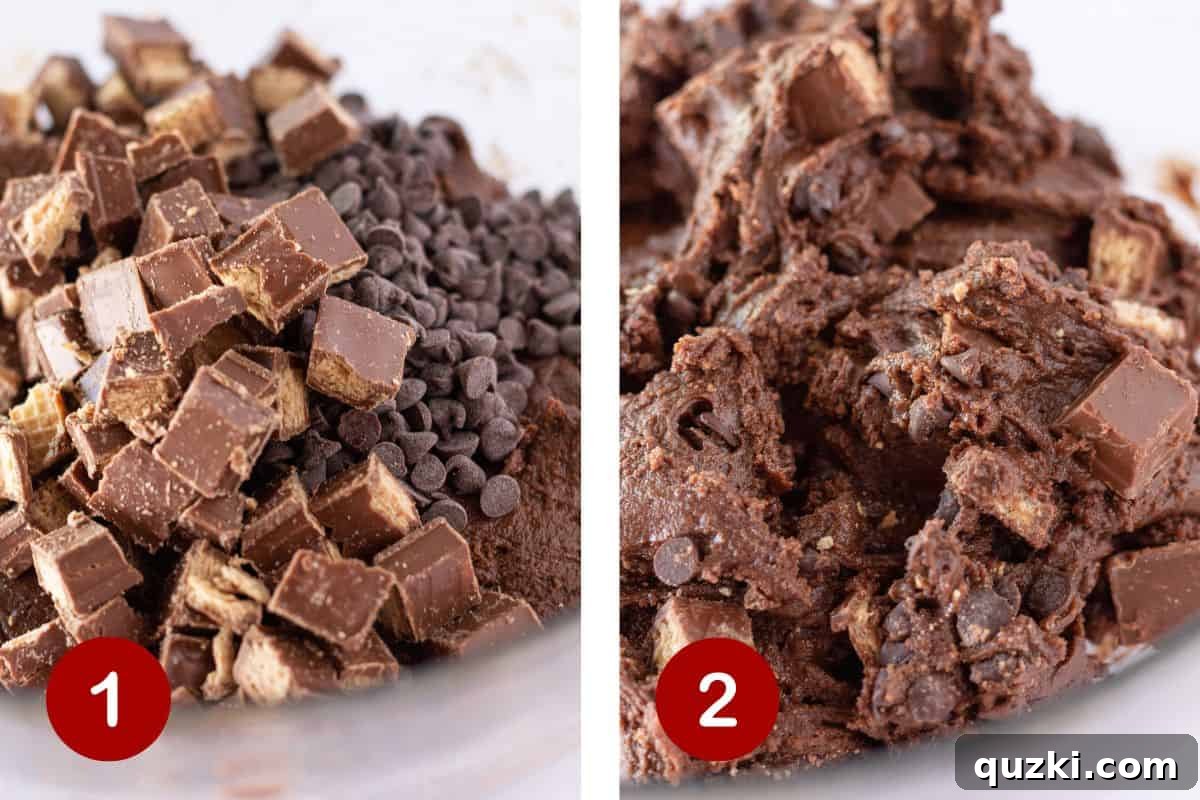
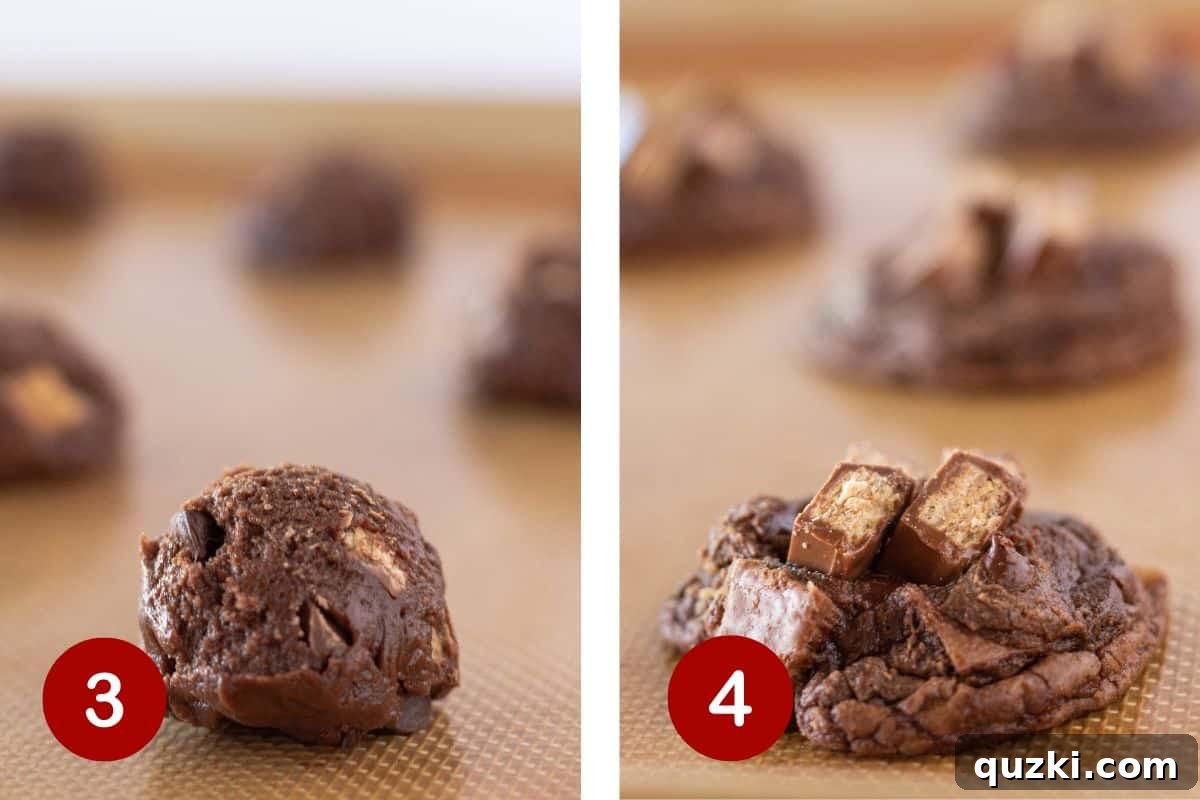
- Scoop and Bake the Cookies: Using a medium cookie scoop (about 1.5 to 2 tablespoons), scoop uniform mounds of cookie dough onto your prepared baking sheets, leaving about 2 inches between each cookie. This spacing is important to prevent them from spreading into each other during baking.
- Bake to Perfection: Place the baking sheets in the preheated oven and bake for 9-11 minutes. The cookies are ready when their edges are set and appear slightly firm, but the centers still look a little soft and undercooked. This slight underbaking is crucial for achieving that signature chewy brownie cookie texture. Do not overbake!
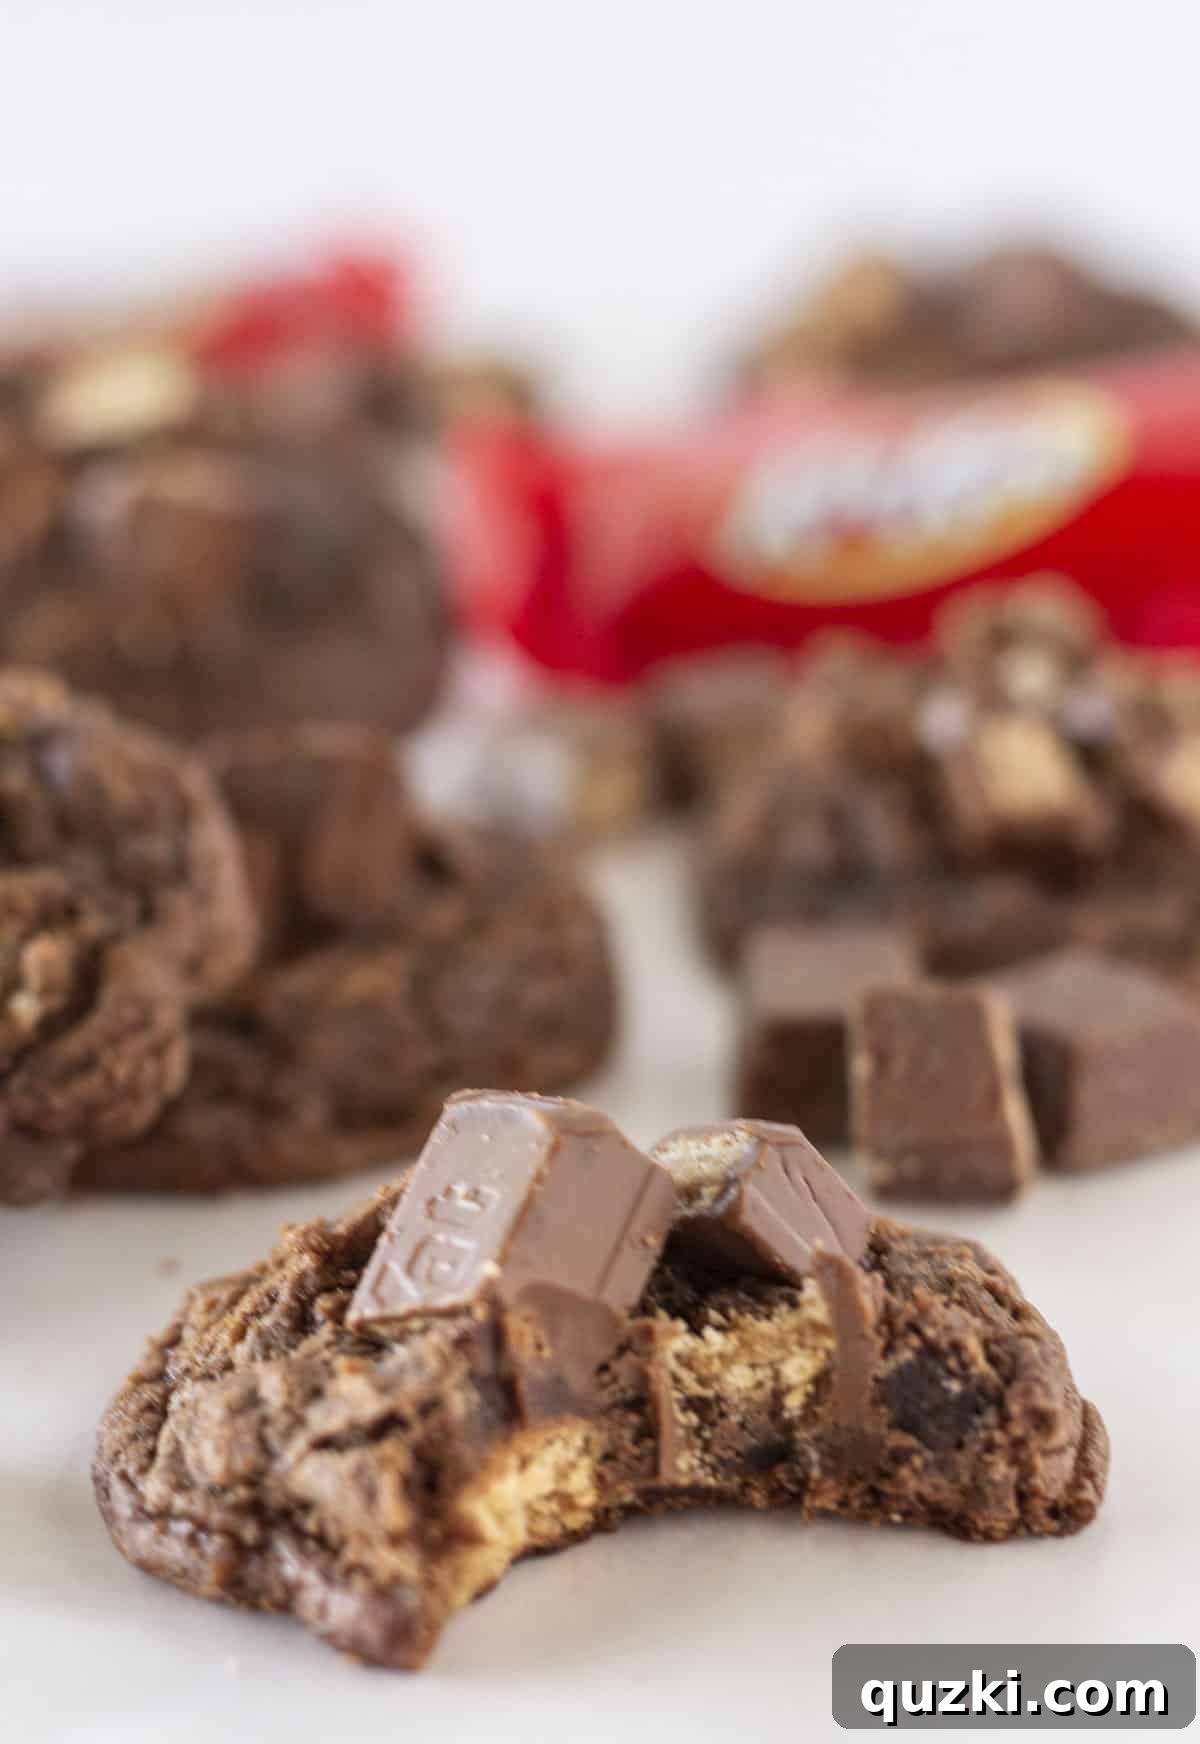
- Add Final Kit Kat Topping and Cool: Immediately upon removing the cookies from the oven, take the remaining ⅓ of the chopped Kit Kat pieces and gently press 3-4 pieces onto the top of each warm cookie. This not only enhances the Kit Kat flavor and crunch but also gives the cookies a beautiful, professional appearance. Allow the cookies to cool on the baking sheet for at least 10 minutes. This is a critical step, as the residual heat from the baking sheet will continue to bake the cookies slightly and help them set up perfectly, preventing them from falling apart when moved.
- Finish Cooling and Serve: After 10 minutes, carefully transfer the cooled cookies to a wire rack to cool completely. Once fully cooled, serve these delicious Kit Kat Brownie Cookies with a cold glass of milk, a scoop of vanilla ice cream, or your favorite hot beverage. Enjoy your perfectly chewy, chocolatey, and crunchy homemade treat!
Expert Tips for Flawless Kit Kat Brownie Cookies
Achieving bakery-quality cookies at home is easier than you think, especially with a few insider tricks. Here are some expert tips to ensure your Kit Kat Brownie Cookies turn out absolutely perfect every time:
- Whisk Your Brownie Mix First: Before combining your brownie mix with the wet ingredients, give it a good whisk in the bowl. Brownie mixes can sometimes develop small lumps from manufacturing or storage. Whisking ensures a smooth, lump-free dry mix, which will result in a uniform cookie dough and a perfectly smooth cookie texture.
- Hand-Fold Inclusions Gently: When adding the chocolate chips and chopped Kit Kat pieces, always stir them into the dough by hand using a spatula or wooden spoon, rather than an electric mixer. This gentle approach prevents the Kit Kats from breaking down excessively and keeps the chocolate chips intact, ensuring visible pieces and distinct textures in your baked cookies.
- Utilize a Cookie Scoop for Uniformity: For consistently sized and perfectly round cookies, a cookie scoop is your best friend. Scooping uniform amounts of dough ensures that all cookies bake evenly, preventing some from being overdone while others are underbaked. Plus, it gives your cookies a professional, polished appearance.
- Avoid Overbaking at All Costs: This is perhaps the most crucial tip for chewy brownie cookies. Pull the cookies from the oven when the edges are set but the centers still look slightly soft and gooey. They might appear slightly underbaked, but the residual heat from the baking sheet will continue to cook them to perfection as they cool. Overbaking leads to dry, cakey, or even hard cookies, losing that signature fudgy chewiness.
- Allow Ample Cooling Time on the Baking Sheet: Don’t rush to transfer your cookies. Let them cool on the hot baking sheet for a full 10 minutes after removing them from the oven. This crucial step allows the cookies to finish setting up, becoming firm enough to handle without breaking, while maintaining their tender interior.
- Room Temperature Ingredients: Ensure your eggs are at room temperature. Room temperature eggs emulsify better with fats (like the oil), creating a smoother, more uniform dough that bakes more evenly.
- Don’t Overmix the Dough: After adding the dry ingredients to the wet, mix just until combined. Overmixing develops the gluten in the flour, which can lead to tougher, less tender cookies. A thick dough is what you’re looking for!
- Chill the Dough (Optional, but Recommended): If you have time, chilling the cookie dough for 30 minutes to an hour can yield thicker, chewier cookies and prevent excessive spreading. It allows the flour to fully hydrate and the fats to firm up.
Variations and Customizations
While Kit Kat Brownie Cookies are perfect as they are, the beauty of this recipe lies in its versatility. The brownie mix base provides an excellent canvas for various culinary explorations. Don’t hesitate to get creative and tailor these cookies to your taste or the ingredients you have on hand!
- Alternate Candy Bars: This recipe is a fantastic way to use up any leftover chocolate candy. Imagine the possibilities! Try chopped Reese’s Peanut Butter Cups for a peanut butter and chocolate explosion, Crunch Bars for an extra crispy texture, Twix for a caramel and shortbread twist, or Snickers for nuts, caramel, and nougat. Almost any chocolate-based candy bar can be a delicious substitute.
- Different Chocolate Chips: While mini semi-sweet chocolate chips are standard, feel free to switch it up. Use milk chocolate chips for a sweeter cookie, dark chocolate chips for a more intense cocoa flavor, white chocolate chips for a creamy contrast, or even a mix of all three!
- Nutty Additions: For an added crunch and depth of flavor, fold in about ½ cup of chopped nuts such as walnuts, pecans, or almonds along with your Kit Kats and chocolate chips.
- Extracts and Spices: Enhance the flavor profile with a touch of extract. A teaspoon of peppermint extract can turn these into festive holiday treats, while a splash of almond extract can add a sophisticated touch. A pinch of sea salt sprinkled on top before baking can also amplify the chocolate flavors.
- Different Brownie Mix Flavors: While fudge brownie mix is recommended for its richness, you could experiment with other brownie mix flavors if available, like dark chocolate fudge or even a “cookies and cream” brownie mix for a fun twist.
- Stuffed Cookies: For an ultimate indulgence, press a whole mini Kit Kat bar (or a segment of a full-size bar) into the center of each cookie dough ball before baking. The melted Kit Kat center will be a delightful surprise.
Storage and Freezing Your Kit Kat Cookies
Proper storage is key to keeping your delicious Kit Kat Brownie Cookies fresh and enjoyable for as long as possible. Whether you plan to savor them over a few days or save them for a future craving, here’s how to store and freeze them effectively:
- Storing Baked Cookies:
Once your cookies have completely cooled to room temperature, transfer them to an airtight container. Keep the container at room temperature, away from direct sunlight or heat. Stored this way, your Kit Kat Brownie Cookies will maintain their soft, chewy texture and rich flavor for 4-5 days. To prevent them from sticking together, you can place a piece of parchment paper between layers if stacking.
- Freezing Baked Cookies:
These cookies freeze beautifully, making them perfect for meal prepping desserts or having a stash ready for unexpected guests. Once fully cooled, place the cookies in a single layer on a baking sheet and flash freeze them for about 30 minutes until firm. This prevents them from sticking together. Then, transfer the frozen cookies to a freezer-safe bag or an airtight freezer container. They will stay fresh in the freezer for up to 3 months, much like our popular White Chocolate Macadamia Nut Cookies.
When you’re ready to enjoy them, simply remove the desired number of cookies from the freezer and let them thaw at room temperature for about 15-30 minutes. For a “fresh from the oven” experience, you can warm them slightly in the microwave for a few seconds or in a low oven.
- Freezing Cookie Dough:
You can also freeze the unbaked cookie dough! Scoop the dough balls onto a parchment-lined baking sheet and flash freeze until solid. Then, transfer the frozen dough balls to a freezer-safe bag. When ready to bake, place the frozen dough balls on a prepared baking sheet and bake for an additional 2-4 minutes beyond the recommended time, or until the edges are set.
Recipe FAQs: Your Kit Kat Cookie Questions Answered
Got questions about making these incredible Kit Kat Brownie Cookies? We’ve got you covered with answers to some of the most common queries, ensuring your baking experience is smooth and successful.
Absolutely! This brownie cookie base is incredibly versatile and works wonderfully with almost any chocolate candy. For a fun twist, try chopped Reese’s Peanut Butter Cups, Snickers, Twix, or Butterfingers. Even M&M’s or chopped chocolate bars would be extra awesome. This recipe is an excellent way to raid your Halloween candy bucket and give those leftover treats a delicious second life. If cookies aren’t your current craving, perhaps a Halloween Candy No-Bake Cheesecake could be your next adventure!
Yes, you certainly can! Just be aware that these cookies can be quite rich, so larger sizes are for serious cookie lovers. If you prefer a bigger cookie, use a ¼ cup measuring scoop for each dough ball. You’ll need to adjust the baking time slightly; increase it to approximately 12-14 minutes, or until the edges are set and the centers still look soft.
When using a brownie or cake mix, getting the desired texture can be a bit tricky. For a soft and chewy cookie, the key is to manage the amount of additional flour and baking time. The less extra flour you add beyond what’s in the mix, the chewier your cookie will be. Flour adds structure, and too much can lead to a drier, more cake-like texture. The other crucial factor is to avoid overbaking. Pull the cookies from the oven when they are just set at the edges but still appear slightly underbaked in the center. Allow them to cool on the hot baking sheet for 10 minutes; the residual heat will continue to cook them perfectly without drying them out. For a more cake-like cookie, you would typically add more flour and sometimes a bit of cornstarch to the dough. The extra flour creates a thicker dough, and cornstarch helps to lighten the cookies as they bake, giving them a fluffier, cake-like crumb.
If your cookies are spreading more than desired, a few factors could be at play. Ensure you’ve added the three tablespoons of all-purpose flour, as this is crucial for providing structure. Your butter (if substituting for oil) might have been too warm, or your baking sheets could be too hot when the dough is placed on them. Chilling the dough for 30 minutes to an hour before baking can also significantly help prevent spreading.
Yes, many gluten-free brownie mixes are available and can be used as a direct substitute. The results might vary slightly in texture depending on the brand, but you should still get delicious Kit Kat Brownie Cookies. Always check the package instructions for any specific recommendations for the gluten-free mix you choose.
More Irresistible Cookie Recipes You’ll Love
If you’re a true cookie connoisseur and enjoyed these Kit Kat Brownie Cookies, you’ll be thrilled to discover more delightful recipes to add to your baking list. From classic flavors to unique twists, there’s a cookie for every craving. Here are some of our other fantastic cookie creations:
Discover Your Next Favorite Cookie!
Cake Mix Cookies
The Best Churro Cookies Recipe
Cookies
The Best Chocolate Chip and Pecan Cookies
Cookies
Easy Cinnamon Coffee Cake Cookies
Desserts
Easy Strawberry Jam Thumbprint Cookies
Did you try this amazing recipe?
We’d love to hear your thoughts! Leave a ⭐️ review below and tag @practicallyhomemade on Pinterest when you share your delicious creations!
Easy Kit Kat Brownie Cookies Recipe
June Albertson-Dick
10 minutes
35 minutes
45 minutes
24 cookies
Rate Recipe
Print Recipe
Ingredients
- 1 box fudge brownie mix
- 2 large eggs
- ¼ cup vegetable oil
- 3 Tablespoons all purpose flour
- ¼ cup mini chocolate chips
- 21 snack size Kit Kat bars, {chopped}-reserve some for top
Instructions
-
Preheat the oven to 350°F (175°C). Line baking sheets with parchment paper or silicone mats. Chop Kit Kat bars, reserving ⅓ for topping.
-
Combine the brownie mix with eggs, vegetable oil, and flour in a medium bowl. Use an electric mixer to combine until you have a thick dough. Fold in mini chocolate chips and ⅔ of the chopped Kit Kat bars by hand until evenly distributed.
-
Use a medium cookie scoop to portion mounds of dough onto the lined baking sheet, leaving adequate space between cookies.
-
Bake for 9-11 minutes, or until the edges are set and the centers appear slightly undercooked. Remove from the oven and immediately press 3-4 of the reserved chopped Kit Kat pieces into the top of each cookie.
-
Allow the cookies to cool on the baking sheet for 10 minutes. Then, transfer them to a wire rack to cool completely. Store your cookies in an airtight container at room temperature for 4-5 days or freeze for up to 3 months.
Notes
- If you want larger cookies, use a 1/4 cup measuring cup as a scoop and bake for 13-15 minutes.
- If your brownie mix has lumps, be sure to whisk it before adding the other cookie dough ingredients for a smooth dough.
- Use a cookie scoop to ensure that all of the cookies are the same size and bake evenly for a professional look.
- Stir the chocolate chips and Kit Kat pieces into the dough by hand. That way they don’t break down too much into the dough, preserving their texture.
Nutrition
Serving: 1cookie
,
Calories: 134kcal
,
Carbohydrates: 19g
,
Protein: 2g
,
Fat: 6g
,
Saturated Fat: 1g
,
Polyunsaturated Fat: 2g
,
Monounsaturated Fat: 2g
,
Trans Fat: 0.02g
,
Cholesterol: 14mg
,
Sodium: 69mg
,
Potassium: 7mg
,
Fiber: 0.1g
,
Sugar: 12g
,
Vitamin A: 24IU
,
Vitamin C: 0.01mg
,
Calcium: 5mg
,
Iron: 1mg
Nutrition information is automatically calculated, so should only be used as an approximation.
Like this? Leave a comment below!