
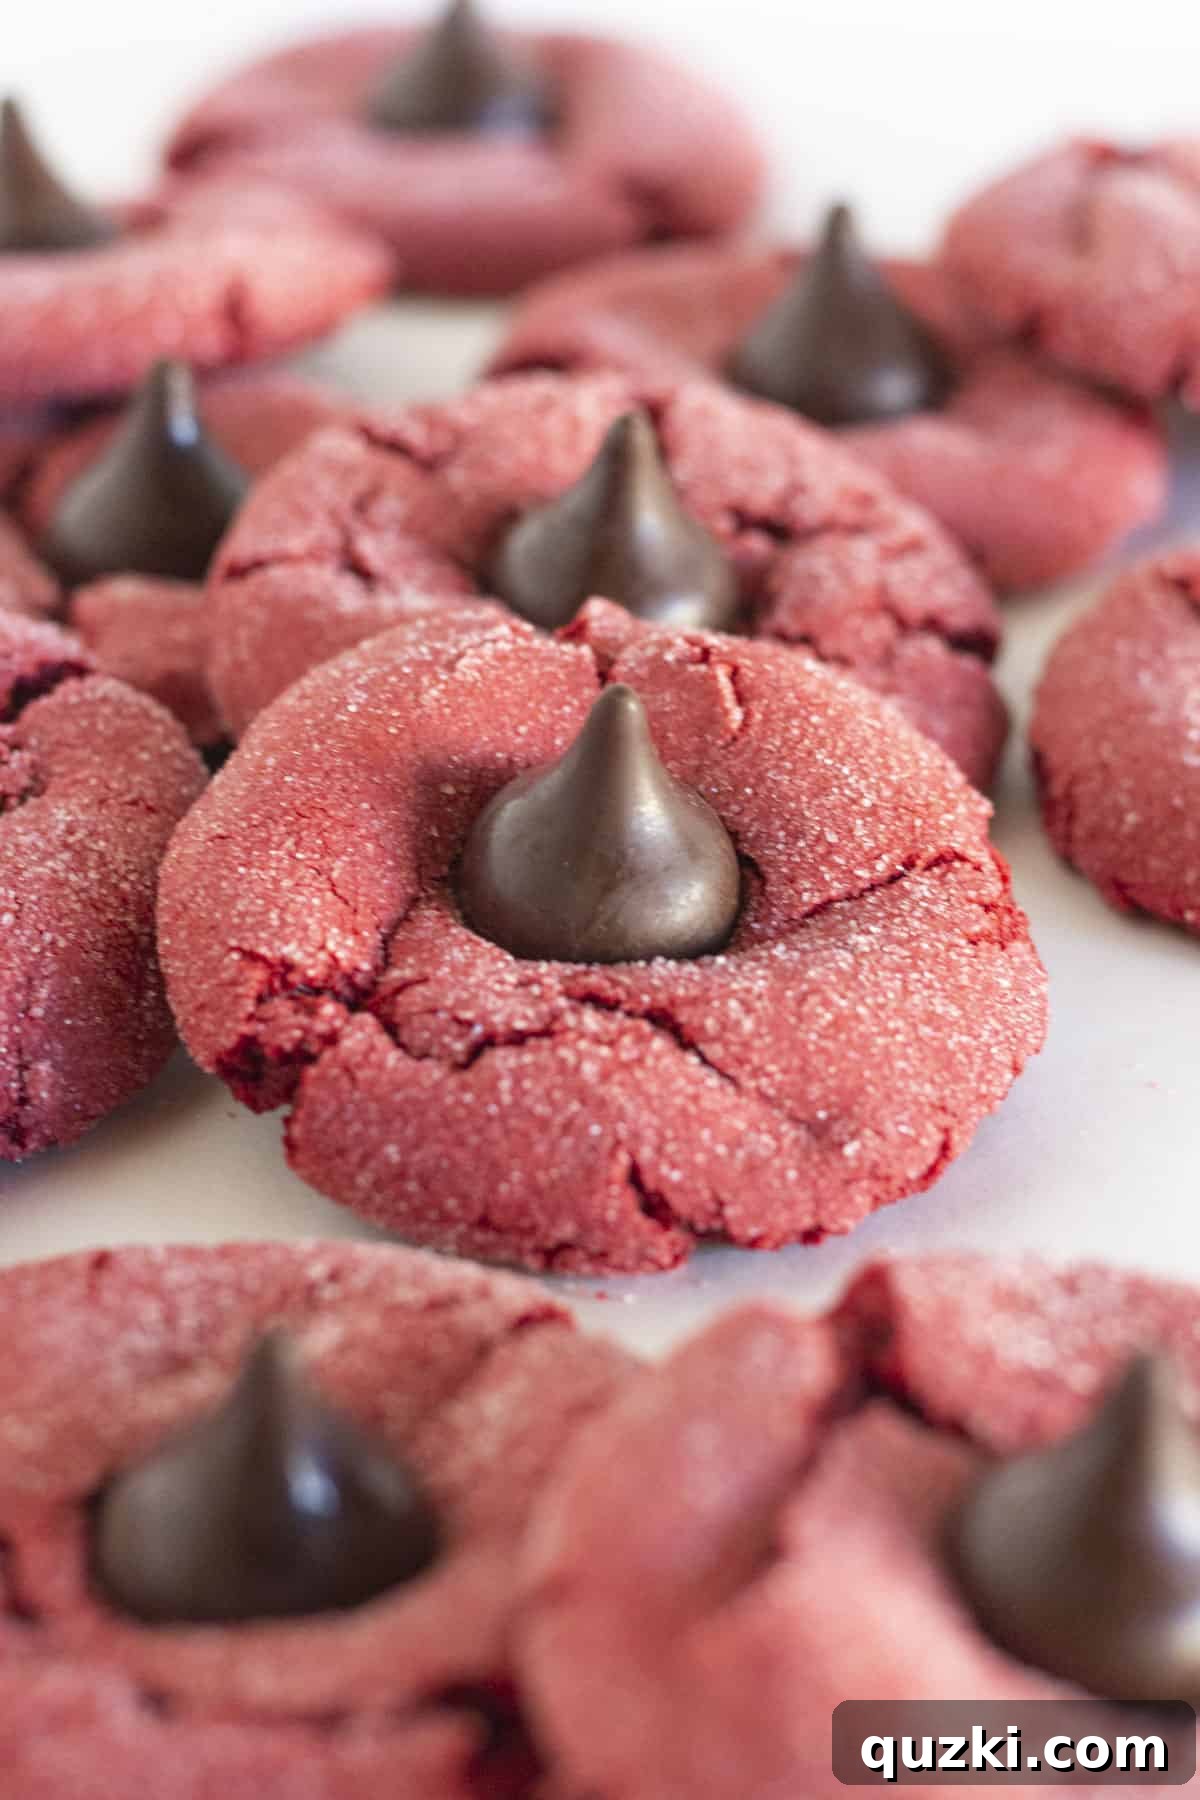
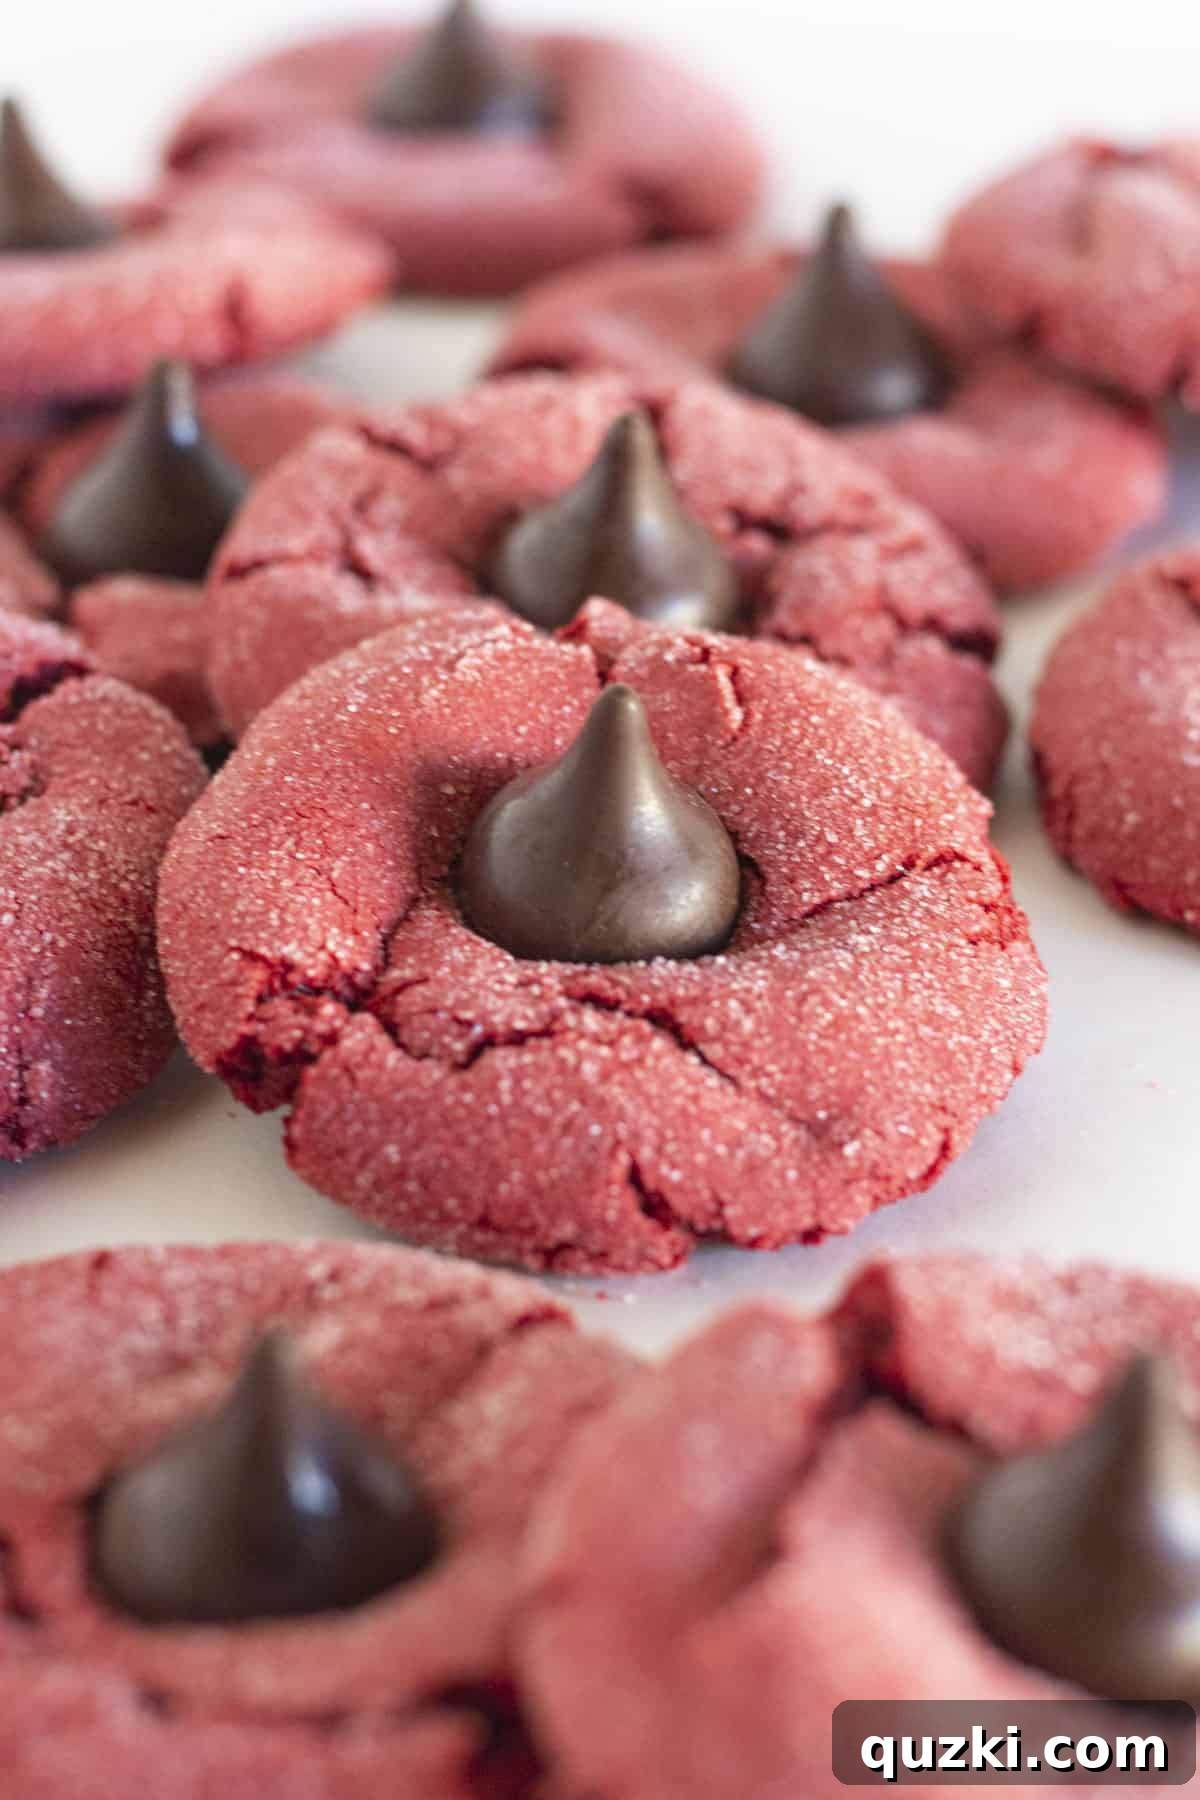
Indulge in the irresistible charm of these **Red Velvet Kiss Cookies**, a delightful treat that perfectly marries softness, chewiness, and a slight cake-like texture. Crafted effortlessly with a simple box of red velvet cake mix, this recipe guarantees consistently reliable results, eliminating the need for any additional food coloring. Each cookie is rolled in granulated sugar before baking, creating a wonderfully light, crisp exterior that beautifully complements the tender interior. The signature touch? A classic Hershey’s Kiss gently pressed into the center of each warm cookie, delivering that iconic, smooth chocolate finish that makes these a perennial favorite.
If your heart yearns for classic **red velvet blossom cookies with Hershey’s Kisses**, this brilliant shortcut version brings you all the festive appeal and rich, velvety flavor you crave, but with significantly fewer steps and far less fuss. The dough can even be chilled, a simple step that helps prevent spreading and ensures your cookies maintain their perfect, plump shape. This makes them an outstanding choice for bustling holiday baking sessions or any moment you desire a genuinely bakery-worthy treat without all the effort. They are not just cookies; they are little bites of joy, perfect for sharing, gifting, or simply enjoying with a cup of coffee.
The Secret to Success: Why Cake Mix is Perfect for Red Velvet Kiss Cookies
Harnessing the power of a red velvet cake mix is truly the secret weapon behind these effortlessly delicious cookies. It’s a game-changer for home bakers, simplifying the process dramatically and ensuring a flawless outcome every single time. Here’s why starting with a cake mix is such a brilliant idea for these **easy red velvet cookies**:
- **Streamlined Dry Ingredients:** The cake mix inherently takes care of all the precise measurements and blending of multiple dry ingredients – flour, sugar, leavening agents, and the unique cocoa blend that gives red velvet its distinct flavor and color. This eliminates guesswork and minimizes the chances of baking errors, making the recipe incredibly dependable.
- **Consistent Flavor and Color:** Achieving that iconic deep red hue and signature subtly chocolatey, vanilla-infused red velvet flavor can be tricky from scratch. A high-quality cake mix ensures a vibrant, appealing color and a perfectly balanced taste without the need to measure out cocoa powder, buttermilk, vinegar, and potentially messy red food coloring drops.
- **Unbeatable Convenience and Time-Saving:** In a busy world, finding ways to save time in the kitchen is invaluable. Using a cake mix drastically cuts down on prep time, making these cookies accessible even on weeknights or when you need a quick dessert for an unexpected gathering. Less measuring means less cleanup too!
- **Foolproof Texture:** Cake mixes are expertly formulated to produce light, tender, and moist baked goods. This translates beautifully into cookies, giving these Red Velvet Kiss Cookies their desirable soft and slightly cakey texture, with just the right amount of chewiness that makes them so addictive.
- **Perfect for Beginner Bakers:** If you’re new to baking or looking for a recipe to make with kids, cake mix cookies are an ideal starting point. The simplified ingredient list and straightforward steps build confidence and consistently deliver impressive results.
Beyond these delightful cookies, the versatility of red velvet cake mix shines in other desserts. For more rich red velvet goodness, you might also enjoy these decadent red velvet brownies or this stunningly simple red velvet bundt cake. They prove that convenience doesn’t mean compromising on flavor or quality!
Red Velvet Kiss Cookies vs. Red Velvet Blossom Cookies: What’s in a Name?
When you encounter recipes for “Red Velvet Kiss Cookies” and “Red Velvet Blossom Cookies,” you might wonder if there’s a significant difference between the two. The delightful truth is, they are fundamentally the same beloved treat! The distinction largely lies in regional naming conventions or personal preference, rather than a difference in ingredients or preparation method.
The term “blossom cookie” is a classic descriptor for any cookie, often a soft, rounded one, that has a chocolate candy, typically a Hershey’s Kiss, pressed into its warm center after baking. This creates a visually appealing “blossom” effect as the chocolate melts slightly and then sets. Peanut butter blossom cookies are perhaps the most famous example of this style. When this technique is applied to a red velvet-flavored cookie, it naturally becomes a “Red Velvet Blossom Cookie.”
Similarly, “Red Velvet Kiss Cookies” refers to the exact same concept, with “Kiss” directly referencing the iconic Hershey’s Kiss that crowns each cookie. Both names evoke the same image of a vibrant red cookie base, bursting with that distinctive red velvet taste, and crowned with a sweet, melty chocolate center.
You may find the “blossom cookie” terminology more prevalent around seasonal holidays, given its traditional association with festive baking. Regardless of the name, rest assured that the method, the irresistibly rich red velvet flavor, and the delightful chocolate finish remain identical. So whether you call them “Kiss” or “Blossom,” you’re making the same wonderfully festive and delicious cookie!
Essential Ingredients for Perfect Red Velvet Kiss Cookies
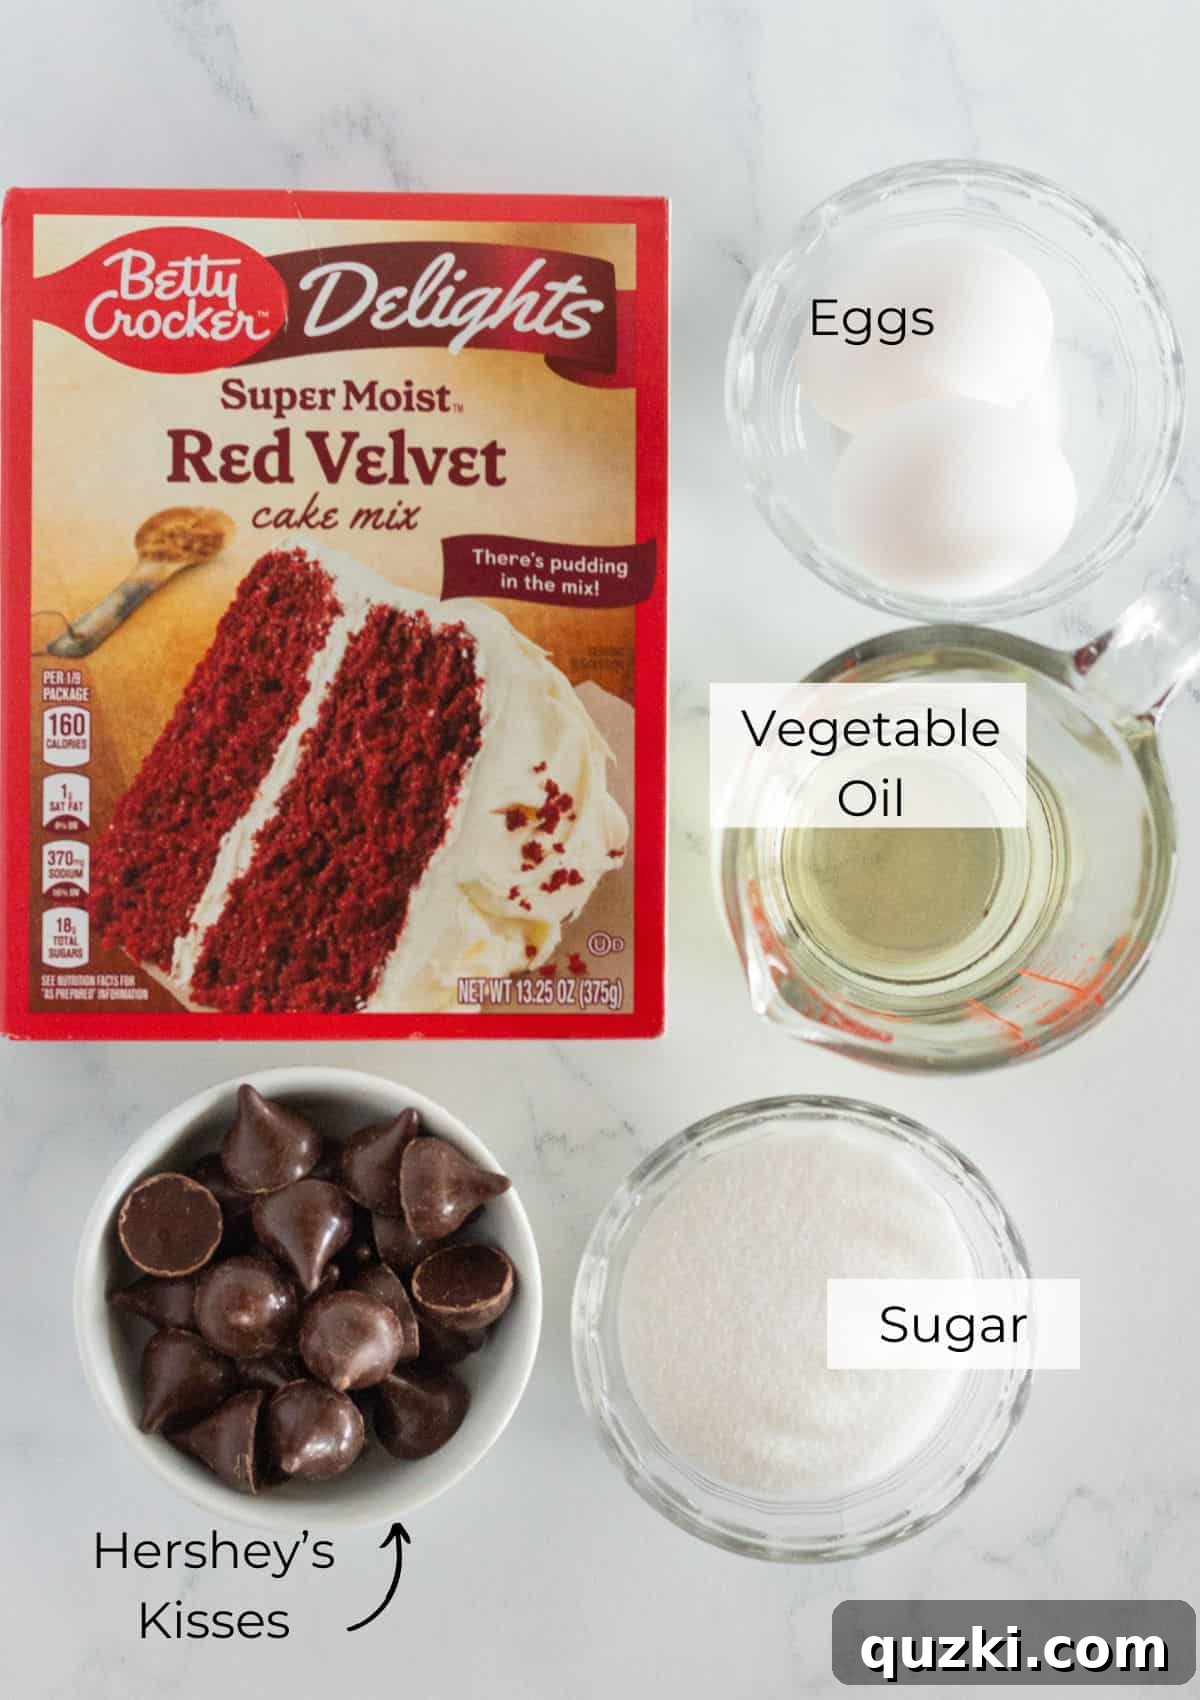
The beauty of this recipe lies in its simplicity, utilizing just a handful of common ingredients to create a truly spectacular cookie. Each component plays a crucial role in achieving the desired flavor, texture, and festive appearance of these **easy red velvet cookies**.
- Red Velvet Cake Mix: The cornerstone of this recipe, a standard 13.25-ounce box of red velvet cake mix is your shortcut to success. It effortlessly provides the classic red velvet flavor and vibrant color, eliminating the need to measure multiple dry ingredients and adding food coloring separately. This makes the process incredibly clean and straightforward. For even more creative ideas, explore my collection of red velvet cake mix recipes.
- Vegetable Oil: This essential liquid fat serves multiple purposes. It not only helps to bind the cake mix and other ingredients into a cohesive cookie dough but also contributes significantly to the cookies’ characteristic soft, moist, and tender texture. Unlike butter, which can sometimes make cookies spread more, vegetable oil helps maintain a lovely thickness.
- Eggs: Acting as a primary binding agent, large eggs are vital for the structure of these cookies. They help hold the dough together, add richness, and contribute to the light, slightly cakey interior that defines a good red velvet cookie. Eggs also aid in emulsification, ensuring a smooth, uniform dough.
- Granulated Sugar: While the cake mix already contains sugar, an extra step of rolling the cookie dough balls in granulated sugar before baking is crucial. This creates a delightful, lightly crisp, and sparkling exterior crust that adds a wonderful textural contrast to the soft interior. It also helps the cookies maintain their shape and prevents excessive spreading, resulting in beautifully thick blossom cookies.
- Hershey’s Kisses: No “Kiss Cookie” would be complete without these iconic chocolate candies. Unwrapped Hershey’s Kisses are gently pressed into the center of each warm cookie after baking. As they slightly melt, they form a perfect, silky smooth milk chocolate finish that is both visually appealing and deliciously satisfying.
Please refer to the detailed recipe card below for precise measurements and quantities for each ingredient, ensuring you have everything you need for baking success.
Get Creative: Exciting Red Velvet Kiss Cookie Variations
While the classic Red Velvet Kiss Cookie is perfect as is, this recipe is incredibly adaptable, inviting you to experiment with flavors, colors, and shapes to suit any occasion or personal preference. Here are some delightful ways to customize your cookies:
- Explore Diverse Chocolate Kisses: Don’t limit yourself to traditional milk chocolate Hershey’s Kisses! The variety available is astounding. Consider using dark chocolate Kisses for a richer, more intense chocolate flavor, white chocolate Kisses for a softer contrast, or even flavored Kisses like caramel, mint, or cookies ‘n’ creme for an unexpected twist. Seasonal varieties, such as peppermint Kisses during winter holidays, are excellent for adding a festive touch. Hershey’s Hugs also work beautifully for a white chocolate striped option.
- Seasonal Shapes for Celebrations: Elevate these cookies beyond a simple round shape for special occasions. For Valentine’s Day, gently mold the dough into heart shapes before rolling in sugar and baking. You could even replace the Hershey’s Kisses with heart-shaped Dove chocolates or mini chocolate hearts for an extra romantic touch. For Christmas, use a star-shaped cookie cutter (or carefully shape by hand) and top with a green or white chocolate kiss.
- Vibrant Sanding Sugar Options: Instead of plain granulated sugar, roll your cookie dough in colored sanding sugar. The baking aisle typically offers a rainbow of sanding sugars – think red and green for Christmas, pink for Valentine’s Day, or blue and white for Hanukkah. This not only adds a festive pop of color but also contributes a slightly coarser, sparkling texture that’s visually appealing. You could even use a mix of two colors for a unique effect.
- Add a Drizzle or Sprinkles: Once the chocolate kisses have set, consider a decorative drizzle of melted white chocolate or a contrasting dark chocolate over the cookies for an elegant finish. A scattering of festive sprinkles over the soft, melted kiss before it sets can also add extra cheer, especially for birthday celebrations or themed parties.
- A Twist on a Classic: If you enjoy the “blossom” concept, you absolutely must try this awesome Classic Peanut Butter Blossom Cookie recipe. It’s an easy version of the traditional peanut butter blossoms and offers a wonderfully different flavor profile, proving how versatile this cookie style can be.
- Add Extracts for Flavor Depth: While red velvet has a distinct flavor, a tiny drop (1/4 teaspoon) of almond extract or even a hint of raspberry extract can be added to the dough for an extra layer of flavor complexity. Experiment cautiously to find your perfect balance!
These variations allow you to tailor your Red Velvet Kiss Cookies to any event, taste, or season, making them a truly versatile and endlessly enjoyable dessert.
Step-by-Step Guide: How to Make Easy Red Velvet Kiss Cookies
Creating these beautiful and delicious Red Velvet Kiss Cookies is a straightforward process, made even simpler with the cake mix base. Follow these detailed steps to ensure perfectly baked, delightful cookies every time:
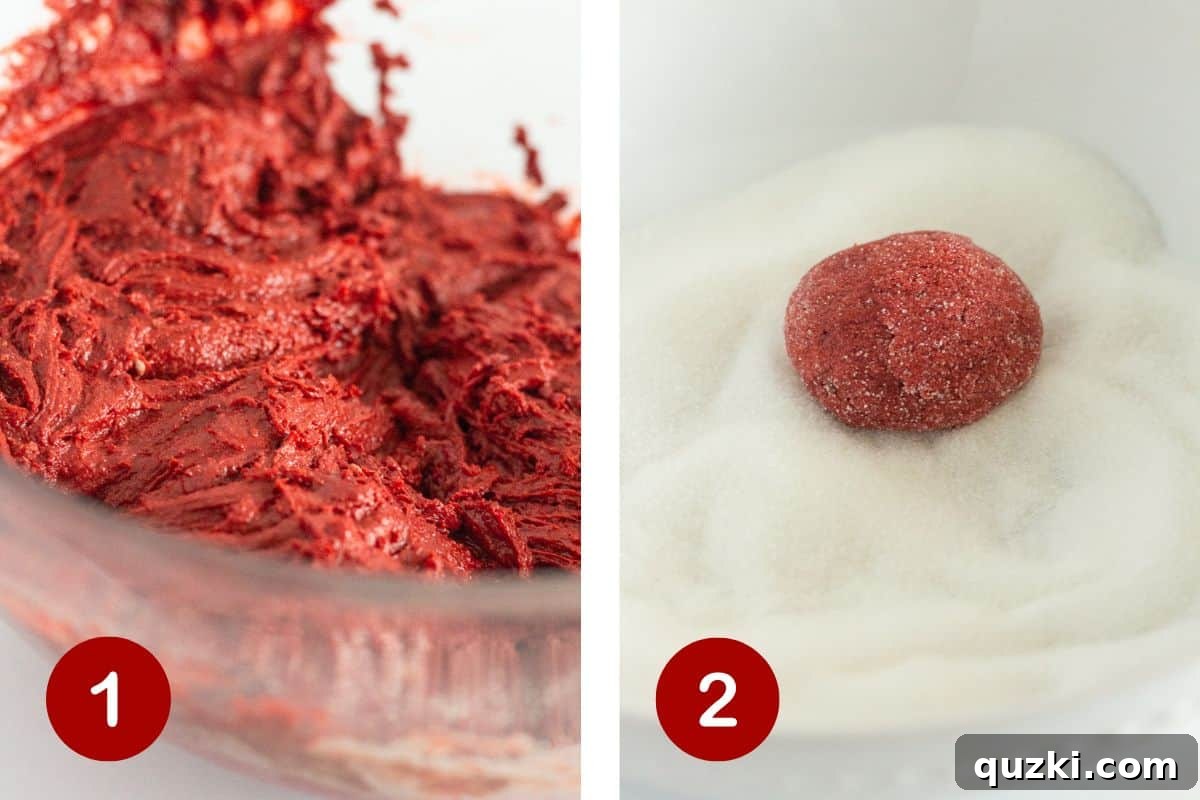
- Prepare the Dough: In a large mixing bowl, combine the entire box of red velvet cake mix, the two large eggs, and the vegetable oil. Using an electric mixer on medium speed (or a sturdy spoon if mixing by hand), mix the ingredients until they are thoroughly combined. The goal is to achieve a thick, cohesive, and beautifully deep red cookie dough. Be careful not to overmix; stop once all ingredients are just incorporated to maintain a tender cookie.
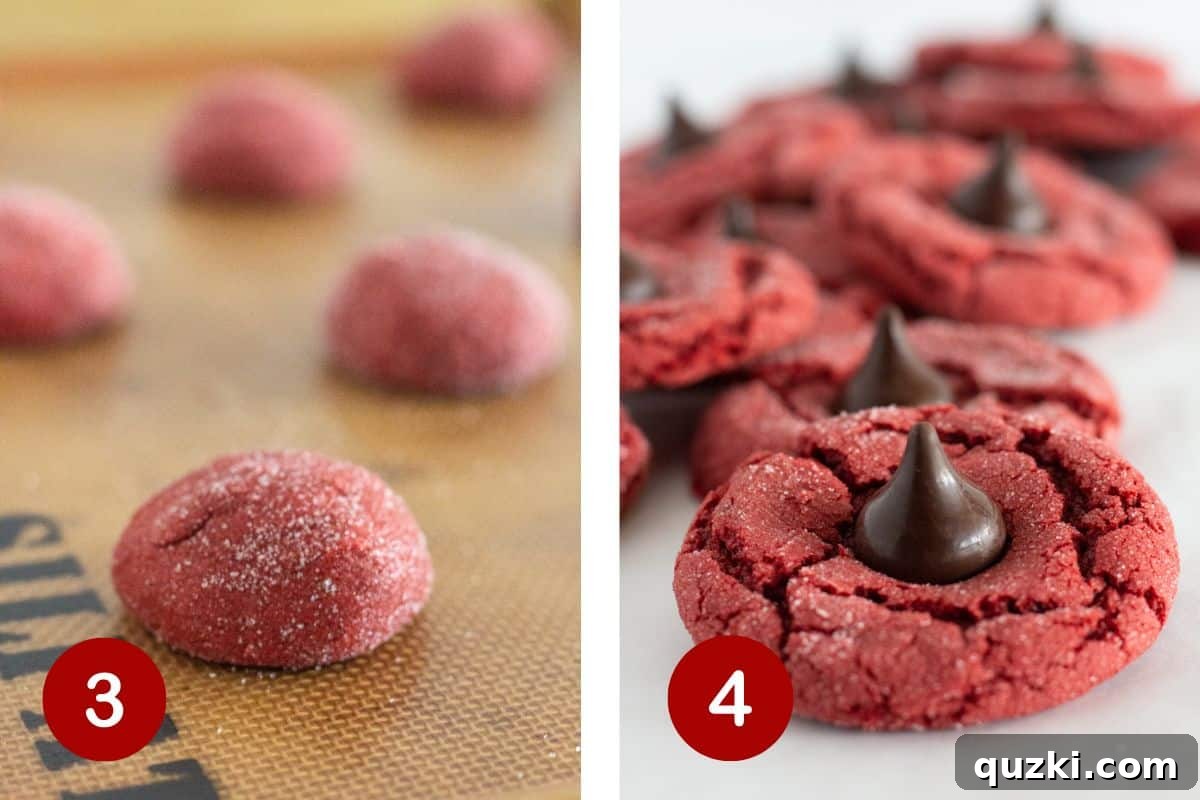
- Shape and Sugar Coat: Using a medium cookie scoop (approximately 1.5 to 2 tablespoons per scoop) or by hand, form the cookie dough into uniform balls. This ensures even baking. Roll each cookie dough ball generously in granulated sugar, ensuring it’s completely coated. The sugar coating will give the cookies a lovely crisp texture and help prevent spreading.
- Chill the Dough (Crucial Step): Arrange the sugar-coated cookie dough balls onto a baking sheet lined with parchment paper or wax paper. Cover the baking sheet tightly with plastic wrap and refrigerate the dough for at least one hour. This chilling period is vital as it helps the cookies maintain their thickness and prevents them from spreading too much during baking, resulting in a perfectly plump blossom cookie.
- Preheat Oven and Bake: After the dough has chilled for an hour, preheat your oven to 350°F (175°C). Line a fresh baking sheet with a silicone mat or parchment paper. Place 8-12 chilled cookie dough balls onto the prepared baking sheet, ensuring enough space between them for slight expansion. Bake for 9-11 minutes, or until the edges are lightly set and the centers appear slightly puffed and cooked through. Avoid overbaking to keep the cookies soft.
- Add Hershey’s Kisses and Cool: Promptly remove the baking sheet from the oven. Allow the cookies to cool on the baking sheet for a crucial 5 minutes. This allows them to firm up slightly before handling. After 5 minutes, carefully transfer the cookies to a wire cooling rack. Immediately press an unwrapped Hershey’s Kiss into the center of each warm cookie. The residual heat will gently melt the chocolate, creating that iconic “blossom” effect.
- Final Cooling and Setting: Allow the cookies to cool completely on the cooling rack, which can take 30-60 minutes, depending on your room temperature. It’s important for the Hershey’s Kisses to fully set and solidify before serving or storing, as this prevents them from being too soft or smudging. Once set, your beautiful Red Velvet Kiss Cookies are ready to enjoy!
Mastering Your Red Velvet Kiss Cookies: Expert Baking Tips
Achieving bakery-quality Red Velvet Kiss Cookies is simpler than you might think, especially with a few insider tricks. These expert tips will help ensure your cookies are perfect every time:
- Utilize a Cookie Scoop for Uniformity: Investing in a good quality cookie scoop is a game-changer. Using a scoop ensures that all your cookie dough balls are precisely the same size. This consistency is critical for even baking, preventing some cookies from being overdone while others are still raw. Uniform cookies also look far more professional and appealing on a platter.
- Timing is Key for Hershey’s Kisses: This is perhaps the most crucial tip for any blossom cookie! Always add the unwrapped Hershey’s Kiss *after* the cookies have baked and cooled for approximately 5 minutes on the baking sheet, and then immediately after transferring them to a cooling rack. If you add the Kisses before baking, the chocolate will entirely melt and spread, losing its distinct shape and texture. The residual heat from the freshly baked cookie is just enough to soften the Kiss to a perfect, glossy “blossom” without fully liquefying it.
- Avoid Overmixing the Dough: Whether you’re using a hand-held electric mixer or stirring the dough by hand, it’s vital to mix only until the ingredients are just combined and no dry streaks of cake mix remain. Overmixing develops the gluten in the flour, which can lead to tough, dense, and less tender cookies. For that characteristic soft, light, and slightly cakey red velvet texture, a gentle hand is best.
- Chill Your Dough: While optional in some cookie recipes, chilling the dough for at least an hour (or even overnight) for these red velvet kiss cookies is highly recommended. Chilled dough spreads less in the oven, resulting in thicker, chewier cookies with a more pronounced dome. It also allows the flavors to meld and prevents the cookies from becoming too flat and crispy.
- Parchment Paper or Silicone Mats are Your Friends: Always bake on baking sheets lined with parchment paper or a silicone baking mat. This prevents sticking, ensures even browning on the bottom of the cookies, and makes cleanup incredibly easy. Do not grease the baking sheet directly, as this can cause cookies to spread excessively.
- Don’t Overbake: For soft, chewy cookies, it’s better to slightly underbake than overbake. The cookies might look a little soft in the center when you pull them out, but they will continue to set as they cool. Look for lightly golden edges and a set, slightly puffed center. Overbaked cookies will be dry and hard.
- Space Your Cookies: Leave at least 2 inches between each cookie dough ball on the baking sheet. While these cookies don’t spread excessively, they do need room to expand slightly without merging into one giant cookie. Baking in batches ensures consistent oven temperature and even heat distribution.
Storage and Freezing Instructions for Red Velvet Kiss Cookies
To keep your Red Velvet Kiss Cookies fresh and delicious for as long as possible, follow these simple storage and freezing guidelines:
Storage:
Once completely cooled and the chocolate kisses have fully set, Red Velvet Kiss Cookies can be easily stored in an airtight container at room temperature. They will remain wonderfully fresh, soft, and flavorful for up to 4 days. To maintain their quality, avoid placing them in direct sunlight or near heat sources. If stacking, consider placing a sheet of parchment paper between layers to protect the delicate chocolate kisses from smudging or sticking.
Freezing:
These delightful cookies are also excellent candidates for freezing, allowing you to enjoy a homemade treat whenever the craving strikes for up to 3 months. Here’s how to freeze them effectively:
- Baked Cookies: Ensure the cookies are completely cool and the Hershey’s Kisses are fully set. Place the cookies in a single layer on a baking sheet and flash freeze for about 30 minutes until solid. This prevents them from sticking together. Once firm, transfer the cookies to a freezer-safe airtight container or heavy-duty freezer bag. Squeeze out as much air as possible to prevent freezer burn.
- Dough Balls (Unbaked): If you want to bake fresh cookies later, you can freeze the unbaked, sugar-coated dough balls. After rolling them in sugar, arrange them on a parchment-lined baking sheet and flash freeze until solid. Then transfer them to a freezer-safe bag or container. When ready to bake, you can bake them from frozen, adding a few extra minutes to the baking time (typically 12-15 minutes at 350°F / 175°C).
Thawing and Reheating:
To thaw frozen baked cookies, simply remove them from the freezer and let them come to room temperature on a wire rack for a few hours. For a warm, freshly baked experience, you can gently reheat thawed cookies in a microwave for 10-15 seconds or in a preheated oven at 275°F (135°C) for about 5 minutes.
Frequently Asked Questions About Red Velvet Kiss Cookies
Coating Red Velvet Blossom Cookies in granulated sugar before baking serves two fantastic purposes. First, as the cookies bake, the sugar on the exterior melts slightly and caramelizes, creating a wonderfully sparkling, lightly crisp crust. This adds a delightful textural contrast to the soft, chewy interior of the cookie, enhancing the overall eating experience. Second, and equally important, the sugar coating acts as a barrier that helps the cake mix cookies from spreading too much while they bake. This ensures your cookies maintain a beautiful, thick, and perfectly domed shape, which is essential for that classic “blossom” appearance when the Hershey’s Kiss is added.
Absolutely! This recipe is incredibly versatile, and you can certainly experiment with other cake mixes to create a variety of delicious kiss cookies with different flavors. While using a red velvet cake mix gives these cookies their iconic flavor and striking color, a chocolate cake mix would yield a rich chocolate blossom cookie, a vanilla or white cake mix could create a classic sugar cookie style, and even a lemon or strawberry cake mix would offer a delightful fruity twist. Any flavor of cake mix would be delicious, but remember that the distinctive red velvet taste will only come from using a red velvet cake mix. For instance, you could try this wonderful chocolate cake mix blossom cookie recipe.
While the classic milk chocolate Hershey’s Kiss is always a perfect choice for these cookies, there’s a world of flavor to explore! Using seasonal and varied Hershey’s Kisses is an excellent way to customize the look and taste of your Red Velvet Kiss Cookies, making them ideal for different holidays or themes. Dark chocolate Kisses offer a deeper, more intense chocolate flavor that contrasts beautifully with the red velvet. White chocolate Kisses or Hershey’s Hugs provide a creamy, milder chocolate note. For holiday baking, consider peppermint Kisses for Christmas, caramel Kisses for fall, or even strawberry cream Kisses for Valentine’s Day. The possibilities are endless, allowing you to tailor your cookies to any occasion or preference!
No, there is generally no need to add any additional red food coloring when you are using a commercially prepared red velvet cake mix for these cookies. The red velvet cake mix is specifically formulated to contain the necessary cocoa and red food coloring to achieve that classic, vibrant red hue and signature red velvet flavor. One of the main benefits of using a cake mix for this recipe is precisely to avoid the mess and extra step of adding liquid food coloring, making the process much cleaner and simpler while still delivering that unmistakable look and taste.
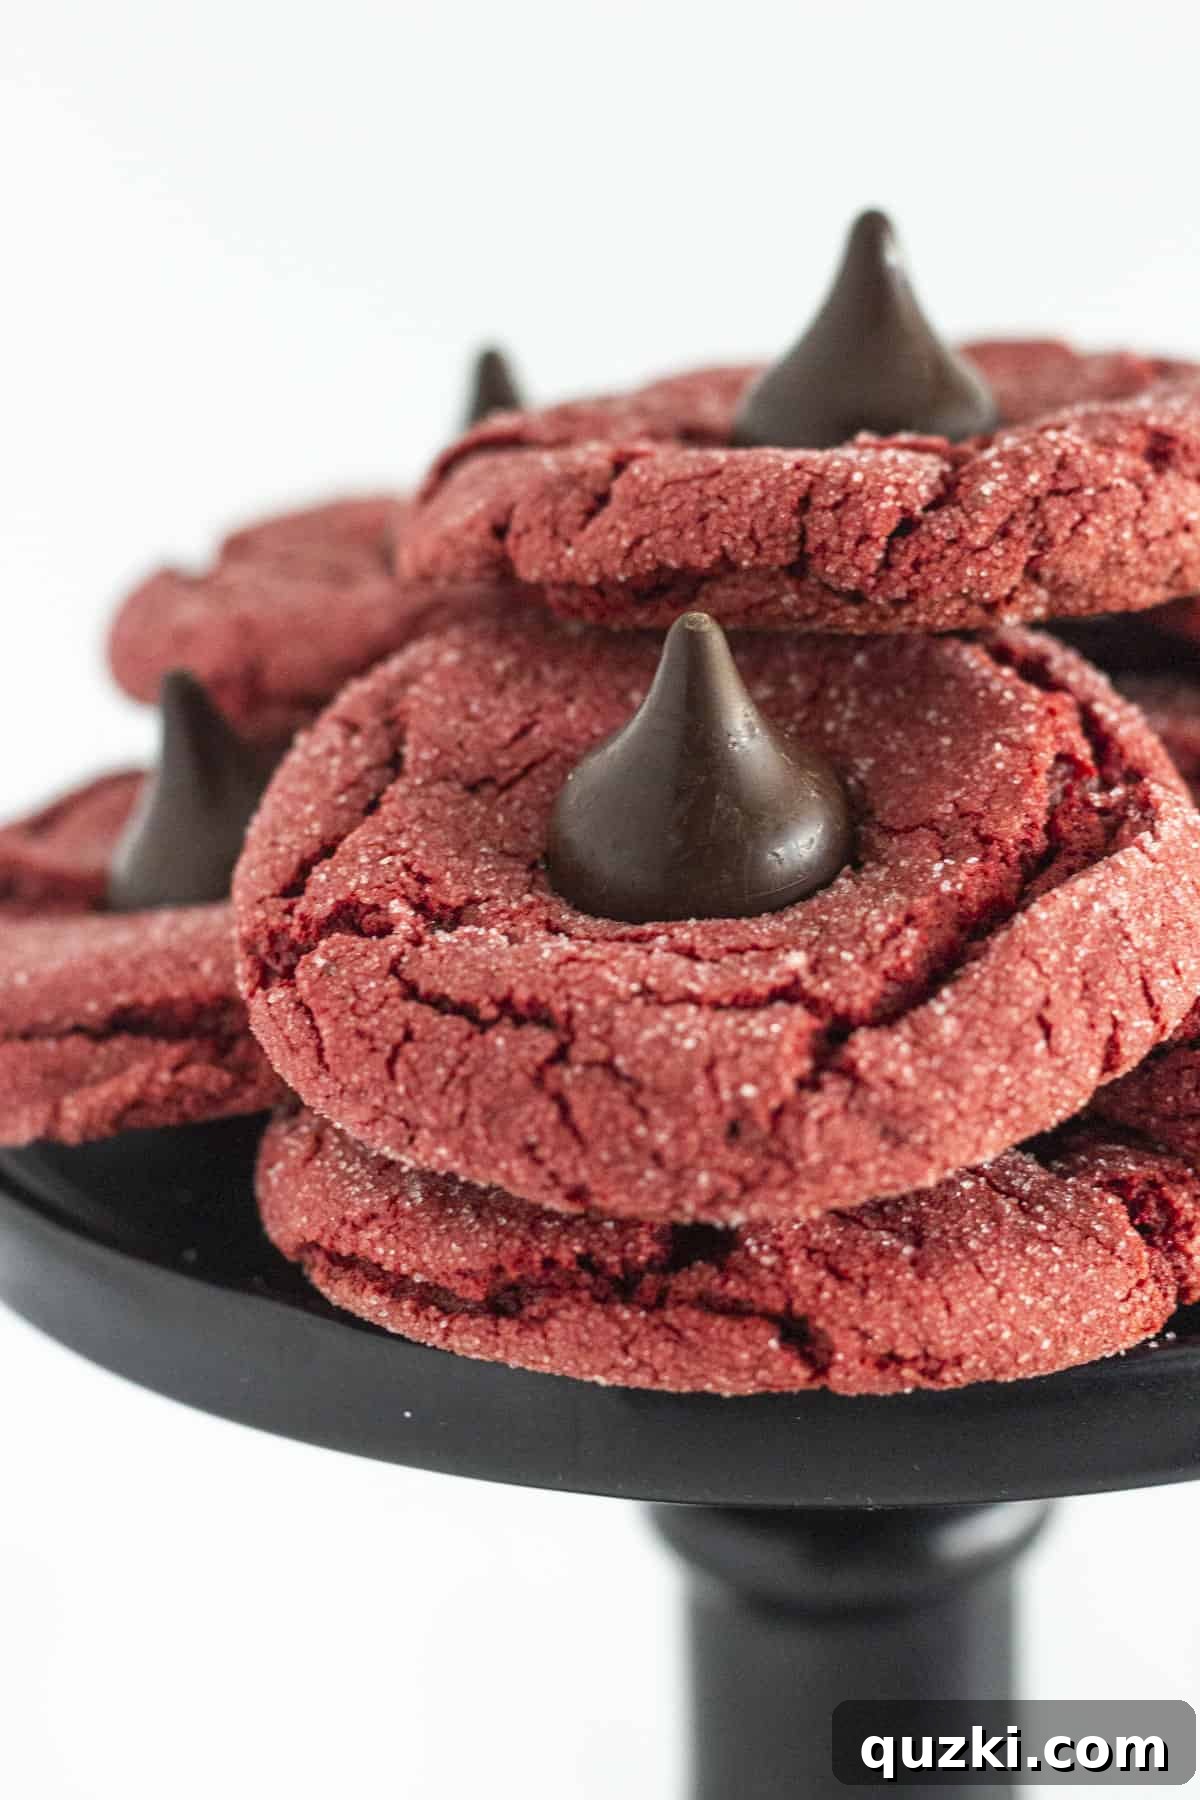
Craving More Red Velvet? Explore These Easy Recipes!
If you’ve fallen in love with the rich flavor and stunning appearance of red velvet, you’re in luck! There’s a whole world of delightful red velvet desserts to explore, many of which are just as simple to make as these cookies. Expand your red velvet repertoire with these fantastic and easy recipes:
Cakes
Easy Red Velvet Bundt Cake Recipe
Cakes
Black Bottom Red Velvet Bundt Cake Recipe with Cake Mix
Cookies
Red Velvet Sheet Cake Cookies Recipe with a Cake Mix
Cookies
Easy Red Velvet Sandwich Cookies
Did you try this recipe and love it? We’d be thrilled to hear from you!
Please leave a ⭐ review below and tag @practicallyhomemade on Pinterest!
Easy Red Velvet Kiss Cookies
June Albertson-Dick
These festive Red Velvet Cake Mix Cookies are rolled in sugar and finished with a classic chocolate kiss, making them an easy and delightful treat for any occasion.
5 mins
25 mins
1 hr
1 hr 30 mins
20 cookies
Rate Recipe
Print Recipe
Ingredients
- 1 box Red Velvet Cake Mix, {13.25 ounces}
- 2 large eggs
- ¼ cup oil
- ⅓ cup granulated sugar
- 20 Hershey Kisses, {unwrapped}
Instructions
-
In a medium-sized bowl, combine the red velvet cake mix, eggs, and vegetable oil. Mix using an electric mixer (or by hand) until you have a thick, cohesive dough. Be careful not to overmix.
-
Use a medium cookie scoop to portion the dough, then roll each cookie dough ball generously in granulated sugar. Place the sugar-coated cookie dough balls onto a baking sheet lined with parchment paper or wax paper. Cover with plastic wrap and refrigerate the dough for at least 1 hour.
-
After an hour, preheat your oven to 350°F (175°C). Place 8-12 chilled cookie dough balls onto a silicone mat or parchment paper-lined baking sheet, ensuring adequate spacing. Bake the cookies for 9-11 minutes, or until the edges are lightly set and the centers appear cooked through.
-
Remove the cookies from the oven and let them cool on the baking sheet for 5 minutes. After 5 minutes, carefully move the cookies to a cooling rack. Immediately press an unwrapped Hershey’s Kiss into the middle of each warm cookie. Allow the cookies to cool completely on the rack until the Hershey’s Kisses have fully set before serving or storing. Store in an airtight container at room temperature for up to 4 days, or freeze for up to 3 months.
Notes
- Refrigerating the cookie dough is an optional but highly recommended step, as it significantly helps in achieving thicker, less spread-out cookies.
- Always add the unwrapped Hershey’s Kiss after the cookies have baked and cooled for 5 minutes. Adding them too soon (before baking or immediately after removal) will cause the chocolate to completely melt and lose its shape.
- Wait until the candy kiss has fully set and hardened before moving or stacking the cookies, to prevent any smudging or deformation of the chocolate.
- Feel free to change up the kind of Hershey’s Kiss you add to the middle of the cookies. Dark chocolate, white chocolate, milk chocolate, or even seasonal flavors like peppermint would all be wonderful choices and can add a fun twist.
Nutrition
Calories: 160 kcal,
Carbohydrates: 22 g,
Protein: 2 g,
Fat: 8 g,
Saturated Fat: 2 g,
Polyunsaturated Fat: 2 g,
Monounsaturated Fat: 3 g,
Trans Fat: 0.01 g,
Cholesterol: 20 mg,
Sodium: 189 mg,
Potassium: 78 mg,
Fiber: 1 g,
Sugar: 14 g,
Vitamin A: 28 IU,
Calcium: 44 mg,
Iron: 1 mg
Nutrition information is automatically calculated, so should only be used as an approximation.