
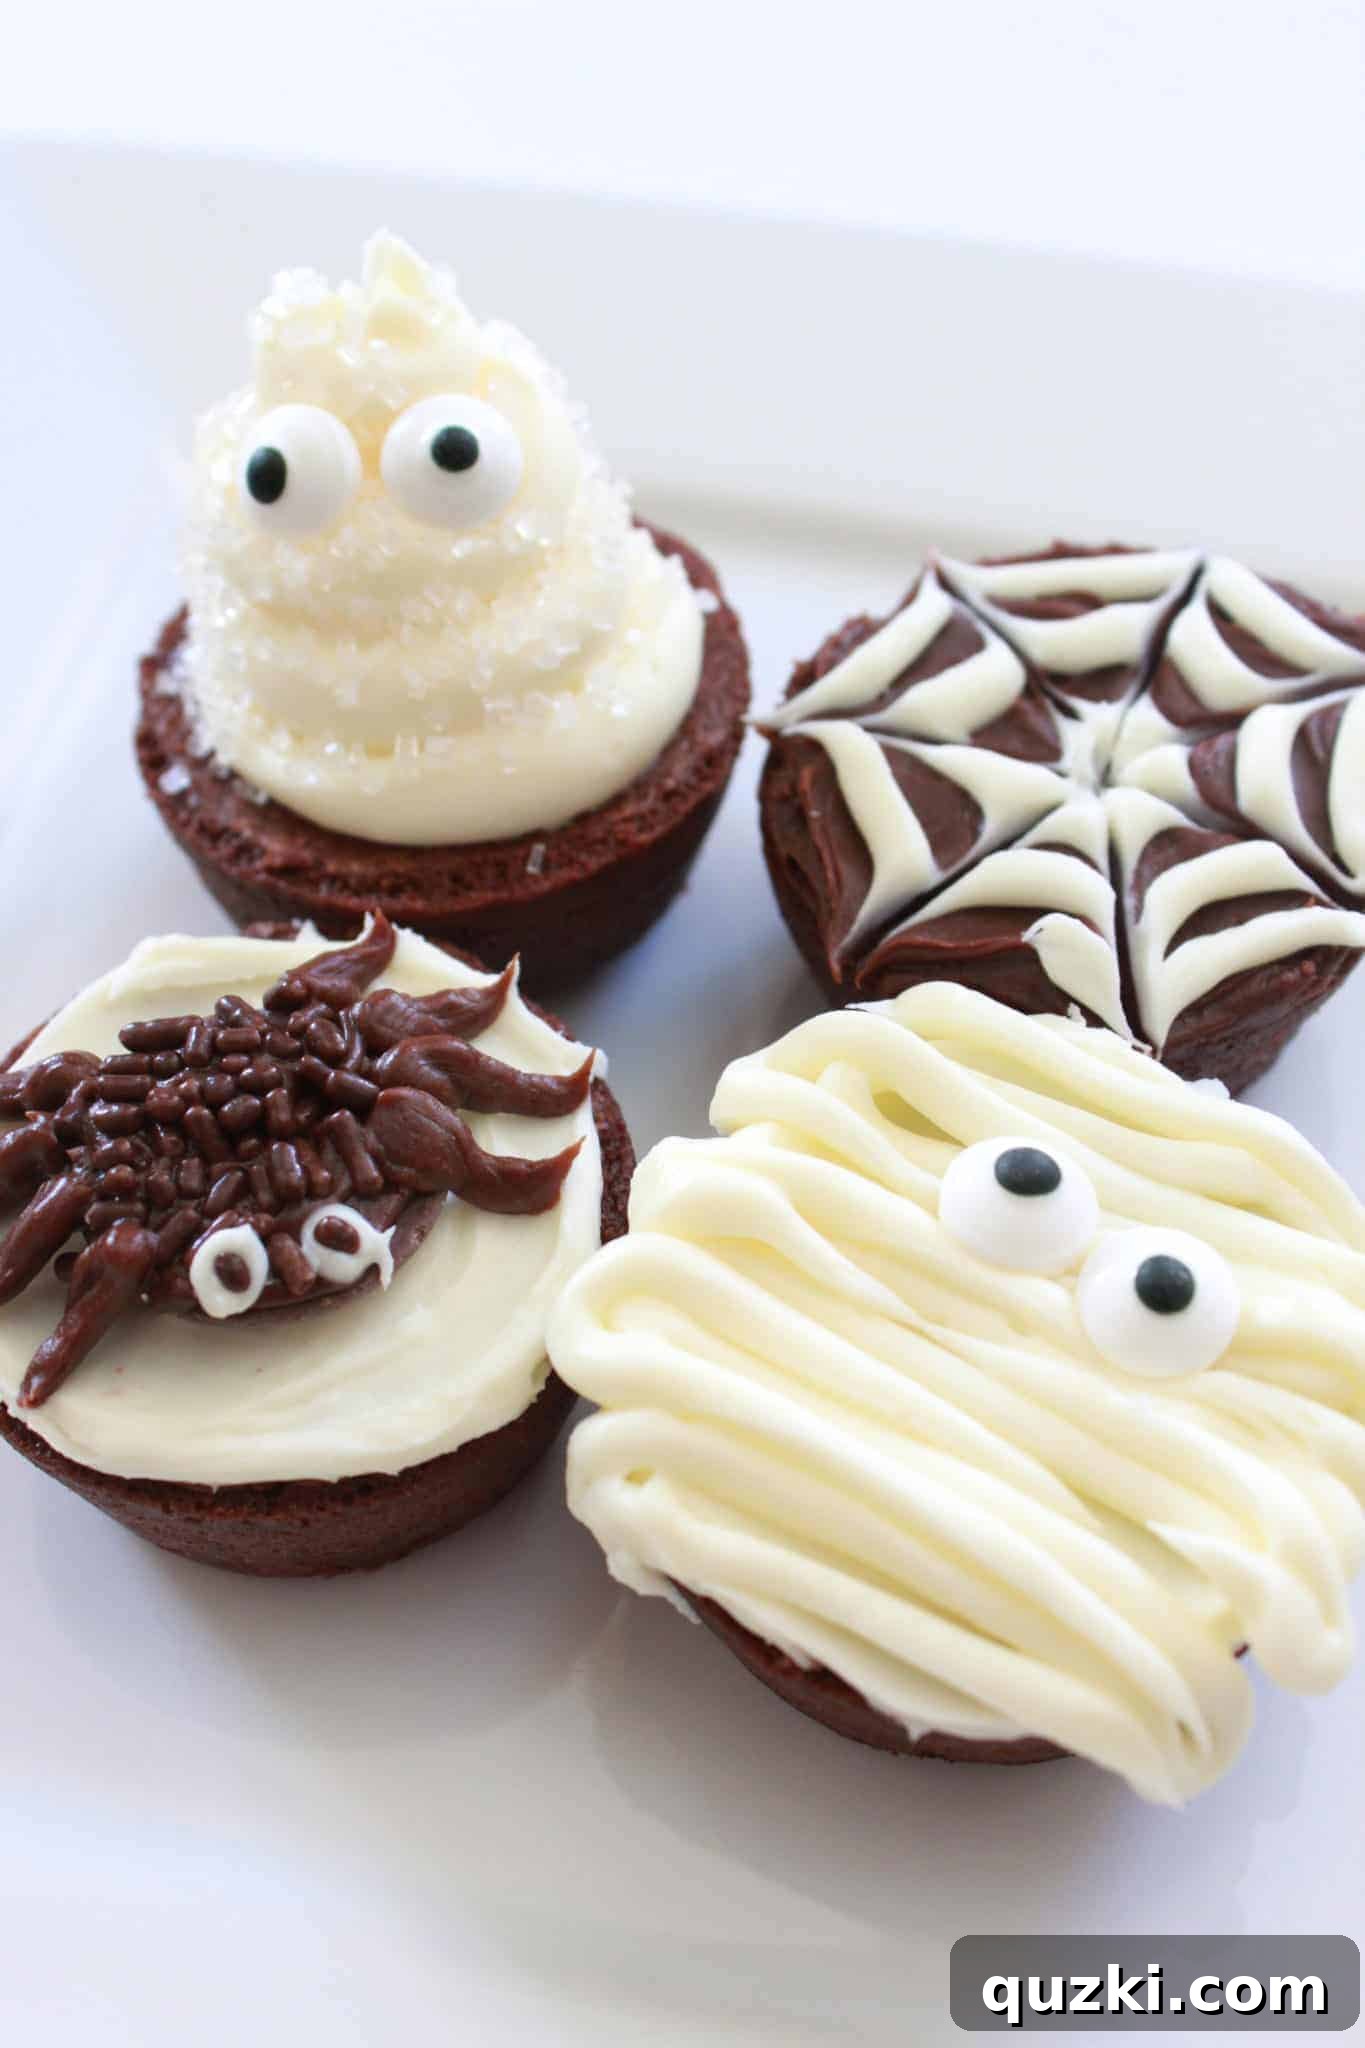
Easy Halloween Brownie Bites: Spooky & Simple Treats for Any Party
As a parent, I’ve lived through countless “last-minute panic” moments, especially when it came to school events. I vividly recall one Halloween eve, well past 9 p.m., when my son (fondly known as Tater) casually informed me he needed to bring a treat for every student to his class party the very next day. While the exact concoction I magically pulled together that night escapes me now, I certainly remember the sleep deprivation that followed. Oh, how I wish I had discovered the genius of these easy Halloween Brownie Bites back then!
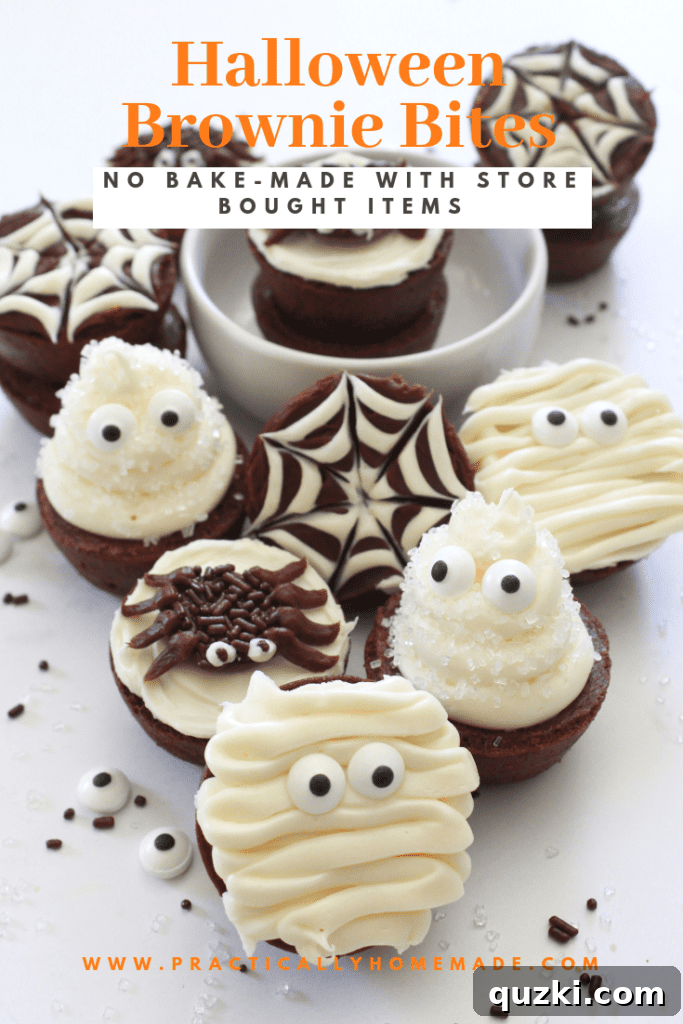
Now, Tater is a college junior, and those frantic days are cherished memories. But they also fueled the creation of my blog, Practically Homemade. This platform is dedicated to helping fellow parents (and anyone who loves simple, delightful food!) not just survive those unexpected culinary challenges, but truly excel at them. This recipe for Halloween Brownie Bites perfectly embodies that philosophy. You won’t need to be a gourmet chef or an expert decorator; everything you need can be found at your local grocery store, and the decorating techniques are incredibly beginner-friendly. Let’s dive into making these adorable and spooky treats!
Why These Halloween Brownie Bites Are a Must-Make
Halloween is a time for fun, costumes, and, of course, delicious treats! But it doesn’t have to be a source of stress. These Halloween brownie bites are designed to be your go-to solution for any spooky occasion. Forget spending hours baking from scratch or wrestling with intricate decorating tools. Our approach leverages store-bought brownie bites, making the process incredibly fast and straightforward. They are perfect for:
- School Parties: Individually sized and easy to transport, these are a hit with kids and teachers alike.
- Halloween Gatherings: An impressive-looking dessert spread without the effort.
- Fun Family Activity: Get the kids involved in decorating their own spooky creations!
- Last-Minute Cravings: When that sweet tooth strikes and you need something festive, fast.
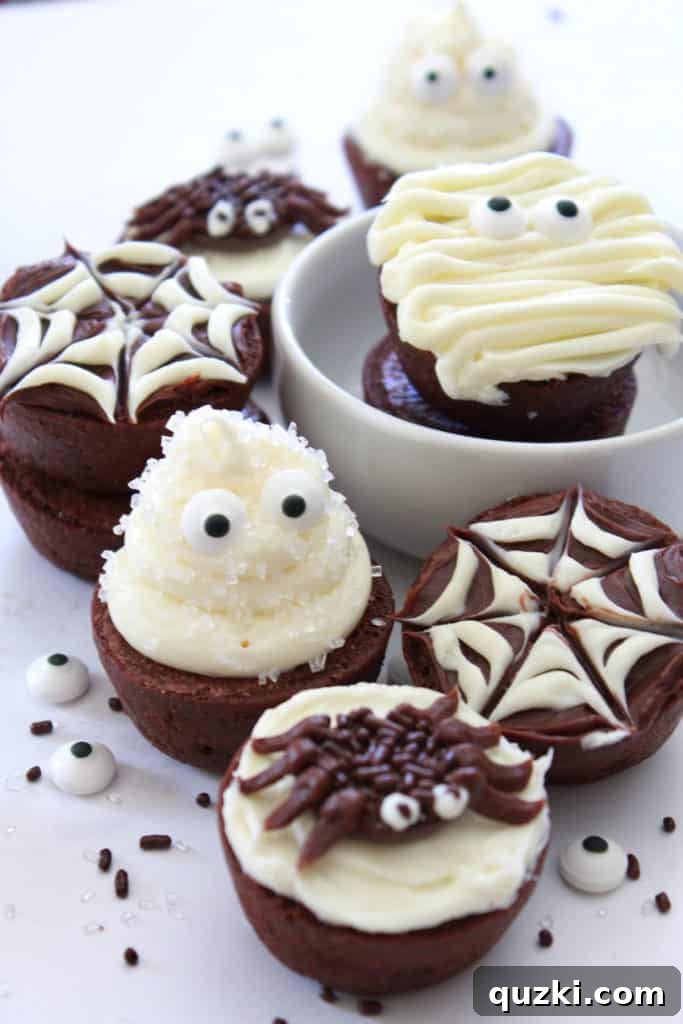
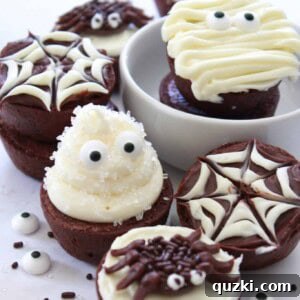
What sets these apart is their versatility and charm. With just a few basic ingredients and simple techniques, you can transform plain brownie bites into a collection of spooky characters: friendly ghosts, intricate spider webs, adorable mummies, and quirky spiders. Each bite is a miniature canvas for Halloween creativity, guaranteeing smiles and compliments.
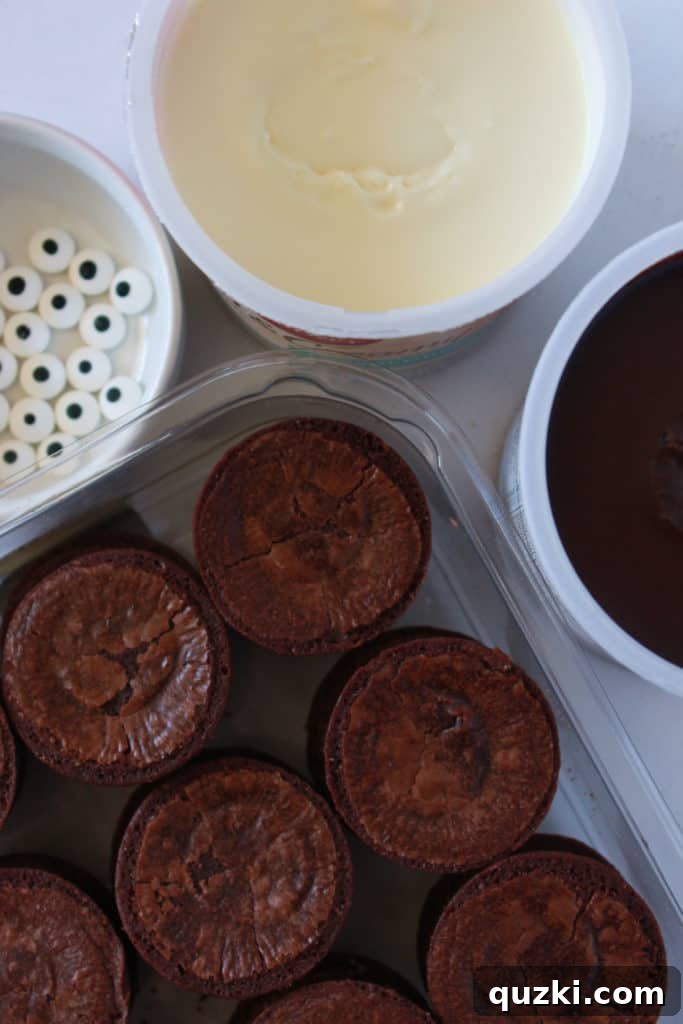
Gathering Your Spooky Supplies: The Simple Grocery List
One of the biggest advantages of this recipe is the minimal and easy-to-find ingredient list. No specialty stores or obscure items required! Here’s what you’ll need to grab on your next grocery run:
- Brownie Bites: Look for a package of pre-made brownie bites in the bakery section of your supermarket. This is our convenient shortcut to saving time and effort. A package of 24 is ideal for creating a varied assortment.
- Edible Eyeballs: These are a game-changer for adding instant character to your spooky treats. You can usually find them in the baking aisle, especially around holidays.
- Melting Wafers (Chocolate): These will form the base for our adorable spider bodies. Any brand of chocolate melting wafers or disks will work perfectly.
- Chocolate Sprinkles: Essential for adding texture and completing the spider look.
- Chocolate Frosting (Canned): A staple for many of our designs, offering a rich chocolate base.
- Vanilla Frosting (Canned): Crucial for ghosts, mummy bandages, and spider webs.
- Ziploc or Decorator Bags: For piping the frosting neatly. If you don’t have professional decorator bags, small Ziploc bags with a corner snipped off work just as well!
- Toothpicks: A simple tool for creating the intricate spider web effect.
That’s it! With these humble ingredients, you’re ready to embark on a fun and festive decorating adventure. Let’s get started on transforming these brownies into Halloween masterpieces.
Decorating Your Halloween Brownie Bites: A Step-by-Step Guide
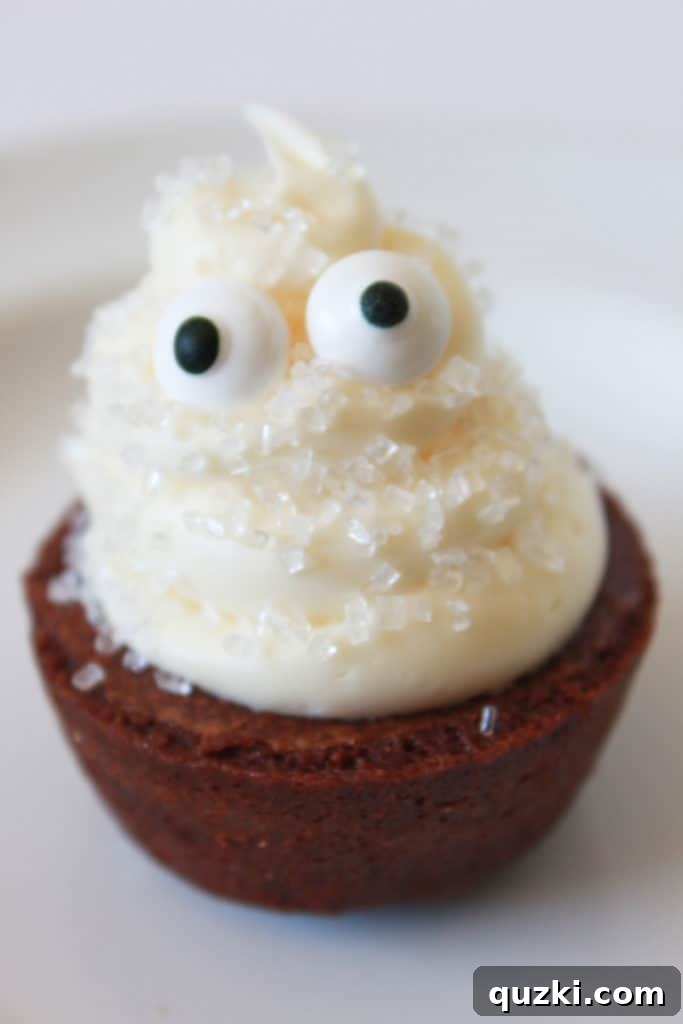
Ghost Brownie Bites: Eerily Easy
These adorable ghosts are by far the simplest to create, making them a fantastic starting point for any novice decorator or impatient helper. The key is a generous swirl of vanilla frosting and those charming edible eyeballs. For an extra touch of sparkle, consider adding a sprinkle of sanding sugar while the frosting is still wet.
Instructions:
- Fill a Ziploc or decorator bag with about 3/4 cup of vanilla frosting.
- Snip a fairly large hole (about 1/2 inch) in one corner of the bag. This will ensure you get a nice, wide swirl.
- On the top of each brownie bite, pipe a tall swirl of frosting. Start at the center of the brownie, creating a steady upward motion, then gently release pressure as you pull up to form the ghost’s head.
- Immediately add two edible eyeballs to the front of the frosting swirl to bring your ghost to life.
The result is a delightful, slightly spooky, and utterly sweet treat that’s ready in seconds!
Spider Web Brownie Bites: Intricate & Impressive
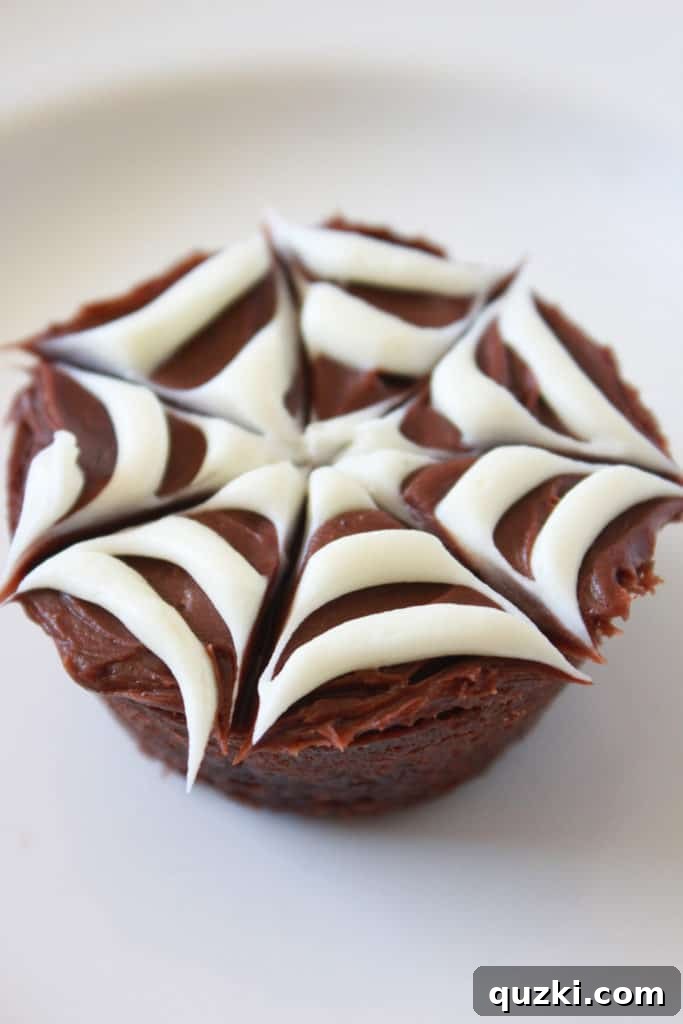
Don’t let the delicate appearance fool you – making these spider webs is surprisingly simple and creates a stunning visual effect. It’s all about layering and a clever trick with a toothpick!
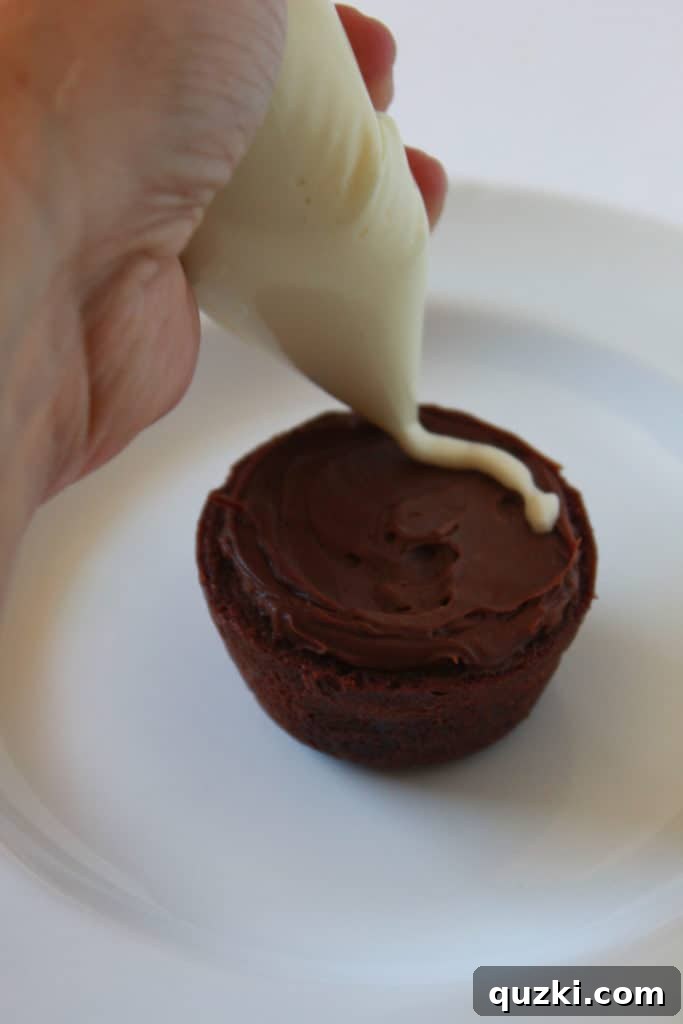
Instructions:
- Start by spreading a thin, even layer of chocolate frosting over the entire top surface of the brownie bite. This will be your dark canvas for the web.
- Next, fill a separate Ziploc or decorator bag with about 1/2 cup of vanilla frosting. Snip a very small hole (just a tiny tip) in the corner of this bag.
- Working quickly before the chocolate frosting sets, pipe a thin swirl of vanilla frosting on top of the chocolate, starting from the outer edge and spiraling inwards towards the center.
- To create the web effect, take a clean toothpick. Starting from the very center of the brownie, gently drag the toothpick outwards towards the edge of the brownie.
- Repeat this process 5 or 6 more times, equally spacing your lines around the brownie, always dragging from the center outwards. Crucially, wipe the toothpick clean with a paper towel after each drag to ensure crisp, clean lines.
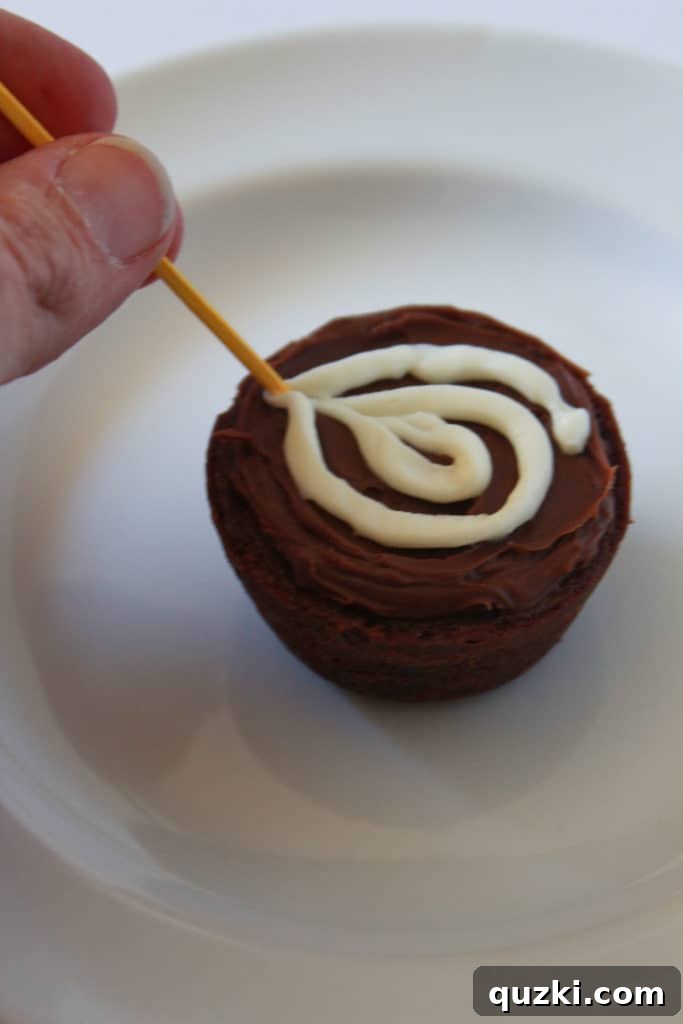
Optional Enhancement: For an even spookier touch, place a small chocolate M&M or mini chocolate chip in the very center of the finished web to represent a spider.
Mummy Brownie Bites: Wrapped in Sweetness
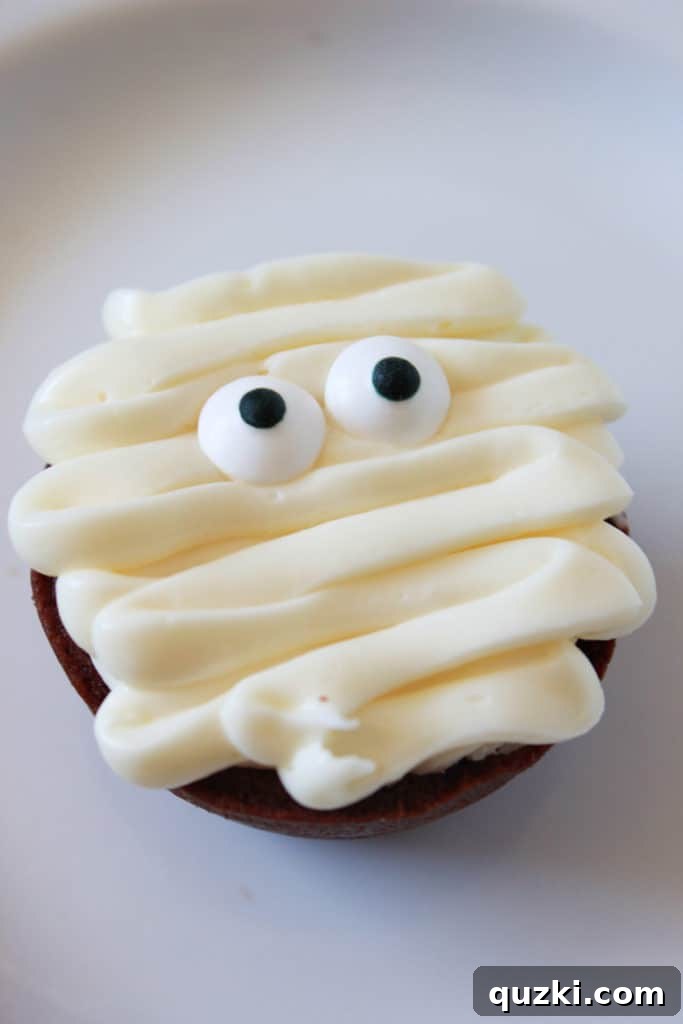
No Halloween treat collection is complete without a classic mummy! These are incredibly fun to make and offer a delightful textural contrast with their frosting “bandages.”
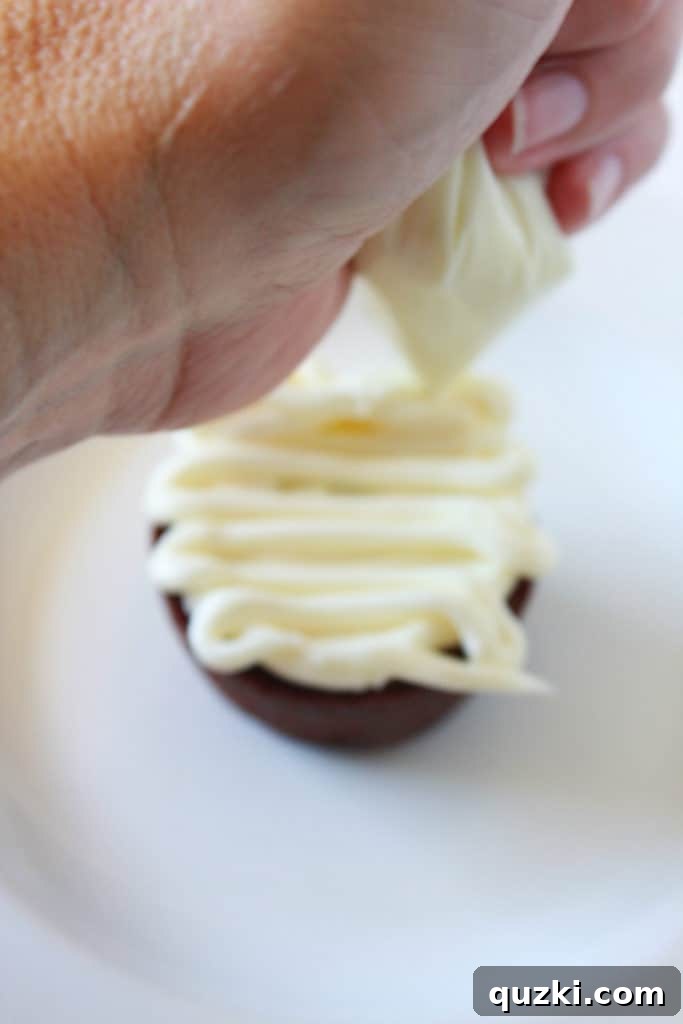
Instructions:
- Begin by spreading a thin layer of vanilla frosting over the entire top surface of the brownie bite. This provides a clean, white base for your mummy bandages.
- Using the same bag of vanilla frosting you used for the spider webs (with the small hole), pipe a zigzag pattern across the brownie, starting from one edge and going to the other. Imagine you’re wrapping a bandage across the mummy.
- Repeat this process, piping another zigzag pattern in the opposite direction. The goal is to create layers that resemble traditional mummy wrappings. Don’t worry about perfection; slightly uneven lines add to the authentic mummy charm!
- Finally, position two edible eyeballs towards the top of the brownie, peering out from beneath the frosting bandages.
And just like that, you have a mummilicious masterpiece, ready to spook and delight!
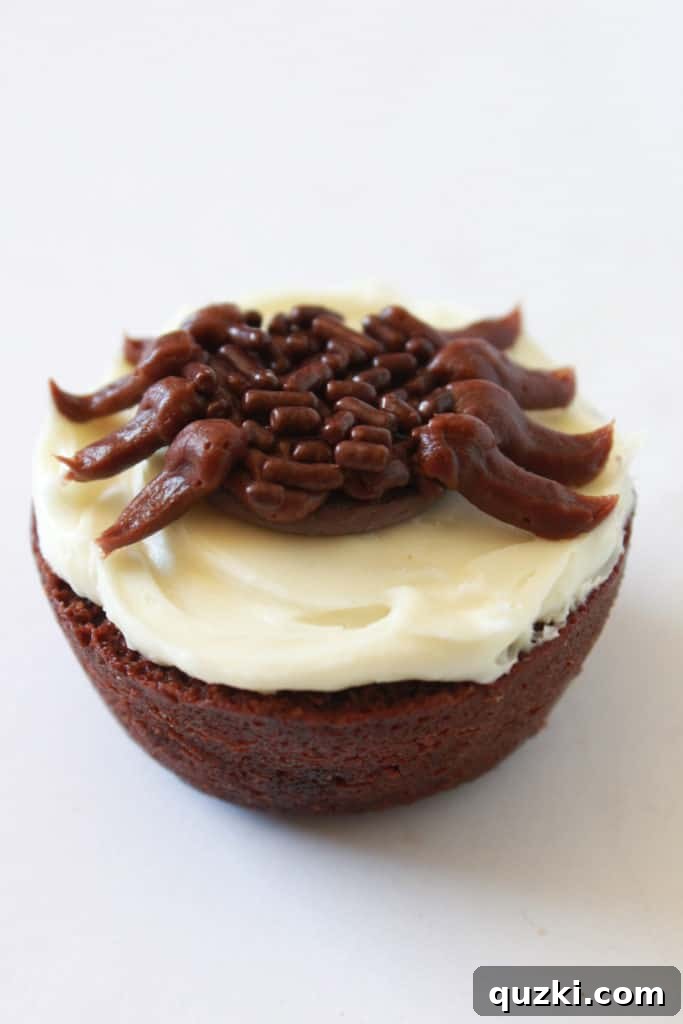
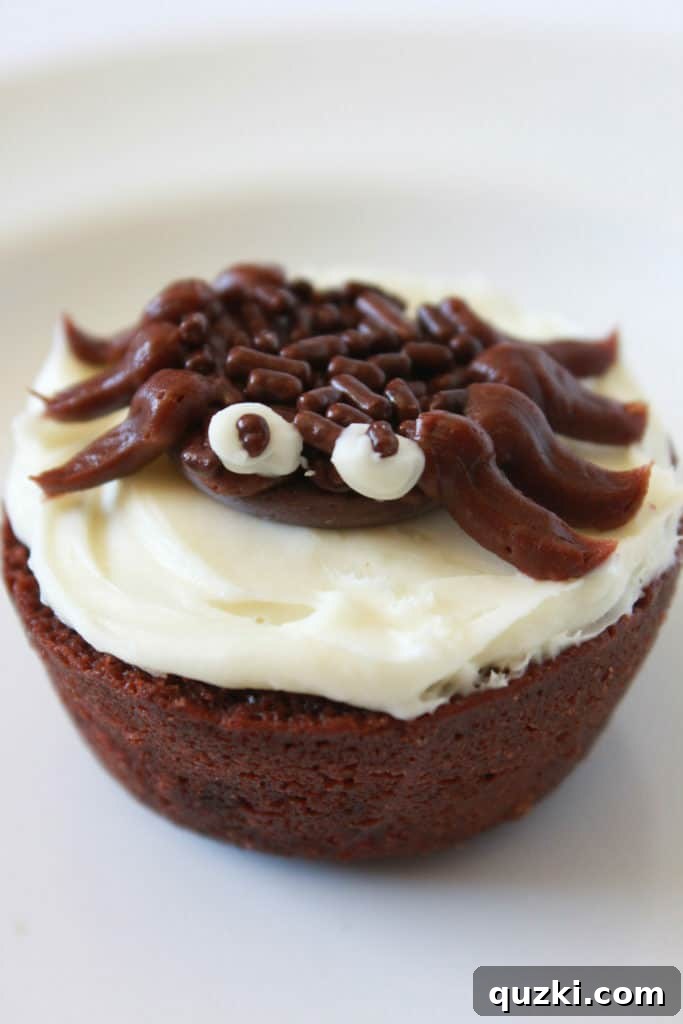
Spider Brownie Bites: Creepy Crawly Fun
While the spiders might seem a tad more involved than the other designs, they are absolutely worth the extra step and still incredibly manageable for all skill levels. Don’t let them intimidate you – the result is charmingly spooky!
Instructions:
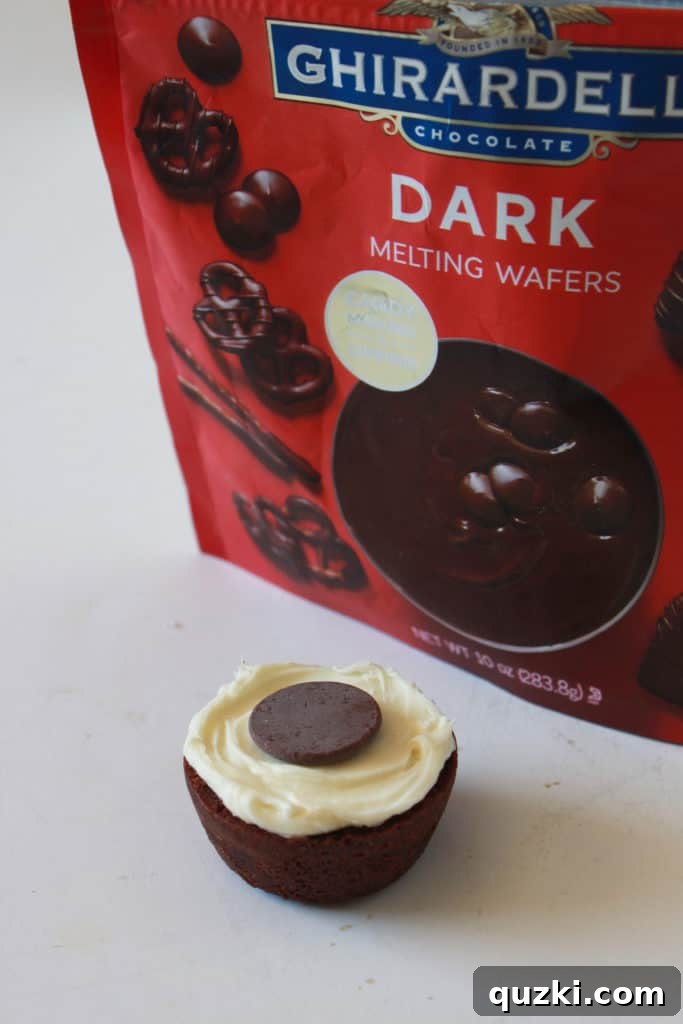
- Spread a thin layer of vanilla frosting over the top of each brownie bite.
- Carefully place a chocolate melting wafer in the center of the frosted brownie, gently pressing it down so it adheres to the vanilla frosting. This forms the spider’s body.
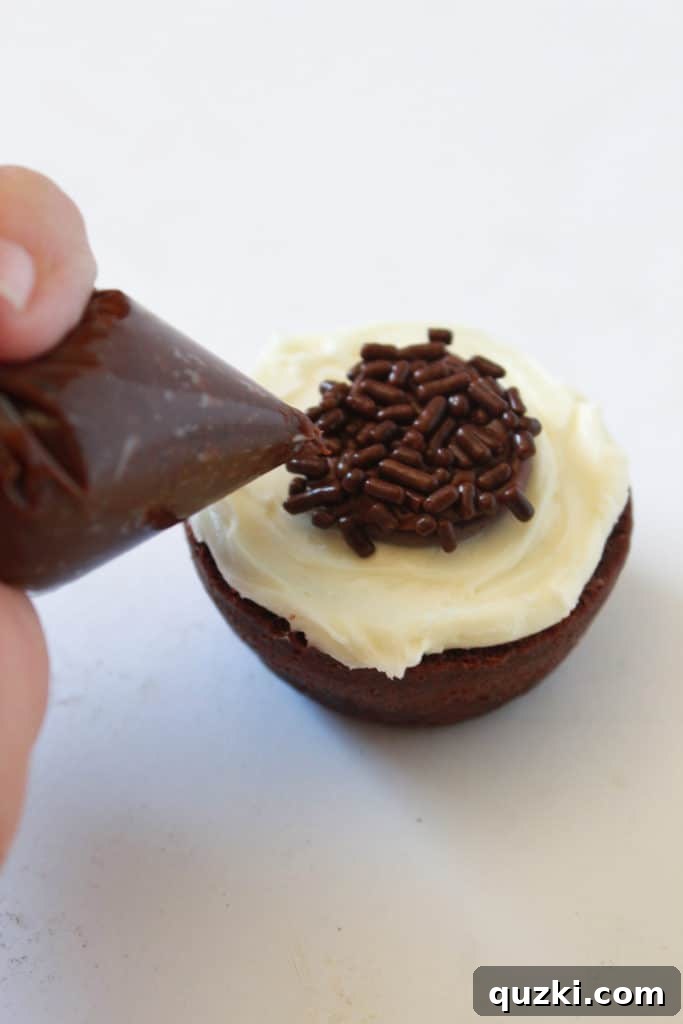
- Fill a fresh Ziploc or decorator bag with about 1/2 cup of chocolate frosting and snip a small opening in the corner.
- Pipe chocolate frosting over the entire top surface of the melting wafer, completely covering it.
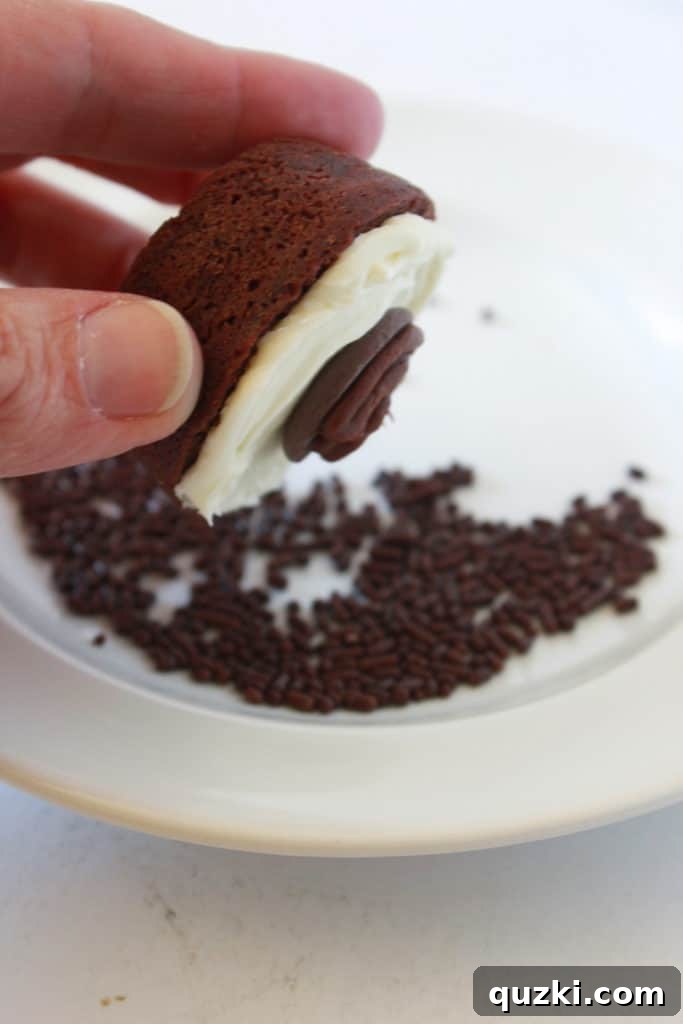
- While the chocolate frosting is still wet, gently flip the brownie bite (holding the brownie, not the wafer) into a bowl of chocolate sprinkles, ensuring the frosted wafer is thoroughly coated. This creates a wonderfully textured, fuzzy spider body.
- Using the same bag of chocolate frosting (with the small opening), pipe eight legs onto each spider. Start the legs on the side of the chocolate body and extend them outwards to the edge of the brownie, creating a realistic creepy-crawly effect.
- For the eyes, instead of edible eyeballs, use a very small dot of vanilla frosting for each eye, then place a tiny chocolate sprinkle on top of each frosting dot. This gives them a distinct, beady-eyed look.
Voila! Your creepy-crawly spider brownie bites are complete, adding a fantastic element of fun to your Halloween spread.
A Spooktacular Display: Bringing Them All Together
Once you’ve finished decorating all your different Halloween brownie bites – the ghosts, spider webs, mummies, and spiders – arrange them together on a platter. The variety of designs and colors creates an absolutely charming and impressive display that’s sure to be the highlight of any Halloween party or gathering. Look at how cute these Halloween brownie bites are together!
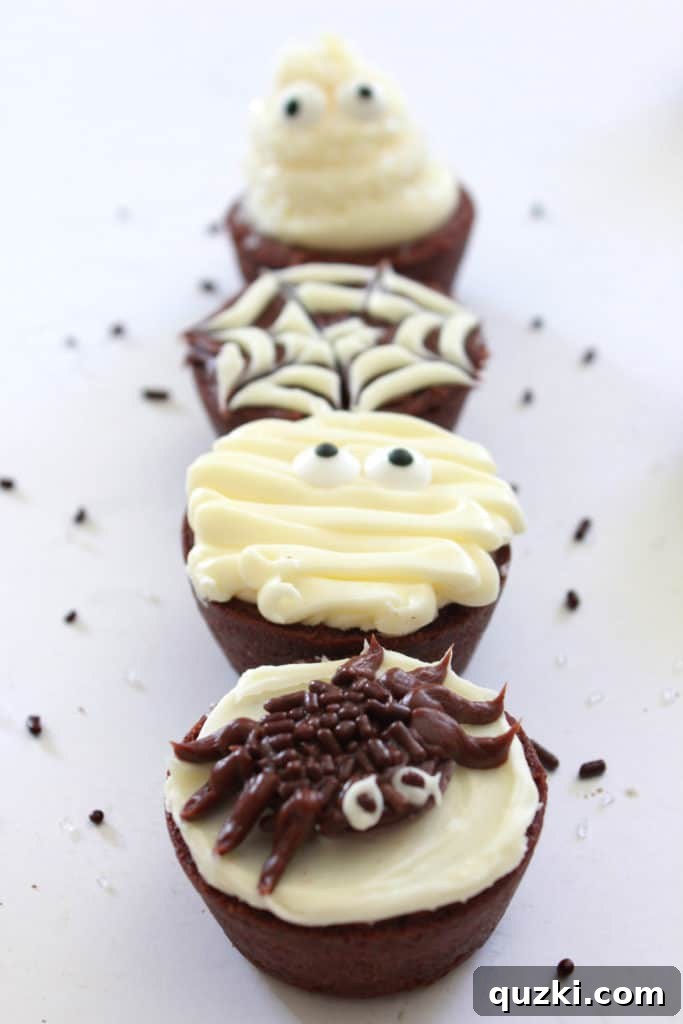
These brownie bites truly are the perfect dessert, whether you’re in a hurry and need a quick fix or just want to enjoy a fun and easy baking project. Their adorable and festive designs make them irresistible additions to any celebration. No matter the occasion, these little spooky babies are guaranteed to be devoured!
Pro Tips for Perfect Halloween Brownie Bites
- Work in Batches: If you’re making a large quantity, decorate a few at a time for each design, especially the spider webs, where you need to work quickly before the frosting sets.
- Frosting Consistency: If your canned frosting is too stiff, microwave it for 5-10 seconds to soften it slightly, making it easier to pipe. If it’s too runny, pop it in the fridge for a few minutes.
- Kid-Friendly Activity: These are fantastic for getting children involved in the kitchen! Let them help with spreading frosting, adding sprinkles, and placing edible eyeballs (under supervision, of course!).
- Storage: Store your decorated brownie bites in an airtight container at room temperature for up to 2-3 days, or in the refrigerator for up to a week. They are best enjoyed fresh, but still delicious after a day or two.
- Creative Variations: Don’t be afraid to experiment! Use different colored frostings, add candy corn, mini chocolate chips, or other Halloween-themed sprinkles to further customize your creations.
If you’re looking for other simple, crowd-pleasing desserts, be sure to check out my recipes for Texas Sheet Cake Cookies and Kentucky Butter Cake Cookies, both magically made with a cake mix!
Halloween Brownie Bites Recipe Card
Here’s a convenient recipe card summarizing everything you need to create these delightful Halloween brownie bites. This quick guide will ensure you have all the necessary ingredients and instructions at your fingertips, making your holiday baking a breeze.
Halloween Brownie Bites
By: June Albertson-Dick
Brownie bites from the grocery store are transformed into Halloween ghosts, mummies, spiders, and webs with canned frosting and edible eyeballs. Simple and fun!
Total: 30 mins
Servings: 24 brownies
Rate Recipe
Print Recipe
Ingredients
- 1 pkg (24) brownie bites
- 1 can chocolate frosting
- 1 can vanilla frosting
- 24 edible eyeballs
- 1/4 cup chocolate sprinkles
- 3 Ziploc or decorator bags
- Toothpicks (for spider webs)
Instructions
Ghosts:
- Fill a bag with about 3/4 cup of vanilla frosting and cut a medium-large hole in the corner of the bag.
- On the top of 6 brownies, make a tall swirl of frosting, starting at the brownie top and ending at the top of the ghost.
- Add 2 edible eyeballs immediately to the frosting.
Spider Webs:
- Working one brownie at a time, spread about a teaspoon of chocolate frosting evenly over the top of 6 brownies.
- Fill a bag with about 1/2 cup of vanilla frosting and cut a small hole in the corner of the bag.
- Starting on the outer edge of the brownie, pipe a swirl of vanilla frosting that ends in the middle of the brownie.
- Take a toothpick and begin at the middle of the swirl/brownie, pulling the toothpick from the middle toward the outer edge of the brownie.
- Continue to do so 5-6 times, being sure to clean the toothpick with a paper towel each time for crisp lines.
Mummies:
- Spread about a teaspoon of vanilla frosting over the top of 6 brownies, creating a white base.
- Using the same bag of vanilla frosting used for the spider webs (with the small hole), make a zigzag pattern that starts at the top of the brownie and stops at the bottom.
- Go over it a second time in the opposite direction to create layered bandages.
- Add two edible eyeballs towards the top of the brownie.
Spiders:
- Spread about a teaspoon of vanilla frosting over the top of 6 brownies.
- Place a chocolate melting wafer in the middle of each brownie, gently pressing it into the vanilla frosting so it sticks.
- Fill a bag with about 1/2 cup of chocolate frosting and cut a small hole in the corner of the bag.
- Cover the top of the melting wafer with chocolate frosting, then immediately turn it over into chocolate sprinkles to coat the body.
- Pipe 8 legs onto each spider, starting on the body and stopping at the edge of the brownie.
- To make the eyes, use a small dot of vanilla frosting for each eye and place a tiny chocolate sprinkle on top.
Nutrition
Serving: 1 brownie bite, Calories: 87 kcal, Carbohydrates: 14 g, Protein: 0.2 g, Fat: 3 g, Saturated Fat: 1 g, Polyunsaturated Fat: 0.4 g, Monounsaturated Fat: 2 g, Sodium: 35 mg, Potassium: 37 mg, Fiber: 0.2 g, Sugar: 13 g, Vitamin A: 0.2 IU, Calcium: 2 mg, Iron: 0.3 mg
Nutrition information is automatically calculated, so should only be used as an approximation.
Like this? Leave a comment below! We love hearing from you and seeing your creative Halloween treats.