
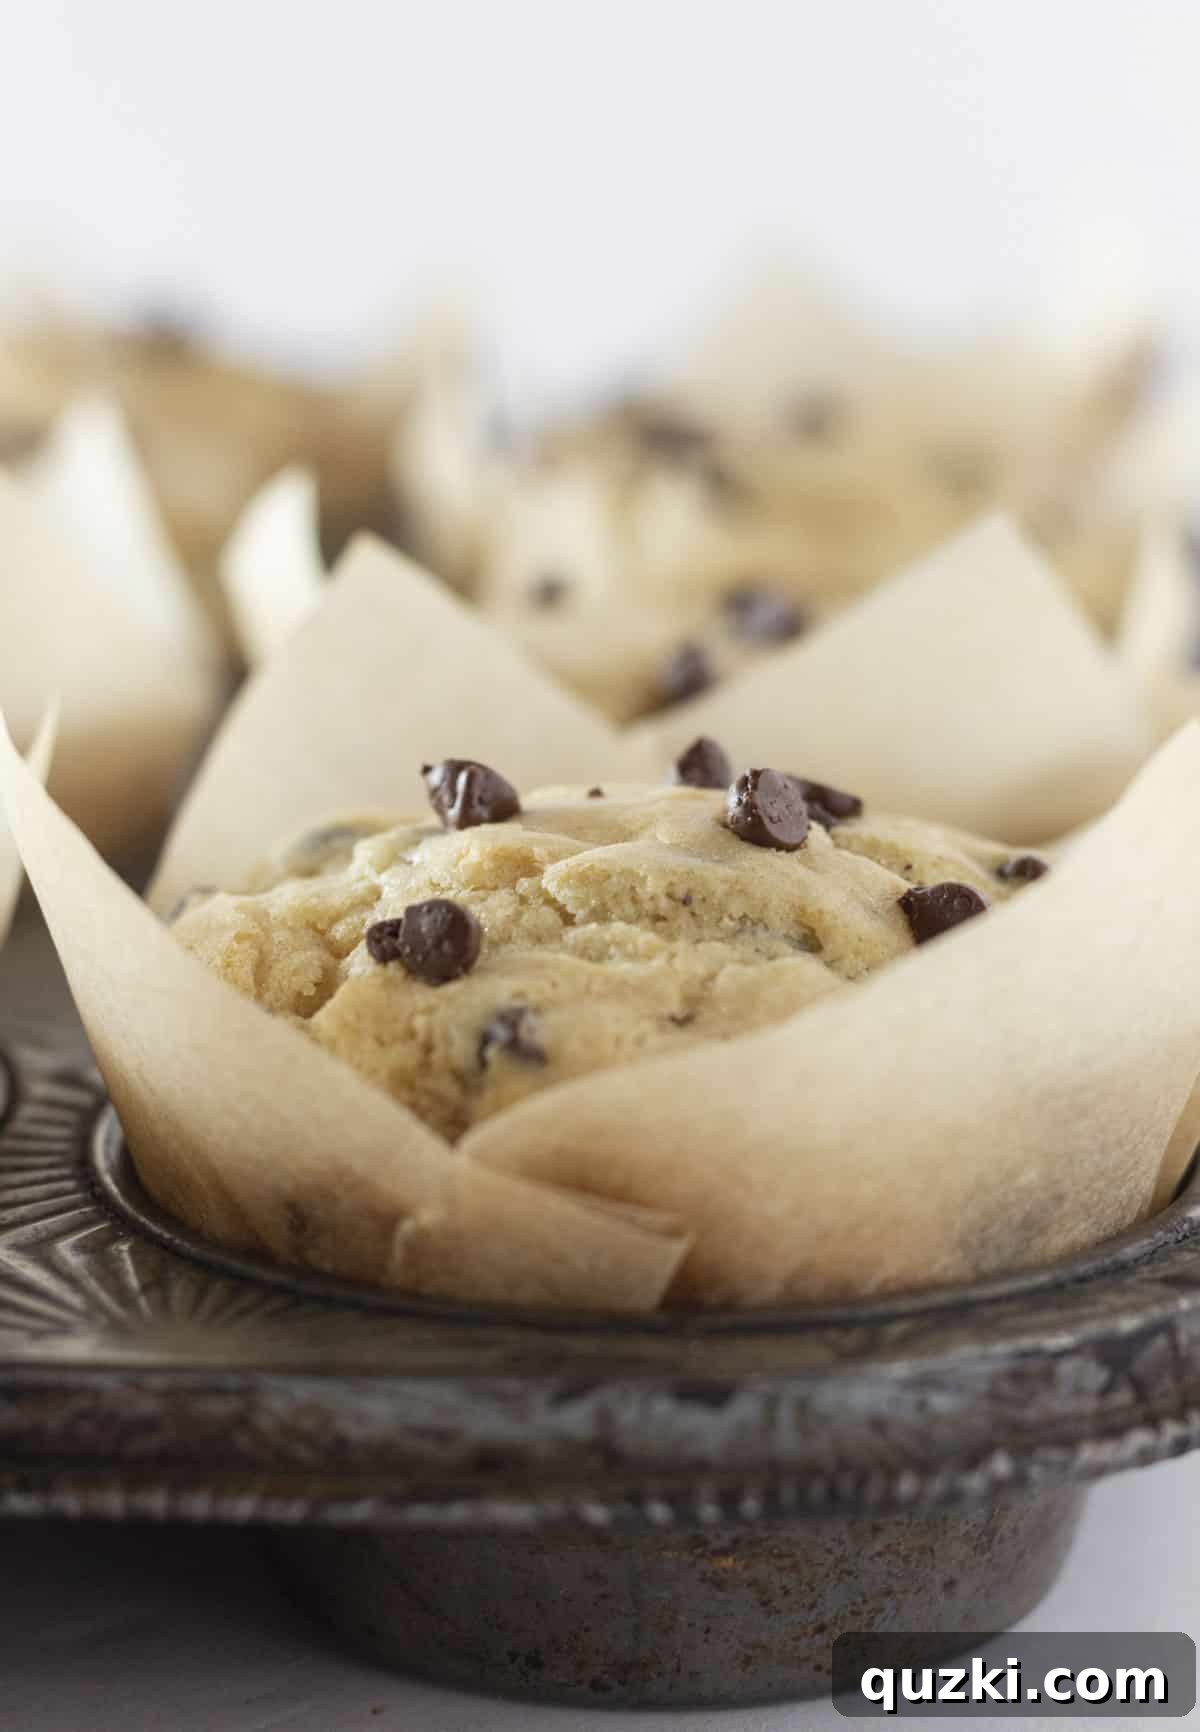
Effortless & Delicious: The Best Pancake Mix Chocolate Chip Muffins Recipe
Baking muffins can sometimes feel like a daunting task. Complicated mixing methods and the constant worry of ending up with dry, crumbly results might make you want to skip homemade treats altogether. But what if there was a way to bypass all that fuss and still create moist, flavorful, and absolutely irresistible muffins? We’re thrilled to share our foolproof method for making Easy Pancake Mix Chocolate Chip Muffins! This recipe is anything but complicated, and the end result is a batch of mouth-watering, perfectly baked muffins that are sure to be a huge hit with the entire family. Get ready to transform your breakfast routine with this simple yet sensational recipe.
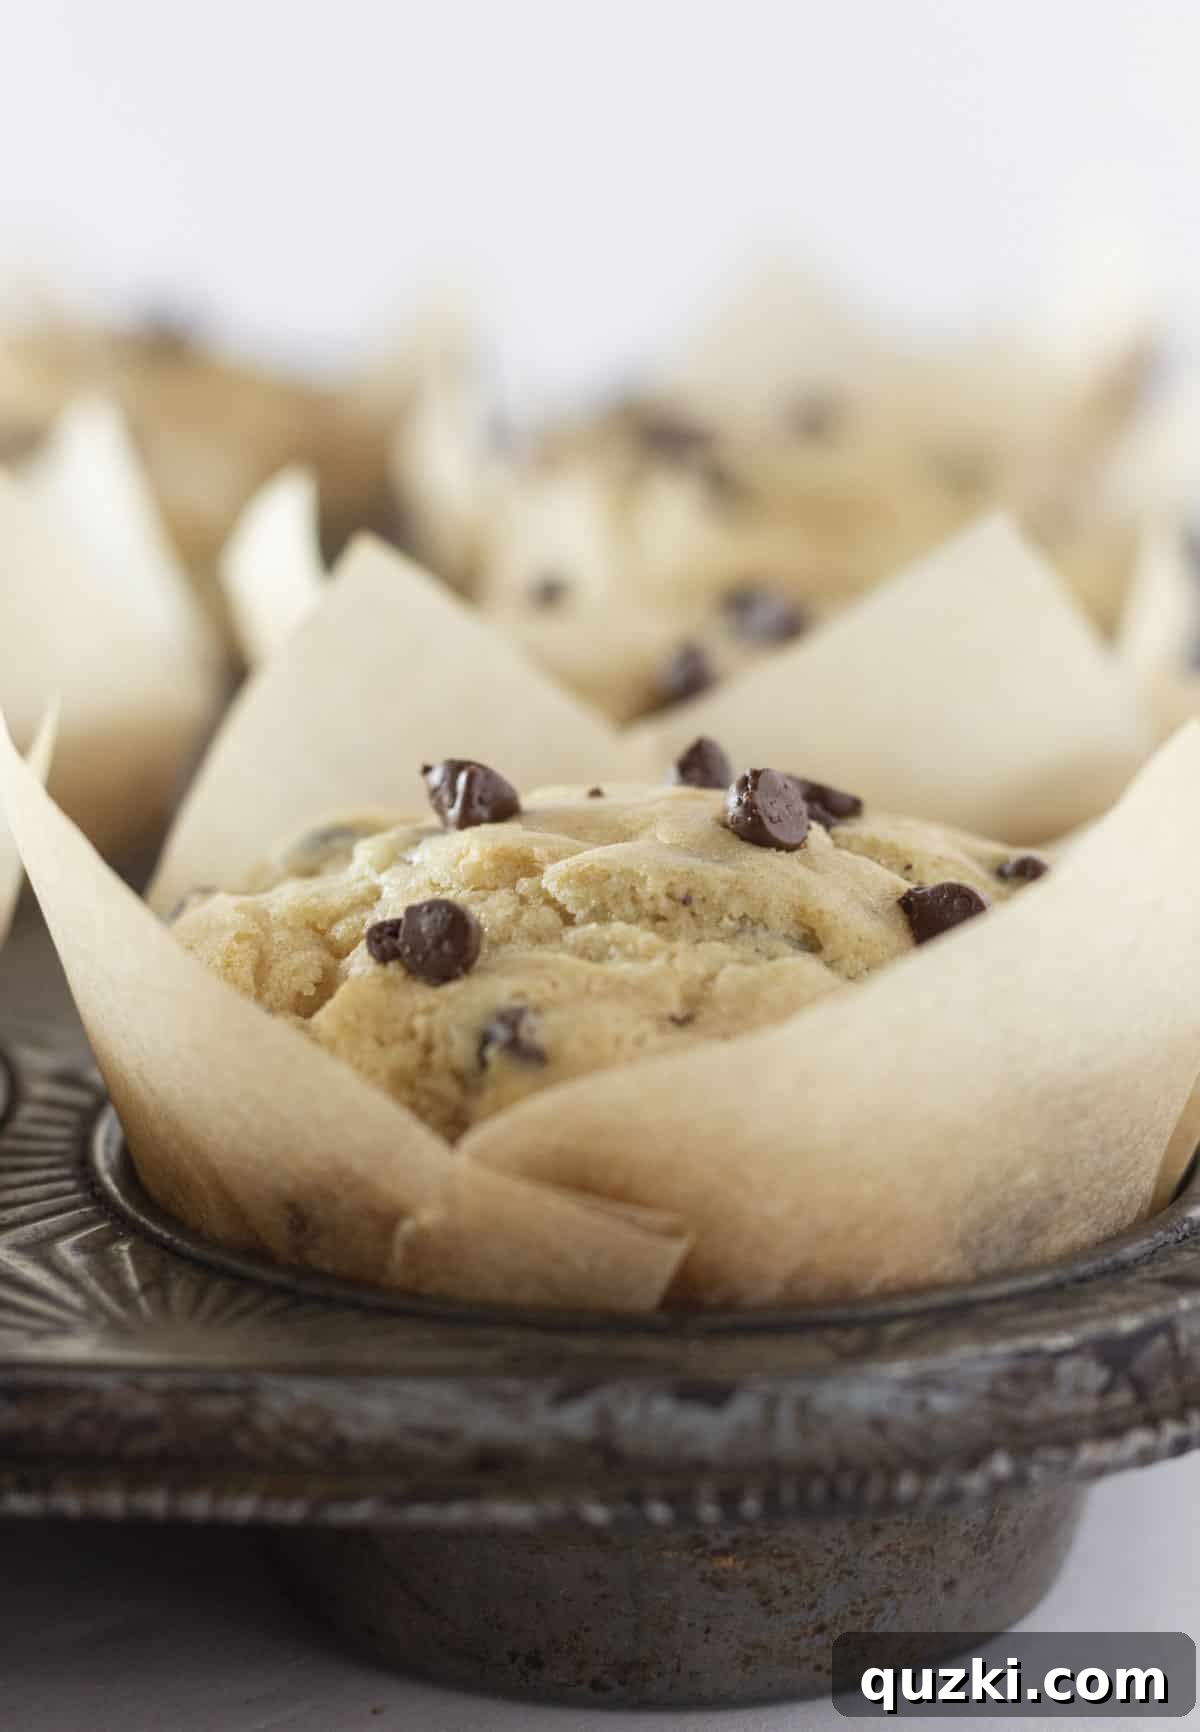
Table of Contents
- Can You Really Make Muffins with Pancake Mix? Absolutely!
- Understanding Pancake Mix: Your Secret Baking Weapon
- Essential Ingredients for Perfect Pancake Mix Muffins
- Endless Mix-In Ideas to Customize Your Muffins
- Step-by-Step Guide: How to Make Chocolate Chip Muffins with Pancake Mix
- Pro Baking Tips for the Best Muffins Every Time
- Storage and Freezing: Enjoy Your Muffins Longer
- Frequently Asked Questions About Pancake Mix Muffins
- Beyond Muffins: More Delicious Creations Using Pancake Mix
- Pancake Mix Chocolate Chip Muffins Recipe Card
Can You Really Make Muffins with Pancake Mix? Absolutely!
The idea of making muffins from pancake mix might sound unconventional at first, but the answer is a resounding yes! Not only can you create delicious muffins with pancake mix, but it’s also a fantastic shortcut for achieving incredibly moist, fluffy, and perfectly baked results. This ingenious method transforms muffin-making from a weekend-only endeavor into a quick and easy breakfast or snack solution suitable for any day of the week, even busy mornings.
Pancake mix is a true time-saver in the kitchen. It already contains a carefully balanced blend of essential dry ingredients found in many baking recipes, including flour, leavening agents (like baking powder and/or baking soda), and often a touch of sugar and salt. By starting with this pre-mixed base, you effectively bypass several steps of measuring and combining individual dry components. This significantly reduces your preparation time and minimizes the chance of measurement errors, leading to a consistently reliable batter that bakes up into wonderfully tender muffins every single time. It’s truly a game-changer for anyone who loves homemade baked goods but needs a little help streamlining the process.
Embrace the versatility of pancake mix! Beyond these amazing muffins, you can easily turn that same box into other delightful breakfast and brunch ideas. Consider whipping up a batch of fluffy sheet pan pancakes for feeding a crowd, or even get creative with delicious pancake donuts topped with a sweet maple glaze. The culinary possibilities with this pantry staple are truly endless!
Understanding Pancake Mix: Your Secret Baking Weapon
To fully appreciate the magic of pancake mix in muffin making, it’s helpful to understand what it is. Essentially, pancake mix is a convenient, pre-portioned blend of dry ingredients specifically formulated for making quick and easy pancakes and waffles. While the precise ratios can vary slightly between brands, it typically includes all-purpose flour, a leavening agent such as baking powder (sometimes combined with baking soda and an acidic component like buttermilk powder), a sweetener (usually sugar), and salt to balance the overall flavor profile. These ingredients are meticulously combined to ensure consistent results every time.
The inherent genius of pancake mix lies in its simplicity. It acts as a phenomenal shortcut, eliminating the need for you to individually measure and combine flour, baking powder, sugar, and salt. This not only saves you invaluable time during your busy mornings but also guarantees that your dry ingredients are perfectly proportioned, leading to more reliable and successful baking outcomes. It’s an indispensable pantry staple for any home baker or cook who desires homemade treats without the extensive prep work.
By leveraging the foundational qualities of pancake mix, you unlock a broad spectrum of baking potential far beyond traditional pancakes. It serves as an excellent base for various quick breads, savory applications, and as demonstrated by this recipe, exceptionally moist and delicious muffins. This adaptability solidifies pancake mix as a true unsung hero in the kitchen, proving that achieving gourmet-level flavors can indeed be accomplished with minimal effort.
Essential Ingredients for Perfect Pancake Mix Muffins
Crafting these delectable chocolate chip muffins requires just a handful of common pantry staples. Each ingredient plays a vital role in creating the perfect balance of flavor, moisture, and texture, resulting in a truly irresistible muffin. Here’s a closer look at what you’ll need to gather:
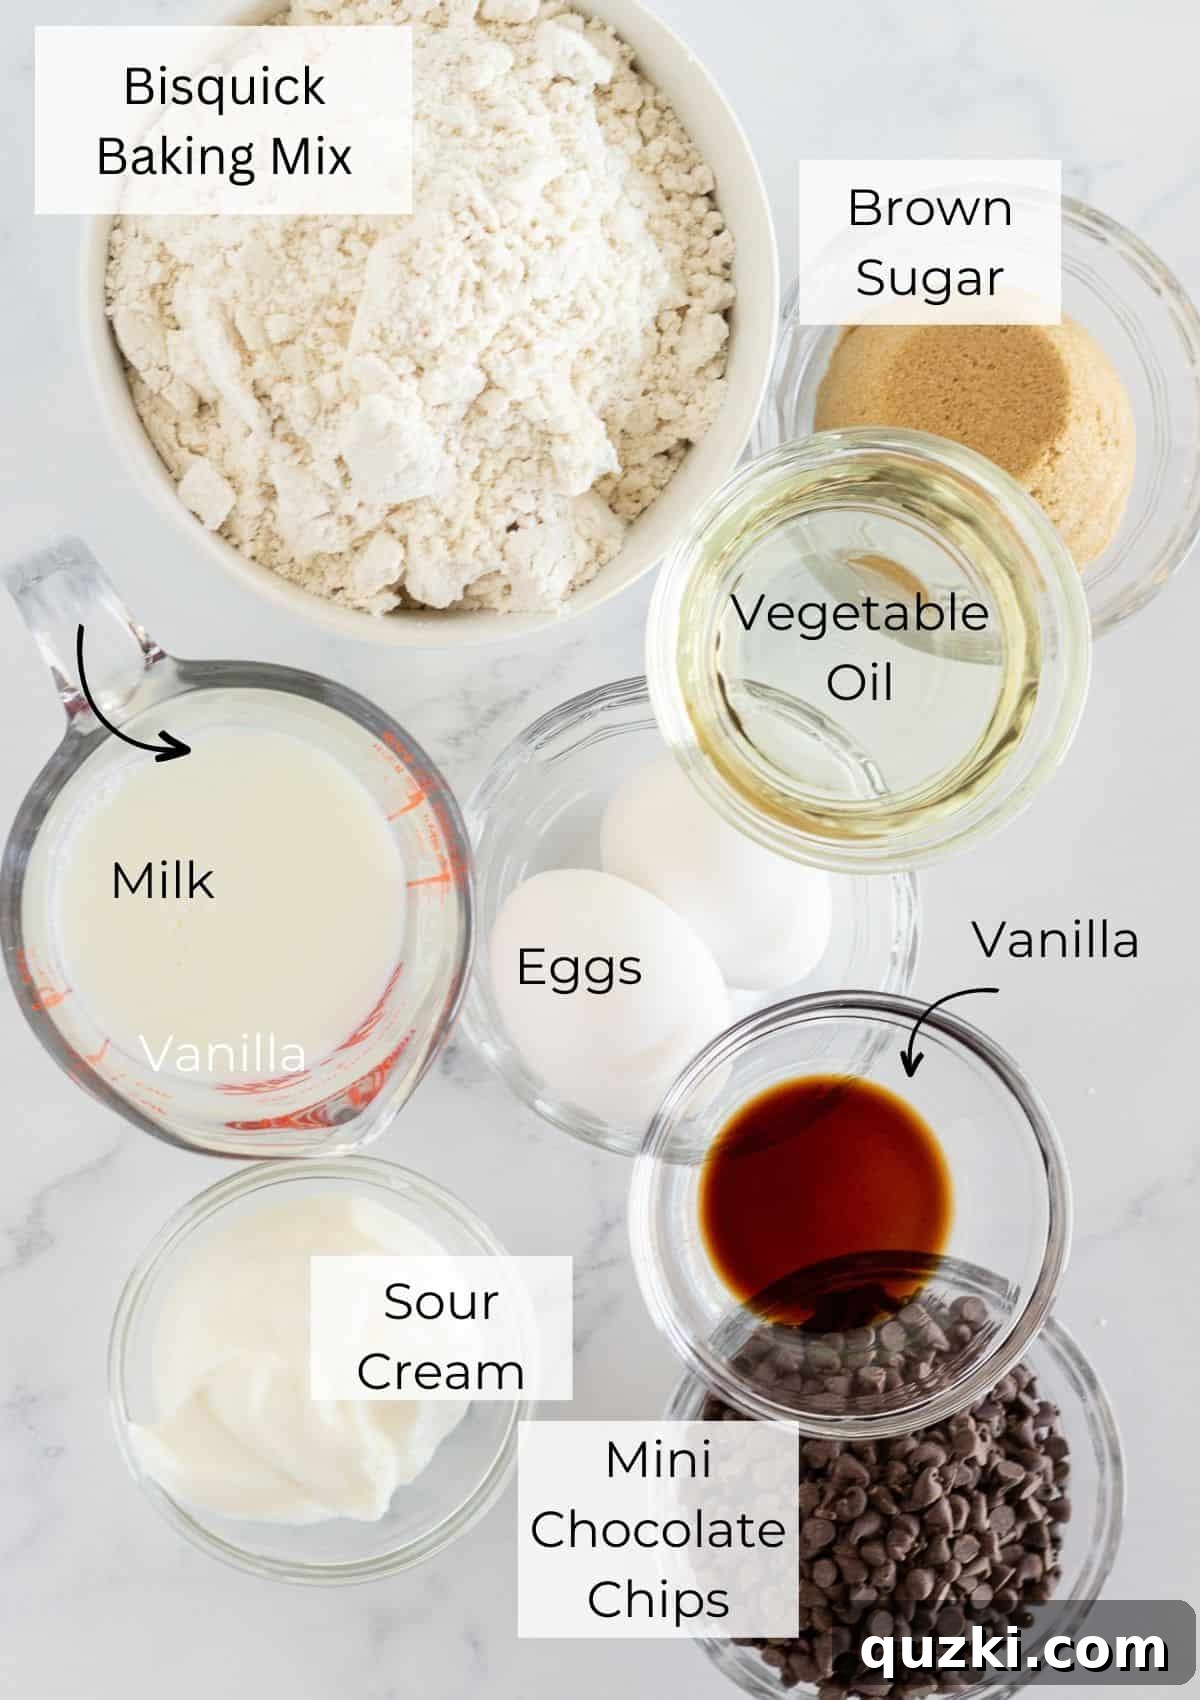
- Pancake Mix: This is our superstar ingredient! Serving as the foundation of our recipe, pancake mix streamlines the process by providing all the necessary dry components—flour, leavening agents, and some seasoning—in one convenient blend. Using your favorite brand will ensure the flavor profile you love.
- Brown Sugar: The inclusion of brown sugar does more than just sweeten; it contributes a rich, molasses-like flavor and crucial moisture, leading to a more tender and flavorful muffin with a delightful hint of caramel.
- Milk: We highly recommend using whole milk for its rich fat content, which imparts a luxurious texture and deepens the flavor of the muffins. However, for those with dietary preferences or what’s on hand, skim milk, almond milk, oat milk, or coconut milk can be successfully substituted, though the fat content may slightly alter the final texture.
- Vegetable Oil: Oil is key to achieving that wonderfully moist crumb, ensuring the muffins stay tender for longer. If you prefer a different flavor dimension, an equal amount of melted unsalted butter can be used, which will add a distinct buttery richness.
- Eggs: Large eggs are essential binders, providing structure to the muffins and contributing to their overall richness and lift during baking. They help create a cohesive batter that bakes beautifully.
- Vanilla Extract: A crucial flavor enhancer, pure vanilla extract adds a warm, inviting aroma and rounds out the sweetness, giving the muffins that classic, comforting bakery taste.
- Sour Cream: This often-overlooked ingredient is our secret weapon for ultra-moist muffins. Sour cream introduces a subtle tang that perfectly balances the sweetness and significantly boosts moisture content, resulting in an incredibly tender crumb that practically melts in your mouth. Do not skip this for the best texture!
- Chocolate Chips: We prefer mini chocolate chips because they distribute evenly throughout the batter, guaranteeing a delightful burst of chocolate in every single bite. However, feel free to use standard-sized chocolate chips, chocolate chunks, or even a mix of dark, milk, or white chocolate, depending on your chocolate cravings.
For precise measurements and quantities of each ingredient, please consult the detailed recipe card conveniently located at the end of this article.
Endless Mix-In Ideas to Customize Your Muffins
While chocolate chip muffins are an undeniable classic, one of the most exciting aspects of this pancake mix muffin recipe is its incredible adaptability. The base batter serves as a perfect blank canvas, inviting you to customize each batch with a wide variety of mix-ins. This flexibility allows you to cater to specific cravings, utilize ingredients you have on hand, or simply experiment with new flavor combinations. Don’t hesitate to unleash your creativity and make these muffins uniquely yours!
- Fresh or Frozen Fruit: Brighten your muffins with the natural sweetness and vibrant textures of fruit.
- Berries: Fresh or frozen raspberries, blueberries (for a classic blueberry muffin), or chopped strawberries are always excellent choices. If using frozen berries, toss them in a tablespoon of flour before adding to the batter to prevent them from sinking.
- Bananas: About ½ cup of mashed ripe bananas can add incredible moisture and a delightful, sweet banana bread-like flavor.
- Apples: Finely diced and lightly sautéed apples, perhaps with a sprinkle of cinnamon, can transform these into a comforting autumnal treat. Pears also work wonderfully.
- Other Chocolate Varieties: Expand beyond traditional chocolate chips!
- White Chocolate Chips: Offer a sweeter, creamier contrast.
- Butterscotch Chips: Introduce a rich, caramel-like sweetness.
- Peanut Butter Chips: For a delightful nutty, savory-sweet combination that’s incredibly addictive.
- Mix & Match: Combine dark chocolate chips with milk chocolate, or pair white chocolate with dried cranberries for a festive and tangy twist.
- Nuts for Texture and Flavor: Add a pleasant crunch and nutty depth.
- Walnuts: A timeless and popular choice that pairs wonderfully with sweet baked goods.
- Pecans: Offer a rich, buttery flavor and satisfying crunch.
- Almonds: Sliced or chopped almonds can add a delicate crispness and mild nutty taste. Toasting them lightly before adding enhances their flavor.
- Dried Fruit Delights: These provide concentrated bursts of sweetness and a pleasant chewiness.
- Dried Cranberries: Offer a tart counterpoint that beautifully balances the muffin’s sweetness.
- Raisins: A traditional choice that adds classic sweetness and a chewy texture.
- Chopped Apricots or Dates: For a more exotic sweetness and a rich, soft texture.
- Warm Spices: Infuse your muffins with comforting and aromatic flavors.
- For a perfectly spiced muffin, blend 1 teaspoon of ground cinnamon, ¼ teaspoon of nutmeg, ¼ teaspoon of ground cloves, and ¼ teaspoon of ground ginger into your dry ingredients. This creates a cozy, autumnal profile.
- A generous spoonful of cinnamon sugar sprinkled on top before baking adds a lovely, crunchy crust and an extra layer of flavor.
- Savory Twists: For an unexpected yet utterly delicious breakfast option, consider savory additions.
- Diced Bacon: Crispy, salty bacon bits folded into the batter are surprisingly incredible, offering a sweet-and-savory indulgence.
- Sausage: Cooked and crumbled breakfast sausage can transform these into a heartier, more substantial breakfast muffin.
- Fun & Festive Additions:
- Sprinkles: Make your muffins festive and fun for holidays, birthdays, or just because, by folding in your favorite colorful sprinkles.
- Coconut Flakes: Toasted coconut flakes add a tropical aroma and a delightful chewy texture.
- Coconut Sugar: A sprinkle of coconut sugar on top before baking provides a lovely, slightly caramelized, and subtly sweet crunch.
No matter which mix-ins you choose, these muffins are guaranteed to be a hit. For an ultimate indulgent experience, serve them warm with a side of rich maple syrup for dipping. That’s precisely how we plan to enjoy our next freshly baked batch of Chocolate Chip Pancake Mix Muffins!
Step-by-Step Guide: How to Make Chocolate Chip Muffins with Pancake Mix
Creating these delightful muffins is a remarkably straightforward process, designed for maximum simplicity and consistently delicious results. Follow these easy, step-by-step instructions to bake a batch of warm, golden-brown chocolate chip muffins that will impress everyone.
Preparation is Key
Begin by preheating your oven to 425°F (220°C). This initial high temperature is crucial for achieving those coveted domed muffin tops. Next, prepare a standard 12-cup muffin pan. Line each cup with paper liners, which not only aids in easy removal but also helps prevent the muffins from drying out. If you don’t have paper liners, generously spray each muffin cup with a nonstick cooking spray. Set the prepared pan aside, ready for your delicious batter.
Combining the Dry Ingredients
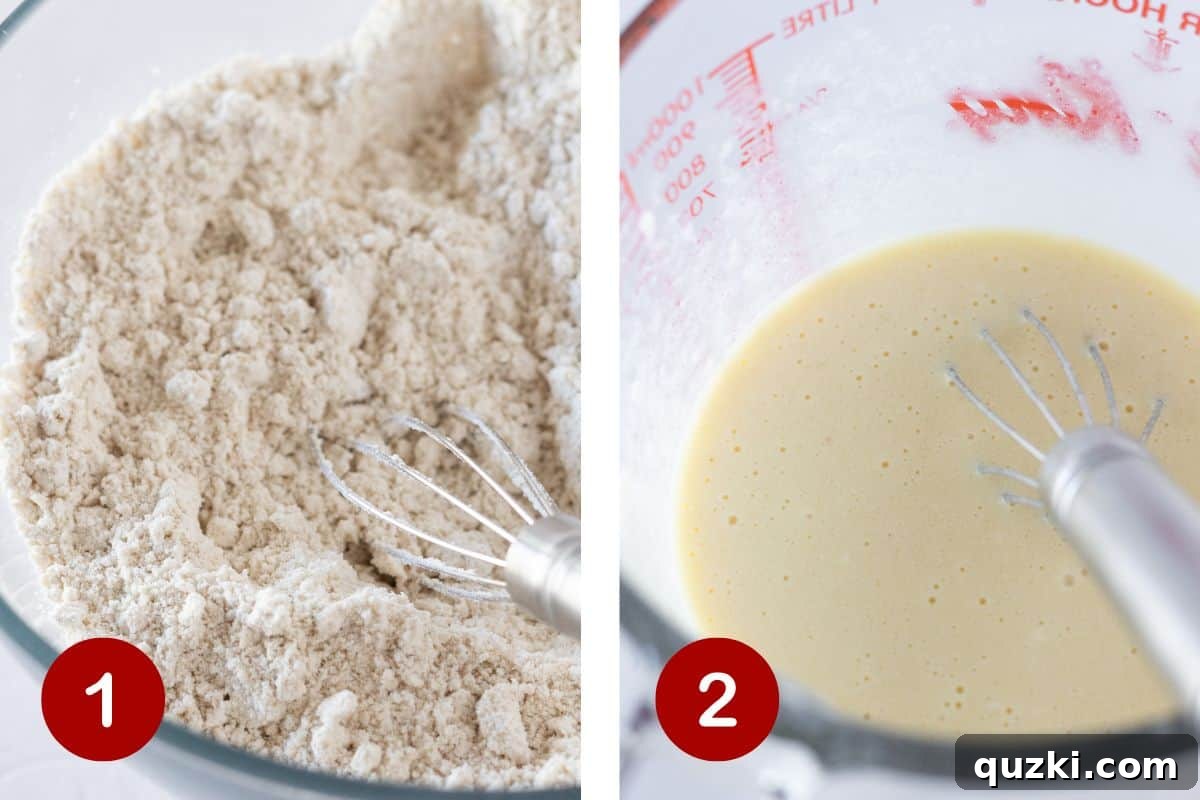
1. In a spacious medium-sized mixing bowl, combine the pancake mix and the packed brown sugar. Using a whisk, thoroughly blend these ingredients together. For an even smoother consistency, you can opt to sift them. This crucial step ensures that any lumps in the pancake mix or brown sugar are completely removed, guaranteeing an even distribution of sweetness and preventing any pockets of unmixed ingredients in your final muffins.
Mixing the Wet Ingredients
2. In a separate, clean bowl, combine all the wet ingredients: milk, large eggs, vegetable oil, vanilla extract, and sour cream. Use a whisk to thoroughly blend these components until they are fully incorporated and the mixture appears smooth and uniform. The sour cream, in particular, will contribute significantly to the muffins’ desired moisture and exceptionally tender crumb.
Combining Wet and Dry, Adding Mix-Ins
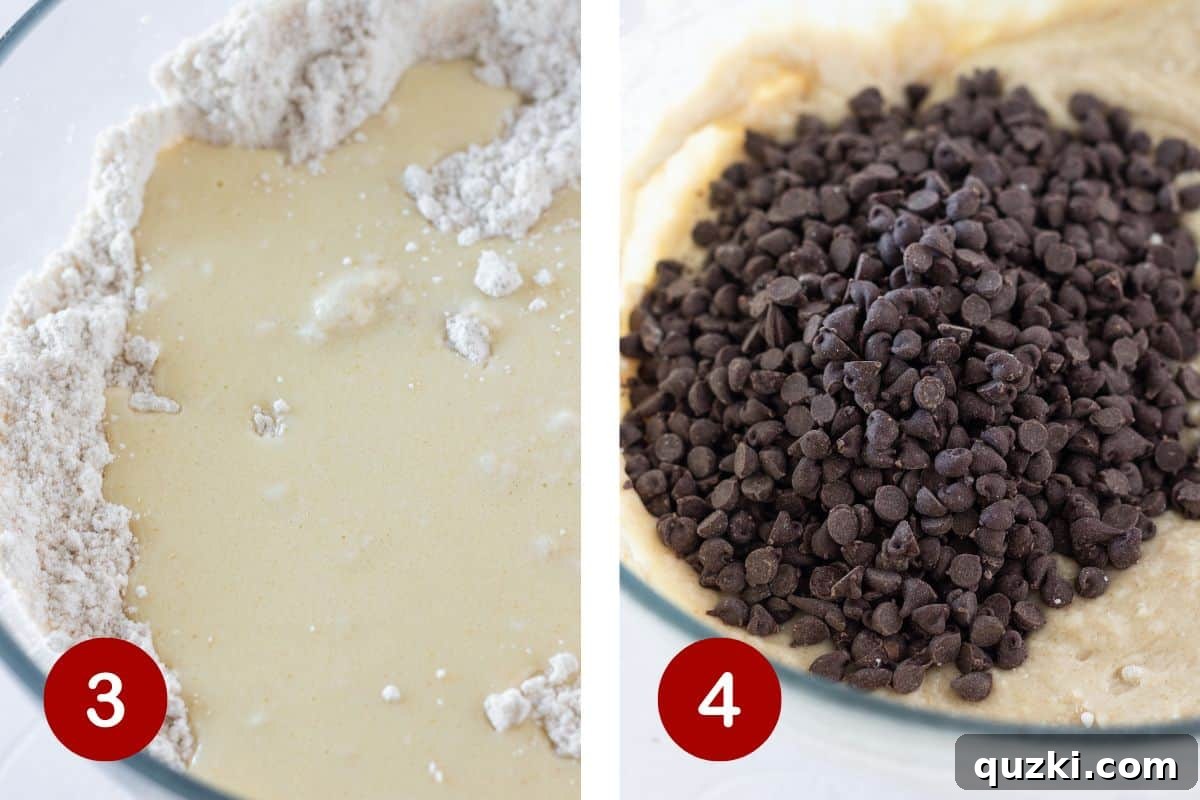
3. Carefully pour the combined wet ingredient mixture directly into the bowl containing your dry ingredients. Using a spatula or a sturdy wooden spoon, stir the ingredients gently until they are *just* combined. It is absolutely crucial to avoid overmixing the batter; a few small lumps are not only acceptable but actually desirable for achieving light, fluffy, and tender muffins. Overmixing develops the gluten in the flour, which can lead to dense and tough muffins. Remember, gentle is key!
4. Once the batter has just come together, gently fold in the chocolate chips. Stir them in carefully until they are evenly distributed throughout the muffin batter. This ensures that every bite offers a delightful burst of chocolate without compromising the delicate texture of your batter.
Filling and Baking Your Muffins
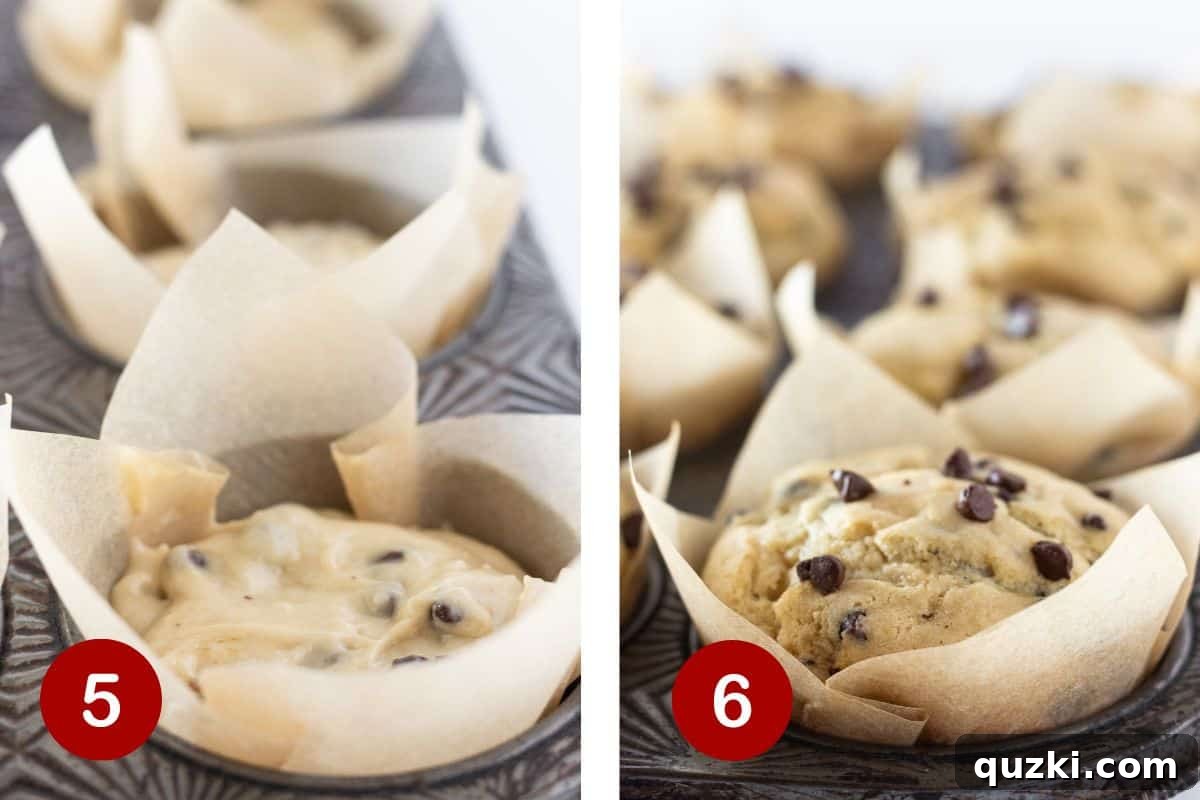
5. Using a large cookie scoop (which typically holds about ¼ cup of batter) or a regular spoon, fill each prepared muffin cup approximately ¾ full with the batter. This specific fill level is important as it allows ample space for the muffins to rise beautifully during baking, resulting in those appealing domed tops without overflowing the pan. For an extra touch of visual appeal and chocolatey goodness, you can sprinkle a few additional mini chocolate chips on top of each muffin before they go into the oven.
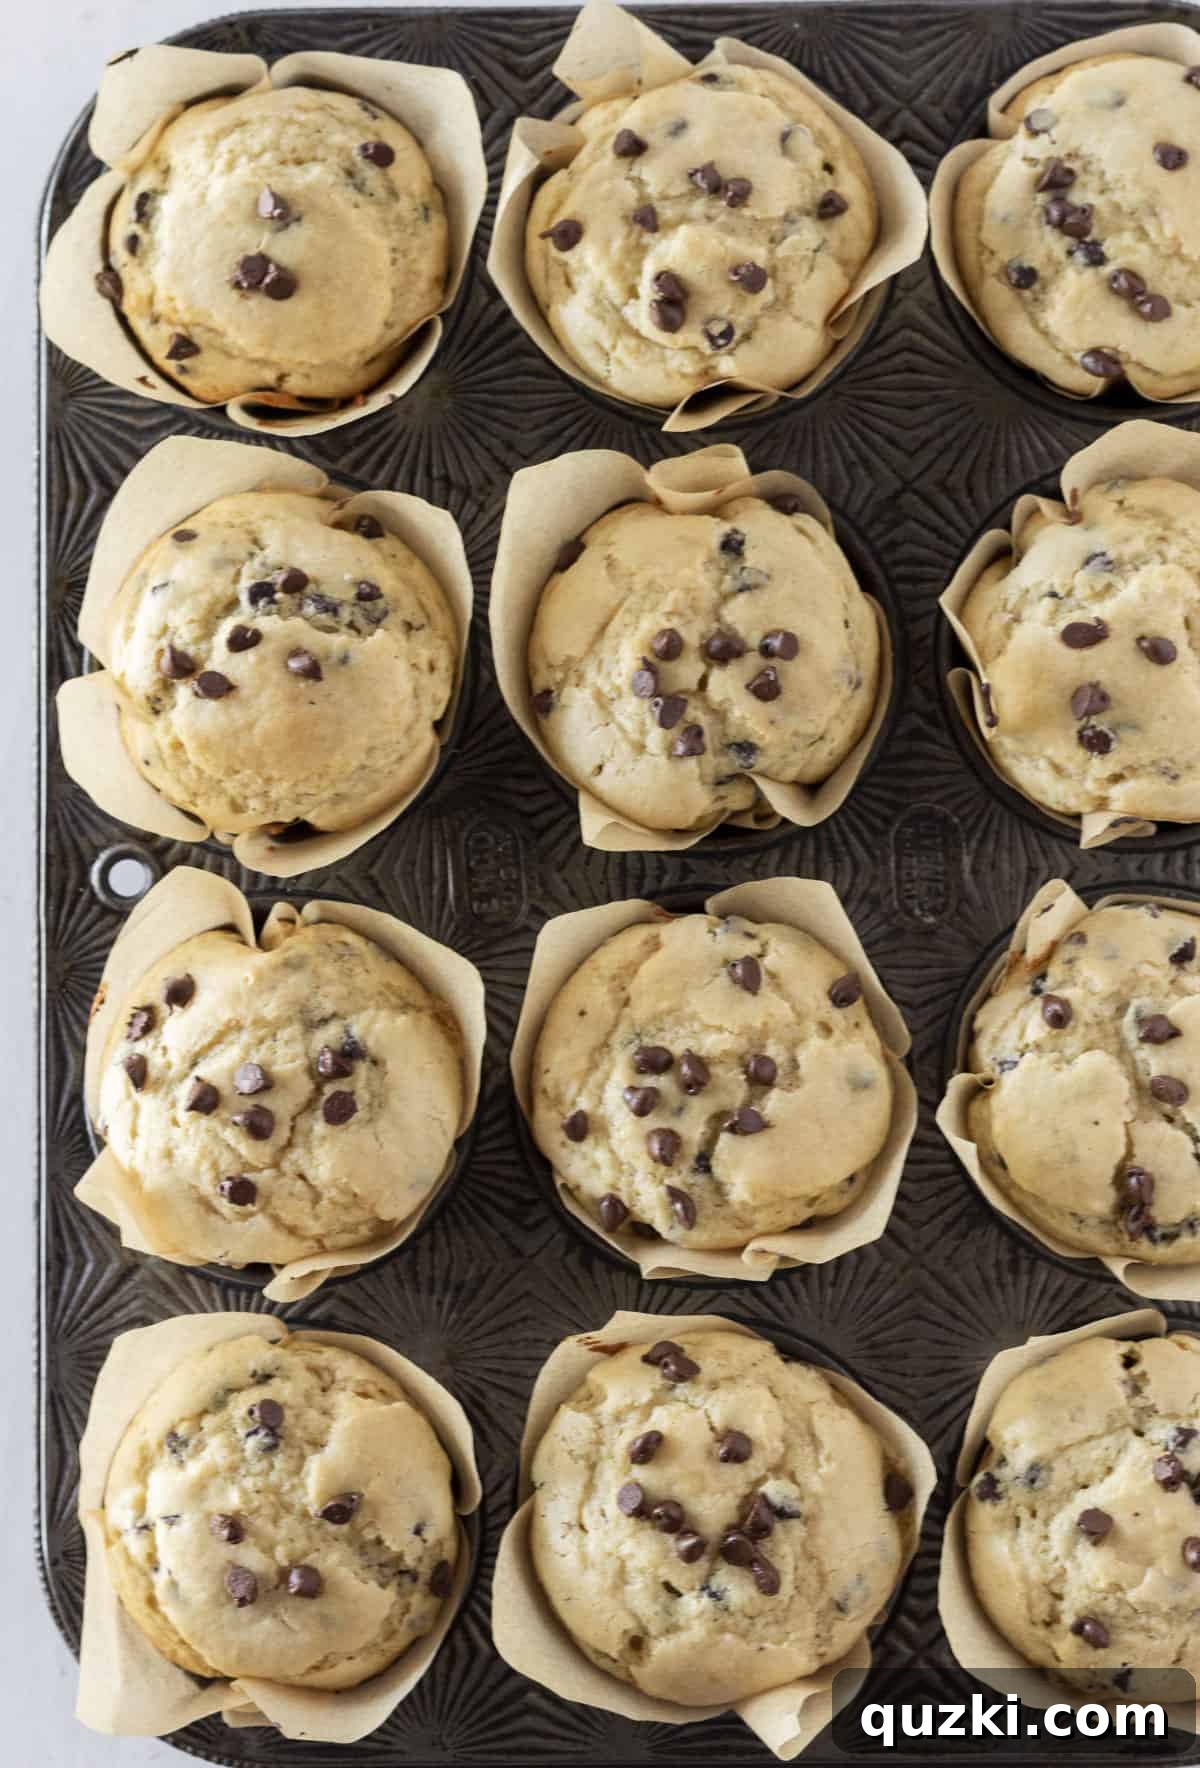
6. Place the muffin pan into your preheated 425°F (220°C) oven and bake for an initial 5 minutes. This burst of high heat encourages a rapid rise, giving your muffins their characteristic tall, rounded tops. After these first 5 minutes, *without* opening the oven door, reduce the oven temperature to 350°F (175°C) and continue baking for another 15-20 minutes. The muffins are fully cooked when they appear golden brown, a gentle press on the top causes them to spring back, or a toothpick inserted into the center comes out clean. Once baked, allow the muffins to cool in the pan for about 10 minutes. This cooling period helps them set properly before you carefully transfer them to a wire rack to cool completely. Serve them warm with a fresh cup of coffee or a cold glass of milk for the perfect breakfast or snack.
Pro Baking Tips for the Best Muffins Every Time
Achieving bakery-quality muffins at home is more accessible than you might think, especially when armed with these expert tips. These insights are designed to ensure your pancake mix muffins turn out perfectly moist, fluffy, and utterly delicious every single time, even if you’re a novice baker:
- Thoroughly Whisk or Sift Dry Ingredients: Before any wet ingredients come into play, always make it a point to thoroughly whisk or sift your pancake mix and brown sugar together. This seemingly small step is crucial. It eliminates any potential lumps in the batter and ensures that the leavening agents and sugar are evenly distributed. The result is a uniformly textured muffin with no unexpected pockets of dry mix.
- Master the Art of Gentle Mixing: The golden rule for tender muffins is simple: do not overmix the batter. Whisk all your wet ingredients in a separate bowl until smooth. Then, pour the wet mixture into the dry ingredients and stir just until they are combined. A few small lumps in the batter are perfectly acceptable and even desirable; they indicate you haven’t overdeveloped the gluten, which is the secret to a light and fluffy crumb, rather than a dense, tough one.
- Embrace Room Temperature Ingredients: This tip is a secret weapon for many successful baked goods! Ensure your eggs, milk, and sour cream are at room temperature before you begin mixing. Room temperature ingredients emulsify much more effectively, leading to a smoother, more uniform batter. This consistency translates directly into a more even rise and a finer, more tender texture in your baked muffins.
- Don’t Skimp on Muffin Liners: Lining your muffin pan with paper liners does more than just simplify cleanup (though that’s a huge bonus!). The liners create a protective barrier between the hot metal of the pan and your delicate muffin batter. This barrier helps prevent the edges and bottoms of your muffins from drying out or becoming overly crusty, ensuring they remain wonderfully moist and tender throughout.
- Fill Muffin Cups Accurately: To achieve those beautiful, professionally-looking domed muffin tops, fill each muffin cup approximately ¾ full. This precise level provides ample room for the batter to rise effectively during baking without the risk of overflowing the pan. It’s a simple trick for picture-perfect muffins every time.
- Utilize the Initial High Heat Boost: The unique baking technique of starting your muffins at a higher temperature (425°F/220°C) for the first 5 minutes, then reducing it to 350°F (175°C) without opening the oven, is absolutely key. This initial blast of intense heat causes the batter to rise rapidly and dramatically, creating that desirable tall, rounded top and a lighter internal structure.
- Always Check for Doneness: Relying solely on visual cues can be misleading as oven temperatures can vary. To ensure your muffins are perfectly baked through but not overcooked, gently press down on the center of a muffin; it should spring back resiliently. Alternatively, the classic toothpick test works wonders: insert a clean toothpick into the center of a muffin – if it comes out clean with no wet batter, your muffins are ready to be removed from the oven.
Storage and Freezing: Enjoy Your Muffins Longer
These delicious pancake mix muffins are undoubtedly at their absolute best when enjoyed warm, fresh from the oven, perhaps with a generous pat of melting butter. However, should you find yourself with any delightful leftovers (a rare but possible occurrence!), proper storage is key to ensuring they remain fresh and delicious for days to come. And for those who love the convenience of planning ahead or wish to have a continuous supply of homemade treats readily available, freezing is an excellent and highly recommended option.
Storing Leftovers
To preserve the exceptional freshness and moistness of your muffins and prevent them from drying out, it is crucial to store them properly. Once completely cooled, place them in an airtight container at room temperature. They will stay fresh and delicious for up to 2-3 days. If you live in a particularly warm or humid climate, or if your muffins contain fresh fruit or dairy, refrigerating them is advisable. In the refrigerator, they will maintain their quality for up to 4 days. Before indulging, a quick warm-up in the microwave for 10-20 seconds will wonderfully restore their soft, tender texture and delightful aroma, making them taste almost as if they were just baked.
Freezing for Future Enjoyment
These muffins freeze exceptionally well, making them an ideal candidate for meal prepping, ensuring you always have a quick and homemade breakfast or snack on hand. For the best results and to effectively prevent freezer burn, follow these simple steps for freezing:
- Cool Completely: This is the most crucial step. Allow your freshly baked muffins to cool completely to room temperature on a wire rack. Freezing warm muffins will create undesirable condensation inside the packaging, which can lead to soggy muffins upon thawing.
- Individual Wrapping: Once thoroughly cooled, individually wrap each muffin tightly in plastic wrap. This extra layer of protection is vital for sealing in their moisture and preserving their delicious flavor.
- Airtight Storage: Place the individually wrapped muffins into a large freezer-safe bag or an airtight freezer-safe container. If using a bag, gently press out as much air as possible before sealing to minimize ice crystal formation and freezer burn.
- Label and Date: Always label your freezer bag or container with the contents and the date of freezing. This helps you keep track of their freshness.
Properly frozen muffins can be stored for up to 3 months without a significant loss of quality. When you’re ready to enjoy a frozen muffin, simply remove it from the freezer, unwrap it, and let it thaw at room temperature for an hour or two. For a warm, comforting treat, you can also microwave it for 30-60 seconds (or slightly longer, depending on your microwave’s wattage and the muffin’s size) until it’s heated through, or warm it in a preheated oven at 300°F (150°C) for about 10 minutes until soft and warm.
Frequently Asked Questions About Pancake Mix Muffins
Here are clear and concise answers to some of the most common questions that often arise when baking with pancake mix, ensuring your baking endeavors are always smooth, successful, and delicious:
Absolutely! Transforming this recipe into mini muffins is a fantastic idea; they are not only incredibly adorable but also perfect for smaller appetites, children, parties, or just for a quick, bite-sized snack. The versatile batter for this recipe works wonderfully in a mini muffin tin. We still highly recommend lining your mini muffin tin with paper liners. This makes removing the little muffins significantly easier and contributes to a cleaner, more appealing presentation. Just like with regular-sized muffins, you will fill each mini muffin cup approximately ¾ full.
The primary adjustment for mini muffins is the baking time. Due to their smaller size, they will bake much faster. Preheat your oven to 350°F (175°C) and bake them for approximately 12-14 minutes, or until they are a light golden brown and a toothpick inserted into the center comes out clean. They will cool quickly in the mini muffin pan, and then your delightful bite-sized treats are ready to be devoured!
Directly substituting plain all-purpose flour for pancake mix in a muffin recipe that specifically calls for pancake mix is generally not recommended and will likely lead to undesirable results. The reason for this is that pancake mix is much more than just flour; it’s a carefully pre-balanced blend that already contains crucial leavening agents (such as baking powder and/or baking soda), salt for flavor enhancement, and often a small amount of sugar for sweetness. If you were to use plain flour in place of pancake mix, your muffins would not rise properly, they would be dense, and the overall flavor profile would be significantly lacking due to the absence of these essential components.
However, if you find yourself without pancake mix but still wish to proceed, you can easily create your own homemade version. To do so, combine 4 cups of all-purpose flour, 3 tablespoons of baking powder, 2 teaspoons of baking soda, 1 teaspoon of salt, and 3 tablespoons of granulated sugar. Whisk all these ingredients together very thoroughly until well combined. Store this homemade mix in an airtight container in a cool, dry place for up to 3 months, and then use it as a direct substitute for store-bought pancake mix in recipes.
While some commercial pancake or muffin mixes might suggest adding water as their liquid component, this specific recipe for pancake mix muffins already incorporates milk as a key liquid ingredient, alongside eggs, vegetable oil, and sour cream. In general baking, substituting water with milk can often yield a richer flavor, a more tender crumb, and increased moistness due to milk’s fat content. However, it’s important to remember that muffins are typically designed to have a hearty, slightly denser texture compared to light, airy cupcakes. For mixes that *do* call for water, using milk could potentially make them *too* moist or slightly alter the texture from what the original mix intended. But for *this* particular pancake mix muffin recipe, milk is an essential and integrated component, specifically chosen for optimal moistness and a wonderfully rich flavor profile. So, no substitution is needed here!
No, pancake mix absolutely does not work the same as plain flour, and they are not interchangeable ingredients in recipes without significant adjustments. To reiterate, pancake mix is a composite ingredient that includes not only flour but also crucial leavening agents (such as baking powder and/or baking soda), a touch of sugar for sweetness, and salt for essential flavor balance. When you incorporate pancake mix into a recipe, you are effectively adding all these components at once, which is why it’s such a convenient shortcut.
On the other hand, plain all-purpose flour is simply milled wheat; it provides the fundamental structure for baked goods but contains no leavening, no added sugar, and no salt. Therefore, if a recipe explicitly calls for flour, you cannot simply swap in pancake mix. The leavening agents in the pancake mix would cause an excessive or unpredictable rise, and the additional sugar and salt would dramatically alter the intended flavor profile and overall balance of the recipe. Always ensure you are using the precise ingredient specified in any recipe for the most successful and delicious outcome.
Beyond Muffins: More Delicious Creations Using Pancake Mix
Don’t let that trusty box of pancake mix sit in your pantry solely for making breakfast flapjacks! Its incredible versatility makes it a true secret weapon for concocting a surprisingly wide array of both sweet and savory dishes. If you’ve enjoyed the sheer simplicity and deliciousness of these chocolate chip muffins, you’ll absolutely love exploring other creative and effortless ways to incorporate pancake mix into your cooking repertoire. Here are a few more inspiring and delightful recipes to try, proving just how much this humble ingredient can truly transform your kitchen adventures:
Discover More Irresistible Pancake Mix Recipes
Dinner
Hearty Pancake Mix Dumplings for Chicken & Dumplings
Brunch
Elegant Pancake Mix Crepes
Donuts
Easy Maple Bacon Baked Donuts with Pancake Mix
Brunch
Effortless Pancake Mix Coffee Cake
We sincerely hope you enjoy creating and savoring this simple yet incredibly delicious recipe! If you try it, we’d be absolutely thrilled if you would consider:
Leaving a ⭐ review below and tagging @practicallyhomemade on Pinterest! Your valuable feedback truly helps us and inspires other home bakers in our wonderful community!

Pancake Mix Chocolate Chip Muffins
June Albertson-Dick
10 minutes
25 minutes
10 minutes
45 minutes
12 muffins
Rate Recipe
Print Recipe
Ingredients
- 2 ½ cups pancake mix
- ½ cup brown sugar, packed
- ½ cup milk, whole milk recommended
- 2 large eggs
- ¼ cup vegetable oil
- 1 teaspoon vanilla extract
- ¼ cup sour cream
- 1 cup mini chocolate chips, plus a few additional for topping (optional)
Instructions
-
Preheat the oven to 425°F (220°C). Line a 12-cup muffin pan with paper liners (or generously spray each cup with nonstick cooking spray) and set aside.
-
In a large bowl, combine the pancake mix and brown sugar. Whisk (or sift) the ingredients together thoroughly to remove any lumps, ensuring a smooth dry mixture.
-
In a separate medium bowl, combine the milk, eggs, vegetable oil, vanilla extract, and sour cream. Whisk these wet ingredients until everything is well combined and pour the mixture into the dry ingredients. Gently mix the wet ingredients into the dry ingredients with a spatula or wooden spoon until *just* combined. Be careful not to overmix, as this can lead to tough muffins. The batter should still have a few small lumps. Add the chocolate chips to the batter and gently fold them in until they are evenly distributed.
-
Use a large cookie scoop (about ¼ cup capacity) or a spoon to fill each muffin cup about ¾ full with the batter. If desired, sprinkle a few additional mini chocolate chips on top of each muffin for an extra visual appeal.
-
Bake in the preheated 425°F (220°C) oven for 5 minutes. After 5 minutes, without opening the oven door, reduce the oven temperature to 350°F (175°C) and continue baking for another 15-20 minutes. The muffins are done when they are golden brown, spring back when lightly pressed, and a toothpick inserted into the center comes out clean.
-
Allow the muffins to cool in the pan for 10 minutes before carefully removing them to a wire rack to cool completely. Serve warm and enjoy! Leftovers can be stored in an airtight container in the refrigerator for up to 4 days.
Notes
- Whisk Dry Ingredients Thoroughly: Sift or whisk the pancake mix and brown sugar together to eliminate any lumps, ensuring a smooth, consistent batter.
- Don’t Overmix Wet and Dry: Combine wet ingredients separately, then add to dry. Mix only until *just* combined to avoid tough muffins. A few lumps are fine!
- Room Temperature is Best: Use room temperature eggs, milk, and sour cream for easier blending and a more uniform, tender crumb.
- Use Muffin Liners: Paper liners prevent sticking and help keep the muffins moist by creating a barrier against the hot pan.
- Fill ¾ Full: This ensures your muffins rise beautifully with lovely domed tops without overflowing the pan.
- Mini Muffins Variation: For mini muffins, prepare batter as directed, fill mini muffin cups ¾ full, and bake at 350°F (175°C) for 12-14 minutes.
Ideas for Different Mix-Ins:
- Fruit: Fresh or frozen raspberries, blueberries, or mashed ripe bananas are excellent choices.
- Other Chocolate Flavors: Experiment with white chocolate, butterscotch, peanut butter chips, or a combination.
- Nuts: Chopped walnuts and pecans add a delightful crunch and nutty flavor.
- Dried Fruit: Dried cranberries, raisins, or chopped apricots provide sweetness and chewiness.
- Spiced: Add 1 tsp cinnamon, ¼ tsp nutmeg, ¼ tsp cloves, and ¼ tsp ginger for a warm, spiced muffin. A sprinkle of cinnamon sugar on top is also wonderful.
- Savory: Diced, cooked bacon or sausage can transform these into a unique, savory breakfast muffin.
- Festive: Incorporate your favorite sprinkles for a fun, celebratory touch, or a sprinkle of coconut sugar for a light crust.
Nutrition Facts (Approximate per serving)
, Calories: 236kcal
, Carbohydrates: 28g
, Protein: 4g
, Fat: 12g
, Saturated Fat: 4g
, Polyunsaturated Fat: 4g
, Monounsaturated Fat: 2g
, Trans Fat: 1g
, Cholesterol: 52mg
, Sodium: 168mg
, Potassium: 97mg
, Fiber: 1g
, Sugar: 19g
, Vitamin A: 187IU
, Vitamin C: 1mg
, Calcium: 104mg
, Iron: 1mg
Nutrition information is automatically calculated and should be used as an approximation. Actual values may vary based on ingredients and preparation methods.
Enjoyed this recipe? We’d love to hear from you! Leave a comment below!